

As summer nears, I start yearning for the bright and bold flavors of the Mediterranean. Each recipe brings to mind the warmth and beauty of sunlit coastlines. From smoky grilled vegetable skewers to refreshing watermelon and feta salad, these dishes capture the essence of the season. If you’re dreaming of a vacation-like meal, let’s explore these easy-to-make recipes that are bursting with freshness. Are you ready to find your next favorite dish?
Grilled Vegetable Skewers With Tzatziki Sauce
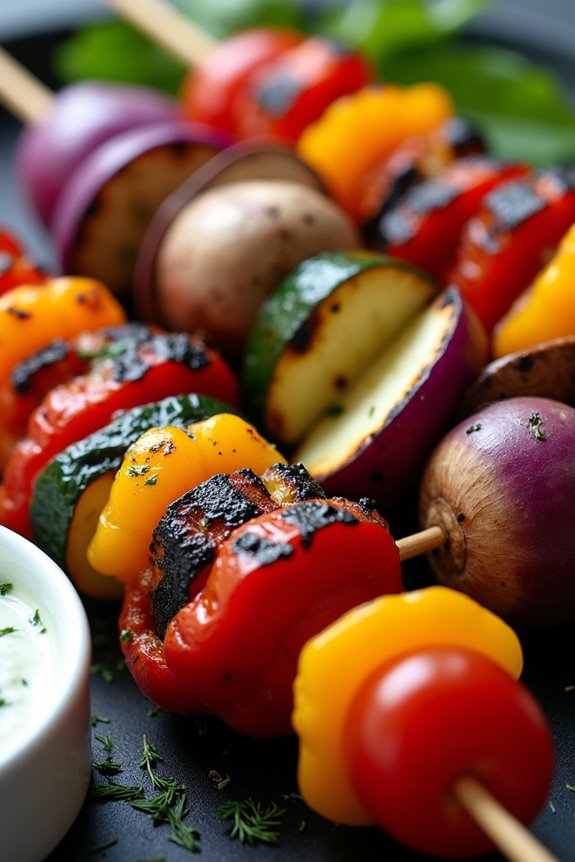
Grilled Vegetable Skewers with Tzatziki Sauce is the perfect dish to celebrate the warmth and flavors of summer in the Mediterranean. This vibrant and colorful dish features an array of fresh vegetables that are marinated and grilled to perfection, resulting in a smoky and savory flavor.
Paired with a creamy, tangy tzatziki sauce, these skewers make an excellent appetizer or side dish for any summer gathering. The combination of textures and tastes will have everyone coming back for more!
Not only are these skewers delicious, but they’re also incredibly versatile. You can mix and match your favorite seasonal vegetables, making it easy to adapt the recipe to your preferences or whatever you have on hand.
The tzatziki sauce, made with yogurt, cucumber, and herbs, adds a revitalizing contrast that complements the grilled vegetables wonderfully. Serve these skewers at your next barbecue, picnic, or outdoor dinner party, and watch them disappear!
Ingredients (serving size of 4-6 people):
- 1 red bell pepper, cut into 1-inch pieces
- 1 yellow bell pepper, cut into 1-inch pieces
- 1 zucchini, sliced into thick rounds
- 1 red onion, cut into wedges
- 8 cherry tomatoes
- 1 cup mushrooms, halved
- 3 tablespoons olive oil
- 2 teaspoons dried oregano
- Salt and pepper, to taste
- Wooden or metal skewers
For the Tzatziki Sauce:
- 1 cup Greek yogurt
- 1/2 cucumber, finely grated
- 1 clove garlic, minced
- 1 tablespoon fresh dill, chopped (or 1 teaspoon dried dill)
- 1 tablespoon lemon juice
- Salt and pepper, to taste
Cooking Instructions:
- Prepare the Vegetables: Start by washing and cutting all of your vegetables into uniform pieces. This guarantees even cooking. Place the bell peppers, zucchini, red onion, cherry tomatoes, and mushrooms in a large mixing bowl.
- Marinate the Vegetables: In a small bowl, whisk together the olive oil, dried oregano, salt, and pepper. Pour this marinade over the vegetables, tossing them gently to coat. Allow them to marinate for at least 30 minutes at room temperature or up to 2 hours in the refrigerator for enhanced flavor.
- Prepare the Skewers: If using wooden skewers, soak them in water for about 30 minutes to prevent burning on the grill. If using metal skewers, there’s no need to soak. Begin threading the marinated vegetables onto the skewers, alternating between different types for a colorful presentation.
- Make the Tzatziki Sauce: In a mixing bowl, combine the Greek yogurt, grated cucumber (squeeze out excess moisture), minced garlic, dill, lemon juice, salt, and pepper. Mix well until all ingredients are fully integrated. Adjust seasoning to taste and refrigerate until ready to serve.
- Grill the Skewers: Preheat your grill to medium-high heat. Place the vegetable skewers on the grill, cooking for 10-15 minutes. Turn occasionally until the vegetables are tender and have grill marks. Ascertain they’re cooked through but still retain some crunch.
- Serve: Once the skewers are grilled to your liking, remove them from the grill and serve hot with a side of tzatziki sauce for dipping.
Extra Tips:
For added flavor, consider incorporating some fresh herbs such as rosemary or thyme into your vegetable marinade.
You can also experiment with different vegetables such as eggplant, asparagus, or even chunks of firm tofu for a plant-based protein option. If you’re cooking for a crowd, feel free to double the recipe and make extra tzatziki sauce for those who love to dip!
Classic Greek Salad With Feta and Olives

Classic Greek Salad is a quintessential Mediterranean dish that embodies the vibrant flavors and fresh ingredients of the region. Originating from Greece, this invigorating salad is perfect for summer gatherings or a light meal any time of the year. With a combination of ripe tomatoes, crisp cucumbers, and tangy feta cheese, it offers a delightful balance of textures and tastes.
The addition of olives and a zesty dressing elevates this dish, making it a beloved choice for salad lovers everywhere. This salad isn’t only easy to prepare but also highly versatile. You can customize it by adding your favorite ingredients such as bell peppers or red onions.
Served alongside grilled meats or as a standalone dish, Classic Greek Salad is a celebration of summer’s bounty. With its deliciously simple ingredients and straightforward preparation, it’s a recipe that’s sure to impress your family and friends.
Ingredients (Serves 4-6):
- 4 large ripe tomatoes, chopped
- 1 large cucumber, peeled and diced
- 1 red onion, thinly sliced
- 1 bell pepper (red or green), diced
- 200g feta cheese, crumbled or cubed
- 150g Kalamata olives, pitted
- 3 tablespoons extra virgin olive oil
- 1 tablespoon red wine vinegar
- 1 teaspoon dried oregano
- Salt and pepper to taste
Cooking Instructions:
- Prepare the Vegetables: Start by washing all the vegetables thoroughly. Chop the ripe tomatoes into bite-sized pieces and place them in a large mixing bowl. Next, peel the cucumber and dice it into small cubes. Add the cucumber to the bowl with the tomatoes.
- Slice the Onion and Bell Pepper: Take the red onion and slice it thinly to maximize its flavor and texture in the salad. Add the sliced onion to the bowl. Then, wash the bell pepper, remove the seeds, and dice it into small pieces. Combine this in the bowl with the other vegetables.
- Add Feta and Olives: Crumble or cube the feta cheese and add it to the bowl. Then, add the Kalamata olives, ensuring they’re pitted. This will enhance the salad’s flavor, providing a salty and savory contrast to the fresh vegetables.
- Prepare the Dressing: In a small bowl or jar, combine the extra virgin olive oil, red wine vinegar, dried oregano, salt, and pepper. Whisk or shake the mixture well until everything is combined. This dressing will add a delightful zing to the salad.
- Combine and Serve: Pour the dressing over the salad and gently toss all the ingredients together, making sure the dressing coats the vegetables evenly. Taste and adjust seasoning if necessary. Serve immediately for the freshest taste or let it sit for about 15 minutes to allow the flavors to meld.
Extra Tips:
For the best flavor, use high-quality extra virgin olive oil and fresh, in-season vegetables. You can also add a squeeze of fresh lemon juice for an extra zest.
If you’re preparing the salad ahead of time, consider keeping the dressing separate until just before serving to prevent the vegetables from becoming soggy. Additionally, feel free to get creative with the ingredients—adding ingredients like capers or fresh herbs can provide new flavors and textures to this classic dish!
Mediterranean Quinoa Salad With Chickpeas
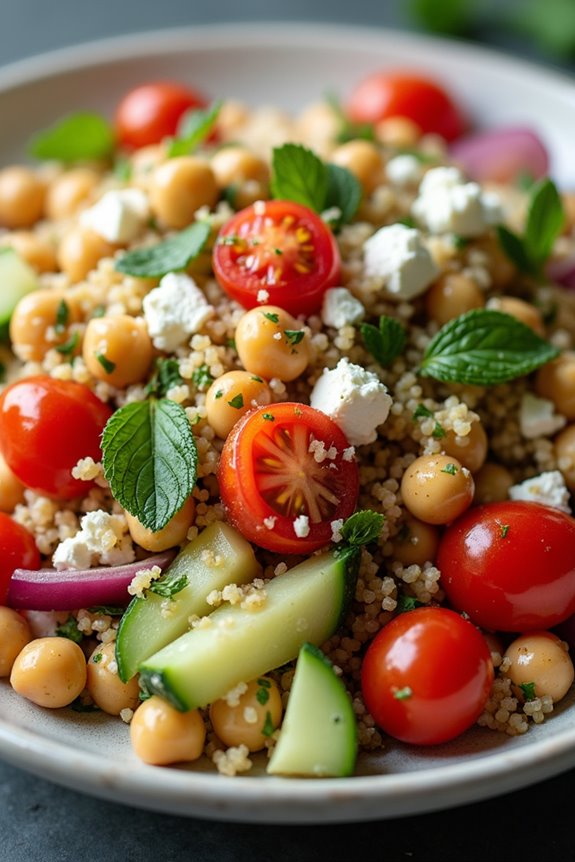
This Mediterranean Quinoa Salad with Chickpeas is a vibrant and nutritious dish perfect for warm summer days. With its colorful array of vegetables, protein-packed quinoa, and hearty chickpeas, this salad isn’t only healthy but also incredibly satisfying.
The combination of zesty lemon, fresh herbs, and a hint of olive oil brings everything together, making it a delightful side dish or a main course for a light summer meal.
Quinoa is a fantastic base for salads as it absorbs flavors beautifully and provides a great source of protein and fiber. This recipe is versatile, allowing you to add or substitute other vegetables based on your preferences or what you have on hand.
Serve it chilled or at room temperature, and enjoy a taste of the Mediterranean in your own home.
Ingredients (Serves 4-6):
- 1 cup quinoa
- 2 cups water or vegetable broth
- 1 can (15 oz) chickpeas, drained and rinsed
- 1 cup cherry tomatoes, halved
- 1 cucumber, diced
- 1 bell pepper (red or yellow), diced
- 1/2 red onion, finely chopped
- 1/4 cup fresh parsley, chopped
- 1/4 cup fresh mint, chopped
- 1/4 cup feta cheese, crumbled (optional)
- Juice of 1 lemon
- 3 tablespoons olive oil
- Salt and pepper to taste
Cooking Instructions:
1. Rinse the Quinoa: Place the quinoa in a fine-mesh sieve and rinse under cold running water for 1-2 minutes. This removes the saponins, a natural coating that can give quinoa a bitter taste.
2. Cook the Quinoa: In a medium saucepan, combine the rinsed quinoa and water (or vegetable broth) and bring to a boil. Once boiling, reduce the heat to low, cover, and simmer for about 15 minutes or until all the liquid is absorbed.
Remove from heat and let it sit covered for 5 minutes. Fluff the cooked quinoa with a fork and let it cool.
3. Prepare the Vegetables: While the quinoa is cooking, chop the cherry tomatoes, cucumber, bell pepper, and red onion. Place them in a large mixing bowl along with the drained chickpeas.
4. Mix the Dressing: In a small bowl, whisk together the lemon juice, olive oil, salt, and pepper until well combined.
5. Combine Everything: Once the quinoa is cooled, add it to the bowl with the chopped vegetables and chickpeas. Pour the dressing over the salad and toss gently to combine all the ingredients.
6. Add Herbs and Cheese: Fold in the chopped parsley and mint, and sprinkle the feta cheese on top if using. Toss lightly to incorporate.
7. Chill and Serve: Allow the salad to sit for at least 30 minutes in the refrigerator for the flavors to meld. Serve chilled or at room temperature.
Extra Tips:
For added flavor and texture, consider roasting the chickpeas before adding them to the salad. Simply toss them in olive oil, salt, and your choice of spices (like paprika or cumin) and bake at 400°F (200°C) for about 20-25 minutes until crispy.
You can also customize this salad by adding other ingredients such as olives, artichokes, or avocado for an extra Mediterranean flair. Enjoy experimenting with different toppings and dressings to make this salad your own!
Lemon Herb Chicken Souvlaki
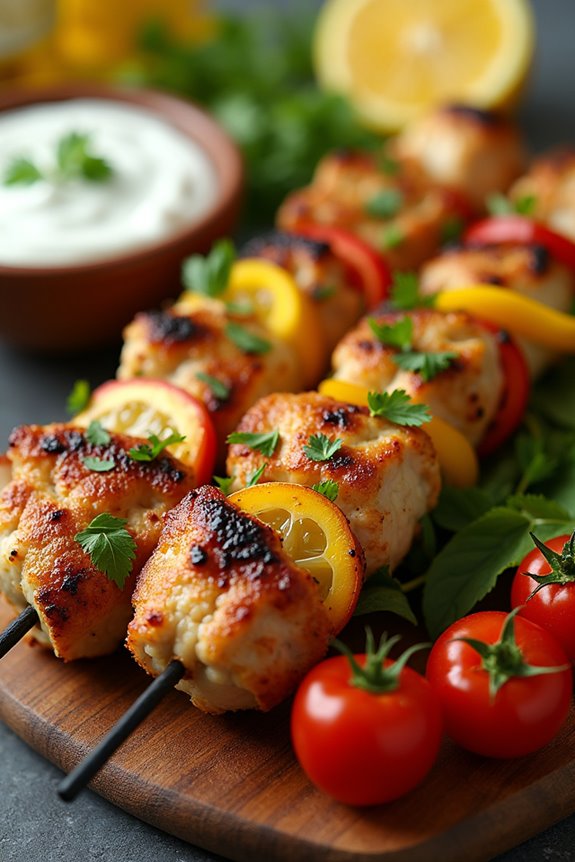
Lemon Herb Chicken Souvlaki is a delightful Mediterranean dish that brings the vibrant flavors of the region right to your table. This dish features succulent pieces of marinated chicken grilled to perfection, served with fresh vegetables and a tangy yogurt sauce. The marinade, infused with lemon juice, garlic, and a medley of herbs, not only tenderizes the chicken but also imparts a zesty flavor that’s simply irresistible.
Whether you’re hosting a summer barbecue or looking for a quick weeknight dinner, Lemon Herb Chicken Souvlaki is sure to impress.
In addition to being delicious, this dish is also quite versatile. You can serve the souvlaki skewers on their own, alongside a revitalizing salad, or stuffed in warm pita bread with a drizzle of tzatziki sauce. Pair it with a glass of chilled white wine or a light Mediterranean salad for a complete meal that captures the essence of summer dining.
Let’s plunge into the recipe!
Ingredients (Serves 4-6)
- 1.5 lbs boneless, skinless chicken breasts
- 1/4 cup olive oil
- 1/4 cup fresh lemon juice
- 4 cloves garlic, minced
- 2 teaspoons dried oregano
- 1 teaspoon dried thyme
- 1 teaspoon salt
- 1/2 teaspoon black pepper
- 1/2 teaspoon paprika
- Bamboo or metal skewers (if using bamboo, soak in water for 30 minutes)
Cooking Instructions
- Prepare the Marinade: In a large mixing bowl, combine the olive oil, lemon juice, minced garlic, oregano, thyme, salt, pepper, and paprika. Whisk the ingredients together until well combined. This marinade won’t only flavor the chicken but will also help to keep it juicy while grilling.
- Marinate the Chicken: Cut the chicken breasts into 1-inch cubes and add them to the bowl with the marinade. Toss the chicken pieces until they’re fully coated in the marinade. Cover the bowl with plastic wrap and let it marinate in the refrigerator for at least 1 hour, or up to 4 hours for maximum flavor.
- Prepare the Skewers: If using bamboo skewers, verify they’ve soaked in water for at least 30 minutes to prevent burning on the grill. If using metal skewers, you can proceed directly without soaking. Thread the marinated chicken pieces onto the skewers, leaving a little space between each piece to guarantee even cooking.
- Preheat the Grill: Preheat your grill to medium-high heat (about 400°F). It’s vital to have a hot grill to achieve those beautiful grill marks and to seal in the juices of the chicken.
- Grill the Souvlaki: Place the chicken skewers on the grill and cook for about 10-12 minutes, turning occasionally until the chicken is cooked through and has nice char marks. The internal temperature should reach 165°F. Be careful not to overcook, as this can lead to dry chicken.
- Serve: Once cooked, remove the skewers from the grill and let them rest for a few minutes. Serve the Lemon Herb Chicken Souvlaki with warm pita bread, a side of tzatziki sauce, and your favorite fresh vegetables or salad.
Extra Tips
For an added layer of flavor, consider marinating the chicken overnight. This allows the herbs and lemon to penetrate deeper into the meat.
Additionally, feel free to customize your skewers by adding vegetables like bell peppers, onions, or cherry tomatoes between the chicken pieces for a colorful and nutritious meal. Always verify that the chicken is cooked evenly, and use a meat thermometer if you’re unsure.
Enjoy your Mediterranean summer meal!
Caprese Salad With Balsamic Glaze
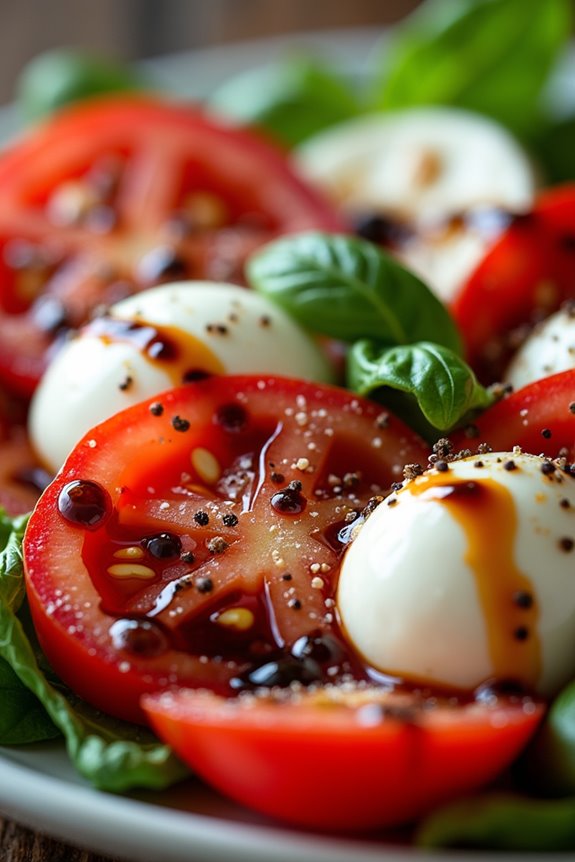
The Caprese Salad is a beloved Italian dish that showcases the vibrant flavors of fresh ingredients, making it a perfect addition to any Mediterranean summer meal. This salad typically features ripe tomatoes, creamy mozzarella, fragrant basil, and a drizzle of balsamic glaze, creating a delightful combination of taste and texture. Its simplicity allows each ingredient to shine, making it an ideal dish for warm weather gatherings, picnics, or light lunches.
Preparing a Caprese Salad is quick and straightforward, but there are a few tips to keep in mind to elevate this dish to restaurant quality. Using the freshest ingredients is key to achieving the best flavor profile, so opt for vine-ripened tomatoes and high-quality mozzarella. The homemade balsamic glaze, which can easily be made by reducing balsamic vinegar, adds a sweet-tart finish that perfectly complements the salad’s briskness.
Ingredients (Serves 4-6):
- 4 large ripe tomatoes
- 1 pound fresh mozzarella cheese
- 1 cup fresh basil leaves
- 1 cup balsamic vinegar
- 2 tablespoons extra virgin olive oil
- Salt and freshly ground black pepper to taste
Cooking Instructions:
- Prepare the Balsamic Glaze: In a small saucepan, pour in the balsamic vinegar. Bring it to a gentle simmer over medium heat. Allow it to simmer for about 10-15 minutes, or until it has reduced to a thicker consistency. Stir occasionally to prevent it from burning. Once it coats the back of a spoon, remove it from heat and let it cool. The glaze will thicken further as it cools.
- Slice the Tomatoes and Mozzarella: While the balsamic glaze is cooling, wash and dry the tomatoes. Slice them into thick rounds (about 1/4 inch thick) and set them aside. Next, slice the fresh mozzarella into similar-sized rounds, matching the thickness of the tomatoes.
- Assemble the Salad: On a large serving platter or individual plates, alternate layers of tomato slices and mozzarella slices. Place a basil leaf between each layer for added flavor and presentation. Continue layering until all ingredients are used, ensuring a colorful display.
- Dress the Salad: Drizzle the extra virgin olive oil over the assembled salad, followed by a sprinkle of salt and freshly ground black pepper to taste. Finish by drizzling the balsamic glaze over the top, adding a beautiful sheen and flavor burst.
- Serve: The Caprese Salad can be served immediately, but letting it sit for a few minutes allows the flavors to meld together beautifully.
Extra Tips:
For the best flavor, try to use heirloom tomatoes when they’re in season, as their unique varieties offer a range of flavors and colors. Additionally, if you prefer a sweeter glaze, you can add a touch of honey to the balsamic while it simmers.
Finally, consider adding a sprinkle of crushed red pepper flakes for a hint of heat or some toasted pine nuts for extra texture and richness. Enjoy your invigorating Caprese Salad!
Shrimp and Feta Pasta With Cherry Tomatoes
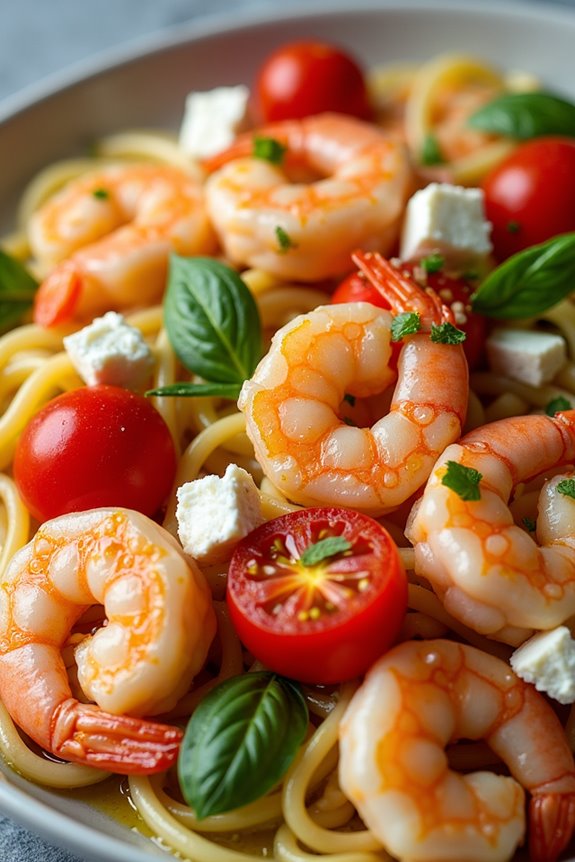
This Shrimp and Feta Pasta with Cherry Tomatoes is a delightful Mediterranean-inspired dish that perfectly captures the essence of summer. Bursting with fresh flavors, this meal combines succulent shrimp with juicy cherry tomatoes, creamy feta cheese, and aromatic herbs to create a symphony of taste that’s sure to impress.
It’s not only quick to prepare but also light and satisfying, making it the ideal choice for warm evenings when you want to enjoy something invigorating.
The beauty of this dish lies in its simplicity and the quality of its ingredients. Fresh shrimp, a staple of Mediterranean cuisine, are sautéed to perfection, while the cherry tomatoes provide a burst of sweetness. Adding feta cheese brings a tangy creaminess that elevates the dish to another level.
Serve it with a side of crusty bread or a green salad for a complete meal that captures the spirit of summer dining.
Ingredients (Serves 4-6):
- 1 pound large shrimp, peeled and deveined
- 8 ounces pasta (such as linguine or spaghetti)
- 2 cups cherry tomatoes, halved
- 4 cloves garlic, minced
- 1/2 cup feta cheese, crumbled
- 1/4 cup olive oil
- 1/4 cup fresh basil, chopped (or 1 tablespoon dried basil)
- 1 teaspoon red pepper flakes (optional)
- Salt and pepper to taste
- Juice of 1 lemon
- Zest of 1 lemon
Cooking Instructions:
- Cook the Pasta: Begin by bringing a large pot of salted water to a boil. Add the pasta of your choice and cook according to the package instructions until al dente. Once cooked, reserve about 1 cup of pasta water, then drain the pasta and set it aside.
- Sauté the Shrimp: In a large skillet, heat the olive oil over medium heat. Add the minced garlic and sauté for about 1 minute until fragrant. Then, add the shrimp to the skillet. Season with salt, pepper, and red pepper flakes if using. Cook the shrimp for about 3-4 minutes, flipping halfway through, until they turn pink and opaque. Remove the shrimp from the skillet and set them aside.
- Cook the Tomatoes: In the same skillet, add the halved cherry tomatoes. Sauté them for about 5 minutes until they start to soften and release their juices. Stir occasionally to prevent burning.
- Combine Ingredients: Once the tomatoes are cooked, return the shrimp to the skillet. Add the cooked pasta and toss everything together. If the mixture seems dry, gradually add some of the reserved pasta water until you reach your desired consistency.
- Add Feta and Herbs: Remove the skillet from heat and fold in the crumbled feta cheese, chopped basil, lemon juice, and lemon zest. Toss gently to combine all the flavors, being careful not to break apart the feta too much.
- Serve: Taste the pasta and adjust the seasoning if needed. Serve warm, garnished with additional basil and a drizzle of olive oil if desired.
Extra Tips:
When making Shrimp and Feta Pasta with Cherry Tomatoes, it’s important to use fresh ingredients for the best flavor. If you can, opt for wild-caught shrimp and ripe, sweet cherry tomatoes.
Additionally, feel free to customize the dish by adding other vegetables like spinach or zucchini for extra nutrition. The dish is also great for meal prep, as it stores well in the refrigerator and can be reheated for a quick lunch or dinner.
Enjoy your Mediterranean feast!
Stuffed Bell Peppers With Rice and Spices

Stuffed bell peppers are a delightful Mediterranean dish that combines vibrant flavors and wholesome ingredients. This recipe features bell peppers filled with a savory mixture of rice, spices, and herbs, making for a nutritious and satisfying meal. It’s an excellent option for a summer dinner, as the fresh ingredients highlight the season’s bounty.
Not only are these stuffed peppers colorful and attractive, but they also allow for creativity, as you can customize the filling to suit your taste or dietary preferences.
To prepare stuffed bell peppers, you’ll need a few key ingredients that are staples in Mediterranean cuisine. The filling is typically made with rice, which serves as a hearty base, complemented by aromatic spices such as cumin and paprika. Fresh herbs like parsley or basil add brightness to the dish, while the bell peppers themselves provide a sweet crunch.
This recipe serves 4-6 people, making it perfect for family gatherings or warm-weather get-togethers.
Ingredients:
- 4-6 large bell peppers (any color)
- 1 cup uncooked long-grain rice
- 2 cups vegetable broth (or water)
- 1 medium onion, finely chopped
- 3 cloves garlic, minced
- 1 teaspoon ground cumin
- 1 teaspoon paprika
- 1/2 teaspoon salt (or to taste)
- 1/4 teaspoon black pepper
- 1 cup canned diced tomatoes (with juices)
- 1 cup cooked chickpeas (or ground meat for a non-vegetarian option)
- 1/4 cup fresh parsley or basil, chopped
- 1 tablespoon olive oil
- Optional: shredded cheese for topping
Cooking Instructions:
- Preheat the Oven: Begin by preheating your oven to 375°F (190°C). This will guarantee that your stuffed peppers cook evenly and thoroughly.
- Prepare the Bell Peppers: Rinse the bell peppers under cold water and slice the tops off. Carefully remove the seeds and membranes inside, creating a hollow space to fill with the rice mixture. Set the prepared peppers aside.
- Cook the Rice: In a medium saucepan, bring vegetable broth (or water) to a boil. Once boiling, add the uncooked rice, reduce the heat to low, cover, and simmer for about 15-20 minutes, or until the rice is tender and the liquid is absorbed. Remove from heat and let it cool slightly.
- Sauté Aromatics: In a large skillet, heat the olive oil over medium heat. Add the chopped onion and sauté for about 5 minutes until softened. Then, add the minced garlic and cook for an additional minute until fragrant.
- Combine Ingredients: In the skillet, stir in the cooked rice, diced tomatoes, chickpeas (or ground meat), cumin, paprika, salt, and pepper. Mix well until all ingredients are evenly combined. Cook for another 2-3 minutes to heat through, then remove from heat and stir in the chopped parsley or basil.
- Stuff the Peppers: Carefully spoon the rice mixture into each bell pepper, filling them generously. If desired, sprinkle shredded cheese on top of each filled pepper.
- Bake: Place the stuffed peppers upright in a baking dish and pour a small amount of water (about 1/4 cup) into the bottom of the dish to create steam. Cover the dish with aluminum foil and bake for 30 minutes. After 30 minutes, remove the foil and bake for an additional 10-15 minutes, or until the peppers are tender.
- Serve: Once cooked, remove the stuffed peppers from the oven and let them cool slightly before serving. Enjoy them warm, drizzled with a little more olive oil or sprinkled with extra herbs.
Extra Tips:
When making stuffed bell peppers, feel free to experiment with different fillings based on your preferences or what you have on hand. You can use quinoa instead of rice, add other vegetables like zucchini or corn, or incorporate spices such as chili flakes for a bit of heat.
If you want to make your dish ahead of time, you can prepare the filling and stuff the peppers earlier in the day, then refrigerate them until you’re ready to bake. This dish also reheats well, making it a great option for leftovers!
Roasted Eggplant Dip (Baba Ganoush)
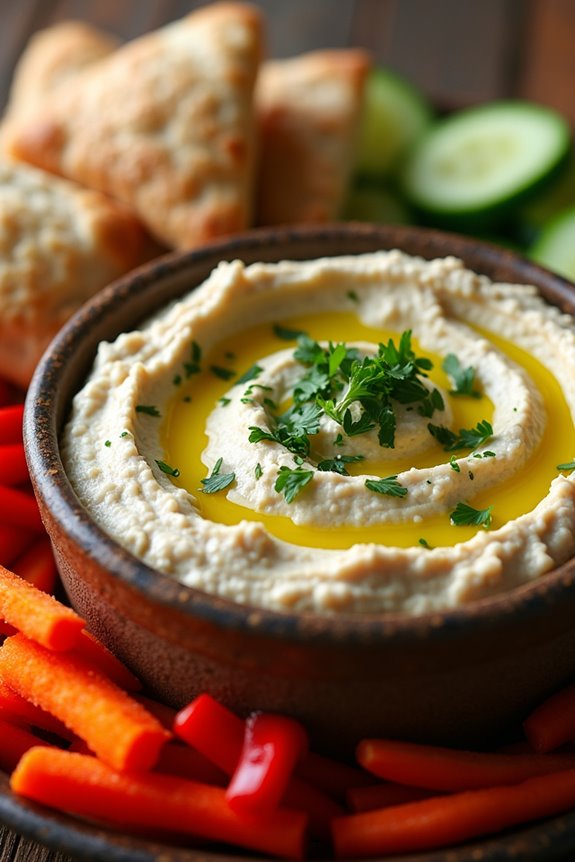
Baba Ganoush is a classic Middle Eastern dip that highlights the rich, smoky flavor of roasted eggplant. This creamy spread isn’t only delicious but also incredibly versatile, making it a perfect addition to any Mediterranean summer gathering. Pair it with warm pita bread, fresh vegetables, or use it as a spread in sandwiches. The combination of tahini, garlic, and lemon juice adds depth and brightness, making each bite a flavorful experience.
The secret to a great Baba Ganoush lies in the roasting of the eggplant. By charring the skin over an open flame or in the oven, you infuse the eggplant with a robust smokiness that defines the dish. This recipe is simple and requires minimal ingredients, making it an excellent choice for both novice cooks and seasoned chefs. With just a bit of preparation and roasting time, you’ll have a delightful dip ready to impress your guests at your next summer barbecue or picnic.
Ingredients (Serves 4-6):
- 2 medium eggplants
- 2 tablespoons tahini
- 2 tablespoons olive oil
- 2 cloves garlic, minced
- 2 tablespoons lemon juice
- Salt, to taste
- Fresh parsley, for garnish (optional)
- Pita bread or fresh vegetables, for serving
Cooking Instructions:
- Preheat the Oven: Begin by preheating your oven to 400°F (200°C). If you prefer, you can also roast the eggplants over an open flame for a more intense smoky flavor. However, the oven method is more accessible for most home cooks.
- Prepare the Eggplants: Rinse the eggplants under cold water and pat them dry. Using a fork, prick the skin of the eggplants several times to allow steam to escape during roasting. This helps prevent the eggplants from bursting in the oven.
- Roast the Eggplants: Place the eggplants on a baking sheet lined with parchment paper and roast them in the preheated oven for about 30-40 minutes, or until the skin is charred and the flesh is soft. You should turn them halfway through the cooking time for even roasting.
- Cool and Scoop: Once roasted, remove the eggplants from the oven and let them cool for about 10-15 minutes. When they’re cool enough to handle, cut them in half lengthwise and scoop out the soft flesh into a mixing bowl, discarding the charred skin.
- Blend the Ingredients: To the bowl with the eggplant flesh, add tahini, olive oil, minced garlic, lemon juice, and salt. Use a fork or a food processor to blend the mixture until it reaches your desired consistency, whether smooth or slightly chunky. Taste and adjust salt or lemon juice as needed.
- Serve and Garnish: Transfer the Baba Ganoush to a serving bowl. Drizzle with a little extra olive oil on top and garnish with chopped fresh parsley, if desired. Serve with warm pita bread or an assortment of fresh vegetables for dipping.
Extra Tips:
For an extra layer of flavor, try adding a pinch of smoked paprika or a dash of cumin to the Baba Ganoush while blending. These spices can enhance the smoky profile of the roasted eggplant.
Additionally, if you want a creamier texture, consider adding a bit more tahini or olive oil. Baba Ganoush can also be made a day in advance; in fact, the flavors improve as they meld together in the refrigerator. Just make sure to cover it tightly to keep it fresh!
Mediterranean Chickpea and Avocado Toast
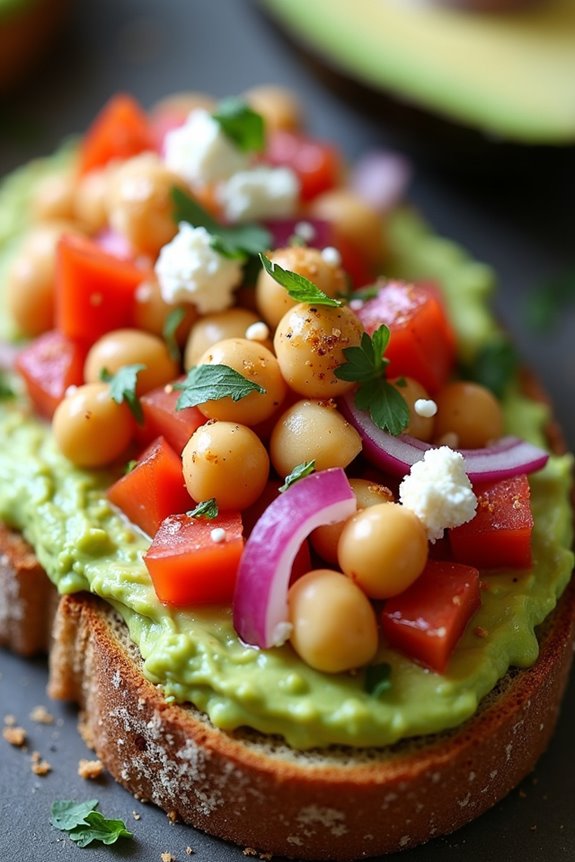
Mediterranean Chickpea and Avocado Toast is a vibrant and invigorating dish perfect for summer gatherings or a light lunch. The combination of creamy avocado, protein-packed chickpeas, and zesty Mediterranean flavors creates a delightful experience for your taste buds. This dish not only offers a wholesome meal option but also showcases the colorful ingredients typical of Mediterranean cuisine, making it both nutritious and visually appealing.
This toast is easy to prepare, making it an ideal choice for busy weekdays or leisurely weekends. You can enjoy it as a light snack or pair it with a side salad for a more filling meal. The creamy avocado complements the chickpeas beautifully, while the addition of fresh herbs and spices adds depth and flavor. Get ready to impress your friends and family with this delicious Mediterranean delight!
Ingredients (serving size: 4-6 people)
- 4 slices of whole grain or sourdough bread
- 2 ripe avocados
- 1 can (15 oz) chickpeas, drained and rinsed
- 1 medium tomato, diced
- 1 small red onion, finely chopped
- 1/2 cup feta cheese, crumbled
- 2 tablespoons olive oil
- Juice of 1 lemon
- 2 tablespoons fresh parsley, chopped
- 1 teaspoon garlic powder
- Salt and pepper to taste
- Optional: Red pepper flakes for garnish
Cooking Instructions
- Prepare the Chickpea Mixture: In a medium bowl, combine the drained chickpeas, diced tomato, chopped red onion, crumbled feta cheese, and fresh parsley. Mix gently using a fork to avoid mashing the chickpeas too much. This mixture will serve as the hearty topping for your toast.
- Season the Mixture: Drizzle the olive oil and lemon juice over the chickpea mixture. Sprinkle in the garlic powder, salt, and pepper to taste. Toss everything together until well combined. The lemon juice adds brightness and helps all the flavors meld together.
- Toast the Bread: While preparing the chickpea mixture, toast the slices of bread in a toaster or under a broiler until they’re golden brown and crispy. This step adds a satisfying crunch to the dish and serves as the perfect base for the toppings.
- Prepare the Avocado: Cut the ripe avocados in half, remove the pit, and scoop out the flesh into a bowl. Mash the avocado with a fork until smooth but still slightly chunky. Season with a pinch of salt and a squeeze of lemon juice to enhance the flavor and prevent browning.
- Assemble the Toast: Spread a generous layer of the mashed avocado on each piece of toasted bread. Top with the chickpea mixture, ensuring an even distribution for all the toppings. If desired, sprinkle with red pepper flakes for an added kick.
- Serve Immediately: Once assembled, serve the Mediterranean Chickpea and Avocado Toast immediately to enjoy the crispiness of the bread and the freshness of the toppings.
Extra Tips
For a unique twist, consider adding other Mediterranean ingredients such as roasted red peppers, olives, or arugula to the chickpea mixture. You can also experiment with different types of bread, like ciabatta or pita, to switch up the texture.
If you have leftovers, store the avocado and chickpea mixture separately in airtight containers to maintain freshness, as the avocado may brown quickly once exposed to air. Enjoy your Mediterranean creation!
Watermelon and Feta Salad With Mint
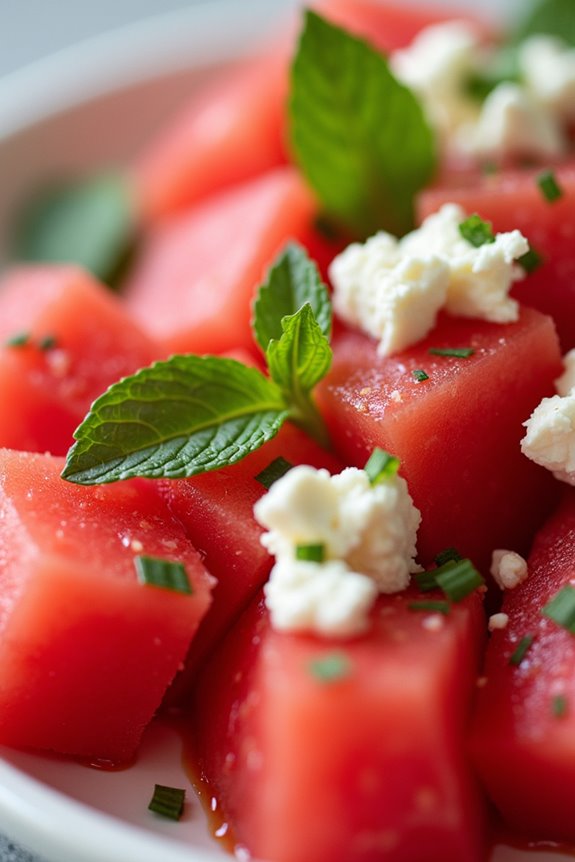
As the summer sun shines brightly, there’s nothing quite as invigorating as a vibrant Watermelon and Feta Salad with Mint. This delightful dish combines the sweet juiciness of watermelon with the creamy, salty flavor of feta cheese, all enhanced by the crispness of fresh mint.
It’s perfect for picnics, barbecues, or as a light, healthy side dish that complements any summer meal. Not only is this salad easy to prepare, but it also brings a colorful presentation to your table, making it a feast for both the eyes and the palate.
This salad is an ideal way to showcase the seasonal produce of summer while providing a delightful contrast of flavors and textures. The sweetness of the watermelon, the tanginess of the feta, and the aromatic scent of mint come together in harmony, creating a dish that’s as pleasing to eat as it’s to prepare.
With simple ingredients and minimal prep time, you can whip up this salad in no time. Let’s plunge into the ingredients and cooking instructions so you can enjoy this invigorating summer treat!
Ingredients (Serves 4-6):
- 4 cups watermelon, cubed
- 1 cup feta cheese, crumbled
- 1/2 cup fresh mint leaves, chopped
- 2 tablespoons olive oil
- 1 tablespoon balsamic vinegar
- Salt and pepper to taste
Cooking Instructions:
- Prepare the Watermelon: Start by selecting a ripe watermelon. Cut it in half, then scoop out the flesh and cut it into bite-sized cubes. Aim for uniform pieces to guarantee an even distribution of flavors in the salad. Place the cubed watermelon in a large mixing bowl.
- Crumble the Feta: Next, take the feta cheese and crumble it into small pieces. You can use your hands or a fork for this step. The feta should be chunky but not too large, allowing it to mix well with the watermelon. Once crumbled, add the feta to the bowl with the watermelon.
- Chop the Mint: Wash the fresh mint leaves thoroughly and pat them dry. Stack a few leaves together and slice them into thin strips, known as chiffonade. This technique releases the mint’s essential oils and enhances the overall flavor. Add the chopped mint to the mixing bowl.
- Dress the Salad: In a small bowl, whisk together the olive oil and balsamic vinegar to create a simple dressing. Pour this dressing over the watermelon, feta, and mint mixture. Gently toss everything together with a spatula or large spoon, being careful not to mash the watermelon or feta.
- Season and Serve: Finally, add salt and pepper to taste. Give the salad one last gentle toss to guarantee the seasoning is evenly distributed. Serve immediately, or let it chill in the refrigerator for about 15-30 minutes to allow the flavors to meld together before serving.
Extra Tips:
When preparing Watermelon and Feta Salad with Mint, consider using a seedless watermelon for an easier eating experience. If you can find artisan feta, it will bring a richer flavor to your dish.
Additionally, feel free to experiment by adding other ingredients such as diced cucumber or a sprinkle of chili flakes for a bit of heat. This salad is best enjoyed fresh but can be stored in the refrigerator for a day or two.
Just be aware that the watermelon may release some juices, so it’s ideal to consume it soon after preparation for the best texture and taste. Enjoy the invigorating flavors of summer!
Spinach and Feta Puff Pastry Rolls
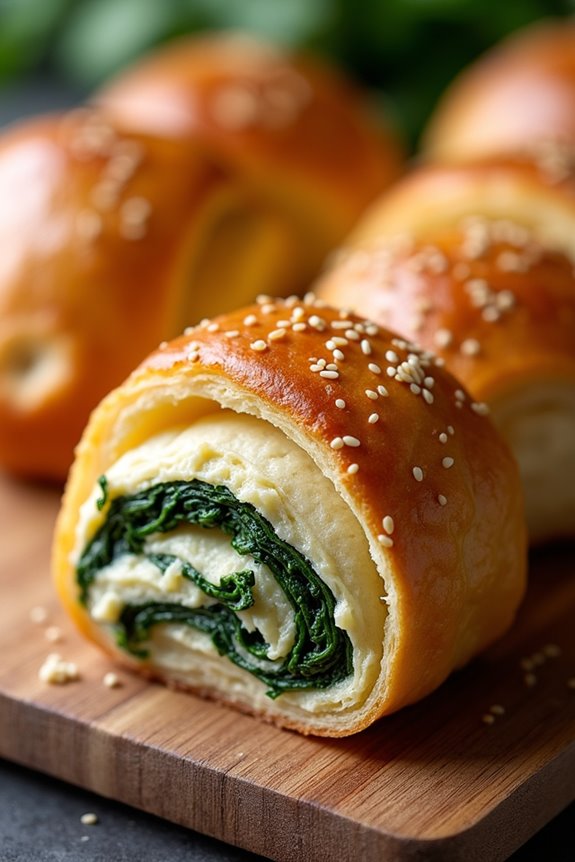
As the summer sun casts its golden rays, Mediterranean flavors come alive, and what better way to embrace this season than with a delightful dish like Spinach and Feta Puff Pastry Rolls? These scrumptious rolls combine the earthy taste of fresh spinach with the tangy richness of feta cheese, all wrapped in flaky puff pastry. Perfect as an appetizer, snack, or even a light meal, these rolls aren’t only simple to prepare but also impressively delicious, making them an ideal addition to any summer gathering.
Whether you’re hosting a picnic, enjoying a casual family dinner, or simply indulging in a quick treat, Spinach and Feta Puff Pastry Rolls are sure to please. The contrasting textures of the crispy pastry and the creamy filling create a delightful bite, while the vibrant green spinach adds a burst of color to the plate. With just a handful of ingredients and minimal preparation time, you can whip up these tasty rolls in no time, bringing a taste of the Mediterranean right to your kitchen.
Ingredients (serving size: 4-6 people)
- 1 package of puff pastry (2 sheets), thawed
- 2 cups fresh spinach, chopped
- 1 cup feta cheese, crumbled
- 1/2 cup ricotta cheese
- 1/4 cup grated Parmesan cheese
- 1 egg, beaten (for egg wash)
- 1 clove garlic, minced
- 1 tablespoon olive oil
- Salt and pepper to taste
- Sesame seeds (optional, for garnish)
Instructions
- Preheat the Oven: Begin by preheating your oven to 400°F (200°C). This step is crucial as it guarantees that the puff pastry will rise beautifully and become golden brown while baking.
- Prepare the Filling: In a large mixing bowl, combine the chopped spinach, crumbled feta, ricotta cheese, grated Parmesan, minced garlic, and olive oil. Season with salt and pepper to taste. Mix all the ingredients until well combined. This mixture will serve as the flavorful filling for your rolls.
- Roll Out the Puff Pastry: On a lightly floured surface, roll out each sheet of puff pastry to smooth it out and guarantee it’s thin enough to work with. Cut each sheet into rectangles, approximately 4×6 inches in size. This will create the perfect base for wrapping your filling.
- Fill the Pastry: Place a generous spoonful of the spinach and cheese mixture in the center of each pastry rectangle. Be careful not to overfill, as this can make sealing the rolls difficult.
- Seal the Rolls: Fold the pastry over the filling to create a rectangle or triangle shape, depending on your preference. Press the edges firmly to seal, and use a fork to crimp the edges for an added decorative touch. This step guarantees that the delicious filling stays inside while baking.
- Apply Egg Wash: Brush the tops of each roll with the beaten egg. This will give the rolls a beautiful golden color once baked. For an extra touch, sprinkle sesame seeds on top before placing them in the oven.
- Bake the Rolls: Place the prepared rolls on a baking sheet lined with parchment paper. Bake in the preheated oven for 20-25 minutes, or until they’re puffed and golden brown. Keep an eye on them to guarantee they don’t over-bake.
- Serve and Enjoy: Once baked, remove the rolls from the oven and let them cool for a few minutes. Serve warm or at room temperature, and enjoy the delicious flavors of the Mediterranean.
Extra Tips
When making Spinach and Feta Puff Pastry Rolls, consider adding your favorite herbs such as dill or oregano to the filling for an extra layer of flavor.
If you want to prepare them ahead of time, you can assemble the rolls and freeze them before baking. Just remember to add a few extra minutes to the baking time if they’re frozen. Enjoy experimenting with different cheeses or even adding sun-dried tomatoes or olives for a personalized twist!
Grilled Lamb Chops With Rosemary and Garlic

Grilled Lamb Chops with Rosemary and Garlic is a quintessential Mediterranean dish that embodies the essence of summer dining. The tender meat of the lamb, marinated in a fragrant mix of fresh rosemary and pungent garlic, is grilled to perfection, resulting in a dish that’s both flavorful and aromatic. This recipe is perfect for gatherings, allowing you to enjoy the warm evenings while savoring a classic Mediterranean flavor profile.
Not only are these lamb chops delicious, but they also showcase the simplicity and elegance of Mediterranean cuisine. Pair them with a fresh salad or roasted vegetables for a complete meal that celebrates the bounty of the season. Whether you’re hosting a barbecue or just enjoying a cozy dinner at home, these grilled lamb chops are sure to impress.
Ingredients (serving size: 4-6 people):
- 8 lamb chops (about 1 inch thick)
- 4 tablespoons olive oil
- 4 cloves garlic, minced
- 2 tablespoons fresh rosemary, chopped
- 1 tablespoon fresh lemon juice
- Salt and pepper to taste
- Lemon wedges for serving (optional)
Cooking Instructions:
- Prepare the Marinade: In a mixing bowl, combine the olive oil, minced garlic, chopped rosemary, lemon juice, salt, and pepper. Whisk the ingredients together until well blended. This marinade will infuse the lamb chops with flavor and help tenderize the meat.
- Marinate the Lamb Chops: Place the lamb chops in a large resealable plastic bag or a shallow dish. Pour the marinade over the chops, ensuring they’re evenly coated. Seal the bag or cover the dish and refrigerate for at least 1 hour, or preferably overnight. This allows the flavors to penetrate the meat deeply.
- Preheat the Grill: About 20 minutes before you’re ready to cook, preheat your grill to medium-high heat. Make sure the grates are clean and lightly oiled to prevent sticking.
- Grill the Lamb Chops: Remove the lamb chops from the marinade, letting any excess marinade drip off. Place the chops on the hot grill. Cook for about 4-5 minutes on one side, then flip and grill for another 3-4 minutes on the other side for medium-rare. Adjust the cooking time according to your desired level of doneness.
- Rest the Chops: Once the lamb chops are done, remove them from the grill and let them rest for about 5 minutes. This resting period allows the juices to redistribute throughout the meat, ensuring they stay tender and juicy.
- Serve: Serve the grilled lamb chops with lemon wedges on the side for a burst of freshness. You can also accompany them with your favorite sides, such as a Greek salad or grilled vegetables.
Extra Tips: For the best results, choose lamb chops that are well-marbled for added flavor and tenderness. If you’re short on time, even a quick marinade of 30 minutes can enhance the taste, but longer marinating will yield better results.
Additionally, consider using a meat thermometer to check for doneness; 145°F is ideal for medium-rare. Finally, feel free to experiment with other herbs, like thyme or oregano, to personalize the flavor according to your preference. Enjoy your Mediterranean summer meal!