

Get ready to explore the vibrant world of Mediterranean grilling. With an array of flavors and aromas, this cuisine is all about celebrating fresh ingredients. Picture succulent shrimp skewers, perfectly charred eggplant, and fragrant herbs elevating each dish. These recipes will transport you to sun-kissed shores with every bite. Let’s fire up the grill and discover the magic of these golden Mediterranean grill recipes.
Grilled Lemon Herb Shrimp Skewers
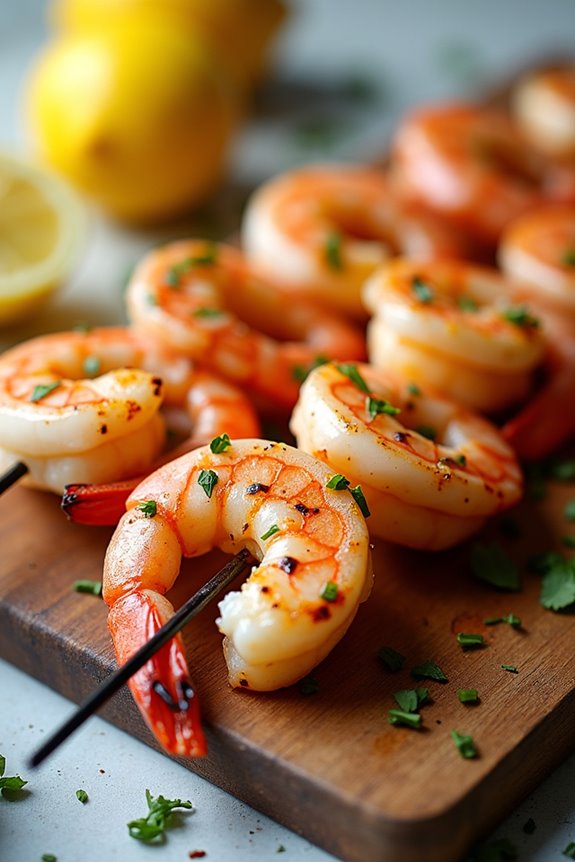
Grilled Lemon Herb Shrimp Skewers are a delicious and easy dish to prepare, perfect for summer barbecues or a quick weeknight dinner. The combination of fresh lemon juice, aromatic herbs, and succulent shrimp creates a vibrant flavor profile that’s sure to impress family and friends alike. Not only are they simple to make, but they also come together in under 30 minutes, making them an ideal choice for any occasion.
Pair these skewers with a fresh salad or grilled vegetables for a complete Mediterranean experience.
To achieve the best results, it’s important to let the shrimp marinate for at least 15 minutes before grilling. This allows the flavors to meld beautifully, guaranteeing that each bite is bursting with zesty goodness. When grilling, be mindful of the shrimp’s cooking time to prevent them from becoming tough. The key is to remove them from the grill as soon as they turn pink and opaque. Serve these skewers as an appetizer or main dish, and watch them disappear!
Ingredients (Serves 4-6):
- 1 pound large shrimp, peeled and deveined
- 3 tablespoons olive oil
- 2 tablespoons fresh lemon juice
- Zest of 1 lemon
- 3 cloves garlic, minced
- 2 tablespoons fresh parsley, chopped
- 1 tablespoon fresh dill, chopped
- 1 teaspoon salt
- ½ teaspoon black pepper
- Wooden or metal skewers
Cooking Instructions:
- Prepare the Shrimp: In a large bowl, combine the peeled and deveined shrimp with olive oil, lemon juice, lemon zest, minced garlic, chopped parsley, chopped dill, salt, and black pepper. Stir until the shrimp are well coated with the marinade. Cover the bowl with plastic wrap and let it marinate in the refrigerator for at least 15 minutes.
- Soak Skewers (if using wooden skewers): If you’re using wooden skewers, soak them in water for about 30 minutes before grilling. This helps prevent them from burning on the grill.
- Preheat the Grill: While the shrimp is marinating, preheat your grill to medium-high heat. This guarantees that the shrimp will cook evenly and develop nice grill marks.
- Skewer the Shrimp: After marinating, thread the shrimp onto the skewers, leaving a little space between each shrimp for even cooking. If desired, you can alternate the shrimp with vegetables like bell peppers or onions for added flavor and color.
- Grill the Skewers: Place the skewers on the preheated grill and cook for about 2-3 minutes on each side, or until the shrimp turn pink and opaque. Be careful not to overcook them, as shrimp can become tough when cooked too long.
- Serve: Once cooked, remove the skewers from the grill and let them rest for a minute. Serve warm with extra lemon wedges on the side for squeezing over the top.
Extra Tips:
For an extra layer of flavor, consider adding a pinch of red pepper flakes to the marinade for a touch of heat. You can also experiment with different herbs such as basil or oregano to customize the dish to your taste.
If you’re planning to serve these skewers at a gathering, consider doubling the recipe, as they tend to disappear quickly! Finally, for a more robust flavor, allow the shrimp to marinate for up to an hour before grilling.
Mediterranean Grilled Chicken With Tzatziki
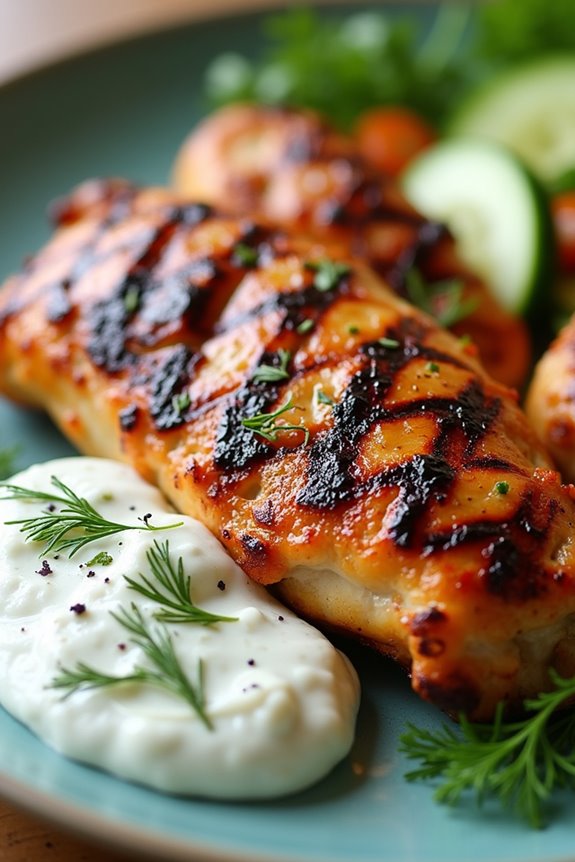
Mediterranean Grilled Chicken with Tzatziki is a delightful dish that brings the vibrant flavors of the Mediterranean right to your table. This recipe features succulent chicken marinated in a blend of aromatic spices, grilled to perfection, and served with a creamy, invigorating tzatziki sauce. The combination of marinated chicken and the coolness of tzatziki creates a delicious balance that’s perfect for summer barbecues, family dinners, or any occasion where you want to impress your guests with a healthy and flavorful meal.
The beauty of this dish lies not only in its taste but also in its simplicity. The marinating process infuses the chicken with a variety of Mediterranean herbs and spices, while the tzatziki sauce, made from yogurt, cucumber, garlic, and herbs, adds a revitalizing contrast. This recipe isn’t only easy to prepare but also provides a great opportunity to enjoy fresh ingredients and vibrant flavors characteristic of Mediterranean cuisine.
Serve it with a side of grilled vegetables or a hearty salad for a complete meal that everyone will love.
Ingredients (Serves 4-6)
- 4 boneless, skinless chicken breasts
- 3 tablespoons olive oil
- 2 tablespoons lemon juice
- 3 cloves garlic, minced
- 2 teaspoons dried oregano
- 1 teaspoon paprika
- Salt and pepper to taste
- 1 cup plain Greek yogurt
- 1 medium cucumber, grated and drained
- 1 tablespoon fresh dill, chopped
- 1 clove garlic, minced (for tzatziki)
- Salt to taste
Cooking Instructions
- Marinate the Chicken: In a mixing bowl, combine the olive oil, lemon juice, minced garlic, dried oregano, paprika, salt, and pepper. Whisk the ingredients together until well blended. Place the chicken breasts in a resealable plastic bag or a shallow dish and pour the marinade over them. Confirm that the chicken is well coated. Seal the bag or cover the dish and refrigerate for at least 30 minutes, but ideally for 2-4 hours to allow the flavors to penetrate the meat.
- Prepare the Tzatziki Sauce: While the chicken is marinating, prepare the tzatziki. In a bowl, mix together the Greek yogurt, grated cucumber (make sure to squeeze out excess moisture), minced garlic, chopped dill, and salt. Stir until all ingredients are combined. Cover and refrigerate the tzatziki sauce until you’re ready to serve.
- Preheat the Grill: Preheat your grill to medium-high heat (about 375°F to 400°F). If using a charcoal grill, confirm the coals are evenly distributed for even cooking.
- Grill the Chicken: Remove the marinated chicken from the refrigerator and let it sit at room temperature for about 10 minutes. This helps in even cooking. Place the chicken on the preheated grill and cook for about 6-8 minutes per side or until the internal temperature reaches 165°F. Avoid flipping the chicken too often to achieve a nice char.
- Rest the Chicken: Once cooked, transfer the chicken to a plate and let it rest for about 5 minutes. This allows the juices to redistribute, making the chicken more tender and juicy.
- Serve: Slice the grilled chicken and serve it with the chilled tzatziki sauce on the side. You can also garnish with additional dill or cucumbers for an extra touch.
Extra Tips
For the best flavor, consider using bone-in, skin-on chicken thighs instead of breasts for added juiciness. Additionally, you can customize the tzatziki sauce by adding fresh mint or a splash of vinegar for an extra zing.
Serve the grilled chicken with pita bread, a Greek salad, or roasted vegetables to create a complete Mediterranean feast. Don’t forget to taste and adjust the seasoning of the tzatziki to your preference before serving, confirming a perfect balance of flavors.
Spicy Harissa Grilled Eggplant
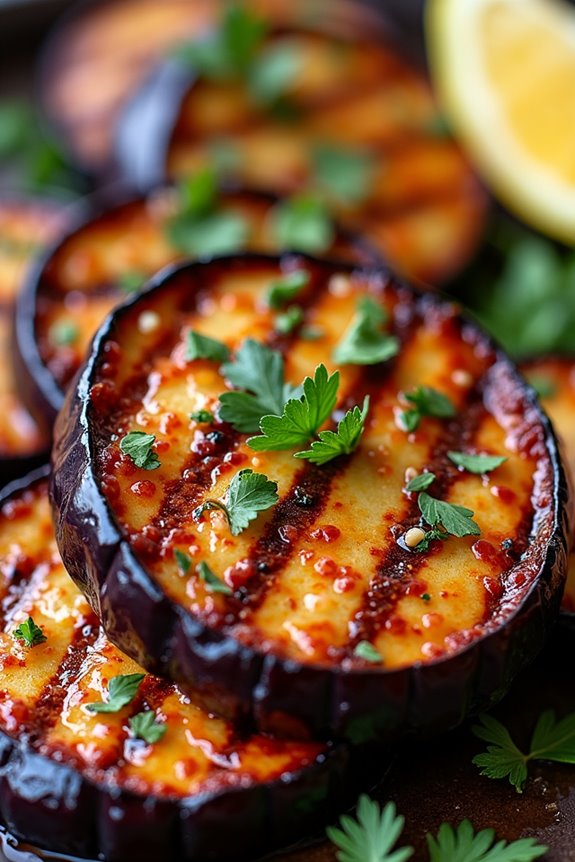
Spicy Harissa Grilled Eggplant is a vibrant and flavorful dish that embodies the essence of Mediterranean cuisine. This recipe showcases the unique taste of eggplant, which is perfectly complemented by the spicy and aromatic harissa paste. Grilling the eggplant enhances its natural sweetness while creating a delightful char that pairs wonderfully with the fiery kick of harissa.
This dish isn’t only delicious but also a fantastic option for those looking to add more plant-based meals to their diet. Whether served as an appetizer, side dish, or a main course for a light meal, Spicy Harissa Grilled Eggplant is sure to impress your family and friends.
The combination of spices and herbs in harissa brings out the best in the eggplant, making it a standout dish in any Mediterranean-themed feast. With its easy preparation and mouthwatering results, this recipe will quickly become a go-to favorite in your culinary repertoire.
Ingredients (Serves 4-6)
- 2 medium-sized eggplants
- 3 tablespoons harissa paste
- 4 tablespoons olive oil
- 2 tablespoons lemon juice
- 2 cloves garlic, minced
- 1 teaspoon salt
- 1/2 teaspoon black pepper
- Fresh parsley, chopped (for garnish)
- Lemon wedges (for serving)
Cooking Instructions
- Prepare the Eggplants: Begin by slicing the eggplants into 1/2-inch thick rounds. This thickness allows the eggplant to cook evenly while maintaining a nice texture. Place the slices in a colander and sprinkle them with salt. Allow them to sit for about 30 minutes to draw out excess moisture and bitterness.
- Make the Marinade: In a bowl, whisk together the harissa paste, olive oil, lemon juice, minced garlic, salt, and black pepper. This mixture will serve as both a marinade and a sauce for the grilled eggplant, infusing it with robust flavors.
- Marinate the Eggplants: After 30 minutes, rinse the eggplant slices under cold water to remove excess salt and pat them dry with paper towels. Place the eggplant in a large bowl and pour the harissa marinade over the slices. Toss them gently to confirm each piece is evenly coated. Let them marinate for at least 15 minutes to absorb the flavors.
- Heat the Grill: Preheat your grill to medium-high heat. If using a grill pan, preheat it on the stovetop. Confirm the grill grates are clean and lightly oiled to prevent sticking.
- Grill the Eggplants: Once the grill is hot, place the marinated eggplant slices on the grill. Cook for about 4-5 minutes on each side, or until they’re tender and have nice grill marks. Avoid flipping them too often to allow for better charring.
- Serve: After grilling, remove the eggplant slices from the grill and transfer them to a serving platter. Garnish with freshly chopped parsley and serve with lemon wedges on the side for an extra burst of freshness.
Extra Tips
For an even deeper flavor, consider adding additional spices like cumin or smoked paprika to the marinade. If you prefer a milder version, adjust the amount of harissa paste to your taste.
You can also add grilled vegetables, such as bell peppers or zucchini, to create a colorful and diverse platter. Leftovers can be stored in an airtight container in the refrigerator and enjoyed cold or reheated the next day, making this dish an excellent option for meal prep.
Grilled Octopus With Olive Oil and Lemon
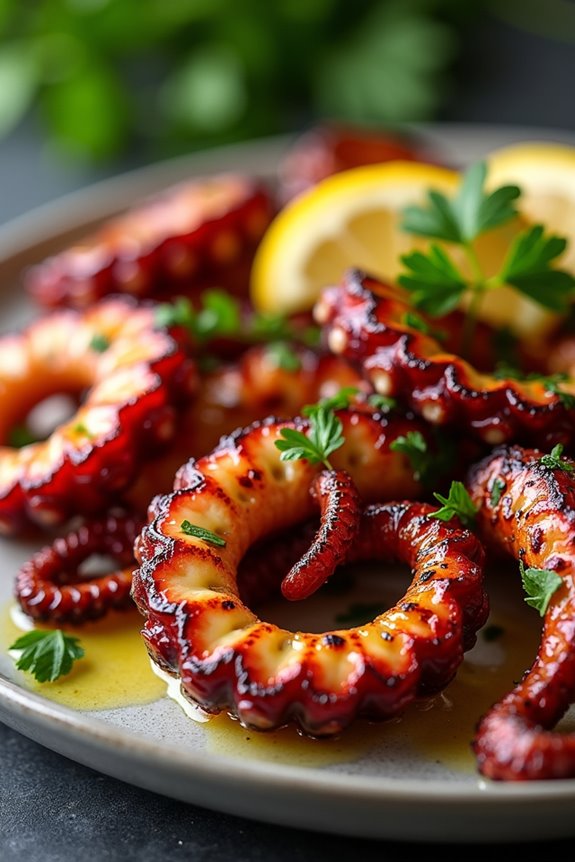
Grilled octopus is a classic Mediterranean dish that showcases the simplicity and freshness of the region’s ingredients. This dish isn’t only visually stunning but also packed with flavor, making it an excellent choice for gatherings or a special dinner. The combination of tender octopus, bright lemon juice, and the richness of olive oil creates a harmonious balance that’s sure to impress your guests.
To prepare grilled octopus, the key is to first tenderize the octopus, which can be done through boiling before grilling. Marinating the octopus enhances its flavor, allowing the olive oil and lemon to seep into the meat. Once grilled, the octopus develops a delightful char, adding depth to the dish. Serve it with a drizzle of olive oil and a squeeze of fresh lemon for a revitalizing finish.
Ingredients (Serves 4-6)
- 2 pounds octopus, cleaned
- 1 cup olive oil
- 4 cloves garlic, minced
- 1 lemon, juiced and zested
- 1 teaspoon red pepper flakes
- Salt and pepper, to taste
- Fresh parsley, chopped (for garnish)
- Lemon wedges (for serving)
Cooking Instructions
- Tenderize the Octopus: Start by bringing a large pot of salted water to a boil. Carefully add the cleaned octopus to the boiling water. Boil for about 30-40 minutes, or until the octopus is tender when pierced with a fork. This step is vital to guarantee that the octopus isn’t chewy when grilled.
- Prepare the Marinade: While the octopus is boiling, combine the olive oil, minced garlic, lemon juice, lemon zest, red pepper flakes, salt, and pepper in a mixing bowl. Whisk until well combined. The marinade will infuse the octopus with flavors, so it’s important to let it sit while the octopus cooks.
- Marinate the Octopus: Once tender, remove the octopus from the boiling water and let it cool slightly. Cut the tentacles from the body and place them in the bowl with the marinade. Toss to coat the octopus evenly in the marinade and allow it to sit for at least 30 minutes, or up to 2 hours in the refrigerator for a deeper flavor.
- Preheat the Grill: While the octopus is marinating, preheat your grill to medium-high heat. A hot grill is significant for getting those beautiful grill marks and a nice char on the octopus.
- Grill the Octopus: Remove the octopus from the marinade, allowing any excess marinade to drip off. Place the tentacles directly on the grill. Grill for about 3-4 minutes per side, or until the octopus is nicely charred and heated through. Watch carefully to avoid overcooking, as this can make the octopus tough.
- Serve: Once grilled, transfer the octopus to a serving platter. Drizzle with additional olive oil, sprinkle with chopped parsley, and serve with lemon wedges on the side for squeezing over the top.
Extra Tips
When cooking grilled octopus, patience is key. The boiling process is crucial to achieve tenderness; don’t skip it. If you have the time, consider marinating the octopus overnight for even more flavor.
Also, confirm your grill is hot enough before placing the octopus on it to create a perfect char without sticking. Finally, don’t hesitate to experiment with additional herbs and spices in the marinade to suit your taste preferences!
Saffron Infused Grilled Fish
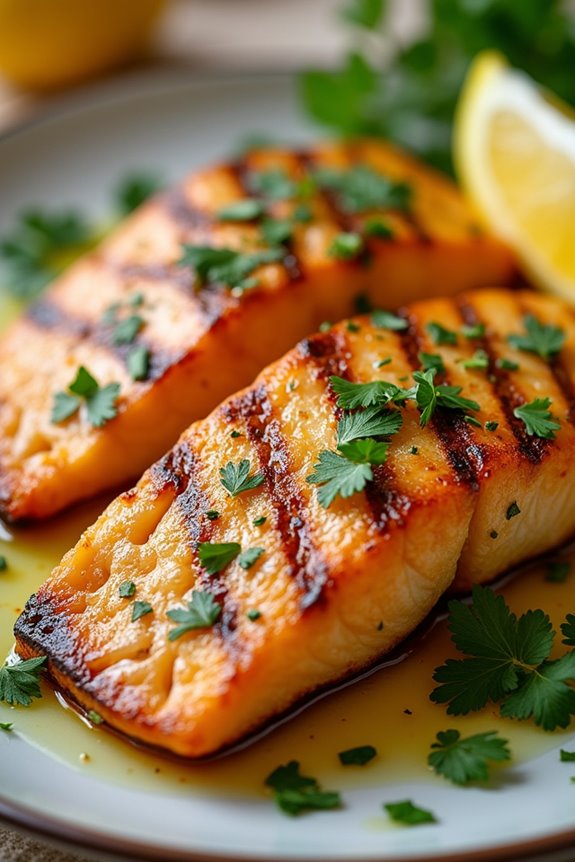
Saffron Infused Grilled Fish is a delightful Mediterranean dish that brings the aroma and flavors of the sea to your table. This recipe features fresh fish, marinated in a saffron-infused mixture that elevates its natural taste, making it a perfect dish for summer grilling or a special family dinner. The use of saffron not only adds a luxurious touch but also imparts a beautiful golden hue to the fish, making it visually appealing as well.
Grilling fish can be a bit tricky, as it can easily stick to the grill or dry out if overcooked. However, with the right preparation and technique, you’ll be able to achieve perfectly grilled fish that’s both succulent and flavorful. This dish pairs wonderfully with a side of Mediterranean vegetables or a fresh salad, making it a well-rounded meal that’s sure to impress your guests.
Ingredients (serving size of 4-6 people):
- 4-6 fillets of fish (such as sea bass, snapper, or tilapia)
- 1/4 teaspoon saffron threads
- 1/4 cup olive oil
- 2 tablespoons lemon juice
- 3 cloves garlic, minced
- 1 teaspoon salt
- 1/2 teaspoon black pepper
- 1 teaspoon fresh parsley, chopped (for garnish)
- Lemon wedges (for serving)
Cooking Instructions:
- Prepare the Saffron Infusion: Begin by placing the saffron threads in a small bowl. Add 2 tablespoons of warm water to the saffron and let it steep for about 10 minutes. This allows the saffron to release its color and flavor, creating a fragrant infusion.
- Make the Marinade: In a separate bowl, combine the olive oil, lemon juice, minced garlic, salt, and black pepper. Once the saffron has steeped, add it along with the water to this mixture. Whisk everything together until well combined.
- Marinate the Fish: Place the fish fillets in a shallow dish and pour the saffron marinade over them. Make sure the fish is well-coated. Cover the dish with plastic wrap and refrigerate for at least 30 minutes, allowing the flavors to meld into the fish.
- Preheat the Grill: While the fish is marinating, preheat your grill to medium-high heat. Make sure the grates are clean and lightly oiled to prevent sticking.
- Grill the Fish: Once the grill is ready, remove the fish from the marinade, letting any excess marinade drip off. Place the fillets on the grill, skin side down if applicable. Grill for about 4-5 minutes on one side, then carefully flip and grill for another 3-4 minutes, or until the fish is opaque and flakes easily with a fork.
- Serve: Once cooked, remove the fish from the grill and transfer it to a serving platter. Garnish with chopped parsley and serve with lemon wedges on the side for an extra burst of freshness.
Extra Tips: When grilling fish, it’s crucial to monitor the cooking time closely to avoid overcooking, which can lead to dryness. If you’re unsure, use a meat thermometer; the internal temperature should reach 145°F (63°C).
Additionally, consider using a fish basket or aluminum foil to help keep the fish intact while grilling, especially if you’re working with delicate fillets. Enjoy your Saffron Infused Grilled Fish with a side of grilled vegetables or a fresh Mediterranean salad for a complete meal.
Grilled Vegetable Antipasto Platter
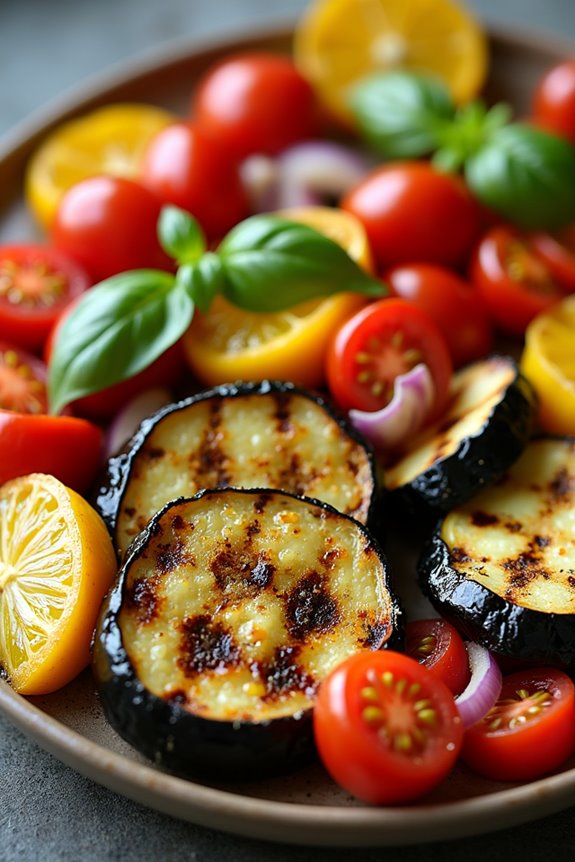
Grilled Vegetable Antipasto Platter is a delightful and colorful dish that brings together the fresh flavors of the Mediterranean. This dish is perfect for sharing and makes for an impressive appetizer at any gathering. The vibrant mix of grilled vegetables combined with aromatic herbs and a drizzle of olive oil creates a mouthwatering experience that showcases the essence of Mediterranean cuisine.
The best part about this antipasto platter is its versatility. You can select your favorite vegetables and adjust the grilling time to achieve the perfect char. Serve it with crusty bread, olives, and a selection of cheeses to elevate your antipasto experience. Whether you’re hosting a summer barbecue or enjoying a cozy dinner at home, this dish is sure to please both vegetarians and meat lovers alike.
Ingredients (Serves 4-6):
- 1 zucchini, sliced into 1/4-inch thick rounds
- 1 yellow squash, sliced into 1/4-inch thick rounds
- 1 red bell pepper, cut into quarters
- 1 yellow bell pepper, cut into quarters
- 1 eggplant, sliced into 1/2-inch thick rounds
- 1 red onion, cut into thick slices
- 1 cup cherry tomatoes, whole
- 3 tablespoons olive oil
- 2 teaspoons balsamic vinegar
- 2 teaspoons dried oregano
- 1 teaspoon garlic powder
- Salt and pepper, to taste
- Fresh basil leaves, for garnish
Cooking Instructions:
- Prepare the Vegetables: Begin by washing all the vegetables thoroughly. Slice the zucchini, yellow squash, red and yellow bell peppers, eggplant, and red onion as indicated in the ingredient list. Leave the cherry tomatoes whole, as they’ll be grilled as is.
- Marinate the Vegetables: In a large bowl, combine the sliced vegetables with olive oil, balsamic vinegar, dried oregano, garlic powder, salt, and pepper. Toss everything gently until all the vegetables are well-coated with the marinade. Let them sit for about 15-20 minutes to absorb the flavors.
- Preheat the Grill: While the vegetables are marinating, preheat your grill to medium-high heat. If you’re using a grill pan, place it on the stove over medium-high heat. Make sure the grill grates are clean and lightly oiled to prevent sticking.
- Grill the Vegetables: Once the grill is hot, place the marinated vegetables directly onto the grill grates. Grill the zucchini, yellow squash, eggplant, and onion for about 4-6 minutes per side, or until they develop nice grill marks and are tender. The bell peppers may take a little longer, around 8-10 minutes, so keep an eye on them. The cherry tomatoes can be added towards the end for about 2-3 minutes, just until they’re blistered.
- Arrange the Platter: Once all the vegetables are grilled to perfection, remove them from the grill and let them cool slightly. Arrange the grilled vegetables artistically on a large platter. Garnish with fresh basil leaves for an added touch of freshness and color.
- Serve and Enjoy: Serve the grilled vegetable antipasto platter warm or at room temperature with a side of crusty bread, olives, and your favorite cheese. Encourage guests to mix and match flavors for a delightful tasting experience.
Extra Tips:
When preparing your Grilled Vegetable Antipasto Platter, feel free to experiment with different vegetables based on the season or your personal preferences. Asparagus, mushrooms, or even artichokes can be delicious additions.
Additionally, for an extra flavor boost, consider adding a sprinkle of feta cheese or a drizzle of pesto just before serving. Finally, if you have leftovers, store them in an airtight container in the refrigerator, as they can be enjoyed cold in salads or sandwiches the next day.
Lamb Kofta Kebabs With Mint Yogurt
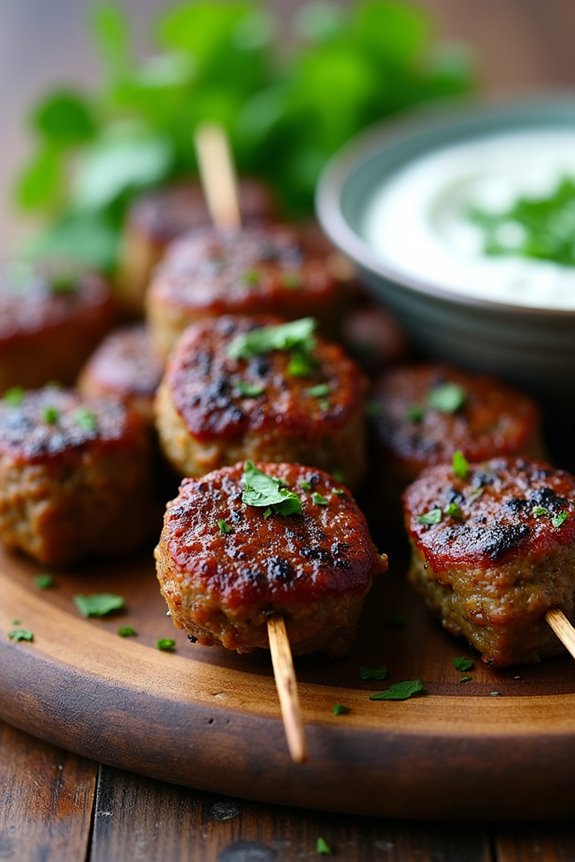
Lamb Kofta Kebabs are a delightful and savory dish that hails from the rich culinary traditions of the Mediterranean. These flavorful skewers are made from ground lamb mixed with aromatic spices and herbs, providing a juicy and tender bite that’s perfect for grilling. The addition of mint yogurt as a dipping sauce adds a revitalizing contrast to the warm, spiced meat, making this dish an ideal choice for summer barbecues or a cozy family dinner.
Preparing Lamb Kofta Kebabs is a straightforward process that allows you to enjoy the vibrant flavors of the Mediterranean right at home. The key to a successful kofta is to confirm that the mixture is well-combined, allowing the spices to infuse the lamb evenly. Grilling the kebabs over high heat creates a beautiful char on the outside while keeping the inside moist and flavorful. Serve these kebabs with a side of warm pita bread and a fresh salad for a complete meal that everyone will love.
Ingredients (Serves 4-6):
- 1 pound ground lamb
- 1 small onion, finely chopped
- 2 cloves garlic, minced
- 1 teaspoon ground cumin
- 1 teaspoon ground coriander
- 1 teaspoon smoked paprika
- 1 teaspoon ground cinnamon
- 1 teaspoon salt
- ½ teaspoon black pepper
- ¼ cup fresh parsley, chopped
- ¼ cup fresh mint, chopped
- 1 egg, beaten
- 2 tablespoons olive oil (for brushing)
- Wooden or metal skewers
For Mint Yogurt:
- 1 cup plain Greek yogurt
- ¼ cup fresh mint, finely chopped
- 1 tablespoon lemon juice
- Salt and pepper to taste
Cooking Instructions:
- Prepare the Kofta Mixture: In a large mixing bowl, combine the ground lamb, chopped onion, minced garlic, ground cumin, ground coriander, smoked paprika, ground cinnamon, salt, black pepper, chopped parsley, chopped mint, and beaten egg. Mix the ingredients until well combined, confirming that the spices and herbs are evenly distributed throughout the meat.
- Shape the Kebabs: Once the mixture is ready, take a handful and mold it around a skewer, forming a long, oval shape that adheres to the skewer. Repeat this process with the remaining mixture, making sure to leave some space between each kebab on the skewer for even cooking. If using wooden skewers, soak them in water for about 30 minutes beforehand to prevent burning.
- Preheat the Grill: Heat your grill to medium-high heat. If using a charcoal grill, wait until the coals are covered with ash. Lightly brush the grill grates with olive oil to prevent sticking.
- Cook the Kebabs: Place the kebabs on the grill and cook for about 4-5 minutes on each side, or until they’re browned and cooked through. Use tongs to rotate the kebabs gently for even grilling. The internal temperature should reach 160°F.
- Prepare the Mint Yogurt: While the kebabs are grilling, combine the Greek yogurt, chopped mint, lemon juice, salt, and pepper in a bowl. Stir until smooth and well mixed. Adjust seasoning to taste.
- Serve: Once the kebabs are fully cooked, remove them from the grill and let them rest for a few minutes. Serve the kebabs hot with the mint yogurt on the side, along with pita bread and fresh vegetables if desired.
Extra Tips:
For a more intense flavor, let the kofta mixture marinate in the refrigerator for at least 30 minutes before shaping the kebabs. This allows the spices to meld beautifully into the meat.
Additionally, if you’re looking for a smoky flavor, consider adding a few drops of liquid smoke to the mixture or using a charcoal grill. Always confirm that the kebabs are cooked thoroughly, but be careful not to overcook them, as lamb can dry out quickly.
Enjoy your Lamb Kofta Kebabs with a revitalizing beverage for a complete Mediterranean experience!
Citrus and Fennel Grilled Salmon
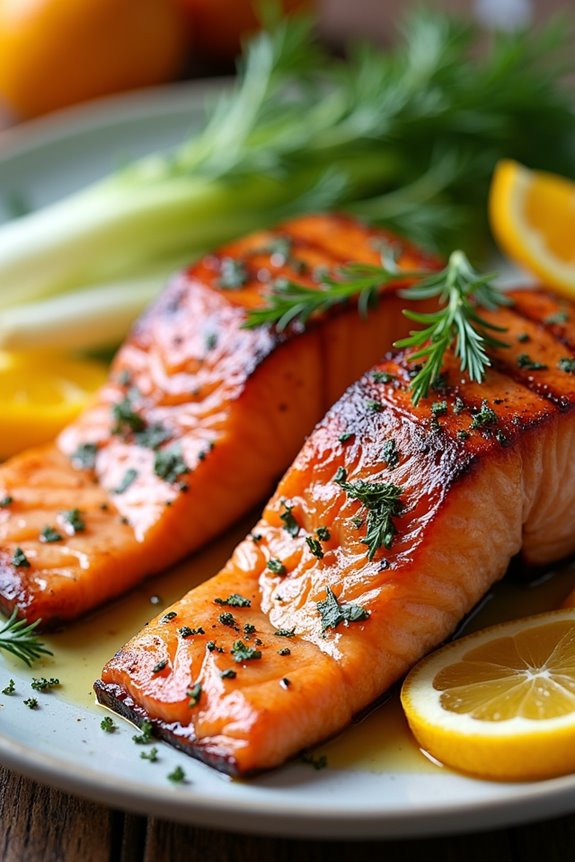
Grilled salmon is a delightful dish that embodies the vibrant flavors of the Mediterranean, and when enhanced with citrus and fennel, it takes on an exceptional freshness that’s simply irresistible. The combination of zesty citrus and the aromatic essence of fennel creates a perfect balance, making this dish not only healthy but also incredibly tasty.
This recipe is perfect for summer barbecues or any casual dinner with family and friends, bringing a touch of the Mediterranean to your table.
To achieve the best flavor, it’s recommended to marinate the salmon for at least 30 minutes before grilling. This allows the citrus and fennel to infuse their flavors into the fish, resulting in a moist and flavorful meal. Pair this citrus and fennel grilled salmon with a light salad or grilled vegetables for a complete Mediterranean feast that’s sure to impress your guests.
Ingredients (Serves 4-6):
- 4-6 salmon fillets (about 6 ounces each)
- 1 large bulb of fennel, thinly sliced
- 2 oranges, zested and juiced
- 1 lemon, zested and juiced
- 3 tablespoons olive oil
- 2 cloves garlic, minced
- 1 teaspoon salt
- ½ teaspoon black pepper
- ½ teaspoon red pepper flakes (optional)
- Fresh dill or parsley for garnish
Cooking Instructions:
- Prepare the Marinade: In a bowl, combine the orange zest, orange juice, lemon zest, lemon juice, olive oil, minced garlic, salt, black pepper, and red pepper flakes (if using). Whisk the ingredients together until well blended to create a marinade that will flavor the salmon.
- Marinate the Salmon: Place the salmon fillets in a shallow dish or a resealable plastic bag. Pour the marinade over the salmon, making sure each fillet is well coated. Add the thinly sliced fennel on top. Cover the dish or seal the bag and refrigerate for at least 30 minutes, allowing the flavors to meld.
- Preheat the Grill: While the salmon is marinating, preheat your grill to medium-high heat. This guarantees that the salmon cooks evenly and develops a nice char.
- Grill the Salmon: Once the grill is hot, lightly oil the grill grates to prevent the salmon from sticking. Remove the salmon and fennel from the marinade, letting excess marinade drip off. Place the salmon fillets skin-side down on the grill. Grill for about 5-6 minutes on one side, then carefully flip and grill for another 4-5 minutes, or until the salmon flakes easily with a fork and reaches your desired doneness.
- Serve: Once cooked, remove the salmon from the grill and let it rest for a few minutes. Serve garnished with fresh dill or parsley, alongside the grilled fennel, and enjoy the delightful Mediterranean flavors.
Extra Tips:
When preparing citrus and fennel grilled salmon, consider using skin-on fillets, as the skin helps to keep the salmon moist during grilling.
If you’re short on time, you can marinate the salmon for just 15 minutes, but for the best flavor, aim for the full 30 minutes or even longer if possible.
If you have leftover marinade, it can be boiled to use as a sauce; just confirm it reaches a safe temperature. Enjoy this dish with a side of grilled vegetables or a fresh Mediterranean salad for a complete meal.
Mediterranean Stuffed Peppers on the Grill
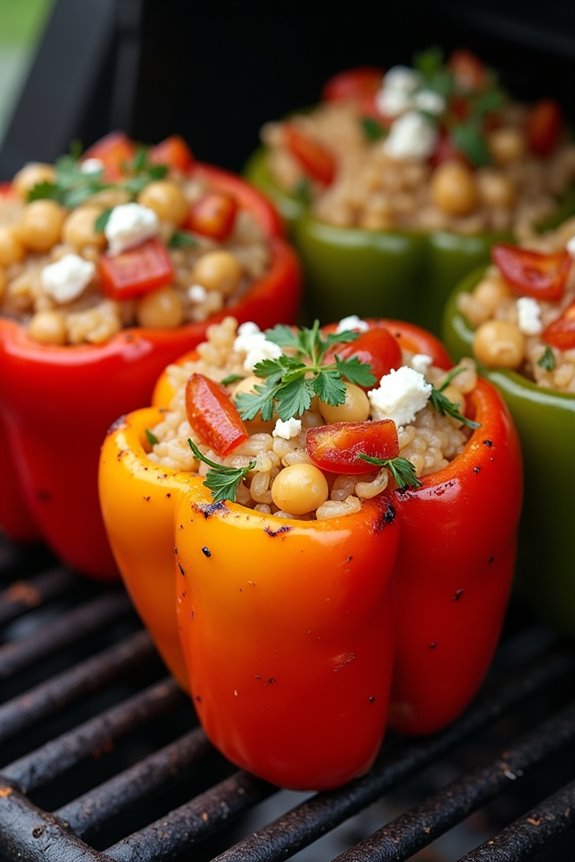
Grilling is a fantastic way to infuse flavors and create a delicious meal, and Mediterranean stuffed peppers are no exception. These vibrant, colorful peppers are filled with a savory mixture of rice, vegetables, herbs, and spices, embodying the essence of Mediterranean cuisine. As they cook on the grill, the peppers become tender while the stuffing takes on a smoky flavor that elevates this healthy dish to another level. Perfect as a main course or a side dish, these stuffed peppers are bound to impress at any gathering.
To make Mediterranean stuffed peppers on the grill, select fresh bell peppers in various colors for a visually appealing dish. The filling is versatile, allowing you to customize it based on your preferences or what you have on hand. Paired with a rejuvenating yogurt sauce or a sprinkle of feta cheese, these grilled stuffed peppers will transport your taste buds to sunnier shores. Gather your ingredients and fire up the grill for a delightful culinary adventure!
Ingredients (serving size: 4-6 people)
- 4 large bell peppers (red, yellow, or green)
- 1 cup cooked rice (white or brown)
- 1 cup canned chickpeas, rinsed and drained
- 1 cup diced tomatoes (fresh or canned)
- 1 small onion, finely chopped
- 2 cloves garlic, minced
- 1 teaspoon dried oregano
- 1 teaspoon ground cumin
- 1/2 teaspoon paprika
- Salt and pepper to taste
- 1/4 cup fresh parsley, chopped
- 1/2 cup feta cheese, crumbled (optional)
- Olive oil for brushing
Cooking Instructions
- Prepare the Peppers: Start by washing the bell peppers thoroughly. Cut the tops off and remove the seeds and membranes to create hollow shells. Lightly brush the outside of each pepper with olive oil to prevent sticking on the grill.
- Make the Filling: In a large mixing bowl, combine the cooked rice, chickpeas, diced tomatoes, chopped onion, minced garlic, oregano, cumin, paprika, salt, and pepper. Mix well until all ingredients are evenly incorporated. If using, fold in the crumbled feta cheese for added flavor.
- Stuff the Peppers: Carefully fill each hollowed bell pepper with the rice mixture, pressing down gently to pack the filling. Leave a little space at the top to allow for expansion while grilling.
- Preheat the Grill: Prepare your grill for medium-high heat. If using a charcoal grill, ensure that the coals are evenly distributed and glowing. For a gas grill, preheat for about 10-15 minutes.
- Grill the Peppers: Place the stuffed peppers upright on the grill grates. Close the grill lid and cook for about 25-30 minutes, turning occasionally, until the peppers are tender and the filling is heated through. The peppers should have nice grill marks and a slightly charred exterior.
- Serve: Once cooked, carefully remove the peppers from the grill. Let them sit for a few minutes before serving. Garnish with fresh parsley and additional feta cheese if desired.
Extra Tips
For an extra layer of flavor, consider adding spices such as cayenne pepper or chili flakes to the filling for a bit of heat. You can also experiment with different grains such as quinoa or couscous in place of rice for a nutritional boost.
If you’re short on time, pre-cooked rice or leftover grains make for a quick and easy filling. Additionally, grilling the peppers in a grilling basket can help them stay upright and prevent any filling from falling out. Enjoy your Mediterranean feast!
Grilled Halloumi and Watermelon Salad
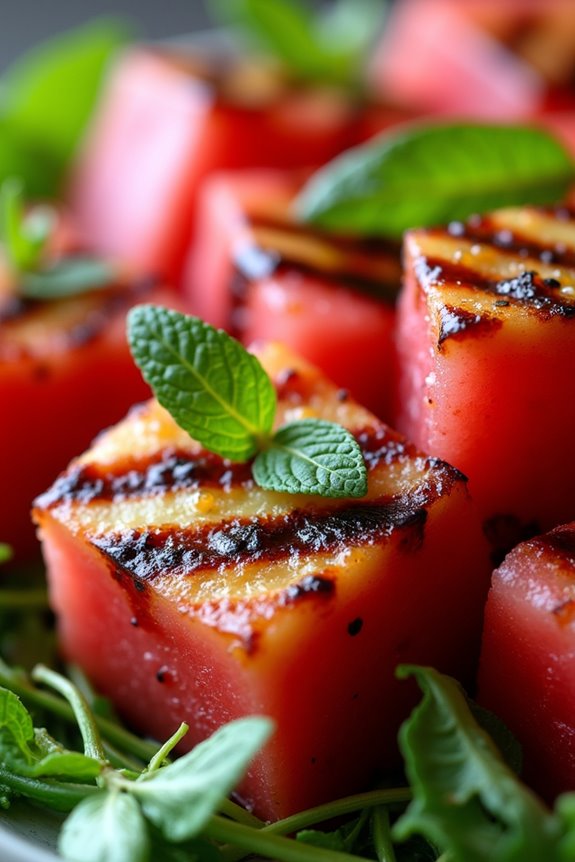
This Grilled Halloumi and Watermelon Salad is a revitalizing and delightful dish that perfectly represents the vibrant flavors of the Mediterranean. The combination of sweet, juicy watermelon and salty halloumi cheese creates a beautiful contrast that’s both satisfying and invigorating. It’s perfect for a summer gathering or barbecue, serving as a light main course or a side dish that complements grilled meats beautifully.
With its bright colors and textures, this salad is sure to impress your guests. To make the most out of this dish, consider using ripe, in-season watermelon for the best flavor. The halloumi cheese, which has a unique texture that holds up well to grilling, adds a savory component that balances the sweetness of the watermelon. Toss in some fresh mint and a light dressing to elevate the flavors, and you’ve got a dish that isn’t only delicious but also visually stunning.
Ingredients (Serves 4-6):
- 1 large watermelon, cut into 1-inch cubes
- 8 ounces halloumi cheese, sliced into 1/2-inch thick slices
- 2 tablespoons olive oil, plus extra for drizzling
- Salt and black pepper, to taste
- 1/4 cup fresh mint leaves, chopped
- Juice of 1 lime
- 1/4 cup balsamic glaze (optional, for drizzling)
- Arugula or mixed greens (for serving, optional)
Cooking Instructions:
- Prepare the Watermelon: Start by cutting the watermelon into 1-inch cubes. Make sure to remove any seeds if necessary. Place the watermelon cubes in a large bowl and set them aside to let the juices settle.
- Season the Halloumi: Take the halloumi cheese and slice it into 1/2-inch thick slices. Drizzle both sides with olive oil and season with salt and black pepper. This will enhance the flavor of the cheese and help it grill beautifully.
- Preheat the Grill: Heat your grill or grill pan over medium-high heat. If using a grill pan, make sure it’s well-greased to prevent the cheese from sticking. Preheating is essential for achieving those lovely grill marks on the halloumi.
- Grill the Halloumi: Once the grill is hot, place the halloumi slices on the grill. Grill for about 2-3 minutes on each side, or until golden brown and slightly crispy. Keep an eye on them, as halloumi can go from perfectly grilled to burnt quickly.
- Combine the Salad: In a large serving bowl, combine the grilled halloumi and watermelon cubes. Add the chopped mint and drizzle with lime juice, tossing gently to combine. Adjust the seasoning with additional salt and pepper if necessary.
- Serve: If desired, lay a bed of arugula or mixed greens on a serving platter and spoon the halloumi and watermelon mixture on top. Drizzle with balsamic glaze for an added touch of sweetness and flavor. Serve immediately while the halloumi is still warm.
Extra Tips:
When making Grilled Halloumi and Watermelon Salad, it’s essential to serve the dish right after grilling to enjoy the contrast of warm halloumi and cool watermelon.
You can also customize the salad by adding other ingredients like cherry tomatoes, cucumber, or avocado for additional flavor and texture. For a twist, try marinating the watermelon in lime juice and a pinch of salt for a few minutes before grilling the halloumi.
This dish not only tastes great but also looks stunning, making it a winner for any summer gathering!
Garlic and Rosemary Grilled Pork Chops
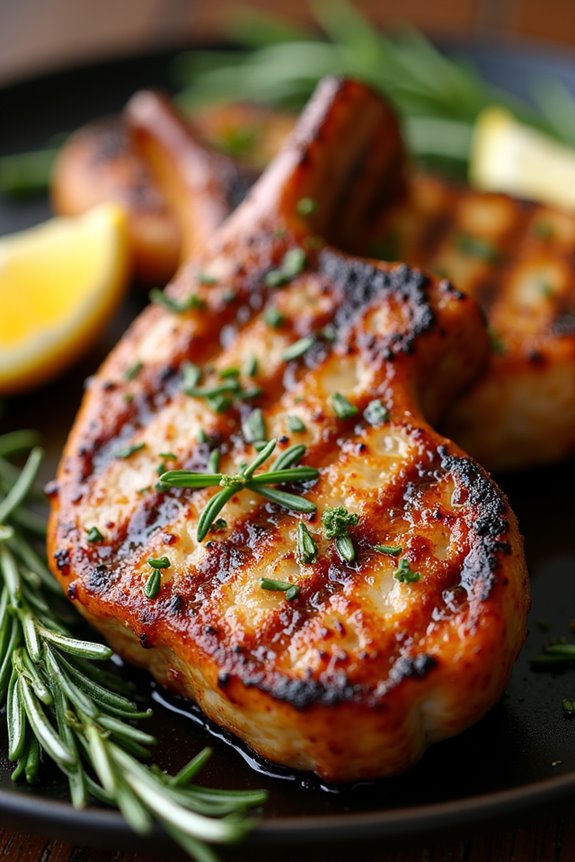
Garlic and Rosemary Grilled Pork Chops are a deliciously aromatic dish that perfectly captures the essence of Mediterranean flavors. The combination of fresh garlic, fragrant rosemary, and succulent pork chops creates a meal that isn’t only satisfying but also easy to prepare.
Whether you’re hosting a summer barbecue or enjoying a cozy family dinner, these grilled pork chops are sure to impress.
The marinade plays an essential role in infusing the pork with flavor and tenderness. The combination of olive oil, garlic, rosemary, lemon juice, and seasoning helps to break down the meat fibers, resulting in juicy and flavorful chops.
Grilling them to perfection adds a smoky char that complements the herbs beautifully, making every bite a delightful experience.
Ingredients (Serves 4-6)
- 4-6 pork chops (bone-in or boneless, about 1-inch thick)
- 4 cloves garlic, minced
- 2 tablespoons fresh rosemary, chopped (or 1 tablespoon dried rosemary)
- 1/4 cup olive oil
- 2 tablespoons lemon juice
- 1 teaspoon salt
- 1/2 teaspoon black pepper
- 1 teaspoon paprika (optional for a smoky flavor)
Cooking Instructions
- Prepare the Marinade: In a mixing bowl, combine the minced garlic, chopped rosemary, olive oil, lemon juice, salt, black pepper, and paprika (if using). Whisk the ingredients together until well blended to create a fragrant marinade.
- Marinate the Pork Chops: Place the pork chops in a large resealable plastic bag or a shallow dish. Pour the marinade over the chops, making sure they’re well coated. Seal the bag or cover the dish and refrigerate for at least 30 minutes, or up to 2 hours for maximum flavor infusion.
- Preheat the Grill: While the pork chops are marinating, preheat your grill to medium-high heat. If using a charcoal grill, make certain the coals are evenly distributed and glowing. For a gas grill, allow it to heat up for about 10-15 minutes.
- Grill the Pork Chops: Remove the pork chops from the marinade, allowing excess marinade to drip off. Place the chops on the grill grates. Grill them for about 4-5 minutes on one side, then flip and grill for an additional 4-5 minutes on the other side, or until the internal temperature reaches 145°F (63°C).
- Rest the Chops: Once the pork chops are done, remove them from the grill and let them rest on a cutting board for about 5 minutes. This resting period allows the juices to redistribute throughout the meat, guaranteeing each chop is juicy and flavorful.
- Serve: Slice the pork chops if desired, and serve them warm with your choice of side dishes, such as grilled vegetables, a fresh salad, or Mediterranean rice.
Extra Tips
For even more flavor, consider adding a splash of white wine or balsamic vinegar to the marinade. If you want to enhance the smokiness, try adding wood chips to your grill.
Additionally, you can customize the herbs in the marinade based on your personal preferences—thyme or oregano also pairs well with pork.
Remember not to skip the resting step after grilling, as it’s key to achieving juicy and tender pork chops!
Grilled Prawns With Garlic and Paprika Butter

Grilled Prawns with Garlic and Paprika Butter is a delightful Mediterranean dish that brings together the rich flavors of garlic, smoked paprika, and fresh seafood. This dish is perfect for outdoor gatherings or a cozy family dinner, and it pairs beautifully with a side of grilled vegetables or a fresh salad.
The prawns are marinated to absorb all the wonderful flavors, then grilled to perfection, giving them a smoky aroma and a satisfying char. This recipe serves 4-6 people and isn’t only easy to prepare but also offers a taste of the Mediterranean that will impress your guests.
The combination of garlic and paprika in the butter sauce adds depth to the prawns, making each bite a burst of flavor. Whether you’re a seasoned griller or a novice in the kitchen, this dish is sure to become a favorite.
Ingredients:
- 1 pound large prawns, peeled and deveined
- 4 tablespoons unsalted butter
- 4 cloves garlic, minced
- 1 teaspoon smoked paprika
- 1 teaspoon sea salt
- 1/2 teaspoon black pepper
- 1 tablespoon olive oil
- 1 tablespoon fresh lemon juice
- 2 tablespoons fresh parsley, chopped (for garnish)
- Lemon wedges (for serving)
Cooking Instructions:
- Prepare the Marinade: In a medium bowl, combine the minced garlic, smoked paprika, sea salt, black pepper, olive oil, and lemon juice. Mix until well combined. This marinade will infuse the prawns with flavor and create a delicious base for the butter sauce.
- Marinate the Prawns: Add the peeled and deveined prawns to the marinade and toss to coat evenly. Cover the bowl with plastic wrap and let it sit in the refrigerator for about 30 minutes. This allows the prawns to absorb the flavors from the garlic and paprika.
- Make the Garlic and Paprika Butter: In a small saucepan, melt the unsalted butter over medium heat. Once melted, stir in the remaining minced garlic and smoked paprika. Cook for 2-3 minutes until the garlic is fragrant but not browned. Remove from heat and set aside.
- Preheat the Grill: While the prawns are marinating, preheat your grill to medium-high heat. If using a grill pan, heat it on the stovetop. Make sure the grill grates are clean and lightly oiled to prevent sticking.
- Grill the Prawns: Remove the prawns from the marinade and thread them onto skewers for easier grilling. Place the skewers on the grill and cook for about 2-3 minutes on each side, until the prawns turn pink and opaque. Be careful not to overcook them, as they can become rubbery.
- Serve: Once the prawns are grilled, remove them from the skewers and drizzle the garlic and paprika butter over the top. Garnish with freshly chopped parsley and serve with lemon wedges on the side for an added zesty flavor.
Extra Tips:
For the best flavor, use fresh prawns whenever possible, as frozen prawns may lose some of their texture and taste upon thawing.
You can also customize the marinade by adding a pinch of cayenne pepper for heat or substituting fresh herbs like thyme or oregano. If you don’t have skewers, grill the prawns directly on the grill or in a grill basket to prevent them from falling through the grates.
Enjoy your Grilled Prawns with Garlic and Paprika Butter!