

Exploring Mediterranean cuisine is like discovering a treasure trove of vibrant flavors and colors. Each dish is more than just a meal; it’s a visual delight. From a refreshing quinoa salad to a beautifully layered hummus dip, these recipes are sure to impress. I’m excited to share these Mediterranean gems with you. Let’s make your next meal a feast for both the taste buds and the eyes.
Colorful Mediterranean Quinoa Salad
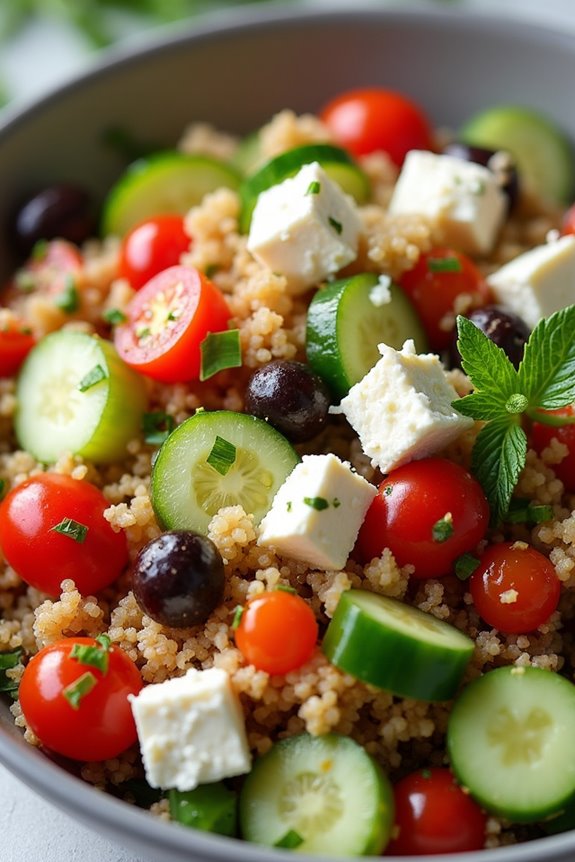
The Colorful Mediterranean Quinoa Salad is a vibrant and nutritious dish that embraces the essence of Mediterranean cuisine. Bursting with fresh vegetables, hearty quinoa, and zesty flavors, this salad isn’t only visually appealing but also packed with protein and fiber. It’s perfect as a light meal, a side dish for a summer barbecue, or a revitalizing option for picnics and gatherings. The combination of colorful ingredients makes it a feast for the eyes and the palate.
This salad is incredibly versatile and can easily be adjusted to suit your taste preferences or dietary needs. You can add or swap out ingredients such as olives, chickpeas, or different herbs to create your own signature version. With its bright colors and delightful textures, the Colorful Mediterranean Quinoa Salad will surely impress your family and friends while providing a healthy dose of nutrients.
Ingredients (serves 4-6):
- 1 cup quinoa
- 2 cups water or vegetable broth
- 1 medium cucumber, diced
- 1 bell pepper (any color), diced
- 1 cup cherry tomatoes, halved
- 1/2 red onion, finely chopped
- 1/2 cup feta cheese, crumbled
- 1/4 cup Kalamata olives, pitted and sliced
- 1/4 cup fresh parsley, chopped
- 1/4 cup fresh mint, chopped
- 1/4 cup olive oil
- 2 tablespoons lemon juice
- Salt and pepper, to taste
Cooking Instructions:
- Rinse the Quinoa: Start by rinsing the quinoa under cold running water in a fine-mesh sieve. This step helps remove the natural coating called saponin, which can make the quinoa taste bitter. Rinse for about 1-2 minutes until the water runs clear.
- Cook the Quinoa: In a medium saucepan, combine the rinsed quinoa and water (or vegetable broth) and bring it to a boil over medium-high heat. Once boiling, reduce the heat to low, cover the pot, and let it simmer for about 15 minutes, or until the quinoa has absorbed all the liquid and is fluffy. Remove from heat and let it sit covered for an additional 5 minutes.
- Fluff the Quinoa: After resting, use a fork to fluff the quinoa gently. This step helps to separate the grains and gives it a light texture. Transfer the fluffed quinoa to a large mixing bowl and allow it to cool to room temperature.
- Prepare the Vegetables: While the quinoa is cooling, chop the cucumber, bell pepper, cherry tomatoes, and red onion into bite-sized pieces. The colors of these vegetables will add vibrancy to your salad.
- Mix the Salad: Once the quinoa has cooled, add the chopped vegetables, crumbled feta cheese, sliced olives, and chopped herbs (parsley and mint) to the bowl with the quinoa.
- Make the Dressing: In a small bowl, whisk together the olive oil, lemon juice, salt, and pepper. Taste and adjust seasoning as needed, ensuring it’s well-balanced and flavorful.
- Combine and Serve: Pour the dressing over the quinoa salad mixture and toss gently until all ingredients are evenly coated. Serve the salad immediately or refrigerate for about 30 minutes to let the flavors meld together.
Extra Tips:
For a heartier salad, consider adding cooked chickpeas or grilled chicken. You can also play with the dressing by adding a splash of balsamic vinegar or a teaspoon of Dijon mustard for a bit of tang. This salad can be made ahead of time, so feel free to prepare it a few hours in advance; just be sure to give it a good toss before serving to redistribute the dressing and flavors.
Enjoy your colorful Mediterranean Quinoa Salad as a revitalizing addition to any meal!
Vibrant Roasted Vegetable Platter
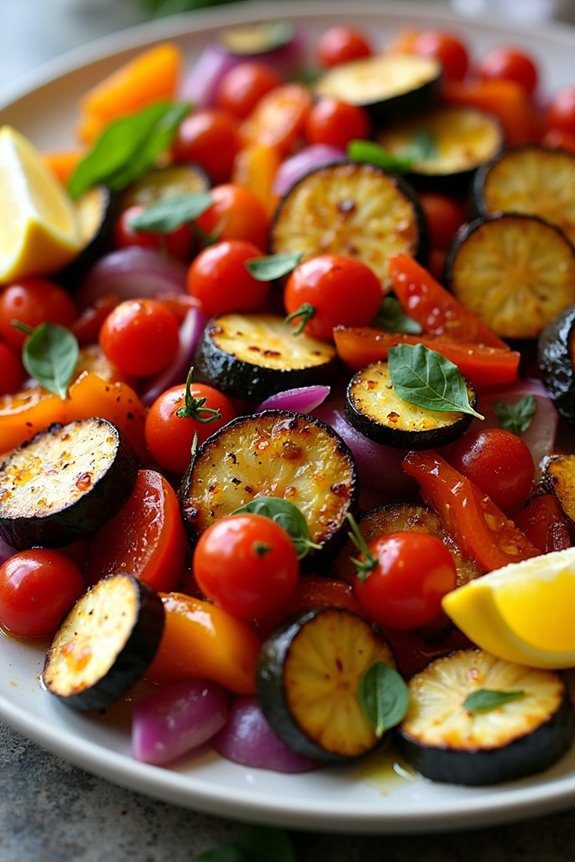
The Vibrant Roasted Vegetable Platter is a colorful and nutritious dish that celebrates the bounty of Mediterranean produce. This dish isn’t only visually stunning but also bursting with flavor, making it an ideal centerpiece for gatherings and family dinners.
Roasting vegetables enhances their natural sweetness and brings out a depth of flavor that’s hard to resist. The combination of various vegetables, herbs, and a drizzle of olive oil creates a delicious medley that pairs well with a variety of proteins or can stand alone as a wholesome vegetarian option.
In this recipe, you’ll be using seasonal vegetables, which can include bell peppers, zucchini, cherry tomatoes, and red onions. The key to achieving the perfect roasted vegetable platter is to cut the vegetables into similar sizes for even cooking and to roast them at a high temperature. This method will guarantee they become tender while achieving a delightful caramelization.
Serve this dish warm or at room temperature, and don’t forget to garnish it with fresh herbs and a squeeze of lemon juice for an added zing.
Ingredients (Serves 4-6):
- 2 bell peppers (red and yellow), sliced into strips
- 2 medium zucchinis, sliced into half-moons
- 1 red onion, cut into wedges
- 1 cup cherry tomatoes, halved
- 1 medium eggplant, diced into cubes
- 4 cloves garlic, minced
- 4 tablespoons olive oil
- 1 teaspoon dried oregano
- 1 teaspoon dried thyme
- Salt and pepper, to taste
- Fresh basil or parsley, for garnish
- Lemon wedges, for serving
Cooking Instructions:
- Preheat the Oven: Begin by preheating your oven to 425°F (220°C). A high temperature is vital for roasting vegetables as it helps them caramelize and develop rich flavors.
- Prepare the Vegetables: While the oven is heating, wash and chop all the vegetables as directed. Confirming they’re cut into uniform sizes will help them cook evenly. Place the prepared vegetables in a large mixing bowl.
- Season the Vegetables: Add the minced garlic, olive oil, dried oregano, dried thyme, salt, and pepper to the bowl with the vegetables. Toss everything together until the vegetables are well-coated with the oil and seasonings. This step is essential as it infuses the vegetables with flavor.
- Arrange on a Baking Sheet: Line a large baking sheet with parchment paper for easy cleanup. Spread the seasoned vegetables out in a single layer on the sheet, making sure not to overcrowd them. This allows for proper roasting and prevents steaming.
- Roast the Vegetables: Place the baking sheet in the preheated oven and roast for 25-30 minutes. Halfway through, use a spatula to flip the vegetables for even cooking. You want them to be tender and slightly charred around the edges.
- Garnish and Serve: Once roasted, remove the vegetables from the oven and transfer them to a serving platter. Garnish with fresh basil or parsley and serve with lemon wedges on the side for an extra burst of flavor.
Extra Tips:
To enhance the flavors of your Vibrant Roasted Vegetable Platter, consider marinating the vegetables in olive oil, garlic, and herbs for 30 minutes before roasting. This added step allows the vegetables to soak up more flavor.
Additionally, feel free to customize the vegetable selection based on what’s in season or what you have on hand. Root vegetables like carrots or sweet potatoes can also make a delightful addition to the platter.
Classic Greek Tzatziki With Fresh Veggies
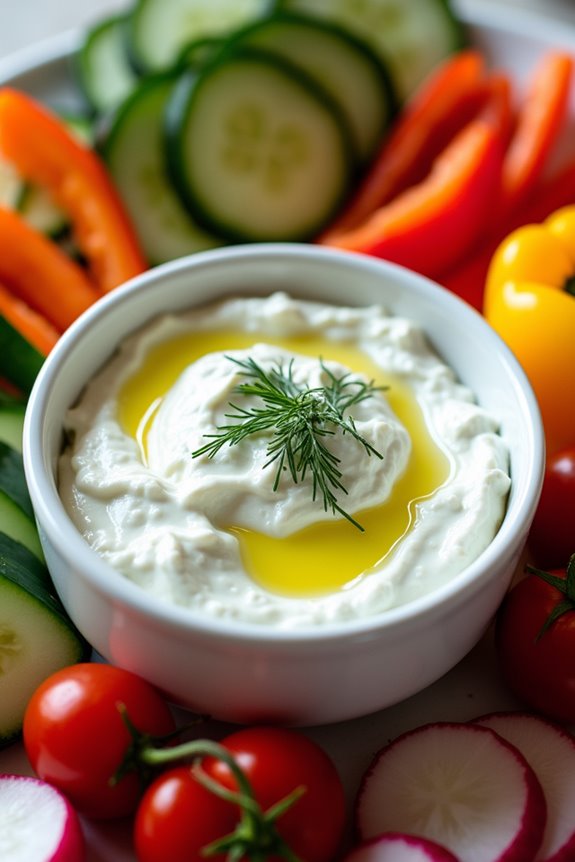
Tzatziki is a quintessential Greek dip that combines the invigorating flavors of yogurt, cucumber, garlic, and herbs. This creamy sauce isn’t only a staple in Mediterranean cuisine but also serves as a versatile accompaniment to many dishes.
Whether you’re enjoying it with grilled meats, pita bread, or fresh veggies, tzatziki adds a delightful tang and richness that elevates any meal. The preparation is simple, making it perfect for gatherings or a healthy snack at home.
Pairing tzatziki with an array of fresh veggies creates a colorful and nutritious platter that’s sure to impress. The cool crunch of cucumbers, the sweetness of bell peppers, and the bite of radishes complement the creamy dip beautifully.
This dish isn’t only visually appealing but also packed with vitamins, making it a great addition to any appetizer spread or as part of a light lunch.
Ingredients (serving size: 4-6 people):
- 2 cups Greek yogurt
- 1 medium cucumber, grated and excess moisture squeezed out
- 2 cloves garlic, minced
- 2 tablespoons olive oil
- 1 tablespoon white wine vinegar or lemon juice
- 1 tablespoon fresh dill, chopped (or 1 teaspoon dried dill)
- Salt and pepper to taste
- Assorted fresh veggies for dipping (e.g., bell peppers, carrots, cherry tomatoes, radishes)
Cooking Instructions:
1. Prepare the Cucumber: Start by grating the cucumber using a box grater or a food processor. Once grated, place the cucumber in a clean kitchen towel or cheesecloth, and twist to squeeze out as much moisture as possible.
This step is essential to guarantee that your tzatziki remains thick and doesn’t become watery.
2. Combine Yogurt and Garlic: In a medium mixing bowl, add the Greek yogurt and minced garlic. Stir them together until well combined. The garlic will add a strong flavor, so adjust the amount according to your taste preference.
3. Add Cucumber and Seasonings: Next, add the squeezed cucumber to the yogurt and garlic mixture. Pour in the olive oil and white wine vinegar or lemon juice. Add the chopped dill, along with salt and pepper to taste.
Mix everything together until you achieve a smooth and creamy consistency.
4. Chill the Tzatziki: Cover the bowl with plastic wrap or a lid and place it in the refrigerator for at least 30 minutes. Chilling allows the flavors to meld together, enhancing the overall taste of the tzatziki.
5. Prepare the Veggies: While the tzatziki is chilling, wash and prepare the assorted fresh veggies. Cut them into bite-sized pieces or sticks for easy dipping.
Arrange them on a serving platter for a colorful presentation.
6. Serve: Once chilled, give the tzatziki a good stir and transfer it to a serving bowl. Place it alongside the prepared veggies, and enjoy!
Extra Tips:
For an extra layer of flavor, consider adding a splash of fresh lemon juice or a pinch of cayenne pepper for a little heat.
If you have leftovers, store the tzatziki in an airtight container in the refrigerator for up to 3 days. This dish can also be made a day in advance, which allows the flavors to deepen even further.
Enjoy experimenting with different veggies or even using tzatziki as a spread in sandwiches or wraps!
Beautifully Layered Hummus Dip
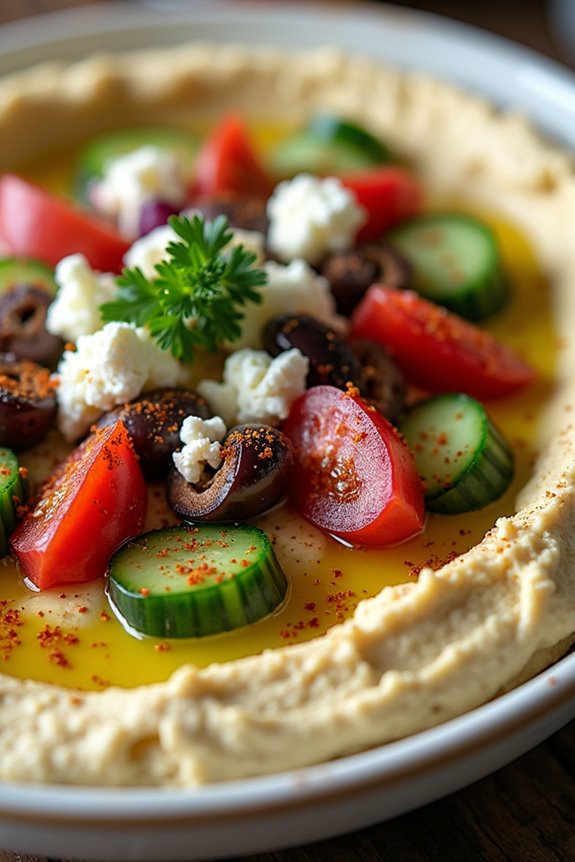
Hummus is a beloved staple in Mediterranean cuisine, known for its creamy texture and rich flavor. This beautifully layered hummus dip takes the classic dish to a new level, transforming it into an elegant appetizer that’s as pleasing to the eye as it’s to the palate. By adding layers of various toppings, you can create a stunning presentation that will impress guests at any gathering or special occasion.
With its nutritious ingredients, this dip isn’t only delicious but also a healthy option for snacking. The base of smooth hummus is complemented by fresh vegetables, flavorful spices, and vibrant herbs. Serve it with an assortment of pita bread, crackers, or fresh veggie sticks for a delightful experience that captures the essence of the Mediterranean.
Ingredients (Serves 4-6):
- 1 can (15 oz) chickpeas, drained and rinsed
- 1/4 cup tahini
- 2 tablespoons olive oil
- 2 tablespoons lemon juice
- 1 garlic clove, minced
- 1/2 teaspoon ground cumin
- Salt to taste
- 1/4 cup water (more if needed for consistency)
- 1/4 cup diced cucumber
- 1/4 cup diced tomatoes
- 1/4 cup diced red onion
- 1/4 cup Kalamata olives, sliced
- 1/4 cup crumbled feta cheese
- Fresh parsley, chopped (for garnish)
- Paprika (for garnish)
- Olive oil (for drizzling)
Cooking Instructions:
- Prepare the Hummus Base: In a food processor, combine the drained chickpeas, tahini, olive oil, lemon juice, minced garlic, ground cumin, and a pinch of salt. Blend until smooth, scraping down the sides as needed. If the mixture is too thick, gradually add water, one tablespoon at a time, until you reach a creamy consistency.
- Layer the Hummus: In a shallow serving dish or a large bowl, spread the hummus mixture evenly across the bottom. Use the back of a spoon to create a smooth surface, and then use the spoon to create a slight well in the center for the toppings.
- Add the Toppings: Begin layering the toppings over the hummus. Start with the diced cucumber, followed by diced tomatoes, red onion, and Kalamata olives. Sprinkle the crumbled feta cheese evenly over the top, allowing each ingredient to showcase its color and texture.
- Garnish the Dip: To finish, drizzle a little olive oil over the entire dish, and sprinkle fresh parsley and paprika for added color and flavor. You can adjust the garnish as desired to suit your aesthetic preferences.
- Serve and Enjoy: Serve the beautifully layered hummus dip with an assortment of pita bread, crackers, or fresh vegetable sticks. Encourage guests to scoop up the dip with their choice of dippers, enjoying the delightful combination of flavors.
Extra Tips:
For an added twist, consider incorporating roasted red peppers or sun-dried tomatoes into the hummus base for a burst of flavor. You can also customize the toppings according to your preferences or seasonal ingredients.
To save time, prepare the hummus a day in advance and let the flavors meld in the refrigerator overnight. This dip can be stored in an airtight container for up to 3 days, making it a convenient option for meal prep or entertaining.
Zesty Lemon Herb Grilled Chicken

Zesty Lemon Herb Grilled Chicken is a delightful dish that encapsulates the vibrant flavors of the Mediterranean. This recipe combines the tang of fresh lemon juice with fragrant herbs, creating a marinade that not only tenderizes the chicken but infuses it with a burst of invigorating flavor. Perfect for summer barbecues or a weeknight dinner, this dish is sure to impress family and friends alike. Serve it with a side of grilled vegetables or a fresh salad for a complete meal that transports you to sun-soaked shores.
The beauty of this recipe lies in its simplicity and versatility. The marinade can be adjusted to suit your palate, allowing you to experiment with different herbs or add a pinch of heat with some crushed red pepper flakes. Whether you choose to grill, bake, or pan-sear the chicken, the result will be a juicy and flavorful dish that celebrates the essence of Mediterranean cuisine.
Ingredients (Serves 4-6):
- 4-6 boneless, skinless chicken breasts
- 1/4 cup fresh lemon juice (about 2 lemons)
- 3 tablespoons olive oil
- 3 cloves garlic, minced
- 1 tablespoon fresh oregano, chopped
- 1 tablespoon fresh thyme, chopped
- 1 tablespoon fresh parsley, chopped
- 1 teaspoon salt
- 1/2 teaspoon black pepper
- Zest of 1 lemon
Cooking Instructions:
- Prepare the Marinade: In a medium-sized bowl, whisk together the fresh lemon juice, olive oil, minced garlic, chopped oregano, thyme, parsley, salt, pepper, and lemon zest. This mixture will serve as a marinade that infuses the chicken with flavor and keeps it moist during cooking.
- Marinate the Chicken: Place the chicken breasts in a large resealable plastic bag or a shallow dish. Pour the marinade over the chicken, making sure each piece is well-coated. Seal the bag or cover the dish and refrigerate for at least 1 hour, or up to 4 hours for deeper flavor. Marinating the chicken allows the flavors to penetrate, making it tender and delicious.
- Preheat the Grill: Prepare your grill by preheating it to medium-high heat. If using a charcoal grill, make sure the coals are glowing and covered with ash. For a gas grill, allow it to heat for about 10-15 minutes before cooking.
- Grill the Chicken: Remove the chicken from the marinade, letting the excess drip off. Place the chicken on the grill and cook for about 6-7 minutes on each side, or until the internal temperature reaches 165°F (75°C). Avoid flipping the chicken too often to get those beautiful grill marks and to guarantee even cooking.
- Rest and Serve: Once cooked, remove the chicken from the grill and let it rest for 5 minutes before slicing. This resting period allows the juices to redistribute throughout the meat, keeping it moist and flavorful. Serve the grilled chicken with a sprinkle of fresh herbs and lemon wedges on the side.
Extra Tips:
For an even more aromatic experience, consider adding additional Mediterranean spices like paprika or cumin to the marinade. If you prefer a smoky flavor, try using wood chips on your grill.
Also, feel free to make a larger batch of the marinade to use as a dressing for salads or vegetables. This Zesty Lemon Herb Grilled Chicken isn’t just a meal; it’s a culinary journey that brings the sunny Mediterranean vibes right to your table. Enjoy!
Stunning Stuffed Bell Peppers

Stunning Stuffed Bell Peppers is a vibrant and delicious dish that beautifully embodies the flavors of the Mediterranean. This dish features colorful bell peppers filled with a savory mixture of rice, vegetables, and protein, making it a hearty and visually appealing meal. With their bright colors and rich flavors, these stuffed peppers are perfect for impressing guests at a dinner party or simply enjoying a cozy family meal.
The beauty of this dish lies not only in its taste but also in its versatility. You can customize the filling to suit your preferences, whether that be ground meat, a variety of grains, or an array of vegetables. As they bake, the peppers soften, and the flavors meld together, creating a comforting dish that’s both nutritious and satisfying. Let’s plunge into making these stunning stuffed bell peppers!
Ingredients (Serves 4-6)
- 4 large bell peppers (any color)
- 1 cup cooked rice (white, brown, or quinoa)
- 1 cup ground meat (beef, turkey, or chicken) or a plant-based protein
- 1 cup diced tomatoes (fresh or canned)
- 1 small onion, finely chopped
- 2 cloves garlic, minced
- 1 teaspoon dried oregano
- 1 teaspoon dried basil
- 1/2 teaspoon paprika
- Salt and pepper to taste
- 1 cup shredded cheese (mozzarella or feta)
- Fresh parsley or basil for garnish (optional)
Cooking Instructions
1. Preheat the Oven: Begin by preheating your oven to 375°F (190°C). This guarantees that your stuffed peppers will cook evenly and thoroughly, allowing the flavors to develop beautifully.
2. Prepare the Bell Peppers: While the oven is preheating, carefully cut the tops off the bell peppers and remove the seeds and membranes. If needed, you can slice a small amount off the bottom to help them stand upright, but be careful not to create any holes.
3. Cook the Filling: In a large skillet over medium heat, add a drizzle of olive oil. Sauté the chopped onion and minced garlic until translucent, about 3-4 minutes. If using ground meat, add it to the skillet and cook until browned.
Stir in the cooked rice, diced tomatoes, oregano, basil, paprika, salt, and pepper. Mix well and let it cook for another 2-3 minutes until everything is heated through.
4. Stuff the Peppers: Take the cooked filling off the heat and carefully spoon it into each bell pepper, packing it tightly. Leave a little space at the top for the cheese.
5. Add Cheese: Sprinkle the shredded cheese on top of each stuffed pepper, making sure they’re generously covered for a deliciously melty topping.
6. Bake the Peppers: Place the stuffed peppers upright in a baking dish. If desired, you can add a splash of water or broth to the bottom of the dish to create steam while baking.
Cover the dish with foil and bake in the preheated oven for 30 minutes. Remove the foil and bake for an additional 10-15 minutes, or until the peppers are tender and the cheese is bubbly and golden.
7. Garnish and Serve: Once done, let the stuffed peppers cool for a few minutes. Garnish with fresh parsley or basil before serving to add a pop of freshness.
Extra Tips
For an added depth of flavor, consider roasting the bell peppers before stuffing them; this can enhance their sweetness. Additionally, feel free to mix in other vegetables like zucchini or mushrooms into the filling for extra nutrition.
Leftover stuffed peppers can be stored in the fridge for up to three days and reheated in the oven or microwave, making them a great option for meal prep!
Eye-Catching Mediterranean Pasta Salad
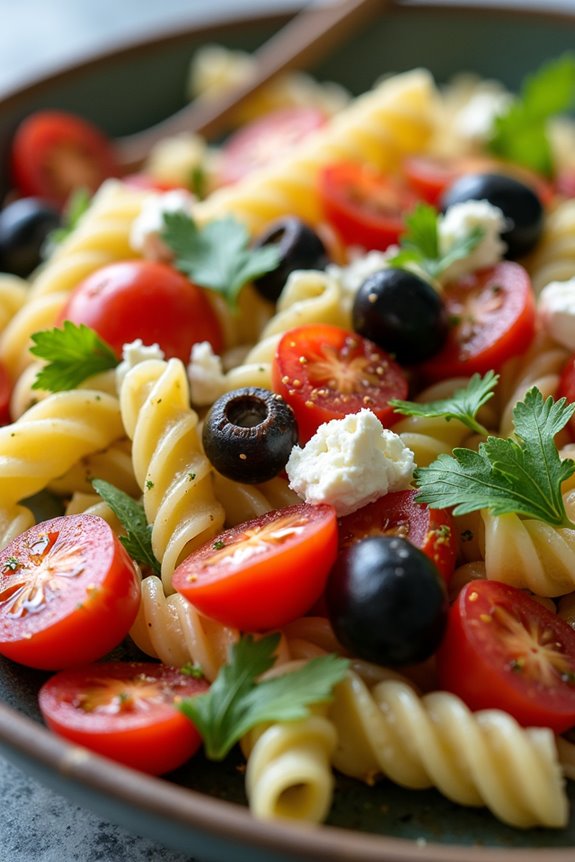
Mediterranean Pasta Salad is a vibrant, flavorful dish that embodies the essence of the Mediterranean region. Bursting with fresh vegetables, aromatic herbs, and tangy dressing, this salad isn’t only pleasing to the eye but also a delightful explosion of taste. With its colorful ingredients such as bell peppers, cherry tomatoes, olives, and feta cheese tossed in al dente pasta, this salad makes for a perfect side dish or a light main course.
Ideal for summer gatherings, picnics, or potlucks, it brings a taste of the Mediterranean to any occasion.
The beauty of the Eye-Catching Mediterranean Pasta Salad lies in its versatility. You can easily tailor it to your preferences by adding your favorite proteins like grilled chicken or shrimp, or even make it vegetarian by incorporating more vegetables. The dressing, a simple concoction of olive oil, lemon juice, and herbs, enhances the flavors while keeping things light and invigorating.
Serve it chilled or at room temperature, and watch as it quickly becomes a favorite among your family and friends.
Ingredients (Serves 4-6):
- 12 ounces of pasta (such as rotini or penne)
- 1 cup cherry tomatoes, halved
- 1 cup cucumbers, diced
- 1 cup bell peppers (red, yellow, or orange), diced
- 1/2 cup red onion, finely chopped
- 1 cup Kalamata olives, pitted and halved
- 1 cup crumbled feta cheese
- 1/4 cup fresh parsley, chopped
- 1/4 cup olive oil
- 2 tablespoons red wine vinegar
- 1 tablespoon lemon juice
- 1 teaspoon dried oregano
- Salt and pepper to taste
Cooking Instructions:
- Cook the Pasta: Begin by bringing a large pot of salted water to a boil. Add the pasta and cook according to the package instructions until al dente. Once cooked, drain the pasta and rinse it under cold water to stop the cooking process. This will also help cool it down for the salad.
- Prepare the Vegetables: While the pasta is cooling, prepare your vegetables. Dice the cucumbers, bell peppers, and red onion, and halve the cherry tomatoes. Make sure to chop the parsley finely. This step guarantees that all the ingredients are ready to be mixed together seamlessly.
- Make the Dressing: In a small bowl, whisk together the olive oil, red wine vinegar, lemon juice, dried oregano, salt, and pepper. Adjust the seasoning to your taste. The dressing won’t only enhance the flavors of the salad but also help tie all the ingredients together.
- Combine Ingredients: In a large mixing bowl, combine the cooled pasta, cherry tomatoes, cucumbers, bell peppers, red onion, Kalamata olives, and crumbled feta cheese. Pour the dressing over the salad and gently toss everything together until evenly coated. Be careful not to break the feta too much.
- Chill and Serve: Once everything is well mixed, cover the bowl with plastic wrap or a lid and refrigerate the salad for at least 30 minutes. This allows the flavors to meld together. Before serving, give the salad a gentle toss and adjust seasoning if necessary.
Extra Tips:
For an added crunch, consider incorporating some toasted pine nuts or walnuts. You can also enhance the dish by adding grilled chicken or shrimp for protein.
If you prefer a more robust flavor, marinate the olives and feta in olive oil and herbs beforehand. This salad is best enjoyed fresh, but it can be stored in the refrigerator for up to three days, making it a great make-ahead option for busy weekends or gatherings.
Remember to serve it cold for the best taste!
Refreshing Watermelon Feta Salad

As the sun beats down and the temperatures rise, there’s nothing quite like a revitalizing salad to cool you off while tantalizing your taste buds. The Invigorating Watermelon Feta Salad embodies the spirit of the Mediterranean with its vibrant colors and contrasting flavors. The juicy sweetness of ripe watermelon paired with the creamy, salty feta cheese creates a delightful balance that’s sure to impress. Toss in some fresh herbs and a hint of citrus, and you have a dish that isn’t only visually appealing but also incredibly satisfying.
This salad is perfect for summer gatherings, picnics, or as a light side dish for grilled meats. Its simplicity allows the natural flavors of the ingredients to shine, while the combination of textures—from the crispness of the watermelon to the crumbly feta—adds depth to every bite. Whether served as an appetizer or a side, this Invigorating Watermelon Feta Salad is a celebration of Mediterranean cuisine that you won’t want to miss.
Ingredients (serving size: 4-6 people)
- 4 cups watermelon, cubed
- 1 cup feta cheese, crumbled
- 1/2 cup red onion, thinly sliced
- 1/2 cup fresh mint leaves, chopped
- 1/4 cup olive oil
- 2 tablespoons balsamic vinegar
- Zest of 1 lime
- Juice of 1 lime
- Salt and pepper, to taste
Cooking Instructions
- Prepare the Watermelon: Begin by washing the watermelon thoroughly. Cut it in half, and then slice it into quarters. Remove the rind and cube the flesh into bite-sized pieces. This step is vital as the watermelon serves as the star of the salad, providing both sweetness and hydration.
- Slice the Onion: Take the red onion and slice it thinly. This will add a sharp, tangy flavor to the salad that complements the sweetness of the watermelon. Soaking the onion slices in cold water for a few minutes can help mellow their flavor if desired.
- Chop the Mint: Rinse the fresh mint leaves under cold water, then pat them dry. Remove the leaves from the stems and chop them coarsely. The mint adds a revitalizing herbal note that elevates the dish and enhances the Mediterranean essence.
- Prepare the Dressing: In a small bowl, whisk together the olive oil, balsamic vinegar, lime zest, and lime juice. This combination will create a bright and tangy dressing that ties all the flavors together. Season with salt and pepper to taste.
- Combine Ingredients: In a large mixing bowl, gently combine the cubed watermelon, crumbled feta cheese, sliced red onion, and chopped mint. Be careful not to mash the watermelon; you want to keep those lovely cubes intact for the best texture.
- Dress the Salad: Pour the dressing over the salad mixture and toss gently to coat all the ingredients evenly. This step guarantees that every bite is bursting with flavor. Allow the salad to sit for about 10 minutes before serving to let the flavors meld.
- Serve and Enjoy: Transfer the salad to a serving dish or individual bowls. Garnish with additional mint leaves or a sprinkle of feta if desired. This salad is best served chilled, making it a perfect addition to any summer meal.
Extra Tips
When preparing the Invigorating Watermelon Feta Salad, consider using a seedless watermelon to simplify the process and enhance the texture. If you prefer a bit of crunch, add some toasted pine nuts or sliced almonds to the mix for an additional layer of flavor.
This salad can also be made ahead of time; just keep the dressing separate until you’re ready to serve to maintain the freshness of the ingredients. Enjoy this delightful dish as a centerpiece for your summer feasts!
Elegant Baked Eggplant Parmesan
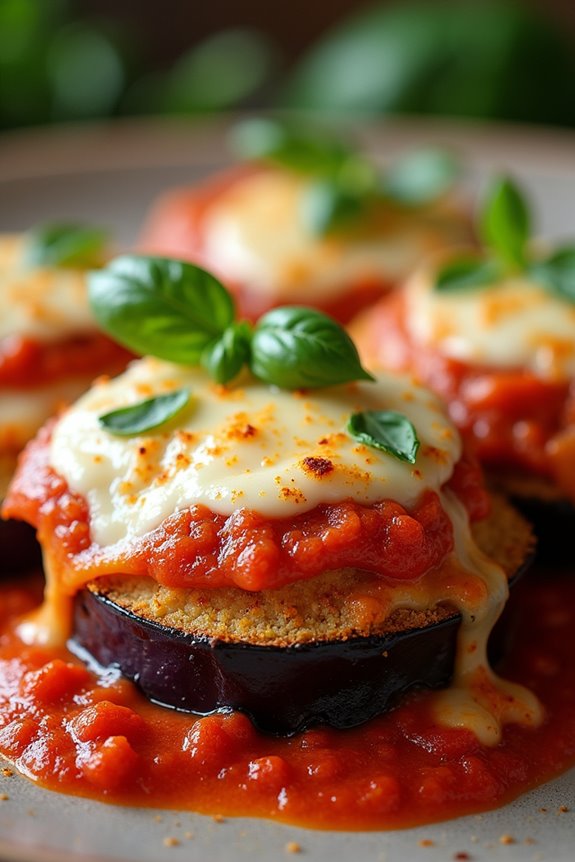
Baked Eggplant Parmesan is a timeless classic that brings the warmth of Mediterranean cuisine right to your table. This dish showcases tender, roasted eggplant layered with rich marinara sauce, creamy mozzarella, and a sprinkle of fragrant basil, all baked to perfection. Not only is it visually stunning with its vibrant colors, but it also embodies the essence of healthy, flavorful eating.
This elegant dish is perfect for family gatherings or as a delectable centerpiece for any dinner party, impressing guests with both its taste and presentation.
The beauty of Baked Eggplant Parmesan lies in its simplicity and the quality of its ingredients. By using fresh, ripe eggplants, hand-crafted marinara sauce, and freshly grated cheese, you elevate this dish from ordinary to extraordinary. This recipe serves 4-6 people, making it an ideal choice for sharing with loved ones.
Let’s plunge into the preparation of this delightful dish that will have everyone coming back for seconds!
Ingredients:
- 2 medium-sized eggplants
- 1 teaspoon salt
- 2 cups marinara sauce
- 3 cups fresh mozzarella cheese, shredded
- 1 cup grated Parmesan cheese
- 1 cup all-purpose flour
- 3 large eggs, beaten
- 2 cups breadcrumbs (preferably Italian seasoned)
- 1 teaspoon dried oregano
- 1 teaspoon dried basil
- Fresh basil leaves for garnish
- Olive oil for drizzling
Cooking Instructions:
- Prepare the Eggplants: Begin by slicing the eggplants into 1/4-inch thick rounds. Sprinkle both sides with salt and place them in a colander to drain for about 30 minutes. This process helps remove excess moisture and bitterness from the eggplants, resulting in a better texture.
- Rinse and Dry: After 30 minutes, rinse the salted eggplant slices under cold water to remove the salt. Pat them dry with paper towels to absorb any remaining moisture. This step is vital as it prevents the eggplant from becoming soggy during baking.
- Set Up the Breading Station: In three separate shallow dishes, place the flour, beaten eggs, and breadcrumbs. Mix in the dried oregano and basil into the breadcrumbs for added flavor. This will create a flavorful crust for the eggplant.
- Bread the Eggplants: Dip each eggplant slice first in the flour, shaking off any excess, then in the beaten eggs, and finally in the breadcrumb mixture. Confirm each slice is evenly coated for a crispy finish.
- Bake the Eggplants: Preheat your oven to 400°F (200°C). Arrange the breaded eggplant slices on a baking sheet lined with parchment paper. Drizzle lightly with olive oil and bake for about 20-25 minutes, flipping halfway through, until golden brown and crispy.
- Assemble the Dish: In a large baking dish, spread a thin layer of marinara sauce on the bottom. Layer half of the baked eggplant slices on top, followed by a layer of marinara sauce, half of the mozzarella, and half of the Parmesan cheese. Repeat the layers with the remaining eggplant, sauce, mozzarella, and Parmesan.
- Bake the Entire Dish: Cover the baking dish with aluminum foil and bake in the preheated oven for 30 minutes. After that, remove the foil and bake for an additional 15 minutes or until the cheese is bubbly and golden.
- Let it Rest and Serve: Once baked, remove the dish from the oven and let it rest for about 10 minutes. This allows the layers to set, making it easier to slice. Garnish with fresh basil leaves before serving.
Extra Tips:
For an extra layer of flavor, consider adding sautéed garlic or onions to the marinara sauce. You can also experiment with different cheeses, such as provolone or fontina, for a unique twist.
To make this dish even healthier, you can grill the eggplant instead of baking it, or use whole wheat breadcrumbs. Finally, serve this dish with a side salad or crusty bread to complete your Mediterranean meal!
Artful Mediterranean Flatbread
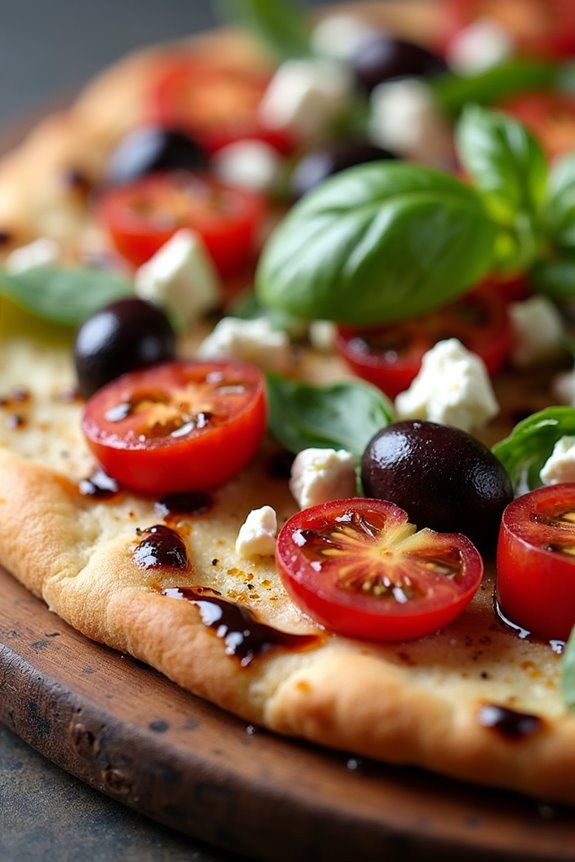
Artful Mediterranean Flatbread is a delightful dish that beautifully captures the essence of the Mediterranean cuisine. This flatbread isn’t only a feast for the eyes but also a treat for your taste buds, featuring a harmonious blend of fresh herbs, spices, and toppings that reflect the vibrant culture of the region. Perfect for sharing, it can be served as a starter, side dish, or even a light meal when topped generously with your favorite ingredients.
Making this flatbread is a wonderful way to embrace the Mediterranean lifestyle, characterized by fresh flavors and colorful presentations. The dough is simple to prepare, and the variety of toppings allows for endless creativity—whether you prefer classic combinations like olives and feta or more adventurous choices like roasted vegetables and tahini. Gather your ingredients, roll up your sleeves, and get ready to impress your friends and family with this artful culinary creation.
Ingredients (Serves 4-6)
- 3 cups all-purpose flour
- 1 teaspoon salt
- 1 teaspoon sugar
- 1 packet (2 ¼ teaspoons) active dry yeast
- 1 cup warm water (about 110°F)
- 2 tablespoons olive oil
- 1 teaspoon dried oregano
- 1 teaspoon garlic powder
- ½ cup cherry tomatoes, halved
- ½ cup Kalamata olives, pitted and sliced
- 1 cup crumbled feta cheese
- ½ cup fresh basil leaves
- 2 tablespoons balsamic glaze (for drizzling)
Cooking Instructions
- Prepare the Dough: In a small bowl, dissolve the sugar in warm water, and then sprinkle the yeast on top. Let it sit for about 5-10 minutes until frothy. In a large mixing bowl, combine the flour, salt, oregano, and garlic powder. Create a well in the center and add the yeast mixture and olive oil. Mix until a dough forms.
- Knead the Dough: Transfer the dough onto a floured surface and knead for about 8-10 minutes until it becomes smooth and elastic. If the dough is too sticky, add a little more flour as needed. Once ready, form the dough into a ball and place it in a lightly oiled bowl, covering it with a damp cloth.
- First Rise: Allow the dough to rise in a warm place for about 1 hour, or until it has doubled in size. This step is essential for achieving a fluffy texture in your flatbread.
- Shape the Flatbread: Once the dough has risen, punch it down to release the air. Divide the dough into 2-3 equal portions, depending on how large you want your flatbreads. Roll each portion out on a floured surface to your desired thickness, about ¼ inch thick.
- Preheat the Oven: Preheat your oven to 475°F (245°C) and place a baking sheet or pizza stone inside to heat up.
- Add Toppings: Carefully remove the heated baking sheet or stone from the oven. Place the rolled flatbread onto it. Top the flatbread with cherry tomatoes, olives, and crumbled feta cheese, arranging them artfully.
- Bake the Flatbread: Bake in the preheated oven for about 10-12 minutes, or until the edges are golden brown and the cheese is slightly melted.
- Finish and Serve: Once baked, remove from the oven and sprinkle fresh basil leaves on top. Drizzle with balsamic glaze for an extra touch of flavor. Slice the flatbread into wedges and serve warm.
Extra Tips
When making Artful Mediterranean Flatbread, feel free to experiment with toppings to suit your taste. You can add ingredients like roasted red peppers, spinach, or even a drizzle of pesto for a different flavor profile.
Additionally, if you prefer a crispier base, you can bake the flatbread for a couple of extra minutes, keeping an eye on it to prevent burning. Finally, serve the flatbreads with a side of tzatziki or hummus to elevate your Mediterranean experience!
Gorgeous Shrimp and Avocado Ceviche
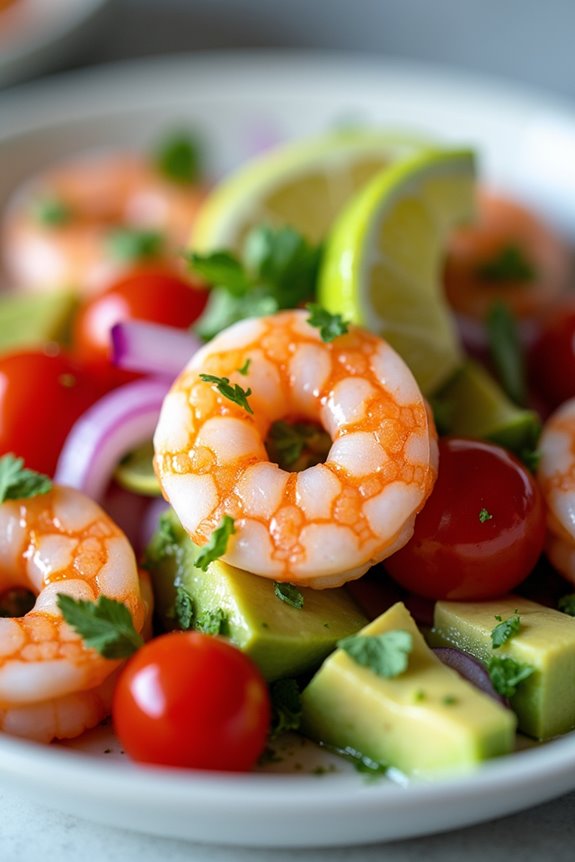
Ceviche is a classic dish that showcases the vibrant and fresh flavors of the Mediterranean, marrying seafood with zesty citrus and creamy avocado. This Gorgeous Shrimp and Avocado Ceviche is a delightful twist on the traditional recipe, perfect for summer gatherings or as a light appetizer. The key to this dish is using fresh, high-quality shrimp and ripe avocados, guaranteeing that each bite is bursting with flavor and texture.
The combination of shrimp, lime juice, cilantro, and avocado creates a revitalizing and visually stunning dish that’s as pleasing to the eye as it’s to the palate. Served chilled, this ceviche can be accompanied by tortilla chips or enjoyed on its own for a satisfying, healthy treat. Get ready to impress your guests with this colorful and delicious Mediterranean-inspired dish.
Ingredients (serving size: 4-6 people)
- 1 pound large shrimp, peeled and deveined
- 1 cup fresh lime juice (about 8-10 limes)
- 1 avocado, diced
- 1 medium red onion, finely chopped
- 1 cup cherry tomatoes, diced
- 1 jalapeño, seeded and minced (optional)
- 1/2 cup fresh cilantro, chopped
- Salt and pepper to taste
- Tortilla chips (for serving)
Instructions
- Prepare the Shrimp: Begin by placing the peeled and deveined shrimp in a bowl. Pour the fresh lime juice over the shrimp, guaranteeing they’re fully submerged. The acidity of the lime juice will “cook” the shrimp, turning them opaque. Cover the bowl with plastic wrap and refrigerate for about 30-40 minutes, or until the shrimp are pink and firm.
- Chop the Vegetables: While the shrimp is marinating, take this time to prepare the vegetables. Finely chop the red onion, dice the cherry tomatoes, and mince the jalapeño if you’re using it. Place all the chopped vegetables in a large mixing bowl, combining them for an even distribution of flavors.
- Combine the Ingredients: Once the shrimp has marinated and is ready, drain any excess lime juice, retaining some for seasoning. Add the shrimp to the bowl with the vegetables and gently mix them together.
- Add Avocado and Cilantro: Carefully fold in the diced avocado and chopped cilantro into the shrimp and vegetable mixture. Be gentle to avoid mashing the avocado, as you want to maintain its texture.
- Season the Ceviche: Taste the ceviche and season with salt and pepper as needed. If you prefer a more tangy flavor, you can drizzle a bit more lime juice over the top. Mix everything gently to guarantee all the ingredients are evenly coated.
- Serve: Transfer the ceviche to a serving dish or individual bowls. Serve chilled with tortilla chips on the side for dipping, or enjoy it as is for a light and revitalizing appetizer.
Extra Tips
For the best flavor and texture, always use fresh shrimp that hasn’t been previously frozen. If you want to add a twist to your ceviche, consider incorporating other ingredients such as mango for sweetness or cucumber for crunch.
Additionally, for a more pronounced spice level, you can increase the amount of jalapeño or add a dash of hot sauce. Enjoy your Gorgeous Shrimp and Avocado Ceviche as a vibrant centerpiece for your Mediterranean-inspired meal!
Delectable Spinach and Feta Phyllo Rolls

These Delectable Spinach and Feta Phyllo Rolls are a delightful Mediterranean dish that brings together the earthy flavors of fresh spinach and the creamy, tangy notes of feta cheese, all wrapped in crispy, golden phyllo pastry. Perfect as an appetizer or a light main course, these rolls are sure to impress guests at your next gathering or simply satisfy your cravings for something delicious and unique.
The combination of textures and flavors creates a dish that isn’t only aesthetically pleasing but also incredibly gratifying.
Phyllo pastry can seem intimidating at first, but once you get the hang of it, you’ll find it’s quite manageable. This dish isn’t only simple to prepare but also allows you to get creative with the filling. While spinach and feta are classic choices, you can easily add other ingredients like herbs, sun-dried tomatoes, or even olives to personalize your rolls.
Serve these phyllo rolls warm with a side of tzatziki or a simple yogurt sauce for a revitalizing complement.
Ingredients (Serves 4-6)
- 1 package of phyllo pastry (16 oz)
- 2 tablespoons olive oil, plus extra for brushing
- 1 large onion, finely chopped
- 2 cloves garlic, minced
- 10 oz fresh spinach, washed and chopped (or 1 package frozen spinach, thawed and drained)
- 8 oz feta cheese, crumbled
- 1 large egg, beaten
- 1 teaspoon dried oregano
- Salt and pepper, to taste
- Sesame seeds (optional, for garnish)
Cooking Instructions
- Preheat the Oven: Begin by preheating your oven to 375°F (190°C). This guarantees that your phyllo rolls will bake evenly and become perfectly golden and crispy.
- Sauté the Onions and Garlic: In a large skillet, heat 2 tablespoons of olive oil over medium heat. Add the chopped onion and sauté until it becomes translucent, about 5-7 minutes. Add the minced garlic and sauté for an additional 1-2 minutes until fragrant. Be careful not to burn the garlic.
- Add Spinach: Once the onions and garlic are ready, add the chopped spinach to the skillet. If using fresh spinach, cook until wilted, which should take about 3-4 minutes. If using frozen spinach, make sure it’s fully thawed and drained before adding it to the skillet. Stir well to combine.
- Mix the Filling: Remove the skillet from heat and allow the mixture to cool slightly. In a mixing bowl, combine the sautéed spinach, onion, and garlic mixture with crumbled feta cheese, beaten egg, dried oregano, salt, and pepper. Mix until all ingredients are well incorporated.
- Prepare the Phyllo Sheets: Take your phyllo pastry out of the package and lay it flat on a clean surface. Cover it with a damp kitchen towel to prevent it from drying out. Take one sheet of phyllo and brush it lightly with olive oil. Layer a second sheet on top and brush it again with oil.
- Form the Rolls: Place about 2-3 tablespoons of the spinach and feta filling at one end of the phyllo sheets. Fold the sides over the filling and roll it tightly from the filling end to the opposite end. Repeat this process with the remaining phyllo sheets and filling.
- Bake the Rolls: Place the rolled phyllo pastries on a baking sheet lined with parchment paper. Brush the tops with a little more olive oil and sprinkle with sesame seeds if desired. Bake in the preheated oven for 20-25 minutes or until the rolls are golden brown and crispy.
- Serve: Once baked, remove the rolls from the oven and let them cool for a few minutes. Serve warm, either on their own or with a side of tzatziki sauce for dipping.
Extra Tips
When working with phyllo pastry, it’s important to keep the sheets covered with a damp towel to prevent them from drying out. If you notice the edges of your rolls are getting too dark while baking, you can cover them with a piece of aluminum foil to prevent further browning.
Additionally, feel free to experiment with different herbs and spices in the filling to suit your palate, and consider adding some grated lemon zest for a fresh burst of flavor! Enjoy these Delectable Spinach and Feta Phyllo Rolls hot out of the oven for the best experience.
Luscious Olive Oil Cake With Citrus

The Luscious Olive Oil Cake With Citrus is a delightful Mediterranean dessert that embodies the essence of sun-kissed orchards and the fragrant notes of lemon and orange. This cake is moist and rich, thanks to the use of high-quality olive oil, which not only adds flavor but also contributes to its delicate texture. Infused with the zest and juice of citrus fruits, this cake is perfect for any occasion, whether it’s a casual family gathering or a festive celebration.
With its light crumb and a subtle sweetness, it pairs beautifully with a dollop of whipped cream or a dusting of powdered sugar.
Baking an olive oil cake is a simple yet rewarding experience. The ingredients meld together seamlessly to create a cake that’s both sophisticated and comforting. The use of olive oil instead of butter not only makes this cake a bit healthier but also adds a unique depth of flavor that enhances the citrus notes. This recipe will serve 4-6 people, guaranteeing that there’s enough to share with friends and family, or to enjoy over a few days as a delicious treat with your morning coffee or afternoon tea.
Ingredients:
- 1 cup all-purpose flour
- 1 teaspoon baking powder
- 1/2 teaspoon baking soda
- 1/4 teaspoon salt
- 1/2 cup granulated sugar
- 1/2 cup extra virgin olive oil
- 3 large eggs
- 1/4 cup fresh orange juice
- Zest of 1 orange
- 1/4 cup fresh lemon juice
- Zest of 1 lemon
- 1 teaspoon vanilla extract
Cooking Instructions:
- Preheat the Oven: Begin by preheating your oven to 350°F (175°C). This guarantees that the cake bakes evenly and rises properly as soon as it’s placed inside.
- Prepare the Baking Pan: Grease a 9-inch round cake pan with olive oil or butter and lightly dust it with flour. This prevents the cake from sticking and makes it easier to remove once baked.
- Mix Dry Ingredients: In a medium bowl, whisk together the flour, baking powder, baking soda, and salt. This step helps to guarantee that the leavening agents are evenly distributed throughout the flour.
- Combine Wet Ingredients: In a large mixing bowl, combine the sugar and olive oil, whisking until the mixture is smooth. Add in the eggs, one at a time, whisking well after each addition. Then stir in the orange juice, lemon juice, orange zest, lemon zest, and vanilla extract until everything is fully combined.
- Incorporate Dry Ingredients: Gradually add the dry ingredient mixture to the wet ingredients, stirring gently until just combined. Be careful not to overmix, as this can lead to a tougher cake.
- Pour and Bake: Pour the batter into the prepared cake pan, smoothing the top with a spatula. Bake in the preheated oven for about 30-35 minutes, or until a toothpick inserted into the center comes out clean.
- Cool the Cake: Once baked, remove the cake from the oven and let it cool in the pan for 10 minutes. Then, carefully transfer it to a wire rack to cool completely.
- Serve: Once cooled, dust the cake with powdered sugar if desired, or serve with whipped cream. Slice and enjoy the luscious flavors of olive oil and citrus!
Extra Tips:
When making Luscious Olive Oil Cake With Citrus, using high-quality extra virgin olive oil can greatly elevate the flavor of the cake.
Additionally, feel free to experiment with different citrus fruits; blood oranges or grapefruits can create a unique twist. For added moisture, consider incorporating a simple syrup made from citrus juice and sugar, drizzling it over the cake after it has cooled. This not only enhances the cake’s flavor but also keeps it wonderfully moist.
Captivating Fruit and Yogurt Parfait

The Enchanting Fruit and Yogurt Parfait is an alluring dish that beautifully combines layers of creamy yogurt with vibrant, fresh fruits. This Mediterranean-inspired delight not only looks stunning but also offers a revitalizing and nutritious option for breakfast, dessert, or a snack.
With an array of colorful fruits and a touch of honey, this parfait is sure to tantalize your taste buds while providing essential nutrients and energy.
This delightful parfait is as versatile as it’s delectable. You can customize it with your favorite seasonal fruits, whether it’s sweet strawberries, juicy peaches, or tangy blueberries. The creamy yogurt acts as the perfect base, while the crunch of granola adds texture to each spoonful.
As you layer these ingredients in a clear glass, the vibrant colors will create a visual feast that’s sure to impress both family and friends.
Ingredients (Serves 4-6)
- 4 cups of Greek yogurt (plain or flavored)
- 2 cups of mixed fresh fruits (strawberries, blueberries, kiwi, peaches, etc.)
- 1 cup of granola
- 4 tablespoons of honey (or to taste)
- Fresh mint leaves for garnish (optional)
Cooking Instructions
- Prepare the Fruits: Start by washing all the fruits thoroughly under cold water. After they’re clean, chop larger fruits like peaches and strawberries into bite-sized pieces. Keep smaller fruits like blueberries intact, as they can be layered directly.
- Layer the Yogurt: In a clear glass or a serving bowl, spoon a layer of Greek yogurt at the bottom. Aim for about 1 cup of yogurt per serving. This creamy layer will be the foundation of your parfait.
- Add the Fruits: Next, add a layer of your prepared mixed fruits on top of the yogurt. Try to create a colorful assortment so that every bite is a visual delight. Use about 1 cup of mixed fruits per serving.
- Sprinkle Granola: After the fruit layer, add a layer of granola. About 1/4 cup of granola per serving works well. This will add a satisfying crunch to your parfait and balance the creamy yogurt.
- Repeat the Layers: Continue the layers by repeating the yogurt, fruits, and granola until you reach the top of the glass or bowl. Aim for at least two layers for a beautiful presentation.
- Drizzle with Honey: Once you have finished layering, drizzle honey generously over the top of your parfait. The sweetness of the honey will enhance the flavors of the fruits and yogurt.
- Garnish: If desired, add fresh mint leaves on top for a pop of color and a revitalizing hint of flavor. Serve immediately or refrigerate for up to an hour before serving.
Extra Tips
When preparing your Enchanting Fruit and Yogurt Parfait, consider using a variety of fruits that are in season for the best flavor and texture.
Additionally, you can experiment with different types of yogurt, such as coconut or almond milk yogurt for a dairy-free option. Feel free to adjust the sweetness by varying the amount of honey according to your preference.
Finally, assembling the parfait in clear glasses not only allows for beautiful presentation but also makes it easy for guests to see the delicious layers they’re about to enjoy!