

When I think of a romantic date night, Mediterranean cuisine always comes to mind. The vibrant flavors and fresh ingredients create such a lovely atmosphere. Starting with silky hummus and crispy pita chips sets the tone. Colorful stuffed peppers bursting with flavor make for an unforgettable main course. Ready to explore these delightful recipes that can set the perfect mood for your evening?
Classic Hummus With Pita Chips
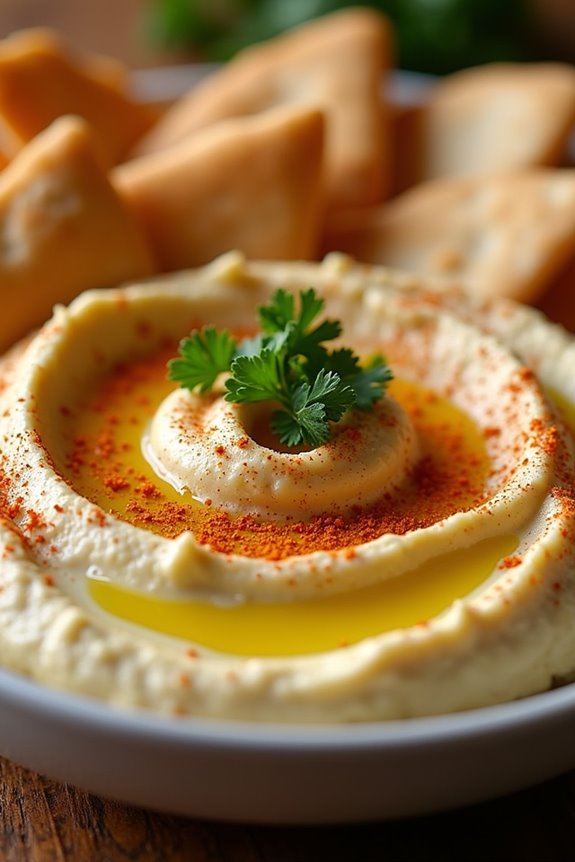
Nothing says romance quite like a cozy Mediterranean evening at home, and there’s no better way to set the mood than with a classic dish like hummus paired with crispy pita chips. This delightful appetizer isn’t only delicious but also incredibly simple to prepare. The creamy texture of the hummus combined with the crunch of freshly baked pita chips makes for a perfect starter to your romantic Mediterranean date night.
Hummus is a versatile dish that can be customized to suit your taste, whether you prefer it plain or with added flavors like roasted garlic or sun-dried tomatoes. Making homemade pita chips is equally easy and allows you to enjoy a fresh, warm snack that’s far superior to store-bought options. Together, this classic hummus with pita chips will surely impress your partner and create an intimate dining experience.
Ingredients (Serves 4-6):
- 1 can (15 oz) chickpeas, drained and rinsed
- 1/4 cup tahini
- 2 tablespoons olive oil
- 2 tablespoons fresh lemon juice
- 1-2 cloves garlic, minced
- 1/2 teaspoon ground cumin
- Salt, to taste
- Water, as needed
- 4-6 pita bread
- Olive oil, for brushing
- Sea salt, for sprinkling
Cooking Instructions:
- Prepare the Hummus Base: In a food processor, combine the drained chickpeas, tahini, olive oil, lemon juice, minced garlic, ground cumin, and a pinch of salt. Process until the mixture is smooth. You may need to scrape down the sides of the bowl to guarantee all ingredients are well blended.
- Adjust Consistency: If the hummus is too thick, add water one tablespoon at a time until you reach your desired creamy consistency. Taste the hummus and adjust the seasoning with more salt or lemon juice if needed, then blend again to incorporate.
- Chill the Hummus: Transfer the hummus to a serving bowl and drizzle a little extra olive oil on top. For best flavor, cover and refrigerate the hummus for at least 30 minutes to allow the flavors to meld.
- Prepare the Pita Chips: Preheat your oven to 375°F (190°C). Cut the pita bread into triangles and place them on a baking sheet. Brush each piece lightly with olive oil and sprinkle with sea salt.
- Bake the Pita Chips: Bake in the preheated oven for about 10-12 minutes or until the pita chips are golden and crispy. Be sure to keep an eye on them to prevent burning.
- Serve: Once the pita chips are ready and the hummus has chilled, serve them together on a platter. Enjoy this delicious appetizer with your loved one!
Extra Tips:
For an extra touch, consider garnishing your hummus with a sprinkle of paprika, chopped parsley, or a drizzle of olive oil right before serving. You can also experiment with flavors by adding roasted red peppers or olives to the hummus before blending.
If you have leftovers, store the hummus in an airtight container in the refrigerator for up to a week, and enjoy it as a healthy snack or spread!
Mediterranean Stuffed Peppers

Mediterranean Stuffed Peppers are a delightful and vibrant dish that brings the flavors of the Mediterranean to your dinner table. These colorful bell peppers are filled with a savory mixture of grains, vegetables, and spices, making them not only a feast for the eyes but also a nutritious meal. Ideal for a romantic date night, they’re easy to prepare and can be made ahead of time, allowing you to focus on enjoying the evening rather than being stuck in the kitchen.
The combination of ingredients in these stuffed peppers highlights the essence of Mediterranean cuisine, featuring ingredients like quinoa or rice, fresh herbs, and a touch of feta cheese for creaminess. As you cut into the pepper, the aroma of the herbs and spices will tantalize your senses, making each bite a pleasure. These stuffed peppers can be served as a main course or as a side dish, making them versatile enough for any occasion.
Ingredients (Serves 4-6)
- 4 large bell peppers (any color)
- 1 cup quinoa (or rice)
- 2 cups vegetable broth (or water)
- 1 medium onion, diced
- 2 cloves garlic, minced
- 1 cup cherry tomatoes, halved
- 1 can (15 oz) chickpeas, drained and rinsed
- 1 teaspoon dried oregano
- 1 teaspoon dried basil
- 1 teaspoon smoked paprika
- ½ teaspoon salt
- ¼ teaspoon black pepper
- 1 cup feta cheese, crumbled
- ¼ cup fresh parsley, chopped
- 2 tablespoons olive oil
- Juice of 1 lemon
Cooking Instructions
- Preheat the Oven: Begin by preheating your oven to 375°F (190°C). This guarantees that your stuffed peppers will cook evenly and develop a beautiful, slightly charred exterior.
- Prepare the Quinoa: Rinse 1 cup of quinoa under cold water to remove its natural coating, which can be bitter. In a medium saucepan, combine the rinsed quinoa and 2 cups of vegetable broth (or water). Bring to a boil, then reduce the heat to low, cover, and simmer for about 15 minutes or until all the liquid is absorbed. Once cooked, fluff the quinoa with a fork and set aside.
- Sauté the Vegetables: In a large skillet, heat 2 tablespoons of olive oil over medium heat. Add the diced onion and sauté for about 5 minutes until translucent. Stir in the minced garlic and cook for an additional minute until fragrant.
- Combine the Filling: To the skillet, add the cherry tomatoes, drained chickpeas, cooked quinoa, dried oregano, dried basil, smoked paprika, salt, and black pepper. Mix everything well and allow it to cook for another 5 minutes, letting the flavors meld together. Remove from heat and stir in the crumbled feta cheese and chopped parsley. Squeeze the lemon juice over the mixture for added freshness.
- Prepare the Peppers: While the filling is cooling slightly, wash the bell peppers and slice the tops off, removing the seeds and membranes. If they don’t stand upright, you can slice a small bit off the bottom to create a flat base.
- Stuff the Peppers: Carefully spoon the quinoa and vegetable mixture into each bell pepper, filling them generously. Place the stuffed peppers in a baking dish.
- Bake: Cover the baking dish with aluminum foil and bake in the preheated oven for 25 minutes. After 25 minutes, remove the foil and bake for an additional 10-15 minutes, until the peppers are tender and the tops are slightly golden.
- Serve: Once cooked, remove the stuffed peppers from the oven and let them sit for a few minutes before serving. They can be enjoyed warm or at room temperature, making them perfect for your romantic Mediterranean date night.
Extra Tips
When preparing Mediterranean Stuffed Peppers, feel free to customize the filling according to your taste preferences. You can add olives, spinach, or even ground meat for a heartier dish.
Additionally, if you want to make this dish ahead of time, you can prepare the filling and stuff the peppers a day in advance; just cover them and store them in the refrigerator. When ready to serve, simply bake them as directed. Enjoy your culinary journey through the Mediterranean!
Grilled Shrimp Skewers With Lemon Garlic Marinade
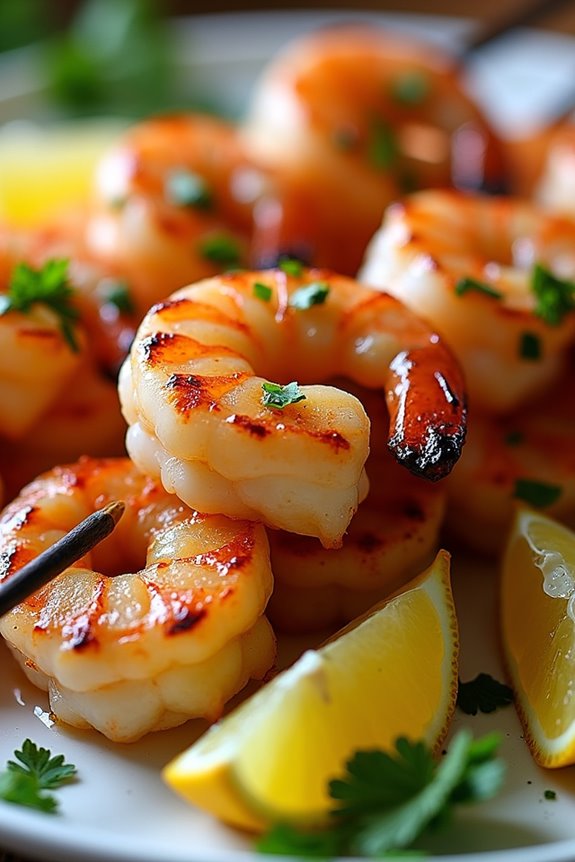
For a romantic Mediterranean date night, nothing beats the tantalizing flavors of grilled shrimp skewers. These succulent shrimp are marinated in a zesty lemon garlic mixture that infuses them with brightness and depth. Perfectly charred on the grill, they make for a delightful appetizer or main dish that pairs wonderfully with fresh salads, crusty bread, or a glass of crisp white wine. The vibrant colors and enticing aroma will surely set the mood for a memorable evening.
Not only are grilled shrimp skewers quick and easy to prepare, but they’re also versatile. You can adjust the marinade to suit your taste preferences or add seasonal vegetables to the skewers for a more colorful and nutritious meal. Whether you’re dining al fresco under the stars or enjoying an intimate dinner indoors, these grilled shrimp skewers will elevate your culinary experience and impress your loved one.
Ingredients (serving size: 4-6 people):
- 1.5 pounds large shrimp, peeled and deveined
- 1/4 cup olive oil
- 3 tablespoons fresh lemon juice
- 4 cloves garlic, minced
- 1 teaspoon lemon zest
- 1 teaspoon smoked paprika
- 1/2 teaspoon red pepper flakes (optional)
- Salt and black pepper, to taste
- Fresh parsley, chopped (for garnish)
- Wooden or metal skewers (if using wooden skewers, soak in water for 30 minutes before grilling)
Cooking Instructions:
- Prepare the Marinade: In a medium bowl, whisk together the olive oil, fresh lemon juice, minced garlic, lemon zest, smoked paprika, red pepper flakes (if using), salt, and black pepper. This vibrant marinade will be the base for infusing the shrimp with flavor.
- Marinate the Shrimp: Add the peeled and deveined shrimp to the marinade, making sure they’re well-coated. Cover the bowl with plastic wrap and let the shrimp marinate in the refrigerator for at least 30 minutes, but no longer than 2 hours. This allows the flavors to penetrate the shrimp and helps to tenderize them.
- Preheat the Grill: While the shrimp are marinating, preheat your grill to medium-high heat. If using a charcoal grill, make certain the coals are glowing and covered with ash. For a gas grill, allow it to heat up for about 10-15 minutes.
- Skewer the Shrimp: After marinating, thread the shrimp onto your skewers, leaving a little space between each shrimp for even cooking. If you’re adding vegetables, alternate them with the shrimp on the skewers for a colorful presentation.
- Grill the Skewers: Place the skewers on the preheated grill. Grill the shrimp for about 2-3 minutes on each side, or until they turn pink and opaque. Be careful not to overcook them, as shrimp can become rubbery if left on the grill too long.
- Serve: Once cooked, remove the skewers from the grill and transfer them to a serving platter. Garnish with freshly chopped parsley for a pop of color and additional flavor. Serve immediately with lemon wedges on the side.
Extra Tips:
To enhance the flavor of your grilled shrimp skewers, consider adding a touch of honey or a splash of white wine to the marinade for a hint of sweetness. You can also experiment with various herbs like cilantro or basil for a different twist on the classic Mediterranean flavor profile.
Ultimately, if you find yourself in a pinch for time, marinating the shrimp for just 15 minutes will still yield delicious results, guaranteeing a quick yet delightful meal. Enjoy!
Spinach and Feta Spanakopita
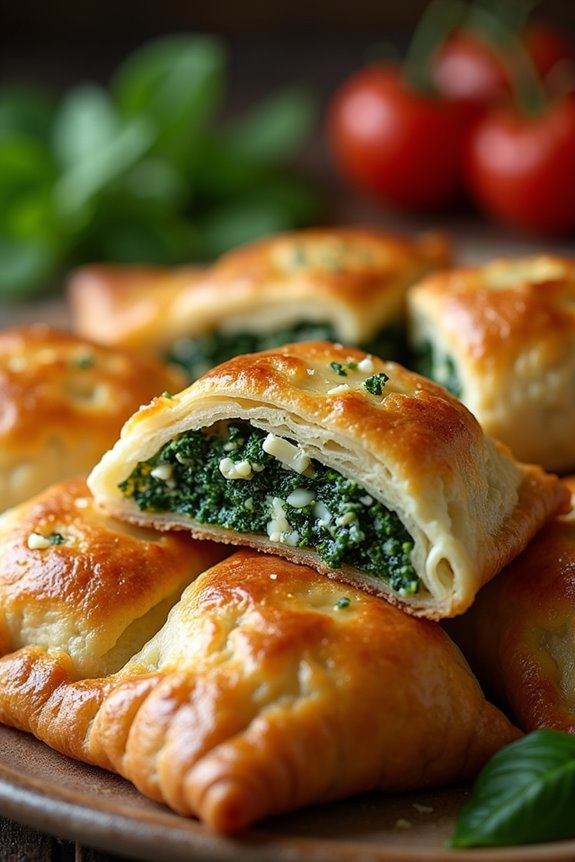
Spanakopita is a delightful Greek pastry that features layers of flaky phyllo dough filled with a savory mixture of spinach, feta cheese, and aromatic herbs. This dish is perfect for a romantic Mediterranean date night, bringing a taste of the Mediterranean right to your kitchen. The combination of the crispy outer layer and the warm, cheesy filling creates an irresistible treat that can be served as an appetizer or a main dish.
Making spanakopita might seem intimidating at first, but with a little patience and practice, you’ll be able to create a stunning dish that will impress your partner. The key to achieving the perfect spanakopita lies in making sure the phyllo dough remains moist while handling, and in balancing the flavors of the spinach and feta. With a few fresh ingredients and some simple techniques, you can make this traditional Greek dish a highlight of your romantic evening.
Ingredients (Serves 4-6):
- 1 package (16 oz) phyllo dough, thawed
- 1 lb fresh spinach, washed and chopped (or 10 oz frozen spinach, thawed and drained)
- 1 cup feta cheese, crumbled
- 1/2 cup ricotta cheese
- 1/2 cup green onions, chopped
- 2 cloves garlic, minced
- 1/4 cup fresh dill, chopped (or 1 tbsp dried dill)
- 1/4 cup fresh parsley, chopped
- 2 large eggs, beaten
- 1/2 cup unsalted butter, melted
- Salt and pepper to taste
Cooking Instructions:
- Prepare the Filling: In a large mixing bowl, combine the chopped spinach, feta cheese, ricotta cheese, green onions, garlic, dill, parsley, and beaten eggs. Season the mixture with salt and pepper to taste. Mix everything together until well combined. This filling will create the rich and flavorful component of your spanakopita.
- Preheat the Oven: Preheat your oven to 375°F (190°C). This guarantees that your spanakopita will be baked to perfection, achieving a golden-brown color and crispy texture.
- Prepare the Phyllo Dough: Carefully unroll the phyllo dough and cover it with a damp kitchen towel to prevent it from drying out. Take a sheet of phyllo and place it on a clean surface. Brush it lightly with melted butter. Repeat this process, layering 5-6 sheets of phyllo dough, brushing each layer with butter, to create a sturdy base for your spanakopita.
- Add the Filling: Once you have your phyllo layers stacked, spoon the spinach and feta filling along one edge of the phyllo. Be sure to leave some space on the sides for folding.
- Roll the Dough: Carefully fold the sides of the phyllo over the filling, then roll it up tightly from the edge with the filling. Use the butter to seal the edges of the roll. Place the rolled spanakopita seam-side down on a baking sheet lined with parchment paper. Brush the top with more melted butter.
- Bake: Bake in the preheated oven for 30-35 minutes or until the spanakopita is golden brown and crispy. Keep an eye on it to make sure it doesn’t over-brown.
- Serve: Once done, remove from the oven and let it cool for a few minutes. Cut into slices and serve warm. Pair with a revitalizing Greek salad or tzatziki for a complete meal.
Extra Tips:
To enhance the flavor of your spanakopita, consider adding a pinch of nutmeg to the filling, which complements the spinach beautifully. Additionally, if you’re using frozen spinach, make sure it’s thoroughly drained to prevent the filling from becoming watery.
When handling phyllo dough, work quickly and keep it covered with a damp towel to maintain its moisture. You can also prepare the spanakopita in advance and freeze it before baking; just add a few extra minutes to the baking time when you’re ready to enjoy it.
Roasted Eggplant Dip (Baba Ganoush)
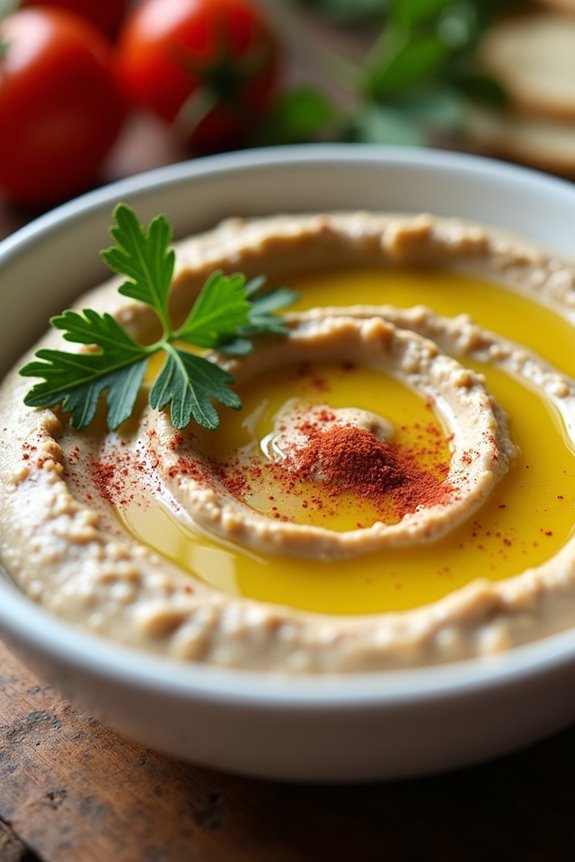
Baba Ganoush is a traditional Middle Eastern dip that features roasted eggplant as its star ingredient. This creamy and smoky dip isn’t only delicious but also showcases the vibrant flavors of the Mediterranean, making it a perfect addition to your romantic date night menu.
The preparation of Baba Ganoush is simple yet elegant, ensuring you can impress your significant other with minimal effort. Serve it with warm pita bread, fresh veggies, or even as part of a mezze platter to elevate your dining experience.
The key to a great Baba Ganoush lies in the roasting of the eggplant, which imparts a rich, smoky flavor that’s hard to resist. The combination of tahini, garlic, and lemon juice adds depth and brightness to the dip, creating a harmonious balance of flavors. With a few basic ingredients and straightforward techniques, you can craft this delightful dish and transport your taste buds to the sun-kissed shores of the Mediterranean.
Ingredients (Serves 4-6):
- 2 medium eggplants
- 2 tablespoons tahini
- 2 tablespoons olive oil
- 2 cloves garlic, minced
- Juice of 1 lemon
- Salt, to taste
- Fresh parsley, chopped (for garnish)
- Paprika or sumac (for garnish, optional)
Cooking Instructions:
- Preheat the Oven: Begin by preheating your oven to 400°F (200°C). A hot oven is essential for roasting the eggplants properly and achieving that desired smokiness.
- Prepare the Eggplants: While the oven is preheating, wash the eggplants and slice them in half lengthwise. You can score the flesh lightly in a crisscross pattern, which helps the eggplant cook evenly and allows for better flavor absorption.
- Roast the Eggplants: Place the halved eggplants on a baking sheet, cut side up. Drizzle them with olive oil and sprinkle with salt. Roast the eggplants in the preheated oven for about 30-40 minutes, or until the flesh is tender and the skin is slightly charred. Remove from the oven and let them cool for a few minutes.
- Scoop the Flesh: Once cool enough to handle, use a spoon to scoop out the roasted flesh of the eggplant and place it in a mixing bowl. Discard the skins.
- Blend the Ingredients: Add tahini, minced garlic, lemon juice, and a pinch of salt to the bowl with the eggplant flesh. Using a fork or a food processor, blend the ingredients until smooth and creamy. Adjust the seasoning by adding more salt or lemon juice to taste.
- Garnish and Serve: Transfer the Baba Ganoush to a serving dish. Drizzle with a little extra olive oil, and sprinkle with chopped parsley and paprika or sumac for a pop of color and flavor. Serve it warm or at room temperature with pita bread or your choice of dippers.
Extra Tips:
For an even richer flavor, try grilling the eggplants instead of roasting them in the oven. This will add a deeper smokiness to the dip.
You can also experiment with adding roasted red peppers or spices like cumin for a unique twist on the classic Baba Ganoush. Be sure to serve it fresh, but if you have leftovers, they can be stored in the refrigerator for a couple of days—just give it a good stir before serving again!
Chicken Souvlaki With Tzatziki Sauce
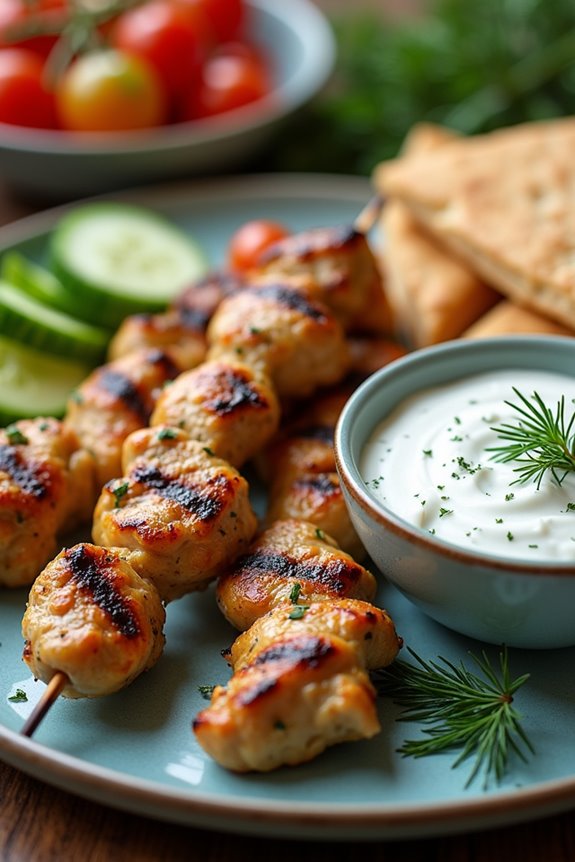
Transport yourself to the sun-kissed shores of the Mediterranean with this delightful recipe for Chicken Souvlaki with Tzatziki Sauce. This dish isn’t only flavorful but also presents beautifully, making it an ideal choice for a romantic Mediterranean date night. The tender, marinated chicken skewers paired with the invigorating yogurt-based tzatziki sauce create a culinary experience that both you and your partner will cherish.
Souvlaki, a beloved Greek street food, consists of marinated meat grilled to perfection and served on skewers. This version uses chicken, marinated in a zesty blend of lemon juice, garlic, and aromatic herbs, ensuring every bite is bursting with flavor. The accompanying tzatziki sauce, made from creamy yogurt, cucumber, and fresh dill, adds a cool contrast to the savory chicken. Serve these skewers with warm pita bread and a side salad for a complete Mediterranean feast.
Ingredients (Serves 4-6):
- 1.5 lbs boneless, skinless chicken breast, cut into 1-inch cubes
- 1/4 cup olive oil
- 3 tablespoons lemon juice
- 3 cloves garlic, minced
- 1 tablespoon dried oregano
- 1 teaspoon salt
- 1/2 teaspoon black pepper
- 6 wooden or metal skewers (if using wooden skewers, soak in water for 30 minutes)
For Tzatziki Sauce:
- 1 cup plain Greek yogurt
- 1/2 cup cucumber, grated and excess water squeezed out
- 2 cloves garlic, minced
- 1 tablespoon fresh dill, chopped (or 1 teaspoon dried dill)
- 1 tablespoon lemon juice
- Salt and pepper to taste
Cooking Instructions:
- Marinate the Chicken: In a large bowl, combine the olive oil, lemon juice, minced garlic, dried oregano, salt, and black pepper. Whisk together until well mixed. Add the chicken cubes to the marinade, ensuring they’re fully coated. Cover the bowl and refrigerate for at least 1 hour, or up to overnight for maximum flavor.
- Prepare the Tzatziki Sauce: While the chicken is marinating, prepare the tzatziki sauce. In a separate bowl, combine the Greek yogurt, grated cucumber, minced garlic, chopped dill, lemon juice, and a pinch of salt and pepper. Mix well and adjust seasoning to taste. Cover and refrigerate until ready to serve.
- Skewer the Chicken: Preheat your grill or grill pan to medium-high heat. Once the chicken has marinated, thread the chicken pieces onto the skewers, leaving a little space between each piece for even cooking.
- Grill the Souvlaki: Place the skewers on the preheated grill and cook for about 10-15 minutes, turning occasionally, until the chicken is cooked through and has nice grill marks. The internal temperature should reach 165°F (75°C).
- Serve: Once the chicken is cooked, remove the skewers from the grill. Serve the Chicken Souvlaki hot with the tzatziki sauce on the side. Pair with warm pita bread and a fresh salad for a complete meal.
Extra Tips:
For an added depth of flavor, consider adding a tablespoon of red wine vinegar to the marinade or some chopped fresh parsley for garnish.
You can also substitute chicken thighs for a juicier result. If time allows, let the chicken marinate longer than an hour; overnight marination will enhance the flavors considerably.
Additionally, feel free to customize your tzatziki with ingredients like mint or a dash of cayenne for a kick. Enjoy your culinary journey through the Mediterranean!
Greek Salad With Fresh Herbs
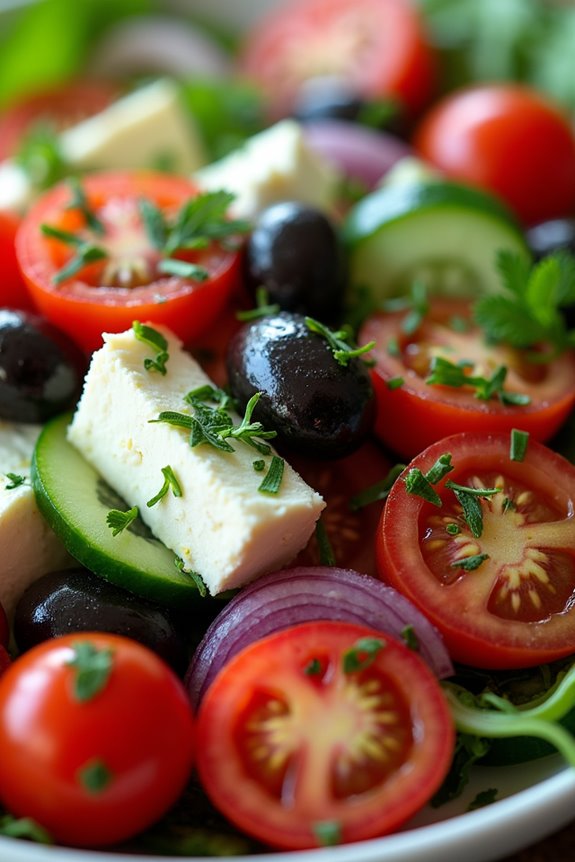
A Greek Salad with Fresh Herbs is the perfect dish to bring a taste of the Mediterranean to your romantic dinner at home. Bursting with vibrant colors and fresh flavors, this salad isn’t only visually appealing but also incredibly invigorating. The combination of crisp vegetables, tangy feta cheese, and a drizzle of olive oil, all enhanced by aromatic herbs, makes this salad a delightful accompaniment to any main course or a light meal on its own.
The key to a great Greek Salad is the quality of the ingredients. Using ripe tomatoes, crunchy cucumbers, and fresh herbs will elevate the dish and provide a genuine taste of Greece. This salad is also versatile; feel free to adjust the ingredients based on your personal preferences or what’s in season. Serve it in a large bowl for sharing or plated individually for a more elegant presentation.
Ingredients (Serves 4-6)
- 4 ripe tomatoes, chopped
- 1 large cucumber, peeled and diced
- 1 red bell pepper, chopped
- 1 small red onion, thinly sliced
- 200g feta cheese, crumbled or diced
- ½ cup Kalamata olives, pitted and halved
- ¼ cup extra-virgin olive oil
- 2 tablespoons red wine vinegar
- 1 teaspoon dried oregano
- Salt and pepper, to taste
- Fresh parsley, dill, and mint, chopped (to taste)
Cooking Instructions
- Prepare the Vegetables: Begin by washing and chopping the tomatoes, cucumber, red bell pepper, and red onion. Make sure the pieces are roughly the same size for even distribution and a pleasing presentation. Place all the chopped vegetables in a large mixing bowl.
- Add the Cheese and Olives: Once the vegetables are combined, add the crumbled or diced feta cheese and the Kalamata olives to the bowl. The cheese adds creaminess while the olives contribute a briny flavor, both essential components of a Greek salad.
- Mix the Dressing: In a separate small bowl, whisk together the extra-virgin olive oil, red wine vinegar, dried oregano, salt, and pepper to create a simple yet flavorful dressing. Adjust the seasoning to taste, ensuring a balance of acidity and richness.
- Combine and Toss: Pour the dressing over the salad mixture and gently toss everything together until the vegetables are evenly coated. Be careful not to break up the feta too much; you want to maintain some chunks for texture.
- Add Fresh Herbs: Finally, sprinkle the chopped fresh parsley, dill, and mint over the salad and gently toss again. The fresh herbs will add an aromatic lift and enhance the overall flavor profile of the dish.
- Serve: Transfer the Greek Salad to a serving platter or individual bowls. For an elegant touch, you can garnish with additional herbs or a few extra olives on top.
Extra Tips
When preparing a Greek Salad with Fresh Herbs, it’s best to make it just before serving to maintain the crispness of the vegetables. If you need to prepare it ahead of time, consider keeping the dressing separate until you’re ready to serve. This will prevent the vegetables from becoming soggy.
Additionally, using high-quality olive oil and fresh herbs will greatly enhance the flavor, so opt for the best ingredients you can find. Enjoy this dish as a light starter or a side to grilled meats, and don’t forget to pair it with a good bottle of Greek wine for a complete Mediterranean experience.
Tomato and Mozzarella Caprese Salad
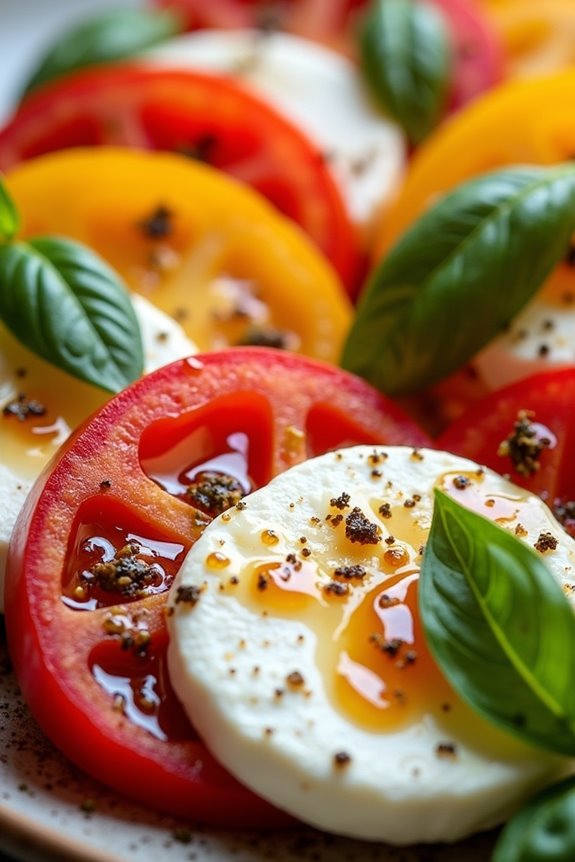
The Tomato and Mozzarella Caprese Salad is a classic Italian dish that beautifully showcases the simplicity and freshness of Mediterranean ingredients. This salad isn’t only vibrant in color but also rich in flavor, making it an ideal starter for a romantic date night.
With just a few high-quality ingredients, you can create a dish that’s both elegant and easy to prepare. The combination of ripe tomatoes, creamy mozzarella cheese, fragrant basil, and a drizzle of olive oil will transport you straight to the sun-soaked coasts of Italy.
To enhance this dish, consider using heirloom tomatoes for a variety of colors and flavors. The key to a delicious Caprese salad lies in the freshness of the ingredients, so be sure to select the ripest tomatoes and the freshest mozzarella.
This salad can be served as an appetizer or a side dish and pairs wonderfully with crusty bread and a glass of chilled white wine. Let’s plunge into the recipe!
Ingredients (serving size: 4-6 people)
- 4 large ripe tomatoes (preferably heirloom)
- 1 pound fresh mozzarella cheese
- 1 cup fresh basil leaves
- 4 tablespoons extra virgin olive oil
- 2 tablespoons balsamic vinegar (optional)
- Salt, to taste
- Freshly cracked black pepper, to taste
Cooking Instructions
1. Prepare the Tomatoes: Start by washing the tomatoes under cool running water. Slice each tomato into thick rounds, about 1/2 inch thick. If using heirloom tomatoes, you can mix colors for a more visually appealing dish.
Arrange the tomato slices on a serving platter, slightly overlapping them for a beautiful presentation.
2. Slice the Mozzarella: Next, take the fresh mozzarella cheese and slice it into rounds similar in thickness to the tomatoes. Aim for about 1/2 inch thick slices as well.
Once sliced, layer the mozzarella slices alternately with the tomato slices on the platter. This creates a beautiful pattern that’s both appealing and delicious.
3. Add Fresh Basil: After layering the tomatoes and mozzarella, wash the fresh basil leaves and pat them dry. You can either leave the basil leaves whole for a rustic look or tear them into smaller pieces for a more delicate presentation.
Scatter the basil leaves evenly over the tomatoes and mozzarella.
4. Season the Salad: Drizzle the extra virgin olive oil over the entire salad, ensuring each slice gets a touch of richness. If desired, add balsamic vinegar for a hint of sweetness and acidity.
Finish by seasoning the salad with salt and freshly cracked black pepper to taste.
5. Serve: For best results, let the salad sit for about 10 minutes before serving. This allows the flavors to meld together beautifully.
Serve the Caprese salad with crusty bread on the side and enjoy a perfect start to your Mediterranean date night.
Extra Tips
When preparing a Tomato and Mozzarella Caprese Salad, remember that the quality of your ingredients is paramount. Opt for fresh, high-quality mozzarella, preferably buffalo mozzarella for a creamier texture.
If you can find it, use a good-quality, aged balsamic vinegar, as it will add depth to the dish. Feel free to experiment with additional toppings, such as a sprinkle of pine nuts or a touch of pesto, to personalize your salad.
Enjoy this delightful dish as a revitalizing appetizer that sets the stage for a romantic evening.
Lamb Kofta Kebabs With Yogurt Sauce
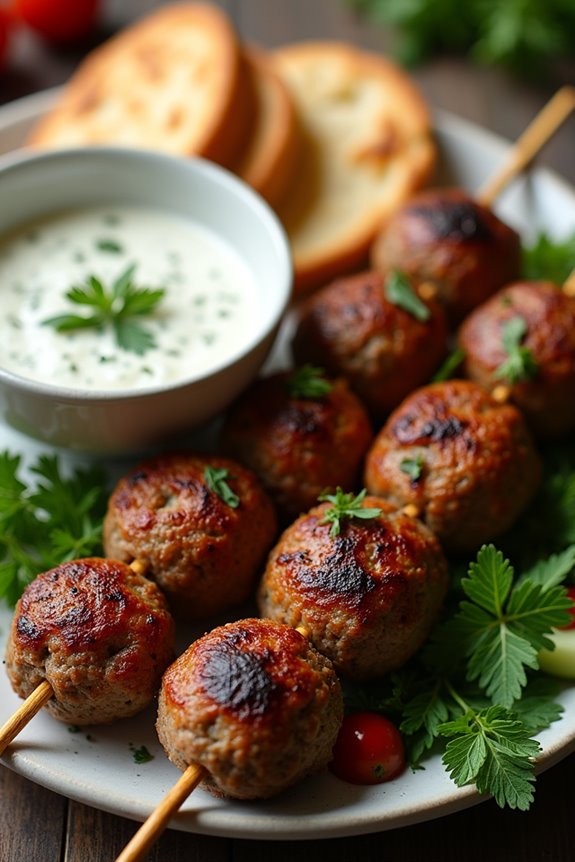
Indulge in the flavors of the Mediterranean with this delightful recipe for Lamb Kofta Kebabs with Yogurt Sauce. These juicy, spiced lamb kebabs aren’t only a feast for the senses but also a perfect dish for a romantic date night. The aromatic spices combined with tender lamb create a savory treat that pairs beautifully with the cooling, creamy yogurt sauce.
Whether you’re grilling outdoors or cooking on a stovetop, these kebabs will impress your partner and set the stage for a lovely evening.
To complement the succulent lamb, the yogurt sauce adds a revitalizing element to the dish. Flavored with fresh herbs, garlic, and a touch of lemon, this sauce enhances the kofta’s flavors and provides a delightful contrast. Serve these kebabs with warm pita bread, fresh vegetables, or a light salad for a complete Mediterranean experience that transports you straight to the sun-kissed shores of the Mediterranean.
Ingredients (Serves 4-6):
- 1 pound ground lamb
- 1 small onion, finely grated
- 2 cloves garlic, minced
- 1/4 cup fresh parsley, chopped
- 1/4 cup fresh mint, chopped
- 1 teaspoon ground cumin
- 1 teaspoon ground coriander
- 1 teaspoon paprika
- 1/2 teaspoon cinnamon
- Salt and pepper to taste
- 1 tablespoon olive oil
- 1 cup plain Greek yogurt
- 1 tablespoon lemon juice
- 1/2 teaspoon dried dill
- Pita bread, for serving
- Fresh vegetables, for serving (optional)
Cooking Instructions:
- Prepare the Kofta Mixture: In a large mixing bowl, combine the ground lamb, grated onion, minced garlic, parsley, mint, cumin, coriander, paprika, cinnamon, salt, and pepper. Use your hands to mix the ingredients thoroughly until well combined. This will guarantee that the spices are evenly distributed throughout the meat.
- Form the Kebabs: Divide the lamb mixture into equal portions (about 8-10) and shape each portion around a skewer to form long, oval-shaped kebabs. If you’re using wooden skewers, soak them in water for at least 30 minutes prior to use to prevent burning on the grill.
- Make the Yogurt Sauce: In a separate bowl, mix together the Greek yogurt, lemon juice, dried dill, and a pinch of salt. Stir until smooth and well combined. This sauce can be made ahead of time and refrigerated until ready to serve.
- Cook the Kebabs: Preheat your grill or stovetop grill pan over medium-high heat. Brush the kebabs lightly with olive oil to prevent sticking. Place the kebabs on the grill and cook for about 4-5 minutes on each side, or until they’re browned and cooked through, reaching an internal temperature of 160°F.
- Serve: Once cooked, remove the kebabs from the grill and let them rest for a few minutes before serving. Serve the kofta kebabs warm with the yogurt sauce on the side. Accompany with warm pita bread and fresh vegetables for a complete meal.
Extra Tips:
For added flavor and moisture, you can incorporate some finely chopped sun-dried tomatoes or feta cheese into the lamb mixture. If you prefer a spicier kick, consider adding a pinch of cayenne pepper or crushed red pepper flakes to the kofta mixture.
Remember to adjust the seasoning according to your taste, and don’t hesitate to experiment with different herbs in the yogurt sauce, such as cilantro or chives, for a unique twist. Enjoy your romantic Mediterranean evening!
Seafood Paella
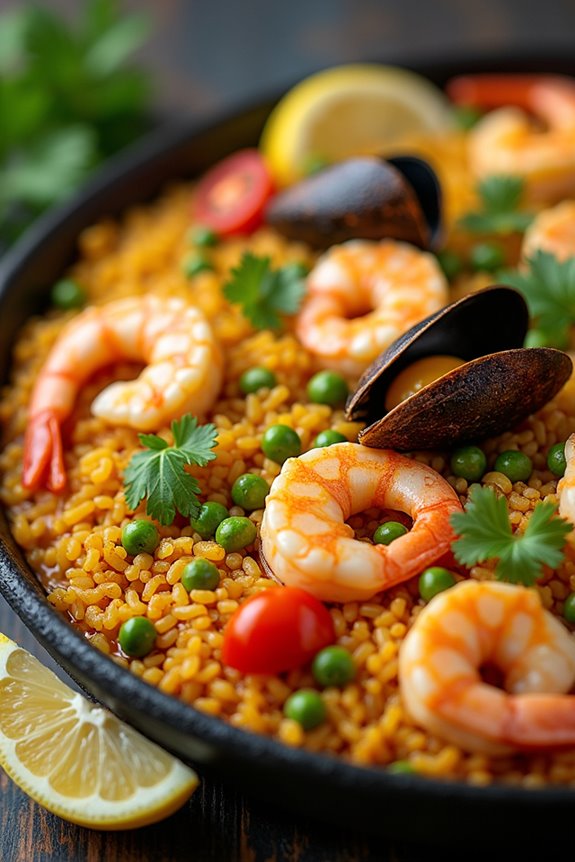
Seafood Paella is a classic Spanish dish that originates from the Valencia region, known for its vibrant colors, rich flavors, and impressive presentation. This one-pan meal is perfect for romantic Mediterranean date nights, as it not only tastes divine but also allows you to showcase your culinary skills without overwhelming yourself with too many dishes.
The combination of fresh seafood, aromatic spices, and a base of saffron-infused rice creates a delightful experience that will transport you and your partner straight to the sunny Mediterranean coast.
Crafting the perfect Seafood Paella requires a careful balance of ingredients and cooking techniques. Starting with a flavorful sofrito, or base of garlic, onion, and tomatoes, you’ll build layers of taste by adding the rice and broth, allowing it to absorb all the delicious flavors.
Once the seafood is added, the dish becomes a stunning centerpiece, with vibrant colors and enticing aromas that make it an irresistible option for your romantic evening.
Ingredients (Serves 4-6):
- 2 tablespoons olive oil
- 1 onion, finely chopped
- 4 garlic cloves, minced
- 1 red bell pepper, diced
- 2 tomatoes, diced
- 1 teaspoon smoked paprika
- 1/4 teaspoon saffron threads
- 1 1/2 cups Arborio rice
- 4 cups fish or chicken broth
- 1 cup white wine
- 1 pound shrimp, peeled and deveined
- 1 pound mussels, cleaned
- 1 pound calamari, sliced into rings
- 1 cup frozen peas
- Salt and pepper to taste
- Fresh parsley, chopped (for garnish)
- Lemon wedges (for serving)
Cooking Instructions:
- Prepare the Sofrito: In a large, deep skillet or paella pan, heat the olive oil over medium heat. Add the chopped onion and sauté until translucent, about 5 minutes. Stir in the minced garlic and diced red bell pepper, cooking for another 3 minutes until softened.
- Add Tomatoes and Spices: Mix in the diced tomatoes, smoked paprika, and saffron threads. Cook for an additional 5 minutes, stirring occasionally, until the mixture thickens and the tomatoes break down, creating a rich base for the paella.
- Incorporate Rice and Liquids: Add the Arborio rice to the skillet, stirring well to coat the grains with the sofrito. Pour in the fish or chicken broth and white wine, bringing the mixture to a boil. Season with salt and pepper. Reduce the heat to low and let it simmer uncovered for about 15 minutes, allowing the rice to absorb the liquid.
- Add the Seafood: Gently nestle the shrimp, mussels, and calamari into the rice mixture. Sprinkle the frozen peas on top. Cover the pan with a lid or aluminum foil, and cook for an additional 10-12 minutes until the seafood is cooked through, and the mussels have opened up.
- Rest and Serve: Once the seafood is cooked, remove the pan from the heat and let it rest for 5 minutes. This allows the flavors to meld together. Garnish with fresh parsley and serve with lemon wedges on the side for an extra zesty kick.
Extra Tips:
To elevate your Seafood Paella, consider marinating the shrimp in a mixture of olive oil, garlic, and lemon juice for an hour before cooking, as this will enhance their flavor.
Additionally, using a combination of seafood, such as lobster or clams, can add variety and richness to the dish.
Finally, verify you don’t stir the rice once you’ve added the broth; this will help create a desirable socarrat, the crispy layer of rice at the bottom of the pan that adds texture and flavor.
Enjoy your cooking experience and the delightful meal that follows!
Baklava With Honey Syrup
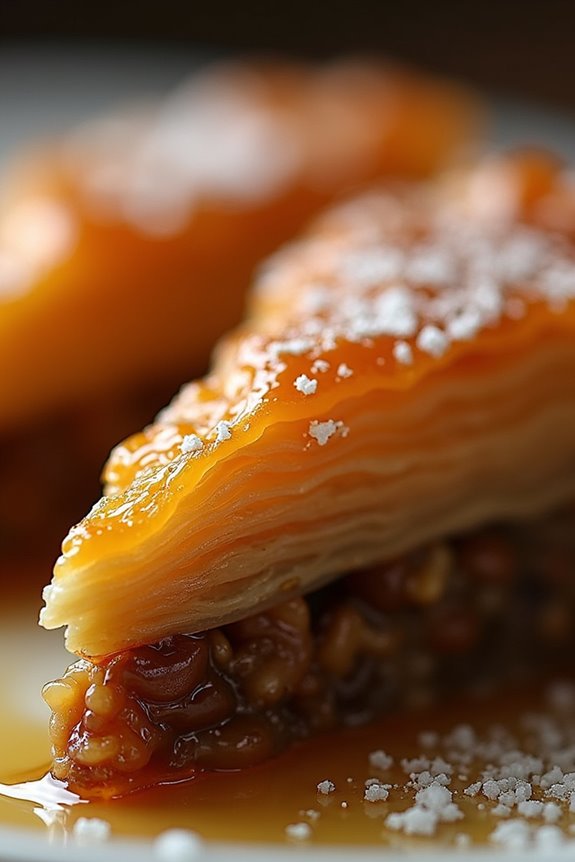
Baklava is a stunning dessert that hails from the Mediterranean region, bringing together layers of flaky phyllo pastry, rich nuts, and a sweet honey syrup. This decadent treat is perfect for a romantic date night, as its intricate preparation and beautiful presentation are bound to impress your partner.
The combination of textures—from the crunchy nuts to the soft, syrup-soaked pastry—creates a dish that’s both delightful and indulgent. Making baklava can seem intimidating at first, but with a little patience and attention to detail, you can master this classic recipe.
The key to a perfect baklava lies in the layering of the phyllo dough and the precise balance of sweetness in the syrup. Once you serve this warm, golden-brown pastry drizzled with honey syrup, you’ll find it hard to resist going back for seconds.
Ingredients (Serves 4-6):
- 1 package (16 oz) phyllo dough, thawed
- 2 cups unsalted butter, melted
- 2 cups walnuts, finely chopped
- 1 cup pistachios, finely chopped
- 1 cup granulated sugar
- 1 teaspoon ground cinnamon
- 1 cup water
- 1 cup honey
- 1 teaspoon vanilla extract
- Optional: powdered sugar for dusting
Cooking Instructions:
1. Prepare the Nut Mixture****: In a large mixing bowl, combine the finely chopped walnuts, pistachios, granulated sugar, and ground cinnamon. Mix well to make sure the nuts are evenly coated with the sugar and spice. This mixture will create the flavorful filling for your baklava.
2. Preheat the Oven: Preheat your oven to 350°F (175°C). Confirming your oven is at the right temperature before baking is vital for achieving that perfect golden color on your baklava.
3. Prepare the Phyllo Dough: Carefully unroll the thawed phyllo dough and cover it with a damp towel to prevent it from drying out. Phyllo can be delicate, and keeping it moist will help you work with it more easily.
4. Layer the Phyllo: Brush a 9×13 inch baking dish with melted butter. Lay one sheet of phyllo dough in the dish, then brush it lightly with more melted butter. Repeat this process, layering and buttering each sheet, for about 10 sheets.
This creates the base of your baklava, making sure it will have a crispy, flaky texture.
5. Add the Nut Filling****: Once you’ve layered about 10 sheets, evenly spread a third of the nut mixture over the phyllo layer. Continue layering and buttering more phyllo sheets (approximately 5 sheets), followed by another third of the nut mixture.
Repeat this process until you’ve used up all the nut mixture, finishing with about 10 more layers of phyllo on top, brushing each layer with butter.
6. Cut the Baklava: Before baking, use a sharp knife to cut the baklava into diamond or square shapes. This allows the syrup to penetrate and flavor each piece while it bakes.
7. Bake the Baklava: Place the baking dish in the preheated oven and bake for about 45-50 minutes, or until the baklava is golden brown and crisp. Keep an eye on it, as ovens can vary in temperature.
8. Prepare the Honey Syrup: While the baklava bakes, combine water, honey, sugar, and vanilla extract in a saucepan. Bring to a boil, then reduce heat and let it simmer for about 10 minutes.
Allow the syrup to cool slightly before using it on the baklava.
9. Soak the Baklava: Once the baklava is finished baking, immediately pour the warm honey syrup over the hot baklava, making sure every piece is generously soaked.
This step is essential for infusing flavor and sweetness into the layers.
10. Cool and Serve: Allow the baklava to cool completely before serving. Once cooled, you can dust it with powdered sugar if desired.
Cut along the original lines to separate the pieces, and enjoy this delicious Mediterranean dessert.
Extra Tips:
To elevate your baklava experience, feel free to experiment with different types of nuts or even add a hint of orange or lemon zest to the syrup for a citrusy twist.
Additionally, be patient when layering the phyllo dough; the more precise and careful you are, the better the final result will be. If you have leftovers, baklava can be stored in an airtight container at room temperature, where it will stay deliciously sweet for several days.
Enjoy your romantic Mediterranean date night!