

There’s something truly magical about Mediterranean cuisine that keeps me coming back for more.
The coastal flavors of grilled octopus with a hint of lemon or a refreshing scoop of tzatziki are simply irresistible.
I love the thought of enjoying a slice of herb-infused focaccia alongside the fragrant aroma of saffron risotto.
These recipes are a beautiful blend of tradition and the fresh essence of the sea.
Get ready to be inspired by what comes next!
Grilled Octopus With Lemon and Olive Oil

Grilled octopus is a beloved dish along the Mediterranean coast, celebrating the fresh flavors of the sea. This recipe highlights the tender and smoky qualities of octopus, perfectly complemented by the brightness of lemon and the richness of olive oil. Whether served as a starter or a main course, grilled octopus is bound to impress your guests with its unique texture and vibrant taste.
Preparing octopus may seem intimidating, but with the right technique, it can be a delightful and rewarding experience. The key to achieving tender octopus lies in the cooking method—boiling it before grilling guarantees that it becomes tender while still maintaining a slight char on the grill. This dish isn’t only a visual feast but also a symphony of flavors, making it a must-try for seafood lovers.
Ingredients (serving size: 4-6 people):
- 2 pounds octopus, cleaned
- 1 cup olive oil, plus more for grilling
- 4 cloves garlic, minced
- 1 lemon, zested and juiced
- 1 teaspoon red pepper flakes
- Salt and black pepper to taste
- Fresh parsley, chopped (for garnish)
- Lemon wedges (for serving)
Cooking Instructions:
1. Prepare the Octopus:
Begin by rinsing the cleaned octopus under cold water to remove any grit. Place the octopus in a large pot filled with water and bring it to a boil. You can add a pinch of salt to the water for flavor.
Once boiling, reduce the heat to a simmer and cook the octopus for about 45-60 minutes, or until tender when pierced with a fork.
2. Marinate the Octopus:
Once the octopus is cooked, transfer it to a cutting board and let it cool slightly. In a bowl, combine the olive oil, minced garlic, lemon zest, lemon juice, red pepper flakes, salt, and black pepper.
Cut the octopus into manageable pieces, such as tentacles or smaller sections, and toss them in the marinade, making sure they’re well coated. Allow the octopus to marinate for at least 30 minutes to absorb the flavors.
3. Preheat the Grill:
While the octopus is marinating, preheat your grill to medium-high heat. Make sure the grill grates are clean and lightly oiled to prevent sticking.
4. Grill the Octopus:
Once the grill is hot, remove the octopus from the marinade, allowing any excess marinade to drip off. Place the octopus pieces on the grill and cook for about 3-4 minutes on each side, or until they develop a nice char and grill marks.
Keep an eye on them to prevent burning.
5. Serve:
Remove the grilled octopus from the grill and transfer it to a serving platter. Drizzle with a little more olive oil, and garnish with freshly chopped parsley. Serve with lemon wedges on the side for an extra burst of flavor.
Extra Tips:
For the best results, choose a fresh octopus from a reputable source. When boiling, consider adding aromatics such as bay leaves or peppercorns to the water to enhance the flavor.
Additionally, if you want to save time, you can also use pre-cooked octopus, which can be found in specialty seafood markets. Just make sure to grill it briefly to achieve a nice char without overcooking. Enjoy your culinary adventure along the Mediterranean coast!
Classic Greek Tzatziki Sauce
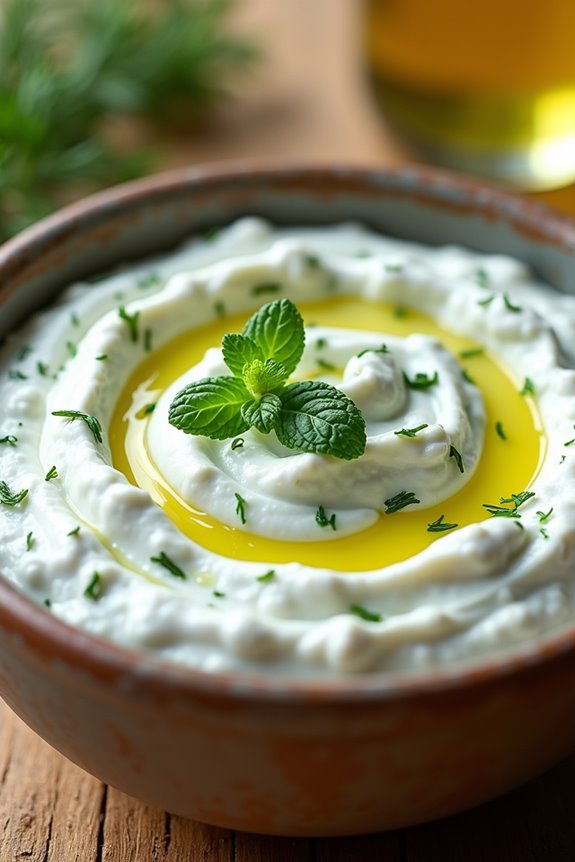
Classic Greek Tzatziki Sauce is a revitalizing and creamy condiment that perfectly complements a variety of Mediterranean dishes. This yogurt-based sauce combines the flavors of cucumber, garlic, and fresh herbs, making it an ideal accompaniment for grilled meats, pita bread, or as a dip for fresh vegetables.
Tzatziki isn’t only delicious but also incredibly easy to prepare, making it a staple in many Greek households and a must-try for anyone looking to infuse their meals with Mediterranean flair.
The key to a great tzatziki lies in the balance of flavors and the quality of the ingredients. Using thick, creamy Greek yogurt is vital, as it adds richness and a tangy note to the sauce. Fresh cucumbers provide a crisp texture and a burst of freshness, while garlic adds a punch of flavor.
Dill or mint can be used to enhance the taste, giving the tzatziki an aromatic touch that elevates any dish it accompanies. Enjoy this versatile sauce at your next gathering or family meal for a taste of the Mediterranean.
Ingredients (Serves 4-6):
- 2 cups Greek yogurt
- 1 medium cucumber
- 2-3 cloves garlic, minced
- 2 tablespoons olive oil
- 1 tablespoon white wine vinegar or lemon juice
- 1 tablespoon fresh dill or mint, chopped
- Salt, to taste
- Pepper, to taste
Cooking Instructions:
- Prepare the Cucumber: Start by washing the cucumber thoroughly. Peel the skin if desired, then grate the cucumber using a box grater or a food processor. Once grated, place the cucumber in a clean kitchen towel or cheesecloth and squeeze out excess moisture. This step is fundamental to prevent the tzatziki from becoming watery.
- Combine the Ingredients: In a medium mixing bowl, add the Greek yogurt. Then, incorporate the grated cucumber, minced garlic, olive oil, and white wine vinegar or lemon juice. Mix the ingredients together until they’re well combined.
- Season the Mixture: Add the chopped fresh dill or mint to the yogurt mixture. Season with salt and pepper to taste, adjusting according to your preference. Stir the mixture again to make sure the herbs and seasoning are evenly distributed.
- Chill Before Serving: Cover the bowl with plastic wrap or a lid and place it in the refrigerator. Allow the tzatziki to chill for at least 30 minutes to an hour. This resting period allows the flavors to meld together and enhances the overall taste of the sauce.
- Serve: Once chilled, give the tzatziki a good stir before serving. Transfer it to a serving dish and enjoy it alongside grilled meats, pita bread, or fresh vegetables.
Extra Tips:
For an extra layer of flavor, consider adding a splash of lemon juice or zest to the tzatziki before chilling it. If you prefer a smoother texture, you can blend the tzatziki in a food processor for a few seconds.
Additionally, using fresh herbs instead of dried will enhance the sauce’s flavor profile. Tzatziki can be stored in an airtight container in the refrigerator for up to three days, making it a great make-ahead option for gatherings or meals throughout the week.
Mediterranean Quinoa Salad
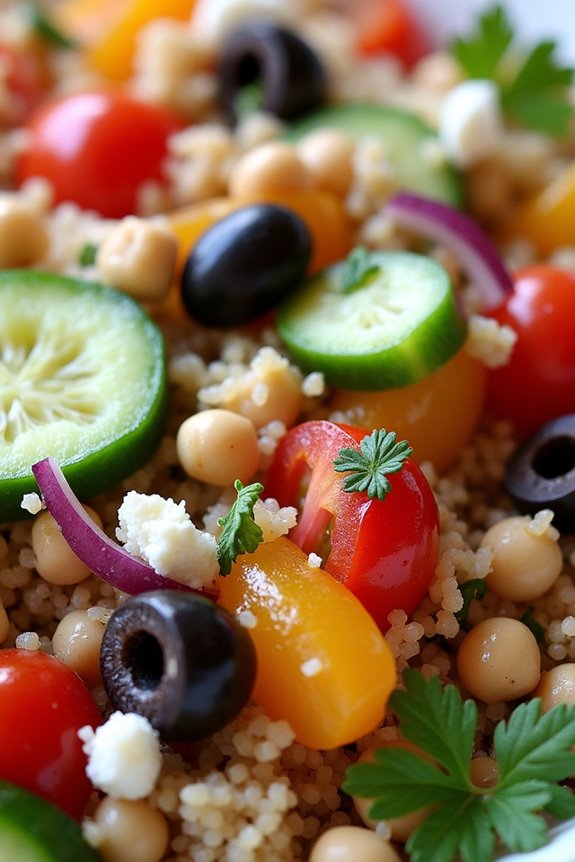
Mediterranean Quinoa Salad is a vibrant and nutritious dish that captures the essence of the Mediterranean diet. Rich in flavors and textures, this salad isn’t only filling but also packed with essential nutrients. It’s an ideal choice for a light lunch, a side dish at a barbecue, or a revitalizing addition to any meal. The combination of protein-rich quinoa, fresh vegetables, and zesty dressing makes it a crowd-pleaser that can be enjoyed year-round.
This salad is incredibly versatile, allowing for substitutions based on personal preferences or seasonal ingredients. You can easily customize it by adding your favorite vegetables, proteins, or even nuts for an extra crunch. Whether you’re entertaining guests or preparing a meal for yourself, this Mediterranean Quinoa Salad is sure to impress with its beautiful presentation and delightful flavors.
Ingredients (serves 4-6):
- 1 cup quinoa
- 2 cups water or vegetable broth
- 1 cup cherry tomatoes, halved
- 1 cucumber, diced
- 1 bell pepper (red or yellow), diced
- 1/2 red onion, finely chopped
- 1 cup canned chickpeas, rinsed and drained
- 1/2 cup feta cheese, crumbled (optional)
- 1/4 cup fresh parsley, chopped
- 1/4 cup olives, sliced (Kalamata or green)
- Juice of 1 lemon
- 1/4 cup extra virgin olive oil
- 1 teaspoon dried oregano
- Salt and pepper to taste
Cooking Instructions:
- Rinse the Quinoa: Start by rinsing the quinoa under cold water in a fine-mesh strainer. This step is essential as it removes the natural coating called saponin, which can impart a bitter flavor. Shake off the excess water.
- Cook the Quinoa: In a medium-sized pot, combine the rinsed quinoa and water (or vegetable broth) and bring to a boil over medium-high heat. Once boiling, reduce the heat to low, cover, and let it simmer for about 15 minutes, or until the quinoa has absorbed all the liquid and is tender. Remove from heat and let it sit covered for 5 minutes before fluffing it with a fork.
- Prepare the Vegetables: While the quinoa is cooking, prepare the vegetables. Halve the cherry tomatoes, dice the cucumber and bell pepper, finely chop the red onion, and rinse the chickpeas. If using feta cheese, crumble it into small pieces.
- Make the Dressing: In a small bowl, whisk together the lemon juice, olive oil, dried oregano, salt, and pepper. Adjust the seasoning to taste, ensuring a balanced flavor that complements the fresh ingredients.
- Combine Ingredients: In a large mixing bowl, combine the cooked quinoa, halved cherry tomatoes, diced cucumber, bell pepper, chopped red onion, chickpeas, olives, and parsley. Pour the dressing over the salad and gently toss everything together until well mixed.
- Add Feta and Serve: If using, sprinkle the crumbled feta cheese over the top and give the salad one last gentle toss. Taste and adjust seasoning if necessary. Serve the salad chilled or at room temperature.
Extra Tips:
For added flavor and texture, consider incorporating roasted vegetables or grilled chicken into your Mediterranean Quinoa Salad.
This dish can also be made in advance, as the flavors meld beautifully over time. Store it in an airtight container in the refrigerator for up to three days, giving you a convenient and healthy meal option throughout the week.
Enjoy the versatility of this salad by experimenting with different herbs or spices to suit your taste!
Spanish Paella With Seafood
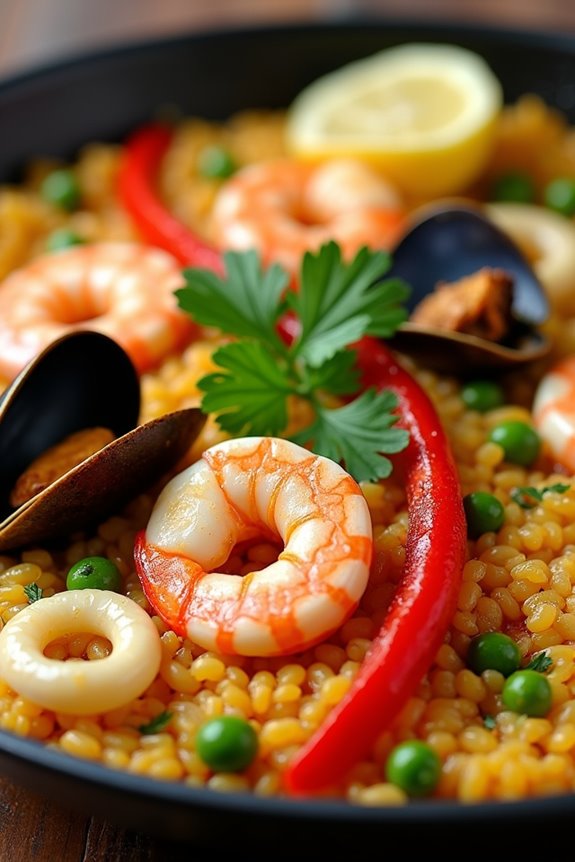
Spanish Paella is a vibrant and flavorful dish that hails from the coastal regions of Spain, particularly Valencia. This iconic rice dish is renowned for its beautiful presentation and rich flavors, combining the freshest seafood with aromatic spices and vegetables.
Traditionally cooked in a wide, shallow pan, paella isn’t just a meal; it’s a celebration, often enjoyed during gatherings with family and friends. The combination of saffron, paprika, and a variety of seafood creates a delightful experience for the palate, making it a must-try for anyone looking to savor the essence of Mediterranean cuisine.
When preparing Spanish Paella with Seafood, the key is to use high-quality ingredients and allow the rice to absorb all the flavors. Whether it’s shrimp, mussels, or calamari, each seafood element adds its own unique taste to the dish.
With its colorful presentation and mouthwatering aroma, this paella will surely impress your guests and transport them straight to the Mediterranean coast. Let’s plunge into making this delicious dish!
Ingredients (Serving Size: 4-6 people)
- 1 ½ cups Bomba or Arborio rice
- 4 cups seafood stock (preferably homemade)
- ½ teaspoon saffron threads
- 1 teaspoon smoked paprika
- ¼ cup olive oil
- 1 medium onion, finely chopped
- 4 cloves garlic, minced
- 1 red bell pepper, diced
- 1 cup green peas (fresh or frozen)
- 12 large shrimp, peeled and deveined
- 12 mussels, cleaned and debearded
- 6 oz calamari, sliced into rings
- Salt and pepper to taste
- Lemon wedges for garnish
- Fresh parsley, chopped for garnish
Cooking Instructions
1. Prepare the seafood stock: In a saucepan, heat the seafood stock over medium heat. Add the saffron threads to the stock and let it infuse, allowing the saffron to release its vibrant color and flavor. Keep this mixture warm throughout the cooking process.
2. Sauté the vegetables: In a large paella pan or a wide skillet, heat the olive oil over medium heat. Add the chopped onion and garlic, sautéing until they become translucent and fragrant, about 3-4 minutes.
Next, stir in the diced red bell pepper and cook for another 2 minutes until slightly softened.
3. Add the rice and spices: Add the Bomba or Arborio rice to the pan, stirring well to coat the rice with the oil and vegetable mixture. Cook for about 2 minutes, stirring occasionally.
Then, sprinkle in the smoked paprika and mix thoroughly to combine the flavors.
4. Pour in the stock: Carefully pour the warm seafood stock into the pan, ensuring the rice is evenly distributed. Season with salt and pepper to taste.
Bring the mixture to a gentle simmer and avoid stirring it from this point forward, as this will help create a crispy bottom layer known as “socarrat.”
5. Incorporate the seafood: After about 10 minutes of cooking, add the shrimp, mussels, and calamari evenly over the top of the rice. Press them gently into the rice without stirring the mixture.
Continue to cook for an additional 10-12 minutes, or until the seafood is cooked through and the rice is tender.
6. Finish and serve: Once the rice has absorbed all the liquid and the seafood is cooked, remove the pan from heat. Cover it with a clean kitchen towel or aluminum foil and let it rest for about 5 minutes.
This allows the flavors to meld together. Garnish with green peas, lemon wedges, and chopped parsley before serving.
Extra Tips
When making Spanish Paella, it’s important to use a wide, shallow pan to allow for even cooking and better flavor absorption. If you can find it, Bomba rice is preferred for its ability to absorb liquid without becoming mushy.
For an authentic touch, feel free to add other seafood like clams or lobster, as well as vegetables like artichokes or green beans. Finally, don’t skip the resting step after cooking; it’s essential for achieving the perfect texture and flavor in your paella. Enjoy your culinary journey to Spain!
Herb-Infused Focaccia Bread
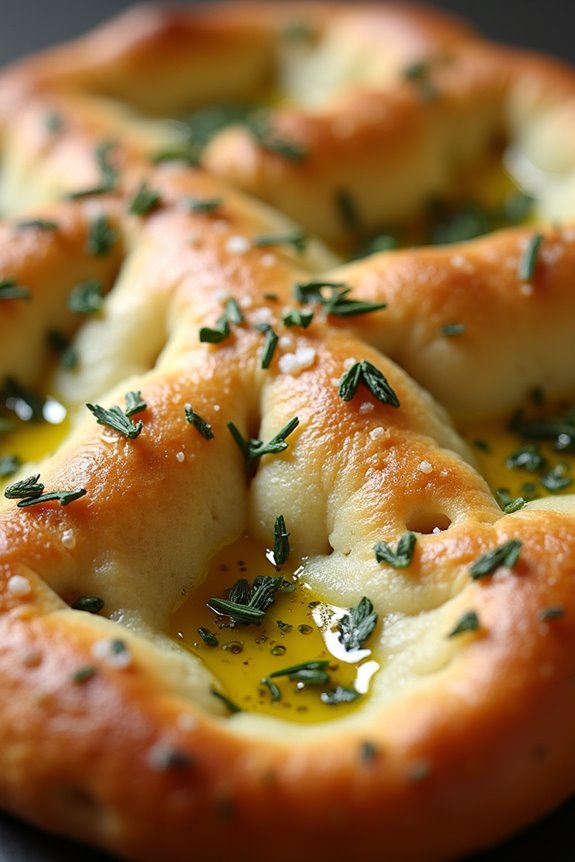
Focaccia bread, a staple of Mediterranean cuisine, is known for its rich flavor, soft texture, and delightful aroma. This easy-to-make bread is perfect for pairing with soups, salads, or simply enjoyed on its own with a drizzle of olive oil. Infused with fresh herbs, this version elevates the classic focaccia to a new level, making it an aromatic centerpiece for your meal. The combination of herbs like rosemary, thyme, and oregano brings a taste of the Mediterranean right to your kitchen.
Making herb-infused focaccia bread requires minimal ingredients and a little bit of patience, but the result is a beautifully risen, golden-brown loaf that will impress your family and friends. The dough is simple to prepare, and once you let it rise, you can customize the toppings to suit your taste.
Whether you choose to use sea salt, cherry tomatoes, olives, or a sprinkling of cheese, the possibilities are endless, making this focaccia a versatile addition to any culinary repertoire.
Ingredients (Serves 4-6)
- 4 cups all-purpose flour
- 2 teaspoons sea salt
- 1 packet (2 1/4 teaspoons) active dry yeast
- 1 3/4 cups warm water (about 110°F)
- 1/4 cup extra-virgin olive oil (plus extra for drizzling)
- 2 tablespoons fresh rosemary, chopped
- 1 tablespoon fresh thyme, chopped
- 1 tablespoon fresh oregano, chopped
- Coarse sea salt for topping
Cooking Instructions
- Activate the Yeast: In a small bowl, combine the warm water and active dry yeast. Let it sit for about 5-10 minutes until it becomes foamy. This indicates that the yeast is active and ready to use.
- Prepare the Dough: In a large mixing bowl, combine the all-purpose flour and sea salt. Make a well in the center and pour in the activated yeast mixture along with the 1/4 cup of extra-virgin olive oil. Mix the ingredients together until a shaggy dough forms.
- Knead the Dough: On a lightly floured surface, knead the dough for about 8-10 minutes until it becomes smooth and elastic. If the dough is too sticky, add a little more flour as needed.
- First Rise: Place the kneaded dough in a greased bowl, cover it with a damp cloth, and let it rise in a warm place for about 1-2 hours or until it has doubled in size.
- Prepare for Baking: After the dough has risen, punch it down to release the air. Grease a baking sheet or a shallow pan with olive oil. Spread the dough onto the prepared pan, gently stretching it to fit the shape.
- Second Rise: Cover the dough again with a damp cloth and let it rise for another 30 minutes. This will give it a light and airy texture.
- Add Toppings: Preheat your oven to 425°F (220°C). Once the dough has risen, use your fingers to create dimples all over the surface. Drizzle with olive oil, sprinkle the chopped herbs, and add coarse sea salt as desired.
- Bake the Focaccia: Place the focaccia in the preheated oven and bake for 20-25 minutes or until it’s golden brown and sounds hollow when tapped on the bottom.
- Cool and Serve: Remove the focaccia from the oven and let it cool on a wire rack for a few minutes. Slice it into squares or wedges, and serve warm.
Extra Tips
For added flavor, feel free to experiment with different herbs or toppings such as caramelized onions, roasted garlic, or even cheese.
If you want to make the focaccia ahead of time, you can prepare the dough and let it rise in the refrigerator overnight, which will enhance the flavor. Just remember to bring it back to room temperature and allow for the second rise before baking.
Enjoy your herb-infused focaccia bread as a delightful accompaniment to your Mediterranean meals!
Roasted Eggplant With Tahini
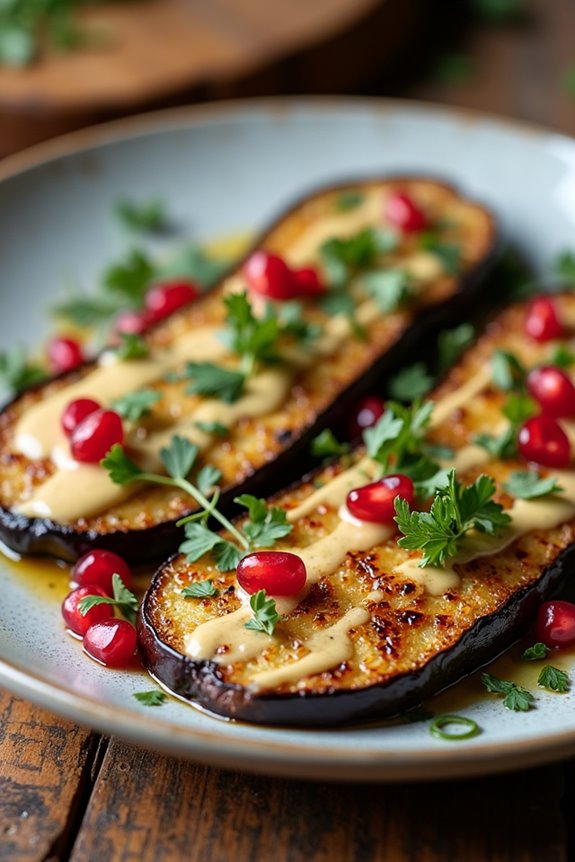
Roasted Eggplant With Tahini is a delectable Mediterranean dish that showcases the rich flavors of eggplant paired with a creamy, nutty tahini sauce. This dish isn’t only a feast for the eyes with its vibrant colors, but it also offers a satisfying texture and a harmonious blend of flavors. The eggplant is perfectly roasted until tender and caramelized, providing a smoky depth that beautifully complements the tangy tahini dressing.
This recipe makes a perfect side dish for grilled meats, a delightful addition to a mezze platter, or even a light vegetarian main course. The preparation of Roasted Eggplant With Tahini is straightforward, making it accessible for home cooks of all levels. Whether you’re serving it at a dinner party or enjoying a casual family meal, the combination of roasted eggplant and tahini is sure to impress.
With a few simple ingredients and a little bit of time, you can create a dish that captures the essence of the Mediterranean coast right in your own kitchen.
Ingredients (serves 4-6):
- 2 medium-sized eggplants
- 4 tablespoons olive oil
- 1 teaspoon salt
- 1 teaspoon black pepper
- 1 teaspoon smoked paprika
- 1/2 cup tahini
- 2 tablespoons lemon juice
- 2 cloves garlic, minced
- 1/4 cup water (adjust for desired consistency)
- Fresh parsley, chopped (for garnish)
- Pomegranate seeds (for garnish, optional)
Cooking Instructions:
- Preheat the Oven: Begin by preheating your oven to 400°F (200°C). This high temperature will help to achieve a nice caramelization on the eggplant.
- Prepare the Eggplants: Wash and dry the eggplants. Cut them in half lengthwise and score the flesh in a crisscross pattern without cutting through the skin. This scoring will help the eggplant absorb flavors and cook evenly.
- Season the Eggplants: In a small bowl, mix together olive oil, salt, black pepper, and smoked paprika. Brush this mixture generously over the cut sides of the eggplants to enhance their flavor during roasting.
- Roast the Eggplants: Place the seasoned eggplants cut-side down on a baking sheet lined with parchment paper. Roast them in the preheated oven for about 25-30 minutes, or until they’re tender and the skin is slightly blistered.
- Make the Tahini Sauce: While the eggplants are roasting, prepare the tahini sauce. In a mixing bowl, combine tahini, lemon juice, minced garlic, and water. Whisk until smooth and creamy, adjusting the water as needed to reach your desired consistency.
- Assemble the Dish: Once the eggplants are roasted, remove them from the oven and let them cool slightly. Flip them over so the cut side is facing up. Drizzle the tahini sauce generously over the eggplants.
- Garnish and Serve: Sprinkle the chopped parsley over the top for a fresh touch. If desired, add pomegranate seeds for a burst of color and sweetness. Serve warm or at room temperature.
Extra Tips:
When roasting eggplant, choose firm, glossy specimens for the best texture. If you want less bitterness, you can sprinkle the cut eggplant with salt and let it sit for about 30 minutes before rinsing and patting them dry. This process draws out excess moisture and bitterness.
Additionally, feel free to customize the tahini sauce by adding spices or herbs like cumin or cilantro for an extra flavor boost. Enjoy your culinary journey through the Mediterranean with this delightful dish!
Fresh Caprese Salad With Balsamic Glaze
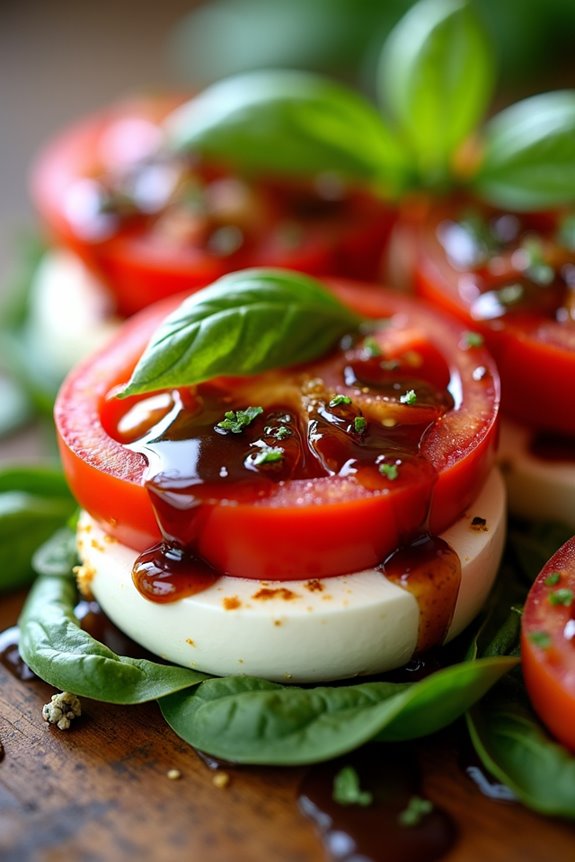
The Fresh Caprese Salad with Balsamic Glaze is a vibrant and revitalizing dish that beautifully showcases the flavors of the Mediterranean. Originating from the island of Capri, this salad combines the rich taste of fresh mozzarella, the juiciness of ripe tomatoes, and the aromatic fragrance of basil.
The addition of balsamic glaze enhances the flavors, adding a sweet yet tangy finish that elevates this simple salad into a delightful appetizer or side dish. Perfect for warm summer days or as an accompaniment to grilled meats, this salad embodies the essence of Mediterranean cuisine.
Preparing a Fresh Caprese Salad isn’t only quick and easy, but it also allows for creativity and personalization. You can choose the freshest tomatoes available, whether they’re heirloom, cherry, or vine-ripened, and select high-quality mozzarella for the best taste.
The drizzle of balsamic glaze adds a sophisticated touch, making it an ideal dish for both casual meals and dinner parties. Gather your ingredients, and let’s plunge into making this classic Mediterranean salad!
Ingredients (Serves 4-6):
- 4 large ripe tomatoes
- 12 ounces fresh mozzarella cheese
- 1 cup fresh basil leaves
- 1/4 cup extra virgin olive oil
- 1/4 cup balsamic glaze
- Salt and freshly ground black pepper to taste
Cooking Instructions:
- Prepare the Ingredients: Start by gathering all your ingredients. Rinse the tomatoes under cold water and pat them dry with a clean towel. If you’re using larger tomatoes, slice them into thick rounds. For cherry tomatoes, you can simply halve them. Set the tomatoes aside.
- Slice the Mozzarella: Take the fresh mozzarella cheese and slice it into thick rounds, similar in thickness to the tomato slices. If you’re using bocconcini (small mozzarella balls), you can leave them whole or slice them in half.
- Assemble the Salad: On a large serving platter or individual plates, alternate layers of tomato slices and mozzarella slices, overlapping them slightly for visual appeal. Tuck fresh basil leaves between the layers to add color and flavor. You can also tear the basil leaves for a more rustic look.
- Drizzle with Olive Oil and Balsamic Glaze: Once the salad is assembled, drizzle the extra virgin olive oil generously over the top. Follow with a drizzle of balsamic glaze, allowing it to cascade over the salad. Be careful not to overdo the glaze, as a little goes a long way in flavor.
- Season and Serve: Finally, sprinkle a pinch of salt and freshly ground black pepper over the salad to enhance the flavors. Serve immediately, allowing guests to enjoy the freshness of the ingredients.
Extra Tips:
For an elevated flavor experience, consider using heirloom tomatoes, which come in various colors and have unique tastes. You can also make your own balsamic reduction by simmering balsamic vinegar until it thickens, which gives a more intense flavor.
Additionally, serve the salad chilled for a revitalizing bite on hot days, and pair it with crusty bread or grilled meats for a complete Mediterranean meal. Enjoy your Fresh Caprese Salad with Balsamic Glaze!
Baked Feta With Cherry Tomatoes
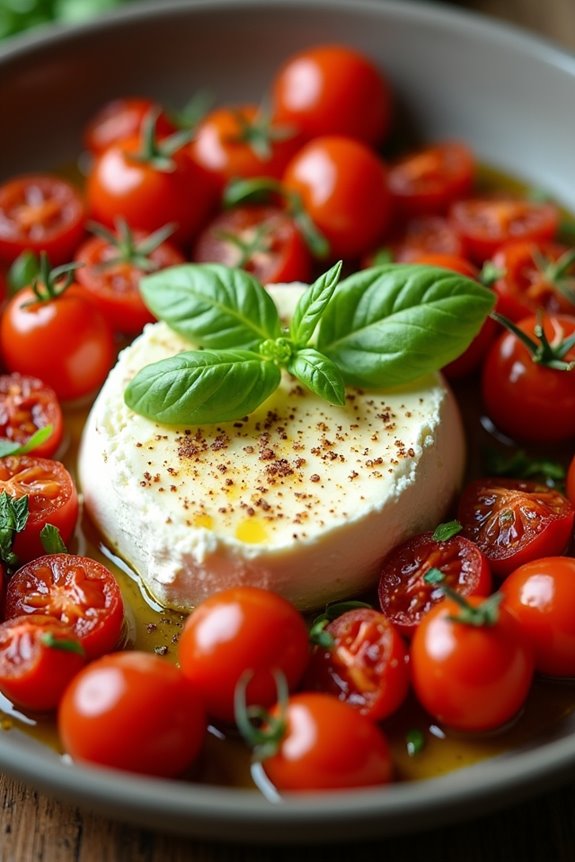
Baked Feta with Cherry Tomatoes is a delightful Mediterranean dish that combines the creamy, tangy flavors of feta cheese with the sweetness of roasted cherry tomatoes. This simple yet elegant recipe highlights the best of Mediterranean ingredients, making it a perfect appetizer or a side dish for any meal.
The warmth of the oven enhances the flavors and creates a savory aroma that will fill your kitchen, inviting everyone to the table. This dish isn’t only easy to prepare but also requires minimal ingredients, making it an ideal choice for both busy weeknights and special gatherings.
The baked feta becomes wonderfully soft and spreadable, while the cherry tomatoes burst with flavor, resulting in a delicious combination that pairs beautifully with crusty bread or fresh vegetables. Whether you’re hosting a dinner party or simply enjoying a cozy night in, Baked Feta with Cherry Tomatoes is sure to captivate.
Ingredients (Serves 4-6):
- 1 block (8 oz) of feta cheese
- 2 cups of cherry tomatoes
- 3 tablespoons of olive oil
- 2 cloves of garlic, minced
- 1 teaspoon of dried oregano
- Salt and pepper, to taste
- Fresh basil or parsley, for garnish (optional)
- Crusty bread or crackers, for serving
Cooking Instructions:
- Preheat the Oven: Start by preheating your oven to 400°F (200°C). This will guarantee that your dish cooks evenly and the feta and tomatoes become nicely roasted.
- Prepare the Ingredients: In a baking dish, place the block of feta cheese in the center. Surround it with the cherry tomatoes, making sure they’re evenly distributed around the cheese.
- Add Flavor: Drizzle the olive oil over the feta and cherry tomatoes. Sprinkle the minced garlic, dried oregano, salt, and pepper over the top, guaranteeing that everything is well-seasoned. This step infuses the dish with rich Mediterranean flavors.
- Bake the Dish: Place the baking dish in the preheated oven and bake for about 25-30 minutes, or until the feta is soft and slightly golden and the cherry tomatoes are bursting. Keep an eye on it to prevent overcooking.
- Serve: Once baked, remove the dish from the oven and let it cool for a few minutes. Garnish with fresh basil or parsley if desired. Serve warm with crusty bread or crackers for dipping into the creamy feta and juicy tomatoes.
Extra Tips:
For an extra depth of flavor, consider adding a splash of balsamic vinegar or a sprinkle of red pepper flakes before baking. You can also experiment with different herbs such as thyme or rosemary to personalize the dish to your taste.
This recipe is highly versatile, so feel free to add other vegetables like bell peppers or zucchini for a heartier option. Enjoy this delicious Mediterranean dish as part of a larger spread or on its own for a delightful snack!
Moroccan Spiced Fish Tacos
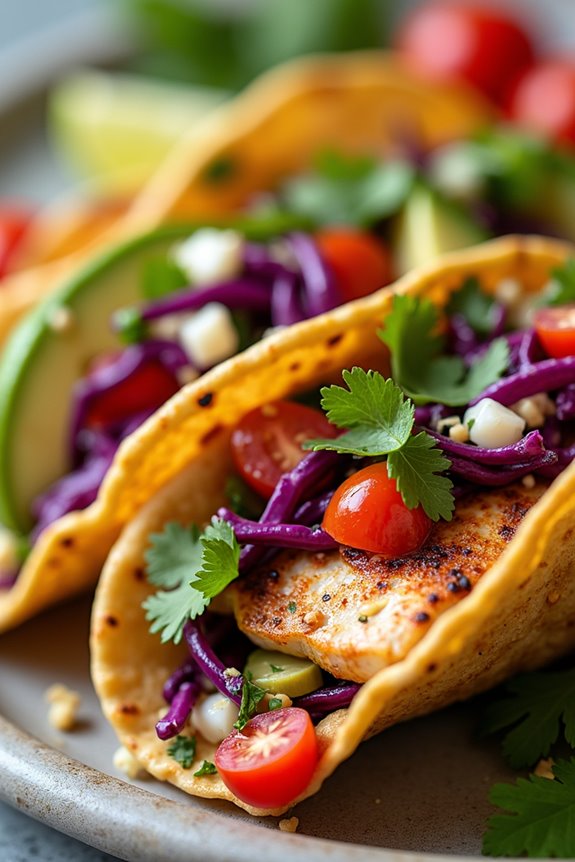
Moroccan Spiced Fish Tacos offer a delicious twist on traditional tacos, blending the vibrant flavors of Moroccan spices with fresh fish. This dish is perfect for a casual gathering or a family dinner, bringing a taste of the Mediterranean right to your table. The fish is marinated in a blend of aromatic spices, grilled to perfection, and served in warm tortillas with a variety of toppings, making each bite a burst of flavor.
The combination of spices such as cumin, coriander, and paprika gives the fish a unique and tantalizing taste, while the fresh vegetables and zesty sauce add a revitalizing contrast. These tacos not only delight the palate but also provide a colorful presentation that’s sure to impress your guests. Serve them with a side of tangy slaw or a light salad for a complete meal that celebrates the essence of Mediterranean coastal cuisine.
Ingredients (Serves 4-6):
- 1.5 pounds white fish fillets (such as cod, tilapia, or snapper)
- 2 tablespoons olive oil
- 1 tablespoon ground cumin
- 1 tablespoon ground coriander
- 1 tablespoon smoked paprika
- 1 teaspoon ground cinnamon
- 1 teaspoon cayenne pepper (adjust to taste)
- Salt and pepper to taste
- 8-10 small corn or flour tortillas
- 1 cup shredded cabbage (green or red)
- 1 avocado, sliced
- 1 cup diced tomatoes
- 1/2 cup chopped fresh cilantro
- Lime wedges for serving
- 1/2 cup Greek yogurt or sour cream (optional, for sauce)
- 1 tablespoon lemon juice (optional, for sauce)
Cooking Instructions:
- Prepare the Marinate: In a small bowl, combine the olive oil, ground cumin, ground coriander, smoked paprika, ground cinnamon, cayenne pepper, salt, and pepper. Mix well to create a marinade.
- Marinate the Fish: Place the fish fillets in a shallow dish and pour the marinade over them, ensuring they’re well coated. Cover the dish with plastic wrap and let it marinate in the refrigerator for at least 30 minutes, allowing the flavors to meld.
- Heat the Grill or Skillet: Preheat your grill or a large skillet over medium-high heat. If using a grill, oil the grates to prevent the fish from sticking. For a skillet, add a small amount of olive oil to coat the bottom.
- Cook the Fish: Remove the fish from the marinade and place it on the grill or skillet. Cook for about 4-5 minutes per side, or until the fish flakes easily with a fork and is cooked through. Be careful not to overcook it.
- Warm the Tortillas: While the fish is cooking, warm the tortillas either on the grill for about 30 seconds per side or in a microwave wrapped in a damp paper towel for about 15-20 seconds until soft.
- Assemble the Tacos: Once the fish is cooked, break it into large pieces and place it in the warm tortillas. Top with shredded cabbage, avocado slices, diced tomatoes, and chopped cilantro. If desired, drizzle with Greek yogurt or sour cream mixed with lemon juice for added creaminess.
- Serve: Serve the tacos with lime wedges on the side for squeezing over the top just before eating. Enjoy your Moroccan Spiced Fish Tacos with friends and family!
Extra Tips:
For an added layer of flavor, consider grilling some bell peppers or onions alongside the fish to use as additional toppings.
If you prefer a spicier kick, add sliced jalapeños or a drizzle of hot sauce to the tacos.
Don’t hesitate to experiment with different types of fish or even shrimp for variation.
Make sure to serve the tacos immediately while the fish is warm and the tortillas are soft for the best experience!
Lemon Garlic Shrimp Pasta
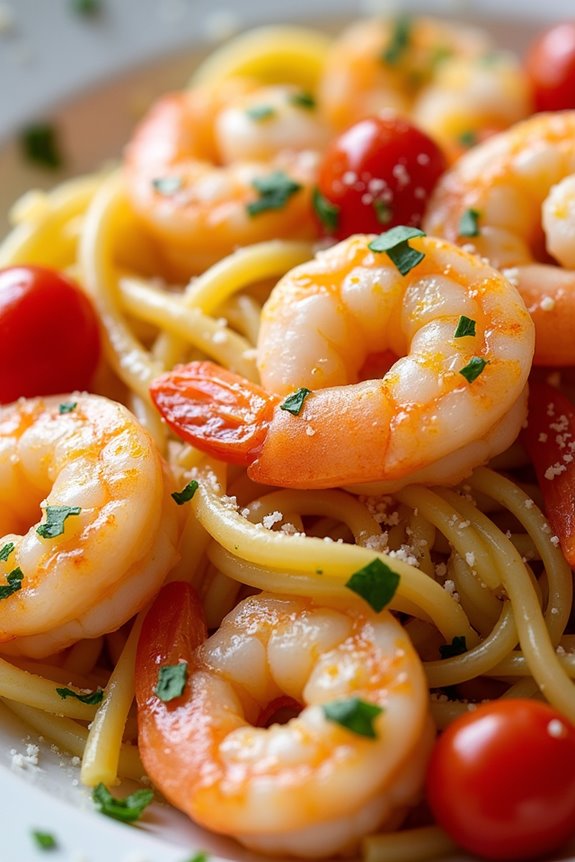
Lemon Garlic Shrimp Pasta is a delightful dish that perfectly captures the essence of Mediterranean cuisine. The combination of succulent shrimp, fragrant garlic, and a bright splash of lemon juice creates a melody of flavors that dance on your palate. This dish isn’t only quick and easy to prepare, making it ideal for a weeknight dinner, but it also brings a touch of elegance to any occasion.
Paired with a side salad or crusty bread, this pasta is sure to impress family and friends alike. The beauty of Lemon Garlic Shrimp Pasta lies in its simplicity. With just a handful of fresh ingredients, you can whip up a delicious meal in no time. The key to achieving the perfect balance of flavors is to use high-quality olive oil and fresh herbs, which will elevate the dish and make it truly memorable.
Whether you’re cooking for a crowd or just a cozy dinner for two, this recipe is sure to become a favorite in your culinary repertoire.
Ingredients (serving size: 4-6 people)
- 12 ounces linguine or spaghetti
- 1 pound large shrimp, peeled and deveined
- 4 tablespoons olive oil
- 4 cloves garlic, minced
- 1 teaspoon red pepper flakes (optional)
- Zest and juice of 1 lemon
- 1 cup cherry tomatoes, halved
- 1/2 cup fresh parsley, chopped
- Salt and pepper, to taste
- Grated Parmesan cheese, for serving (optional)
Cooking Instructions
- Cook the Pasta: In a large pot, bring salted water to a boil. Add the linguine or spaghetti and cook according to the package instructions until al dente. Reserve about 1 cup of the pasta cooking water, then drain the pasta and set aside.
- Sauté the Shrimp: In a large skillet over medium heat, add the olive oil. Once the oil is hot, add the minced garlic and sauté for about 1 minute until fragrant but not browned. Add the shrimp to the skillet, season with salt and pepper, and cook for about 2-3 minutes on each side until the shrimp are pink and opaque.
- Add Flavorings: Once the shrimp are cooked, add the red pepper flakes (if using), lemon zest, and lemon juice to the skillet. Stir well to combine, allowing the flavors to meld for about 1 minute.
- Combine Pasta and Sauce: Add the cooked pasta and halved cherry tomatoes to the skillet. Toss everything together gently, adding reserved pasta water a little at a time to help create a light sauce that coats the pasta evenly.
- Finish with Herbs: Remove the skillet from heat and stir in the chopped parsley. Taste and adjust seasoning with more salt, pepper, or lemon juice if desired.
- Serve: Plate the Lemon Garlic Shrimp Pasta in bowls, and if desired, sprinkle with grated Parmesan cheese before serving. Enjoy your delicious and vibrant Mediterranean dish!
Extra Tips
For the best flavor, consider using fresh shrimp rather than frozen, as they tend to have a more pronounced taste and better texture. If you want to add more depth to the dish, feel free to incorporate other vegetables such as spinach or bell peppers.
Additionally, a splash of white wine added to the skillet after sautéing the shrimp can enhance the sauce beautifully. Remember to serve the pasta immediately, as it tastes best fresh!
Stuffed Bell Peppers With Couscous
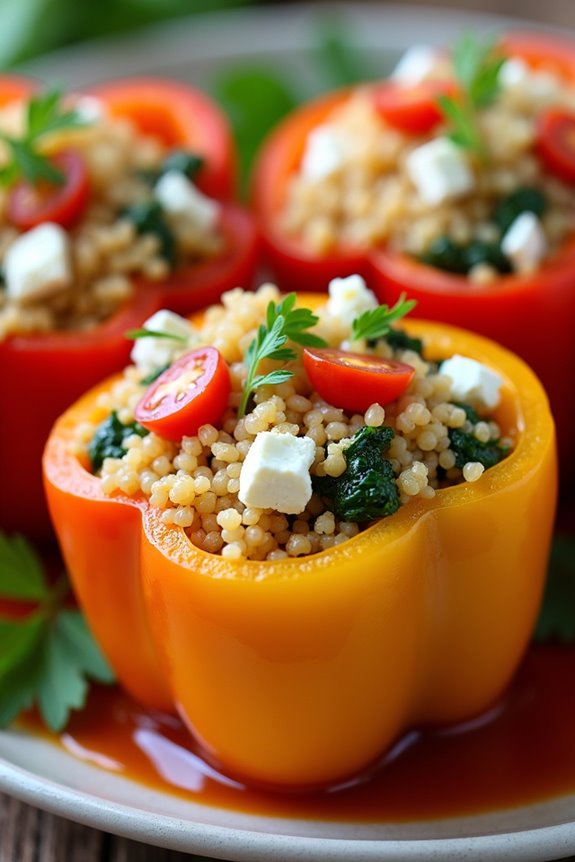
Stuffed bell peppers with couscous is a vibrant and flavorful dish that captures the essence of Mediterranean cuisine. This recipe combines the sweetness of bell peppers with the nutty flavor of couscous, which is often enhanced with aromatic herbs and spices. The dish isn’t only visually appealing but also nutritious, making it a perfect option for a family dinner or a gathering with friends.
You can easily customize the filling based on your preferences or what you have on hand, allowing for endless variations that cater to both vegetarian and meat-eating guests.
Cooking stuffed bell peppers is a straightforward process that involves parboiling the peppers, preparing the couscous filling, and then baking until everything is heated through and the peppers are tender. This dish can be served as a main course or as a side, making it versatile for any meal. With the right blend of ingredients and a little bit of time, you can create a dish that’s sure to impress while also being easy to prepare.
Ingredients (serving size of 4-6 people):
- 4 large bell peppers (any color)
- 1 cup couscous
- 1 1/4 cups vegetable broth or water
- 1 small onion, finely chopped
- 2 cloves garlic, minced
- 1 cup cherry tomatoes, halved
- 1 cup spinach, chopped
- 1 teaspoon dried oregano
- 1 teaspoon paprika
- 1/2 teaspoon salt
- 1/4 teaspoon black pepper
- 1/2 cup feta cheese, crumbled (optional)
- 1/4 cup fresh parsley, chopped (for garnish)
- Olive oil for drizzling
Cooking Instructions:
- Prepare the Bell Peppers: Preheat your oven to 375°F (190°C). Cut the tops off the bell peppers and remove the seeds and membranes. If desired, you can lightly blanch the peppers in boiling water for about 5 minutes to soften them slightly. Drain and set aside.
- Cook the Couscous: In a medium saucepan, bring the vegetable broth (or water) to a boil. Once boiling, remove from heat and stir in the couscous. Cover and let it sit for about 5 minutes until the couscous absorbs the liquid and becomes fluffy. Fluff with a fork and set aside.
- Sauté the Vegetables: In a large skillet over medium heat, add a drizzle of olive oil. Sauté the chopped onion and minced garlic until the onion is translucent, about 3-4 minutes. Add the cherry tomatoes and spinach, cooking until the spinach wilts, about 2-3 minutes.
- Combine the Filling: In a large bowl, combine the cooked couscous, sautéed vegetables, dried oregano, paprika, salt, black pepper, and crumbled feta cheese if using. Mix well until all ingredients are evenly distributed.
- Stuff the Peppers: Spoon the couscous mixture into each prepared bell pepper, packing it in gently. Place the stuffed peppers upright in a baking dish. Drizzle a little olive oil on top of each pepper.
- Bake: Cover the baking dish with aluminum foil and bake in the preheated oven for 25 minutes. Remove the foil and bake for an additional 10-15 minutes, or until the peppers are tender and the tops are lightly golden.
- Serve: Remove from the oven and let cool for a few minutes. Garnish with fresh parsley before serving.
Extra Tips:
When making stuffed bell peppers with couscous, feel free to experiment with different fillings. You can add cooked ground meat, beans, or even different vegetables based on your taste.
For a spicier kick, consider adding crushed red pepper flakes or chopped jalapeños to the filling. If you have leftover stuffing, it can be served as a side dish or enjoyed on its own.
Additionally, these stuffed peppers can be prepared ahead of time and stored in the refrigerator, then baked before serving, making them a convenient option for busy weeknight meals.
Tomato and Cucumber Salad With Feta
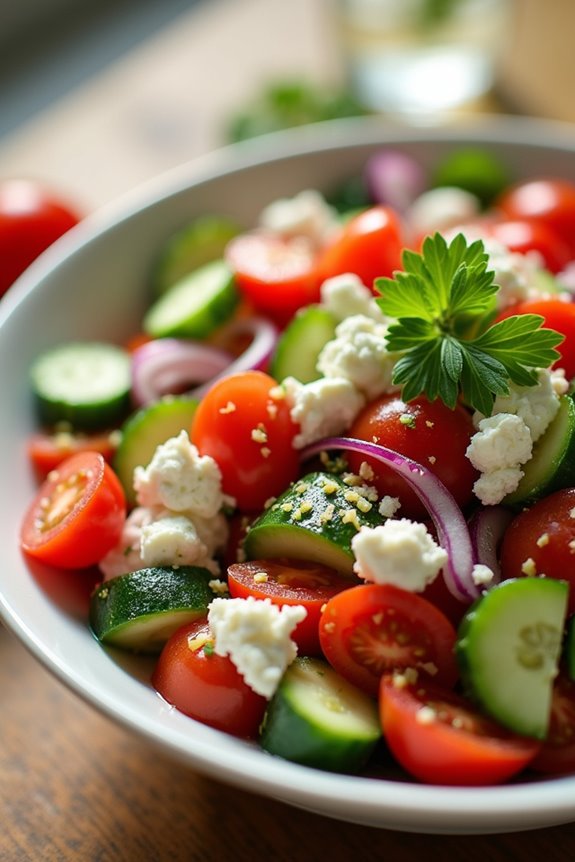
Tomato and Cucumber Salad with Feta is a revitalizing Mediterranean dish that perfectly captures the essence of summer. This vibrant salad combines juicy tomatoes, crisp cucumbers, and creamy feta cheese, all tossed together with a light dressing that enhances the natural flavors of the ingredients.
It’s an ideal accompaniment to grilled meats or fish, or can be enjoyed on its own as a light meal, making it a versatile addition to any gathering.
This salad isn’t only easy to prepare but also packed with nutrients, thanks to the fresh vegetables. The combination of tangy feta and the crunch of cucumbers creates a delightful contrast, while the tomatoes add a burst of sweetness.
Whether you’re hosting a summer barbecue or simply looking for a quick and healthy side dish, this Tomato and Cucumber Salad with Feta is sure to impress.
Ingredients (serves 4-6):
- 4 medium ripe tomatoes, diced
- 2 large cucumbers, peeled and diced
- 1 cup feta cheese, crumbled
- 1/4 red onion, thinly sliced
- 1/4 cup extra virgin olive oil
- 2 tablespoons red wine vinegar
- 1 teaspoon dried oregano
- Salt and pepper to taste
- Fresh parsley, chopped (for garnish)
Cooking Instructions:
1. Prepare the Vegetables: Begin by washing the tomatoes and cucumbers thoroughly under cold water. Dice the tomatoes into bite-sized pieces and peel and dice the cucumbers. Place both in a large mixing bowl.
Verify that the vegetables are cut evenly to maintain a consistent texture throughout the salad.
2. Add the Feta and Onion: Crumble the feta cheese into the bowl with the diced tomatoes and cucumbers. Thinly slice the red onion and add it to the mixture.
The sharpness of the onion complements the sweetness of the tomatoes and the creaminess of the feta.
3. Make the Dressing: In a small bowl, whisk together the extra virgin olive oil, red wine vinegar, dried oregano, salt, and pepper.
This dressing is simple yet flavorful, enhancing the salad without overpowering its fresh ingredients. Adjust the seasoning according to your taste preference.
4. Combine the Ingredients: Pour the dressing over the salad ingredients in the mixing bowl. Gently toss everything together until the tomatoes, cucumbers, feta, and onion are well-coated with the dressing.
Be careful not to break up the feta too much; you want to maintain some larger chunks for texture.
5. Garnish and Serve: Transfer the salad to a serving dish or bowl. Garnish with freshly chopped parsley for an added touch of color and flavor.
Serve immediately to enjoy the freshness of the ingredients, or let it sit for about 15 minutes to allow the flavors to meld.
Extra Tips:
For an even more flavorful salad, consider adding some kalamata olives or bell peppers for an added depth of flavor and color.
You can also experiment with the dressing by adding a squeeze of fresh lemon juice or some fresh herbs like basil or mint for a twist. This salad is best enjoyed fresh but can be stored in the refrigerator for a day; however, it’s important to keep the dressing separate until you’re ready to serve, to maintain the crispness of the vegetables.
Saffron Risotto With Scallops

Saffron Risotto with Scallops is a luxurious dish that embodies the essence of Mediterranean cuisine. The creamy texture of the risotto, infused with the delicate flavor of saffron, pairs beautifully with the sweet, tender scallops. This dish is perfect for a special occasion or a cozy dinner at home, showcasing the vibrant colors and flavors of the Mediterranean.
The key to a great risotto is patience and attention, as stirring the rice slowly allows the starch to release, resulting in that desired creamy consistency.
In this recipe, we’ll guide you through the process of creating a saffron-infused risotto and perfectly seared scallops. The saffron threads will impart a warm golden hue to the dish while enhancing its aromatic profile. This dish serves 4-6 people, making it ideal for a family gathering or an intimate dinner. Let’s plunge into this culinary masterpiece!
Ingredients
- 1 ½ cups Arborio rice
- 4 cups chicken or vegetable broth
- 1 cup dry white wine
- 1 medium onion, finely chopped
- 4 cloves garlic, minced
- 1 cup grated Parmesan cheese
- 2 tablespoons olive oil
- 2 tablespoons unsalted butter
- 1 teaspoon saffron threads
- 1 pound sea scallops
- Salt and pepper to taste
- Fresh parsley, chopped for garnish (optional)
- Lemon wedges for serving (optional)
Cooking Instructions
- Prepare the Broth: In a saucepan, heat the chicken or vegetable broth over low heat. Add the saffron threads to the broth to infuse it with flavor and color. Keep the broth warm but not boiling throughout the cooking process.
- Sauté Aromatics: In a large skillet or saucepan, heat the olive oil and 1 tablespoon of butter over medium heat. Add the chopped onion and sauté for about 5 minutes, or until translucent. Stir in the minced garlic and cook for an additional 1-2 minutes, being careful not to let it burn.
- Toast the Rice: Add the Arborio rice to the skillet with the onions and garlic. Stir the rice for about 2-3 minutes, allowing it to toast slightly and absorb the flavors. This step helps to enhance the nutty flavor of the rice.
- Deglaze with Wine: Pour in the dry white wine and stir continuously until the wine has been absorbed by the rice. This will add depth to the flavor of the risotto.
- Add Broth Gradually: Begin adding the warm saffron-infused broth one ladle at a time, stirring constantly. Wait until the liquid is almost fully absorbed before adding the next ladle. Continue this process for about 18-20 minutes until the rice is creamy and al dente.
- Finish the Risotto: Once the rice is cooked to your liking, remove the skillet from the heat. Stir in the remaining tablespoon of butter and the grated Parmesan cheese. Season with salt and pepper to taste. Cover and let it sit for a few minutes to achieve the perfect creamy consistency.
- Sear the Scallops: In a separate skillet, heat a drizzle of olive oil over medium-high heat. Pat the scallops dry with paper towels and season them with salt and pepper. Once the oil is hot, carefully add the scallops to the pan. Sear for about 2-3 minutes on each side until they’re golden brown and cooked through.
- Serve: To plate, spoon the saffron risotto onto each dish and top it with several seared scallops. Garnish with fresh parsley and serve with lemon wedges on the side for a zesty finish.
Extra Tips
When cooking Saffron Risotto with Scallops, it’s important to use high-quality saffron for the best flavor and color.
Additionally, avoid overcrowding the pan when searing the scallops, as this can cause them to steam rather than sear, resulting in a less desirable texture. Always allow the scallops to rest for a minute after cooking to maintain their juiciness.
Finally, remember that risotto is best served immediately after cooking, so have your guests ready to enjoy the dish as soon as it’s prepared!
Grilled Vegetable Skewers
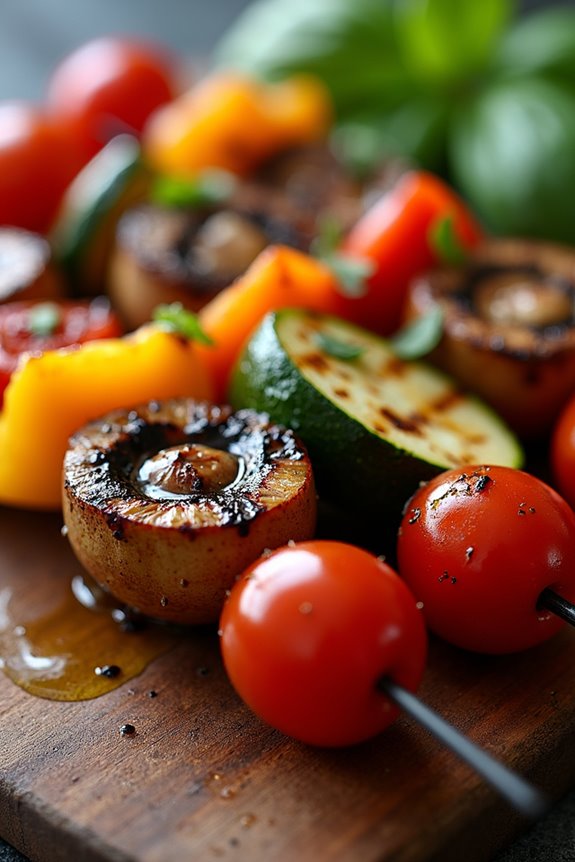
Grilled Vegetable Skewers are a vibrant and delicious addition to any Mediterranean meal, perfect for summer barbecues or as a flavorful side dish. This dish celebrates the rich flavors and colors of seasonal vegetables, all beautifully charred over an open flame.
Whether you’re a vegetarian or just looking to add some lighter options to your meal, these skewers can be customized with your favorite vegetables and are bound to impress your guests. The grilling process infuses the vegetables with a smoky flavor, while their natural sweetness shines through.
You can serve these skewers as a side dish or pair them with a revitalizing dip, such as tzatziki or hummus, to enhance the Mediterranean experience. They’re not only easy to prepare but also a great way to enjoy fresh produce in a fun and interactive way.
Ingredients (serving size of 4-6 people):
- 1 red bell pepper, cut into chunks
- 1 yellow bell pepper, cut into chunks
- 1 zucchini, sliced into thick rounds
- 1 red onion, cut into wedges
- 1 cup cherry tomatoes
- 8-10 button mushrooms, cleaned and stems removed
- 1/4 cup extra-virgin olive oil
- 2 tablespoons balsamic vinegar
- 2 cloves garlic, minced
- 1 teaspoon dried oregano
- Salt and pepper, to taste
- Skewers (wooden or metal)
Cooking Instructions:
- Prepare the Skewers: If you’re using wooden skewers, soak them in water for about 30 minutes to prevent burning on the grill. If you’re using metal skewers, you can skip this step. This will help guarantee that your skewers hold together without catching fire while grilling.
- Chop the Vegetables: While the skewers are soaking, wash and cut all the vegetables into uniform pieces. This helps them cook evenly. Aim for similar sizes for all pieces, approximately 1-inch chunks for the bell peppers, zucchini, and onion, and leave the cherry tomatoes and mushrooms whole.
- Make the Marinade: In a large bowl, whisk together the olive oil, balsamic vinegar, minced garlic, oregano, salt, and pepper. This mixture won’t only add flavor but also help the vegetables grill beautifully.
- Marinate the Vegetables: Add the chopped vegetables to the marinade and toss them gently to coat. Let the vegetables sit for about 15-30 minutes to absorb the flavors. You can cover the bowl and refrigerate it if you’re preparing it ahead of time.
- Assemble the Skewers: Thread the marinated vegetables onto the skewers, alternating between different types to create a colorful display. Leave a little space between each piece to allow for even cooking.
- Preheat the Grill: Preheat your grill to medium-high heat. If using a charcoal grill, ensure the coals are white hot before placing the skewers on the grill.
- Grill the Skewers: Place the skewers on the grill and cook for about 10-15 minutes, turning them occasionally, until the vegetables are tender and have nice grill marks. The tomatoes should burst slightly, releasing their juices.
- Serve: Once cooked, remove the skewers from the grill and let them cool for a few minutes. Serve warm, either straight off the skewer or removed onto a serving platter.
Extra Tips:
For an added layer of flavor, consider adding fresh herbs such as basil or parsley to the marinade or as a garnish after grilling.
You can also experiment with different vegetables like eggplant, asparagus, or even fruits like pineapple for a sweet twist. Remember to keep an eye on the skewers while grilling, as cooking times can vary based on the heat of your grill and the size of the vegetable pieces. Enjoy your Mediterranean feast!
Pistachio Baklava With Honey Syrup
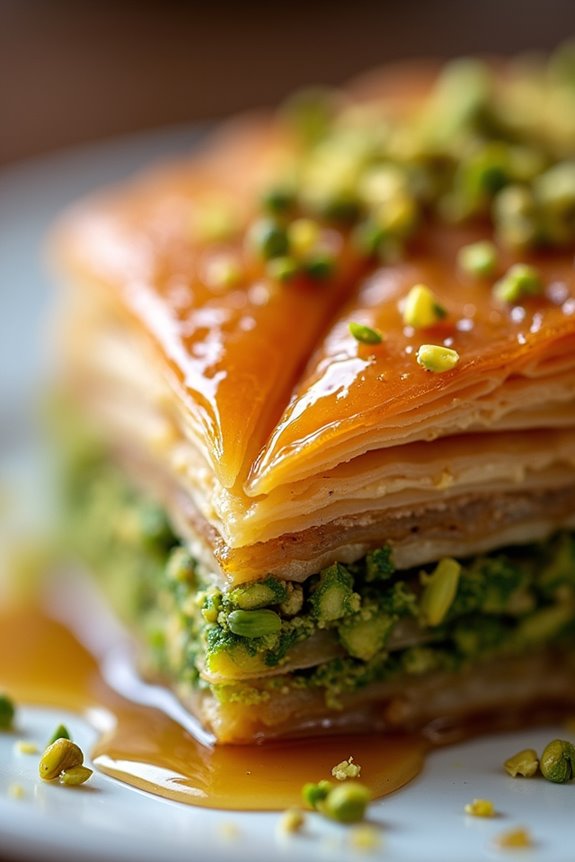
Pistachio Baklava is a classic Mediterranean dessert that brings together flaky layers of phyllo pastry, rich pistachios, and a sweet honey syrup. This delectable treat is often served at special occasions, and its delightful crunch and syrupy sweetness are certain to impress your guests.
The process may seem intricate, but with a little patience and practice, you’ll be able to create this indulgent delicacy in your own kitchen. The secret to a perfect baklava lies not only in the layers of pastry and nuts but also in the homemade honey syrup that ties everything together.
The syrup is made with simple ingredients that complement the nuttiness of the pistachios, resulting in a heavenly combination. Whether you’re hosting a festive gathering or simply craving something sweet, this Pistachio Baklava will be a showstopper that everyone will love.
Ingredients (Serves 4-6):
- 1 package (16 oz) phyllo dough, thawed
- 2 cups shelled pistachios, finely chopped
- 1 cup unsalted butter, melted
- 1 teaspoon ground cinnamon
- 1 cup granulated sugar
- 1 cup water
- 1 cup honey
- 1 teaspoon vanilla extract
- Optional: additional crushed pistachios for garnish
Cooking Instructions:
1. Preheat the Oven: Begin by preheating your oven to 350°F (175°C). This guarantees that the baklava bakes evenly and achieves a golden brown color.
2. Prepare the Nut Mixture****: In a mixing bowl, combine the finely chopped pistachios and ground cinnamon. This mixture will provide the flavorful filling for the baklava. Stir well to make sure the cinnamon is evenly distributed among the nuts.
3. Layer the Phyllo Dough: Unroll the phyllo dough and cover it with a damp kitchen towel to prevent it from drying out. Brush a 9×13 inch baking dish with melted butter. Place one sheet of phyllo in the dish and brush it with melted butter.
Repeat this process, layering about 6-8 sheets of phyllo, brushing each layer with butter.
4. Add the Nut Filling: Once you’ve layered enough phyllo, sprinkle a thin layer of the pistachio mixture evenly over the dough. Add another 2-3 sheets of phyllo on top, brushing each with butter, before adding another layer of nuts.
Repeat this process until you run out of nut mixture, finishing with a top layer of 6-8 sheets of phyllo dough.
5. Cut the Baklava: Using a sharp knife, carefully Cut the Baklava into diamond or square shapes. This will help the syrup soak in later and make serving easier. Be gentle so as not to cut through the bottom layers.
6. Bake the Baklava: Place the baking dish in the preheated oven and bake for about 45-50 minutes, or until the baklava is golden brown and crisp. Keep an eye on it to prevent burning.
7. Make the Honey Syrup: While the baklava is baking, prepare the honey syrup. In a saucepan, combine the sugar, water, honey, and vanilla extract. Bring to a boil, then reduce the heat and simmer for about 10 minutes.
Remove from heat and let it cool slightly.
8. Syrup the Baklava: Once the baklava is done baking, remove it from the oven and immediately pour the warm honey syrup evenly over the hot baklava. This allows the syrup to soak in and enhances the flavors.
9. Cool and Serve: Allow the baklava to cool completely before serving. This will help the layers set and make it easier to cut. Garnish with crushed pistachios if desired.
Extra Tips:
When making Pistachio Baklava, it’s important to keep the phyllo dough covered with a damp towel to prevent it from drying out while you work. Additionally, feel free to experiment with other nuts, such as walnuts or almonds, to create your own unique variation.
For an added touch of flavor, consider infusing the syrup with a bit of lemon juice or orange zest. Enjoy your baklava fresh, or store it in an airtight container for up to a week!