

As the winter chill settles in, I find myself daydreaming of the enchanting aromas from European Christmas markets. The sweet scent of warm gingerbread and the spiced warmth of mulled wine create a cozy and magical atmosphere. Each recipe is a journey through festive traditions. Let’s explore these delightful treats that truly capture the spirit of the season. You’ll want to savor every bite.
Glühwein (Mulled Wine)

Glühwein is a traditional German spiced wine that perfectly embodies the warmth and festivity of the Christmas season. This cozy beverage is often enjoyed at Christmas markets across Europe, delighting those who seek a taste of holiday cheer. The combination of red wine, various spices, and citrus fruits creates a fragrant and flavorful drink that not only warms the body but also lifts the spirit during the cold winter months.
Making Glühwein at home is a simple yet rewarding process. With just a few ingredients and a little patience, you can create a delightful concoction that will fill your home with enchanting aromas. Whether you’re hosting a holiday gathering or simply enjoying a quiet evening by the fireplace, Glühwein is the perfect companion to celebrate the season.
Ingredients (Serves 4-6)
- 1 bottle of red wine (750 ml)
- 1 orange (sliced)
- 1 lemon (sliced)
- 1/4 cup sugar (or to taste)
- 2 cinnamon sticks
- 4-6 whole cloves
- 2 star anise (optional)
- 1/4 cup brandy (optional)
- Fresh cranberries or pomegranate seeds for garnish (optional)
Cooking Instructions
- Prepare the Ingredients: Start by washing the orange and lemon thoroughly, as you’ll be using the peels. Slice the orange and lemon into thin rounds and set them aside. Measure out your spices and sugar.
- Combine Wine and Ingredients: In a large pot, pour in the entire bottle of red wine. Add the sliced orange and lemon, sugar, cinnamon sticks, cloves, and star anise (if using). Stir gently to combine all the ingredients.
- Heat the Mixture: Place the pot over medium heat. It’s important to heat the wine slowly. Allow it to warm up until you see steam rising, but don’t bring it to a boil. Boiling the wine will evaporate the alcohol and alter the flavor.
- Simmer: Once the wine is hot, reduce the heat to low and let it simmer for about 15-20 minutes. This allows the flavors of the spices and citrus to infuse into the wine. Stir occasionally and taste to adjust the sweetness if needed.
- Optional Brandy Addition: If you prefer a stronger flavor, you can add the brandy during the last few minutes of simmering. Stir well to combine.
- Strain and Serve: After simmering, remove the pot from heat. Use a fine mesh strainer to strain the Glühwein into a heatproof pitcher or directly into mugs, discarding the solids (spices and fruit).
- Garnish and Enjoy: Serve the Glühwein hot, garnished with fresh cranberries or pomegranate seeds if desired. Enjoy the warmth and festive flavors!
Extra Tips
For the best Glühwein experience, choose a good quality red wine that you enjoy drinking, as the flavor will shine through. You can also experiment with different spices such as nutmeg or cardamom to customize the flavor profile to your liking.
If you find the drink too sweet, feel free to adjust the amount of sugar to suit your taste. Finally, remember that Glühwein is best served hot, so keep it warm on the stove or in a slow cooker for holiday gatherings. Enjoy the festive spirit!
Lebkuchen (Gingerbread Cookies)
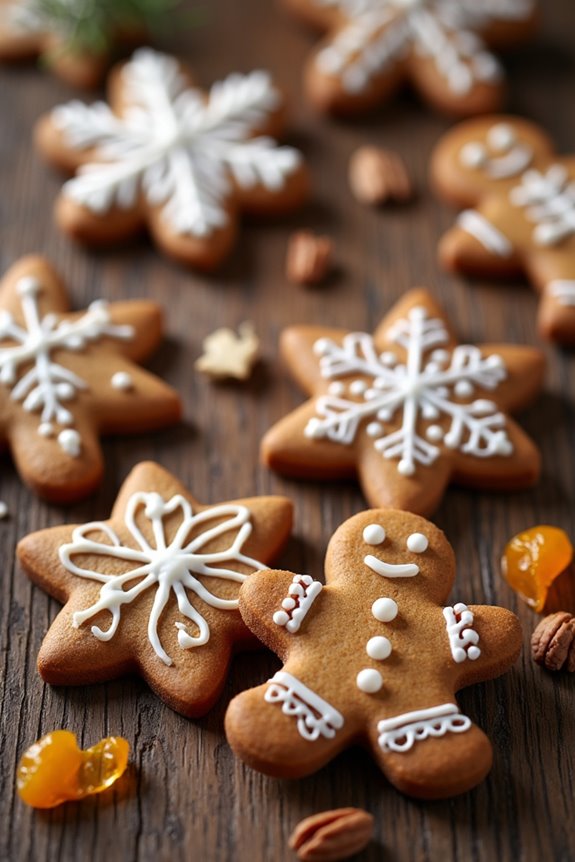
Lebkuchen, a traditional German gingerbread cookie, is a delightful treat that’s often enjoyed during the Christmas season. These spiced cookies aren’t only aromatic but also have a rich history, dating back to the 13th century. They’re typically made with honey, spices, and nuts, making them a perfect festive dessert that embodies the flavors of the holiday season.
Whether you’re decorating them with icing or enjoying them plain, Lebkuchen is certain to bring warmth and cheer to your holiday gatherings.
Making Lebkuchen can be a fun and rewarding experience, especially when you get family and friends involved in the decorating process. The dough is easy to prepare and can be made ahead of time for added convenience. Once baked, these cookies can be stored for weeks, allowing you to savor their flavors throughout the holiday season.
Pair them with a warm cup of tea or hot chocolate for the ultimate festive treat!
Ingredients (Serves 4-6)
- 1 cup honey
- 1 cup brown sugar
- 1/2 cup unsalted butter
- 1 egg
- 4 cups all-purpose flour
- 2 teaspoons baking powder
- 2 teaspoons ground ginger
- 2 teaspoons ground cinnamon
- 1 teaspoon ground cloves
- 1 teaspoon ground nutmeg
- 1/2 cup finely chopped nuts (such as almonds or hazelnuts)
- 1/2 cup candied orange peel (optional)
- Icing for decoration (optional)
Cooking Instructions
- Prepare the Dough: In a saucepan, combine the honey, brown sugar, and butter. Heat over low heat, stirring until the butter is melted and the mixture is smooth. Remove from heat and let it cool slightly. Once cooled, stir in the egg until well combined.
- Mix the Dry Ingredients: In a large bowl, whisk together the flour, baking powder, ginger, cinnamon, cloves, and nutmeg. This will guarantee that the spices are evenly distributed throughout the dough.
- Combine Wet and Dry Ingredients: Gradually add the honey mixture to the dry ingredients, stirring until a soft dough forms. If the dough is too sticky, you can add a little more flour until it reaches a workable consistency. Fold in the chopped nuts and candied orange peel if using.
- Chill the Dough: Cover the dough with plastic wrap and refrigerate for at least 2 hours, or overnight. Chilling the dough will help it firm up, making it easier to roll out and cut into shapes.
- Preheat the Oven: Preheat your oven to 350°F (175°C). Line a baking sheet with parchment paper to prevent the cookies from sticking.
- Roll Out and Cut the Cookies: On a floured surface, roll out the chilled dough to about 1/4 inch thickness. Use cookie cutters to cut out your desired shapes and place them on the prepared baking sheet.
- Bake the Cookies: Bake in the preheated oven for 10-12 minutes, or until the edges are lightly golden. Remove from the oven and allow to cool on the baking sheet for a few minutes before transferring to a wire rack to cool completely.
- Decorate (Optional): Once the cookies are completely cool, you can decorate them with icing or enjoy them plain. If using icing, pipe it onto the cookies in festive designs.
Extra Tips
When making Lebkuchen, feel free to experiment with different spices or add-ins like dried fruits or chocolate chips to customize the flavor to your liking.
Additionally, these cookies taste even better after a few days, as the flavors meld together, so consider making them ahead of time. Store them in an airtight container to keep them fresh, and don’t hesitate to share them with friends and family for a truly joyful holiday experience!
Stollen (Christmas Bread)
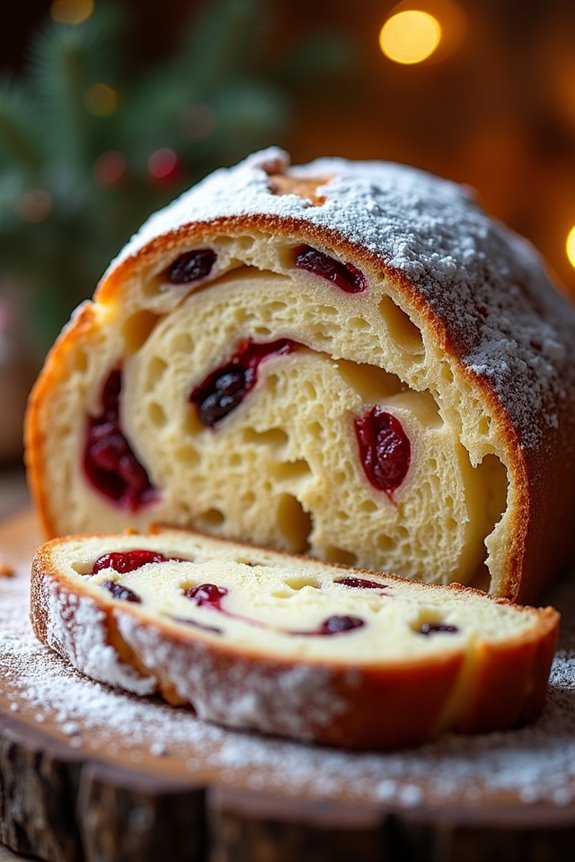
Stollen is a traditional German Christmas bread that’s rich with history and flavor, often enjoyed during the festive season. This delightful loaf is typically studded with dried fruits, nuts, and spices, and it’s often dusted with powdered sugar to give it a snowy appearance, reminiscent of the winter season.
The bread isn’t only delicious but also symbolizes the journey of the Holy Family, making it a beloved holiday treat for many families across Europe.
Making Stollen at home is a wonderful way to celebrate the holiday season. The process involves creating a sweet yeast dough that’s filled with a mix of candied fruits, raisins, and almonds. Once baked, the loaf is brushed with melted butter and rolled in powdered sugar, making it a beautiful centerpiece for any holiday gathering.
Whether enjoyed with coffee, tea, or as a dessert, Stollen is sure to bring warmth and joy to your Christmas festivities.
Ingredients (Serves 4-6):
- 4 cups all-purpose flour
- 1 packet (2 ¼ tsp) active dry yeast
- ¾ cup warm milk (110°F)
- ½ cup granulated sugar
- 1 tsp salt
- 1 tsp ground cinnamon
- ½ tsp ground nutmeg
- 1 cup unsalted butter, softened
- 2 large eggs
- 1 cup mixed dried fruits (such as raisins, currants, and chopped candied orange peel)
- ¾ cup slivered almonds
- ½ cup candied lemon peel (optional)
- ½ cup powdered sugar (for dusting)
Cooking Instructions:
- Activate the Yeast: In a small bowl, combine the warm milk with the active dry yeast and a teaspoon of sugar. Let it sit for about 5-10 minutes until it becomes frothy. This indicates that the yeast is active and ready to be used.
- Mix the Dry Ingredients: In a large mixing bowl, combine the all-purpose flour, remaining sugar, salt, ground cinnamon, and nutmeg. Mix well to guarantee all the dry ingredients are evenly distributed.
- Combine Wet Ingredients: Create a well in the center of the dry mixture and add the activated yeast mixture, softened butter, and eggs. Using a wooden spoon or your hands, mix the ingredients until they come together to form a soft dough.
- Knead the Dough: Transfer the dough to a floured surface and knead it for about 8-10 minutes until it becomes smooth and elastic. If the dough is too sticky, sprinkle in a little more flour as needed.
- Incorporate the Fillings: Once the dough is kneaded, flatten it slightly and add the mixed dried fruits, slivered almonds, and candied lemon peel (if using). Fold the dough over the fillings and knead gently until they’re evenly distributed throughout the dough.
- First Rise: Place the dough in a lightly greased bowl, cover it with a clean kitchen towel, and let it rise in a warm area for about 1-2 hours, or until it has doubled in size.
- Shape the Stollen: After the first rise, punch down the dough to release the air. Shape it into an oval loaf, and then fold one side over to form a slight “hump” in the center, mimicking the shape of a baby Jesus wrapped in swaddling clothes.
- Second Rise: Place the shaped dough on a baking sheet lined with parchment paper. Cover it again with a towel and let it rise for another 30-45 minutes.
- Bake the Stollen: Preheat the oven to 350°F (175°C). Bake the Stollen for about 30-35 minutes or until it’s golden brown and sounds hollow when tapped on the bottom. If it browns too quickly, cover it loosely with aluminum foil.
- Cool and Finish: Once baked, remove the Stollen from the oven and let it cool for about 10 minutes. Brush it generously with melted butter and then dust it with powdered sugar before letting it cool completely on a wire rack.
Extra Tips:
For the best flavor, consider making your Stollen a day in advance. The flavors tend to deepen and meld together as it sits.
Store the cooled Stollen in an airtight container or wrap it tightly in plastic wrap to keep it fresh. Additionally, Stollen can be enjoyed for several weeks, and you can even freeze it for longer storage. Just make sure to thaw it completely before serving. Enjoy this festive bread with a warm beverage for a cozy holiday treat!
Bratwurst (Grilled Sausages)

Bratwurst, a beloved German sausage, is a staple at Christmas markets and festive gatherings throughout Europe. The name “Bratwurst” derives from the German word “braten,” meaning to fry or roast, which perfectly describes the method of cooking these delicious sausages. Traditionally made from pork, beef, or veal, bratwurst is seasoned with a variety of spices, giving it a rich flavor that pairs well with mustard, sauerkraut, and fresh bread.
Grilling bratwurst is a popular choice, as it enhances the smoky flavors and creates a perfectly crispy outside while keeping the inside juicy and tender.
To make perfect bratwurst, it’s important to use high-quality sausages and to monitor the cooking temperature closely. Ideally, bratwurst should be grilled over medium heat to guarantee even cooking. The sausages are often served as part of a larger feast, accompanied by sides like potato salad, red cabbage, or pretzels, making them a versatile addition to any holiday spread.
With their savory taste and satisfying texture, bratwurst are sure to be a hit at your Christmas gathering.
Ingredients (serving size: 4-6 people)
- 6 bratwurst sausages
- 1 tablespoon olive oil
- 1 teaspoon garlic powder
- 1 teaspoon onion powder
- 1 teaspoon paprika
- Salt and pepper to taste
- Buns for serving (optional)
- Mustard and sauerkraut for serving (optional)
Cooking Instructions
- Prepare the Grill: Preheat your grill to medium heat, approximately 350°F (175°C). This will guarantee that the bratwurst cook evenly and develop a nice char without burning. If using a charcoal grill, let the coals burn down until they’re covered in white ash.
- Season the Sausages: While the grill is heating, take the bratwurst sausages and pat them dry with a paper towel. In a small mixing bowl, combine olive oil, garlic powder, onion powder, paprika, salt, and pepper. Rub this mixture all over the sausages to enhance their flavor.
- Grill the Bratwurst: Once the grill is ready, place the bratwurst directly over the heat. Grill them for about 15-20 minutes, turning occasionally to guarantee they’re evenly cooked on all sides. Use a meat thermometer to check that the internal temperature reaches 160°F (70°C) for safety.
- Rest the Sausages: After grilling, remove the bratwurst from the grill and let them rest for about 5 minutes. This resting period allows the juices to redistribute within the sausages, making them even juicier when bitten into.
- Serve: Serve the bratwurst in buns if desired, and offer mustard and sauerkraut on the side for traditional toppings. Enjoy with your choice of sides and beverages.
Extra Tips
When grilling bratwurst, avoid piercing the sausages with a fork or knife, as this can cause the flavorful juices to escape. Instead, use tongs to turn them gently.
If you want to add an extra layer of flavor, consider simmering the bratwurst in beer or broth for a few minutes before grilling. This can help infuse them with additional taste and moisture.
Finally, don’t rush the cooking process; a slower cook allows for a better texture and flavor profile. Enjoy your festive bratwurst!
Roasted Chestnuts
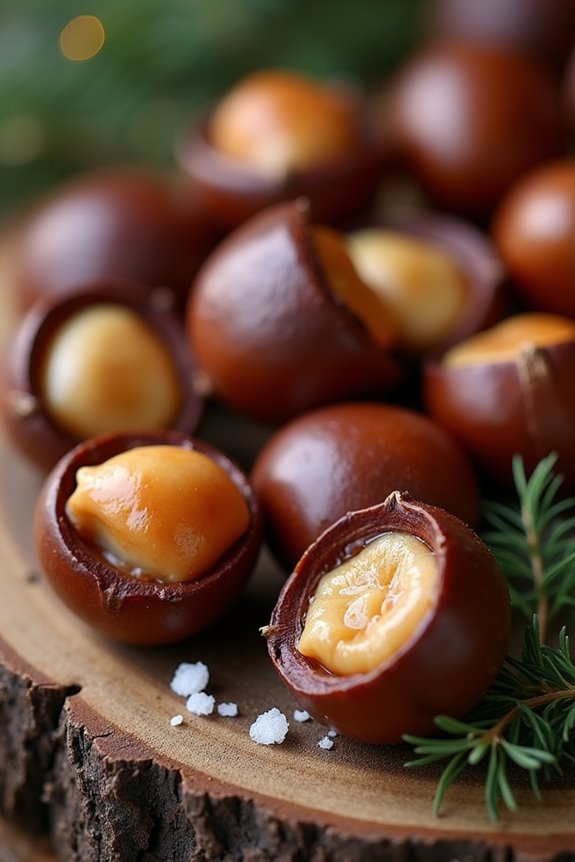
Roasted chestnuts are a beloved winter treat, especially popular throughout Europe during the festive season. Their sweet, nutty flavor and unique texture make them a perfect snack while strolling through Christmas markets or warming up by the fire. This simple yet satisfying recipe captures the essence of the holiday spirit and is sure to impress your family and friends.
Preparing roasted chestnuts at home is quite easy and requires minimal ingredients. The key to achieving the perfect roast is to score the chestnuts properly, allowing steam to escape during cooking and preventing them from bursting. Enjoy these delicious chestnuts as a standalone snack or incorporate them into various holiday dishes for added flavor and texture.
Ingredients (serves 4-6):
- 1 pound (about 450 grams) fresh chestnuts
- Water (for soaking)
- Salt (optional, for seasoning)
- Butter (optional, for serving)
Cooking Instructions:
- Preheat the Oven: Begin by preheating your oven to 425°F (220°C). A hot oven is imperative for roasting the chestnuts evenly and achieving that perfect golden-brown color.
- Prepare the Chestnuts: Rinse the chestnuts under cold water to remove any dirt. Using a sharp knife, carefully score an “X” on the flat side of each chestnut. This step is critical as it allows steam to escape during roasting and prevents the chestnuts from exploding in the heat.
- Soak the Chestnuts: Place the scored chestnuts in a bowl of water and let them soak for about 30 minutes. Soaking not only helps soften the shells but also makes them easier to peel after roasting.
- Drain and Dry: After soaking, drain the chestnuts and pat them dry with a clean kitchen towel. Confirm they’re dry to achieve a crispy outer layer when roasted.
- Roast the Chestnuts: Spread the chestnuts in a single layer on a baking sheet, making sure they aren’t overcrowded. Roast in the preheated oven for about 25-30 minutes, or until the shells have split and the nuts are tender. Shake the baking sheet halfway through to guarantee even cooking.
- Cool and Peel: Once roasted, remove the chestnuts from the oven and let them cool for a few minutes. While still warm, peel the shells and the thin brown skin. Be cautious, as they can be quite hot.
- Serve: Serve the roasted chestnuts warm, optionally tossing them with a pinch of salt or a dab of butter for extra flavor.
Extra Tips:
When roasting chestnuts, it’s important to choose fresh, firm nuts with shiny shells. Avoid any chestnuts that feel light or have holes, as these may be spoiled.
If you’re unsure about your roasting skills, you can also use a chestnut roasting pan or a perforated baking dish designed for this purpose.
Finally, enjoy the chestnuts fresh, as they’re best consumed shortly after roasting for maximum flavor and texture!
Kartoffelpuffer (Potato Pancakes)
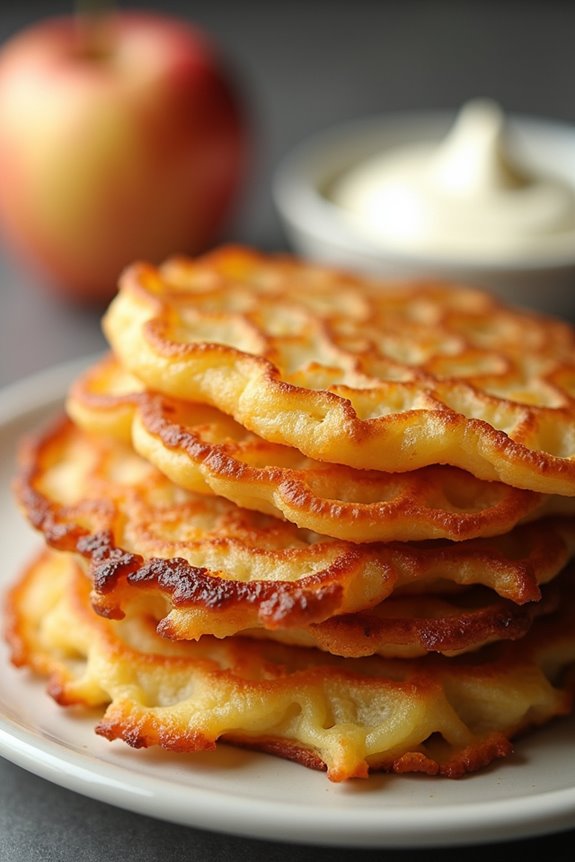
Kartoffelpuffer, also known as potato pancakes, are a delightful dish that has its roots in German cuisine. These crispy, golden-brown pancakes are made primarily from grated potatoes and are often enjoyed during the festive season, especially around Christmas. The combination of crunchy exteriors and a soft, tender interior makes them irresistible, perfect for serving with applesauce or sour cream.
Whether you’re looking to impress guests or simply enjoy a comforting meal at home, Kartoffelpuffer is a fantastic choice. Making Kartoffelpuffer is relatively simple, requiring just a few ingredients and some basic kitchen skills. Traditionally, these pancakes are fried until crispy, resulting in a delicious treat that pairs well with a variety of toppings.
This recipe serves 4-6 people, making it ideal for family gatherings or holiday celebrations. Follow the steps below to create your own batch of these scrumptious potato pancakes.
Ingredients
- 1 kg (2.2 lbs) of starchy potatoes (such as Russet or Yukon Gold)
- 1 medium onion
- 2 large eggs
- 4 tablespoons of all-purpose flour
- 1 teaspoon of salt
- 1/2 teaspoon of black pepper
- Vegetable oil for frying
- Applesauce or sour cream (for serving, optional)
Cooking Instructions
- Prepare the Potatoes: Peel the potatoes and place them in a bowl of cold water to prevent browning. Grate the potatoes using a box grater or a food processor with a grating attachment. Once grated, place the potato shreds in a clean kitchen towel and squeeze out as much moisture as possible. This step is essential for achieving the desired crispness.
- Grate the Onion: Peel and grate the onion using the same grater or food processor. Like the potatoes, it’s important to squeeze out excess moisture from the grated onion as well.
- Mix Ingredients: In a large mixing bowl, combine the grated potatoes and onions. Add the eggs, flour, salt, and pepper. Stir the mixture well until all ingredients are fully combined and form a cohesive batter.
- Heat the Oil: In a large frying pan, heat about 1/4 inch of vegetable oil over medium-high heat. To test if the oil is hot enough, drop a small amount of the potato mixture into the oil; it should sizzle immediately.
- Fry the Pancakes: Using a spoon or your hands, scoop a portion of the potato mixture and carefully place it in the hot oil, flattening it slightly to form a pancake shape. Fry for about 3-4 minutes on each side, or until golden brown and crispy. Make sure not to overcrowd the pan; fry in batches if necessary.
- Drain Excess Oil: Once cooked, transfer the pancakes to a plate lined with paper towels to absorb any excess oil. Keep them warm in a preheated oven while you finish frying the remaining mixture.
- Serve: Serve the Kartoffelpuffer hot with a side of applesauce or sour cream for dipping. Enjoy the warm, crispy delight that’s sure to be a hit at your holiday gatherings.
Extra Tips
For the best results, choose starchy potatoes, as they yield lighter and crispier pancakes. Make sure to squeeze out as much moisture from the grated potatoes and onions as possible, which will enhance their crispiness during frying.
If you want to add a twist to your Kartoffelpuffer, consider incorporating grated carrots or zucchini for additional flavor and color. Enjoy experimenting with different toppings to find your favorite combination!
Spekulatius (Spiced Cookies)
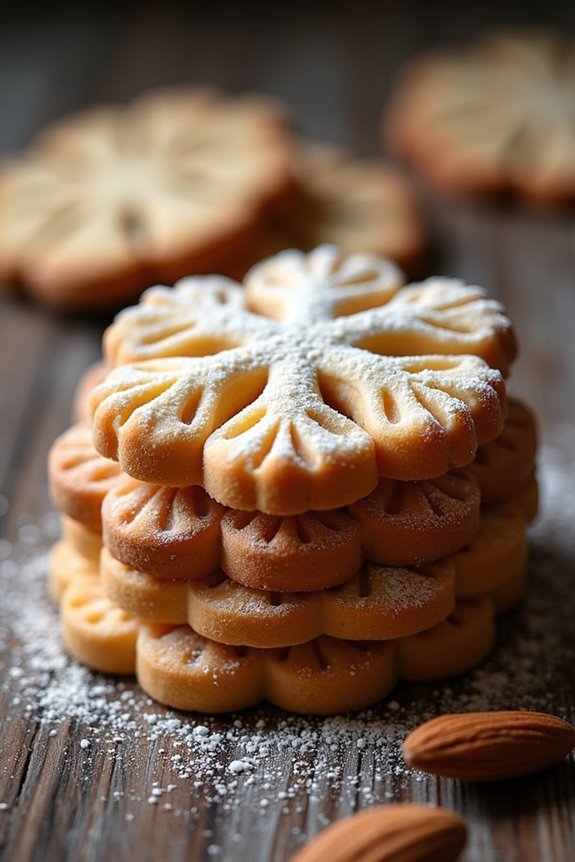
Spekulatius are traditional spiced cookies that originate from the Netherlands and Germany, often enjoyed during the holiday season. These fragrant cookies are characterized by their rich blend of spices, including cinnamon, nutmeg, and cloves, which evoke the warmth of winter festivities.
Traditionally, they’re shaped using wooden molds that create intricate designs, making them not only delicious but visually appealing as well. Making Spekulatius is a delightful way to fill your home with the holiday spirit while engaging in a time-honored baking tradition.
The preparation of Spekulatius is quite straightforward, yet it requires some patience as the dough needs to chill before baking. This resting period allows the flavors to meld beautifully, resulting in a cookie that’s both crisp and flavorful.
Whether you enjoy them with a cup of coffee or hot chocolate, these cookies are sure to be a hit during your holiday gatherings. Let’s get started on creating these festive treats!
Ingredients (Serves 4-6)
- 250g all-purpose flour
- 125g unsalted butter, softened
- 100g brown sugar
- 1 large egg
- 1 teaspoon baking powder
- 2 teaspoons ground cinnamon
- 1 teaspoon ground nutmeg
- 1 teaspoon ground cloves
- 1 teaspoon ground ginger
- ½ teaspoon salt
- 100g slivered almonds (optional for garnish)
Cooking Instructions
1. Prepare the Dough: In a large mixing bowl, cream together the softened butter and brown sugar until the mixture is light and fluffy. This process incorporates air into the mixture, which will help give the cookies a nice texture.
Add the egg and mix until well combined.
2. Mix Dry Ingredients: In a separate bowl, whisk together the flour, baking powder, cinnamon, nutmeg, cloves, ginger, and salt. This step guarantees that the spices and leavening agent are evenly distributed throughout the flour, which is vital for consistent flavor and texture in the cookies.
3. Combine Mixtures: Gradually add the dry ingredients to the butter mixture, stirring until a dough forms. Be careful not to overmix; just combine until there are no dry patches.
The dough may be a bit crumbly at first, but it will come together as you knead it gently.
4. Chill the Dough: Wrap the dough in plastic wrap and refrigerate for at least 1 hour. Chilling the dough helps to solidify the butter, making it easier to roll out and shape the cookies.
5. Shape the Cookies: Preheat your oven to 180°C (350°F). On a lightly floured surface, roll out the chilled dough to about 1/4 inch thick.
Use cookie molds or a cookie cutter to cut out shapes. If using molds, press the dough firmly into the mold to make sure the design transfers well.
6. Prepare for Baking: Place the shaped cookies on a baking sheet lined with parchment paper. If desired, sprinkle slivered almonds on top of the cookies for added texture and flavor.
7. Bake the Cookies: Bake in the preheated oven for about 12-15 minutes, or until the edges are lightly golden. Keep an eye on them, as baking times may vary depending on your oven.
8. Cool and Store: Once baked, allow the cookies to cool on the baking sheet for a few minutes before transferring them to a wire rack to cool completely.
Once cooled, they can be stored in an airtight container for up to two weeks.
Extra Tips
When making Spekulatius, feel free to experiment with the spices to cater to your taste preferences; for instance, adding a pinch of cardamom or anise can give a unique twist to the traditional recipe.
Additionally, make sure to roll the dough to an even thickness to guarantee uniform baking. If you find the dough too sticky, a light dusting of flour can help.
Finally, these cookies make excellent gifts when packaged in decorative tins, so consider baking a batch to share with friends and family during the festive season!
Poff Poff (Sweet Doughnuts)
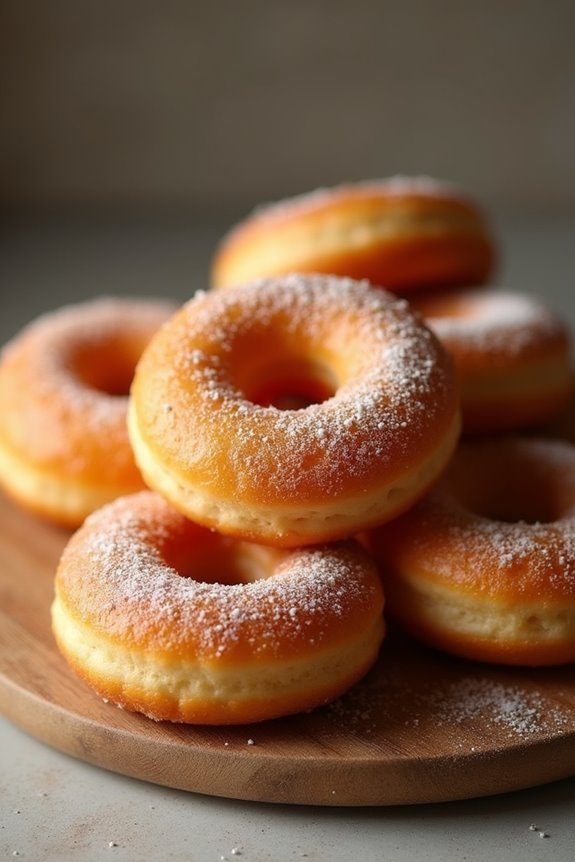
Poff Poff is a delightful treat that hails from West Africa, particularly popular during festive occasions such as Christmas. These sweet, fluffy doughnuts are deep-fried to golden perfection and can be enjoyed plain or dusted with powdered sugar. The light, airy texture combined with a hint of sweetness makes them a favorite among both children and adults alike.
They’re easy to prepare and can be served at parties, family gatherings, or as a sweet snack to brighten up your day. The beauty of Poff Poff lies in its simplicity. With just a few pantry staples, you can create a batch that will satisfy your sweet tooth and impress your guests.
Traditionally enjoyed warm, these doughnuts can also be made in advance and reheated. So, roll up your sleeves and let’s plunge into the delightful world of Poff Poff!
Ingredients (Serves 4-6 people)
- 2 cups all-purpose flour
- 1/2 cup granulated sugar
- 1 tablespoon instant yeast
- 1/2 teaspoon salt
- 1 cup warm water (about 110°F/43°C)
- 1/2 teaspoon nutmeg (optional)
- 2 cups vegetable oil (for frying)
Cooking Instructions
1. Prepare the Dough: In a large mixing bowl, combine the all-purpose flour, granulated sugar, instant yeast, salt, and nutmeg (if using). Mix the dry ingredients well to guarantee even distribution.
Slowly add the warm water to the dry mixture while stirring with a wooden spoon or spatula until a sticky dough forms.
2. Knead the Dough: Turn the dough onto a lightly floured surface and knead it for about 5 minutes until it becomes smooth and elastic. If the dough is too sticky, sprinkle a little more flour as needed.
Once kneaded, place it back in the bowl, cover it with a clean kitchen towel, and let it rise in a warm place for about 1 hour, or until it has doubled in size.
3. Shape the Doughnuts: After the dough has risen, punch it down to remove air bubbles. With oiled hands, take small portions of dough (about the size of a golf ball) and shape them into round balls.
Place the shaped doughnuts on a lightly floured surface or a parchment-lined baking sheet, leaving some space between them.
4. Heat the Oil: In a deep frying pan or pot, heat vegetable oil over medium heat until it reaches about 350°F (175°C). To test if the oil is ready, drop a small piece of dough into the oil; if it sizzles and rises to the surface, the oil is hot enough.
5. Fry the Poff Poff: Carefully add a few dough balls to the hot oil, ensuring not to overcrowd the pan. Fry them for about 2-3 minutes on each side or until they’re golden brown.
Use a slotted spoon to remove them and let them drain on paper towels to absorb excess oil. Repeat the process until all the dough has been fried.
6. Serve: Once the Poff Poff is cool enough to handle, you can dust them with powdered sugar if desired, and they’re ready to be enjoyed! Serve warm for the best taste.
Extra Tips
When making Poff Poff, it’s important to monitor the oil temperature closely; too hot can burn the outside, while too cool can make them greasy.
You can also add flavor variations by incorporating vanilla extract or cinnamon into the dough for an extra festive touch. Experiment with different toppings or fillings, such as chocolate or fruit preserves, to customize your Poff Poff to your liking.
Enjoy the process and share these sweet treats with family and friends for the holiday season!
Raclette (Melted Cheese)

Raclette is a traditional Swiss dish that has gained immense popularity across Europe, especially during the winter holidays. This delightful meal centers around the melting of high-quality cheese, which is then scraped off and served over various accompaniments. The name “raclette” comes from the French word “racler,” meaning “to scrape,” perfectly capturing the essence of this delectable dish.
Originating from the Alpine regions, raclette is often enjoyed during festive gatherings, where friends and family come together to savor the rich, melted cheese paired with an array of delicious sides.
To prepare raclette, you’ll need a special raclette grill or a tabletop grill, which allows diners to melt their cheese to perfection while enjoying the process together. The dish is incredibly versatile, as it can be customized with an assortment of vegetables, meats, and bread. As the cheese melts, it creates a gooey, creamy texture that’s simply irresistible.
Whether you’re hosting a holiday party or a cozy family dinner, raclette is sure to be a hit that brings warmth and joy to your table.
Ingredients (Serves 4-6)
- 1.5 pounds of raclette cheese
- 4 medium-sized potatoes (Yukon Gold or similar)
- 1 cup of pickles (cornichons or gherkins)
- 1 cup of cured meats (prosciutto, salami, or ham)
- 1 cup of assorted vegetables (bell peppers, mushrooms, or zucchini)
- 1 loaf of crusty bread (French baguette or ciabatta)
- Fresh herbs (parsley or chives, for garnish)
- Black pepper (to taste)
Cooking Instructions
1. Prepare the Ingredients: Begin by washing the potatoes thoroughly and placing them in a pot of salted water. Bring the water to a boil, then reduce to a simmer and cook for about 20-25 minutes until the potatoes are tender.
While the potatoes are cooking, slice the raclette cheese into thick pieces, about 1/4 inch thick, and set aside.
2. Set Up the Grill: If you’re using a raclette grill, set it up on your dining table. Preheat the grill according to the manufacturer’s instructions. If you don’t have a raclette grill, you can use a broiler in your oven. Adjust the rack so it’s about 6 inches from the heat source.
3. Prepare the Vegetables and Meats: While the potatoes are cooking, slice your chosen vegetables into bite-sized pieces and arrange them on a serving platter. Similarly, arrange the cured meats on another platter. You can also slice the bread into thick pieces for easy serving.
4. Melt the Cheese: Once the potatoes are cooked, drain them and keep them warm. Place the slices of raclette cheese onto the grill or on a small raclette pan. Allow the cheese to melt for about 5-7 minutes, until it starts to bubble and turn golden brown.
5. Assemble and Serve: When the cheese is melted, scrape it off onto the warm potatoes using a spatula or a knife. Serve immediately with pickles, cured meats, assorted vegetables, and crusty bread. Encourage your guests to create their own combinations on their plates.
6. Garnish: Finish by sprinkling some freshly chopped herbs over the melted cheese and sides for added flavor and a pop of color.
Extra Tips
When preparing raclette, feel free to experiment with different types of cheeses for a unique twist—Gruyère or Emmental can work beautifully as alternatives.
Additionally, consider adding steamed broccoli or grilled asparagus for a healthier touch. Make sure to keep the ingredients warm while serving, as raclette is best enjoyed hot and melted.
Finally, encourage your guests to get creative with their combinations, as part of the fun of raclette is personalizing it to each individual’s taste!
Churros (Spanish Fried Pastries)
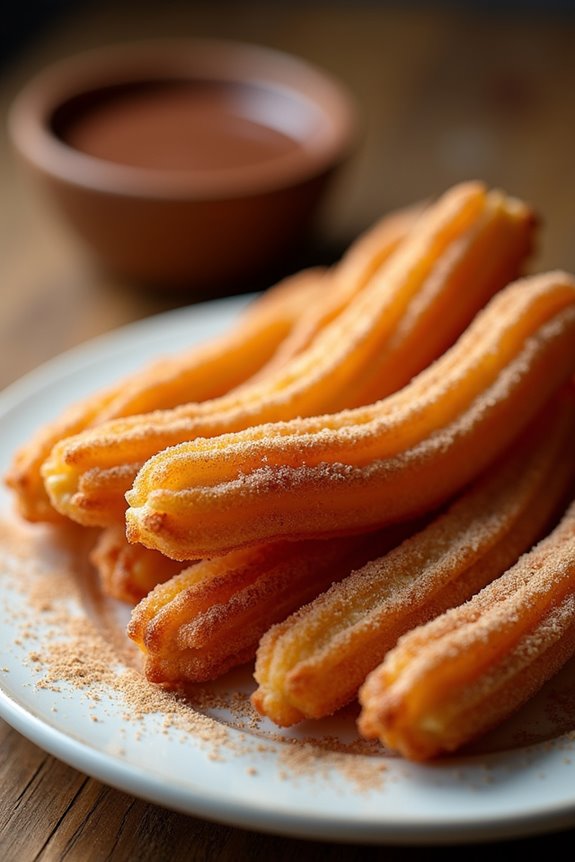
Churros are a delightful treat that hails from Spain and has become popular worldwide, especially during festive seasons. These deep-fried pastries are crispy on the outside and soft on the inside, often enjoyed with a rich chocolate sauce for dipping. Traditionally served for breakfast or as a snack, churros have gained a special place in holiday celebrations, perfect for sharing with family and friends.
The preparation of churros may seem intimidating, but it’s quite simple and results in an impressive dessert that will impress everyone at your Christmas gathering. With just a few basic ingredients, you can recreate this classic Spanish delicacy in your own kitchen. Whether you choose to sprinkle them with sugar and cinnamon or serve them with a warm chocolate dip, churros are sure to bring joy to your holiday festivities.
Ingredients (serving size: 4-6 people)
- 1 cup water
- 2 tablespoons granulated sugar
- 1/2 teaspoon salt
- 1 cup all-purpose flour
- 2 large eggs
- 1 teaspoon vanilla extract
- Vegetable oil (for frying)
- 1 cup granulated sugar (for coating)
- 1 teaspoon ground cinnamon (for coating)
- Chocolate sauce (for dipping, optional)
Cooking Instructions
- Prepare the Churro Dough: In a medium saucepan, combine 1 cup of water, 2 tablespoons of granulated sugar, and 1/2 teaspoon of salt. Bring the mixture to a boil over medium heat. Once boiling, remove it from the heat and stir in 1 cup of all-purpose flour until a dough forms. Allow the dough to cool for a few minutes.
- Add Eggs and Vanilla: Once the dough has cooled slightly, add 2 large eggs and 1 teaspoon of vanilla extract. Mix well until the eggs are fully incorporated, and the dough becomes smooth and glossy.
- Heat the Oil: In a deep frying pan, pour in enough vegetable oil to cover the bottom by about 2 inches. Heat the oil over medium-high heat until it reaches 375°F (190°C). You can test the oil’s readiness by dropping a small piece of dough into it; if it sizzles and rises to the surface, it’s ready.
- Pipe the Churros: Fit a piping bag with a star-shaped nozzle and fill it with the churro dough. Carefully pipe strips of dough (about 6 inches long) directly into the hot oil, being cautious of splattering. Fry the churros in batches, making sure not to overcrowd the pan.
- Fry Until Golden: Cook the churros for about 2-3 minutes on each side, or until they’re golden brown and crispy. Use a slotted spoon to remove them from the oil and place them on a plate lined with paper towels to absorb excess oil.
- Coat with Sugar and Cinnamon: In a shallow dish, mix 1 cup of granulated sugar with 1 teaspoon of ground cinnamon. While the churros are still warm, roll them in the sugar-cinnamon mixture until well-coated.
- Serve: Arrange the churros on a serving platter and serve immediately, with chocolate sauce on the side for dipping if desired.
Extra Tips
For an extra touch of flavor, consider adding a pinch of nutmeg to the sugar and cinnamon mixture or experimenting with different flavored extracts such as almond or orange zest in the dough.
Make sure that the oil temperature remains consistent while frying for the best results—too low can lead to greasy churros, while too high can cause them to burn.
Churros are best enjoyed fresh, so try to serve them soon after frying for that perfect crispy texture!
Panettone (Italian Christmas Cake)
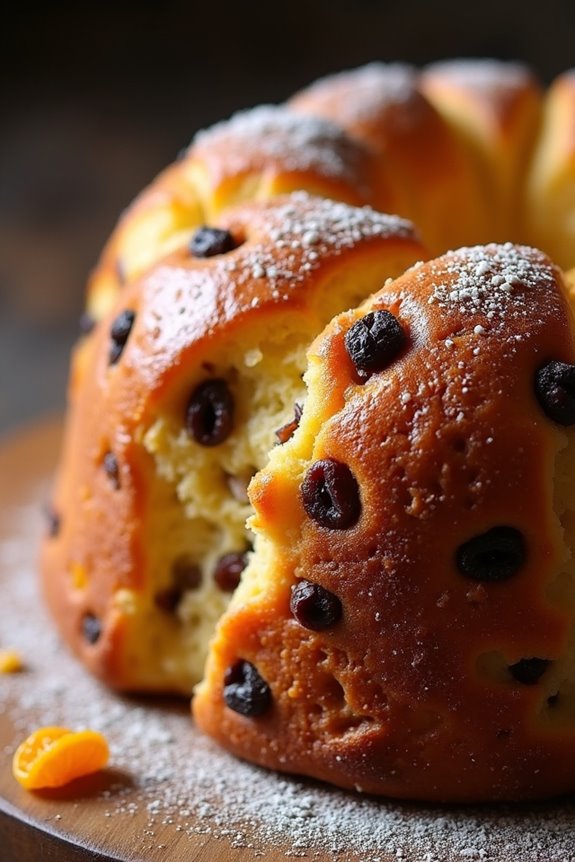
Panettone is a traditional Italian Christmas cake that hails from Milan. Its tall, dome-like shape and rich flavor make it a beloved festive treat not only in Italy but around the world. This soft and airy cake is typically studded with dried fruits like raisins and candied orange peel, which add a delightful sweetness and texture.
Making panettone can be a labor of love, as it requires a careful fermentation process, but the end result is a beautifully fragrant cake that fills your home with the spirit of the holidays. Baking your own panettone allows you to experience this festive delight fresh from the oven, with the ability to customize it to your taste.
While the process may seem intimidating, following these steps will guide you through creating a delicious and impressive panettone that will surely impress your family and friends during the Christmas season. Once you have mastered this recipe, you may find it becoming a cherished tradition in your holiday celebrations.
Ingredients (Serves 4-6 People):
- 500g all-purpose flour
- 100g sugar
- 10g salt
- 10g active dry yeast
- 200ml warm milk
- 3 large eggs
- 100g unsalted butter, softened
- 100g raisins
- 100g candied orange peel
- 100g candied lemon peel
- Zest of 1 orange
- Zest of 1 lemon
- 1 tsp vanilla extract
- 50ml rum (optional)
Cooking Instructions:
- Prepare the Dough Starter: In a small bowl, combine the warm milk and active dry yeast. Allow it to sit for about 10-15 minutes until it becomes frothy. This indicates that the yeast is active and ready to use.
- Mix Dry Ingredients: In a large mixing bowl, whisk together the flour, sugar, and salt. Make a well in the center of the flour and add the frothy yeast mixture, eggs, softened butter, vanilla extract, and zests of orange and lemon.
- Knead the Dough: Combine all ingredients until a shaggy dough forms. Transfer the dough onto a lightly floured surface and knead for about 10-15 minutes until it becomes smooth and elastic. If the dough is sticky, add a little more flour as needed.
- First Rise: Place the dough in a lightly greased bowl, cover it with a clean cloth, and let it rise in a warm, draft-free area for 2-3 hours, or until it has doubled in size.
- Incorporate Fruits: Once the dough has risen, gently punch it down to release the air. Fold in the raisins, candied orange, and lemon peels. Verify the fruit is evenly distributed throughout the dough.
- Shape the Panettone: Form the dough into a ball and place it in a well-greased panettone mold or a tall baking tin. Cover it again and let it rise for another hour, or until it has risen to the top of the mold.
- Preheat and Bake: Preheat the oven to 180°C (350°F). Once the dough has risen, bake it in the preheated oven for about 40-50 minutes, or until the top is golden brown and a skewer inserted into the center comes out clean.
- Cool and Serve: Allow the panettone to cool in the mold for about 10 minutes before transferring it to a wire rack to cool completely. Once cooled, slice and serve your homemade panettone.
Extra Tips:
When making panettone, patience is key. Allow the dough ample time to rise, as this is what gives the cake its characteristic airy texture.
For an extra touch of flavor, consider soaking the dried fruits in rum overnight before incorporating them into the dough. Additionally, storing the panettone wrapped in plastic wrap will keep it fresh for several days, and it can also be enjoyed toasted with butter for a delightful breakfast or snack.
Enjoy the process and the wonderful aromas that fill your kitchen!
Fondue (Melted Cheese Delight)
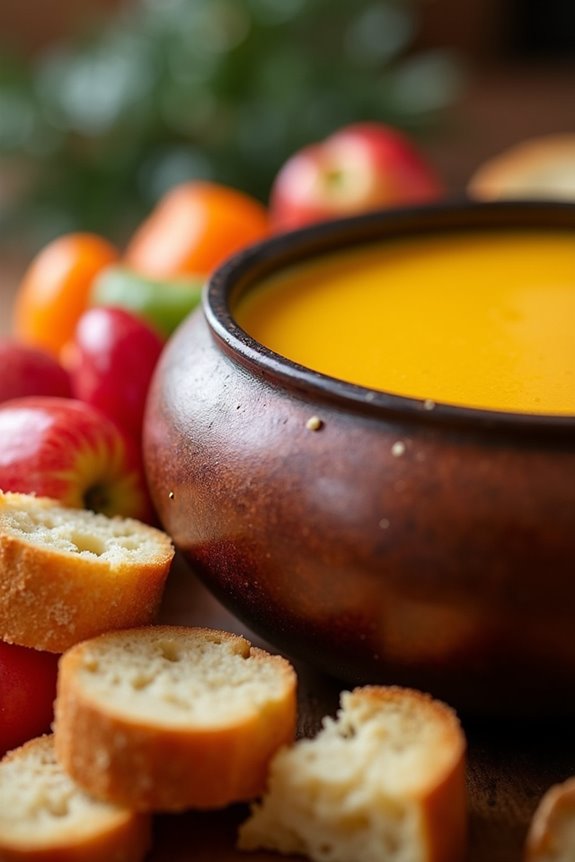
Fondue is a classic Swiss dish that brings warmth and joy during the festive season, perfect for sharing with family and friends. This delightful experience involves melting rich cheeses together and enjoying them with an assortment of dippables. The communal aspect of fondue makes it a fun and interactive meal, allowing everyone to customize their bites with different ingredients.
Whether you gather around a cozy fireplace or a dining table, fondue is sure to create lasting memories around the holiday season.
Traditionally, Swiss fondue is made with a combination of Gruyère and Emmental cheese, providing a smooth and creamy texture with a nutty flavor. The dish is often served with crusty bread, crisp vegetables, and even fruits for dipping. In this recipe, we’ll guide you through the process of creating your own melted cheese delight that will impress your guests and warm their hearts.
Ingredients (Serves 4-6 People)
- 200g Gruyère cheese, grated
- 200g Emmental cheese, grated
- 1 clove of garlic, halved
- 300ml dry white wine
- 1 tablespoon lemon juice
- 1 tablespoon cornstarch
- 3 tablespoons kirsch (cherry brandy)
- Freshly ground black pepper, to taste
- Freshly grated nutmeg, to taste
- Crusty bread, cut into bite-sized pieces
- Assorted dippables (e.g., blanched vegetables, fruits like apples or pears)
Cooking Instructions
- Prepare the Pot: Begin by rubbing the inside of a fondue pot with the halved garlic clove. This will infuse a subtle flavor into the cheese as it melts. After rubbing it, you can discard the garlic.
- Combine Cheese and Cornstarch: In a medium bowl, combine the grated Gruyère and Emmental cheeses with the cornstarch. Toss well to coat the cheese evenly with the cornstarch, which helps prevent clumping during melting.
- Heat the Wine: Place the fondue pot over medium heat and pour in the dry white wine along with the lemon juice. Heat gently until the wine is warm but not boiling. This step helps to prepare the base for the cheese to melt smoothly.
- Melt the Cheese: Gradually add the cheese mixture to the warm wine, stirring constantly in a figure-eight motion with a wooden spoon. This motion promotes even melting and helps to create a creamy texture. Continue to stir until all the cheese has melted and the mixture is smooth.
- Add Kirsch and Seasoning: Once the cheese is melted, stir in the kirsch, freshly ground black pepper, and a pinch of freshly grated nutmeg. Taste and adjust the seasoning if desired. The kirsch adds complexity and a hint of sweetness to the fondue.
- Serve: Once the fondue is ready, reduce the heat to low to keep it warm. Serve with bite-sized pieces of crusty bread and assorted dippables, allowing guests to dip and enjoy the melted cheese delightfully.
Extra Tips
When preparing fondue, it’s crucial to use high-quality cheeses for the best flavor and texture. Keeping the heat low while melting the cheese prevents it from becoming stringy.
If you find the fondue too thick, you can add a splash more wine to reach your desired consistency. Also, encourage your guests to stir occasionally while dipping to keep the cheese well-mixed and creamy throughout the meal.
Enjoy your fondue experience and the delightful conversations that come with it!
Krapfen (Jam-Filled Doughnuts)
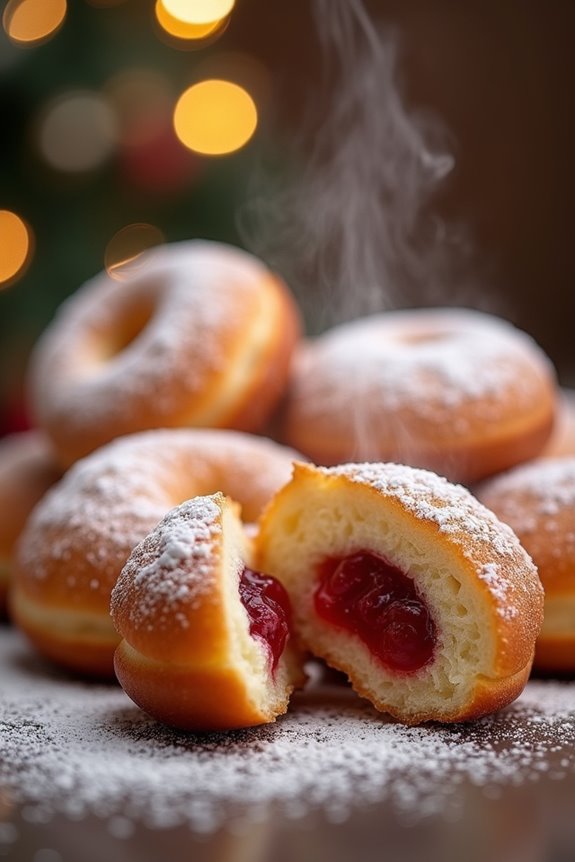
Krapfen, also known as Berliner or jam-filled doughnuts, are a delightful treat enjoyed throughout Europe, particularly in Germany and Austria, during the festive season.
These fluffy, sweet doughnuts, filled with aromatic fruit preserves, are often dusted with powdered sugar and make for a delicious dessert or breakfast option. The process of making Krapfen is a labor of love, as the dough needs to rise to achieve its signature lightness, but the end result is well worth the effort.
These delectable treats are perfect for sharing with family and friends during Christmas gatherings or any special occasion. The combination of soft, pillowy dough and sweet, tangy jam creates a delightful balance that’s sure to please any palate.
Whether you fill them with raspberry, apricot, or any flavor of your choice, Krapfen will surely become a cherished addition to your holiday traditions.
Ingredients (Serves 4-6 people):
- 500g all-purpose flour
- 75g granulated sugar
- 1 packet (7g) active dry yeast
- 250ml whole milk, warmed
- 2 large eggs
- 75g unsalted butter, melted
- 1 teaspoon vanilla extract
- 1/2 teaspoon salt
- 200g fruit jam (e.g., raspberry, apricot, or your choice)
- Vegetable oil for frying
- Powdered sugar for dusting
Cooking Instructions:
1. Prepare the Dough: In a small bowl, combine the warm milk and active dry yeast. Let it sit for about 5-10 minutes until it becomes frothy.
In a large mixing bowl, whisk together the flour, granulated sugar, and salt. Make a well in the center of the dry ingredients and add the yeast mixture, melted butter, eggs, and vanilla extract. Mix until a soft dough forms.
2. Knead the Dough: Turn the dough out onto a lightly floured surface and knead it for about 10 minutes until it’s smooth and elastic. If the dough is too sticky, add a little more flour as needed.
Once kneaded, shape the dough into a ball.
3. First Rise: Place the dough in a lightly greased bowl, cover it with a clean kitchen towel or plastic wrap, and let it rise in a warm place for about 1 to 1.5 hours, or until it has doubled in size.
4. Shape the Krapfen: Once the dough has risen, punch it down to release the air. Roll it out on a floured surface to about 1.5 cm thickness.
Use a round cutter (approximately 7-8 cm in diameter) to cut out circles of dough. Gather the scraps, reroll, and cut out more circles.
5. Second Rise: Place the cut-out dough circles on a floured baking sheet, cover them again, and let them rise for another 30-45 minutes until they puff up slightly.
6. Fry the Krapfen: In a deep pot, heat about 5 cm of vegetable oil to 180°C (350°F). Carefully lower the doughnuts into the hot oil, a few at a time, and fry for about 2-3 minutes on each side, or until they’re golden brown.
Use a slotted spoon to remove them and transfer to a paper towel-lined plate to drain excess oil.
7. Fill the Doughnuts: Allow the fried Krapfen to cool slightly. Using a piping bag fitted with a small nozzle, fill each doughnut with your choice of fruit jam. Dust them with powdered sugar before serving.
Extra Tips:
When making Krapfen, verify that your yeast is fresh for best dough rising. The dough can be prepared the night before and allowed to rise in the refrigerator for a slower fermentation, which enhances flavor.
Don’t overcrowd the pot while frying, as this can lower the oil temperature and lead to greasy doughnuts. For added flair, you can also experiment with different fillings like custard or chocolate, and try rolling the filled doughnuts in granulated sugar for a delightful twist!
Hot Chocolate With Whipped Cream

Hot chocolate is a beloved European winter beverage that warms the heart and soul, especially during the festive Christmas season. Rich and creamy, this delightful drink can be enhanced with various toppings, but nothing beats a generous dollop of freshly whipped cream.
This recipe will guide you on how to prepare a decadent hot chocolate that serves 4-6 people, perfect for sharing with family and friends during cozy gatherings.
Making hot chocolate from scratch allows you to control the sweetness and the richness of the drink, ensuring a luxurious experience. This recipe combines high-quality cocoa powder with milk and cream for a velvety texture, while the whipped cream adds an extra layer of indulgence.
Don’t forget to sprinkle some chocolate shavings or a dash of cinnamon on top for an extra festive touch!
Ingredients (Serves 4-6):
- 4 cups whole milk
- 1 cup heavy cream
- 1/2 cup unsweetened cocoa powder
- 1/2 cup granulated sugar
- 1 teaspoon vanilla extract
- 1/4 teaspoon salt
- Whipped cream (for topping)
- Chocolate shavings or cocoa powder (for garnish)
Cooking Instructions:
- Heat the Milk: In a medium saucepan, pour in the 4 cups of whole milk and 1 cup of heavy cream. Place the saucepan over medium heat, stirring occasionally. Heat the mixture until it’s warm but not boiling; this should take about 5-7 minutes.
- Mix the Dry Ingredients: In a separate bowl, combine the 1/2 cup of unsweetened cocoa powder, 1/2 cup of granulated sugar, and 1/4 teaspoon of salt. Whisk these together until they’re well blended to avoid any lumps.
- Combine Ingredients: Once the milk mixture is warm, gradually whisk in the dry ingredients mix until fully dissolved. Make sure there are no lumps left. Continue to stir the mixture over medium heat until it’s hot and steaming, but again, don’t let it boil.
- Add Flavor: Remove the saucepan from heat and stir in 1 teaspoon of vanilla extract. This will enhance the flavor of your hot chocolate, giving it a wonderful aroma.
- Serve: Pour the hot chocolate into mugs, leaving some space at the top for the whipped cream.
- Top with Whipped Cream: Generously add whipped cream on top of each mug of hot chocolate. For an extra touch, you can sprinkle chocolate shavings or a little cocoa powder over the whipped cream.
Extra Tips:
For an elevated hot chocolate experience, consider adding a pinch of cinnamon or a splash of peppermint extract to the mixture for a holiday twist.
If you prefer a richer flavor, you can substitute part of the milk with dark chocolate or use a combination of milk and almond milk. Always taste your hot chocolate before serving and adjust the sweetness to your liking.
Enjoy this delightful drink alongside festive cookies or pastries for a truly indulgent treat!