

Exploring the culinary treasures of Eastern Europe feels like a comforting trip down memory lane. Each dish, from vibrant borscht to comforting pierogi, is filled with warmth and tradition. These recipes offer more than just nourishment; they bring people together. Join me in uncovering the heart of these old-world creations. Let’s discover what makes them truly special.
Borscht: The Iconic Beet Soup
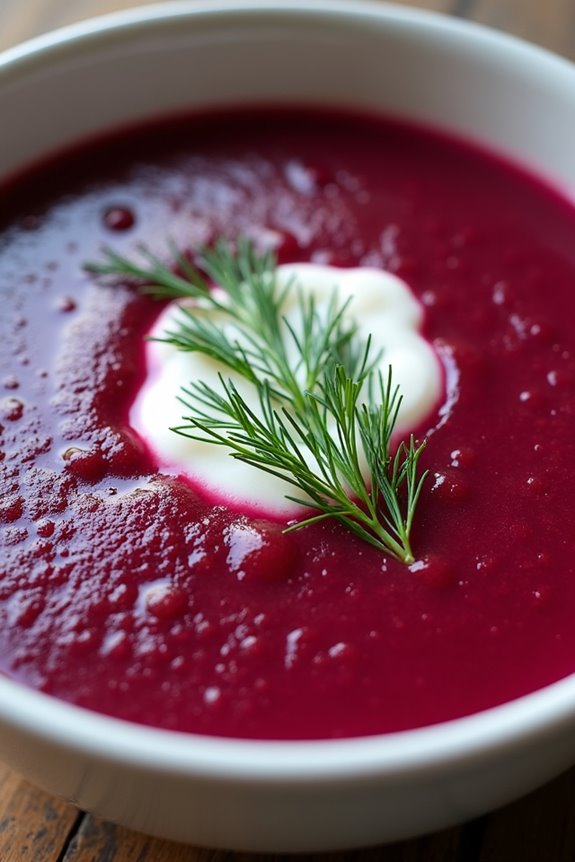
Borscht is a traditional Eastern European soup that has captivated the palates of many around the world with its vibrant color and unique flavor profile. This iconic beet soup isn’t only visually stunning but also packed with nutrients, mainly due to its star ingredient—beets. The origins of borscht can be traced back to Ukraine, where it has become a staple dish enjoyed by families across generations. Each region has its own variations, but the heart of borscht lies in its earthy sweetness from beets, complemented by a medley of vegetables and a splash of acidity, usually from vinegar or lemon juice.
The comforting warmth of borscht makes it a perfect dish for any season, whether served hot in the winter or chilled in the summer. This soup is often garnished with a dollop of sour cream, fresh dill, and sometimes even served with a slice of rye bread for a complete meal. Making borscht takes a little time, but the end result is worth every minute, as it brings together a harmony of flavors that can be enjoyed by everyone.
Ingredients (Serves 4-6)
- 2 medium beets, peeled and grated
- 1 medium onion, finely chopped
- 1 medium carrot, grated
- 1 medium potato, diced
- 1/2 small head of cabbage, shredded
- 2 cloves garlic, minced
- 6 cups vegetable or beef broth
- 2 tablespoons tomato paste
- 1 tablespoon vinegar (white or apple cider)
- 1 teaspoon sugar
- Salt and pepper to taste
- 2 tablespoons vegetable oil
- Fresh dill, for garnish
- Sour cream, for serving
Cooking Instructions
- Prepare the Vegetables: Begin by peeling and grating the beets, grating the carrot, chopping the onion, dicing the potato, and shredding the cabbage. This step sets the foundation for your borscht, ensuring all ingredients are ready to go.
- Sauté the Base: In a large pot, heat the vegetable oil over medium heat. Add the chopped onion and grated carrot, cooking until the onions become translucent, about 5-7 minutes. This step enhances the flavors of the base of your soup.
- Add Beets and Tomato Paste: Stir in the grated beets and tomato paste, cooking for an additional 5 minutes. This allows the beets to soften slightly and the tomato paste to caramelize, enriching the overall flavor of the soup.
- Incorporate Broth and Vegetables: Pour in the vegetable or beef broth and bring the mixture to a boil. Once boiling, add the diced potatoes and shredded cabbage. Lower the heat and let it simmer for about 20 minutes until the vegetables are tender.
- Season the Soup: Add the minced garlic, vinegar, sugar, salt, and pepper to the pot, stirring to combine. The vinegar adds a necessary tang, balancing the sweetness of the beets. Let the soup simmer for an additional 10 minutes to meld the flavors.
- Adjust the Consistency: If you find the soup too thick, feel free to add more broth or water to reach your desired consistency. Taste and adjust the seasoning, if necessary.
- Serve: Ladle the borscht into bowls and garnish each serving with a dollop of sour cream and a sprinkle of fresh dill. Serve warm with crusty rye bread for a complete meal.
Extra Tips
When preparing borscht, feel free to experiment with additional vegetables like bell peppers or tomatoes, or even add meat such as beef or sausage for a heartier version.
If you’re looking to make it vegetarian, simply stick to vegetable broth and omit any meat. Additionally, borscht can be made ahead of time and actually tastes better the next day, as the flavors continue to develop.
Store any leftovers in the refrigerator for up to a week, and consider freezing portions for later enjoyment!
Pierogi: Dumplings of Delight

Pierogi are a beloved staple in Eastern European cuisine, celebrated for their delightful dough filled with various ingredients. These dumplings can be savory or sweet, offering a perfect dish for any occasion. Traditionally, pierogi are made with a simple dough of flour and water, then filled with ingredients such as potatoes, cheese, sauerkraut, or fruit. The versatility of pierogi allows for endless variations, making it a dish that can be tailored to suit any palate.
Making pierogi is a rewarding process that brings family and friends together. Once you’ve mastered the basic dough and filling, you can experiment with different flavors and fillings to create your unique variations. The key to achieving the ideal texture lies in the dough’s elasticity and ensuring that it’s rolled out thinly enough to encase the filling without tearing.
Once cooked, pierogi can be served with toppings such as sautéed onions, sour cream, or crispy bacon, enhancing their flavor and presentation.
Ingredients (serving size: 4-6 people):
- 2 cups all-purpose flour
- 1 large egg
- 1/2 cup water (more as needed)
- 1/2 teaspoon salt
- 2 cups mashed potatoes (about 3 medium potatoes)
- 1 cup cottage cheese or farmer’s cheese
- 1 medium onion, diced
- 2 tablespoons butter (for sautéing onions)
- Salt and pepper to taste
- Sour cream (for serving)
- Fresh herbs (optional, for garnish)
Cooking Instructions:
1. Make the Dough:
In a large mixing bowl, combine the flour and salt. Create a well in the center and add the egg and water. Mix together until a dough forms. Knead the dough on a floured surface for about 5-7 minutes until it’s smooth and elastic. Cover the dough with a clean towel or plastic wrap and let it rest for at least 30 minutes.
2. Prepare the Filling:
While the dough is resting, prepare the filling. Boil the potatoes in salted water until tender, then drain and mash them. In a skillet, melt the butter over medium heat and sauté the diced onion until golden brown. In a bowl, combine the mashed potatoes, cottage cheese, sautéed onions, and seasoning with salt and pepper to taste. Mix well and set aside.
3. Roll Out the Dough:
After resting, divide the dough into quarters to make it easier to handle. Roll out one quarter on a floured surface to about 1/8 inch thick. Use a round cutter or a glass to cut out circles (approximately 3 inches in diameter) from the rolled dough.
4. Fill the Pierogi:
Take one dough circle and place a tablespoon of the filling in the center. Fold the dough over the filling to create a half-moon shape and pinch the edges tightly to seal, making sure there are no air pockets. Repeat this process until all the dough and filling are used.
5. Cook the Pierogi:
Bring a large pot of salted water to a boil. Carefully drop the pierogi into the boiling water in batches, being careful not to overcrowd the pot. Cook for about 3-5 minutes or until they float to the surface. Once they float, allow them to cook for an additional minute. Remove with a slotted spoon and set aside.
6. Serve:
In a skillet, melt some butter over medium heat and sauté the cooked pierogi until golden brown on both sides (optional). Serve hot with a dollop of sour cream and garnish with fresh herbs if desired.
Extra Tips:
When making pierogi, feel free to experiment with different fillings such as sauerkraut, meat, or seasonal fruits for sweet versions. If you have leftover pierogi, they can be frozen before cooking; simply place them on a baking sheet to freeze individually, then transfer to a freezer bag.
To reheat, you can boil or sauté them directly from frozen. Additionally, using a mix of flours, like adding a bit of whole wheat flour, can give the dough a unique flavor and texture. Enjoy your pierogi-making adventure!
Goulash: A Hearty Hungarian Stew
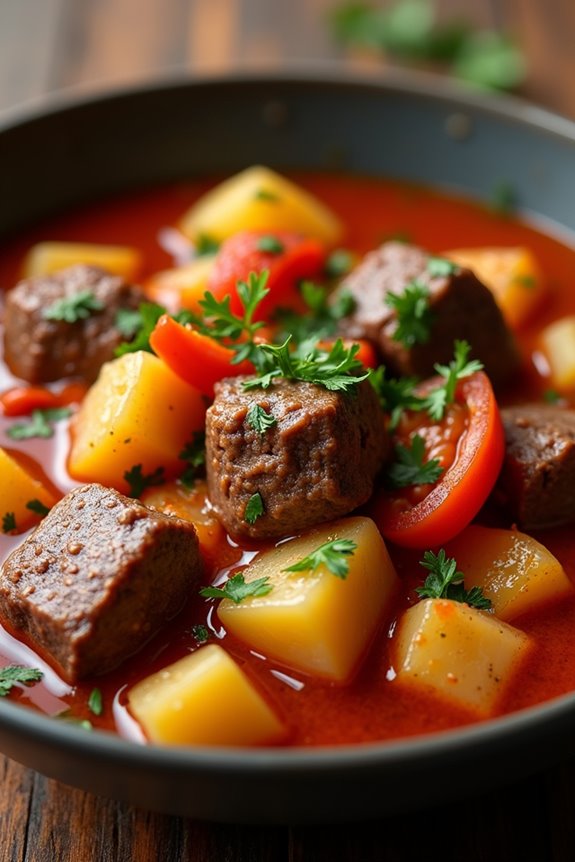
Goulash is a traditional Hungarian dish that has delighted palates for centuries. This rich and flavorful stew is characterized by its savory blend of tender meat, aromatic spices, and vibrant vegetables, making it the perfect comfort food for chilly days.
Originating from the pastoral cuisine of Hungary, goulash has evolved over time, with variations appearing in many Eastern European countries. The key to a great goulash lies in the quality of the ingredients and the slow cooking process that allows the flavors to meld beautifully.
To make a classic goulash, you’ll need a combination of beef, peppers, onions, and a variety of spices, most importantly paprika, which gives the dish its distinctive flavor and color. Serve it with fresh bread or dumplings, and you have a hearty meal that will satisfy both the body and soul. This recipe is designed to serve 4-6 people, making it ideal for family gatherings or cozy dinners with friends.
Ingredients:
- 2 lbs beef chuck, cut into 1-inch cubes
- 2 tablespoons vegetable oil
- 2 medium onions, finely chopped
- 2 cloves garlic, minced
- 2 tablespoons sweet paprika
- 1 teaspoon caraway seeds
- 1 bell pepper (red or green), diced
- 3 medium tomatoes, chopped (or 1 can of diced tomatoes)
- 4 cups beef broth
- 2 medium potatoes, peeled and diced
- Salt and pepper to taste
- Fresh parsley for garnish (optional)
Cooking Instructions:
- Brown the Beef: In a large pot or Dutch oven, heat the vegetable oil over medium-high heat. Add the beef cubes in batches, making sure not to overcrowd the pot. Brown the beef on all sides, which should take about 5-7 minutes. This step is essential as it develops flavor through the Maillard reaction.
- Sauté Onions and Garlic: Once the beef is browned, remove it from the pot and set it aside. In the same pot, add the chopped onions and sauté them until they become translucent, about 5 minutes. Then add the minced garlic and cook for an additional minute. This builds a flavorful base for the stew.
- Add Spices: Stir in the sweet paprika and caraway seeds, cooking for about 1 minute. This will help release the flavors of the spices, making the goulash aromatic.
- Combine Ingredients: Return the browned beef to the pot and add the diced bell pepper and chopped tomatoes. Stir everything together to combine well.
- Pour in Broth: Gradually pour in the beef broth, ensuring that the meat and vegetables are fully submerged. Bring the mixture to a boil, then reduce the heat to low. Cover the pot and let it simmer for about 1.5 to 2 hours, stirring occasionally. The slow cooking will tenderize the beef and meld the flavors.
- Add Potatoes: After the beef has simmered, add the diced potatoes to the pot. Continue to simmer for an additional 30-40 minutes, or until the potatoes are tender and the stew has thickened.
- Season and Serve: Taste the goulash and add salt and pepper as needed. Once everything is cooked through, remove the pot from the heat. Serve hot, garnished with fresh parsley if desired.
Extra Tips:
When making goulash, consider using a combination of meats such as beef and pork for a richer flavor. Additionally, allowing the goulash to sit for a few hours or even overnight can enhance the taste, as the flavors have more time to develop.
If you prefer a thicker stew, you can mix a tablespoon of cornstarch with cold water and stir it into the goulash during the last few minutes of cooking. Enjoy this hearty dish with a side of crusty bread or traditional Hungarian dumplings for a complete meal.
Cabbage Rolls: Stuffed and Savory

Cabbage rolls are a beloved dish across many Eastern European countries, often filled with a savory mixture of rice and meat, then simmered in a rich tomato sauce. These delicious rolls aren’t only comforting but also a great way to enjoy the nutritious benefits of cabbage.
This dish has been passed down through generations and is cherished for its hearty flavors and satisfying texture. With every bite, you experience a blend of spices and seasonings that evoke the warmth of home-cooked meals.
Making cabbage rolls is a labor of love, but the process is straightforward and rewarding. While they may take some time to prepare, the end result is a delightful meal that can feed a crowd or provide delicious leftovers for days.
Whether served at a family gathering or as a cozy dinner for two, cabbage rolls are sure to impress with their delightful taste and beautiful presentation.
Ingredients (serving size: 4-6 people):
- 1 large head of green cabbage
- 1 pound ground beef (or ground pork)
- 1 cup cooked rice
- 1 small onion, finely chopped
- 2 cloves garlic, minced
- 1 teaspoon paprika
- 1 teaspoon dried dill
- Salt and pepper to taste
- 1 can (15 oz) tomato sauce
- 1 can (15 oz) diced tomatoes
- 1 tablespoon olive oil
- 1 tablespoon vinegar (optional)
- Fresh parsley for garnish (optional)
Cooking Instructions:
- Prepare the Cabbage: Bring a large pot of salted water to a boil. Carefully remove the core from the head of cabbage. Place the whole cabbage in the boiling water for about 5-10 minutes, or until the leaves become pliable. Remove the cabbage and let it cool slightly. Gently peel off 12-15 leaves, trying not to tear them. Set aside.
- Make the Filling: In a large mixing bowl, combine the ground beef (or pork), cooked rice, chopped onion, minced garlic, paprika, dried dill, salt, and pepper. Mix well until all ingredients are evenly incorporated. This will be the savory filling for the cabbage rolls.
- Roll the Cabbage Leaves: Take one cabbage leaf and place about 2-3 tablespoons of the filling at the base of the leaf. Fold the sides over the filling and then roll it up tightly from the base to the top. Repeat this process with the remaining leaves and filling, placing the finished rolls seam-side down.
- Prepare the Sauce: In a large skillet or pot, heat the olive oil over medium heat. Add the tomato sauce and diced tomatoes, stirring to combine. If desired, add a tablespoon of vinegar for a touch of acidity. Bring the sauce to a gentle simmer.
- Cook the Cabbage Rolls: Carefully place the cabbage rolls seam-side down into the simmering tomato sauce. Cover the pot and let the rolls cook on low heat for 45 minutes to 1 hour, or until the meat is thoroughly cooked and the flavors meld together. Baste the rolls occasionally with the sauce for added flavor.
- Serve: Once cooked, remove the cabbage rolls from the pot and place them on a serving platter. Spoon some extra sauce over the top and garnish with fresh parsley if desired. Serve warm with crusty bread or a side of sour cream.
Extra Tips: For an even more flavorful filling, consider adding some cooked and crumbled bacon or sausage to the meat mixture. Additionally, you can experiment with different spices or herbs based on your taste preferences.
To make cabbage rolls ahead of time, they can be assembled and stored in the refrigerator for one day before cooking. Just be sure to adjust cooking time as needed if they’re cooked straight from the fridge. Enjoy your delicious cabbage rolls!
Chicken Paprikash: A Creamy Classic

Chicken Paprikash is a beloved dish that hails from Hungary, showcasing the vibrant flavors of paprika and the comforting richness of creamy sauce. This dish isn’t just a meal; it’s a celebration of Eastern European culinary traditions, often served with dumplings or egg noodles. The star of the show is the tender chicken that absorbs the delightful spices and creamy sauce, making it a perfect choice for family gatherings or cozy dinners.
The beauty of Chicken Paprikash lies in its simplicity and depth of flavor. With just a handful of ingredients, you can create a dish that’s both hearty and satisfying. The key is to use high-quality paprika, as it’s the cornerstone of this recipe. The dish is typically garnished with a dollop of sour cream, adding an extra layer of richness and tanginess that perfectly complements the flavors.
Ingredients (Serves 4-6)
- 3-4 pounds of bone-in chicken pieces (thighs, drumsticks, or a mix)
- 2 tablespoons vegetable oil
- 2 medium onions, finely chopped
- 3 cloves garlic, minced
- 2 tablespoons sweet Hungarian paprika
- 1 teaspoon salt
- 1/2 teaspoon black pepper
- 1 cup chicken broth
- 1 cup sour cream
- 2 tablespoons all-purpose flour
- Fresh parsley, chopped (for garnish)
Cooking Instructions
- Prepare The Chicken: Start by patting the chicken pieces dry with paper towels. This helps to achieve a nice sear. Season the chicken with salt and pepper on both sides.
- Brown The Chicken: In a large skillet or Dutch oven, heat the vegetable oil over medium-high heat. Once hot, add the chicken pieces skin-side down and brown for about 5-7 minutes on each side until golden brown. This step is vital as it locks in the flavors. Remove the chicken and set aside.
- Sauté The Onions and Garlic: In the same skillet, add the chopped onions and sauté for about 5 minutes until they become translucent. Then, add the minced garlic and cook for an additional minute until fragrant, being careful not to let it burn.
- Add Paprika: Sprinkle the sweet Hungarian paprika over the sautéed onions and garlic, stirring well to combine. Cook for about 1-2 minutes; this will help to release the paprika’s key oils, enhancing the overall flavor of the dish.
- Deglaze The Pan: Pour in the chicken broth, scraping up any browned bits stuck to the bottom of the pan. This step infuses the broth with deep flavors. Bring the mixture to a gentle simmer.
- Simmer the Chicken: Return the browned chicken to the pan, skin-side up. Cover the skillet and let it simmer on low heat for about 30-40 minutes, or until the chicken is cooked through and tender. The internal temperature should reach 165°F (75°C).
- Prepare The Creamy Sauce: In a small bowl, combine the sour cream and flour until smooth. Gradually add a ladle of the hot broth from the pan to temper the sour cream, then stir this mixture back into the skillet. This will thicken the sauce. Simmer for an additional 5 minutes, stirring gently.
- Serve: Once the sauce is thickened and the chicken is tender, remove from heat. Garnish with freshly chopped parsley before serving. Enjoy with dumplings, egg noodles, or a crusty bread to soak up the delicious sauce.
Extra Tips
When making Chicken Paprikash, it’s important to use high-quality sweet paprika for the best flavor. If you prefer a bit of heat, you can add a pinch of cayenne pepper or use smoked paprika for a different twist.
Always taste and adjust seasoning as needed. For a creamier sauce, consider adding a bit more sour cream at the end. Additionally, this dish can be made ahead of time and reheats beautifully, making it perfect for meal prep!
Beef Stroganoff: A Russian Favorite
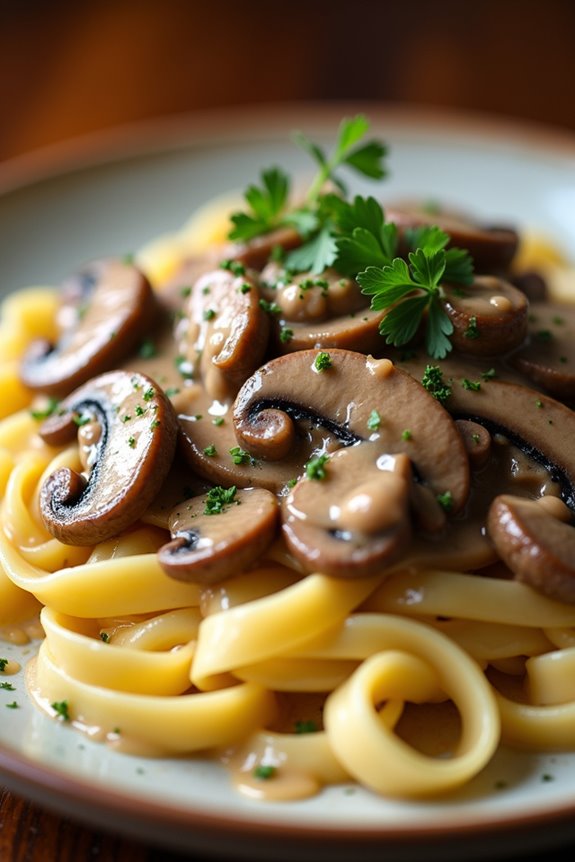
Beef Stroganoff is a classic Russian dish that has gained international popularity for its rich flavors and comforting texture. Traditionally made with tender strips of beef, this dish is simmered in a creamy mushroom sauce and served over egg noodles or rice. The combination of savory beef, earthy mushrooms, and a smooth sour cream sauce creates a hearty meal that’s perfect for family dinners or special occasions.
The origins of Beef Stroganoff can be traced back to the 19th century, where it was created by the Stroganov family, a wealthy Russian family known for their culinary influence. Over the years, variations of the dish have emerged, incorporating different ingredients such as onions, mustard, and various types of mushrooms. However, the essence of the dish remains the same: a deliciously creamy sauce enveloping tender beef, making it a beloved comfort food across the globe.
Ingredients (Serves 4-6):
- 1.5 lbs beef sirloin or tenderloin, cut into thin strips
- 2 tablespoons olive oil
- 1 medium onion, finely chopped
- 2 cloves garlic, minced
- 8 oz mushrooms, sliced (button or cremini)
- 1 tablespoon all-purpose flour
- 1 cup beef broth
- 1 tablespoon Worcestershire sauce
- 1 teaspoon Dijon mustard
- 1 cup sour cream
- Salt and pepper to taste
- Fresh parsley, chopped (for garnish)
- Egg noodles or rice (for serving)
Cooking Instructions:
- Prepare the Ingredients: Start by gathering all the ingredients and slicing the beef into thin strips against the grain. This helps in achieving tender pieces of meat once cooked. Chop the onions and garlic, and slice the mushrooms to verify they’re ready to go.
- Sear the Beef: In a large skillet or frying pan, heat the olive oil over medium-high heat. Once the oil is hot, add the beef strips in batches, being careful not to overcrowd the pan. Sear the beef for about 2-3 minutes until browned on the outside but not fully cooked. Remove the beef from the pan and set aside.
- Cook the Vegetables: In the same skillet, add the chopped onions and sauté for about 3-4 minutes until they become translucent. Add the minced garlic and sliced mushrooms, cooking for an additional 5-7 minutes until the mushrooms are softened and browned.
- Make the Sauce: Sprinkle the flour over the sautéed vegetables and stir to combine. This will help thicken the sauce. Gradually pour in the beef broth, stirring continuously to avoid lumps. Add Worcestershire sauce and Dijon mustard, and bring the mixture to a simmer for about 5 minutes.
- Combine and Finish: Lower the heat and return the seared beef to the skillet. Stir in the sour cream and mix well until everything is combined. Allow the mixture to simmer for an additional 5 minutes until the beef is cooked through and the sauce is creamy. Season with salt and pepper to taste.
- Serve: Serve the Beef Stroganoff over cooked egg noodles or rice. Garnish with freshly chopped parsley to add a pop of color and freshness.
Extra Tips:
To enhance the flavor of your Beef Stroganoff, consider marinating the beef in a little Worcestershire sauce and Dijon mustard for a few hours before cooking. This adds depth to the beef.
Additionally, you can experiment by adding a splash of white wine to the sauce for a more complex flavor profile. If you’re looking for a lighter option, substitute Greek yogurt for sour cream.
Finally, make sure to cook the noodles or rice according to the package instructions so they’re ready to serve alongside the Stroganoff. Enjoy your meal!
Sarmale: Romanian Stuffed Cabbage

Sarmale, a traditional Romanian dish, is a comforting and hearty meal that embodies the rich flavors of Eastern European cuisine. This dish consists of tender cabbage leaves filled with a savory mixture of minced meat and rice, seasoned with herbs and spices, then slowly cooked in a flavorful tomato sauce.
Sarmale is often prepared for special occasions and family gatherings, where it’s typically served alongside a dollop of sour cream and a slice of hearty bread. The preparation may seem labor-intensive, but the end result is a warming and satisfying dish that’s well worth the effort.
To make Sarmale, you’ll need to use pickled cabbage leaves, which add a distinctive tanginess to the dish. If pickled cabbage isn’t available, you can use fresh cabbage leaves, but they’ll need to be blanched to soften them for rolling. The filling usually combines ground pork, beef, or a mixture of both, along with rice, onion, and various spices.
This dish not only showcases the flavors of Romania but also brings people together, making it a beloved staple in Romanian households.
Ingredients (Serves 4-6):
- 1 large head of pickled cabbage (or fresh cabbage)
- 500g ground pork
- 500g ground beef
- 200g rice
- 2 medium onions, finely chopped
- 3 tablespoons vegetable oil
- 1 teaspoon dried thyme
- 1 teaspoon paprika
- 1 teaspoon black pepper
- 1 teaspoon salt
- 2 tablespoons tomato paste
- 400ml tomato juice
- 2-3 bay leaves
- Fresh dill (optional, for garnish)
Cooking Instructions:
1. Prepare the Cabbage:
If using fresh cabbage, bring a large pot of water to boil. Core the cabbage and carefully peel off the leaves, blanching them in hot water for about 2-3 minutes until they’re pliable. If using pickled cabbage, rinse the leaves briefly to reduce saltiness and set aside.
2. Make the Filling:
In a large skillet, heat the vegetable oil over medium heat. Add the finely chopped onions and sauté until they become translucent. In a large bowl, combine the ground pork, ground beef, cooked onions, rice, thyme, paprika, black pepper, and salt. Mix well until all ingredients are evenly incorporated.
3. Assemble the Sarmale:
Take a cabbage leaf and place about 1-2 tablespoons of the filling at the base of the leaf. Fold the sides over the filling and roll it up tightly, starting from the base towards the top. Repeat this process until all filling is used.
4. Prepare the Cooking Pot:
In a large pot, spread some chopped cabbage leaves on the bottom to prevent the sarmale from sticking. Layer the rolled sarmale tightly in the pot, adding bay leaves between layers.
5. Add the Sauce:
In a separate bowl, mix the tomato paste with the tomato juice. Pour this mixture over the sarmale, ensuring they’re covered with liquid. If needed, add water to cover the rolls completely.
6. Cook the Sarmale:
Cover the pot with a lid and bring to a simmer over medium heat. Once boiling, reduce the heat to low and let it cook for about 2-3 hours. The longer they cook, the more flavorful they become. Check occasionally and add water if the sauce reduces too much.
7. Serve:
Once cooked, remove the pot from heat and let it rest for about 15 minutes. Serve warm, garnished with fresh dill and a side of sour cream.
Extra Tips:
When preparing Sarmale, consider making a larger batch to freeze for later use. They can be frozen before cooking or after and reheated when needed.
Additionally, feel free to experiment with the filling by adding grated carrots or smoked meats for an extra layer of flavor. Cooking Sarmale slowly allows the flavors to meld beautifully, so don’t rush the process for the best taste.
Kasha Varnishkes: Buckwheat and Noodles
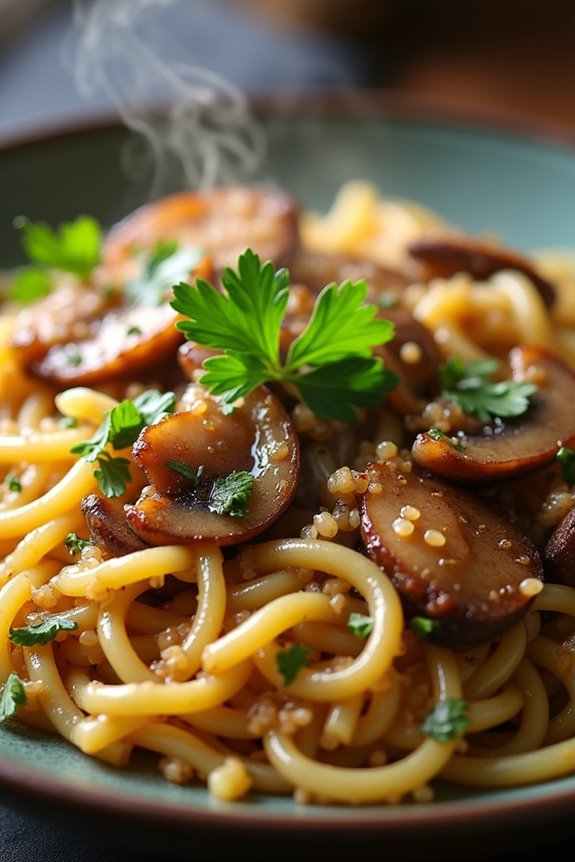
Kasha Varnishkes is a traditional Eastern European dish that beautifully marries the earthy flavors of buckwheat groats with the comforting texture of egg noodles. This dish, often served as a side or a main course, is a staple in Jewish cuisine, particularly among Ashkenazi communities. The combination of nutty kasha and tender noodles creates a satisfying meal that’s both hearty and wholesome.
It’s typically flavored with onions and mushrooms, making it an aromatic and savory delight that appeals to all palates.
The preparation of Kasha Varnishkes is relatively simple, but it requires attention to detail to achieve the perfect balance of flavors. The buckwheat is toasted to enhance its nuttiness before being cooked to fluffy perfection. Meanwhile, the noodles are boiled until al dente and then tossed together with the kasha, sautéed onions, and mushrooms for a dish that isn’t only delicious but also filling.
This recipe serves 4-6 people, making it perfect for family gatherings or casual dinners with friends.
Ingredients (Serves 4-6):
- 1 cup buckwheat groats
- 2 cups water or vegetable broth
- 1 tablespoon olive oil or butter
- 1 medium onion, finely chopped
- 8 ounces mushrooms, sliced
- 1 teaspoon salt (to taste)
- 1/2 teaspoon black pepper (to taste)
- 8 ounces egg noodles
- 2 tablespoons chopped fresh parsley (optional, for garnish)
Cooking Instructions:
- Toast the Buckwheat: In a dry skillet over medium heat, add the buckwheat groats. Toast them for about 5-7 minutes, stirring frequently, until they’re fragrant and lightly browned. This step enhances the nutty flavor of the kasha.
- Cook the Kasha: In a medium saucepan, bring 2 cups of water or vegetable broth to a boil. Add the toasted buckwheat to the boiling liquid, reduce the heat to low, cover, and simmer for about 15-20 minutes, or until the liquid is absorbed and the kasha is tender. Fluff with a fork once cooked.
- Prepare the Noodles: While the kasha is cooking, bring a large pot of salted water to a boil. Add the egg noodles and cook according to package instructions until al dente. Drain and set aside.
- Sauté the Onions and Mushrooms: In a large skillet, heat the olive oil or butter over medium heat. Add the chopped onion and cook for about 5 minutes, or until translucent. Then, add the sliced mushrooms and cook for an additional 5-7 minutes, until the mushrooms are browned and tender.
- Combine Ingredients: Once the onions and mushrooms are cooked, add the cooked kasha and drained noodles to the skillet. Season with salt and black pepper, and gently toss everything together until well combined. Cook for another 2-3 minutes over low heat to warm through.
- Serve: Transfer the Kasha Varnishkes to a serving dish and garnish with chopped fresh parsley if desired. Serve warm, and enjoy the comforting flavors of this traditional dish.
Extra Tips:
When making Kasha Varnishkes, feel free to customize the dish by adding other vegetables such as bell peppers or carrots for extra flavor and nutrition.
Additionally, for a creamier texture, you can stir in a little sour cream or cream cheese before serving. Be sure to taste and adjust seasoning as necessary, as the flavors can vary based on the broth used.
This dish also makes for excellent leftovers, as the flavors meld beautifully when stored in the refrigerator.
Blini: Fluffy Russian Pancakes

Blini are traditional Russian pancakes that are light, fluffy, and incredibly versatile. Often enjoyed during celebrations or as a special breakfast treat, these delightful pancakes can be served with a variety of toppings, from sweet to savory.
Whether you fill them with jam, sour cream, caviar, or even smoked salmon, they’re sure to impress your family and guests. The secret to achieving the perfect blini lies in the batter, which requires a blend of yeast and baking powder for that airy texture.
Making blini at home is easier than you might think. With just a few simple ingredients, you can whip up a batch that rivals those found in authentic Russian kitchens. This recipe yields 4-6 servings, making it perfect for family breakfasts or gatherings. Follow these steps, and you’ll be enjoying your own fluffy blini in no time!
Ingredients:
- 1 cup all-purpose flour
- 1 cup milk (warm)
- 1 large egg
- 1 tablespoon sugar
- 1 teaspoon salt
- 1 teaspoon baking powder
- 1 teaspoon active dry yeast
- 2 tablespoons melted butter (plus extra for cooking)
- 1/2 cup water (warm)
Cooking Instructions:
- Activate the Yeast: In a small bowl, combine the warm milk and warm water, then sprinkle the active dry yeast over the top. Allow it to sit for about 5-10 minutes until it becomes frothy. This indicates that the yeast is active and ready to use.
- Prepare the Batter: In a large mixing bowl, whisk together the flour, sugar, salt, and baking powder. Create a well in the center and add the egg, melted butter, and the frothy yeast mixture. Stir everything together until you achieve a smooth batter. The consistency should be similar to that of a thick pancake batter.
- Let the Batter Rest: Cover the bowl with a clean kitchen towel or plastic wrap and let the batter rest in a warm place for about 30-45 minutes. This resting period allows the yeast to work, creating bubbles that contribute to the fluffy texture of the blini.
- Cook the Blini: Heat a non-stick skillet or a crepe pan over medium heat. Add a little melted butter to coat the surface. Pour a ladleful of batter onto the skillet, tilting the pan to spread the batter evenly. Cook for about 2-3 minutes or until bubbles form on the surface and the edges begin to look set. Flip the blini and cook for another 1-2 minutes until golden brown. Repeat this process with the remaining batter.
- Serve: Stack the cooked blini on a plate and keep them warm by covering them with a kitchen towel. Serve with your favorite toppings, such as sour cream, caviar, or fresh berries.
Extra Tips: To make your blini even more delightful, consider experimenting with different types of flour, such as buckwheat flour, for a more traditional flavor.
Additionally, serve them warm for the best taste and texture, and feel free to prepare a variety of toppings to cater to different palates. If you’re not using them right away, you can keep the cooked blini in an airtight container in the refrigerator for a few days or freeze them for later use. Just reheat in a skillet or microwave when ready to enjoy!
Pirozhki: Flavorful Pastries

Pirozhki are delightful Eastern European pastries that can be filled with a variety of ingredients, making them a versatile treat perfect for any occasion. Originating from Russia, these small buns are often filled with savory or sweet fillings, and they’re typically baked or fried to perfection.
Pirozhki can be enjoyed as a snack, a meal, or even a dessert, depending on the filling chosen. When served warm, they offer a comforting taste that transports you to the heart of Eastern Europe with every bite.
Making pirozhki at home is an enjoyable process that allows you to customize the fillings to suit your taste. The dough is soft and fluffy, providing an excellent base for whatever filling you choose—be it meat, vegetables, or fruits. This recipe will guide you through creating a classic pirozhki with a savory filling of ground beef and onions, but feel free to experiment with other fillings like mushrooms, potatoes, or sweet fruit mixtures in your variations.
Ingredients (Serves 4-6)
- 3 cups all-purpose flour
- 1 packet (2 ¼ teaspoons) active dry yeast
- 1 cup warm milk (110°F)
- 2 tablespoons sugar
- 1 teaspoon salt
- 1 large egg
- 4 tablespoons unsalted butter, melted
- 1 pound ground beef
- 1 medium onion, finely chopped
- Salt and pepper to taste
- Oil for frying or baking
Cooking Instructions
1. Prepare the Dough: In a large bowl, combine warm milk, sugar, and yeast. Let it sit for about 5-10 minutes until it becomes frothy. This step activates the yeast and guarantees that your dough rises properly.
2. Mix Dry Ingredients: In a separate bowl, mix the flour and salt together. Once the yeast mixture is frothy, add the melted butter and egg to the bowl and mix well.
3. Combine and Knead****: Gradually add the flour mixture to the yeast mixture, stirring until a dough forms. Transfer the dough to a floured surface and knead for about 5-7 minutes until the dough is smooth and elastic.
Place the kneaded dough in a lightly greased bowl, cover it with a kitchen towel, and let it rise in a warm place for about 1 hour, or until it doubles in size.
4. Prepare the Filling: In a skillet over medium heat, cook the chopped onion until translucent, about 5 minutes. Add the ground beef and season with salt and pepper. Cook until the meat is browned and fully cooked through. Remove from heat and let it cool slightly.
5. Shape the Pirozhki: Once the dough has risen, punch it down and divide it into small balls (about the size of a golf ball). Roll each ball into a flat circle, about 4-5 inches in diameter.
Place a spoonful of the beef filling in the center of each circle, then fold the dough over the filling to create a pocket. Pinch the edges to seal.
6. Cooking the Pirozhki: You can either fry or bake the pirozhki. For frying, heat oil in a deep skillet over medium heat and fry each pirozhok until golden brown on both sides, about 3-4 minutes per side.
For baking, preheat your oven to 375°F (190°C), place the pirozhki on a baking sheet lined with parchment paper, brush with egg wash (optional), and bake for about 20-25 minutes or until golden.
7. Serve: Allow the pirozhki to cool slightly before serving. Enjoy them warm, either on their own or with a side of sour cream or a dipping sauce.
Extra Tips
When making pirozhki, verify that your dough doesn’t become too sticky; adjust with a little extra flour if necessary. For a more flavorful filling, consider adding herbs or spices to the meat mixture.
If you choose to experiment with sweet fillings, such as fruit preserves, you can sprinkle a bit of sugar on top of the pirozhki before baking for added sweetness. Finally, if you’re preparing these ahead of time, pirozhki freeze beautifully; just reheat them in the oven when you’re ready to enjoy!
Kolaczki: Sweet Polish Cookies

Kolaczki are delightful little pastries that hail from Poland, known for their flaky texture and sweet fillings. Traditionally made for special occasions and holidays, these cookies aren’t only a treat for the taste buds but also a beautiful addition to any dessert table. The dough is rich and buttery, providing a perfect contrast to the sweet, fruity fillings that can vary from apricot to raspberry or even sweet cheese. Their charming appearance, often dusted with powdered sugar, makes them a favorite among cookie lovers.
Making Kolaczki is a rewarding experience, as it combines simple ingredients to create a dish full of flavor and nostalgia. Whether you’re sharing them with family during a festive gathering or enjoying a quiet afternoon tea, these cookies are sure to bring a smile to anyone who takes a bite. Let’s plunge into the recipe to create these irresistible Sweet Polish Cookies.
Ingredients (serving size: 4-6 people):
- 2 cups all-purpose flour
- 1/2 cup unsalted butter, softened
- 1/2 cup cream cheese, softened
- 1/4 cup granulated sugar
- 1 teaspoon vanilla extract
- 1/4 teaspoon salt
- 1/2 cup fruit preserves (apricot, raspberry, or your choice)
- Powdered sugar for dusting
Cooking Instructions:
1. Prepare the Dough: In a mixing bowl, combine the softened butter, cream cheese, granulated sugar, and vanilla extract. Using an electric mixer or a wooden spoon, beat the mixture until it’s smooth and creamy.
Gradually add the all-purpose flour and salt, mixing just until the dough comes together. Be careful not to overmix, as this can make the cookies tough. Once combined, shape the dough into a ball, wrap it in plastic wrap, and refrigerate for at least 1 hour to firm up.
2. Roll Out the Dough: After chilling, preheat your oven to 350°F (175°C). On a lightly floured surface, roll out the chilled dough to about 1/8 inch thick.
Use a round cookie cutter or a glass to cut out circles of dough, roughly 2-3 inches in diameter. Gather any scraps of dough, re-roll, and cut out additional circles until all the dough is used.
3. Fill the Cookies: Place a teaspoon of fruit preserves in the center of each dough circle. Be careful not to overfill, as this can cause the cookies to burst during baking.
To form the cookies, fold two opposite edges of the dough over the filling, creating a pocket, and pinch the edges to seal. Alternatively, you can fold all edges towards the center, creating a pinwheel shape.
4. Bake: Line a baking sheet with parchment paper and arrange the filled cookies on the sheet, leaving space between each.
Bake in the preheated oven for 15-20 minutes, or until the edges are lightly golden. Keep an eye on them to prevent over-baking.
5. Cool and Dust**: Once baked, remove the cookies from the oven and let them cool** on the baking sheet for a few minutes before transferring them to a wire rack to cool completely.
Once cooled, dust the Kolaczki generously with powdered sugar for a beautiful finish.
Extra Tips:
When making Kolaczki, feel free to experiment with different fruit preserves or even nut fillings to suit your taste.
If you want a richer flavor, consider adding a bit of lemon zest to the dough. Also, make certain that the dough is chilled properly before rolling it out, as this helps achieve the desired flaky texture.
These cookies can be stored in an airtight container for several days, but they’re best enjoyed fresh!