

As summer unfolds, I’m drawn to light, vibrant dishes that celebrate the season’s bounty. There’s something invigorating about a Mediterranean quinoa salad or a classic Caprese, both perfect with a chilled glass of rosé. These recipes nourish the body and bring joy to the table. If you’re curious about capturing these flavors in your kitchen, let’s explore some delightful options together.
Mediterranean Quinoa Salad With Feta and Olives
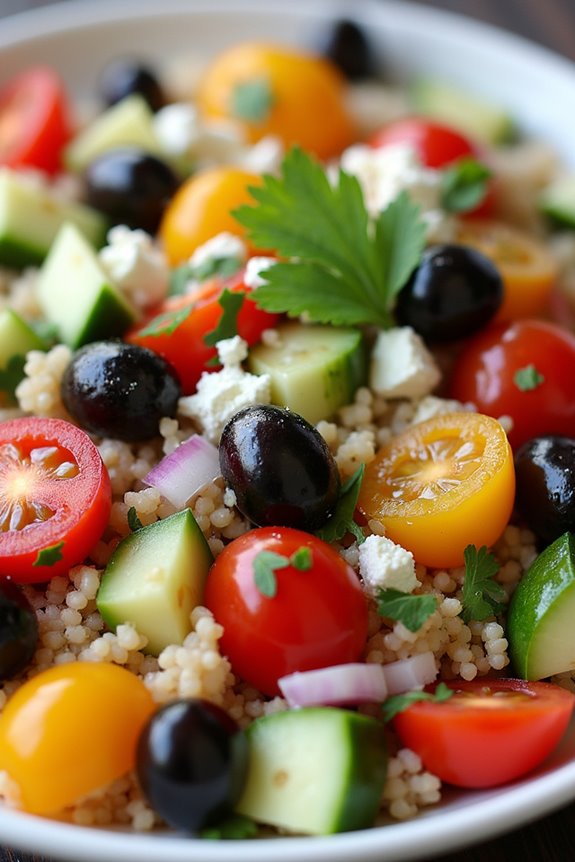
As the sun shines brighter and the days grow longer, there’s nothing quite like a rejuvenating Mediterranean Quinoa Salad with Feta and Olives to celebrate the flavors of summer. This vibrant dish is packed with nutritious ingredients, making it a perfect choice for a light lunch or a delightful side dish at a summer gathering.
The combination of fluffy quinoa, tangy feta cheese, and savory olives creates a harmonious blend of textures and flavors that will transport you to the sun-drenched coasts of the Mediterranean. Not only is this salad easy to prepare, but it also offers a wealth of health benefits.
Quinoa is a complete protein, making it an excellent base for any meal, while the fresh vegetables and herbs contribute essential vitamins and minerals. The addition of feta and olives brings a salty richness that perfectly complements the other ingredients. Enjoy this dish chilled or at room temperature, and feel free to customize it with your favorite vegetables or proteins for a personalized touch.
Ingredients (Serves 4-6):
- 1 cup quinoa
- 2 cups water or vegetable broth
- 1 cup cherry tomatoes, halved
- 1 cucumber, diced
- 1 bell pepper, diced (any color)
- 1/2 red onion, finely chopped
- 1/2 cup Kalamata olives, pitted and sliced
- 1 cup feta cheese, crumbled
- 1/4 cup fresh parsley, chopped
- 1/4 cup extra-virgin olive oil
- 2 tablespoons red wine vinegar
- 1 teaspoon dried oregano
- Salt and pepper to taste
Cooking Instructions:
- Rinse the Quinoa: Start by rinsing the quinoa under cold water in a fine-mesh strainer. This removes any bitterness from the quinoa’s outer coating, known as saponin. Rinsing guarantees a clean flavor in your salad.
- Cook the Quinoa: In a medium saucepan, combine the rinsed quinoa and 2 cups of water or vegetable broth. Bring to a boil over medium-high heat. Once boiling, reduce the heat to low, cover, and let it simmer for about 15 minutes, or until the quinoa is fluffy and the liquid is absorbed. Remove from heat and let it sit, covered, for 5 minutes.
- Prepare the Vegetables: While the quinoa is cooking, chop the cherry tomatoes, cucumber, bell pepper, and red onion. Make sure to cut them into bite-sized pieces for easy eating and to integrate well into the salad.
- Mix the Dressing: In a small bowl, whisk together the olive oil, red wine vinegar, oregano, salt, and pepper. This dressing will add flavor and moisture to the salad, so adjust the seasoning to your preference.
- Combine Ingredients: In a large mixing bowl, fluff the cooked quinoa with a fork to separate the grains. Add the prepared vegetables, sliced olives, crumbled feta, and chopped parsley to the quinoa. Drizzle the dressing over the top and gently toss everything together until well combined.
- Chill and Serve: For the best flavor, let the salad chill in the refrigerator for at least 30 minutes before serving. This allows the flavors to meld together. Adjust any seasoning before serving, if necessary.
Extra Tips:
For added crunch and flavor, consider tossing in some toasted pine nuts or walnuts. You can also substitute ingredients based on your preferences or what you have on hand; for instance, swap out feta for goat cheese or add grilled chicken for a heartier meal.
This salad keeps well in the fridge, making it a great option for meal prep or leftovers, so feel free to make a larger batch to enjoy throughout the week!
Classic Caprese Salad With Balsamic Reduction
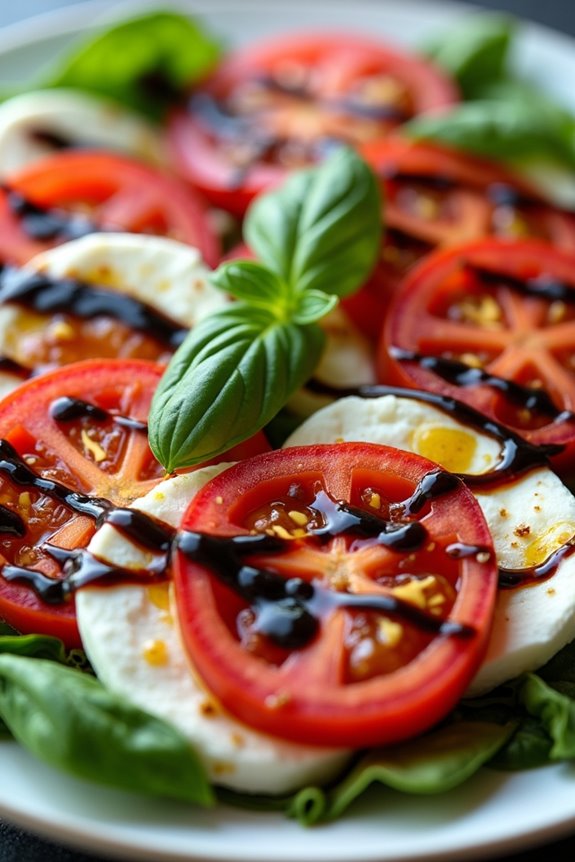
The Classic Caprese Salad with Balsamic Reduction is a rejuvenating and vibrant summer dish that beautifully combines the flavors of fresh tomatoes, creamy mozzarella, and fragrant basil. Originating from the Isle of Capri in Italy, this salad isn’t only visually appealing but also a celebration of simple, high-quality ingredients. The addition of a balsamic reduction elevates the dish, adding a sweet and tangy depth that complements the freshness of the salad.
This salad is perfect for warm summer days, making it an excellent choice for picnics, barbecues, or family gatherings. It can be served as an appetizer or a side dish, allowing the bright flavors to shine through. With its ease of preparation and impressive presentation, the Classic Caprese Salad with Balsamic Reduction is sure to impress your guests and satisfy your palate.
Ingredients (Serves 4-6):
- 4 large ripe tomatoes (preferably heirloom or vine-ripened)
- 16 ounces fresh mozzarella cheese (preferably buffalo mozzarella)
- 1 cup fresh basil leaves
- 1 cup balsamic vinegar
- 2 tablespoons extra virgin olive oil
- Salt and freshly ground black pepper, to taste
Cooking Instructions:
- Prepare the Balsamic Reduction: In a small saucepan, pour 1 cup of balsamic vinegar and place over medium heat. Bring to a gentle boil, then reduce the heat to low and let it simmer for about 15-20 minutes, or until the vinegar has reduced by half and has thickened into a syrup-like consistency. Remove from heat and let it cool.
- Slice the Tomatoes: While the balsamic reduction is cooling, wash and slice the tomatoes into 1/4-inch thick rounds. If using heirloom tomatoes, feel free to vary the thickness for a more rustic look. Arrange the slices on a serving platter in a circular pattern or in rows.
- Slice the Mozzarella: Next, slice the fresh mozzarella cheese into similar 1/4-inch thick rounds. Place a slice of mozzarella on top of each tomato slice, alternating between the two for a beautiful arrangement.
- Add the Basil: Tuck fresh basil leaves between the layers of tomato and mozzarella, allowing the vibrant green color to contrast beautifully with the red and white. You can either leave the basil leaves whole or tear them into smaller pieces for a more rustic appearance.
- Drizzle with Olive Oil: Drizzle the extra virgin olive oil generously over the assembled salad. This will enhance the flavors and add a lovely sheen to the dish.
- Season the Salad: Sprinkle salt and freshly ground black pepper over the salad to taste. The seasoning will bring out the natural flavors of the tomatoes and mozzarella.
- Finish with Balsamic Reduction: Finally, take the cooled balsamic reduction and drizzle it over the top of the salad. Use as much or as little as you prefer, but a generous drizzle will provide a delightful sweetness that complements the dish.
Extra Tips:
For the best flavor, always use the freshest ingredients possible, especially when it comes to tomatoes and mozzarella. If you can, choose locally sourced or organic produce.
Additionally, the balsamic reduction can be made ahead of time and stored in the refrigerator, but be sure to reheat it slightly before drizzling over your salad to enhance its texture.
Feel free to experiment with different kinds of basil or even add sliced avocado for a unique twist on this classic dish!
Grilled Vegetable and Halloumi Skewers

Summer is the perfect time to embrace the bright flavors and vibrant colors of fresh vegetables. Grilled Vegetable and Halloumi Skewers make an excellent dish to enjoy during those warm evenings spent outdoors. This dish combines the savory, salty taste of halloumi cheese with a variety of seasonal vegetables, all roasted to perfection on a grill. Not only is it a delicious vegetarian option, but it also offers a delightful presentation that will impress your family and guests.
Preparing Grilled Vegetable and Halloumi Skewers is both simple and fun. You can customize the skewers with your favorite vegetables, making it a versatile dish that allows for creativity. Whether you’re hosting a barbecue or simply looking for a healthy meal, these skewers are sure to satisfy. Serve them alongside a revitalizing dip like tzatziki or hummus, and you’ve got a complete summer meal!
Ingredients (serving size: 4-6 people):
- 1 block (about 250g) halloumi cheese, cut into 1-inch cubes
- 1 red bell pepper, cut into 1-inch pieces
- 1 yellow bell pepper, cut into 1-inch pieces
- 1 zucchini, sliced into thick rounds
- 1 red onion, cut into wedges
- 1 cup cherry tomatoes
- 3 tablespoons olive oil
- 1 teaspoon dried oregano
- 1 teaspoon garlic powder
- Salt and pepper, to taste
- Bamboo or metal skewers (if using bamboo, soak them in water for 30 minutes before grilling)
Cooking Instructions:
- Prepare the Ingredients: Start by washing and cutting all the vegetables and halloumi cheese as specified in the ingredient list. This preparation helps to guarantee that everything cooks evenly and fits nicely on the skewers.
- Marinate the Vegetables: In a large mixing bowl, combine the chopped vegetables (bell peppers, zucchini, red onion, and cherry tomatoes) with olive oil, dried oregano, garlic powder, salt, and pepper. Toss everything together until the vegetables are well-coated in the marinade. Let them sit for about 15 minutes to absorb the flavors.
- Assemble the Skewers: Take your soaked bamboo skewers or metal skewers, and begin threading the marinated vegetables and halloumi onto each skewer. Alternate between the cheese and different vegetables for a colorful presentation. Aim for a mix of textures and flavors.
- Preheat the Grill: Preheat your grill to medium-high heat. It’s crucial to have a hot grill to create those beautiful grill marks and to cook the vegetables properly without making them too soft.
- Grill the Skewers: Place the assembled skewers on the grill and cook for about 10-15 minutes, turning occasionally. The halloumi should become golden brown and slightly crispy on the outside, while the vegetables should be tender and charred.
- Serve: Once cooked, remove the skewers from the grill and let them cool for a minute. Serve them warm, either on the skewers or carefully removed onto a platter. They can be enjoyed on their own or with your favorite dipping sauce.
Extra Tips:
When preparing Grilled Vegetable and Halloumi Skewers, feel free to experiment with different vegetables based on what’s in season or what you have on hand. Eggplant, mushrooms, and asparagus can also make great additions.
Additionally, if you’re looking for a little more flavor, consider adding a splash of balsamic vinegar or lemon juice to the marinade. This dish isn’t only delicious but also quick to prepare, making it a perfect option for spontaneous summer gatherings!
Shrimp and Avocado Salad With Citrus Dressing
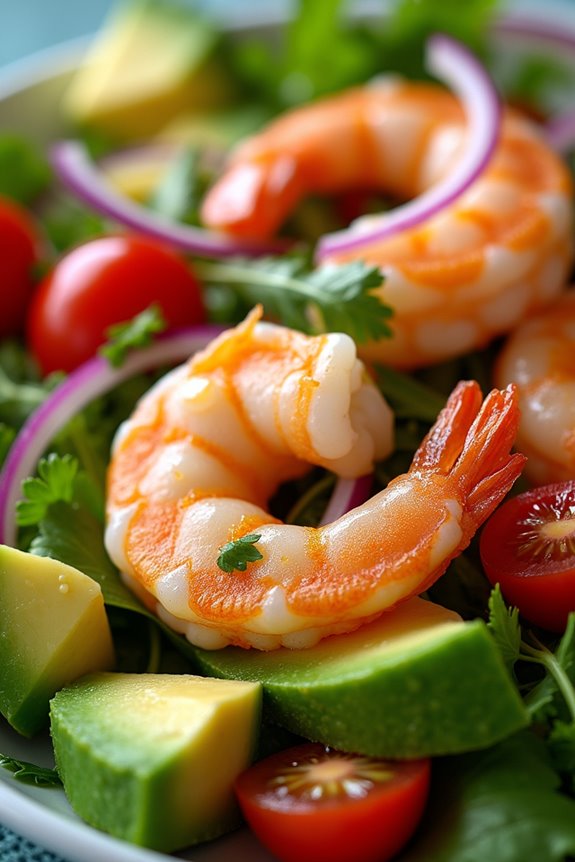
This Shrimp and Avocado Salad with Citrus Dressing is a revitalizing dish that captures the essence of summer, making it perfect for outdoor gatherings, picnics, or a light dinner. The combination of succulent shrimp, creamy avocado, and a zesty citrus dressing creates a delightful balance of flavors and textures that’s both satisfying and healthy. Not only is this salad visually appealing, but it’s also packed with nutrients, making it a great choice for those looking to enjoy a wholesome meal.
The bright, vibrant ingredients in this salad aren’t only delicious but also incredibly easy to prepare. The shrimp can be quickly cooked and tossed together with fresh vegetables and juicy avocados, all brought together with a bright and tangy dressing that enhances the natural flavors. This dish is versatile, allowing you to enjoy it as an appetizer or as a main course, and it’s sure to impress your family and friends with its colorful presentation and delightful taste.
Ingredients (Serves 4-6)
- 1 pound large shrimp, peeled and deveined
- 2 ripe avocados, diced
- 4 cups mixed greens (such as arugula, spinach, or spring mix)
- 1 cup cherry tomatoes, halved
- 1/2 red onion, thinly sliced
- 1/4 cup fresh cilantro, chopped
- 1/4 cup olive oil
- 1/4 cup freshly squeezed orange juice
- 2 tablespoons freshly squeezed lime juice
- 1 teaspoon honey
- Salt and pepper to taste
Cooking Instructions
- Prepare the Shrimp: Begin by heating a large skillet over medium heat. Add a drizzle of olive oil to the skillet. Once the oil is hot, add the peeled and deveined shrimp. Cook for about 2-3 minutes on each side or until the shrimp are pink and opaque. Be sure not to overcook them, as they can become tough. Remove the shrimp from the skillet and set them aside to cool slightly.
- Make the Citrus Dressing: In a small bowl, whisk together the olive oil, freshly squeezed orange juice, lime juice, honey, salt, and pepper. Mix until well combined. The dressing should be tangy and sweet, balancing the flavors of the salad.
- Prepare the Salad Base: In a large salad bowl, combine the mixed greens, diced avocados, halved cherry tomatoes, and thinly sliced red onion. Toss gently to guarantee the ingredients are evenly distributed without mashing the avocado.
- Combine the Ingredients: Add the cooked shrimp to the salad mixture. Drizzle the citrus dressing over the top and gently toss everything together to coat the ingredients evenly with the dressing.
- Garnish and Serve: Sprinkle the chopped cilantro over the salad for a burst of freshness and color. Serve immediately to enjoy the crispness of the greens and the creaminess of the avocado.
Extra Tips
To enhance the flavor of the shrimp, consider marinating them in a mixture of lime juice, garlic, and chili flakes for about 15-30 minutes before cooking. This will add an extra layer of flavor to the dish.
Additionally, you can customize the salad by adding other vegetables such as bell peppers or cucumbers, or even substitute the shrimp with grilled chicken or tofu for a different protein option. Enjoy your Shrimp and Avocado Salad with Citrus Dressing while it’s fresh for the best taste!
Spanish Gazpacho With Fresh Herbs
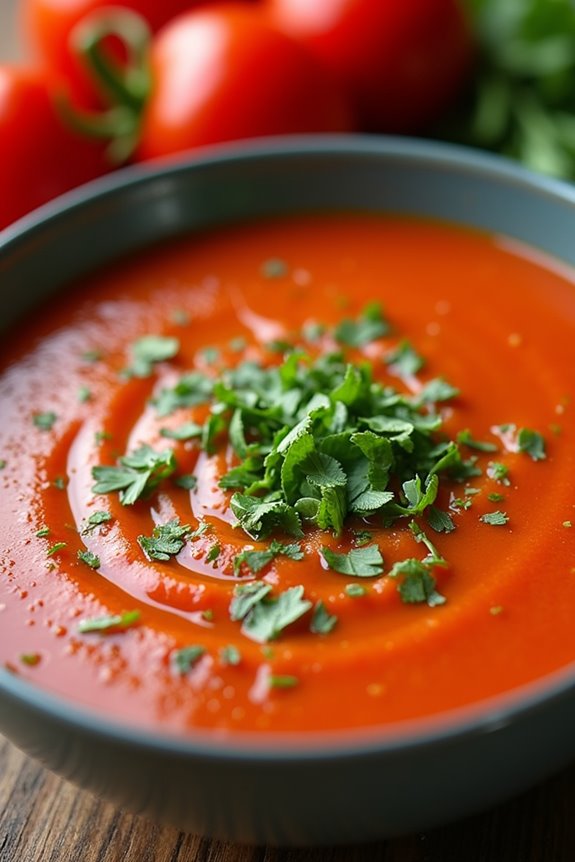
Spanish Gazpacho is a revitalizing cold soup that hails from the sunny regions of Andalusia. Perfect for hot summer days, this vibrant dish combines a medley of fresh vegetables, herbs, and seasonings to create a deliciously light and nutritious meal.
Traditionally served as an appetizer or light lunch, it embodies the flavors of summer and is often enjoyed chilled, making it an excellent choice for outdoor gatherings or picnics.
This recipe for Spanish Gazpacho with Fresh Herbs isn’t only simple to make but also highly customizable based on your taste preferences. The combination of ripe tomatoes, cucumbers, bell peppers, and fresh herbs results in a soup that bursts with flavor.
Serve it with a drizzle of olive oil and some crusty bread for a complete meal. Enjoy the essence of summer with each revitalizing spoonful!
Ingredients (Serves 4-6)
- 6 ripe tomatoes, cored and chopped
- 1 cucumber, peeled and chopped
- 1 red bell pepper, cored and chopped
- 1 small red onion, chopped
- 2 cloves garlic, minced
- 3 cups vegetable broth or water
- 1/4 cup extra virgin olive oil
- 2 tablespoons red wine vinegar
- Salt and pepper to taste
- Fresh herbs (basil, parsley, or cilantro) for garnish
Cooking Instructions
1. Prepare the Vegetables: Start by washing and chopping all the fresh vegetables. Core the tomatoes, peel the cucumber, and remove the seeds from the bell pepper.
This preparation step guarantees that your gazpacho has a smooth texture and allows the flavors to meld beautifully.
2. Blend the Ingredients: In a large blender or food processor, combine the chopped tomatoes, cucumber, red bell pepper, red onion, and garlic. Blend on high until the mixture becomes smooth.
This step is essential as it breaks down the vegetables and creates the soup’s base.
3. Add Liquid and Seasonings: Pour in the vegetable broth (or water) and add the olive oil and red wine vinegar to the blender. Blend again until everything is well combined.
This will give your gazpacho a creamy consistency and enhance the flavors.
4. Season: After blending, taste the gazpacho and Season with salt and pepper as needed.
This step is important to balance the flavors; adjust according to your preference.
5. Chill: Transfer the gazpacho to a bowl or container and refrigerate for at least 2 hours, or until thoroughly chilled.
Cooling the soup allows the flavors to develop fully, making it more delicious.
6. Serve: Once chilled, stir the gazpacho well and serve in bowls. Drizzle with a little extra virgin olive oil and garnish with freshly chopped herbs for a pop of color and flavor.
Extra Tips
For an even more vibrant taste, consider adding a splash of lemon juice or a dash of hot sauce to spice things up.
You can also customize your gazpacho by including other vegetables such as carrots or zucchini. If you prefer a chunkier texture, reserve some chopped vegetables to stir in just before serving.
Pair your gazpacho with crusty bread or croutons for a delightful crunch!
Lemon Herb Risotto With Asparagus
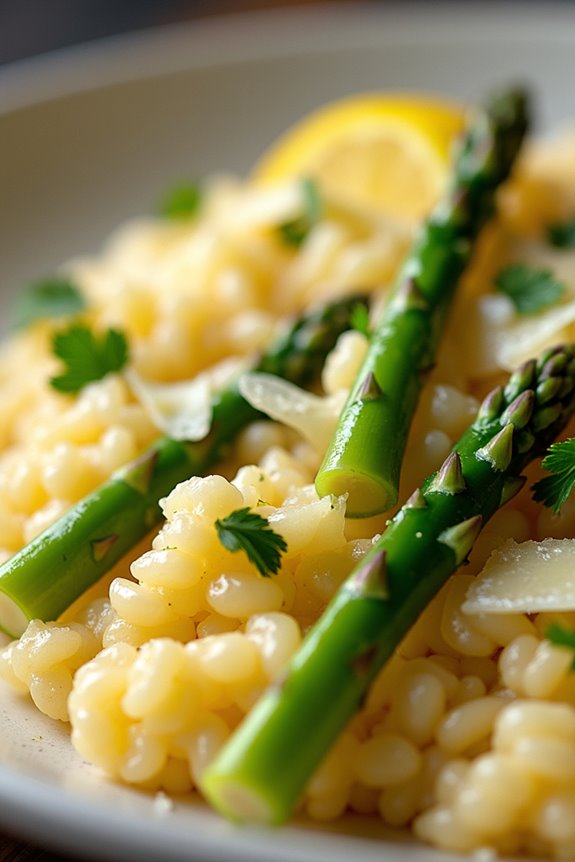
Lemon Herb Risotto With Asparagus is a delightful dish that embodies the essence of summer with its fresh ingredients and vibrant flavors. This creamy risotto is infused with the bright zest of lemon, complemented by the earthy taste of asparagus, making it a perfect choice for a light yet satisfying meal.
The combination of Arborio rice and broth creates a luscious texture that’s both comforting and elegant, ideal for serving at a family gathering or a sunny alfresco dinner.
Cooking risotto may seem intimidating, but with a little patience and attention, you can create a restaurant-quality dish right in your own kitchen. The key to a perfect risotto is to gradually add broth while stirring continuously, allowing the rice to release its starch and achieve that signature creaminess.
The addition of fresh herbs enhances the flavor profile, making this recipe a standout in any summer menu.
Ingredients (Serves 4-6):
- 1 cup Arborio rice
- 4 cups vegetable or chicken broth
- 1 cup asparagus, trimmed and cut into 1-inch pieces
- 1 small onion, finely chopped
- 2 cloves garlic, minced
- 1/2 cup dry white wine
- 1 lemon (zested and juiced)
- 1/2 cup grated Parmesan cheese
- 2 tablespoons olive oil
- 2 tablespoons butter
- 1/4 cup fresh parsley, chopped
- Salt and pepper to taste
Cooking Instructions:
- Prepare the Broth: In a saucepan, heat the vegetable or chicken broth over medium heat until it’s simmering. Keep it warm on the stove while you prepare the risotto.
- Sauté the Aromatics: In a large skillet or saucepan, heat the olive oil and 1 tablespoon of butter over medium heat. Add the chopped onion and sauté until it becomes translucent, about 3-4 minutes. Stir in the minced garlic and cook for an additional minute until fragrant.
- Toast the Rice: Add the Arborio rice to the skillet and stir well to coat the grains with the oil and butter. Toast the rice for about 2 minutes, until it turns slightly translucent around the edges.
- Deglaze with Wine: Pour in the white wine, stirring constantly until it’s mostly absorbed by the rice. This step adds depth to the flavor of the risotto.
- Add the Broth Gradually: Begin adding the warm broth, one ladle at a time, to the rice mixture while stirring continuously. Wait until the liquid is almost fully absorbed before adding the next ladle. Continue this process for about 18-20 minutes, or until the rice is al dente and creamy.
- Cook the Asparagus: About 5 minutes before the risotto is done, stir in the asparagus pieces. This guarantees they cook perfectly while still maintaining a slight crunch.
- Finish with Flavor: Once the rice is cooked, remove the skillet from the heat. Stir in the remaining tablespoon of butter, the grated Parmesan cheese, lemon juice, and lemon zest. Mix until creamy and well combined. Adjust seasoning with salt and pepper to taste.
- Garnish and Serve: Fold in the chopped parsley for a fresh touch. Serve the risotto warm, garnished with extra Parmesan cheese if desired.
Extra Tips:
For the best flavor, use a good quality broth and fresh herbs. You can also experiment with different vegetables like peas or spinach if asparagus isn’t in season.
To make the dish even more luxurious, consider adding a splash of heavy cream or a dollop of mascarpone cheese at the end. Remember to serve the risotto immediately for the best texture, as it tends to thicken as it cools.
Enjoy this lovely Lemon Herb Risotto With Asparagus as a centerpiece at your summer gatherings!
Ratatouille Tart With Puff Pastry
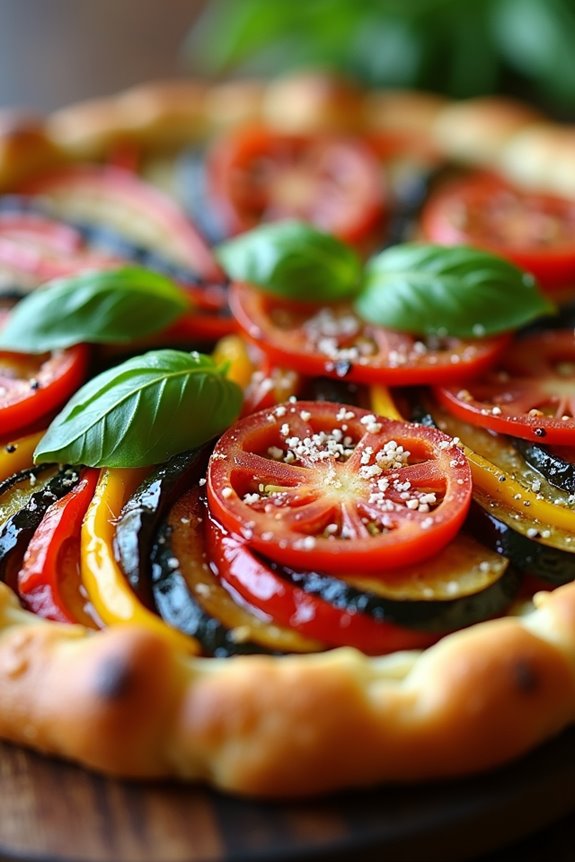
Ratatouille Tart with Puff Pastry is a delightful summer dish that brings together the vivid flavors of fresh vegetables in a light and flaky crust. This recipe takes the classic French ratatouille and transforms it into an elegant tart, making it perfect for entertaining or enjoying a casual family dinner.
The combination of herbs, fresh produce, and buttery pastry creates a dish that isn’t only visually appealing but also bursting with flavor. This tart is versatile and can be served warm or at room temperature, making it an ideal option for picnics or potlucks.
With layers of zucchini, eggplant, bell peppers, and tomatoes, this dish showcases the bounty of summer vegetables, while the puff pastry adds a satisfying crunch. Whether you’re a seasoned chef or a kitchen novice, this Ratatouille Tart is sure to impress your guests and become a staple in your summer recipe collection.
Ingredients (Serves 4-6)
- 1 sheet of puff pastry, thawed
- 1 medium eggplant, thinly sliced
- 1 medium zucchini, thinly sliced
- 1 medium yellow squash, thinly sliced
- 1 red bell pepper, thinly sliced
- 1 yellow bell pepper, thinly sliced
- 2 medium tomatoes, thinly sliced
- 2 cloves garlic, minced
- 1 tablespoon fresh thyme leaves
- 1 tablespoon fresh basil, chopped
- 1/4 cup olive oil
- Salt and pepper, to taste
- 1/2 cup grated Parmesan cheese (optional)
- 1 egg, beaten (for egg wash)
Cooking Instructions
1. Prepare the Puff Pastry: Preheat your oven to 400°F (200°C). On a lightly floured surface, roll out the thawed puff pastry to fit a tart pan. Gently press the pastry into the pan, trimming any excess. Prick the bottom with a fork to prevent bubbling.
Place the crust in the refrigerator to chill while you prepare the filling.
2. Sauté the Vegetables: In a large skillet over medium heat, add the olive oil. Once hot, add the minced garlic and sauté for about 1 minute until fragrant.
Then, add the sliced eggplant, zucchini, and bell peppers. Cook for about 5-7 minutes until they soften slightly. Season with salt, pepper, and fresh thyme. Remove from heat and let cool for a few minutes.
3. Layer the Vegetables: Take the chilled puff pastry out of the refrigerator. Arrange the sautéed vegetables in the tart crust, layering them neatly.
Start with a layer of eggplant, followed by zucchini, bell peppers, and finish with tomato slices on top. Sprinkle fresh basil over the top and add the grated Parmesan cheese if desired.
4. Bake the Tart: Brush the edges of the puff pastry with the beaten egg to give it a golden color. Place the tart in the preheated oven and bake for 25-30 minutes, or until the pastry is puffed and golden brown, and the vegetables are tender.
5. Cool and Serve: Once baked, remove the tart from the oven and allow it to cool for about 10 minutes. Slice into wedges and serve warm or at room temperature.
Extra Tips
For an added depth of flavor, consider roasting the vegetables instead of sautéing them. Simply toss them with olive oil, salt, and herbs, then roast in the oven at 425°F (220°C) until tender before layering them in the tart.
Additionally, feel free to customize the vegetables based on what you have on hand or what’s in season. This tart can also be made ahead of time and reheated, making it a convenient option for busy summer days.
Zucchini Noodles With Pesto and Cherry Tomatoes
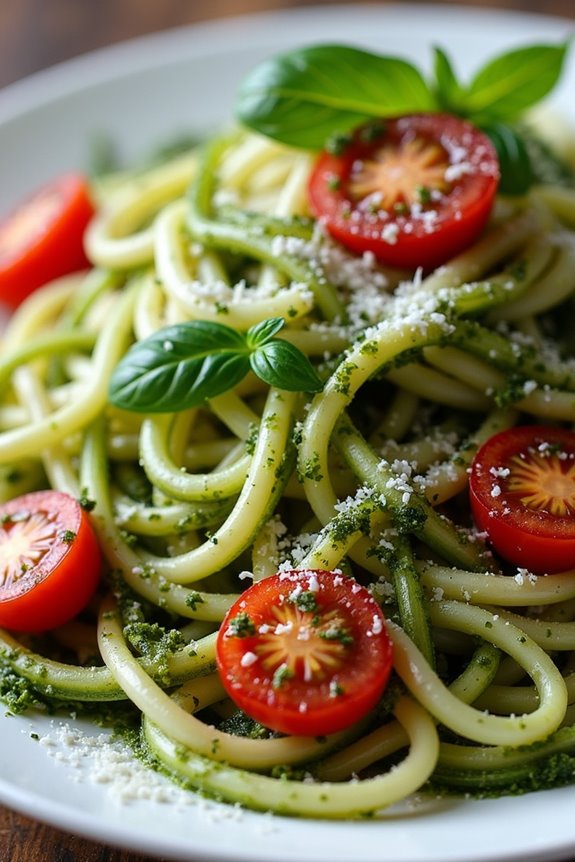
Zucchini Noodles with Pesto and Cherry Tomatoes is a rejuvenating and vibrant dish perfect for summertime meals. This recipe combines the freshness of garden-fresh zucchini with the aromatic flavors of homemade or store-bought pesto, all topped off with juicy cherry tomatoes. It’s a fantastic low-carb alternative to traditional pasta that’s not only delicious but also packed with nutrients. The dish is light yet satisfying, making it an ideal choice for a warm day or a quick weeknight dinner.
This dish is incredibly versatile and can easily be customized to suit your taste. Feel free to add in some grilled chicken for extra protein or toss in some olives or feta cheese for an added layer of flavor. The bright colors of the zucchini and cherry tomatoes, along with the vibrant green of the pesto, make this dish as visually appealing as it’s tasty. Serve it as a main course or as a side dish to complement your favorite summer barbecue.
Ingredients (Serves 4-6)
- 4 medium zucchinis
- 2 cups cherry tomatoes, halved
- 1 cup pesto (store-bought or homemade)
- 2 tablespoons olive oil
- Salt and pepper to taste
- Fresh basil leaves for garnish (optional)
- Grated Parmesan cheese for serving (optional)
Cooking Instructions
- Prepare the Zucchini Noodles: Start by washing the zucchinis thoroughly. Using a spiralizer, julienne peeler, or a regular peeler, create zucchini noodles. If using a peeler, make long, thin strips. Once done, place the noodles in a colander and sprinkle with a little salt to draw out excess moisture. Let them sit for about 10-15 minutes.
- Sauté the Cherry Tomatoes: In a large skillet, heat the olive oil over medium heat. Add the halved cherry tomatoes and season with a pinch of salt and pepper. Sauté for about 3-5 minutes, or until the tomatoes begin to soften and release their juices. Remove from heat and set aside.
- Cook the Zucchini Noodles: After the zucchini has drained, pat them dry with a paper towel to remove any residual moisture. In the same skillet used for the tomatoes, add the zucchini noodles and sauté them over medium heat for about 2-3 minutes. You want them to be tender but still maintain some crunch.
- Combine Ingredients: Once the zucchini noodles are cooked, turn off the heat and add the sautéed cherry tomatoes to the skillet. Pour in the pesto and gently toss everything together until the noodles are evenly coated with the pesto and the tomatoes are distributed throughout.
- Serve: Divide the zucchini noodles into serving bowls. If desired, garnish with fresh basil leaves and sprinkle with grated Parmesan cheese. Serve immediately while warm.
Extra Tips
To enhance the flavors of your Zucchini Noodles with Pesto and Cherry Tomatoes, consider roasting the cherry tomatoes for an extra depth of sweetness. Simply toss them in olive oil, salt, and pepper, and roast in a preheated oven at 400°F (200°C) for about 15-20 minutes.
Additionally, if you have leftover pesto, it can be stored in the refrigerator for up to a week or frozen for later use. Enjoy experimenting with different toppings and variations, such as adding nuts or seeds for crunch, or incorporating other seasonal vegetables into the mix!
Grilled Salmon With Dill and Lemon

Grilled Salmon with Dill and Lemon is a quintessential summer dish that captures the essence of European cuisine. The combination of fresh salmon, aromatic dill, and zesty lemon creates a delightful flavor profile that’s certain to impress. This dish isn’t only easy to prepare but also healthy, making it perfect for a light summer dinner or a festive gathering with family and friends.
As the salmon grills to perfection, the dill and lemon infuse the fish with their vibrant flavors, creating a mouthwatering meal that celebrates the best of the season. The beauty of this dish lies in its simplicity and the quality of the ingredients. Fresh salmon fillets are the star of the show, and when paired with fresh herbs and citrus, they truly shine.
Serve this grilled salmon with a side of seasonal vegetables or a rejuvenating salad for a well-rounded meal that embodies the spirit of summer in Europe. Whether you’re dining al fresco or hosting a summer barbecue, this recipe is sure to be a hit.
Ingredients (serves 4-6):
- 4-6 salmon fillets (about 6 ounces each)
- 3 tablespoons olive oil
- 2 tablespoons fresh dill, chopped
- 1 lemon (juice and zest)
- 2 cloves garlic, minced
- Salt and pepper to taste
- Lemon slices, for garnish
- Fresh dill sprigs, for garnish
Cooking Instructions:
- Prepare the Marinade: In a small bowl, whisk together the olive oil, chopped dill, lemon juice, lemon zest, minced garlic, salt, and pepper. This marinade won’t only enhance the flavor of the salmon but also keep it moist during grilling.
- Marinate the Salmon: Place the salmon fillets in a shallow dish and pour the marinade over them, guaranteeing the fillets are evenly coated. Cover and let the salmon marinate in the refrigerator for at least 30 minutes, or up to 2 hours for a more intense flavor.
- Preheat the Grill: While the salmon is marinating, preheat your grill to medium-high heat. If using a charcoal grill, wait until the coals are glowing and covered with white ash.
- Grill the Salmon: Once the grill is hot, lightly oil the grill grates to prevent sticking. Place the marinated salmon fillets skin-side down on the grill. Close the lid and cook for about 6-8 minutes, depending on the thickness of the fillets. Avoid moving the salmon around too much to guarantee nice grill marks form.
- Flip the Salmon: Carefully flip the salmon fillets using a spatula and grill for an additional 4-6 minutes, or until the salmon flakes easily with a fork and is cooked through.
- Serve: Remove the salmon from the grill and let it rest for a few minutes. Garnish with lemon slices and fresh dill sprigs before serving. Enjoy your grilled salmon with a side of fresh vegetables or a light salad.
Extra Tips:
For the best results, choose high-quality, fresh salmon from a local fish market. If you prefer a smokier flavor, consider adding wood chips to your grill. Additionally, be careful not to overcook the salmon, as it can become dry. The fish should be just opaque in the center and flake easily with a fork.
Enjoy your grilling experience and the delicious flavors of summer!
Berry and Mascarpone Parfait
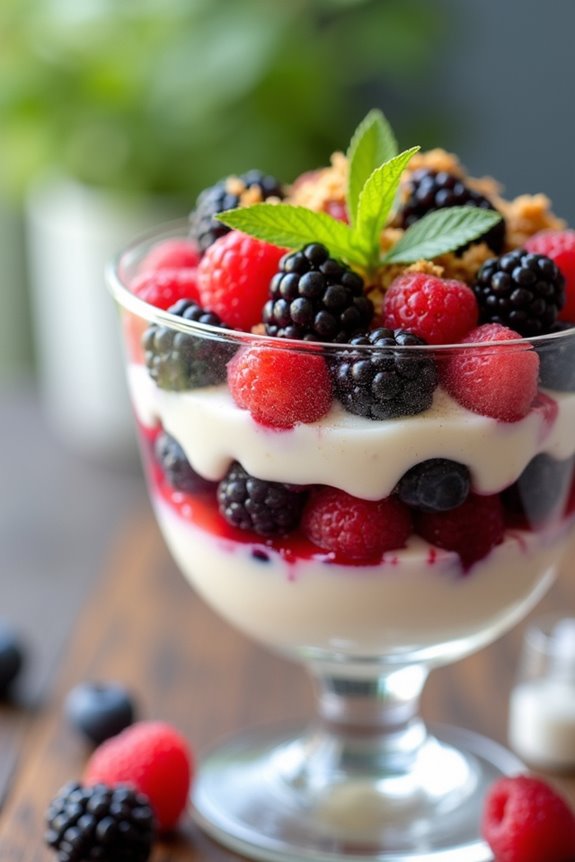
As summer approaches, there’s nothing quite like a light and invigorating dessert that showcases the vibrant flavors of seasonal berries. The Berry and Mascarpone Parfait is a delightful treat that layers sweet, juicy berries with rich mascarpone cheese, creating a perfect balance of flavors and textures. This dessert isn’t only visually stunning but also quick and easy to prepare, making it an ideal choice for summer gatherings, picnics, or simply enjoying at home.
This parfait is versatile and can be customized according to your berry preferences or what’s in season. Raspberries, strawberries, blueberries, and blackberries can all be used, either separately or in combination. The mascarpone adds a creamy richness that’s complemented by the natural sweetness of the berries. With its beautiful presentation and delicious taste, this Berry and Mascarpone Parfait is sure to impress your guests or serve as a lovely ending to a warm summer day.
Ingredients (Serves 4-6):
- 2 cups mixed berries (strawberries, blueberries, raspberries, blackberries)
- 1 cup mascarpone cheese
- 1 cup heavy whipping cream
- 1/4 cup powdered sugar
- 1 teaspoon vanilla extract
- Fresh mint leaves (for garnish, optional)
- Granola or crushed cookies (optional, for added texture)
Cooking Instructions:
- Prepare the Berries: Rinse the mixed berries under cold water and gently pat them dry with a paper towel. If using strawberries, hull them and slice them into quarters. Keep the other berries whole. Set aside the prepared berries in a bowl.
- Make the Mascarpone Mixture: In a large mixing bowl, combine the mascarpone cheese, powdered sugar, and vanilla extract. Using a hand mixer, whip the mixture on medium speed until it’s smooth and creamy. Be careful not to overmix, as you want to maintain the thick texture of the mascarpone.
- Whip the Cream: In a separate bowl, pour the heavy whipping cream and whip it with a hand mixer or stand mixer until soft peaks form. This process should take about 3-4 minutes. Be cautious not to overwhip, as it can turn grainy.
- Fold the Cream into Mascarpone: Gently fold the whipped cream into the mascarpone mixture using a spatula. Start by adding one-third of the whipped cream to lighten the mascarpone, then gradually incorporate the remaining whipped cream until fully combined. This will create a light and airy texture.
- Assemble the Parfaits: In serving glasses or bowls, start by adding a layer of the mascarpone mixture at the bottom. Follow this with a layer of mixed berries, and then another layer of the mascarpone mixture. Repeat the layers until the glasses are filled, finishing with a layer of berries on top.
- Chill and Serve: Refrigerate the assembled parfaits for at least 30 minutes to allow the flavors to meld and to chill. Just before serving, you can sprinkle some granola or crushed cookies on top for an added crunch and garnish with fresh mint leaves if desired.
Extra Tips:
For the best flavor, choose berries that are ripe and in season. You can also add a splash of lemon juice or a sprinkle of zest to the mascarpone mixture for an added citrus note.
If you’re preparing the parfaits in advance, layer them just before serving to prevent the berries from releasing too much juice and making the dessert soggy. Enjoy this delightful treat on a warm summer evening, and feel free to experiment with different combinations of fruits and textures!
Peach Tart With Almond Cream

Peach Tart with Almond Cream is a delightful summer dessert that celebrates the juicy sweetness of fresh peaches, perfectly paired with a rich, nutty almond cream filling. This tart not only showcases the beautiful hues of summer peaches, but it also offers a wonderful contrast in textures with its flaky pastry crust.
Ideal for gatherings, picnics, or simply as a treat for yourself, this dessert combines ease of preparation with an impressive presentation. The tart can be served warm or chilled, making it versatile for different occasions. The almond cream adds a luxurious depth of flavor that enhances the natural sweetness of the peaches.
With just a few simple ingredients, you can create a stunning dessert that will impress your family and friends. Let’s plunge into the recipe and savor the taste of summer!
Ingredients (Serves 4-6)
- 1 pre-made tart shell (9-inch)
- 4 ripe peaches, pitted and sliced
- 1/2 cup almond flour
- 1/2 cup granulated sugar
- 1/4 cup unsalted butter, softened
- 2 large eggs
- 1 teaspoon vanilla extract
- 1/2 teaspoon almond extract
- 1 tablespoon all-purpose flour
- 1/4 teaspoon salt
- Powdered sugar, for dusting (optional)
Cooking Instructions
- Preheat the Oven: Begin by preheating your oven to 350°F (175°C). This guarantees that the tart bakes evenly and the crust achieves a golden color.
- Prepare the Almond Cream: In a mixing bowl, combine the almond flour, granulated sugar, and softened butter. Use a hand mixer or a whisk to cream these ingredients together until the mixture is light and fluffy.
- Add the Eggs and Extracts: Once the almond cream is fluffy, add the eggs, vanilla extract, and almond extract. Continue mixing until everything is well combined and smooth.
- Incorporate Dry Ingredients: Gently fold in the all-purpose flour and salt into the almond cream mixture until just combined. Be careful not to overmix, as this can affect the texture.
- Assemble the Tart: Pour the almond cream into the pre-made tart shell, spreading it evenly with a spatula. Arrange the sliced peaches on top of the almond cream, placing them in a circular pattern for an appealing presentation.
- Bake the Tart: Place the assembled tart in the preheated oven and bake for about 35-40 minutes or until the almond cream is set and the top is lightly golden.
- Cool and Serve: Once baked, remove the tart from the oven and allow it to cool in the pan for about 10 minutes. Carefully transfer it to a serving platter. If desired, dust the top with powdered sugar before slicing and serving.
Extra Tips
For the best flavor and texture, choose ripe but firm peaches as they’ll hold their shape while baking. If you can’t find fresh peaches, canned peaches can be a substitute, but be sure to drain them well to avoid excess moisture.
Additionally, feel free to experiment with other fruits such as plums or nectarines for a variation on this recipe. Serve the tart with a dollop of whipped cream or a scoop of vanilla ice cream for an extra indulgent treat!
Strawberry Rhubarb Crumble With Vanilla Ice Cream
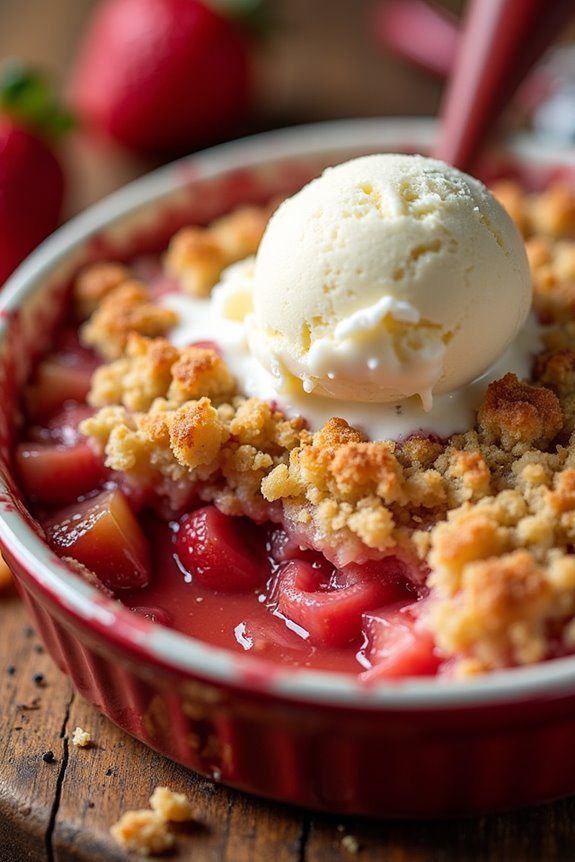
Strawberry Rhubarb Crumble is a delightful dessert that perfectly captures the essence of summer. The tartness of rhubarb pairs beautifully with the sweetness of strawberries, creating a deliciously balanced filling that’s both invigorating and satisfying. Topped with a crumbly, buttery topping, this dish is best served warm, alongside a scoop of creamy vanilla ice cream. The contrast of temperatures and textures makes each bite a heavenly experience.
This crumble isn’t only delicious but also easy to prepare, making it an ideal choice for summer gatherings, picnics, or simply as a sweet treat after dinner. With just a few ingredients, you can create a dish that impresses your family and friends. Enjoy making this classic dessert, and don’t forget to savor every bite!
Ingredients (serving size: 4-6 people)
- 2 cups fresh strawberries, hulled and halved
- 2 cups rhubarb, chopped into 1-inch pieces
- 1 cup granulated sugar, divided
- 1 tablespoon cornstarch
- 1 tablespoon lemon juice
- 1 teaspoon vanilla extract
- 1 cup all-purpose flour
- 1/2 cup rolled oats
- 1/2 cup brown sugar, packed
- 1/2 teaspoon salt
- 1/2 cup cold unsalted butter, cubed
- Vanilla ice cream, for serving
Cooking Instructions
- Preheat the Oven: Begin by preheating your oven to 350°F (175°C). This guarantees that your crumble will bake evenly and thoroughly once you put it in the oven.
- Prepare the Fruit Filling: In a large mixing bowl, combine the halved strawberries and chopped rhubarb. Add 3/4 cup of granulated sugar, cornstarch, lemon juice, and vanilla extract. Toss gently until the fruit is well coated. This mixture will become the delicious filling for your crumble.
- Transfer to Baking Dish: Pour the fruit mixture into a greased 9×9-inch baking dish or a similar-sized oven-safe dish. Spread it out evenly to guarantee uniform baking.
- Make the Crumble Topping: In a separate bowl, combine the flour, rolled oats, brown sugar, remaining 1/4 cup of granulated sugar, and salt. Mix well. Add the cold cubed butter to the dry ingredients. Using a pastry cutter, fork, or your fingers, work the butter into the mixture until it resembles coarse crumbs. This will create the crumble topping that adds texture and flavor to the dish.
- Assemble the Crumble: Evenly sprinkle the crumble topping over the fruit mixture in the baking dish. Make sure to cover the fruit completely for an even bake and to prevent any burning.
- Bake the Crumble: Place the baking dish in the preheated oven and bake for 35-40 minutes, or until the topping is golden brown and the fruit is bubbling around the edges. Keep an eye on it to avoid over-baking.
- Cool and Serve: Once baked, remove the crumble from the oven and let it cool for about 10-15 minutes. This will help the juices set slightly. Serve warm, topped with a generous scoop of vanilla ice cream.
Extra Tips
For the best flavor and texture, use fresh, ripe strawberries and rhubarb when they’re in season. If you can’t find fresh rhubarb, frozen rhubarb can be used but make sure to thaw and drain any excess moisture before mixing it with the strawberries.
Additionally, feel free to experiment by adding spices like cinnamon or nutmeg to the topping for an extra layer of flavor. Enjoy your Strawberry Rhubarb Crumble with Vanilla Ice Cream!