

When I think about European breads, the buttery goodness of a freshly baked baguette or the soft, herb-infused focaccia comes to mind. Each loaf tells a story of tradition and culture that’s hard to resist. From the chewy pretzels of Germany to the sweet Pan de Muerto of Spain, there’s so much to explore. I’m excited to share these recipes with you and uncover the secrets behind each crusty delight. Let’s get baking and savor every carb together.
French Baguette
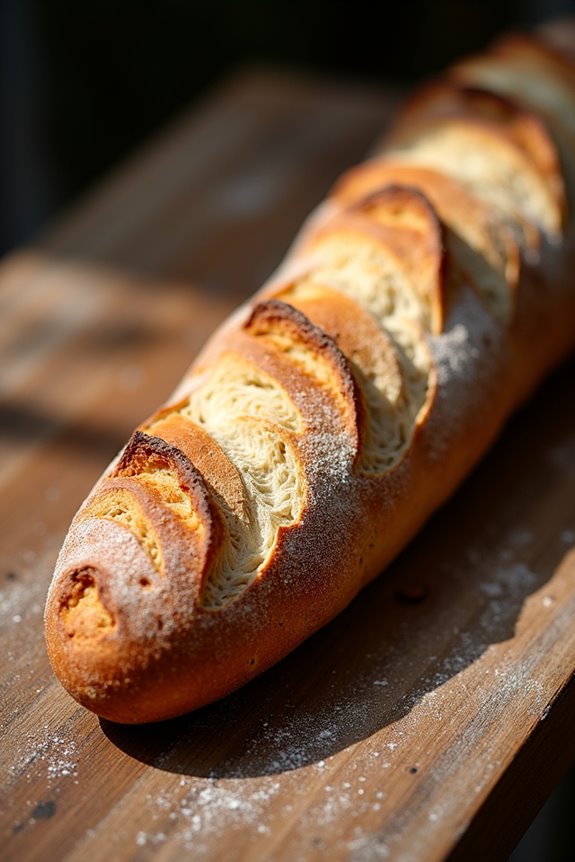
The French baguette is an iconic bread known for its long, narrow shape and crispy crust. Originating from France, this bread is a staple in French cuisine and is often served with meals, used for sandwiches, or simply enjoyed with butter or cheese.
Making a baguette at home may seem challenging, but with a little patience and practice, you can create a delicious loaf that will impress family and friends. The process involves a few basic ingredients and techniques, making it accessible for home bakers who want to try their hand at traditional French bread.
This recipe yields 2 baguettes, perfect for serving 4-6 people. The key to a successful baguette lies in the fermentation process and the baking conditions. Allowing the dough to rise properly and creating steam in the oven are vital elements that contribute to the baguette’s characteristic texture and flavor.
Follow the steps below for a delightful homemade French baguette that will transport you to a quaint Parisian bakery.
Ingredients
- 4 cups all-purpose flour
- 1 ½ cups warm water (about 110°F)
- 1 ½ teaspoons salt
- 2 teaspoons active dry yeast
- 1 tablespoon sugar
- Cornmeal (for dusting)
Cooking Instructions
- Prepare the Yeast Mixture: In a small bowl, combine the warm water, sugar, and yeast. Stir gently and let it sit for about 5-10 minutes until it becomes frothy. This activation step is essential as it guarantees that the yeast is alive and ready to help the dough rise.
- Mix the Dough: In a large mixing bowl, combine the flour and salt. Make a well in the center and pour in the activated yeast mixture. Using a wooden spoon or your hands, mix the ingredients until they come together to form a shaggy dough. The dough should be slightly sticky but manageable.
- Knead the Dough: Transfer the dough onto a lightly floured surface and knead it for about 10 minutes until it becomes smooth and elastic. This step develops the gluten, which gives the baguette its structure. If the dough is too sticky, sprinkle a little flour as needed.
- First Rise: Place the kneaded dough in a lightly greased bowl, cover it with a damp cloth or plastic wrap, and let it rise in a warm area for about 1-2 hours, or until it has doubled in size. This fermentation process enhances the flavor of the bread.
- Shape the Baguettes: Once the dough has risen, punch it down to release the air. Divide the dough into two equal portions. Shape each portion into a long, narrow loaf by flattening it slightly, folding the edges inward, and then rolling it out gently from one end to the other. Pinch the seams to seal.
- Second Rise: Place the shaped baguettes on a baking sheet lined with parchment paper and dusted with cornmeal. Cover them with a cloth and let them rise again for about 30-45 minutes, or until they puff up slightly.
- Preheat the Oven: While the baguettes are rising, preheat your oven to 475°F (245°C). Place an empty baking pan on the bottom rack of the oven to create steam during the baking process.
- Score the Baguettes: Once the dough has risen, use a sharp knife or a lame to make several diagonal cuts on the top of each baguette. This allows the bread to expand while baking and creates an attractive appearance.
- Bake the Baguettes: Carefully pour hot water into the empty baking pan in the oven to create steam, then place the baguettes on the middle rack. Bake for 20-25 minutes, or until the baguettes are golden brown and sound hollow when tapped on the bottom.
- Cool and Serve: Remove the baguettes from the oven and let them cool on a wire rack. Allowing them to cool completely will help maintain their crusty exterior. Slice and serve with your favorite spreads or enjoy them fresh.
Extra Tips
For the best results, consider using a baking stone if you have one, as it helps maintain an even temperature and mimics the conditions of a traditional bakery oven.
Additionally, try to create steam in the oven by placing a pan of hot water at the bottom during the first few minutes of baking. This will enhance the crust’s texture.
Finally, be patient with the rising times; the longer the dough ferments, the better the flavor and texture of your baguette will be. Enjoy your baking experience!
Italian Focaccia
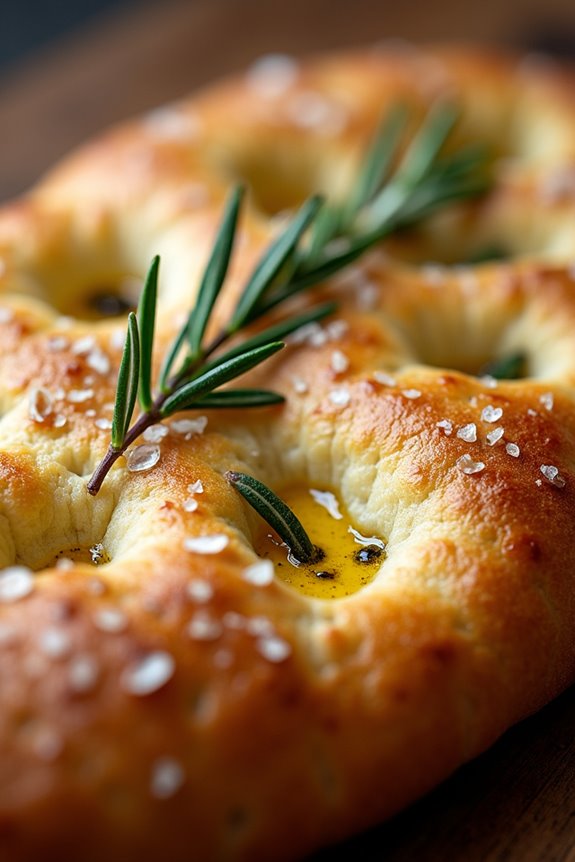
Focaccia is a beloved Italian bread known for its soft, chewy texture and flavorful topping options. This versatile bread can be enjoyed on its own, used as a sandwich base, or served alongside a variety of dishes. The simplicity of the ingredients combined with the rich taste of olive oil and fresh herbs makes focaccia a must-try recipe for both novice and experienced bakers alike.
Creating focaccia at home is a rewarding experience that fills your kitchen with the irresistible aroma of freshly baked bread. The key to a perfect focaccia lies in the dough’s hydration and the generous use of olive oil, which contributes to its distinctive flavor and moist crumb. With a few straightforward steps, you’ll have a delicious loaf that can be customized with toppings like rosemary, garlic, or even sun-dried tomatoes.
Ingredients (Serves 4-6):
- 4 cups all-purpose flour
- 2 teaspoons salt
- 1 teaspoon sugar
- 1 packet (2 ¼ teaspoons) active dry yeast
- 1 ¾ cups warm water (about 110°F)
- ¼ cup extra-virgin olive oil, plus more for drizzling
- Sea salt, for sprinkling
- Fresh herbs (such as rosemary or thyme) for garnish (optional)
Cooking Instructions:
- Activate the Yeast: In a small bowl, combine warm water, sugar, and yeast. Stir gently and let it sit for about 5-10 minutes until it becomes frothy. This indicates that the yeast is activated and ready to use.
- Prepare the Dough: In a large mixing bowl, combine the flour and salt. Make a well in the center and pour in the activated yeast mixture along with ¼ cup of olive oil. Using a wooden spoon or your hands, mix until a shaggy dough forms.
- Knead the Dough: Transfer the dough to a lightly floured surface and knead it for about 8-10 minutes until it becomes smooth and elastic. If the dough is sticky, add a little more flour as needed.
- First Rise: Place the kneaded dough into a lightly oiled bowl, cover it with a damp cloth or plastic wrap, and let it rise in a warm place for about 1-2 hours until it doubles in size.
- Shape the Focaccia: Once the dough has risen, punch it down to release the air. Transfer it to a greased baking sheet or a parchment-lined baking pan. Gently stretch the dough to fit the pan, creating dimples with your fingers across the surface.
- Second Rise: Cover the shaped focaccia with a cloth and let it rise again for about 30 minutes, allowing it to puff up a bit more.
- Preheat the Oven: While the dough is rising, preheat your oven to 425°F (220°C).
- Add Toppings: After the second rise, drizzle additional olive oil over the surface of the dough, sprinkle with sea salt, and add any desired toppings such as fresh herbs or sliced garlic.
- Bake the Focaccia: Place the focaccia in the preheated oven and bake for 20-25 minutes or until it’s golden brown on top and sounds hollow when tapped.
- Cool and Serve: Once baked, remove the focaccia from the oven and let it cool on a wire rack. Slice and serve warm or at room temperature.
Extra Tips:
For a unique flavor twist, consider experimenting with different toppings and flavorings. Adding olives, sun-dried tomatoes, or even caramelized onions can elevate your focaccia to a whole new level.
Additionally, if you want an extra crispy crust, place a small pan of water in the oven while baking to create steam. This will help achieve that perfect crusty exterior while keeping the inside soft and airy. Enjoy your homemade focaccia!
German Pretzels
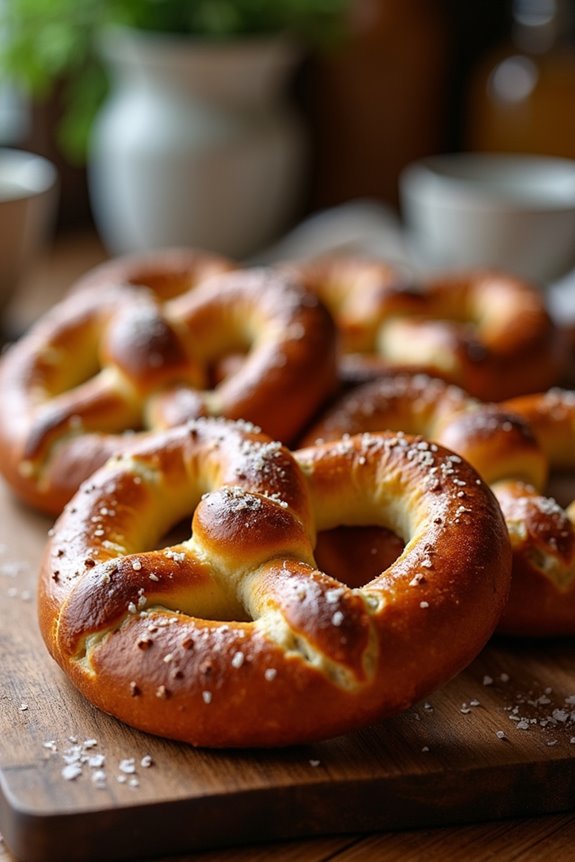
German Pretzels, also known as Brezeln, are a classic snack loved by many, especially in Germany where they’re often enjoyed with mustard or cheese. These soft, twisted bread rolls are characterized by their unique shape and a crunchy, golden-brown crust that contrasts beautifully with their soft, chewy interior.
Traditionally, they’re made with a simple dough that’s boiled in a baking soda solution before baking, giving them their distinct taste and texture. Perfect for parties, game days, or as a delicious snack any time of the day, these pretzels will surely impress your family and friends.
Making German Pretzels at home is easier than you might think! With just a few common ingredients and some patience, you can recreate this beloved treat in your own kitchen. The process of shaping the dough into pretzels is a fun activity for both adults and kids alike.
The best part is that they can be enjoyed fresh out of the oven or stored for later, making them a versatile addition to your culinary repertoire. Now, let’s explore the ingredients and cooking instructions for this delightful dish that serves 4-6 people.
Ingredients
- 4 cups all-purpose flour
- 1 packet (2 ¼ teaspoons) active dry yeast
- 1 ½ cups warm water (about 110°F/43°C)
- 1 tablespoon granulated sugar
- 1 tablespoon salt
- ⅓ cup baking soda
- 1 egg (for egg wash)
- Coarse sea salt (for sprinkling)
Instructions
- Activate the Yeast: In a large mixing bowl, combine warm water, sugar, and yeast. Stir gently and let it sit for about 5-10 minutes until the mixture is frothy. This indicates that the yeast is active and ready to use.
- Make the Dough: Add the flour and salt to the yeast mixture. Mix until a dough begins to form. Transfer the dough onto a lightly floured surface and knead it for about 5-7 minutes until it’s smooth and elastic.
- Let the Dough Rise: Place the kneaded dough in a greased bowl, cover it with a damp cloth or plastic wrap, and let it rise in a warm place for about 1 hour or until it has doubled in size.
- Prepare the Baking Soda Bath: Preheat your oven to 450°F (232°C). In a large pot, bring 10 cups of water to a gentle boil and add the baking soda. Be cautious, as the mixture may bubble up.
- Shape the Pretzels: Once the dough has risen, punch it down and divide it into 8 equal pieces. Roll each piece into a long rope (about 20 inches long) and twist it into the classic pretzel shape. Pinch the ends to secure them.
- Boil the Pretzels: Carefully place each shaped pretzel into the boiling baking soda bath, one at a time, for about 30 seconds. This step is essential for achieving the pretzel’s signature crust. Remove them with a slotted spoon and place them on a baking sheet lined with parchment paper.
- Apply Egg Wash and Salt: Beat the egg in a small bowl and brush it over each pretzel for a shiny finish. Sprinkle coarse sea salt on top of each pretzel.
- Bake the Pretzels: Bake in the preheated oven for 12-15 minutes or until they’re deep golden brown. Let them cool on a wire rack before serving.
Extra Tips
When making German Pretzels, make sure that the baking soda bath is boiling before adding the pretzels, as this is key to achieving that perfect crust.
If you prefer a slightly sweeter pretzel, you can add a tablespoon of honey to the dough for added flavor. Feel free to experiment with toppings such as sesame seeds, poppy seeds, or even cinnamon sugar for a sweet twist. Enjoy your homemade pretzels with your favorite dips or toppings for an authentic German experience!
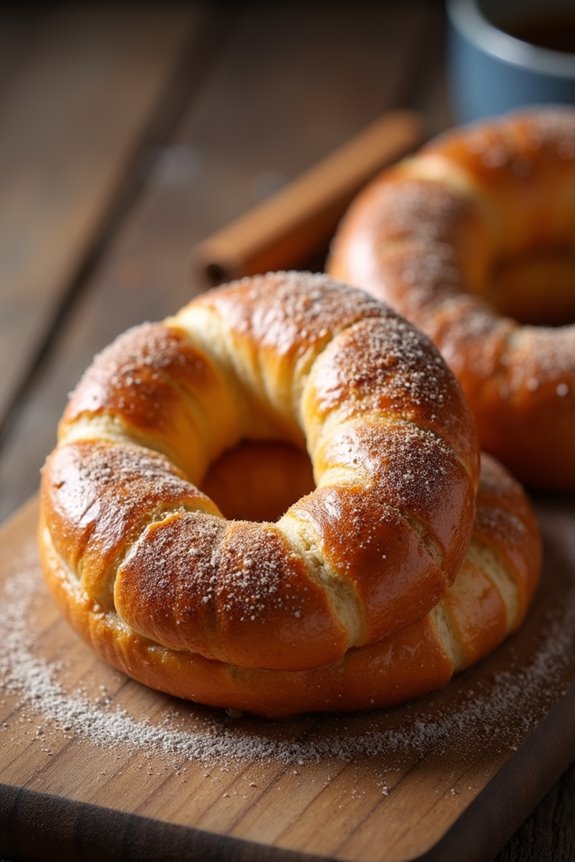
Spanish Pan De Muerto
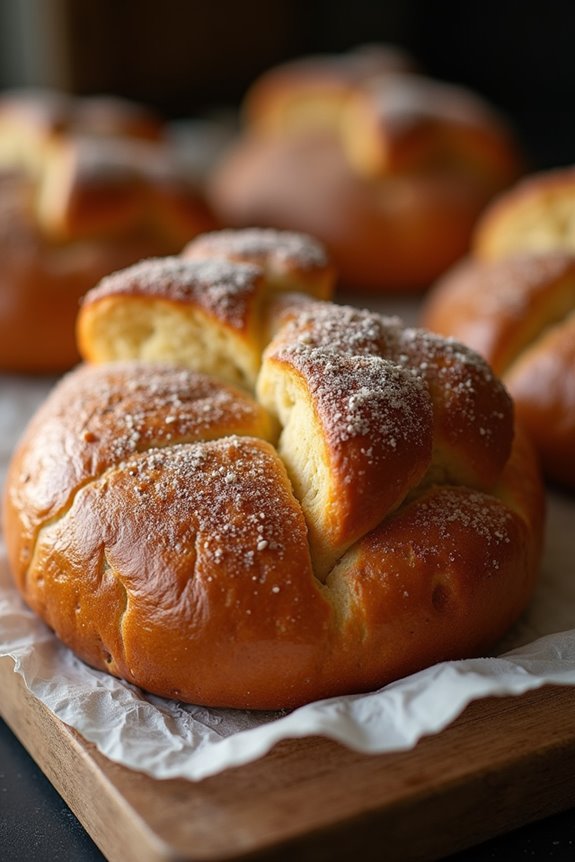
Pan de Muerto, or “Bread of the Dead,” is a traditional Spanish pastry that’s particularly associated with the Day of the Dead celebrations in Mexico. This sweet, soft bread is often shaped like a skull or decorated with bone-like pieces, symbolizing the cycle of life and death.
Although it carries deep cultural significance, its delightful flavor and aroma make it a beloved treat enjoyed by many throughout the year.
The preparation of Pan de Muerto can vary from region to region, with different flavors and ingredients reflecting local customs. This recipe will guide you through making a classic version of Pan de Muerto, ideal for serving 4-6 people. The bread is typically flavored with orange zest and anise, offering a unique taste that pairs wonderfully with coffee or hot chocolate.
Ingredients
- 4 cups all-purpose flour
- 1 cup granulated sugar
- 1/2 cup unsalted butter (softened)
- 3/4 cup milk (warm)
- 3 large eggs
- 2 teaspoons active dry yeast
- 1 teaspoon salt
- 1 tablespoon orange zest
- 1 teaspoon anise seeds
- Extra sugar for dusting
- 1 egg (for egg wash)
Cooking Instructions
- Activate the Yeast: In a small bowl, combine the warm milk and active dry yeast. Allow it to sit for about 5-10 minutes until it becomes frothy. This step guarantees that the yeast is alive and ready to help the dough rise.
- Mix Dry Ingredients: In a large mixing bowl, whisk together the flour, sugar, salt, and anise seeds. Make sure the ingredients are well combined, which helps to evenly distribute the flavors throughout the dough.
- Combine Wet Ingredients: In a separate bowl, whisk the eggs and add the softened butter and orange zest. Mix until well combined. Once the yeast mixture is frothy, add it to the wet ingredients.
- Form the Dough: Gradually add the wet mixture to the dry ingredients, stirring with a wooden spoon until a dough begins to form. Once combined, knead the dough on a floured surface for about 10 minutes until it becomes smooth and elastic.
- First Rise: Place the kneaded dough into a greased bowl, covering it with a damp cloth or plastic wrap. Allow it to rise in a warm area for about 1-2 hours or until it has doubled in size.
- Shape the Bread: After the dough has risen, punch it down to release the air. Divide the dough into two parts—one larger for the main body and a smaller piece for the decorative bones. Shape the larger piece into a round loaf and shape the smaller piece into bone-like shapes or small balls to place on top.
- Second Rise: Place the shaped dough on a baking sheet lined with parchment paper. Cover it again and let it rise for another 30-45 minutes until puffy.
- Preheat Oven and Prepare for Baking: Preheat your oven to 350°F (175°C). Brush the risen dough with the egg wash to create a golden crust during baking.
- Bake: Bake the Pan de Muerto in the preheated oven for 25-30 minutes or until it’s golden brown and sounds hollow when tapped on the bottom.
- Cool and Dust: Once baked, remove the bread from the oven and let it cool on a wire rack. Once cooled, dust the bread with extra sugar for added sweetness.
Extra Tips
When making Pan de Muerto, feel free to experiment with flavors by adding spices like cinnamon or using different types of citrus zest.
To achieve the perfect texture, confirm your butter is softened at room temperature and that the milk is warm but not hot, as excessive heat can kill the yeast.
For an even more authentic touch, consider shaping the dough into decorative skulls to celebrate the cultural significance of this delightful bread.
Enjoy your Pan de Muerto fresh, or toast slices for a delicious treat later on!
Irish Soda Bread
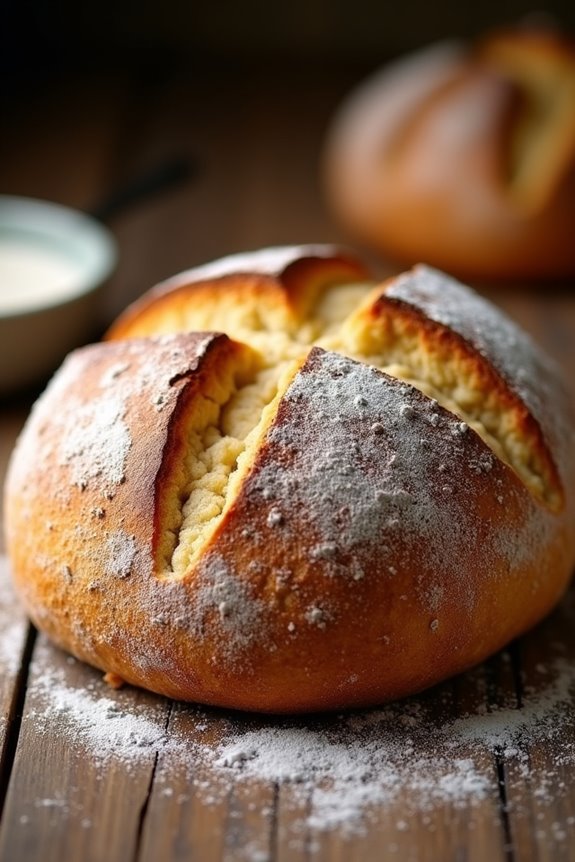
Irish Soda Bread is a traditional Irish bread that’s quick to make and requires no yeast, which makes it perfect for those who want to bake bread without the lengthy rising times associated with yeast breads. Instead, this delightful bread uses baking soda as a leavening agent, which reacts with the buttermilk to create a tender, flavorful loaf. The result is a rustic, hearty bread that’s perfect for slathering with butter or enjoying alongside a warm bowl of soup or stew.
The simplicity of the ingredients is part of what makes Irish Soda Bread so appealing. With just a handful of pantry staples, you can whip up a delicious loaf in no time. This recipe captures the essence of traditional Irish baking, and it can be customized with additions such as raisins or caraway seeds for a twist on the classic flavor. Whether you’re serving it for breakfast, lunch, or dinner, this bread is sure to be a hit at your table.
Ingredients (Serves 4-6)
- 4 cups all-purpose flour
- 1 teaspoon baking soda
- 1 teaspoon salt
- 1 3/4 cups buttermilk
Cooking Instructions
- Preheat the Oven: Begin by preheating your oven to 425°F (220°C). This high temperature will help the bread rise quickly and create a lovely crust.
- Mix Dry Ingredients: In a large mixing bowl, combine the flour, baking soda, and salt. Whisk them together until well mixed. This step is vital as it guarantees that the baking soda is evenly distributed throughout the flour, which is necessary for proper rising.
- Add Buttermilk: Make a well in the center of the dry ingredients and pour in the buttermilk. Using your hands or a wooden spoon, gently mix the ingredients until they just come together. Be careful not to overmix, as this can lead to a dense loaf.
- Shape the Dough: Turn the dough out onto a lightly floured surface. With floured hands, gently knead the dough for about 1 minute until it forms a rough ball. It should be slightly sticky but manageable.
- Form the Loaf: Shape the dough into a round loaf, about 1.5 inches thick. Place it on a baking sheet lined with parchment paper. Using a sharp knife, cut a deep cross into the top of the loaf. This not only looks beautiful but also allows the bread to expand as it bakes.
- Bake: Place the loaf in the preheated oven and bake for 30-35 minutes, or until the bread is golden brown and sounds hollow when tapped on the bottom. If you prefer a crustier loaf, you can bake it for an additional 5-10 minutes.
- Cool: Once baked, remove the bread from the oven and let it cool on a wire rack for at least 10 minutes before slicing. This helps the interior set and makes it easier to cut.
Extra Tips
When making Irish Soda Bread, using fresh baking soda is essential for achieving the best rise. If you prefer a sweeter version, feel free to add about half a cup of sugar or a handful of raisins to the dough.
Additionally, if you don’t have buttermilk on hand, you can substitute it with regular milk mixed with a tablespoon of vinegar or lemon juice, allowing it to sit for 5-10 minutes before using. Enjoy your homemade Irish Soda Bread fresh out of the oven for the best flavor and texture!
Portuguese Pão De Queijo

Pão de Queijo, a delightful Brazilian cheese bread, has its roots in Portuguese cuisine but has become a beloved snack across Brazil. The chewy, airy texture made from tapioca flour and the rich cheesy flavor make it an irresistible treat perfect for any occasion. Traditionally served warm, these little cheese puffs are often enjoyed as a snack or appetizer and pair wonderfully with coffee or tea.
Making Pão de Queijo is surprisingly simple and requires just a few key ingredients. This recipe will yield about 4-6 servings, making it ideal for sharing with family and friends during gatherings or as a delicious treat to enjoy at home. With the right technique, you can achieve that perfect golden crust and soft, chewy interior that characterizes these delightful cheese breads.
Ingredients
- 2 cups tapioca flour
- 1 cup milk
- 1/2 cup vegetable oil
- 1 teaspoon salt
- 2 large eggs
- 1 cup grated cheese (such as Parmesan or a mix of cheeses)
- 1/4 teaspoon baking powder (optional)
Cooking Instructions
- Preheat the Oven: Start by preheating your oven to 375°F (190°C). This guarantees that the bread cooks evenly and achieves a golden crust.
- Combine Milk, Oil, and Salt: In a saucepan over medium heat, combine the milk, vegetable oil, and salt. Stir occasionally until the mixture comes to a gentle boil. This step helps to dissolve the salt and infuse the oil into the milk.
- Mix with Tapioca Flour: Once the milk mixture is boiling, remove it from the heat and pour it over the tapioca flour in a mixing bowl. Stir vigorously with a wooden spoon until the mixture becomes smooth and fully incorporated. This forms a dough that will give the Pão de Queijo its characteristic chewiness.
- Add Eggs and Cheese: Allow the dough to cool slightly (about 5-10 minutes) before adding the eggs one at a time, mixing well after each addition. Then fold in the grated cheese and baking powder, if using, until fully combined. The eggs give the dough structure, while the cheese provides flavor and richness.
- Shape the Dough: With your hands, take small portions of the dough and roll them into balls about the size of a golf ball. Place the balls on a parchment-lined baking sheet, leaving some space between each one to allow for expansion during baking.
- Bake: Place the baking sheet in the preheated oven and bake for 15-20 minutes, or until the tops are lightly golden and puffed up. Keep an eye on them, as baking times may vary slightly depending on your oven.
- Serve Warm: Once baked, remove the Pão de Queijo from the oven and let them cool for a few minutes on the baking sheet. Serve warm for the best texture and flavor.
Extra Tips
For best results, use a cheese that melts well, such as Parmesan or mozzarella, or a combination of both for extra flavor. If you prefer a more pronounced cheese flavor, feel free to add extra cheese to the dough.
Also, if you’re looking to spice things up, try adding herbs or spices like oregano or crushed red pepper flakes for an added kick. Pão de Queijo is best enjoyed fresh from the oven, but leftovers can be stored in an airtight container and reheated in the oven for a few minutes to regain their delightful texture.
Greek Tsoureki
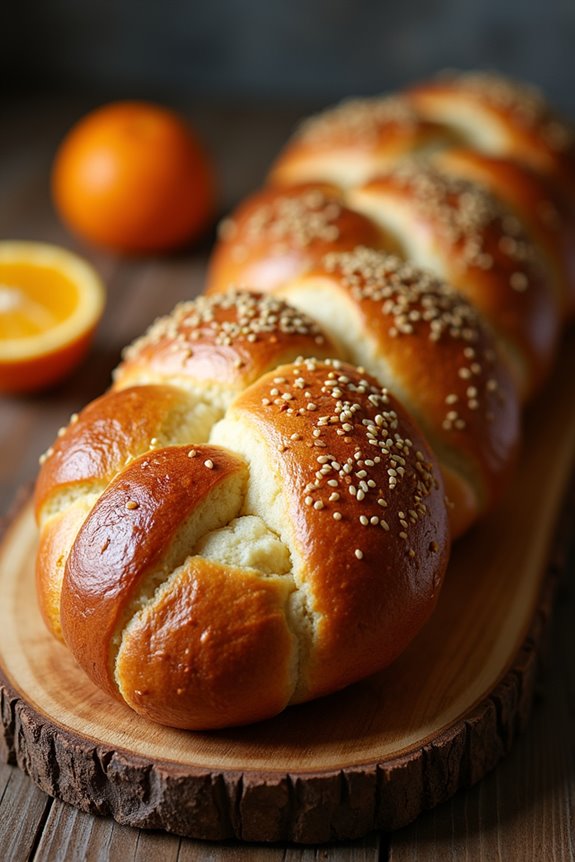
Greek Tsoureki is a traditional sweet bread, often enjoyed during Easter but cherished year-round for its delightful flavor and soft, fluffy texture. This aromatic bread is infused with a touch of mastic and orange zest, giving it a unique taste that sets it apart from other breads. Typically braided and sprinkled with sesame seeds, Tsoureki isn’t only a feast for the palate but also a visual delight, making it a favorite centerpiece for festive occasions.
The preparation of Tsoureki requires patience and attention to detail, but the end result is well worth the effort. This recipe will guide you through the process of making this beloved Greek bread, guaranteeing that you achieve the perfect balance of sweetness and texture. Whether you’re baking for a special celebration or simply to enjoy a piece of Greek culture at home, Tsoureki is sure to impress your family and friends.
Ingredients (serves 4-6 people)
- 4 cups all-purpose flour
- 1 cup milk, warmed
- 1/2 cup sugar
- 2 1/4 teaspoons active dry yeast (1 packet)
- 1/2 cup unsalted butter, melted
- 3 large eggs
- 1 teaspoon salt
- 1 tablespoon orange zest
- 1 teaspoon ground masticha (optional)
- 1/4 cup sesame seeds (for topping)
- 1 egg (for egg wash)
Cooking Instructions
- Activate the Yeast: In a small bowl, combine the warm milk with the sugar and yeast. Stir gently and let it sit for about 5-10 minutes until frothy. This indicates that the yeast is active and ready to help your dough rise.
- Prepare the Dough: In a large mixing bowl, combine the flour, salt, orange zest, and masticha (if using). Create a well in the center and add the melted butter, the activated yeast mixture, and 3 eggs. Mix everything together until a sticky dough begins to form.
- Knead the Dough: Transfer the dough to a floured surface and knead it for about 10 minutes until it becomes smooth and elastic. If the dough is too sticky, add a little more flour as needed, but be careful not to add too much.
- First Rise: Place the kneaded dough in a lightly greased bowl, cover it with a damp cloth, and let it rise in a warm place for about 1-2 hours, or until it has doubled in size.
- Shape the Tsoureki: Once the dough has risen, punch it down to release the air. Divide the dough into three equal portions. Roll each portion into a long rope, about 12-14 inches long. Braid the three ropes together and tuck the ends under to form a circle or leave it as a long loaf.
- Second Rise: Place the braided dough on a parchment-lined baking sheet. Cover it with a cloth and let it rise again for about 30-45 minutes, or until it has puffed up.
- Preheat and Prepare for Baking: Preheat your oven to 350°F (175°C). In a small bowl, whisk the remaining egg and brush it over the risen dough to give it a beautiful golden color. Sprinkle sesame seeds on top for added texture.
- Bake the Tsoureki: Bake in the preheated oven for 25-30 minutes, or until the bread is golden brown and sounds hollow when tapped on the bottom. If it browns too quickly, cover it loosely with aluminum foil.
- Cool: Once baked, remove the Tsoureki from the oven and let it cool on a wire rack before slicing. This helps maintain its soft texture.
Extra Tips
When making Tsoureki, it’s important to verify that your ingredients are at room temperature for better incorporation. You can also experiment by adding a dash of vanilla or a pinch of nutmeg for added flavor.
If you want to add a festive touch, consider placing dyed red eggs in the braids before baking, a traditional practice during Greek Easter. Enjoy your Tsoureki fresh, or store it in an airtight container to keep it soft for several days!
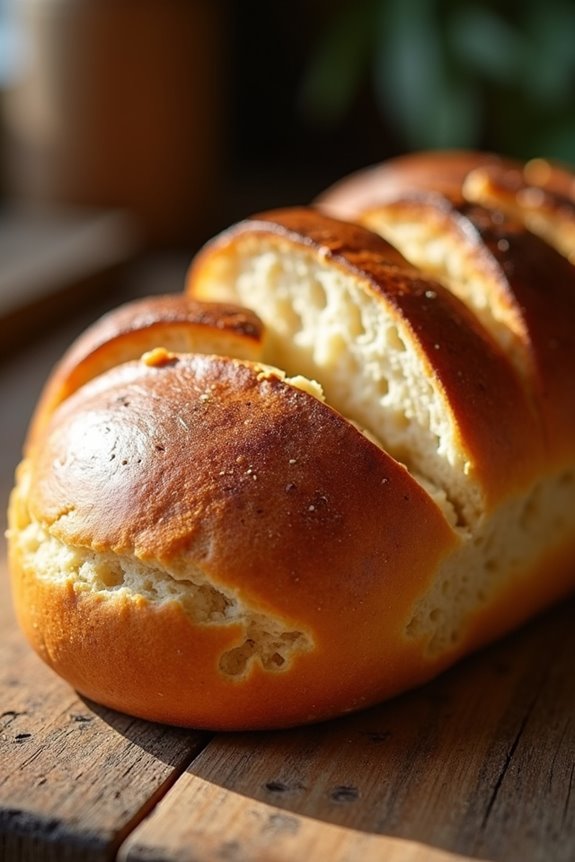
Swedish Limpa Bread
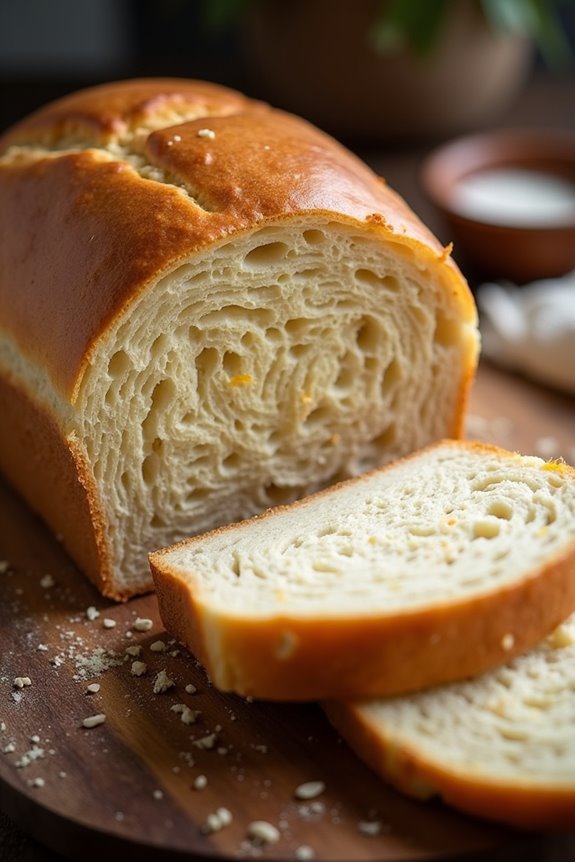
Swedish Limpa Bread is a traditional rye bread that’s infused with a delightful mix of spices, often featuring anise and orange zest, which gives it a unique flavor profile that sets it apart from other breads. This bread isn’t only delicious but also pairs wonderfully with a variety of toppings, from butter and cheese to smoked salmon.
Its dense texture and aromatic qualities make it an excellent choice for any meal, whether enjoyed fresh or toasted. Making Limpa Bread at home allows you to experience the rich cultural heritage of Sweden while filling your kitchen with mouthwatering aromas. The process may take some time, but it’s well worth the effort as you create a warm, hearty loaf that can be shared with family and friends.
This recipe yields a serving size of 4-6 people, making it perfect for gatherings or simply as an everyday staple.
Ingredients
- 2 cups rye flour
- 1 cup all-purpose flour
- 2 tablespoons brown sugar
- 1 teaspoon salt
- 1 teaspoon anise seeds
- 1 teaspoon caraway seeds
- 1 tablespoon orange zest
- 1 packet (2 1/4 teaspoons) instant yeast
- 1 1/2 cups warm water (110°F)
- 2 tablespoons molasses
- 2 tablespoons unsalted butter, melted
Cooking Instructions
- Prepare the Yeast Mixture: In a small bowl, combine the warm water and molasses. Sprinkle the instant yeast over the top and let it sit for about 5-10 minutes until it becomes foamy. This step guarantees that the yeast is active and ready to help the bread rise.
- Mix Dry Ingredients: In a large mixing bowl, combine the rye flour, all-purpose flour, brown sugar, salt, anise seeds, caraway seeds, and orange zest. Stir the dry ingredients together until well mixed. This will help to evenly distribute the flavors throughout the bread.
- Combine Wet and Dry Ingredients: Once the yeast mixture is foamy, pour it into the bowl with the dry ingredients along with the melted butter. Use a wooden spoon or your hands to mix the ingredients together until a sticky dough forms. The dough will be denser than typical white bread dough due to the rye flour.
- Knead the Dough: Transfer the dough onto a well-floured surface. Knead the dough for about 8-10 minutes until it’s smooth and elastic. If the dough is too sticky, sprinkle a little more all-purpose flour as needed. This step develops the gluten, which will give the bread its structure.
- First Rise: Place the kneaded dough in a greased bowl and cover it with a clean kitchen towel. Allow it to rise in a warm place until it has doubled in size, about 1-1.5 hours. This fermentation process is essential for the texture and flavor of the bread.
- Shape the Loaf: Once the dough has risen, punch it down to release the air. Shape it into a loaf by flattening it slightly, then rolling it tightly from one end to the other. Pinch the seams to seal. Place the shaped loaf into a greased 9×5 inch loaf pan.
- Second Rise: Cover the loaf with the kitchen towel again and let it rise for another 30-45 minutes, or until it has roughly doubled in size again. This second rise helps to create a light and airy texture in the finished bread.
- Preheat the Oven: While the loaf is rising, preheat your oven to 375°F (190°C). This guarantees the oven is ready for baking when the bread has finished rising.
- Bake the Bread: Once the loaf has risen, place it in the preheated oven and bake for 30-35 minutes, or until the bread is golden brown and sounds hollow when tapped on the bottom. Baking time can vary, so keep an eye on the loaf to prevent over-baking.
- Cool the Bread: After baking, remove the bread from the oven and let it cool in the pan for about 10 minutes before transferring it to a wire rack to cool completely. This step allows the moisture to escape and helps maintain the crusty exterior.
Extra Tips
When making Swedish Limpa Bread, feel free to experiment with the spices to suit your taste preferences. You can adjust the amount of anise or caraway seeds, or even add other flavors like fennel or coriander.
Additionally, for a more intense orange flavor, consider adding a splash of orange juice to the wet ingredients. To keep the bread fresh longer, store it wrapped in a clean kitchen towel or in a bread box at room temperature. Enjoy this delicious bread with various toppings or simply warm it up for a delightful treat!
Austrian Kaisersemmel

Austrian Kaisersemmel, also known as Kaiser rolls, are traditional bread rolls that are both crusty on the outside and soft on the inside. These rolls are often enjoyed for breakfast or served alongside soups and salads. The name “Kaiser” translates to “Emperor” in German, and these rolls are said to be fit for royalty.
With their distinctive star-shaped top, they not only taste delightful but also add a touch of elegance to any meal. Making Kaisersemmel at home may seem challenging, but with a few simple ingredients and some patience, you can create these delicious rolls that will impress family and friends.
The dough is enriched with milk and butter, giving it a rich flavor and tender crumb. A hint of malt adds depth, while the unique scoring technique creates the signature appearance of these rolls. Let’s explore the ingredients and steps required to create your own Austrian Kaisersemmel for 4-6 people.
Ingredients:
- 500g all-purpose flour
- 300ml warm milk
- 20g fresh yeast (or 7g active dry yeast)
- 10g sugar
- 10g salt
- 50g unsalted butter, melted
- 1 teaspoon malt extract (optional)
- 1 egg, for egg wash
- Cornmeal, for dusting
Cooking Instructions:
- Activate the Yeast: In a small bowl, combine the warm milk and sugar. Sprinkle the fresh yeast over the top and let it sit for about 5-10 minutes until it becomes frothy. This indicates that the yeast is active and ready to use.
- Mix the Dough: In a large mixing bowl, combine the all-purpose flour and salt. Make a well in the center and pour in the activated yeast mixture along with the melted butter (and malt extract if using). Mix the ingredients together with a wooden spoon or your hands until they form a rough dough.
- Knead the Dough: Transfer the dough to a lightly floured surface and knead for about 10 minutes until it becomes smooth and elastic. This step is essential as it develops the gluten, which gives the rolls their structure.
- First Rise: Place the kneaded dough into a lightly greased bowl, cover it with a clean kitchen towel or plastic wrap, and let it rise in a warm, draft-free area for approximately 1-1.5 hours, or until it has doubled in size.
- Shape the Rolls: Once the dough has risen, punch it down to release any air bubbles. Turn it out onto a floured surface and divide it into 8 equal pieces. Shape each piece into a round ball, then flatten slightly. Using a sharp knife or a dough scraper, make a star pattern on the top of each roll.
- Second Rise: Place the shaped rolls on a baking sheet lined with parchment paper, spaced apart. Cover with a towel and let them rise again for about 30-45 minutes until they puff up.
- Preheat the Oven: While the rolls are rising, preheat your oven to 220°C (428°F). Place a shallow pan of water on the bottom rack to create steam, which will help achieve a crispy crust.
- Egg Wash and Bake: Just before baking, beat the egg and brush it over the tops of the rolls for a golden finish. Carefully place the rolls in the preheated oven and bake for about 20-25 minutes or until they’re golden brown and sound hollow when tapped on the bottom.
- Cool and Serve: Remove the rolls from the oven and let them cool on a wire rack. Serve warm or at room temperature, enjoying them with butter, jam, or as a side to your favorite meal.
Extra Tips:
For the best results, make sure your ingredients are at room temperature before you begin. If using active dry yeast, be sure to dissolve it in the warm milk properly before mixing it with the flour.
Additionally, for an extra crispy crust, you can mist the rolls with water just before placing them in the oven. Enjoy your freshly baked Austrian Kaisersemmel as part of a hearty breakfast or alongside your favorite dishes!
Danish Rugbrød
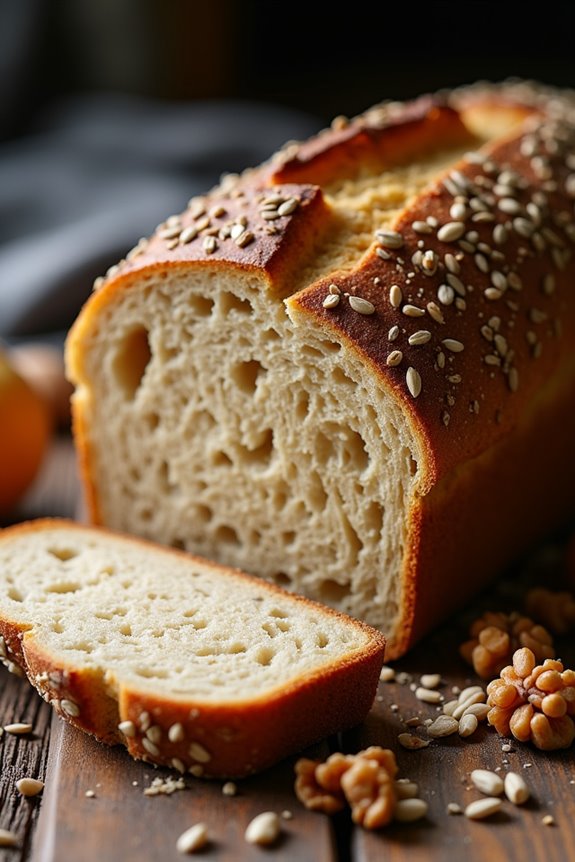
Danish Rugbrød, or rye bread, is a beloved staple in Denmark known for its dense, hearty texture and rich flavor. This traditional bread is made primarily from rye flour, and it’s often enjoyed with a variety of toppings, including pickled herring, cheese, or cold cuts. The use of whole grains makes it not only delicious but also nutritious, packed with fiber and essential nutrients.
Whether served at breakfast or as a side during lunch or dinner, Rugbrød is a versatile choice that embodies the essence of Danish cuisine.
Baking Rugbrød at home may seem challenging, but the process is straightforward and rewarding. The key to a perfect loaf lies in allowing the dough to ferment properly, which develops its unique sour flavor and enhances its texture. The following recipe will guide you through creating an authentic Danish Rugbrød that serves 4-6 people, perfect for sharing with family and friends.
Ingredients:
- 2 cups (240g) rye flour
- 1 cup (120g) whole wheat flour
- 1 cup (120g) all-purpose flour
- 1 ½ cups (360ml) buttermilk or sour milk
- 1 cup (240ml) water
- 1 tablespoon (15g) salt
- 2 tablespoons (30g) honey or molasses
- 1 teaspoon (5g) active dry yeast
- 1 cup (100g) mixed seeds (such as sunflower seeds, flaxseeds, and sesame seeds)
- ½ cup (60g) walnuts or hazelnuts, chopped (optional)
Cooking Instructions:
- Prepare the Dough: In a large mixing bowl, combine the rye flour, whole wheat flour, and all-purpose flour. In a separate bowl, whisk together the buttermilk, water, honey (or molasses), and salt. Dissolve the active dry yeast in the liquid mixture and let it sit for about 5 minutes until it becomes frothy.
- Mix Ingredients: Pour the liquid mixture into the bowl with the dry ingredients. Stir with a wooden spoon or spatula until the mixture comes together into a sticky dough. Add the mixed seeds and nuts (if using) and mix until evenly distributed.
- First Rise: Cover the bowl with a clean kitchen towel or plastic wrap and let it rise in a warm, draft-free area for about 1 to 2 hours or until the dough has doubled in size. This fermentation process is essential for developing flavor.
- Shape the Dough: After the first rise, lightly flour a clean surface and turn the dough out onto it. Shape the dough into a loaf by folding it over itself a few times and placing it into a greased loaf pan. Smooth the top with a spatula.
- Second Rise: Cover the loaf pan with the kitchen towel or plastic wrap and allow the dough to rise again for about 30 minutes until it has puffed up.
- Preheat the Oven: While the dough is rising, preheat your oven to 350°F (175°C).
- Bake the Bread: Once the second rise is complete, place the loaf pan in the preheated oven. Bake for about 45-50 minutes or until the bread is deep brown and sounds hollow when tapped on the bottom.
- Cool the Bread: Remove the bread from the oven and let it cool in the pan for about 10 minutes before transferring it to a wire rack to cool completely. This cooling process helps the texture set properly.
Extra Tips: When making Danish Rugbrød, using a mix of different seeds can enhance both flavor and nutrition, so feel free to experiment with your favorites.
Additionally, if you prefer a more pronounced sour flavor, consider using a sourdough starter instead of commercial yeast. Just be sure to adjust the liquid content accordingly.
For best freshness, store your Rugbrød in a bread bag or wrap it tightly in plastic wrap, and it can last for several days. Enjoy your homemade Danish Rugbrød with a variety of toppings for a truly delightful experience!
Hungarian Langos

Hungarian Langos is a beloved street food that has been enjoyed for generations. This deep-fried flatbread is crispy on the outside and soft on the inside, often topped with a variety of savory or sweet accompaniments. Traditionally, Langos is served with sour cream and grated cheese, but the toppings can be customized to suit your taste.
It’s a perfect dish for gatherings, parties, or as a delicious snack any time of the day.
Making Langos at home is quite simple and requires just a handful of ingredients. The dough is made from basic pantry staples, and the frying process yields a wonderfully satisfying texture. Whether you’re familiar with this dish or trying it for the first time, the aroma of freshly fried Langos will surely tempt everyone to the table.
Ingredients (Serves 4-6)
- 2 cups all-purpose flour
- 1 cup warm water
- 1 packet (2 1/4 tsp) active dry yeast
- 1 teaspoon sugar
- 1 teaspoon salt
- 1 tablespoon vegetable oil (plus more for frying)
- 1 cup sour cream (for serving)
- 1 cup grated cheese (e.g., mozzarella or feta, for serving)
- Optional toppings: garlic, herbs, or even sweet toppings like jam or Nutella
Cooking Instructions
- Prepare the Yeast Mixture: In a small bowl, combine the warm water, sugar, and yeast. Stir gently and let it sit for about 5-10 minutes until it becomes frothy. This indicates that the yeast is active and ready to use.
- Make the Dough: In a large mixing bowl, combine the flour and salt. Once the yeast mixture is frothy, add it to the flour along with the tablespoon of vegetable oil. Mix until a sticky dough forms.
- Knead the Dough: Transfer the dough onto a lightly floured surface and knead for about 5-7 minutes until it becomes smooth and elastic. If the dough is too sticky, sprinkle a little more flour as needed.
- First Rise: Place the kneaded dough into a greased bowl, cover it with a clean kitchen towel, and let it rise in a warm place for about 1 hour or until it has doubled in size.
- Shape the Langos: After the dough has risen, punch it down to release any air bubbles. Divide the dough into 6 equal pieces and shape each piece into a flat disk, about 1/2-inch thick.
- Heat the Oil: In a deep frying pan or pot, heat vegetable oil over medium-high heat until it reaches 350°F (175°C). You can test the oil by dropping a small piece of dough into it; if it sizzles, it’s ready.
- Fry the Langos: Carefully place one or two disks of dough in the hot oil, frying them for about 2-3 minutes on each side or until they’re golden brown. Avoid overcrowding the pan to guarantee even cooking.
- Drain and Serve: Once cooked, remove the Langos from the oil and place them on paper towels to drain excess oil. Serve warm with sour cream, grated cheese, and any additional toppings of your choice.
Extra Tips
When making Langos, verify the oil is hot enough for frying, as this will help achieve that perfect golden crispness.
If you’re not comfortable frying, you can also bake the Langos in a preheated oven at 400°F (200°C) for about 15-20 minutes, turning them halfway through, though they won’t have the same deep-fried texture.
Experiment with different toppings to find your favorite combination, and don’t hesitate to get creative!
Czech Trdelník
Czech Trdelník, also known as chimney cake, is a delightful pastry that originates from Central Europe. Traditionally cooked over an open flame, this sweet treat has gained popularity in many countries for its unique shape and delicious flavor. The dough is wrapped around a wooden cylinder, coated in sugar, and baked until golden brown, creating a crispy outer layer and a soft, fluffy interior.
Often served with a sprinkle of cinnamon or filled with various toppings, Trdelník is a must-try for anyone who loves baked goods.
Making Trdelník at home can be a fun and rewarding experience. The process may seem a bit intricate, but with the right ingredients and a little patience, you can replicate this iconic Czech delicacy in your own kitchen. Perfect for gatherings, festivals, or just a sweet treat for yourself, this recipe serves 4-6 people, making it ideal for sharing with family and friends.
Ingredients:
- 4 cups all-purpose flour
- 1/2 cup granulated sugar
- 1/4 cup unsalted butter, melted
- 1 cup milk, warm
- 2 large eggs
- 2 1/4 teaspoons active dry yeast (1 packet)
- 1/2 teaspoon salt
- 1 tablespoon vanilla extract
- 1/2 cup sugar (for rolling)
- 1 tablespoon ground cinnamon (for rolling)
- Optional toppings (e.g., Nutella, whipped cream, ice cream)
Cooking Instructions:
- Activate the Yeast: In a small bowl, combine the warm milk and active dry yeast. Let it sit for about 5-10 minutes until it becomes frothy. This activation is vital as it helps the dough rise properly.
- Mix the Dough: In a large mixing bowl, combine the flour, sugar, and salt. Create a well in the center and add the melted butter, eggs, vanilla extract, and the frothy yeast mixture. Mix everything together until combined.
- Knead the Dough: Transfer the dough onto a floured surface and knead it for about 8-10 minutes until it’s smooth and elastic. You may need to add a bit more flour if it’s too sticky.
- First Rise: Place the kneaded dough into a lightly greased bowl, cover it with a clean kitchen towel, and let it rise in a warm place for about 1 hour or until it has doubled in size.
- Shape the Trdelník: Once risen, punch down the dough to release the air. Divide the dough into equal pieces (about 6 pieces) and roll each piece into a long rope. Wrap the ropes around wooden cylinders or thick metal rods, making sure they’re tightly coiled.
- Prepare the Sugar Mixture: In a small bowl, mix together the sugar and ground cinnamon. Roll the wrapped dough in this mixture, coating it evenly.
- Bake the Trdelník: Preheat your oven to 375°F (190°C). Place the prepared rods on a baking sheet lined with parchment paper. Bake for about 15-20 minutes, rotating halfway through, until golden brown. If using an open flame, rotate continuously until evenly cooked.
- Cool and Serve: Carefully remove the Trdelník from the rods and let them cool slightly on a wire rack. Serve warm, optionally filled with your choice of toppings like Nutella or whipped cream.
Extra Tips:
When making Czech Trdelník, make certain that your dough is well-kneaded to achieve the right texture. If you don’t have wooden cylinders, you can fashion your own using aluminum foil or use a thick rolling pin, but make sure to grease them well before wrapping the dough.
For an extra flavor boost, try adding a hint of lemon zest to the dough or experimenting with different sugar toppings like crushed nuts. Enjoy the process and don’t hesitate to get creative with your fillings!
British Brioche
British Brioche is a rich, buttery bread that’s perfect for breakfast, brunch, or even as a delightful snack. This soft, pillowy loaf is known for its slightly sweet flavor and its light, airy texture, which is achieved through a process of careful mixing and resting. Traditionally, brioche is made with a mixture of flour, eggs, butter, sugar, and yeast, creating a delicious bread that can be enjoyed on its own or with a variety of spreads.
The versatility of brioche means it can also be used to make French toast, bread pudding, or even sandwiches, making it a staple in many households.
Making British Brioche at home may seem intimidating, but with a little patience and attention to detail, you can create a loaf that rivals those found in bakeries. The key to a successful brioche is to allow the dough enough time to rise, which gives it its characteristic texture. Once you have mastered this recipe, you can experiment with different flavors or add-ins, such as chocolate chips or dried fruit, to make it your own.
Ingredients (Serving Size: 4-6 People)
- 500g strong white bread flour
- 75g caster sugar
- 10g salt
- 10g instant yeast
- 5 large eggs
- 250g unsalted butter, softened and cubed
- 100ml whole milk, warmed
- 1 egg (for egg wash)
Cooking Instructions
- Mix Dry Ingredients: In a large mixing bowl, combine the strong white bread flour, caster sugar, and salt. Make a well in the center and add the instant yeast on one side of the well and the salt on the other side. This guarantees the yeast doesn’t come into direct contact with the salt initially, which can inhibit its action.
- Add Eggs and Milk: Crack the 5 large eggs into the well and pour the warmed whole milk over the mixture. Using a wooden spoon or a dough hook attached to a stand mixer, begin to mix the ingredients together until a shaggy dough forms.
- Incorporate Butter: Gradually add the softened butter, a few cubes at a time, mixing until fully incorporated before adding more. Continue to knead the dough for about 10-15 minutes, either by hand or with a stand mixer, until it becomes smooth and elastic.
- First Rise: Shape the dough into a ball and place it in a lightly greased bowl. Cover with a damp cloth or plastic wrap and let it rise in a warm, draft-free area for about 1-2 hours, or until it has doubled in size.
- Shape the Brioche: Once the dough has risen, gently punch it down to release the air. Turn it out onto a lightly floured surface and divide it into three equal pieces. Shape each piece into a ball and place them in a greased loaf tin, ensuring they’re snug but not too crowded.
- Second Rise: Cover the loaf tin again with a damp cloth or plastic wrap and allow the dough to rise for another 1-1.5 hours, or until it has risen to the top of the tin.
- Preheat Oven: About 20 minutes before baking, preheat your oven to 180°C (350°F).
- Egg Wash and Bake: Beat the remaining egg and brush it gently over the top of the brioche for a beautiful golden finish. Bake in the preheated oven for 25-30 minutes, or until the brioche is golden brown and sounds hollow when tapped on the bottom.
- Cool and Serve: Remove the brioche from the oven and allow it to cool in the tin for 10 minutes before transferring it to a wire rack to cool completely. Slice and serve as desired.
Extra Tips
For the best texture and flavor, make sure that your butter is at room temperature before incorporating it into the dough, as this will help it mix evenly.
If you want to add additional flavors, consider mixing in zest from citrus fruits or spices like cinnamon. Additionally, brioche can be frozen after baking; simply wrap it tightly in plastic wrap and foil to preserve its freshness, and thaw at room temperature when you’re ready to enjoy it again.