

I was a bit doubtful when I first started exploring gluten-free cooking, especially with classic European recipes. However, I was delighted to find they can be just as rich and comforting. From creamy Italian risotto to hearty Hungarian goulash, these dishes stay true to their roots while being perfect for gluten-sensitive diets. Want to see how these flavors come together? Let’s take a look at these delicious recipes.
Classic Italian Risotto
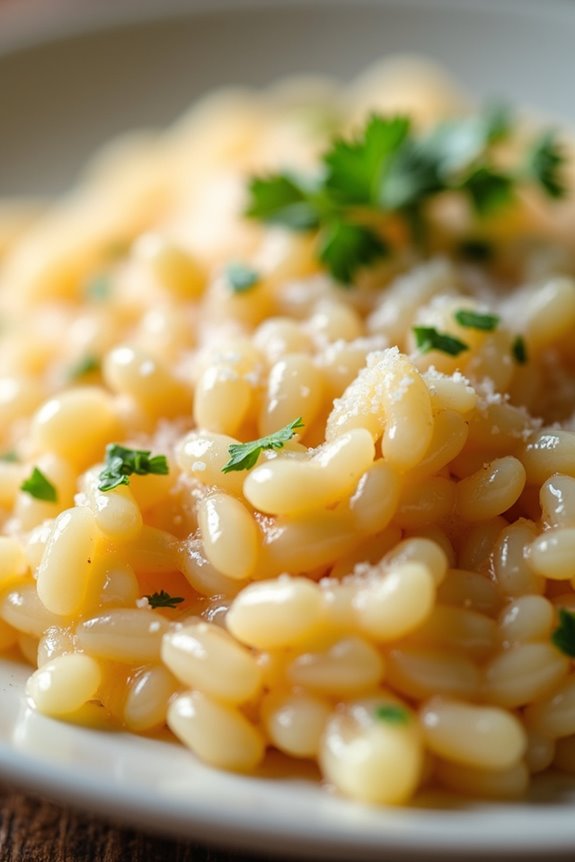
Risotto is a beloved Italian dish known for its creamy texture and rich flavors. This Classic Italian Risotto is a gluten-free delight, perfect for those looking to savor an authentic taste of Italy without the gluten. The key to a great risotto lies in the quality of the ingredients and the technique used in its preparation.
Arborio rice, a short-grain rice, is the star of this dish, as it releases starch during cooking, resulting in the signature creamy consistency. Making risotto requires patience and attention, but the process is rewarding. As you stir the rice and gradually add broth, you’ll develop a sense of connection with the dish.
This recipe will guide you through the steps to create a perfect risotto that can be served as a main course or a side dish. Whether you’re hosting a dinner party or enjoying a cozy night in, this classic risotto will impress your guests and satisfy your taste buds.
Ingredients (Serves 4-6):
- 1 ½ cups Arborio rice
- 4 cups low-sodium vegetable broth
- 1 cup dry white wine
- 1 medium onion, finely chopped
- 2 cloves garlic, minced
- 3 tablespoons olive oil
- ½ cup grated Parmesan cheese (optional for strict gluten-free)
- Salt and pepper, to taste
- Fresh parsley, chopped (for garnish)
Cooking Instructions:
- Prepare the Broth: In a medium saucepan, heat the vegetable broth over low heat until it’s warm but not boiling. Keeping the broth warm helps the rice cook evenly and absorb flavors.
- Sauté the Aromatics: In a large, heavy-bottomed skillet, heat the olive oil over medium heat. Add the finely chopped onion and cook until it becomes translucent, about 5 minutes. Stir in the minced garlic and cook for an additional minute until fragrant, being careful not to let it burn.
- Toast the Rice: Add the Arborio rice to the skillet with the sautéed onions and garlic. Stir the rice frequently for about 2-3 minutes until the grains are coated in oil and slightly translucent around the edges. This toasting step enhances the nutty flavor of the rice.
- Deglaze with Wine: Pour in the dry white wine and stir continuously until the wine is almost completely absorbed by the rice. This process adds depth of flavor to the risotto.
- Add the Broth Gradually: Begin adding the warm vegetable broth to the rice, one ladleful at a time. Stir gently and allow the rice to absorb the broth before adding the next ladleful. This process should take about 18-20 minutes. The rice should be creamy and al dente when finished.
- Finish with Cheese and Season: Once the rice is cooked to your liking, remove the skillet from the heat. Stir in the grated Parmesan cheese (if using), and season with salt and pepper to taste. The cheese will melt into the risotto, adding creaminess and flavor.
- Serve and Garnish: Spoon the risotto onto plates or into bowls. Garnish with freshly chopped parsley for a pop of color and additional flavor. Serve immediately while hot.
Extra Tips:
When making risotto, it’s crucial to stir often but gently to prevent the rice from breaking apart. The slow addition of broth allows the rice to cook evenly while developing that coveted creamy texture.
Feel free to customize your risotto by adding seasonal vegetables, herbs, or proteins like shrimp or chicken for a heartier dish. Additionally, remember that the risotto will continue to thicken as it cools, so it’s best served fresh and hot!
Spanish Tortilla

Spanish Tortilla, also known as Tortilla Española, is a traditional dish from Spain that’s both simple and satisfying. This delightful dish is primarily made with eggs and potatoes, and it can be enjoyed at any time of day—be it breakfast, lunch, or dinner. Its combination of flavors and textures makes it a beloved staple in Spanish cuisine, and the best part is that it can easily be adapted to be gluten-free, allowing everyone to enjoy its deliciousness.
Making a Spanish Tortilla isn’t only about following the recipe; it’s also about embracing the spirit of Spanish cooking, which often emphasizes using fresh, quality ingredients. The key to a successful tortilla is to cook the potatoes slowly, allowing them to become tender and flavorful without browning too much. Once the eggs are added, the dish transforms into a fluffy, creamy delight that can be served warm or at room temperature.
Let’s explore the ingredients and steps to create a perfect gluten-free Spanish Tortilla.
Ingredients (Serves 4-6):
- 4 medium-sized potatoes
- 6 large eggs
- 1 medium onion (optional)
- 1/2 cup olive oil
- Salt, to taste
- Pepper, to taste
Cooking Instructions:
- Prepare the Potatoes and Onion: Start by peeling the potatoes and slicing them thinly (about 1/8 inch thick). If you choose to include onion, slice it thinly as well. The thin slices will guarantee that the potatoes cook evenly and become tender.
- Cook the Potatoes and Onion: In a large skillet, heat the olive oil over medium heat. Once the oil is hot, add the sliced potatoes and onion (if using). Season with salt and pepper. Cook gently for about 15-20 minutes, stirring occasionally, until the potatoes are tender but not browned. You want them to be soft and slightly translucent.
- Drain the Potatoes: Once the potatoes are cooked, remove the skillet from the heat. Using a slotted spoon, transfer the potatoes and onion to a bowl, leaving as much oil in the skillet as possible. Allow them to cool slightly.
- Mix with Eggs: In a separate bowl, crack the eggs and whisk them until well combined. Add the cooked potatoes and onion to the eggs, mixing gently to guarantee the potatoes are coated without breaking them apart too much. Season the mixture with a little more salt and pepper, if desired.
- Cook the Tortilla: Return the skillet with the reserved oil to medium heat. Pour the egg and potato mixture into the skillet, spreading it out evenly. Cook for about 5-7 minutes, or until the edges start to set and the bottom is golden brown.
- Flip the Tortilla: To flip the tortilla, place a large plate over the skillet and carefully invert the skillet to transfer the tortilla onto the plate. Then, slide the tortilla back into the skillet to cook the other side. Cook for an additional 5-7 minutes until it’s fully set and golden brown.
- Serve: Once cooked, transfer the Spanish Tortilla to a serving plate. It can be served warm or at room temperature, cut into wedges. Enjoy it as is or with a drizzle of olive oil on top.
Extra Tips:
For a richer flavor, consider adding herbs like parsley or chives to the egg mixture. You can also experiment with different vegetables, such as bell peppers or spinach, for added color and nutrition.
If you prefer a creamier texture, let the tortilla cook just until it’s mostly set, as it will continue to cook slightly after being removed from the heat. Always remember that practice makes perfect; don’t be discouraged if your first tortilla isn’t perfect—each attempt will bring you closer to mastering this classic dish!
French Ratatouille
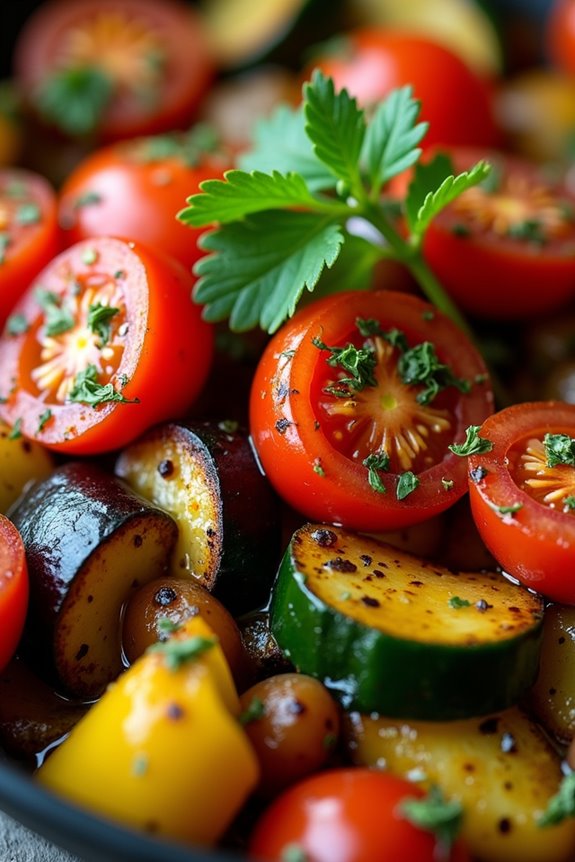
French Ratatouille is a delightful and colorful vegetable dish that originates from the Provence region of France. This dish isn’t only gluten-free but also a celebration of seasonal vegetables, making it a perfect choice for healthy eating. The combination of vibrant vegetables such as eggplant, zucchini, bell peppers, and tomatoes cooked slowly to develop their flavors makes Ratatouille a wholesome and hearty option for any meal. It can be served as a main dish, a side, or even as a topping for gluten-free pasta or rice.
Ratatouille isn’t only visually appealing but also packed with nutrients. Its versatility allows for a variety of serving options, whether you choose to enjoy it warm or at room temperature. The key to a perfect Ratatouille is to select fresh, high-quality vegetables and to allow the dish to simmer gently so that the flavors meld together beautifully. With this easy-to-follow recipe, you can create a delicious French Ratatouille to impress your family and friends.
Ingredients (Serves 4-6)
- 1 medium eggplant, diced
- 2 medium zucchinis, sliced
- 1 bell pepper (red or yellow), chopped
- 1 medium onion, chopped
- 3 cloves garlic, minced
- 4 medium ripe tomatoes, diced (or one can of diced tomatoes)
- 1/4 cup olive oil
- 1 teaspoon dried thyme
- 1 teaspoon dried basil
- Salt and pepper to taste
- Fresh parsley, chopped (for garnish)
Cooking Instructions
- Prepare the Vegetables: Start by washing and chopping all the vegetables. Dice the eggplant, slice the zucchinis, chop the bell pepper and onion, and mince the garlic. If using fresh tomatoes, dice them as well. This step is essential to guarantee that all the vegetables are ready to be cooked evenly.
- Sauté the Onions and Garlic: In a large skillet or Dutch oven, heat the olive oil over medium heat. Add the chopped onions and sauté for about 3-4 minutes until they become translucent. Then add the minced garlic and sauté for another minute, making sure that the garlic doesn’t burn, as it can turn bitter.
- Add the Eggplant and Bell Pepper: Once the onions and garlic are ready, add the diced eggplant and chopped bell pepper to the skillet. Stir well to coat them in the olive oil and cook for about 5-7 minutes until they start to soften.
- Incorporate Zucchini and Tomatoes: Next, add the sliced zucchinis and diced tomatoes (or canned tomatoes) to the skillet. Stir everything together and let it cook for another 10 minutes. This allows the vegetables to release their juices, creating a flavorful base for the Ratatouille.
- Season and Simmer: Add the dried thyme, dried basil, salt, and pepper to taste. Stir well to combine all the flavors. Lower the heat and let the mixture simmer uncovered for an additional 15-20 minutes, stirring occasionally. This step is vital as it allows the flavors to meld together beautifully.
- Final Adjustments and Serve: Once the vegetables are tender and the Ratatouille has thickened slightly, taste and adjust the seasoning if necessary. Remove from heat and garnish with fresh parsley before serving. You can serve it warm or let it cool to room temperature if you prefer.
Extra Tips
For the best flavor, consider letting your Ratatouille sit for a few hours or even overnight in the refrigerator; the flavors will continue to develop as it sits.
You can also experiment with different vegetables based on what’s in season or available to you. Adding a splash of balsamic vinegar or a sprinkle of Parmesan cheese (if not strictly dairy-free) just before serving can enhance the flavor profile even further.
Enjoy your culinary journey into the heart of French cuisine!
Hungarian Goulash
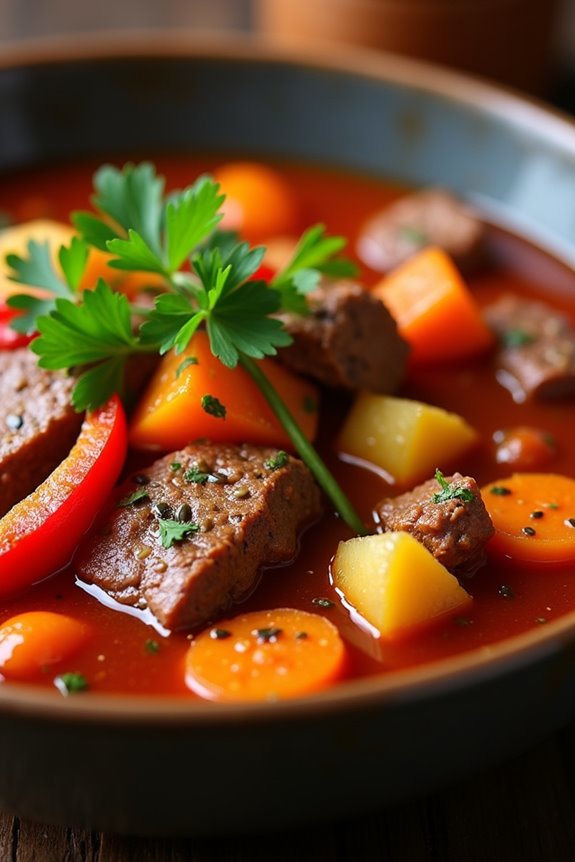
Hungarian Goulash is a comforting and hearty dish that hails from the rich culinary traditions of Hungary. This flavorful stew is characterized by its use of paprika, tender beef, and a variety of vegetables, and it’s naturally gluten-free, making it perfect for those with dietary restrictions.
With slow-cooked beef melting in your mouth and an aromatic broth that warms the soul, Hungarian Goulash is ideal for family gatherings or cozy nights in. This dish isn’t only delicious but also versatile. You can serve it with a side of gluten-free bread, over rice, or even with gluten-free noodles for a complete meal.
The combination of spices creates an inviting aroma that fills your home, making it perfect for entertaining guests. Follow this recipe for a delightful experience that’s sure to captivate everyone at the table.
Ingredients (Serves 4-6)
- 2 lbs beef chuck, cut into 1-inch cubes
- 2 tablespoons olive oil
- 2 large onions, chopped
- 3 cloves garlic, minced
- 2 tablespoons sweet paprika
- 1 teaspoon caraway seeds
- 1 teaspoon salt (more to taste)
- ½ teaspoon black pepper
- 4 cups beef broth (gluten-free)
- 2 large carrots, sliced
- 2 large potatoes, diced
- 1 red bell pepper, chopped
- 1 can (14 oz) diced tomatoes, drained
- 1 tablespoon apple cider vinegar
- Fresh parsley, chopped (for garnish)
Cooking Instructions
- Sear the Beef: In a large pot or Dutch oven, heat the olive oil over medium-high heat. Add the beef cubes in batches, making sure not to overcrowd the pot. Sear them until browned on all sides, about 5-7 minutes. This step adds depth of flavor to the meat.
- Cook the Onions and Garlic: Remove the seared beef from the pot and set it aside. In the same pot, add the chopped onions. Sauté them until they’re soft and translucent, about 5 minutes. Then, add the minced garlic and cook for an additional minute, stirring constantly to prevent burning.
- Add Spices: Stir in the sweet paprika, caraway seeds, salt, and black pepper into the onion mixture. Cook for a minute until fragrant, allowing the spices to release their essential oils.
- Combine Ingredients: Return the browned beef to the pot. Pour in the gluten-free beef broth and stir to combine. Add the sliced carrots, diced potatoes, chopped bell pepper, and drained diced tomatoes. Stir well to make sure everything is evenly distributed.
- Simmer the Goulash: Bring the mixture to a boil, then reduce the heat to low. Cover the pot and let it simmer for about 1.5 to 2 hours, or until the beef is tender and the flavors meld together. Stir occasionally to prevent sticking.
- Finish the Dish: Once the beef is tender, stir in the apple cider vinegar. Taste and adjust seasoning if necessary. Let it simmer for an additional 5-10 minutes.
- Serve: Ladle the goulash into bowls and garnish with freshly chopped parsley. Serve hot with your choice of gluten-free accompaniments.
Extra Tips
For an added depth of flavor, consider marinating the beef overnight with the spices to enhance the taste. You can also experiment with additional vegetables like parsnips or mushrooms for a heartier stew.
If you prefer a thicker goulash, remove the lid during the last 30 minutes of cooking to allow some of the liquid to evaporate. Enjoy your Hungarian Goulash with a side of gluten-free bread or salad for a complete meal!
Greek Moussaka
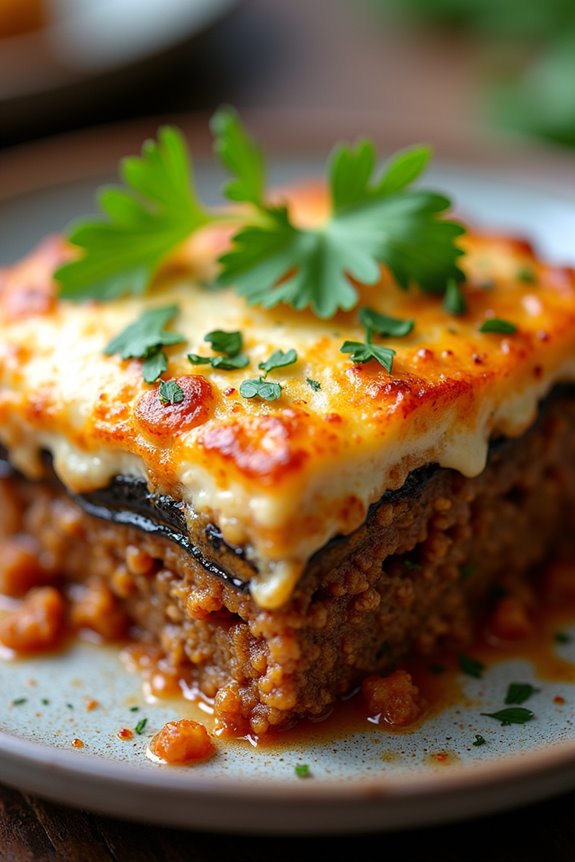
Greek Moussaka is a traditional dish that beautifully layers flavors and textures, making it a favorite for many. This comforting casserole features tender layers of eggplant, spiced ground meat, and a creamy béchamel sauce, all baked to perfection. The gluten-free version maintains the authenticity of the dish while guaranteeing that those with gluten sensitivities can enjoy it without worry.
This hearty meal isn’t only satisfying but also rich in Mediterranean flavors. The combination of herbs, spices, and fresh ingredients creates a dish that’s both delicious and visually appealing. Whether you’re hosting a dinner party or simply looking to treat yourself to a homemade classic, this gluten-free Greek Moussaka is sure to impress.
Ingredients (Serves 4-6)
- 2 large eggplants, sliced into 1/2-inch rounds
- Salt, for sweating the eggplant
- 2 tablespoons olive oil
- 1 onion, finely chopped
- 2 cloves garlic, minced
- 1 pound ground beef or lamb
- 1 can (14 ounces) diced tomatoes
- 2 tablespoons tomato paste
- 1 teaspoon dried oregano
- 1 teaspoon ground cinnamon
- 1/2 teaspoon ground allspice
- Freshly ground black pepper, to taste
- 3 cups milk
- 1/4 cup gluten-free all-purpose flour
- 1/4 cup unsalted butter
- 2 large eggs
- 1 cup grated feta cheese (optional)
- Fresh parsley, for garnish
Cooking Instructions
1. Prepare the Eggplant: Sprinkle the sliced eggplant with salt and let it sit in a colander for about 30 minutes. This process, known as “sweating,” helps to draw out excess moisture and bitterness from the eggplant.
After 30 minutes, rinse the slices under cold water and pat them dry with paper towels.
2. Cook the Meat Mixture: In a large skillet, heat the olive oil over medium heat. Add the chopped onion and sauté for about 5 minutes until translucent.
Stir in the minced garlic and cook for an additional minute. Add the ground meat to the skillet, cooking until browned. Drain any excess grease, then stir in the diced tomatoes, tomato paste, oregano, cinnamon, allspice, and black pepper. Let this simmer for about 15 minutes until the mixture thickens.
3. Prepare the Béchamel Sauce: In a saucepan, melt the butter over medium heat. Once melted, whisk in the gluten-free flour and cook for about 2 minutes until it forms a roux.
Gradually pour in the milk, whisking continuously to prevent lumps. Cook until the sauce thickens, about 5-7 minutes. Remove from heat and allow to cool slightly before whisking in the eggs and half of the feta cheese (if using).
4. Assemble the Moussaka: Preheat your oven to 375°F (190°C). In a greased baking dish, layer half of the eggplant slices on the bottom.
Spoon half of the meat mixture over the eggplant, followed by another layer of eggplant. Pour the remaining meat on top, then finish with the rest of the eggplant. Finally, pour the béchamel sauce over the top, spreading it evenly.
5. Bake: Place the baking dish in the preheated oven and Bake for about 45-50 minutes or until the top is golden brown and bubbly.
Once done, remove from the oven and let it rest for 10-15 minutes before slicing.
Extra Tips
When making gluten-free Greek Moussaka, it’s essential to verify that all your ingredients are certified gluten-free, especially the flour and any store-bought items like tomato paste.
For added depth of flavor, consider adding a splash of red wine to the meat mixture during cooking. You can also experiment with different cheeses in the béchamel sauce, such as mozzarella or parmesan, for a unique twist. Serve with a light salad and enjoy your deliciously comforting meal!
Swedish Meatballs
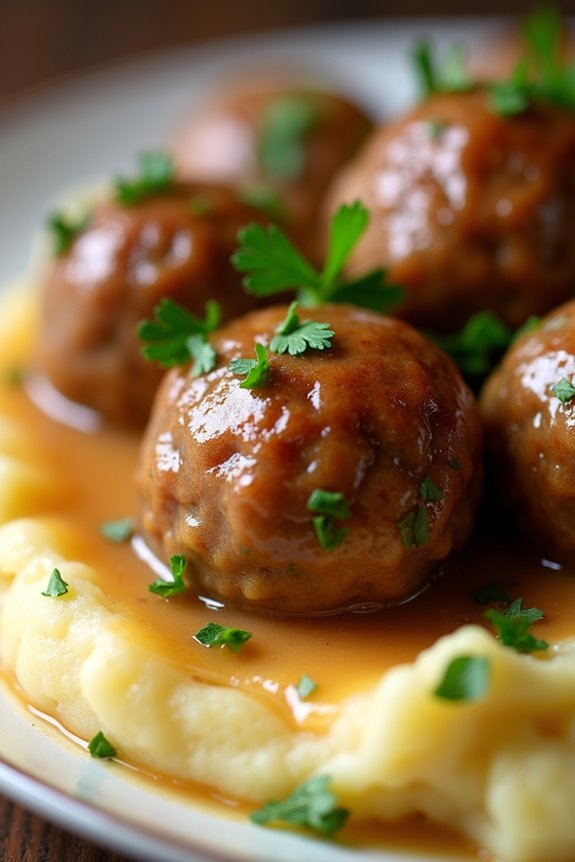
Swedish meatballs are a classic dish that brings together the savory flavors of tender ground meat, aromatic spices, and a creamy sauce. This gluten-free version guarantees that everyone can enjoy this beloved comfort food without sacrificing taste.
Whether you’re serving them at a family gathering, a holiday celebration, or simply for a cozy dinner at home, these meatballs will be a hit!
In this recipe, we’ll guide you through the simple steps to create juicy and flavorful Swedish meatballs from scratch. Paired with a rich, gluten-free gravy, they can be served over gluten-free noodles, mashed potatoes, or even on their own as an appetizer.
Get ready to treat your taste buds to this delectable dish that everyone will love!
Ingredients (serving size: 4-6 people)
- 1 pound ground beef
- 1/2 pound ground pork
- 1/2 cup gluten-free breadcrumbs
- 1/4 cup grated Parmesan cheese
- 1/4 cup chopped onion
- 1/4 cup milk (or dairy-free alternative)
- 1 large egg
- 2 cloves garlic, minced
- 1 teaspoon dried oregano
- 1 teaspoon dried thyme
- 1/2 teaspoon salt
- 1/4 teaspoon black pepper
- 1/4 teaspoon allspice
- 3 tablespoons butter (or dairy-free alternative)
- 2 tablespoons gluten-free flour
- 2 cups beef broth
- 1 cup heavy cream (or coconut cream for dairy-free)
- Fresh parsley, chopped (for garnish)
Cooking Instructions
1. Prepare the Meatball Mixture**: In a large mixing bowl, combine the ground beef, ground pork, gluten-free breadcrumbs, grated Parmesan cheese, chopped onion, milk, egg, minced garlic**, oregano, thyme, salt, black pepper, and allspice.
Use your hands or a spoon to mix everything together until just combined; be careful not to overmix, as this can make the meatballs tough.
2. Form the Meatballs: Once the mixture is well combined, use your hands to form small meatballs, about 1 inch in diameter. Place them on a baking sheet or plate as you go, making sure they’re evenly spaced.
3. Cook the Meatballs: In a large skillet over medium heat, melt 2 tablespoons of butter. Once the butter is hot, add the meatballs in batches to avoid overcrowding the pan.
Cook them for about 6-8 minutes, turning occasionally until they’re browned on all sides and cooked through (internal temperature should reach 160°F). Remove the cooked meatballs from the skillet and set them aside on a plate.
4. Make the Gravy: In the same skillet, melt the remaining tablespoon of butter. Once melted, whisk in the gluten-free flour, stirring constantly for about 1 minute to create a roux.
Gradually whisk in the beef broth, making sure there are no lumps, and bring the mixture to a gentle simmer. Let it cook for a few minutes until it thickens slightly.
5. Add the Cream: Stir in the heavy cream (or coconut cream) and return the meatballs to the skillet. Simmer everything together for an additional 5-7 minutes, allowing the flavors to meld and the meatballs to soak up the delicious sauce.
6. Serve: Once the meatballs are heated through and the gravy has thickened to your liking, remove the skillet from the heat.
Serve the Swedish meatballs hot, garnished with fresh parsley, over gluten-free noodles, mashed potatoes, or on their own.
Extra Tips
When preparing Swedish meatballs, it’s important to keep the mixture moist but not too wet to maintain the right texture.
You can adjust the amount of gluten-free breadcrumbs or milk based on the moisture content of your meat. For added flavor, consider incorporating chopped fresh herbs like dill or parsley into the meatball mixture.
Additionally, if you prefer a spicier kick, a pinch of cayenne pepper can be a great addition to the meatball mixture. Enjoy your delicious gluten-free Swedish meatballs!
Portuguese Caldo Verde
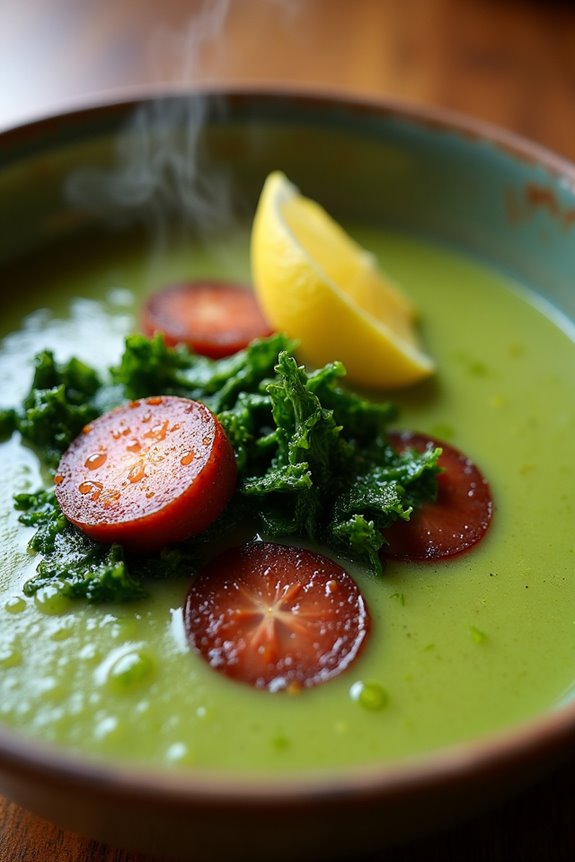
Portuguese Caldo Verde is a traditional soup that embodies the flavors of Portugal, specifically the northern region of Minho. This hearty green soup is made primarily with potatoes, kale, and chorizo, making it a warm and comforting dish perfect for any occasion.
The vibrant green color of the kale adds a fresh touch, while the smoky flavor of the chorizo enhances the overall taste, creating a delightful balance that’s both nourishing and satisfying. This gluten-free recipe allows everyone to enjoy a taste of Portugal without any worries.
Making Caldo Verde is relatively simple and requires only a few key ingredients, making it an ideal choice for home cooks looking for a delicious and wholesome meal. The soup is typically served with crusty bread, but for a gluten-free option, you can substitute with gluten-free bread or enjoy it on its own.
This dish is perfect for family gatherings, casual dinners, or even meal prep for the week ahead. Let’s plunge into the ingredients and instructions to prepare this delightful Portuguese dish!
Ingredients (Serves 4-6):
- 4 medium-sized potatoes, peeled and diced
- 1 medium onion, diced
- 2 cloves garlic, minced
- 6 cups vegetable broth (confirm it’s gluten-free)
- 1 bunch of kale, stems removed and leaves thinly sliced
- 2 tablespoons olive oil
- 1 teaspoon salt (adjust to taste)
- 1/2 teaspoon black pepper
- 1 cup chorizo, sliced (gluten-free if needed)
- Lemon wedges (for serving)
Cooking Instructions:
- Sauté the Aromatics: In a large pot, heat the olive oil over medium heat. Add the diced onion and minced garlic, sautéing until the onion becomes translucent and fragrant, about 5 minutes. This step builds the flavor base for the soup.
- Cook the Potatoes: Add the diced potatoes to the pot, stirring to combine. Pour in the vegetable broth, ensuring the potatoes are fully submerged. Bring the mixture to a boil, then reduce the heat and let it simmer for about 15-20 minutes or until the potatoes are tender.
- Blend the Soup: Once the potatoes are soft, use an immersion blender to puree the soup until smooth. If you don’t have an immersion blender, you can carefully transfer the soup in batches to a regular blender. This step creates a creamy texture that forms the foundation of your Caldo Verde.
- Add the Kale: After blending, return the soup to the stove over low heat. Stir in the sliced kale and let it simmer for an additional 5-10 minutes until the kale is tender yet vibrant. This adds both nutrition and a beautiful color to the dish.
- Cook the Chorizo: In a separate pan, cook the sliced chorizo over medium heat until it’s browned and crispy, about 5-7 minutes. This step enhances the flavor of the chorizo, making it more aromatic and delicious.
- Combine and Season: Add the cooked chorizo to the soup, and season with salt and black pepper to taste. Stir everything together and allow it to heat through for a couple of minutes before serving.
- Serve: Ladle the Caldo Verde into bowls and serve hot, garnished with a squeeze of lemon juice for a bright finish.
Extra Tips:
When preparing Portuguese Caldo Verde, feel free to adjust the thickness of the soup to your preference by adding more or less broth.
For a spicier kick, you can use spicy chorizo or add a pinch of red pepper flakes. If you prefer a vegetarian version, simply omit the chorizo and consider adding other vegetables like carrots or bell peppers for additional flavor.
Finally, always taste the soup before serving to verify the seasoning is just right, and don’t hesitate to experiment with different greens if kale isn’t available. Enjoy your cooking experience!
German Potato Salad
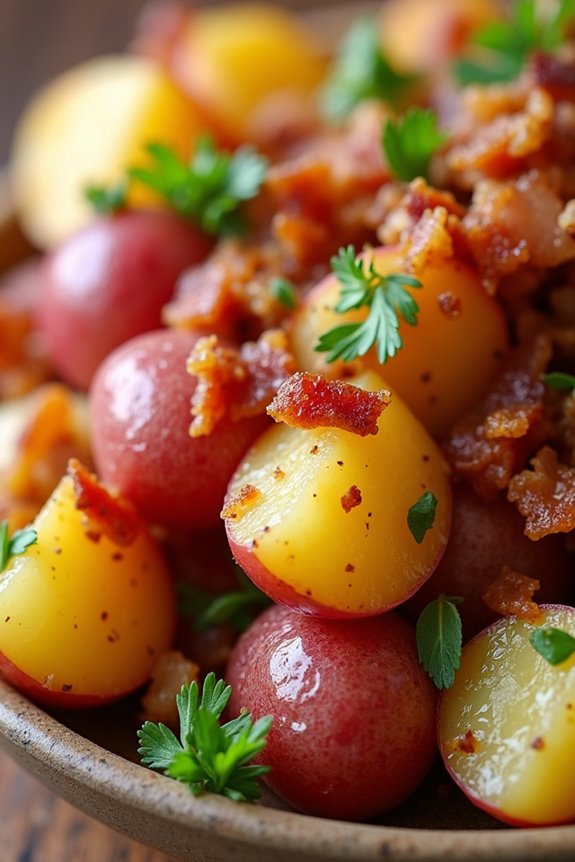
German Potato Salad is a delightful dish that brings a unique twist to the classic potato salad. Unlike its American counterpart, which is often creamy and mayonnaise-based, German Potato Salad is typically made with a tangy vinegar dressing that gives it a revitalizing flavor. This warm salad is perfect for gatherings, barbecues, or even a cozy family dinner.
Its blend of tender potatoes, crispy bacon, and zesty dressing makes it an irresistible side dish that everyone will enjoy. This gluten-free version maintains all the traditional flavors while ensuring that it can be enjoyed by those with gluten sensitivities.
Using simple, wholesome ingredients, this dish is easy to prepare and can be served warm or at room temperature. Whether you’re serving it at a picnic or as a side to your favorite protein, Gluten Free German Potato Salad is sure to impress your family and friends.
Ingredients (Serves 4-6)
- 2 pounds of small red potatoes
- 4 slices of gluten-free bacon
- 1 small onion, finely chopped
- 1/4 cup apple cider vinegar
- 1/4 cup gluten-free chicken or vegetable broth
- 1 tablespoon Dijon mustard
- 1 tablespoon sugar (optional, to taste)
- Salt and pepper, to taste
- Fresh parsley, chopped (for garnish)
Cooking Instructions
1. Prepare the Potatoes: Begin by washing the small red potatoes thoroughly. Place them in a large pot and cover with water. Add a pinch of salt to the water and bring it to a boil. Cook the potatoes until they’re fork-tender, which typically takes about 15-20 minutes.
Once cooked, drain the potatoes and let them cool slightly before slicing them into bite-sized pieces.
2. Cook the Bacon: In a large skillet over medium heat, add the gluten-free bacon slices. Cook them until they’re crispy, which should take about 5-7 minutes. Once cooked, remove the bacon from the skillet and place it on a paper towel to drain excess grease.
Reserve a tablespoon of the bacon fat in the skillet for the dressing.
3. Sauté the Onion: In the same skillet with the reserved bacon fat, add the finely chopped onion. Sauté the Onion over medium heat until it becomes translucent and lightly golden, which should take about 3-4 minutes.
This will enhance the flavor of the dish.
4. Make the Dressing: In the skillet with the sautéed onions, add the apple cider vinegar, gluten-free broth, Dijon mustard, and sugar (if using). Stir well to combine the ingredients.
Allow the dressing to simmer for about 2-3 minutes, allowing the flavors to meld together. Season with salt and pepper to taste.
5. Combine Ingredients: Add the sliced potatoes to the skillet with the dressing. Gently toss the potatoes in the dressing until they’re evenly coated.
Crumble the cooked bacon over the top and mix gently to incorporate.
6. Garnish and Serve: Remove the skillet from the heat and transfer the potato salad to a serving dish. Garnish with freshly chopped parsley before serving.
Enjoy the dish warm or at room temperature.
Extra Tips
For an added burst of flavor, consider incorporating some chopped celery or bell peppers for crunch. You can also experiment with different herbs, like dill or chives, to give your German Potato Salad a unique twist.
If you prefer a slightly sweeter dressing, adjust the sugar amount to suit your taste. This dish can be made ahead of time and stored in the refrigerator; simply warm it up before serving to bring back the comforting flavors.
Italian Caprese Salad
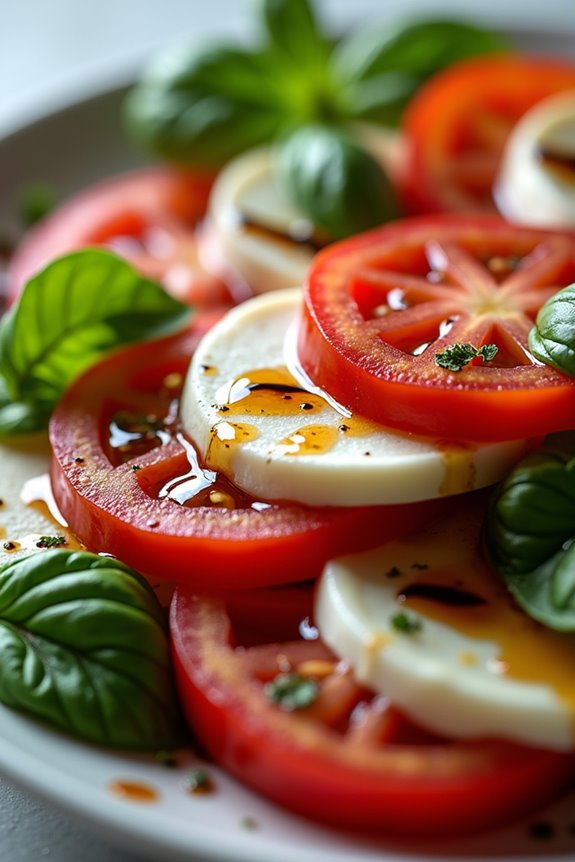
The Italian Caprese Salad is a classic dish that beautifully showcases the flavors of fresh ingredients. Originating from the island of Capri, this salad is a perfect representation of the simplicity and elegance of Italian cuisine. With its vibrant colors of red, white, and green, it isn’t only delicious but also visually appealing, making it a great choice for gatherings and special occasions.
The combination of juicy tomatoes, creamy mozzarella, fresh basil, and a drizzle of balsamic vinegar creates a rejuvenating appetizer or side dish that’s naturally gluten-free. Preparing a Caprese Salad is quick and easy, which is why it has become a staple in many households. It’s best enjoyed when made with the freshest ingredients, particularly during the summer months when tomatoes are in season.
This dish requires minimal cooking skills and can be assembled in just a few minutes, allowing you to focus on enjoying your meal rather than spending hours in the kitchen. With its delightful flavors and charming presentation, the Italian Caprese Salad is sure to impress your family and friends.
Ingredients (Serves 4-6 people):
- 4 large ripe tomatoes, sliced
- 16 oz fresh mozzarella cheese, sliced
- 1 bunch fresh basil leaves
- 1/4 cup extra virgin olive oil
- 1/4 cup balsamic glaze (or balsamic vinegar)
- Salt and freshly ground black pepper to taste
Cooking Instructions:
- Prepare the Ingredients: Start by washing the tomatoes and basil leaves thoroughly. Slice the tomatoes and the fresh mozzarella cheese into even slices, approximately 1/4 inch thick. This guarantees that the slices will layer nicely and provide a balanced bite.
- Assemble the Salad: On a large serving platter or individual plates, start layering the ingredients. Begin with a slice of tomato, followed by a slice of mozzarella, and then a basil leaf. Repeat this process until you have used all the ingredients or reached the desired amount of layers. The alternating colors of red, white, and green will create a beautiful presentation.
- Drizzle with Olive Oil and Balsamic: Once the salad is assembled, take your extra virgin olive oil and drizzle it generously over the top. Follow this with a drizzle of balsamic glaze (or balsamic vinegar) to add a tangy sweetness to the dish.
- Season the Salad: Finally, season with salt and freshly ground black pepper to taste. This step enhances the flavors of the fresh ingredients and brings the dish together.
- Serve Immediately: Caprese Salad is best served fresh, so enjoy it right away! If you need to prepare it ahead of time, consider storing the components separately and assembling them just before serving.
Extra Tips: For an elevated flavor, consider using heirloom tomatoes for a variety of colors and tastes. Additionally, if you want to add a bit of crunch, feel free to include some pine nuts or walnuts for texture.
To enhance the basil flavor, try tearing the basil leaves instead of slicing them, as this releases more of their aromatic oils. Finally, remember to taste your salad before serving; you may want to adjust the seasoning according to your preference. Enjoy your Italian Caprese Salad!
Belgian Waterzooi
Belgian Waterzooi is a traditional stew that hails from the picturesque region of Flanders in Belgium. This comforting dish typically features chicken or fish simmered in a creamy broth, enriched with vegetables and herbs. It’s renowned for its rich flavors and is perfect for a cozy dinner with family or friends.
The beauty of Waterzooi lies in its versatility; you can easily customize the ingredients based on your preferences or dietary restrictions, making it a delightful gluten-free option.
To create a satisfying gluten-free Waterzooi, you’ll need fresh ingredients to guarantee the best flavor. This dish isn’t only hearty but also allows for a beautiful presentation, making it suitable for both casual weeknight meals and special occasions. The creamy, aromatic broth, combined with tender meat and vegetables, delivers a taste of Belgian culinary tradition right to your table.
Ingredients (Serves 4-6):
- 4 chicken thighs (boneless, skinless) or 2 fillets of white fish (e.g., cod)
- 4 large carrots (sliced)
- 2 stalks of celery (sliced)
- 1 large onion (chopped)
- 3 cloves of garlic (minced)
- 1 cup of leeks (sliced)
- 4 cups of low-sodium chicken broth (guarantee gluten-free)
- 1 cup of heavy cream
- 2 tablespoons of olive oil
- 1 teaspoon of dried thyme
- 1 bay leaf
- Salt and pepper (to taste)
- Fresh parsley (chopped, for garnish)
Cooking Instructions:
- Prepare the Ingredients: Begin by washing and chopping all the vegetables. Slice the carrots, celery, and leeks, and chop the onion. Mince the garlic and set everything aside. If you’re using chicken, pat it dry and season with salt and pepper.
- Sauté the Vegetables: In a large pot or Dutch oven, heat the olive oil over medium heat. Add the chopped onion, garlic, carrots, celery, and leeks. Sauté for about 5-7 minutes, stirring occasionally, until the vegetables have softened and the onions are translucent.
- Brown the Chicken or Fish: Push the sautéed vegetables to the side of the pot and add the chicken thighs (or fish fillets) to the center. Brown the chicken on both sides for about 3-4 minutes, then mix everything together.
- Add the Broth and Seasonings: Pour in the chicken broth and add the thyme, bay leaf, and a pinch of salt and pepper. Bring the mixture to a boil, then reduce the heat to low. Cover the pot and let it simmer for 25-30 minutes, or until the chicken is cooked through (internal temperature should reach 165°F) or the fish is flaky.
- Incorporate the Cream: Once the chicken or fish is cooked, remove it from the pot, and set it aside to cool slightly. Stir in the heavy cream into the broth, mixing well. If using chicken, shred it into bite-sized pieces and return it to the pot (or leave the fish fillets whole).
- Final Simmer: Allow the stew to simmer for an additional 5-10 minutes on low heat, uncovered. This will allow the flavors to meld and the broth to thicken slightly. Taste and adjust the seasoning if necessary.
- Serve: Remove the pot from heat. Discard the bay leaf. Serve the Waterzooi hot, garnished with fresh chopped parsley. Pair it with gluten-free bread or over a bed of rice for a complete meal.
Extra Tips:
When making Belgian Waterzooi, feel free to experiment with different vegetables such as potatoes or peas for added texture and flavor.
Always guarantee that your broth and any additional ingredients are certified gluten-free to maintain the integrity of the dish. For an extra depth of flavor, consider adding a splash of white wine before simmering the broth.
This dish can also be made ahead of time and reheated, making it perfect for meal prep or gatherings.
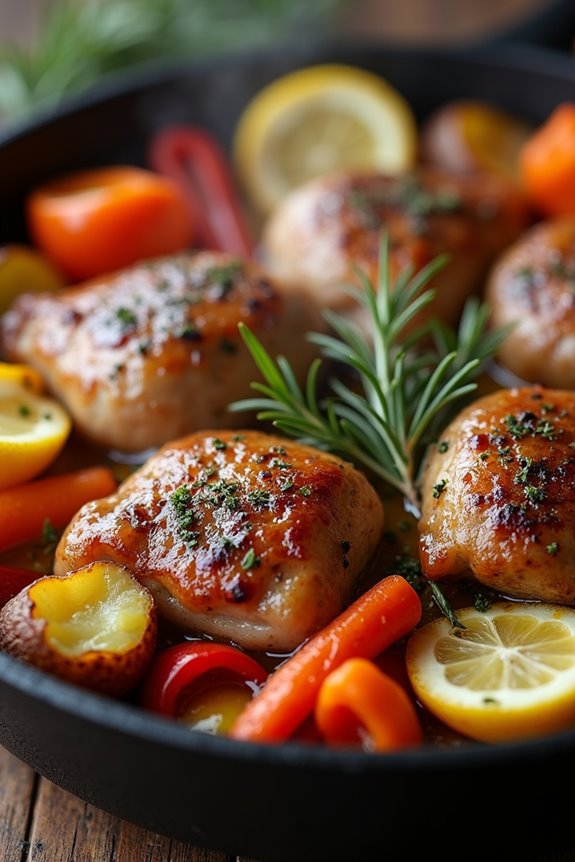
Austrian Paprika Chicken

Austrian Paprika Chicken is a delightful dish that brings the rich flavors of Austria right to your kitchen. This comforting meal features tender chicken pieces cooked in a creamy paprika sauce, making it perfect for a family dinner or a gathering with friends. The dish is naturally gluten-free, ensuring that everyone can enjoy it without any worries.
Paired with rice, gluten-free noodles, or steamed vegetables, it offers a wholesome and satisfying experience. The vibrant color and aromatic spices make Austrian Paprika Chicken not only delicious but also visually appealing. Utilizing smoked paprika adds depth to the flavor, while the creamy sauce creates a luscious coating around the chicken.
This recipe is straightforward to follow, making it an excellent choice for both novice and experienced cooks looking to whip up a hearty meal.
Ingredients (serves 4-6):
- 4-6 boneless, skinless chicken breasts (about 1.5 to 2 pounds)
- 2 tablespoons olive oil
- 1 large onion, finely chopped
- 3 cloves garlic, minced
- 2 tablespoons smoked paprika
- 1 teaspoon sweet paprika
- 1 cup chicken broth (gluten-free)
- 1 cup heavy cream
- Salt and pepper to taste
- Fresh parsley, chopped (for garnish)
Cooking Instructions:
1. Prepare the Chicken:
Start by seasoning the chicken breasts with salt and pepper on both sides. This initial seasoning will enhance the flavor of the chicken as it cooks.
2. Sear the Chicken:
In a large skillet, heat the olive oil over medium-high heat. Once hot, add the seasoned chicken breasts. Sear them for about 5-6 minutes on each side until they’re golden brown. This step locks in the juices and enhances the flavor of the chicken.
3. Cook the Aromatics:
Remove the chicken from the skillet and set it aside. In the same skillet, add the chopped onion and sauté for 3-4 minutes until translucent. Then add the minced garlic and cook for another minute until fragrant. This builds the base flavors for the sauce.
4. Add Paprika:
Sprinkle the smoked and sweet paprika into the skillet. Stir well to coat the onions and garlic evenly. Cooking the paprika for about 1-2 minutes helps release its essential oils, intensifying the flavor.
5. Create the Sauce:
Pour in the chicken broth and stir to combine, scraping up any brown bits from the bottom of the pan. Bring the mixture to a simmer, allowing it to reduce slightly, which will concentrate the flavors.
6. Incorporate the Cream:
Lower the heat and stir in the heavy cream, mixing until fully combined. Return the seared chicken breasts to the skillet, nestling them into the creamy sauce.
7. Simmer:
Cover the skillet and let the chicken simmer in the sauce for about 15-20 minutes on low heat, or until the chicken is cooked through and reaches an internal temperature of 165°F (75°C). This allows the chicken to absorb the flavors of the sauce while remaining tender and juicy.
8. Serve:
Once cooked, garnish with freshly chopped parsley before serving. This adds a touch of brightness and color to the dish.
Extra Tips:
When making Austrian Paprika Chicken, feel free to adjust the amount of paprika according to your taste preference. If you prefer a spicier kick, you can add a pinch of cayenne pepper or use hot paprika.
Additionally, consider serving the dish with a side of gluten-free bread to soak up the delicious sauce, or a simple salad for a revitalizing contrast. Enjoy this flavorful meal with your loved ones!
Croatian Peka
Croatian Peka is a traditional dish that hails from the coastal regions of Croatia, particularly the Dalmatian coast. This hearty meal is known for its unique cooking method, where ingredients are placed underneath a bell-shaped lid called a “peka” and cooked slowly over an open fire or in an oven.
The beauty of Peka lies in its versatility; it can be made with various meats, vegetables, and herbs, allowing for endless combinations that cater to different tastes. This gluten-free version of Peka retains the essence of the traditional recipe while guaranteeing it’s suitable for those with gluten sensitivities.
The slow cooking process allows all the flavors to meld beautifully, resulting in tender meat and flavorful vegetables. With the right ingredients and techniques, you can bring a taste of Croatia to your kitchen that will impress your family and friends.
Ingredients (Serves 4-6):
- 2 lbs of chicken (cut into pieces)
- 1 lb of lamb (cut into chunks)
- 4 large potatoes (peeled and cut into quarters)
- 2 large carrots (sliced)
- 1 red bell pepper (cut into strips)
- 1 large onion (sliced)
- 4 cloves of garlic (minced)
- 1 cup of olive oil
- 2 cups of vegetable broth
- 2 tablespoons of fresh rosemary (chopped)
- 2 tablespoons of fresh thyme (chopped)
- Salt and pepper (to taste)
- 1 lemon (sliced)
Cooking Instructions:
1. Prepare the Ingredients: Begin by washing and cutting all the vegetables and meat. Confirm the chicken and lamb are cut into manageable pieces for even cooking.
It’s essential to have everything prepped before you start cooking to streamline the process.
2. Season the Meat: In a large bowl, combine the chicken and lamb pieces with olive oil, minced garlic, rosemary, thyme, salt, and pepper. Coat the meat thoroughly with the seasoning and let it marinate for at least 30 minutes to enhance the flavors.
3. Layer the Ingredients: In a large pot or a Peka dish, start layering the ingredients. Place the seasoned meat at the bottom, followed by the sliced onions, carrots, bell pepper, and potatoes.
Finally, add the lemon slices on top for a burst of freshness and flavor.
4. Add the Broth: Pour the vegetable broth over the layered ingredients. The broth will create steam during the cooking process, ensuring that the meat and vegetables remain moist and tender.
5. Cover and Cook: Cover the pot with the Peka lid or a tightly fitting lid. If using an oven, preheat it to 375°F (190°C). Place the pot in the oven or over hot coals if you’re using an outdoor fire.
Cook for about 2 to 2.5 hours, checking occasionally to ascertain it’s cooking evenly.
6. Check for Doneness: After 2 hours, carefully remove the lid (be cautious of steam) and check the meat for tenderness. The chicken and lamb should be cooked through and easily pull apart with a fork.
7. Serve: Once done, remove the pot from the heat and let it rest for about 10 minutes before serving.
This resting period allows the flavors to settle. Serve the Peka hot, garnished with fresh herbs if desired.
Extra Tips:
When preparing Croatian Peka, feel free to experiment with different vegetables or even seafood to suit your taste preferences.
Cooking with fresh, high-quality ingredients will greatly enhance the flavor of the dish. If you’re using a traditional Peka, confirm it’s well-seasoned before cooking; this will prevent sticking and improve the taste.
Finally, don’t rush the cooking process; slow and steady will yield the best results, allowing the flavors to develop fully.
Scottish Cullen Skink
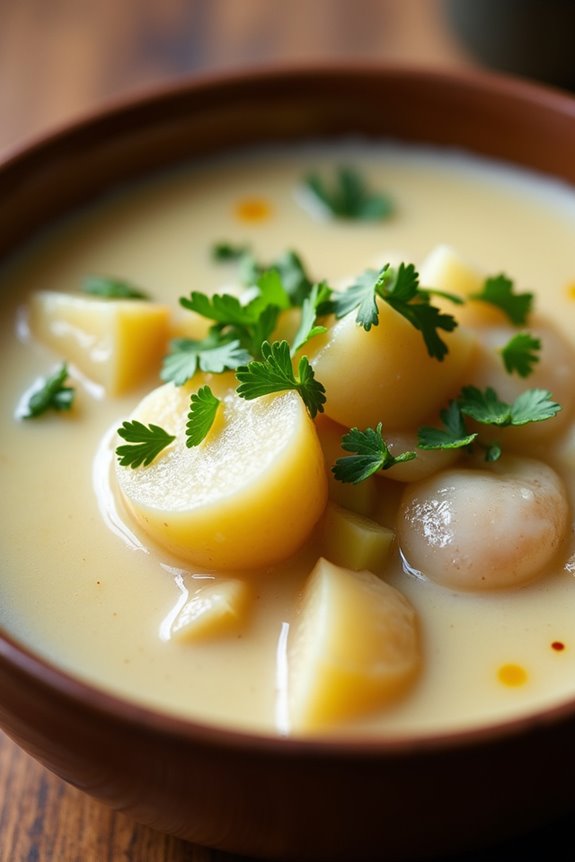
Scottish Cullen Skink is a hearty and flavorful smoked fish soup that hails from the Scottish village of Cullen. This traditional dish combines flaked smoked haddock with potatoes and leeks, creating a comforting and warm meal, perfect for chilly evenings. Not only is it delicious, but Cullen Skink is also naturally gluten-free, making it an excellent choice for those adhering to a gluten-free diet.
The smokiness of the fish, paired with the creaminess of the soup, creates a delightful balance of flavors that will transport your taste buds straight to the Scottish Highlands.
Cooking Cullen Skink is relatively straightforward and requires a few simple ingredients. The key to a great Cullen Skink is to use high-quality smoked haddock, which imparts a rich, smoky flavor to the dish. This recipe serves 4-6 people and is perfect for sharing with family or friends. With a little preparation and patience, you can enjoy a bowl of authentic Scottish comfort right at home.
Ingredients:
- 500g smoked haddock fillets
- 1 medium onion, finely chopped
- 2 leeks, washed and sliced
- 2 large potatoes, peeled and diced
- 1-2 tablespoons of butter
- 1 liter of fish stock (ensure it’s gluten-free)
- 300ml of whole milk
- Salt and black pepper, to taste
- Fresh parsley, chopped (for garnish)
Instructions:
- Prepare the Fish: Place the smoked haddock fillets in a pot and cover them with water. Bring to a gentle simmer over medium heat for about 5-7 minutes, until the fish is cooked through. Remove the fillets, reserving the cooking water, and allow the fish to cool slightly before flaking it into bite-sized pieces. Discard the skin and any bones.
- Sauté the Vegetables: In a large saucepan, melt the butter over medium heat. Add the chopped onion and leeks, cooking until they become soft and translucent, about 5-6 minutes. This step enhances the sweetness of the onions and leeks, which will add depth to your soup.
- Add the Potatoes: Stir in the diced potatoes, allowing them to cook for an additional 2-3 minutes. This helps to begin softening the potatoes before adding the liquid.
- Combine the Stock: Pour the reserved fish cooking water (or fish stock) into the saucepan, ensuring that the vegetables are submerged. Bring the mixture to a boil, then reduce the heat and let it simmer for about 15-20 minutes, or until the potatoes are tender.
- Mix in the Milk: Once the potatoes are cooked, stir in the whole milk and gently add the flaked smoked haddock. Allow the soup to warm through for another 5 minutes, ensuring it doesn’t come to a boil, as this could curdle the milk.
- Season and Serve: Taste the soup and season with salt and black pepper as needed. Ladle the Cullen Skink into bowls, garnishing with freshly chopped parsley before serving.
Extra Tips:
When making Cullen Skink, opting for undyed smoked haddock can provide a more delicate flavor, while dyed versions have a more pronounced smokiness.
Additionally, feel free to adjust the thickness of the soup by adding more or less milk, depending on your preference. For an extra kick, a dash of cayenne pepper or a squeeze of lemon juice can elevate the dish even further.
Enjoy your homemade Scottish Cullen Skink with gluten-free bread for a complete meal!
Dutch Hutspot
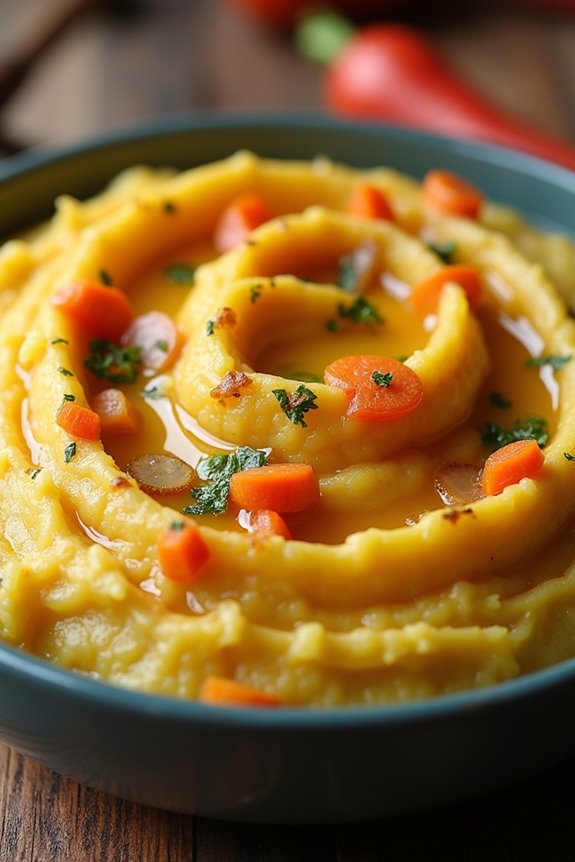
Dutch Hutspot is a classic comfort food that embodies the heartiness of Dutch cuisine. Traditionally, it’s a mash of potatoes, carrots, and onions, offering a simple yet flavorful dish that warms you from the inside out. Its humble origins date back to the 1574 siege of Leiden, where residents had to make do with what they had, creating a dish that has stood the test of time. This gluten-free version maintains the original’s charm while ensuring that everyone can enjoy it, no matter their dietary restrictions.
This delightful meal isn’t only easy to prepare but also allows for variations based on your preferences or what you have in your pantry. You can add in some of your favorite proteins or seasonings to make it your own. The combination of sweet carrots and creamy potatoes creates a beautiful balance, making it a perfect dish for family dinners or gatherings. Let’s explore how to create this comforting Dutch Hutspot at home!
Ingredients (Serves 4-6)
- 2 lbs potatoes (Yukon Gold or Russet), peeled and cubed
- 1 lb carrots, peeled and sliced
- 2 medium onions, chopped
- 4 cups vegetable broth (gluten-free)
- 2 tablespoons olive oil
- Salt and pepper to taste
- Optional: 1 teaspoon dried thyme or nutmeg for added flavor
Cooking Instructions
- Prepare the Vegetables: Begin by peeling and cubing the potatoes, peeling and slicing the carrots, and chopping the onions. Having all your vegetables prepped beforehand will make the cooking process smoother.
- Sauté the Onions: In a large pot, heat the olive oil over medium heat. Add the chopped onions and sauté them until they become translucent and fragrant, approximately 5-7 minutes. This step adds depth to the flavor of the Hutspot.
- Cook the Carrots and Potatoes: Add the sliced carrots and cubed potatoes to the pot with the sautéed onions. Stir to combine the vegetables, allowing them to soak up the flavors. Cook for another 2-3 minutes, stirring occasionally.
- Add the Broth: Pour in the vegetable broth, ensuring the vegetables are submerged. Raise the heat to high until the mixture reaches a boil. Then, reduce the heat to low, cover the pot, and let it simmer for about 20-25 minutes or until the potatoes and carrots are tender.
- Mash the Vegetables: Once cooked, remove the pot from heat and use a potato masher or fork to mash the mixture to your desired consistency. Some prefer a smoother texture, while others enjoy a chunkier mash.
- Season and Serve: Season the Hutspot with salt, pepper, and any optional seasonings like thyme or nutmeg. Mix well and serve hot. This dish pairs wonderfully with gluten-free sausages or a protein of your choice.
Extra Tips
When making Dutch Hutspot, feel free to experiment with additional ingredients, such as adding parsnips or leeks for a sweeter flavor profile.
Leftovers can be stored in an airtight container in the refrigerator for up to three days and can easily be reheated on the stove or in the microwave. If the Hutspot appears too thick upon reheating, you can add a splash of vegetable broth or water to achieve your preferred consistency. Enjoy your comforting meal!
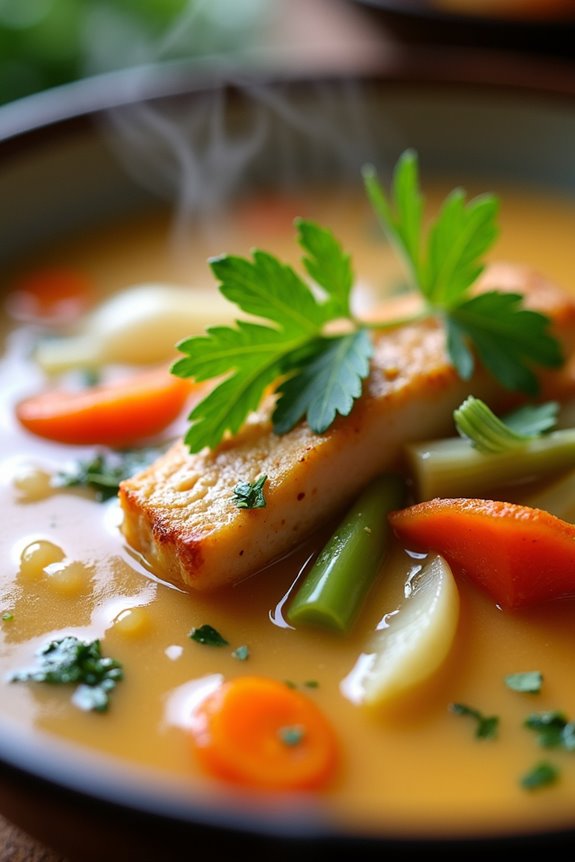
Finnish Salmon Soup

Finnish Salmon Soup, known as “Lohikeitto,” is a comforting and hearty dish that’s both gluten-free and rich in flavor. This traditional Finnish recipe showcases the delicate taste of salmon, complemented by the creaminess of potatoes and the crispness of dill. It’s perfect for a cozy dinner with family or friends, and it brings a taste of Finland right into your kitchen.
The balance of ingredients creates a soothing and aromatic broth that warms the soul, making it a go-to dish during colder months. This soup isn’t only delicious but also incredibly easy to make. With just a few simple ingredients, you can whip up a satisfying meal that’s sure to impress.
The combination of fresh salmon, potatoes, and cream creates a delightful texture and taste, while the dill adds a burst of crispness to each spoonful. Whether you’re looking to expand your culinary repertoire or simply enjoy a comforting bowl of soup, Finnish Salmon Soup is an excellent choice.
Ingredients (Serves 4-6):
- 1 lb (450 g) fresh salmon fillet, skin removed and cut into chunks
- 4 medium potatoes, peeled and diced
- 1 medium onion, finely chopped
- 4 cups (1 liter) fish stock or water
- 1 cup (240 ml) heavy cream
- 1 tablespoon fresh dill, chopped (plus extra for garnish)
- 2 tablespoons butter
- Salt and pepper to taste
- Lemon wedges, for serving
Cooking Instructions:
- Prepare the Ingredients: Begin by gathering all your ingredients. Peel and dice the potatoes into small cubes, chop the onion finely, and cut the salmon into bite-sized chunks. Fresh dill should be chopped and set aside for later use.
- Sauté the Onion: In a large pot, melt the butter over medium heat. Add the chopped onion and sauté for about 5 minutes, or until the onion becomes translucent and fragrant. This step helps to build the flavor base for your soup.
- Cook the Potatoes: Add the diced potatoes to the pot with the sautéed onions. Pour in the fish stock or water, ensuring the potatoes are well-covered. Bring the mixture to a boil, then reduce the heat to a simmer. Cook for about 10-15 minutes, or until the potatoes are tender.
- Add the Salmon: Once the potatoes are cooked, gently add the salmon chunks to the pot. Allow the soup to simmer for an additional 5-7 minutes, or until the salmon is fully cooked and flakes easily with a fork.
- Incorporate the Cream and Dill: Lower the heat and stir in the heavy cream and the chopped dill. Allow the soup to warm through for another 2-3 minutes. Be careful not to let it boil after adding the cream, as this may cause it to curdle.
- Season and Serve: Taste the soup and season with salt and pepper according to your preference. Ladle the soup into bowls and garnish with additional fresh dill. Serve with lemon wedges on the side for a crisp squeeze of citrus.
Extra Tips:
When making Finnish Salmon Soup, using high-quality, fresh salmon will greatly enhance the flavor of the dish. If possible, opt for wild-caught salmon for the best taste.
Additionally, feel free to customize the soup by adding other vegetables such as carrots or leeks if you desire more variety. For a heartier version, serve the soup with crusty gluten-free bread to soak up the delicious broth. Enjoy!