

I’ve recently come across a delightful collection of European recipes that Pinterest users just can’t get enough of. Each dish offers a unique story, from Italy’s creamy Carbonara to Spain’s colorful Paella. The flavors and techniques are as varied as the countries they hail from. If you’re eager to enhance your culinary skills and wow at your next gathering, these recipes could be just what you’re looking for. Let’s explore these delicious options together.
Classic Italian Carbonara
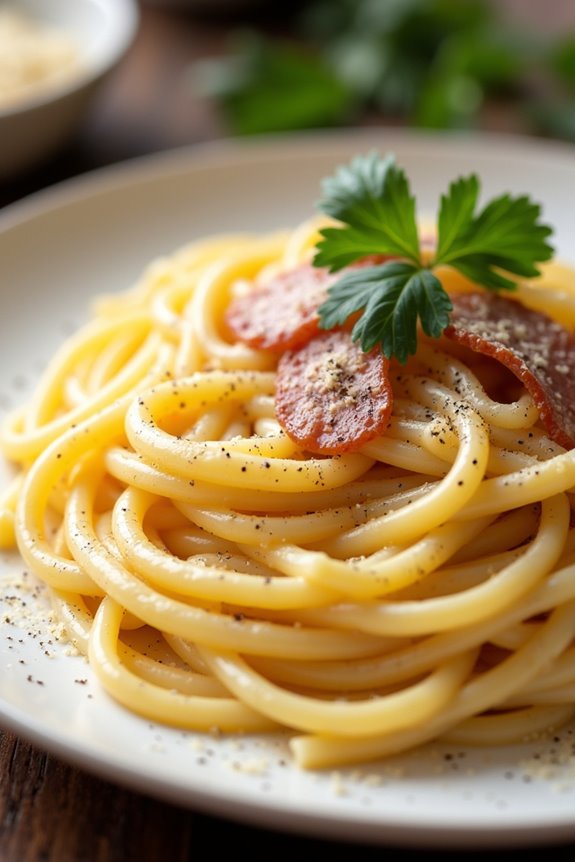
Classic Italian Carbonara is a beloved dish that hails from the Lazio region, specifically Rome. This creamy pasta dish is known for its simplicity and rich flavors, making it a staple in Italian cuisine. Traditionally made with just a few high-quality ingredients, Carbonara showcases the beauty of Italian cooking, where less is often more.
The key to a perfect Carbonara lies in the balance of the creamy egg sauce, the savory pancetta or guanciale, and the sharpness of the Pecorino Romano cheese.
Cooking Carbonara is a delightful experience, as it allows you to witness how minimal ingredients can create something truly extraordinary. The dish’s heart lies in its sauce, which is created by emulsifying the pasta water with eggs and cheese, resulting in a velvety coating that clings to the spaghetti.
This recipe will guide you through the steps to create an authentic Classic Italian Carbonara that serves 4-6 people.
Ingredients:
- 400g spaghetti
- 150g pancetta or guanciale, diced
- 3 large eggs
- 100g Pecorino Romano cheese, grated
- Freshly ground black pepper
- Salt (for pasta water)
- Fresh parsley (optional, for garnish)
Cooking Instructions:
- Prepare the Pasta: Bring a large pot of salted water to a boil. Once boiling, add the spaghetti and cook according to the package instructions until al dente. Make sure to reserve about 1 cup of the pasta cooking water before draining the pasta.
- Cook the Meat: In a large skillet over medium heat, add the diced pancetta or guanciale. Cook until it becomes crispy and golden brown, stirring occasionally. This will take about 5-7 minutes. The rendered fat will help flavor the sauce.
- Mix the Egg Mixture: In a medium bowl, whisk together the eggs, grated Pecorino Romano cheese, and a generous amount of freshly ground black pepper. This will create a creamy mixture that will form the sauce.
- Combine Pasta and Meat: Once the pasta is cooked and drained, immediately add it to the skillet with the crispy pancetta or guanciale. Toss the pasta in the rendered fat to coat it well.
- Emulsify the Sauce: Remove the skillet from heat to avoid scrambling the eggs. Quickly pour the egg and cheese mixture over the hot pasta. Toss vigorously to combine, using a little reserved pasta water if necessary to create a creamy consistency. The heat from the pasta will cook the eggs gently, creating a silky sauce.
- Serve: Plate the Carbonara immediately, garnishing with additional Pecorino Romano cheese, freshly ground black pepper, and chopped fresh parsley if desired. Serve hot and enjoy the authentic flavors of Italy.
Extra Tips:
When making Carbonara, it’s essential to work quickly once you combine the pasta with the egg mixture, as the residual heat is what cooks the eggs.
If the sauce appears too thick, gradually add small amounts of the reserved pasta water until you achieve your desired consistency. Additionally, for an authentic touch, consider using guanciale instead of pancetta for a richer flavor, and always use high-quality cheese for the best results.
Enjoy your homemade Classic Italian Carbonara!
French Ratatouille
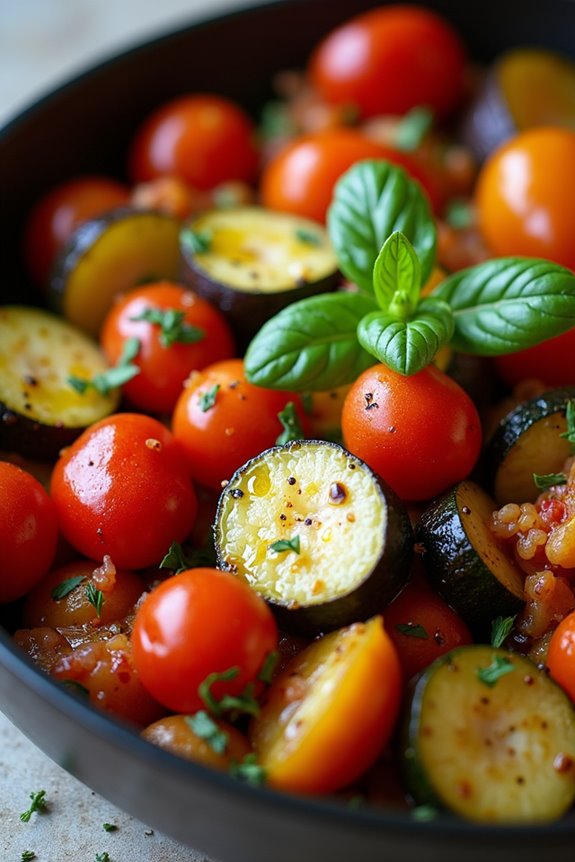
Ratatouille is a classic Provençal vegetable dish that celebrates the vibrant flavors and colors of summer produce. This rustic dish is traditionally made with a medley of vegetables, including eggplant, zucchini, bell peppers, tomatoes, and onions, all simmered together with fragrant herbs.
Ratatouille can be served hot or at room temperature, making it a versatile addition to any meal, whether as a main course or a side dish. Its deep, rich flavors are enhanced through the slow cooking process, allowing the vegetables to meld together beautifully.
The origins of ratatouille date back to the 18th century in Nice, France, where it was considered a peasant dish. Over time, it has evolved into a beloved staple of French cuisine, often associated with a healthy Mediterranean diet.
Ratatouille can be enjoyed on its own, with crusty bread, or as a filling for crepes, pasta, or even as a topping for grilled meats. This dish not only showcases the fresh produce of the season but also reflects the philosophy of cooking with simplicity and using quality ingredients.
Ingredients (Serves 4-6):
- 1 medium eggplant, diced
- 2 medium zucchini, sliced
- 1 bell pepper (red or yellow), chopped
- 1 large onion, chopped
- 3 cloves garlic, minced
- 4 medium ripe tomatoes, chopped (or 1 can of diced tomatoes)
- 1/4 cup olive oil
- 1 teaspoon dried thyme
- 1 teaspoon dried basil
- Salt and pepper, to taste
- Fresh basil leaves, for garnish (optional)
Cooking Instructions:
- Prep the Vegetables: Start by washing all the vegetables thoroughly. Dice the eggplant, slice the zucchini, chop the bell pepper, and onion, and mince the garlic. If using fresh tomatoes, chop them into small pieces. This step guarantees that all ingredients are ready to go and will allow for a smoother cooking process.
- Sauté the Onions and Garlic: In a large skillet or Dutch oven, heat the olive oil over medium heat. Once hot, add the chopped onions and sauté for about 5 minutes until they become translucent. Then, add the minced garlic and sauté for an additional minute, being careful not to let it burn. This creates a flavorful base for the ratatouille.
- Cook the Eggplant: Add the diced eggplant to the skillet and cook for about 5-7 minutes, stirring occasionally. The eggplant will absorb some of the oil and begin to soften. This step is vital as it helps to develop the dish’s depth of flavor.
- Add Remaining Vegetables: Next, add the zucchini, bell pepper, and chopped tomatoes (or canned tomatoes) to the skillet. Stir everything together and let it cook for another 10-15 minutes, allowing the vegetables to soften and release their juices.
- Season the Dish: Sprinkle in the dried thyme and basil, and season with salt and pepper to taste. Stir to combine all the flavors, and let the ratatouille simmer on low heat for an additional 15-20 minutes. This slow cooking allows the vegetables to meld together and enhances the overall taste of the dish.
- Serve: Once the vegetables are tender and the flavors are well combined, remove the skillet from heat. Serve the ratatouille warm or at room temperature, garnished with fresh basil leaves if desired. Pair it with crusty bread or serve it alongside grilled meats for a delightful meal.
Extra Tips:
When making ratatouille, feel free to customize the vegetables based on what you have on hand. Other great additions include squash, carrots, or even mushrooms.
For added depth, you can also incorporate a splash of red wine or a tablespoon of balsamic vinegar during cooking. Ratatouille can be made a day in advance as the flavors continue to develop and improve when allowed to sit.
Store leftovers in the refrigerator and enjoy them for a quick, healthy meal throughout the week!
Spanish Paella
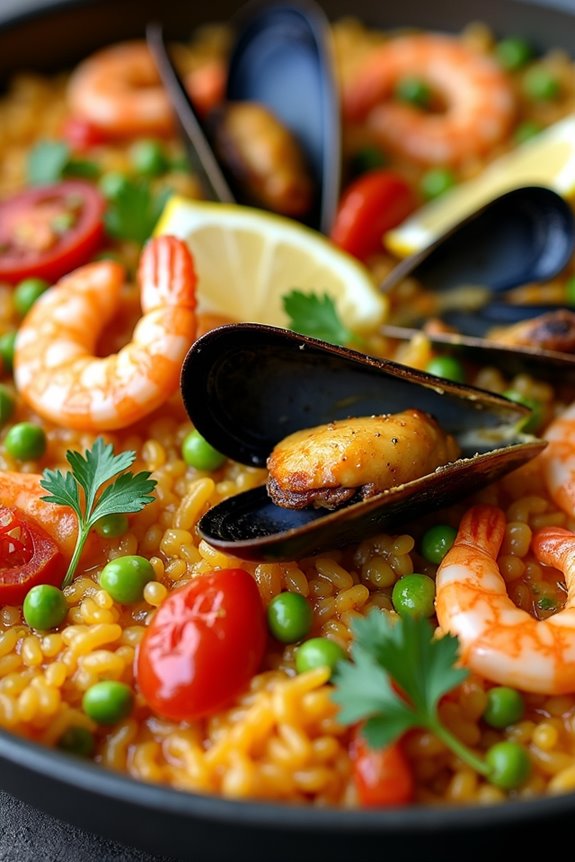
Spanish Paella is a vibrant and flavorful dish that originates from the region of Valencia, Spain. It’s traditionally made in a wide, shallow pan and showcases a delightful combination of rice, saffron, and a variety of proteins such as chicken, seafood, and vegetables.
The beauty of paella lies in its versatility, allowing cooks to incorporate seasonal ingredients and personal preferences. This dish isn’t only a feast for the stomach but also a visual delight, often garnished with fresh herbs and lemon wedges.
Cooking paella may seem intimidating at first, but with the right approach and ingredients, you can create a dish that will transport you to the sunny shores of Spain. The key to a perfect paella is achieving a flavorful base known as “sofrito,” allowing the rice to absorb the rich flavors, and creating that coveted socarrat, the crispy layer of rice at the bottom of the pan.
Gather your loved ones around the table, as paella is best enjoyed shared, making it a great centerpiece for gatherings and celebrations.
Ingredients (Serves 4-6):
- 2 cups Bomba or Arborio rice
- 4 cups chicken or seafood broth
- 1/2 teaspoon saffron threads
- 1/2 cup olive oil
- 1 onion, finely chopped
- 4 cloves garlic, minced
- 1 bell pepper, diced (red or green)
- 1 cup green peas (fresh or frozen)
- 1 cup diced tomatoes (fresh or canned)
- 1 pound chicken thighs, cut into pieces
- 1 pound shrimp, peeled and deveined
- 1/2 pound mussels, cleaned
- 1/2 pound calamari, sliced into rings
- 1 teaspoon smoked paprika
- Salt and pepper to taste
- Fresh parsley, chopped (for garnish)
- Lemon wedges (for serving)
Cooking Instructions:
- Prepare the Broth: In a saucepan, heat the chicken or seafood broth until simmering. Add the saffron threads to the broth and let it infuse while you prepare the other ingredients.
- Sauté the Vegetables: In a large paella pan or a wide skillet, heat the olive oil over medium heat. Add the finely chopped onion and cook until it becomes translucent, about 5 minutes. Then, add the minced garlic and diced bell pepper, cooking for another 2-3 minutes until fragrant.
- Cook the Chicken: Add the chicken pieces to the pan. Season with salt, pepper, and smoked paprika. Cook for about 5-7 minutes, turning occasionally until the chicken is browned on all sides.
- Create the Sofrito: Stir in the diced tomatoes and cook for an additional 5 minutes, allowing the mixture to reduce and create a thick base. This is known as the sofrito and is essential for the flavor of the paella.
- Add the Rice: Pour in the rice and stir to coat the grains in the sofrito. Cook for 1-2 minutes, allowing the rice to absorb some of the flavors.
- Incorporate the Broth: Carefully pour the saffron-infused broth into the pan, stirring gently to combine. Don’t stir after this point to achieve the socarrat. Bring to a gentle simmer.
- Add the Seafood: After about 10 minutes of simmering, add the shrimp, mussels, and calamari on top of the rice. Press them gently into the rice to guarantee they cook evenly.
- Finish Cooking: Allow the paella to simmer without stirring for an additional 10-15 minutes, or until the rice is tender and has absorbed most of the liquid. If necessary, add a bit more broth or water if the rice is still hard.
- Create the Socarrat: In the last few minutes of cooking, increase the heat to medium-high to create the socarrat. Listen for a slight crackling sound, which indicates the rice at the bottom is toasting.
- Rest and Serve: Remove the pan from heat and cover it with a clean kitchen towel for about 5 minutes. Garnish with chopped parsley and serve with lemon wedges on the side.
Extra Tips:
When making Spanish paella, it’s essential to use the right type of rice, such as Bomba or Arborio, as they’ve the ability to absorb liquid without becoming mushy.
Always let your paella rest before serving; this allows the flavors to meld together and the rice to finish cooking. For a smoky flavor, consider adding some chorizo, but remember that traditional Valencian paella doesn’t include it.
Finally, don’t rush the cooking process; allowing the rice to develop a crust at the bottom is key to a truly authentic paella experience. Enjoy your culinary journey to Spain!
German Sauerbraten
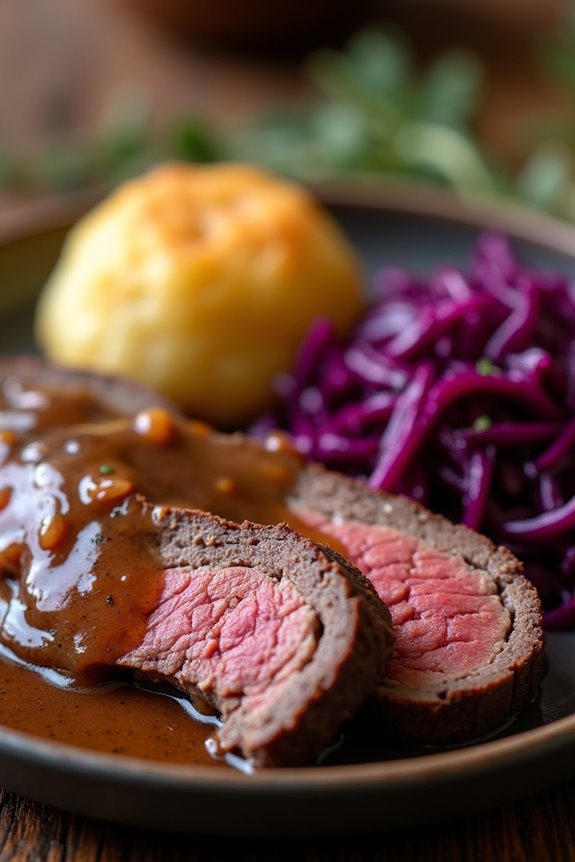
German Sauerbraten is a classic pot roast that hails from the heart of Germany. This dish is known for its unique tangy flavor, which comes from marinating the beef in a mixture of vinegar and spices. Traditionally, it’s served with hearty sides like red cabbage and potato dumplings, making it a beloved comfort food in many German households.
The slow-cooking process allows the tough cuts of meat to tenderize beautifully, absorbing all the delicious flavors of the marinade.
The preparation of Sauerbraten can take a bit of time, as the marination process is vital for achieving the signature taste. However, the end result is well worth the wait. This dish not only showcases the rich culinary traditions of Germany but also brings a sense of warmth and togetherness to the dining table, perfect for gatherings and festive occasions.
Ingredients (Serves 4-6)
- 3-4 lbs beef roast (shoulder or rump)
- 1 cup red wine vinegar
- 2 cups water
- 1 cup red wine
- 1 onion, chopped
- 2 carrots, chopped
- 2 stalks celery, chopped
- 4 cloves garlic, minced
- 1 tablespoon sugar
- 2 bay leaves
- 5 whole cloves
- 1 teaspoon black peppercorns
- 1 teaspoon mustard seeds
- Salt to taste
- 2 tablespoons vegetable oil
- 2 tablespoons all-purpose flour
- 1 cup beef broth
Instructions
- Prepare the Marinade: In a large bowl, combine the red wine vinegar, water, red wine, chopped onion, chopped carrots, chopped celery, minced garlic, sugar, bay leaves, whole cloves, black peppercorns, and mustard seeds. Mix well to guarantee all ingredients are combined. This marinade is vital for infusing the meat with flavor and tenderizing it.
- Marinate the Beef: Place the beef roast in a large resealable plastic bag or a glass dish. Pour the marinade over the meat, making sure it’s well-covered. Seal the bag or cover the dish, and refrigerate for at least 3 days, turning the meat occasionally to verify even marination. This step is key to achieving the authentic tangy flavor of Sauerbraten.
- Prepare for Cooking: After marinating, remove the beef from the marinade and pat it dry with paper towels. Reserve the marinade for later use. Season the meat with salt. In a large heavy-bottomed pot or Dutch oven, heat the vegetable oil over medium-high heat. Sear the beef roast on all sides until browned, about 4-5 minutes per side. This step adds depth of flavor to the dish.
- Create the Cooking Liquid: Once the beef is browned, remove it from the pot and set it aside. Sprinkle the flour over the drippings in the pot and stir to create a roux. Gradually add the reserved marinade and beef broth, stirring continuously to prevent lumps. Bring the mixture to a simmer.
- Slow Cook the Roast: Return the beef to the pot, cover, and reduce the heat to low. Let it cook for about 3-4 hours, until the meat is fork-tender. Make sure to check occasionally and add more broth or water if the liquid level gets too low. This slow-cooking method allows the flavors to meld and the meat to become tender.
- Serve: Once cooked, remove the roast from the pot and let it rest for a few minutes before slicing. Strain the cooking liquid to remove the vegetables and spices, then serve it as a gravy over the sliced meat. Pair with traditional sides like red cabbage and potato dumplings for a complete meal.
Extra Tips
When making Sauerbraten, don’t rush the marination process; the longer the beef sits in the marinade, the better the flavor will develop.
You can also experiment with different spices or add a handful of raisins for a hint of sweetness. If time is a constraint, you can marinate for at least 24 hours, but a full 3-day marination is recommended for an authentic taste.
Finally, Sauerbraten can be made a day in advance; it often tastes even better the next day as the flavors continue to meld.
Greek Moussaka
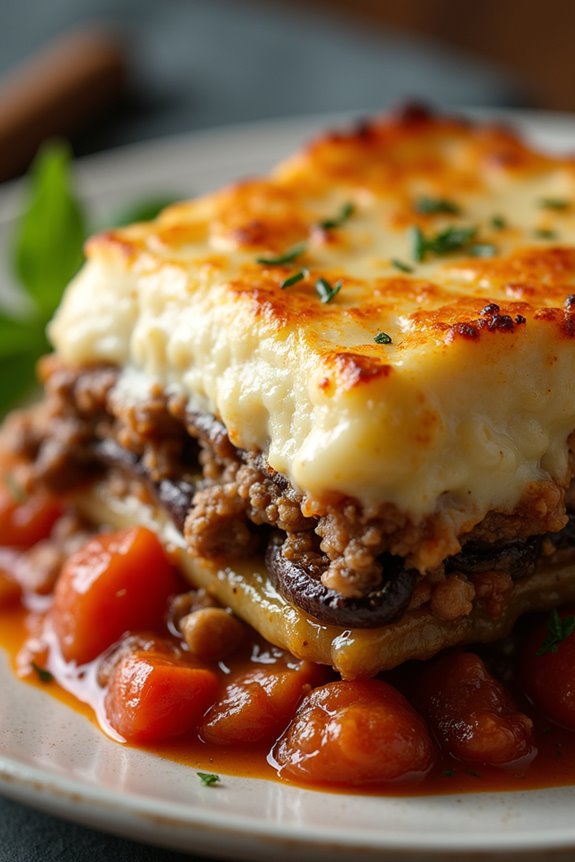
Greek Moussaka is a traditional dish that exemplifies the rich culinary heritage of Greece. This layered casserole typically consists of eggplant, ground meat, and a creamy béchamel sauce, all baked to golden perfection. Moussaka is often enjoyed as a hearty main dish and is perfect for family gatherings or special occasions. Its combination of flavors and textures makes it a beloved classic that captures the essence of Mediterranean cuisine.
Making Moussaka may require some time and effort, but the end result is undeniably worth it. The dish isn’t only filling but also offers a delightful blend of savory and creamy elements. Each layer contributes to a harmonious balance of taste, making Moussaka a memorable meal that will transport you to the sun-soaked landscapes of Greece.
Ingredients (Serves 4-6):
- 2 large eggplants, sliced into 1/2-inch thick rounds
- 1 pound ground beef or lamb
- 1 large onion, diced
- 2 cloves garlic, minced
- 1 can (14 oz) crushed tomatoes
- 2 tablespoons tomato paste
- 1 teaspoon dried oregano
- 1 teaspoon cinnamon
- Salt and pepper to taste
- 4 tablespoons olive oil (divided)
- 3 large potatoes, peeled and sliced into 1/4-inch thick rounds
- 1 cup grated Parmesan cheese
- 2 cups whole milk
- 4 tablespoons unsalted butter
- 1/4 cup all-purpose flour
- 2 large eggs, beaten
- Nutmeg (a pinch)
Cooking Instructions:
- Prepare the Eggplant:
- Sprinkle the sliced eggplant with salt and let it sit for about 30 minutes to draw out excess moisture and bitterness. Rinse the slices under cold water, then pat them dry with paper towels.
- Cook the Potatoes:
- In a large pot, bring salted water to a boil. Add the potato slices and cook for about 5-7 minutes until slightly tender but not fully cooked. Drain and set aside.
- Sauté the Meat Mixture:
- In a large skillet, heat 2 tablespoons of olive oil over medium heat. Add the diced onion and garlic, sautéing until the onion becomes translucent. Add the ground meat, cooking until browned. Stir in the crushed tomatoes, tomato paste, oregano, cinnamon, salt, and pepper. Let the mixture simmer for about 15 minutes until thickened. Remove from heat.
- Fry the Eggplant:
- In the same skillet, add another tablespoon of olive oil and heat over medium-high heat. Fry the eggplant slices in batches until golden brown on both sides, about 3-4 minutes per side. Transfer to a plate lined with paper towels to absorb excess oil.
- Make the Béchamel Sauce:
- In a saucepan, melt the butter over medium heat. Stir in the flour to create a roux and cook for about 2 minutes. Gradually whisk in the milk, cooking until the mixture thickens. Remove from heat and stir in the beaten eggs, grated Parmesan cheese, and a pinch of nutmeg. Mix well until smooth.
- Assemble the Moussaka:
- Preheat your oven to 350°F (175°C). In a greased baking dish, layer half of the potato slices at the bottom. Next, add half of the fried eggplant, followed by the meat mixture. Repeat the layers: the remaining eggplant and then the remaining potatoes. Finally, pour the béchamel sauce evenly over the top layer.
- Bake the Moussaka:
- Place the assembled Moussaka in the preheated oven and bake for 45-60 minutes, or until the top is golden brown and set. Let it cool for about 15 minutes before slicing and serving.
Extra Tips:
When making Greek Moussaka, allow it to rest for a little while after baking to help the layers set and make it easier to slice. You can prepare the meat sauce and béchamel ahead of time to save on prep time on the day you plan to serve it.
For an extra touch, consider adding a layer of zucchini along with the eggplant or experimenting with different spices in the meat sauce to suit your taste preferences. Enjoy your culinary journey through Greece!
British Beef Wellington
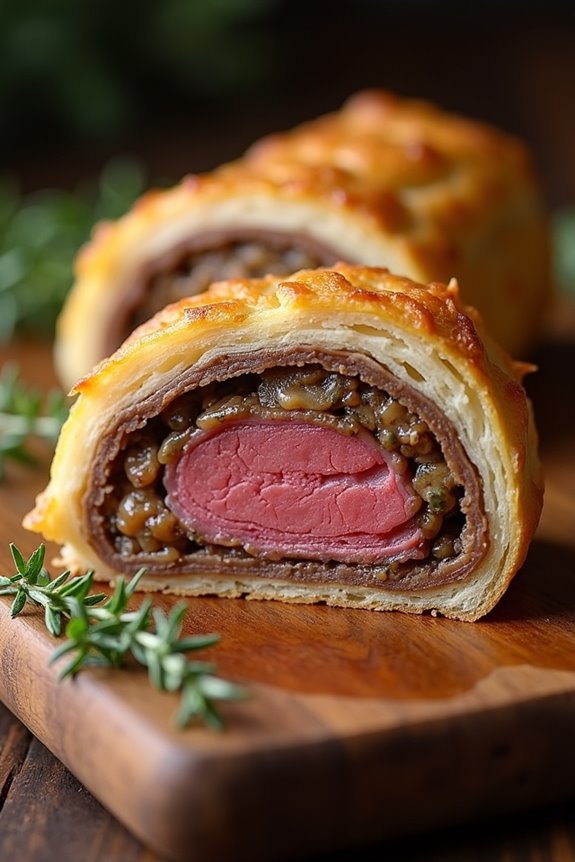
Beef Wellington is a classic British dish that’s often served during special occasions and festive dinners. It consists of a tender beef fillet coated with a rich mushroom duxelles, wrapped in a layer of prosciutto or parma ham, and encased in a golden, flaky puff pastry. The origins of this dish can be traced back to the early 19th century, said to be named after the Duke of Wellington, who led British forces to victory at the Battle of Waterloo.
With its impressive presentation and delightful flavors, Beef Wellington is bound to wow your guests and elevate any meal. The dish isn’t only a feast for the eyes but also a delicious combination of textures and tastes. The juicy beef, earthy mushrooms, and buttery pastry create a harmonious experience that’s hard to resist.
While preparing Beef Wellington may seem intimidating, following the steps carefully will lead you to a stunning centerpiece for your dining table. This recipe serves 4-6 people, making it perfect for family gatherings or an elegant dinner party.
Ingredients:
- 2 lbs beef tenderloin (center-cut)
- Salt and freshly ground black pepper (to taste)
- 2 tbsp olive oil
- 8 oz cremini or button mushrooms (finely chopped)
- 2 cloves garlic (minced)
- 1 tbsp fresh thyme (chopped)
- 1 tbsp Dijon mustard
- 6 slices prosciutto
- 1 sheet puff pastry (thawed)
- 1 egg (beaten, for egg wash)
- Flour (for dusting)
Cooking Instructions:
- Prepare the Beef: Season the beef tenderloin generously with salt and black pepper. In a large skillet, heat the olive oil over high heat. Once hot, sear the beef on all sides for about 2-3 minutes until browned. Remove from the skillet and let it cool, then brush the exterior with Dijon mustard.
- Make the Mushroom Duxelles: In the same skillet, lower the heat and add the finely chopped mushrooms, garlic, and thyme. Cook until the mixture is dry and caramelized, stirring occasionally, about 10-15 minutes. Season with salt and pepper to taste. Remove from heat and let it cool.
- Assemble the Wellington: On a clean, floured surface, lay out the slices of prosciutto in an overlapping pattern to create a rectangle. Spread the cooled mushroom duxelles evenly over the prosciutto. Place the beef in the center and carefully roll it up tightly, making sure the prosciutto and duxelles are wrapped around the beef. Wrap tightly in plastic wrap and refrigerate for 30 minutes.
- Wrap in Puff Pastry: Preheat your oven to 400°F (200°C). Roll out the puff pastry on a floured surface to a size large enough to envelop the beef. Remove the beef from the refrigerator, unwrap it, and place it on the pastry. Fold the pastry over the beef, sealing the edges well. Trim any excess pastry and decorate with leftover pastry scraps if desired. Brush the entire pastry with the beaten egg.
- Bake the Wellington: Place the wrapped beef seam-side down on a baking sheet lined with parchment paper. Bake in the preheated oven for 25-30 minutes or until the pastry is golden brown and cooked through. A meat thermometer inserted into the center should read 125°F (52°C) for medium-rare.
- Rest and Serve: Remove the Beef Wellington from the oven and let it rest for at least 10 minutes before slicing. This allows the juices to redistribute and guarantees a moist, tender result. Slice into thick pieces and serve with your choice of sides.
Extra Tips:
For the best results, make sure that all components are cooled before assembly to prevent the pastry from getting soggy. You can also use a combination of different mushrooms to deepen the flavor of the duxelles.
If you want to prepare it in advance, consider assembling the Beef Wellington up to the point of baking, then refrigerating it until you’re ready to cook. Just remember to adjust the baking time accordingly if it’s coming straight from the fridge. Enjoy your impressive culinary creation!
Portuguese Bacalhau À Brás
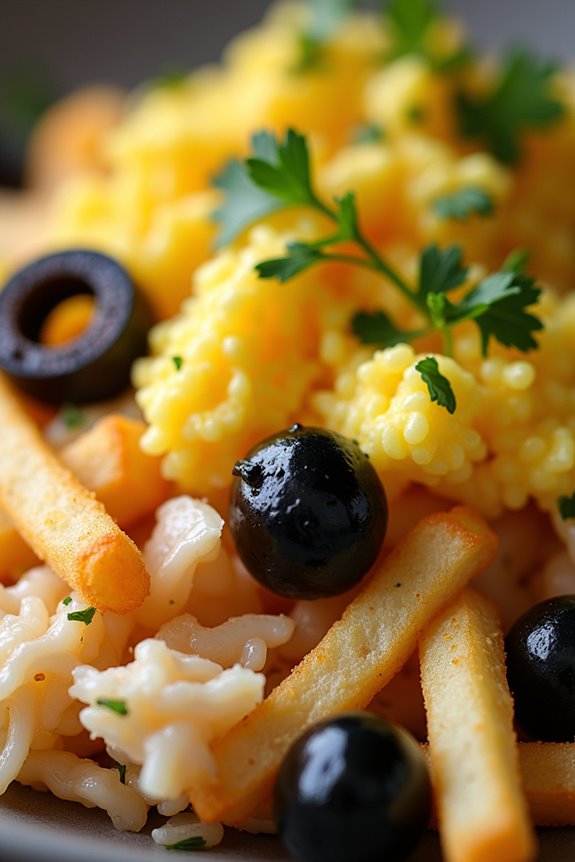
Bacalhau À Brás is a beloved Portuguese dish that showcases the versatility of bacalhau, or salted cod. This hearty meal combines shredded cod with finely chopped onions and straw fries, all bound together with creamy scrambled eggs and garnished with black olives and fresh parsley.
It’s a comforting dish that encapsulates the soul of Portuguese cuisine, making it a favorite for family gatherings and festive occasions. The origins of Bacalhau À Brás can be traced back to Lisbon, where it has become a staple in many households.
This dish isn’t only rich in flavor but also provides a delightful texture contrast between the crispy fries and the smooth, creamy eggs. Whether served as a main course or a special treat, Bacalhau À Brás is sure to captivate your guests with its delicious taste and cultural significance.
Ingredients (Serves 4-6):
- 500g salted cod (bacalhau), soaked for 24-48 hours and desalted
- 300g potatoes, cut into thin strips (for fries)
- 1 large onion, finely chopped
- 4 large eggs
- 2-3 tablespoons olive oil
- 100g black olives, pitted and sliced
- Fresh parsley, chopped (for garnish)
- Salt and black pepper to taste
Cooking Instructions:
1. Prepare the Cod: After soaking the salted cod for 24-48 hours, change the water several times to remove excess salt. Once desalted, boil the cod in fresh water for about 10-15 minutes until cooked through.
Remove from water and let it cool. Once cooled, shred the cod into bite-sized pieces, removing any skin and bones.
2. Cook the Potatoes: Heat oil in a deep pan or fryer over medium heat. Add the potato strips and fry them until they become golden and crispy. This usually takes about 5-7 minutes.
Once done, remove the fries from the oil and place them on a paper towel to drain excess oil.
3. Sauté the Onions: In the same pan, add a bit more olive oil if necessary and sauté the finely chopped onions over medium heat until they become translucent and soft, about 5-6 minutes.
4. Combine Ingredients: Add the shredded cod to the pan with the sautéed onions and stir well to combine. Allow the mixture to cook together for about 3-4 minutes, letting the flavors meld.
5. Add the Potatoes: Gently fold in the crispy fries, making sure they’re evenly distributed throughout the mixture. This step adds texture and heartiness to the dish.
6. Scramble the Eggs: In a separate bowl, whisk the eggs with a pinch of salt and pepper. Pour the eggs over the cod and potato mixture in the pan, stirring gently to create a soft scramble.
Cook until the eggs are just set but still creamy, about 2-3 minutes.
7. Garnish and Serve: Once the eggs are cooked to your liking, remove the pan from heat. Top the dish with sliced black olives and chopped fresh parsley for added flavor and presentation.
Serve hot, and enjoy!
Extra Tips:
When preparing Bacalhau À Brás, it’s important to verify that the salted cod is properly desalted to avoid an overly salty dish. If you prefer a creamier texture, you can add a splash of milk or cream to the eggs before scrambling them.
For an extra touch of flavor, consider incorporating a pinch of paprika or fresh herbs like chives into the egg mixture. Serve with a side salad or crusty bread to complete the meal, and don’t forget to enjoy it with a glass of Portuguese wine for the perfect pairing!
Hungarian Goulash
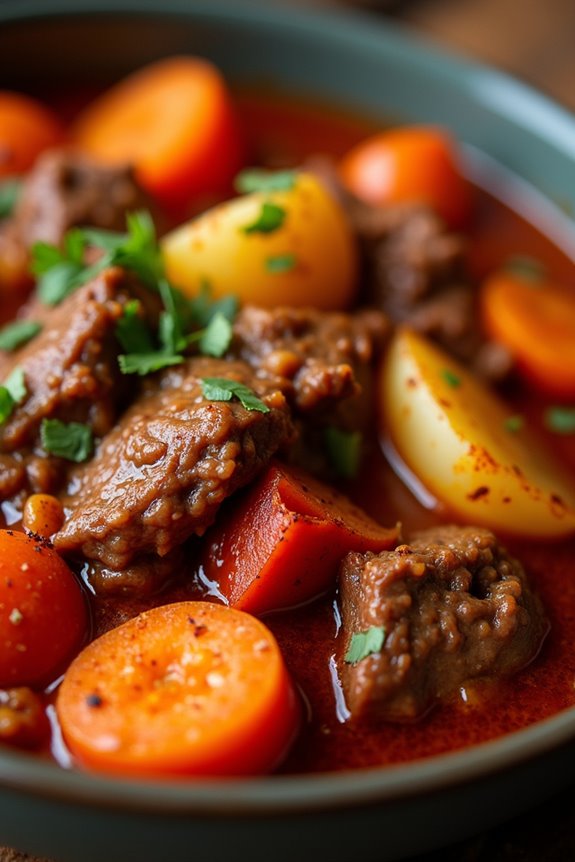
Hungarian Goulash is a hearty and flavorful dish that has its roots in the traditional cooking of Hungary. Known for its rich taste and aromatic spices, this stew is made with tender pieces of beef, vegetables, and a blend of spices that create a warm, comforting meal. Its origins can be traced back to the 9th century, but it has evolved over time with various regional adaptations and is now enjoyed by many around the world.
Perfect for cold days, Hungarian Goulash is often served with crusty bread or dumplings, making it a complete and satisfying dish.
The key to an authentic Hungarian Goulash lies in the quality of the ingredients and the preparation method. The use of sweet Hungarian paprika is essential, as it imparts the characteristic flavor and color to the stew. Slow cooking allows the flavors to meld beautifully, resulting in a dish that’s both rich and comforting.
With just a few simple ingredients and some patience, you can create a delicious Hungarian Goulash that will surely impress family and friends.
Ingredients (serves 4-6 people):
- 2 pounds beef chuck, cut into 1-inch cubes
- 2 tablespoons vegetable oil
- 2 large onions, chopped
- 3 cloves garlic, minced
- 2 tablespoons sweet Hungarian paprika
- 1 teaspoon caraway seeds
- 1 teaspoon salt
- 1/2 teaspoon black pepper
- 3 medium carrots, sliced
- 2 medium potatoes, diced
- 1 red bell pepper, chopped
- 1 can (14.5 ounces) diced tomatoes, with juice
- 4 cups beef broth
- 2 bay leaves
- Fresh parsley, chopped (for garnish)
Cooking Instructions:
- Brown the Beef: In a large pot or Dutch oven, heat the vegetable oil over medium-high heat. Add the beef cubes in batches, making sure not to overcrowd the pot. Brown the beef on all sides, which should take about 5-7 minutes per batch. This step is vital for developing the deep flavors of the goulash.
- Sauté the Onions and Garlic: Once the beef is browned, remove it from the pot and set it aside. In the same pot, add the chopped onions and cook until they’re soft and translucent, about 5 minutes. Add the minced garlic and cook for an additional minute, stirring frequently to avoid burning.
- Add Spices: Sprinkle the sweet Hungarian paprika, caraway seeds, salt, and black pepper over the onions and garlic. Stir well to coat the onions and allow the spices to bloom for about 1-2 minutes, releasing their fragrant aroma.
- Combine Ingredients: Return the browned beef to the pot and add the sliced carrots, diced potatoes, chopped red bell pepper, diced tomatoes (with juice), and beef broth. Stir everything together until well combined.
- Add Bay Leaves and Simmer: Toss in the bay leaves and bring the mixture to a boil. Once boiling, reduce the heat to low and cover the pot. Let it simmer gently for about 1.5 to 2 hours, or until the beef is tender and the flavors have melded together.
- Adjust Seasoning and Serve: After the simmering time, taste the goulash and adjust the seasoning if necessary. Remove the bay leaves before serving. Ladle the goulash into bowls and garnish with chopped fresh parsley for an added touch of color and flavor.
Extra Tips: For a richer flavor, consider adding a splash of red wine to the pot after sautéing the onions; let it reduce slightly before adding the other ingredients. Additionally, you can customize your goulash by including other vegetables such as parsnips or peas.
If you prefer a thicker stew, you can mash some of the potatoes into the broth or let the goulash simmer uncovered for the last 30 minutes to allow the liquid to reduce. Enjoy your homemade Hungarian Goulash!
Swedish Meatballs

Swedish Meatballs, or “Köttbullar,” are a beloved dish that originates from Sweden and has become popular worldwide. These small, flavorful meatballs are typically served in a creamy sauce and often accompanied by lingonberry sauce and mashed potatoes. The combination of spices, herbs, and a touch of sweetness in the meatballs creates a comforting meal that can be enjoyed any time of the year.
Making Swedish Meatballs is a delightful culinary adventure that brings the warmth of Scandinavian cooking into your home. The process involves combining ground meat with breadcrumbs, onions, and spices, then rolling them into small balls before frying or baking. The final touch is a rich gravy made from the drippings, which adds a luscious finish to the dish. This recipe serves 4-6 people, making it perfect for family dinners or gatherings with friends.
Ingredients (Serves 4-6)
- 1 pound ground beef
- 1 pound ground pork
- 1 cup breadcrumbs
- 1 small onion, finely chopped
- 2 cloves garlic, minced
- 1/4 cup milk
- 1 egg
- 1 teaspoon salt
- 1/2 teaspoon black pepper
- 1/4 teaspoon ground nutmeg
- 1/4 teaspoon ground allspice
- 2 tablespoons butter (for frying)
- 2 tablespoons flour (for gravy)
- 2 cups beef broth
- 1 cup heavy cream
- 1 tablespoon soy sauce
- Lingonberry sauce (for serving, optional)
Cooking Instructions
- Prepare the Meat Mixture: In a large mixing bowl, combine the ground beef and ground pork. Add the breadcrumbs, chopped onion, minced garlic, milk, egg, salt, black pepper, nutmeg, and allspice. Use your hands or a spoon to mix everything together until well combined. Be careful not to overmix, as this can make the meatballs tough.
- Shape the Meatballs: With wet hands, take small portions of the meat mixture and roll them into balls about 1 inch in diameter. Place the formed meatballs on a plate or baking sheet, ensuring they aren’t touching each other.
- Cook the Meatballs: In a large skillet, heat the butter over medium heat. Once hot, add the meatballs in batches, making sure not to overcrowd the pan. Cook for about 5-7 minutes, turning occasionally, until they’re browned on all sides and cooked through. Remove the meatballs from the skillet and set them aside on a plate.
- Make the Gravy: In the same skillet, add the flour to the drippings and stir to create a roux. Cook for about 1-2 minutes until the flour is lightly browned. Gradually whisk in the beef broth, ensuring there are no lumps. Bring the mixture to a simmer and cook for about 5 minutes until it thickens.
- Add Cream and Season: Stir in the heavy cream and soy sauce to the gravy, mixing well. Return the meatballs to the skillet, coating them in the gravy. Let them simmer for another 5 minutes to absorb the flavors.
- Serve: Transfer the meatballs to a serving dish, pouring the creamy gravy over the top. Serve with mashed potatoes and a side of lingonberry sauce for an authentic Swedish experience.
Extra Tips
For a more authentic flavor, consider adding finely chopped fresh parsley or dill to the meat mixture. You can also experiment with different types of ground meat, such as turkey or chicken, for a lighter version.
If you prefer a thicker gravy, allow it to simmer longer, or add a cornstarch slurry (cornstarch mixed with cold water) to achieve your desired consistency. Enjoy your Swedish Meatballs with a side of pickled cucumbers for a delightful contrast in flavors!
Belgian Waffles

Belgian waffles are a beloved breakfast treat that originated in Belgium and have become a favorite around the world for their light, airy texture and deep pockets perfect for holding toppings.
These waffles are characterized by their larger size, crisp exterior, and fluffy interior, making them ideal for serving with a variety of accompaniments, from fresh fruit and whipped cream to syrup and chocolate sauce.
With a few simple ingredients, you can whip up a batch of these delightful waffles in no time, bringing a taste of Europe right to your kitchen.
Whether you’re hosting a brunch or simply indulging in a weekend breakfast, Belgian waffles are sure to impress.
The batter is made with a combination of flour, sugar, eggs, and milk, which come together to create a deliciously rich flavor.
You can also customize your waffles by adding ingredients like vanilla extract or cinnamon to the batter, or even incorporating chocolate chips or nuts for an extra twist.
Let’s explore the recipe and start making these delicious Belgian waffles!
Ingredients (Serves 4-6):
- 2 cups all-purpose flour
- 2 tablespoons sugar
- 1 tablespoon baking powder
- 1/2 teaspoon salt
- 2 large eggs
- 1 3/4 cups milk
- 1/2 cup vegetable oil or melted butter
- 1 teaspoon vanilla extract (optional)
- Cooking spray or additional oil for greasing the waffle iron
Cooking Instructions:
- Preheat the Waffle Iron: Start by preheating your waffle iron according to the manufacturer’s instructions. This step is essential as a hot waffle iron helps to achieve that crispy outer layer while keeping the inside fluffy.
- Mix the Dry Ingredients: In a large mixing bowl, whisk together the flour, sugar, baking powder, and salt until well combined. This guarantees that the leavening agent is evenly distributed throughout the flour, which is important for the waffles to rise properly.
- Combine the Wet Ingredients: In another bowl, beat the eggs and then add the milk, vegetable oil (or melted butter), and vanilla extract if using. Mix until everything is well combined. This mixture will add moisture and richness to your waffles.
- Combine Wet and Dry Mixtures: Pour the wet ingredients into the bowl with the dry ingredients. Gently stir the mixture using a spatula or wooden spoon until just combined. Be careful not to overmix; a few lumps are perfectly fine. Overmixing can lead to tougher waffles.
- Grease the Waffle Iron: Lightly grease the preheated waffle iron with cooking spray or brush with a little oil or melted butter. This will prevent the waffles from sticking and help achieve a golden-brown color.
- Cook the Waffles: Pour an appropriate amount of batter onto the center of the waffle iron, usually about 1/2 to 3/4 cup, depending on the size of your waffle iron. Close the lid and cook according to the manufacturer’s instructions, typically around 4-6 minutes, until the waffles are golden brown and crisp.
- Serve and Enjoy: Carefully remove the waffles from the iron and keep them warm in a low-temperature oven while you repeat the process with the remaining batter. Serve the waffles hot with your favorite toppings, such as fresh fruits, whipped cream, syrup, or even chocolate sauce.
Extra Tips:
For an even more delightful experience, consider letting the batter rest for about 10-15 minutes before cooking. This allows the gluten to relax, resulting in an even fluffier waffle.
Additionally, if you want to make your waffles ahead of time, you can freeze them after cooking; simply reheat them in a toaster or oven when you’re ready to serve.
Don’t forget to experiment with toppings and mix-ins to make your Belgian waffles truly your own!
Austrian Sachertorte
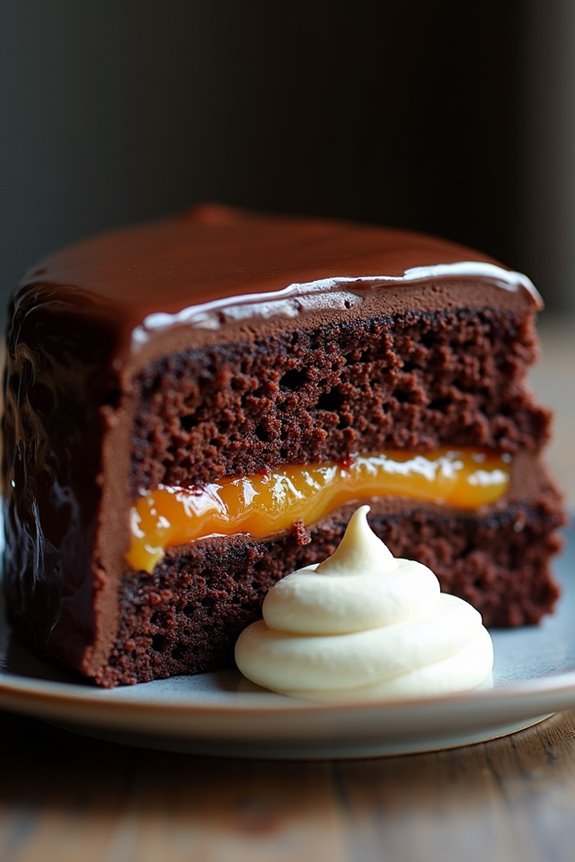
Austrian Sachertorte is a decadent chocolate cake that has become synonymous with Vienna’s café culture. Originating in the 19th century, this rich dessert features a dense chocolate sponge, layered with apricot jam, and enveloped in a smooth chocolate glaze. Traditionally served with a dollop of unsweetened whipped cream, Sachertorte is a must-try for any chocolate lover and a staple of Austrian cuisine.
Its combination of flavors and textures makes it a showstopper for any occasion, from elegant dinner parties to casual family gatherings.
Creating an authentic Sachertorte might seem challenging, but with the right ingredients and a bit of patience, you can impress your friends and family with this classic dessert. The cake isn’t only a treat for the taste buds but also a feast for the eyes.
When prepared correctly, it features a glossy chocolate finish that encases the rich, moist interior, making it a true masterpiece worthy of celebration.
Ingredients (Serves 4-6):
- 140g dark chocolate (70% cocoa)
- 115g unsalted butter, softened
- 100g granulated sugar
- 1 teaspoon vanilla extract
- 5 large eggs, separated
- 140g all-purpose flour
- 1/4 teaspoon salt
- 200g apricot jam
- 200g dark chocolate, for glazing
- 100ml heavy cream, for glazing
- Whipped cream, for serving (optional)
Cooking Instructions:
- Preheat the Oven: Begin by preheating your oven to 170°C (340°F). This guarantees that your cake will bake evenly and rise properly. Prepare a 9-inch round cake pan by greasing it with butter and dusting it with flour, or lining it with parchment paper.
- Melt the Chocolate: In a heatproof bowl, break the 140g of dark chocolate into pieces. Place the bowl over a pot of simmering water (double boiler method) and melt the chocolate slowly, stirring occasionally. Once melted, remove from heat and let it cool slightly.
- Cream Butter and Sugar: In a large mixing bowl, cream together the softened butter and granulated sugar until the mixture is light and fluffy. This usually takes about 3-5 minutes. Add in the vanilla extract and mix well.
- Add Egg Yolks: Beat in the egg yolks, one at a time, into the butter-sugar mixture, confirming each yolk is incorporated fully before adding the next. Then, stir in the melted chocolate until fully combined.
- Combine Dry Ingredients: In a separate bowl, whisk together the all-purpose flour and salt. Gradually fold the flour mixture into the chocolate mixture using a spatula, being careful not to overmix.
- Whip Egg Whites: In a clean bowl, beat the egg whites until stiff peaks form. This step is essential for achieving a light and airy cake. Gently fold about one-third of the whipped egg whites into the chocolate mixture to lighten it, then carefully fold in the remaining egg whites until just combined.
- Bake the Cake: Pour the batter into the prepared cake pan and smooth the top. Bake in the preheated oven for 40-45 minutes, or until a toothpick inserted into the center comes out clean. Let the cake cool in the pan for about 10 minutes before transferring it to a wire rack to cool completely.
- Prepare the Apricot Jam: Once the cake has cooled, warm the apricot jam in a small saucepan over low heat until it becomes liquid. Use a brush or spatula to spread a layer of the warm apricot jam evenly over the top and sides of the cake.
- Make the Chocolate Glaze: In a separate saucepan, combine the dark chocolate and heavy cream. Heat gently over low heat, stirring until smooth and glossy. Allow the glaze to cool slightly before pouring it over the top of the cake, ensuring it drips down the sides for an elegant finish.
- Serve: Let the glaze set for at least 30 minutes before slicing the Sachertorte. Serve with a dollop of whipped cream on the side, if desired.
Extra Tips:
For an authentic touch, allow your Sachertorte to sit for a day before serving, as this will enhance the flavors and improve the texture.
Additionally, you can decorate the top of the cake with a simple chocolate inscription or a dusting of cocoa powder for presentation.
When slicing, use a warm knife to achieve clean cuts through the rich chocolate layers, guaranteeing each piece looks as good as it tastes.
Enjoy your homemade Sachertorte with a cup of coffee or tea for the full Viennese experience!