

Discovering the charm of European cuisine is like opening a beautiful storybook. Each traditional recipe carries its own tale, filled with rich history and flavor. From the fragrant saffron in Risotto Alla Milanese to the hearty notes of Coq Au Vin, these dishes are culinary gems. They bring techniques and cultures that have endured through generations right to your kitchen. Curious about which recipes are true must-tries? Let’s explore these timeless treasures together.
Coq Au Vin
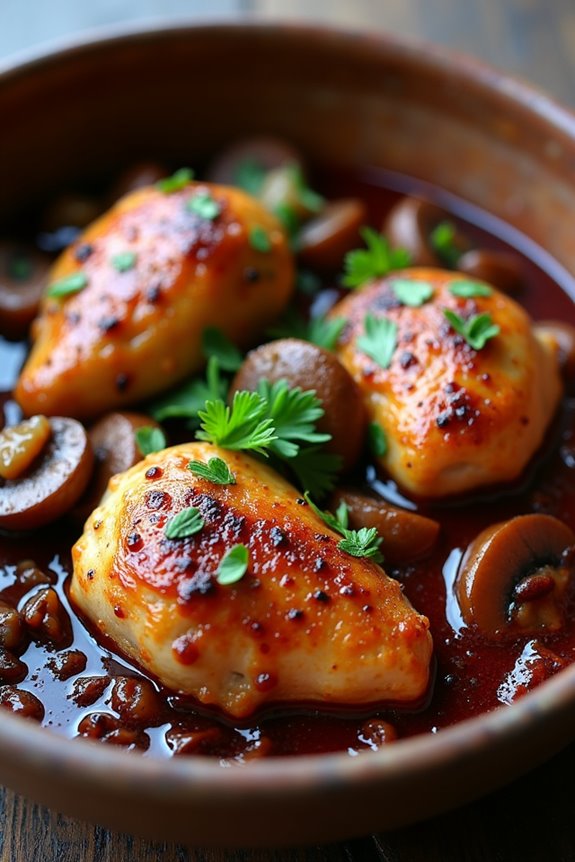
Coq Au Vin, or “rooster in wine,” is a classic French dish that beautifully showcases the rustic charm of traditional European cuisine. This dish, originating from the Burgundy region, is a hearty stew of chicken braised slowly in red wine, along with mushrooms, lardons (bacon), onions, and garlic. The combination of these ingredients creates a rich, flavorful sauce that elevates the humble chicken to a gourmet experience. Traditionally, the dish uses rooster, but chicken is a more accessible substitute for modern cooks.
Cooking Coq Au Vin isn’t only about the delicious end result but also about the methodical preparation that brings out the depth of flavors. The dish typically requires marinating the chicken in wine, which tenderizes the meat and infuses it with robust flavors. Although it may seem time-consuming, the process of simmering and reducing the sauce creates a comforting meal that’s perfect for gatherings or a cozy night in.
Ingredients (Serves 4-6)
- 4-6 pieces of chicken (bone-in, skin-on thighs and drumsticks recommended)
- 750 ml bottle of red wine (preferably Burgundy)
- 4 oz lardons or bacon, diced
- 1 large onion, chopped
- 2-3 cloves garlic, minced
- 2 cups mushrooms, sliced
- 2 cups chicken stock
- 2 tablespoons tomato paste
- 2 tablespoons all-purpose flour
- 2-3 sprigs of fresh thyme
- 2 bay leaves
- Salt and pepper to taste
- 2 tablespoons olive oil
- Fresh parsley, chopped (for garnish)
Cooking Instructions
- Marinate the Chicken: Place the chicken pieces in a large bowl or resealable plastic bag. Pour the red wine over the chicken, add thyme and bay leaves, and let it marinate in the refrigerator for at least 2 hours (preferably overnight). This step will enhance the flavor of the chicken and tenderize the meat.
- Prepare the Lardons: In a large Dutch oven or heavy pot, heat the olive oil over medium heat. Add the diced lardons or bacon and cook until crispy, about 5-7 minutes. Remove the bacon with a slotted spoon and set aside, leaving the fat in the pot.
- Brown the Chicken: Remove the chicken from the marinade (reserve the marinade) and pat dry with paper towels. Season with salt and pepper. In the same pot, add the chicken pieces, skin-side down, and brown them for about 5-6 minutes on each side until golden. Work in batches if necessary to avoid overcrowding the pot. Once browned, remove the chicken and set aside.
- Sauté the Vegetables: In the same pot, add the chopped onion and sauté for about 3-4 minutes until softened. Add the minced garlic and sliced mushrooms, cooking for an additional 5 minutes until the mushrooms are browned.
- Make the Sauce: Stir in the tomato paste and flour, cooking for 1-2 minutes to remove the raw flour taste. Gradually pour in the reserved wine marinade and chicken stock, scraping the bottom of the pot to release any browned bits. Bring the mixture to a simmer.
- Braise the Chicken: Return the chicken and crispy lardons to the pot. Add the thyme sprigs and bay leaves, ensuring the chicken is mostly submerged in the sauce. Cover the pot, reduce the heat to low, and let it simmer for about 45 minutes to 1 hour, or until the chicken is tender and cooked through.
- Finish the Dish: Once cooked, remove the chicken from the pot and let it rest. Increase the heat to medium-high and let the sauce simmer uncovered for about 10-15 minutes until it thickens. Adjust seasoning with salt and pepper as needed.
- Serve: Return the chicken to the pot to warm through. Serve the Coq Au Vin hot, garnished with fresh parsley, alongside crusty bread or over mashed potatoes for a comforting meal.
Extra Tips
When preparing Coq Au Vin, feel free to experiment with the wine you choose—opt for a good quality red wine that you enjoy drinking, as it will greatly affect the flavor of the dish.
Additionally, consider adding pearl onions for a touch of sweetness and texture. The dish can be made a day in advance; in fact, it often tastes better the next day as the flavors continue to meld.
Just reheat gently before serving, and enjoy the hearty taste of this traditional French masterpiece!
Risotto Alla Milanese
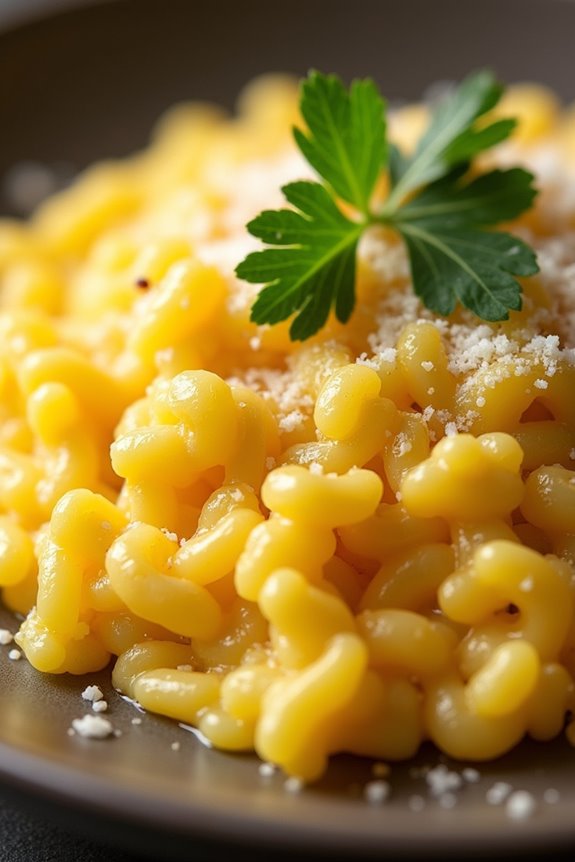
Risotto Alla Milanese is a classic Italian dish that hails from the vibrant city of Milan. This luxurious risotto is known for its creamy texture and rich flavor, primarily enhanced by the addition of saffron, which imparts a beautiful golden hue and a unique aroma. Traditionally served as a first course, this dish embodies the essence of Italian comfort food and is perfect for special occasions or a cozy dinner at home.
The key to a successful Risotto Alla Milanese lies in the technique of slowly cooking the rice, allowing it to absorb the flavorful broth while releasing its starch, resulting in a creamy consistency. Pair it with a glass of white wine, and you have a delightful meal that showcases the simplicity and elegance of traditional European cuisine.
Ingredients (Serves 4-6)
- 1 ½ cups Arborio rice
- 1 small onion, finely chopped
- 4 cups chicken or vegetable broth
- 1 cup dry white wine
- 2 tablespoons olive oil
- 2 tablespoons unsalted butter
- ½ cup grated Parmesan cheese
- 1 pinch of saffron threads
- Salt, to taste
- Freshly ground black pepper, to taste
- Fresh parsley, chopped (for garnish)
Cooking Instructions
- Prepare the Broth: In a medium saucepan, heat the chicken or vegetable broth over low heat. Add the saffron threads to the broth to allow the flavor and color to infuse. Keep the broth warm but not boiling, as this will help in cooking the risotto evenly.
- Sauté the Onion: In a large, heavy-bottomed saucepan, heat the olive oil and 1 tablespoon of butter over medium heat. Add the finely chopped onion and sauté until it becomes translucent, about 3-4 minutes. This step is essential as it builds the base flavor for the risotto.
- Toast the Rice: Add the Arborio rice to the saucepan with the onion. Stir frequently for about 2-3 minutes until the rice is lightly toasted and opaque. This helps to enhance the nutty flavor of the rice and prepares it for absorbing the broth.
- Add the Wine: Pour in the dry white wine and stir until it’s mostly absorbed by the rice. This step adds acidity and depth to the flavor of the dish, making it more complex.
- Incorporate the Broth: Begin adding the warm broth one ladle at a time, stirring continuously. Wait until the liquid is almost completely absorbed before adding the next ladle. This process usually takes about 18-20 minutes. The constant stirring helps to release the starch from the rice, creating a creamy texture.
- Finish the Risotto: Once the rice is al dente and has absorbed most of the broth, remove the saucepan from the heat. Stir in the remaining tablespoon of butter and the grated Parmesan cheese. Season with salt and freshly ground black pepper to taste. The risotto should be creamy and slightly loose.
- Serve and Garnish: Ladle the Risotto Alla Milanese into bowls, garnish with chopped fresh parsley, and serve immediately. Enjoy the dish while it’s hot to fully appreciate its flavors.
Extra Tips
For the best flavor, use high-quality broth and freshly grated Parmesan cheese. If you want to elevate the dish further, consider adding some sautéed mushrooms or peas for additional texture and flavor.
Always remember to taste and adjust seasoning as needed throughout the cooking process, as this will enhance the overall dish. Finally, risotto is best served fresh, but if you have leftovers, you can reheat them gently with a splash of broth to regain the creamy texture.
Beef Stroganoff

Beef Stroganoff is a classic Russian dish that has gained popularity throughout Europe and beyond, known for its rich and creamy sauce combined with tender strips of beef. The dish is often served over egg noodles or rice, making it a hearty meal perfect for family gatherings or special occasions.
Traditionally, it features sautéed mushrooms, onions, and a luxurious sour cream sauce that brings all the ingredients together in a delightful symphony of flavors.
To achieve the best results, it’s essential to use high-quality beef, such as tenderloin or sirloin, and to cook it carefully to avoid overcooking. The key to a successful Beef Stroganoff lies in the balance of flavors and the smoothness of the sauce. This dish isn’t only comforting but also allows for creativity, as you can adjust the ingredients to suit your taste preferences.
Ingredients (serving size: 4-6 people):
- 1.5 lbs beef tenderloin or sirloin, cut into thin strips
- 2 tablespoons olive oil
- 1 medium onion, finely chopped
- 2 cloves garlic, minced
- 8 oz mushrooms, sliced
- 1 cup beef broth
- 1 tablespoon Worcestershire sauce
- 1 teaspoon Dijon mustard
- 1 cup sour cream
- Salt and pepper to taste
- Fresh parsley, chopped (for garnish)
- Egg noodles or rice (for serving)
Cooking Instructions:
- Prepare the Beef: Start by cutting the beef into thin strips, approximately 1 inch in length. This helps the beef cook quickly and evenly. Season the strips with salt and pepper for added flavor.
- Sauté the Beef: In a large skillet or frying pan, heat the olive oil over medium-high heat. Once the oil is hot, add the beef strips in batches to avoid overcrowding the pan. Cook for about 1-2 minutes on each side until browned. Remove the beef from the pan and set it aside on a plate.
- Cook the Vegetables: In the same skillet, add the chopped onion and sauté for about 3-4 minutes until it becomes translucent. Then, add the minced garlic and sliced mushrooms to the pan, cooking for an additional 5 minutes until the mushrooms are tender and golden.
- Create the Sauce: Pour in the beef broth, Worcestershire sauce, and Dijon mustard into the skillet with the sautéed vegetables. Stir everything together, scraping up any browned bits from the bottom of the pan. Bring the mixture to a simmer and let it cook for 5 minutes to reduce slightly.
- Add the Beef Back: Once the sauce has thickened slightly, reduce the heat to low and return the cooked beef to the skillet. Stir in the sour cream until fully combined, allowing the beef to heat through for another 2-3 minutes. Taste and adjust seasoning with additional salt and pepper if needed.
- Serve: Spoon the Beef Stroganoff over cooked egg noodles or rice. Garnish with freshly chopped parsley for a pop of color and added flavor.
Extra Tips: For an added depth of flavor, consider marinating the beef in a mixture of soy sauce and garlic for about 30 minutes before cooking.
If you prefer a thicker sauce, you can mix a teaspoon of cornstarch with a tablespoon of cold water and stir it into the sauce just before adding the sour cream. Remember to serve the dish immediately for the best texture and taste!
Paella
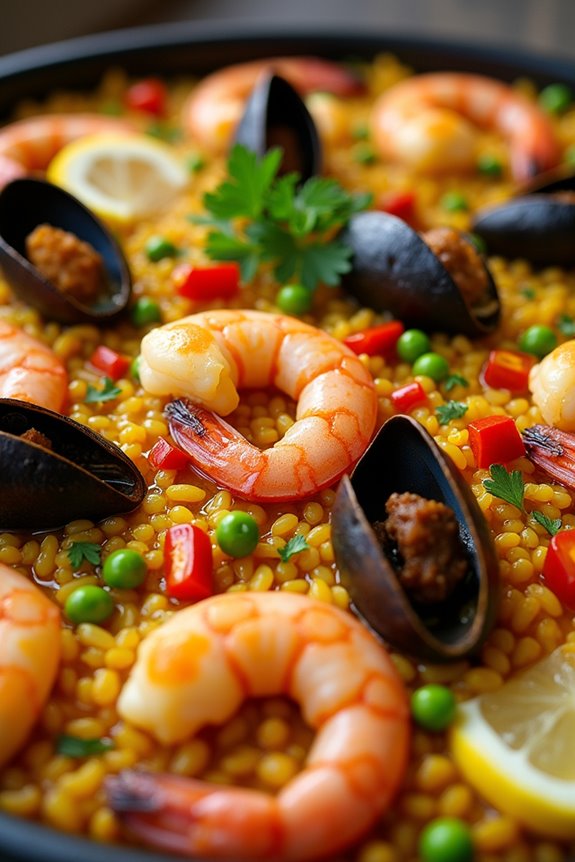
Paella is a vibrant and flavorful Spanish dish that originated in the region of Valencia. This iconic rice dish is renowned for its colorful presentation and the variety of ingredients that can be used, making it a versatile choice for gatherings and celebrations.
Traditionally cooked in a wide, shallow pan over an open flame, paella brings together a harmonious blend of saffron-infused rice, fresh seafood, tender meats, and seasonal vegetables, resulting in a meal that’s both visually stunning and delicious.
The beauty of paella lies in its adaptability; it can be made with various proteins such as chicken, rabbit, and seafood, or even be prepared as a vegetarian option. It’s often enjoyed during family gatherings or festive occasions, where the recipe allows for creativity and personalization.
Whether you choose to stick to the classic version or add your own twist, this dish is sure to impress your guests and transport them to the sun-drenched shores of Spain.
Ingredients (Serves 4-6)
- 2 cups Bomba or Arborio rice
- 4 cups chicken broth (or seafood broth for seafood paella)
- 1/2 tsp saffron threads
- 1 lb chicken thighs, chopped into pieces
- 1/2 lb chorizo sausage, sliced
- 1/2 lb shrimp, peeled and deveined
- 1/2 lb mussels, cleaned and debearded
- 1 red bell pepper, diced
- 1 cup green peas (fresh or frozen)
- 1 medium onion, finely chopped
- 4 cloves garlic, minced
- 1/2 cup olive oil
- 1 tsp smoked paprika
- Salt and pepper, to taste
- Lemon wedges, for serving
- Fresh parsley, chopped (for garnish)
Cooking Instructions
- Prepare the Broth: In a saucepan, warm the chicken or seafood broth over low heat. Add the saffron threads to the broth to infuse it with flavor and color. Keep the broth warm throughout the cooking process.
- Cook the Proteins: In a large paella pan or a wide skillet, heat the olive oil over medium heat. Add the chicken pieces and chorizo slices, cooking until the chicken is browned and cooked through, about 5-7 minutes. Remove them from the pan and set aside.
- Sauté the Aromatics: In the same pan, add the chopped onion and red bell pepper. Sauté for about 5 minutes, or until the onion is translucent. Then, add the minced garlic and smoked paprika, cooking for an additional minute until fragrant.
- Add the Rice: Stir in the Bomba or Arborio rice to the pan, making sure each grain is coated with the oil and mixed well with the vegetables. Cook for about 2 minutes, allowing the rice to toast slightly.
- Combine Ingredients: Pour the warm broth with saffron into the pan. Stir to combine, then add the reserved chicken, chorizo, and green peas. Season with salt and pepper to taste. Don’t stir the rice after this point, as this will help form the coveted socarrat (the crispy bottom layer).
- Add Seafood: Arrange the shrimp and mussels on top of the rice mixture. Allow the paella to simmer on low heat for about 20-25 minutes, or until the rice has absorbed most of the liquid and is tender. If needed, you can cover the pan with a lid or foil to help cook the seafood thoroughly.
- Rest and Serve: Once cooked, remove the paella from heat and let it rest for about 5 minutes. Garnish with chopped parsley and serve with lemon wedges on the side.
Extra Tips
To enhance the flavor of your paella, consider using a combination of seafood and meats to create a more complex taste profile. For a smoky flavor, you can add a few pieces of smoked fish or adjust the amount of smoked paprika to your liking.
Additionally, make sure that you don’t stir the rice once the broth is added, as this is essential for achieving the perfect texture and forming the socarrat. If you want to make it a one-pan meal, feel free to incorporate seasonal vegetables or even beans for added nutrition and color.
Enjoy your culinary journey into Spanish cuisine!
Ratatouille
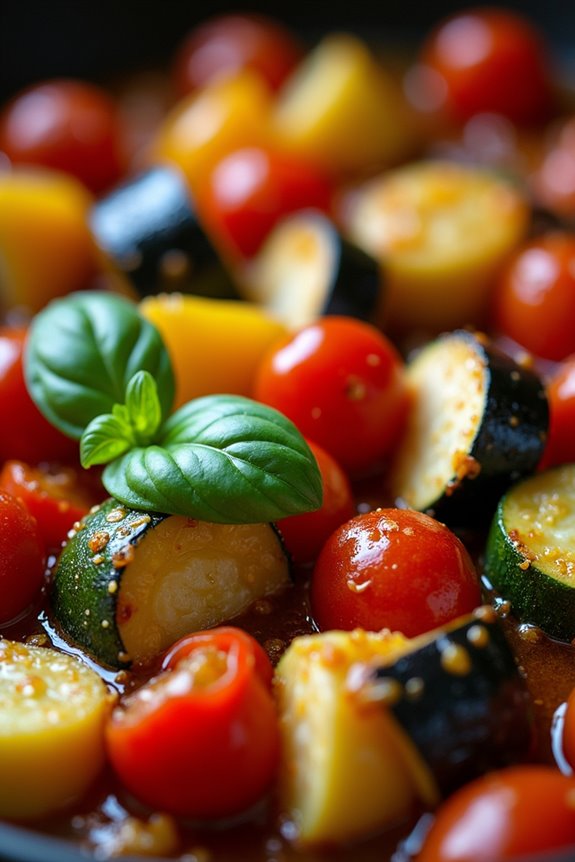
Ratatouille is a classic Provençal dish that beautifully showcases the vibrant flavors of summer vegetables. Originating from Nice, this rustic vegetable stew isn’t only a staple of French cuisine but also a symbol of the Mediterranean lifestyle, where fresh, seasonal produce takes center stage.
The dish typically features a medley of zucchini, eggplant, bell peppers, tomatoes, and aromatic herbs, all simmered together to create a deliciously comforting meal that can be enjoyed on its own or as a side to grilled meats or crusty bread.
The beauty of ratatouille lies in its versatility and the way it brings out the natural sweetness and flavors of the vegetables. While there are many variations, the traditional method involves sautéing the vegetables separately to maintain their unique flavors and textures before combining them into a rich stew.
Ratatouille isn’t just a feast for the palate but also a feast for the eyes, with its colorful array of vegetables making it an appealing dish to serve at any gathering or family dinner.
Ingredients (Serves 4-6):
- 1 medium eggplant, diced
- 2 medium zucchini, sliced
- 1 bell pepper (red or yellow), diced
- 1 onion, chopped
- 3 cloves garlic, minced
- 4 medium ripe tomatoes, diced (or 1 can of diced tomatoes)
- 1/4 cup olive oil
- 1 teaspoon dried thyme
- 1 teaspoon dried basil
- Salt and pepper to taste
- Fresh basil leaves for garnish (optional)
Cooking Instructions:
- Prepare the Vegetables: Start by washing and chopping all the vegetables. Dice the eggplant and bell pepper, slice the zucchini, chop the onion, and mince the garlic. If using fresh tomatoes, dice them as well. This preparation step is essential to guarantee that all the vegetables are ready to be cooked efficiently.
- Sauté the Eggplant: Heat a large skillet or Dutch oven over medium heat and add 2 tablespoons of olive oil. Once hot, add the diced eggplant. Sauté for about 5-7 minutes until the eggplant is golden brown and tender. This step helps to draw out excess moisture from the eggplant and enhances its flavor.
- Cook the Onion and Garlic: Add the chopped onion and minced garlic to the skillet with the eggplant. Sauté for another 3-4 minutes until the onion becomes translucent and fragrant. This combination of onion and garlic creates a flavorful base for the dish.
- Add the Bell Pepper and Zucchini: Stir in the diced bell pepper and sliced zucchini. Cook for an additional 5 minutes, stirring occasionally, until the vegetables are slightly softened. This step allows the bell pepper and zucchini to become tender while retaining some of their crunch.
- Incorporate the Tomatoes: Add the diced tomatoes (or canned tomatoes) to the skillet along with the dried thyme and basil. Season with salt and pepper to taste. Stir everything together and bring the mixture to a gentle simmer. This is where the flavors meld together beautifully.
- Simmer the Ratatouille: Cover the skillet and let the ratatouille simmer on low heat for about 20-30 minutes, stirring occasionally. This slow cooking allows the vegetables to infuse their flavors into one another and creates a rich, hearty stew.
- Final Adjustments and Serve: After simmering, taste the ratatouille and adjust the seasoning if necessary. Serve hot, garnished with fresh basil leaves if desired. Ratatouille can be enjoyed immediately or allowed to cool and served at room temperature.
Extra Tips: For an added depth of flavor, consider roasting the vegetables before simmering them together. You can also customize the dish by adding other vegetables such as mushrooms or squash.
Ratatouille tastes even better the next day, so prepare it in advance for a delightful meal. Serve it with crusty bread or over a bed of rice or pasta for a complete and satisfying dish.
Tiramisu

Tiramisu is a classic Italian dessert that has captivated dessert lovers around the world with its rich flavors and creamy texture. Originating from the Veneto region of Italy, this no-bake dessert features layers of coffee-soaked ladyfingers and a luscious mixture of mascarpone cheese, eggs, and sugar, all dusted with cocoa powder. Its name, which translates to “pick me up,” perfectly captures the delightful jolt of energy from the espresso that infuses the dessert, making it an indulgent treat for any occasion.
This elegant dessert is surprisingly simple to make and can be prepared in advance, allowing you to serve a stunning finish to your meal without the last-minute rush. Whether you’re hosting a dinner party or simply treating yourself, tiramisu is sure to impress. With a perfect balance of sweetness and a hint of bitterness from the coffee, it’s a delightful way to end any meal.
Ingredients (Serves 4-6)
- 3 large eggs, separated
- 100g granulated sugar
- 250g mascarpone cheese
- 1 cup strong brewed espresso, cooled
- 2 tablespoons coffee liqueur (optional)
- 200g ladyfingers (savoiardi)
- Unsweetened cocoa powder, for dusting
- Dark chocolate shavings (optional, for garnish)
Cooking Instructions
- Prepare the Egg Mixture: In a large mixing bowl, whisk together the egg yolks and granulated sugar until the mixture becomes pale and creamy. This may take about 5-7 minutes using an electric mixer. The goal is to create a light and airy base for your tiramisu.
- Incorporate Mascarpone: Gently fold the mascarpone cheese into the egg yolk mixture. Use a spatula to combine them slowly, ensuring that the mixture remains light and fluffy without deflating.
- Whip the Egg Whites: In a separate bowl, beat the egg whites until stiff peaks form. This step is vital as it adds volume to the tiramisu. Gently fold the whipped egg whites into the mascarpone mixture in three additions, being careful to maintain the airiness.
- Prepare the Coffee Mixture: In a shallow dish, combine the brewed espresso and coffee liqueur, if using. Let it cool to room temperature so that it doesn’t cook the ladyfingers when dipped.
- Assemble the Tiramisu: Quickly dip each ladyfinger into the coffee mixture, ensuring they soak just long enough to absorb the coffee without becoming soggy. Layer half of the soaked ladyfingers in the bottom of a rectangular dish.
- Layer the Cream: Spread half of the mascarpone mixture over the first layer of ladyfingers evenly. Use a spatula to smooth it out.
- Repeat Layers: Dip the remaining ladyfingers in the coffee mixture and layer them on top of the mascarpone mixture. Follow with the rest of the mascarpone mixture, spreading it evenly over the top.
- Chill: Cover the dish with plastic wrap and refrigerate for at least 4 hours, or overnight if possible. This allows the flavors to meld and the dessert to set properly.
- Serve: Just before serving, dust the top of the tiramisu with unsweetened cocoa powder and sprinkle with dark chocolate shavings if desired. Cut into squares and serve chilled.
Extra Tips
For the best tiramisu, use high-quality mascarpone cheese and fresh espresso for a rich flavor. If you prefer a stronger coffee taste, you can increase the amount of espresso or liqueur in the soaking mixture.
Additionally, to make it a bit more decadent, consider adding a layer of grated chocolate between the mascarpone layers. Tiramisu is best enjoyed after sitting overnight in the refrigerator, allowing all the flavors to meld beautifully, so plan ahead for peak taste!
Borscht
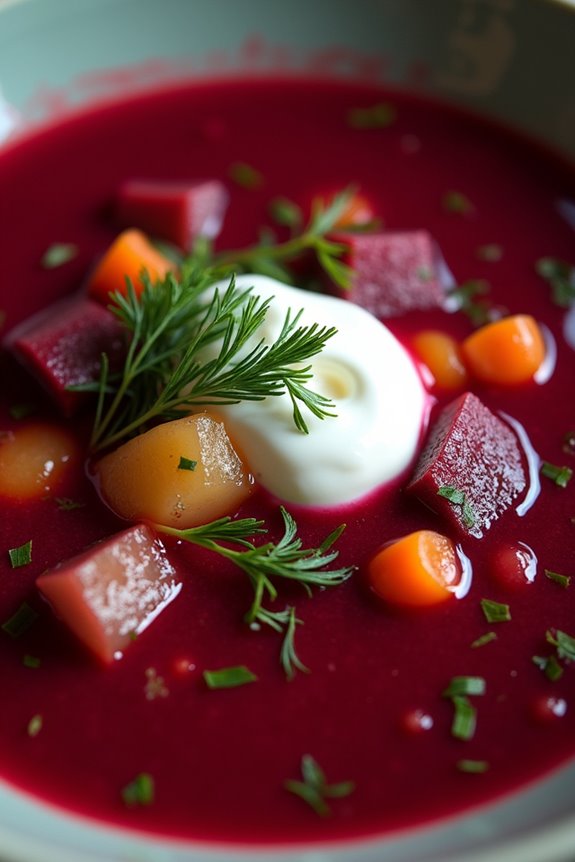
Borscht is a traditional Eastern European soup that’s rich in flavor and vibrant in color, primarily known for its deep red hue derived from beets. This hearty dish is a staple in many countries, including Ukraine, Russia, and Poland, each having its own variations.
Often served hot or cold, Borscht can be enjoyed as a comforting meal by itself or paired with sour cream and fresh herbs for added richness. The combination of beets, vegetables, and sometimes meat creates a delightful balance of sweetness and earthiness, making it a favorite among many.
Making Borscht from scratch is a rewarding culinary experience that allows for creativity in adjusting ingredients based on personal preference. While the base recipe is simple, the flavors develop beautifully with time, making it an excellent dish for meal prep.
Whether you’re looking to impress guests at a dinner party or simply want to warm your soul on a chilly day, this classic soup is sure to satisfy.
Ingredients (Serves 4-6):
- 2 medium beets, peeled and grated
- 1 large onion, chopped
- 1 medium carrot, grated
- 1 medium potato, diced
- 1/2 small head of cabbage, shredded
- 2 cloves garlic, minced
- 6 cups vegetable or beef broth
- 2 tablespoons tomato paste
- 1 tablespoon vinegar (apple cider or white wine)
- 2 tablespoons olive oil
- Salt and pepper, to taste
- Fresh dill and/or parsley for garnish
- Sour cream for serving (optional)
Cooking Instructions:
- Sauté the Aromatics: In a large pot, heat the olive oil over medium heat. Add the chopped onion and grated carrot. Sauté for about 5-7 minutes, stirring occasionally, until the onions are translucent and the carrots have softened. This step builds a flavorful base for the soup.
- Add the Beets: Stir in the grated beets and cook for an additional 5 minutes. The beets will release their vibrant color and flavor, enhancing the overall taste of the Borscht. You may want to wear gloves during this step to avoid staining your hands.
- Incorporate Remaining Vegetables: Add the diced potatoes, shredded cabbage, and minced garlic to the pot. Mix well and cook for another 3-4 minutes. This helps to slightly soften the vegetables before adding the broth, ensuring a well-rounded flavor.
- Pour in the Broth: Slowly add the broth to the pot, stirring to combine all the ingredients. Bring the mixture to a boil over high heat, then reduce the heat to low and let it simmer uncovered for about 30 minutes. This allows the flavors to meld together and the vegetables to become tender.
- Season and Finish: After 30 minutes, stir in the tomato paste and vinegar. Season with salt and pepper to taste. Let the soup simmer for another 10 minutes. The vinegar adds a slight tang, balancing the sweetness of the beets.
- Serve: Ladle the Borscht into bowls and serve hot, garnished with a dollop of sour cream and a sprinkle of fresh dill or parsley, if desired. The sour cream adds creaminess and a beautiful contrast to the vibrant soup.
Extra Tips:
When making Borscht, feel free to customize the recipe by adding other vegetables like bell peppers or tomatoes, or even meat such as beef or pork for a heartier version.
For an added depth of flavor, consider roasting the beets before grating them. Additionally, Borscht tastes even better the next day, as the flavors continue to develop, making it an excellent option for meal prep or leftovers.
Spanakopita
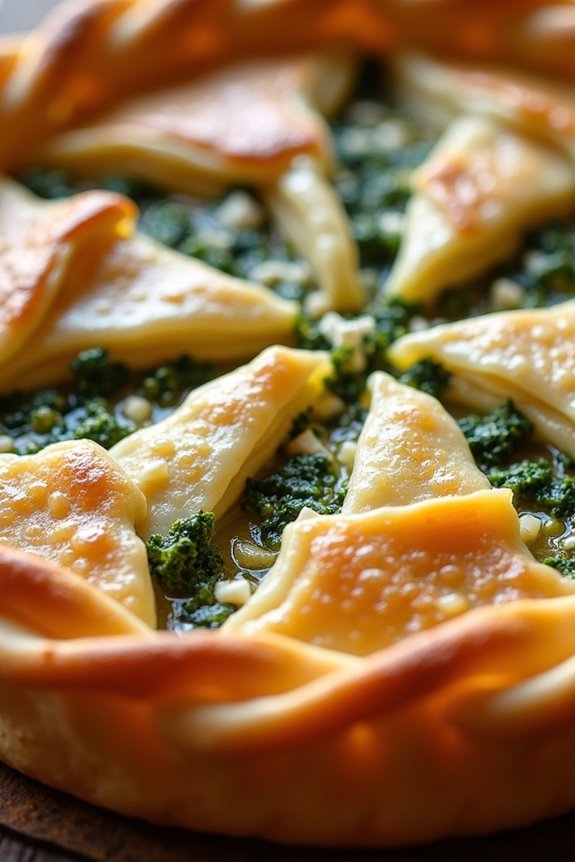
Spanakopita, a traditional Greek dish, is a savory pie made with layers of flaky phyllo pastry and filled with a delicious mixture of spinach, feta cheese, and herbs. This exquisite dish has been enjoyed for centuries and is often served as an appetizer or a main course. Its delightful combination of textures and flavors makes it a popular choice at gatherings and celebrations, embodying the essence of Mediterranean cuisine.
The origins of spanakopita can be traced back to ancient Greece, where the use of phyllo pastry was first popularized. This dish can be prepared in various ways, with some recipes incorporating additional ingredients like leeks or dill. Regardless of the variations, the hallmark of a perfect spanakopita is its crispy, golden-brown exterior and the rich, creamy filling that awaits inside. Whether you’re hosting a dinner party or simply looking for a comforting meal, spanakopita is sure to impress.
Ingredients (serves 4-6):
- 1 package of phyllo pastry (16 oz), thawed
- 1 lb fresh spinach, chopped (or 10 oz frozen spinach, thawed and drained)
- 1 cup feta cheese, crumbled
- 1/2 cup ricotta cheese
- 1/2 cup green onions, chopped
- 1/4 cup fresh dill, chopped (or 2 tablespoons dried dill)
- 2 large eggs, beaten
- 1/4 cup olive oil, plus more for brushing
- Salt and pepper to taste
Cooking Instructions:
- Prepare the Filling: In a large mixing bowl, combine the chopped spinach, crumbled feta, ricotta cheese, chopped green onions, dill, and beaten eggs. Season with salt and pepper to taste. Mix well until all ingredients are evenly combined.
- Preheat the Oven: Preheat your oven to 375°F (190°C). This will guarantee that your spanakopita bakes evenly and achieves a nice golden color.
- Prepare the Phyllo Pastry: Unroll the thawed phyllo pastry and cover it with a damp kitchen towel to prevent it from drying out. Take a large baking dish (about 9×13 inches) and lightly brush the bottom with olive oil.
- Layer the Phyllo: Place one sheet of phyllo pastry in the baking dish and brush it lightly with olive oil. Repeat this process with 6-8 sheets, layering and brushing each sheet with oil. This will create a flaky base for the spanakopita.
- Add the Filling: Once you have layered enough phyllo, spread the spinach and cheese filling evenly over the layered phyllo base. Make sure to distribute the filling evenly to guarantee every slice has a balanced amount of filling.
- Top with More Phyllo: Continue to layer more sheets of phyllo on top of the filling, brushing each sheet with olive oil as you did before. Aim for about 6-8 additional layers to create a crispy top.
- Seal the Edges: Once you have layered the top, tuck in any overhanging phyllo around the edges of the dish to seal the filling inside. Brush the top layer with a bit more olive oil for extra crispiness.
- Score the Pie: Using a sharp knife, carefully score the top of the spanakopita into diamond or square shapes. This will help with even cooking and make it easier to cut once baked.
- Bake: Place the dish in the preheated oven and bake for about 30-40 minutes, or until the top is golden brown and crispy. Keep an eye on it towards the end to prevent burning.
- Cool and Serve: Once baked, remove the spanakopita from the oven and allow it to cool for a few minutes. Cut along the scored lines and serve warm or at room temperature.
Extra Tips:
To enhance the flavor of your spanakopita, consider adding a squeeze of lemon juice to the filling for a invigorating zest. If using frozen spinach, verify it’s thoroughly drained to avoid excess moisture in the filling.
Additionally, experimenting with different herbs, such as parsley or mint, can provide a unique twist on the classic recipe. Serve with a side of tzatziki for a delightful Greek experience!
Goulash
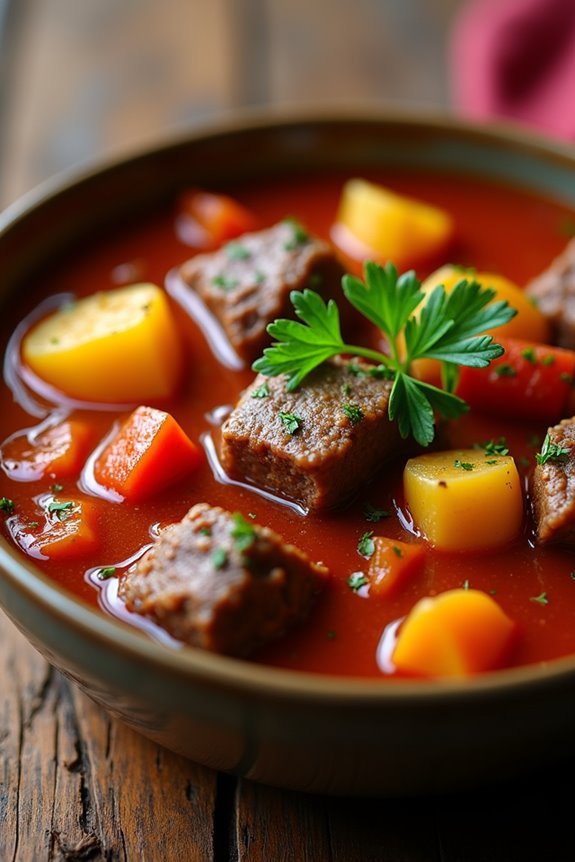
Goulash is a traditional Hungarian stew that has become popular throughout Europe, particularly in Central Europe. This hearty dish is known for its rich flavor and comforting qualities, often enjoyed during colder months. The essence of goulash lies in its use of paprika, which gives the stew its characteristic red color and a warm, smoky flavor.
While there are many variations of goulash, this recipe focuses on the classic version that combines tender beef with vegetables and spices, simmered to perfection in a savory broth.
To create the ultimate goulash experience, it’s important to select the right ingredients and take your time with the cooking process. This dish is best when allowed to simmer slowly, allowing the flavors to meld together beautifully. Serve it with crusty bread or over a bed of egg noodles for a complete meal that warms the soul.
Ingredients (Serves 4-6)
- 2 lbs beef chuck, cut into 1-inch cubes
- 2 tablespoons vegetable oil
- 1 large onion, diced
- 2 cloves garlic, minced
- 2 tablespoons sweet paprika
- 1 teaspoon caraway seeds
- 1 bell pepper, diced (red or green)
- 4 medium potatoes, peeled and cubed
- 3 cups beef broth
- 1 can (14 oz) diced tomatoes
- 2 bay leaves
- Salt and pepper to taste
- Fresh parsley, chopped (for garnish)
Cooking Instructions
- Sear the Beef: In a large pot or Dutch oven, heat the vegetable oil over medium-high heat. Add the beef cubes in batches, ensuring not to overcrowd the pot. Sear the beef on all sides until browned, about 5-7 minutes. This step helps to develop deep flavors in the goulash.
- Sauté Onions and Garlic: Once the beef is browned, remove it from the pot and set it aside. In the same pot, add the diced onion and sauté for about 5 minutes until it becomes translucent. Stir in the minced garlic and cook for an additional minute, making sure it doesn’t burn.
- Add Spices and Veggies: Lower the heat to medium and sprinkle in the sweet paprika and caraway seeds. Stir well to coat the onions with the spices, allowing them to toast slightly for about 1-2 minutes. Then add the diced bell pepper and cook for another 3-4 minutes until softened.
- Combine Ingredients: Return the seared beef to the pot, along with the cubed potatoes, beef broth, diced tomatoes, and bay leaves. Stir to combine all ingredients well. Bring the mixture to a gentle boil.
- Simmer: Once boiling, reduce the heat to low and cover the pot. Let the goulash simmer for about 1.5 to 2 hours, or until the beef is tender and the flavors have melded together. Stir occasionally and check the seasoning, adding salt and pepper as needed.
- Serve: Once the goulash is ready, remove the bay leaves and adjust the seasoning if necessary. Ladle the goulash into bowls and garnish with freshly chopped parsley for a splash of color. Serve hot with crusty bread or over egg noodles.
Extra Tips
For a richer flavor, consider using a mix of beef and pork or adding a splash of red wine to the broth. If you prefer a thicker goulash, you can mash some of the potatoes against the side of the pot to thicken the sauce.
Leftover goulash can be stored in the refrigerator for up to three days and often tastes even better the next day as the flavors continue to develop. Enjoy your homemade goulash!
Shepherd’s Pie
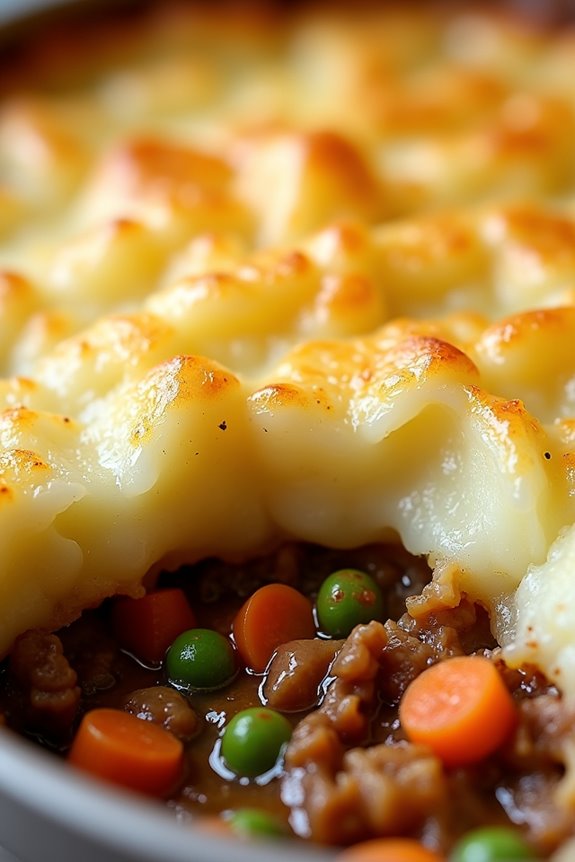
Shepherd’s Pie is a classic dish that hails from the United Kingdom, known for its hearty combination of ground meat, vegetables, and creamy mashed potatoes. Traditionally made with lamb, this comforting casserole offers a delightful balance of flavors and textures. It’s perfect for chilly evenings and serves as an ideal family meal, bringing warmth and satisfaction with every bite.
The origins of Shepherd’s Pie can be traced back to the 18th century, when leftover meat from the Sunday roast was used to create this delicious dish. The meat is typically seasoned and mixed with vegetables, then topped with a layer of fluffy mashed potatoes and baked until golden brown. This dish not only utilizes leftovers efficiently but also showcases the essence of traditional European cooking, where simple ingredients transform into something extraordinary.
Ingredients (serves 4-6):
- 1 lb ground lamb (or beef)
- 1 medium onion, diced
- 2 carrots, diced
- 1 cup frozen peas
- 2 cloves garlic, minced
- 2 tablespoons tomato paste
- 1 cup beef or lamb broth
- 1 teaspoon Worcestershire sauce
- 1 teaspoon dried thyme
- Salt and pepper to taste
- 2 lbs potatoes, peeled and cubed
- 1/2 cup milk
- 4 tablespoons butter
- 1 cup shredded cheddar cheese (optional)
Cooking Instructions:
- Prepare the Potatoes: Start by placing the peeled and cubed potatoes into a large pot and covering them with cold water. Add a pinch of salt and bring to a boil over medium-high heat. Once boiling, reduce the heat and simmer for about 15-20 minutes or until the potatoes are tender. Drain the potatoes and return them to the pot.
- Mash the Potatoes: Add the butter and milk to the drained potatoes. Using a potato masher or a fork, mash the potatoes until they’re smooth and creamy. Season with salt and pepper to taste. Set aside while you prepare the meat filling.
- Cook the Meat and Vegetables: In a large skillet over medium heat, add the ground lamb (or beef) and cook until browned, breaking it apart with a spatula, about 5-7 minutes. Drain any excess fat. Add the diced onion, carrots, and minced garlic, cooking for an additional 5 minutes until the vegetables are softened.
- Add Flavorings: Stir in the tomato paste, Worcestershire sauce, dried thyme, and the broth. Bring the mixture to a simmer and let it cook for about 10 minutes, allowing the flavors to meld together. Add the frozen peas at the end and stir to combine. Season with salt and pepper to taste.
- Assemble the Shepherd’s Pie: Preheat your oven to 400°F (200°C). In a baking dish, spread the meat and vegetable mixture evenly on the bottom. Top with the creamy mashed potatoes, spreading them out to cover the filling completely. If desired, sprinkle shredded cheddar cheese on top for extra flavor.
- Bake the Pie: Place the assembled Shepherd’s Pie in the preheated oven and bake for about 25-30 minutes, or until the top is golden brown and the filling is bubbling. If the top browns too quickly, cover it with aluminum foil.
- Serve: Once done, remove the pie from the oven and let it cool for a few minutes before serving. Scoop portions onto plates and enjoy this hearty meal!
Extra Tips: To elevate your Shepherd’s Pie, consider adding additional vegetables like corn or green beans to the meat mixture for more color and nutrition. You can also experiment with different herbs such as rosemary or parsley for added flavor.
For a twist, try using sweet potatoes instead of regular potatoes for the topping, providing a unique sweetness to the dish. Finally, if you have any leftovers, Shepherd’s Pie reheats beautifully, making it a perfect meal for the next day!
Wiener Schnitzel

Wiener Schnitzel is a classic Austrian dish that has gained popularity across Europe and beyond. This delectable meal consists of a breaded and fried veal cutlet, which is traditionally served with a slice of lemon and a side of potatoes or a fresh green salad. The key to a perfect Wiener Schnitzel is in the preparation and the quality of the ingredients, so it’s crucial to use tender veal and fresh breadcrumbs.
The origins of Wiener Schnitzel can be traced back to the 19th century, and it has since become a symbol of Austrian cuisine. This dish isn’t only a beloved staple in Austrian households but also a favorite in restaurants around the world. Whether you’re preparing this dish for a special occasion or a family dinner, the crispy exterior and tender meat will surely impress your guests.
Ingredients (serving size: 4-6 people)
- 4-6 veal cutlets (about 150-200 grams each)
- Salt and pepper, to taste
- 1 cup all-purpose flour
- 2 large eggs
- 2 cups fresh breadcrumbs (preferably from day-old bread)
- 1/2 cup unsalted butter
- 1/4 cup vegetable oil
- Lemon wedges, for serving
- Chopped parsley, for garnish (optional)
Cooking Instructions
- Prepare the Veal Cutlets: Begin by gently pounding the veal cutlets with a meat mallet or rolling pin between two sheets of plastic wrap or parchment paper. Aim for a thickness of about 1/4 inch. This tenderizes the meat and guarantees even cooking. Season both sides of the cutlets generously with salt and pepper.
- Set Up the Breading Station: In three separate shallow dishes, place the flour, beaten eggs, and breadcrumbs. First, dredge each veal cutlet in flour, shaking off any excess. Then dip it into the beaten eggs, allowing any extra egg to drip off. Finally, coat the cutlet in breadcrumbs, pressing gently to ensure the breadcrumbs adhere well.
- Heat the Oil and Butter: In a large skillet, heat the butter and vegetable oil over medium-high heat. The mixture should sizzle when the cutlets are added. Using a combination of butter and oil helps achieve a rich flavor and a crispy texture.
- Fry the Cutlets: Carefully place the breaded cutlets in the hot skillet, making sure not to overcrowd the pan (you may need to do this in batches). Fry for about 3-4 minutes on each side, or until golden brown and crispy. Use tongs to flip the cutlets gently, ensuring they don’t lose their breading.
- Drain and Serve: Once cooked, transfer the Wiener Schnitzels to a plate lined with paper towels to absorb any excess oil. Serve immediately with lemon wedges and garnish with chopped parsley, if desired. Pair with a fresh salad or potato salad for a complete meal.
Extra Tips
For an even more authentic Wiener Schnitzel, consider using a meat tenderizer to further soften the veal before breading. Make sure to use fresh breadcrumbs for the best texture, and avoid overcrowding the skillet while frying to guarantee even cooking.
You can also experiment with different types of meat, such as pork or chicken, to create variations on this classic dish. Enjoy your culinary journey into traditional European cuisine!
Bouillabaisse
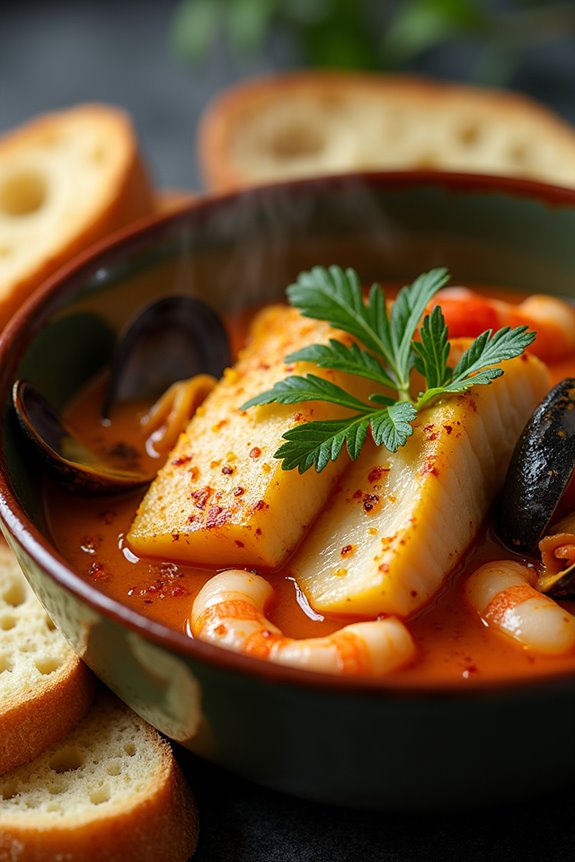
Bouillabaisse is a traditional Provençal fish stew that hails from the port city of Marseille, France. This rich and aromatic dish combines a variety of fresh fish and shellfish with a flavorful broth infused with herbs and spices. Originating from the humble beginnings of fishermen who’d use the catch of the day, Bouillabaisse has evolved into a celebrated culinary masterpiece, often enjoyed in restaurants and homes alike.
The beauty of this dish lies not only in its taste but also in the vibrant colors and textures that come together to create a feast for the senses.
Preparing Bouillabaisse requires a bit of dedication and time, but the end result is well worth the effort. The key to a successful Bouillabaisse lies in the quality of the seafood and the broth. A well-prepared broth, rich with the flavors of saffron, fennel, and tomatoes, serves as the foundation for this dish. Each type of seafood adds its unique flavor and texture, making this stew a delightful combination of flavors that showcases the best of the Mediterranean.
Ingredients (serving size: 4-6 people)
- 2 tablespoons olive oil
- 1 onion, finely chopped
- 2 leeks, cleaned and sliced
- 3 cloves garlic, minced
- 1 large tomato, diced
- 1 teaspoon tomato paste
- 1/2 teaspoon saffron threads
- 1 teaspoon dried thyme
- 1 teaspoon fennel seeds
- 1 bay leaf
- 6 cups fish stock or water
- Salt and pepper, to taste
- 1 pound firm white fish (such as cod or halibut), cut into chunks
- 1 pound mussels, cleaned and debearded
- 1 pound shrimp, peeled and deveined
- 1/2 cup chopped fresh parsley
- Lemon wedges, for serving
- Crusty bread, for serving
Cooking Instructions
- Sauté Aromatics: In a large pot or Dutch oven, heat the olive oil over medium heat. Add the chopped onion and leeks, and sauté for about 5 minutes until they become soft and translucent. Stir in the minced garlic, diced tomato, and tomato paste, cooking for an additional 2 minutes to meld the flavors.
- Add Spices and Stock: Sprinkle in the saffron threads, dried thyme, fennel seeds, and bay leaf. Pour in the fish stock or water and season with salt and pepper. Bring the mixture to a gentle simmer and allow it to cook for about 10 minutes, which will help to infuse the broth with the aromatic flavors.
- Cook the Fish: Once the broth is ready, carefully add the chunks of white fish to the pot. Allow the fish to cook for about 5 minutes, just until it begins to flake easily.
- Add Shellfish: Next, add the cleaned mussels and shrimp to the pot. Cover the pot with a lid and let it cook for another 5-7 minutes, or until the mussels have opened and the shrimp are pink and opaque.
- Finish and Serve: Remove the pot from heat and discard any mussels that remain closed. Stir in the chopped parsley for a fresh finish. Ladle the bouillabaisse into bowls, serve with lemon wedges and crusty bread on the side for dipping into the flavorful broth.
Extra Tips
When preparing Bouillabaisse, always opt for the freshest seafood you can find to enhance the dish’s flavors. You can also personalize your Bouillabaisse by using a variety of seafood, such as scallops or clams, based on availability.
Additionally, serve the dish with a traditional rouille—a garlic mayonnaise spiced with saffron—to elevate the experience. Finally, remember to keep the broth simmering gently; a rolling boil can break apart the fish and seafood, resulting in a less appealing texture.
Enjoy your culinary journey through the Mediterranean!
Sacher Torte
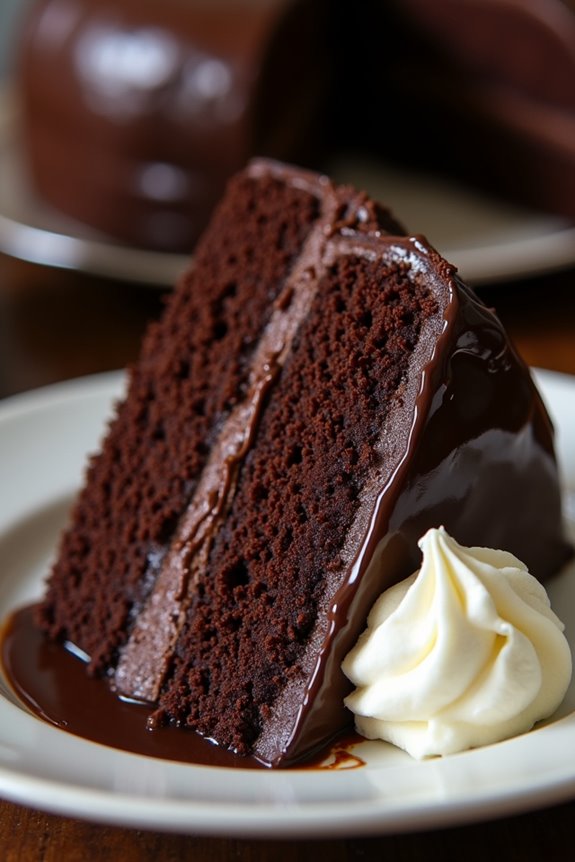
Sacher Torte is a classic Austrian chocolate cake that was invented in 1832 by Franz Sacher for Prince Wenzel von Metternich in Vienna. This decadent dessert is known for its rich chocolate flavor, smooth apricot jam filling, and a glossy dark chocolate glaze.
Traditionally served with a dollop of unsweetened whipped cream, Sacher Torte has become a symbol of Viennese coffee house culture and is beloved by chocolate enthusiasts around the world.
Making Sacher Torte may seem challenging at first, but with the right ingredients and a little patience, you can create this impressive dessert at home. The key to achieving the perfect Sacher Torte lies in the balance of the moist chocolate cake and the sweet-tart apricot jam, complemented by the glossy chocolate icing.
This recipe serves 4-6 people and is perfect for special occasions or a luxurious treat after dinner.
Ingredients:
- 140g dark chocolate (70% cocoa), chopped
- 115g unsalted butter, softened
- 100g granulated sugar
- 1 teaspoon vanilla extract
- 4 large eggs, separated
- 125g all-purpose flour
- 1/4 teaspoon salt
- 200g apricot jam
- 200g dark chocolate (for glazing)
- 100ml heavy cream (for glazing)
Cooking Instructions:
- Preheat the Oven: Begin by preheating your oven to 175°C (350°F). Grease and flour a round 9-inch cake pan, ensuring it’s well-prepared to prevent sticking.
- Melt the Chocolate: In a heatproof bowl, combine 140g of chopped dark chocolate with a small amount of butter. Place the bowl over a pot of simmering water (double boiler method) and stir until melted and smooth. Remove from heat and let it cool slightly.
- Cream the Butter and Sugar: In a large mixing bowl, beat the softened butter with 100g of granulated sugar using an electric mixer until light and fluffy. This should take about 3-5 minutes. Add the vanilla extract and mix well.
- Incorporate Egg Yolks: Gradually add the egg yolks to the butter mixture, one at a time, mixing well after each addition. Then, pour in the melted chocolate and mix until well combined.
- Combine Dry Ingredients: In a separate bowl, whisk together 125g of all-purpose flour and 1/4 teaspoon of salt. Slowly add this mixture to the chocolate batter, folding gently until just combined.
- Whip Egg Whites: In a clean bowl, whip the egg whites until stiff peaks form. Gently fold the whipped egg whites into the chocolate batter in three additions, being careful not to deflate the mixture.
- Bake the Cake: Pour the batter into the prepared cake pan and smooth the top. Bake in the preheated oven for 30-35 minutes, or until a skewer inserted into the center comes out clean. Let the cake cool in the pan for 10 minutes before transferring it to a wire rack to cool completely.
- Prepare the Apricot Filling: Once the cake is completely cool, slice it in half horizontally. Spread a generous layer of apricot jam on the bottom layer, then place the top layer back on.
- Make the Chocolate Glaze: In a saucepan, heat 100ml of heavy cream until it begins to simmer. Remove from heat and add 200g of chopped dark chocolate. Stir until melted and smooth.
- Glaze the Cake: Pour the chocolate glaze over the top of the assembled cake, allowing it to drip down the sides. Use a spatula to smooth the glaze for an even finish. Let the glaze set before serving.
Extra Tips: When making Sacher Torte, it’s important to use high-quality dark chocolate for both the cake and the glaze as it greatly enhances the flavor.
Allowing the cake to cool completely before glazing is essential to prevent the glaze from melting. Additionally, serving the cake with a side of unsweetened whipped cream balances the richness of the chocolate and adds a delightful touch.
For an extra layer of flavor, consider adding a hint of espresso powder to the chocolate batter.
Fish and Chips

Fish and chips is a quintessential British dish that has charmed palates around the world. It consists of battered and fried fish served alongside crispy golden fries, often accompanied by malt vinegar or tartar sauce. The dish has its roots in the 19th century, where it became a popular fast food option among the working class. Traditionally, cod or haddock is used for the fish, but you can experiment with other types of fish as well. The dish is synonymous with British seaside culture and is often enjoyed on a Friday evening or during festive occasions.
Making fish and chips at home can be a rewarding experience, allowing you to control the ingredients and achieve that perfect crunch. The secret to perfect fish and chips lies in the batter and the frying technique. A light and crisp batter keeps the fish moist and flavorful, while the fries should be twice-fried to achieve that irresistible crunch. With a few simple ingredients and some patience, you can recreate this beloved dish in your own kitchen.
Ingredients (serving size: 4-6 people)
- 4-6 pieces of white fish fillets (cod or haddock)
- 1 cup all-purpose flour (for batter)
- 1 cup cold sparkling water
- 1 teaspoon baking powder
- Salt and pepper to taste
- 4 large potatoes (for fries)
- Oil for frying (vegetable or canola)
- Malt vinegar (for serving)
- Tartar sauce (for serving)
- Lemon wedges (for serving)
Cooking Instructions
- Prepare the Potatoes: Start by peeling the potatoes and cutting them into thick chips (about 1 inch wide). Rinse the cut potatoes in cold water to remove excess starch, then pat them dry with a clean kitchen towel to guarantee they fry well.
- Preheat the Oil: In a large, heavy-bottomed pot or deep fryer, pour in enough oil to submerge the chips (about 2-3 inches deep). Heat the oil to 325°F (163°C) for the first fry. Use a thermometer for accuracy.
- First Fry of the Chips: Carefully add the chips to the hot oil in batches, making sure not to overcrowd the pot. Fry them for about 4-5 minutes until they’re soft but not browned. Remove the chips with a slotted spoon and drain them on paper towels.
- Make the Batter: In a mixing bowl, combine the flour, baking powder, a pinch of salt, and pepper. Gradually whisk in the cold sparkling water until smooth and slightly thick. The batter should have a consistent, pourable texture.
- Prepare the Fish: Pat the fish fillets dry with paper towels and season them lightly with salt and pepper. Dredge each piece of fish in a bit of flour to help the batter stick.
- Heat the Oil for Frying Fish: Increase the temperature of the oil to 350°F (177°C).
- Coat and Fry the Fish: Dip each floured fish fillet into the batter, allowing any excess to drip off before carefully placing it into the hot oil. Fry the fillets for about 5-7 minutes or until golden brown and cooked through. Remove the fish with a slotted spoon and drain on paper towels.
- Final Fry of the Chips: Increase the oil temperature back to 350°F (177°C) if necessary. Add the pre-fried chips back into the oil and cook for an additional 2-3 minutes or until they’re golden and crispy. Remove and drain on paper towels.
- Serve: Plate the crispy fish and chips together, and serve with malt vinegar, tartar sauce, and lemon wedges on the side.
Extra Tips
For the best results, confirm your oil is at the correct temperature for frying; too low will make the food greasy, while too high can burn the batter. It’s also essential to drain both the fish and chips on paper towels to remove any excess oil. If you prefer a thicker batter, you can add a bit more flour, but keep in mind that it may take longer to cook through. Enjoy your homemade fish and chips with a side of mushy peas for an authentic touch!
Croissant

Croissants are a beloved pastry originating from France, known for their flaky, buttery layers and crescent shape. The secret to a perfect croissant lies in the technique of laminating dough, which involves folding layers of butter into the dough to create a light and airy texture. The process may seem intimidating at first, but with patience and practice, you can achieve bakery-worthy results right in your own kitchen. Serve them fresh out of the oven for breakfast, or enjoy them as a snack throughout the day.
The origins of the croissant can be traced back to the Austrian kipferl, which dates back to at least the 13th century. The modern croissant, however, was popularized in France during the 19th century and has since become a staple in French cuisine. Perfecting this recipe won’t only impress your family and friends but also enhance your baking skills. So roll up your sleeves, and let’s get started on making these delightful pastries!
Ingredients for Croissants (serving size: 4-6 people):
- 500g all-purpose flour
- 60g granulated sugar
- 10g salt
- 10g instant yeast
- 300ml cold milk
- 250g unsalted butter (cold)
- 1 egg (for egg wash)
Cooking Instructions:
1. Prepare the Dough:
In a large mixing bowl, combine the flour, sugar, salt, and instant yeast. Make sure to keep the salt and yeast on opposite sides of the bowl initially, as salt can kill yeast. Slowly add the cold milk and mix until a rough dough forms. Knead the dough on a lightly floured surface for about 5-7 minutes until it becomes smooth and elastic.
Shape it into a ball, cover it with plastic wrap, and refrigerate for at least 2 hours to chill.
2. Prepare the Butter Block:
While the dough is chilling, prepare the butter block. Place the cold unsalted butter between two sheets of parchment paper. Use a rolling pin to pound and roll the butter into a flat rectangle about 1 cm thick.
Once shaped, refrigerate the butter block for about 30 minutes to keep it firm.
3. Laminate the Dough:
After the dough has chilled, roll it out on a floured surface into a large rectangle (about 1 cm thick). Place the cold butter block in the center of the dough. Fold the dough over the butter like an envelope, sealing the edges to encase the butter completely.
Roll the dough out into a long rectangle, then fold it into thirds (like a letter). This is the first turn. Wrap the dough in plastic wrap and refrigerate for 30 minutes.
Repeat this process for a total of three turns, chilling the dough in between each turn.
4. Shape the Croissants:
After completing the turns, roll the dough into a large rectangle again. Cut the dough into long triangles (about 10 cm wide at the base). Starting from the base of each triangle, tightly roll the dough towards the tip to form a crescent shape.
Place the shaped croissants on a baking tray lined with parchment paper, ensuring they’ve space to rise.
5. Proof the Croissants:
Cover the croissants with a clean kitchen towel and let them proof in a warm area for about 1-2 hours, or until they’ve doubled in size. Preheat your oven to 200°C (400°F) during the final 30 minutes of proofing.
6. Bake the Croissants:
Before baking, brush the tops of the croissants with a beaten egg for a glossy finish. Bake in the preheated oven for 15-20 minutes, or until they’re golden brown and puffed.
Allow them to cool slightly on a wire rack before serving.
Extra Tips:
When making croissants, it’s essential to keep all ingredients cold, especially the butter, to achieve that flaky texture. Additionally, don’t rush the proofing process; allowing the croissants ample time to rise will enhance their flavor and texture.
Finally, consider experimenting with different fillings like chocolate or almond paste for a twist on the classic croissant! Enjoy your homemade pastries with a cup of coffee or tea for a delightful treat.