

When I think of European cuisine, I picture vibrant colors and fresh ingredients that not only taste great but also nourish the body. From the Mediterranean’s zesty quinoa salads to the simplicity of a classic ratatouille, there’s a wealth of healthy options that prove wellness can be delicious. Curious about how these dishes can transform your meals? Let’s explore some mouthwatering recipes that celebrate both flavor and nutrition.
Mediterranean Quinoa Salad
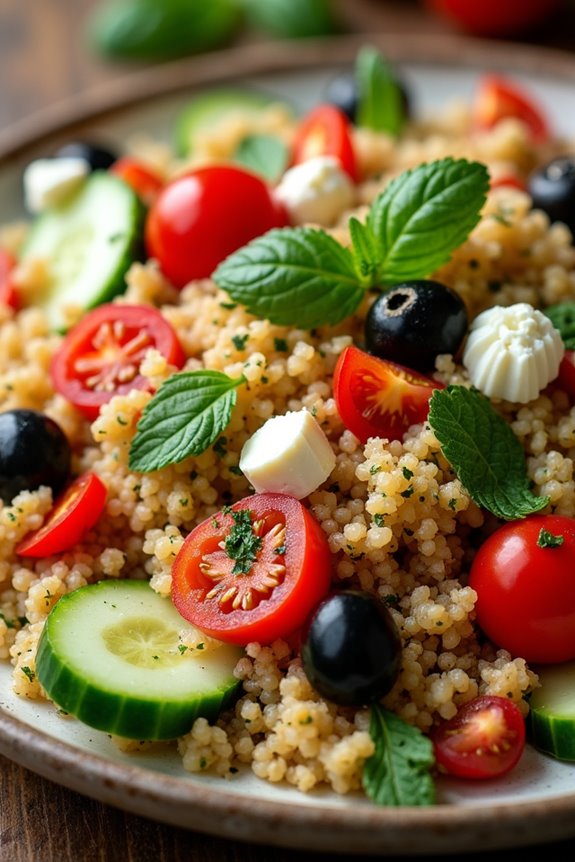
Mediterranean Quinoa Salad is a vibrant and nutritious dish that brings the flavors of the Mediterranean right to your table. Combining protein-packed quinoa with fresh vegetables, herbs, and a zesty dressing, this salad isn’t only delicious but also a healthy option for lunch or dinner.
Perfect for meal prep, it can be made ahead of time and served chilled or at room temperature, making it an excellent choice for picnics, barbecues, or as a side dish for a larger meal.
This salad is versatile and can be easily customized based on seasonal ingredients or personal preferences. The combination of crunchy cucumbers, juicy tomatoes, and briny olives creates a delightful texture and flavor profile that will satisfy your taste buds.
Additionally, the addition of feta cheese adds a creamy tang that complements the dish beautifully. Whether you’re a long-time fan of Mediterranean cuisine or trying it for the first time, this Mediterranean Quinoa Salad will quickly become a favorite.
Ingredients (Serves 4-6)
- 1 cup quinoa, rinsed
- 2 cups water or vegetable broth
- 1 cup cherry tomatoes, halved
- 1 cucumber, diced
- 1 bell pepper, diced (any color)
- 1/2 red onion, finely chopped
- 1/2 cup Kalamata olives, pitted and sliced
- 1/2 cup feta cheese, crumbled
- 1/4 cup fresh parsley, chopped
- 1/4 cup fresh mint, chopped
- 3 tablespoons olive oil
- 2 tablespoons lemon juice
- 1 teaspoon dried oregano
- Salt and pepper to taste
Cooking Instructions
1. Cook the Quinoa: In a medium saucepan, combine the rinsed quinoa and water (or vegetable broth). Bring to a boil over medium-high heat, then reduce the heat to low, cover, and simmer for about 15 minutes, or until the quinoa is fluffy and the liquid is absorbed.
Remove from heat and let it sit covered for an additional 5 minutes. Fluff with a fork and allow it to cool.
2. Prepare the Vegetables: While the quinoa is cooling, chop the cherry tomatoes, cucumber, bell pepper, and red onion. Place them in a large mixing bowl. Adding a variety of colors will enhance the visual appeal of the salad.
3. Add Olives and Feta: Once the vegetables are prepared, add the sliced Kalamata olives and crumbled feta cheese to the bowl. These ingredients will provide savory and briny flavors that enhance the overall taste of the salad.
4. Mix the Herbs: Chop the fresh parsley and mint, then add them to the vegetable mixture. The fresh herbs will add an invigorating taste that’s characteristic of Mediterranean cuisine.
5. Prepare the Dressing: In a small bowl, whisk together the olive oil, lemon juice, dried oregano, salt, and pepper. This dressing will add brightness and depth to the salad.
6. Combine the Ingredients: Add the cooled quinoa to the bowl with the vegetables, olives, feta, and herbs. Pour the dressing over the salad and gently toss everything together until well combined. Make sure that the dressing evenly coats all the ingredients.
7. Taste and Adjust: Taste the salad and adjust the seasoning if necessary, adding more salt, pepper, or lemon juice according to your preference.
8. Serve or Chill: You can serve the Mediterranean Quinoa Salad immediately or let it chill in the refrigerator for 30 minutes to allow the flavors to meld together. This dish is great served cold or at room temperature.
Extra Tips
When preparing Mediterranean Quinoa Salad, feel free to get creative with the ingredients. You can substitute or add other vegetables like spinach, zucchini, or artichoke hearts, or even include proteins such as chickpeas or grilled chicken for a heartier version.
If you’re preparing the salad in advance, consider keeping the dressing separate until just before serving to maintain the freshness and crunch of the vegetables. Enjoy experimenting with different flavor combinations to find your perfect version of this delicious salad!
Norwegian Salmon With Dill and Lemon
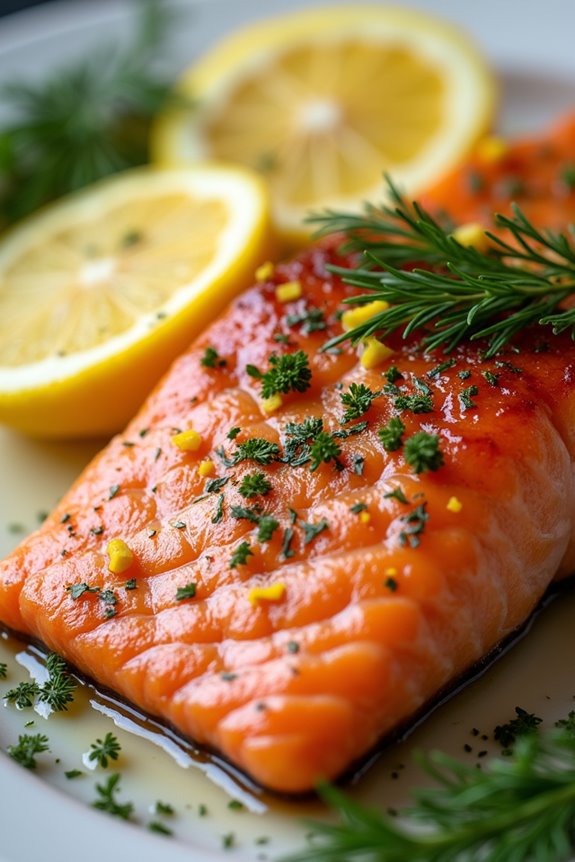
Norwegian Salmon with Dill and Lemon is a light, flavorful dish that captures the essence of Scandinavian cuisine. The star of this recipe is the fresh, high-quality salmon, which is renowned for its rich, buttery flavor and delicate texture.
Paired with the fresh brightness of lemon and the aromatic warmth of dill, this dish not only delights the palate but also provides a healthy, heart-healthy option for any meal.
This recipe is perfect for gatherings or a cozy family dinner, serving approximately 4 to 6 people. It’s simple to prepare yet sophisticated enough to impress your guests. The combination of baking and seasoning allows the salmon to retain its moisture while infusing it with the delicious flavors of dill and lemon.
Ingredients:
- 4 to 6 pieces of fresh Norwegian salmon fillets (about 6 ounces each)
- 2 tablespoons of olive oil
- 2 tablespoons of fresh dill, chopped (or 1 tablespoon of dried dill)
- Zest and juice of 1 lemon
- 2 cloves of garlic, minced
- Salt and pepper to taste
- Lemon slices, for garnish
- Fresh dill sprigs, for garnish
Cooking Instructions:
- Preheat the Oven: Begin by preheating your oven to 375°F (190°C). This guarantees that the salmon cooks evenly and thoroughly once it’s placed in the oven.
- Prepare the Marinade: In a small bowl, mix together the olive oil, chopped dill, lemon zest, lemon juice, minced garlic, salt, and pepper. This marinade will enhance the flavor of the salmon and help keep it moist during cooking.
- Marinate the Salmon: Place the salmon fillets in a baking dish or on a sheet pan lined with parchment paper. Pour the marinade over the top of the salmon, making sure each piece is generously coated. Allow the salmon to marinate for at least 15 minutes to absorb all the flavors.
- Bake the Salmon: Once marinated, place the baking dish in the preheated oven. Bake the salmon for approximately 15 to 20 minutes, or until the fish flakes easily with a fork and is cooked through. The cooking time may vary slightly depending on the thickness of the fillets.
- Serve: Once cooked, remove the salmon from the oven. Transfer the fillets to a serving platter. Garnish with fresh lemon slices and dill sprigs for added flavor and presentation.
Extra Tips:
When preparing Norwegian Salmon with Dill and Lemon, make certain that you choose fresh, high-quality salmon for the best flavor.
If you can’t find fresh dill, dried dill can be used but will have a slightly different flavor profile. Additionally, consider serving the salmon with a side of roasted vegetables or a light salad to complement the dish.
For an added twist, you can also experiment with other herbs like parsley or tarragon in place of dill for a unique flavor experience.
Greek Yogurt and Berry Parfait
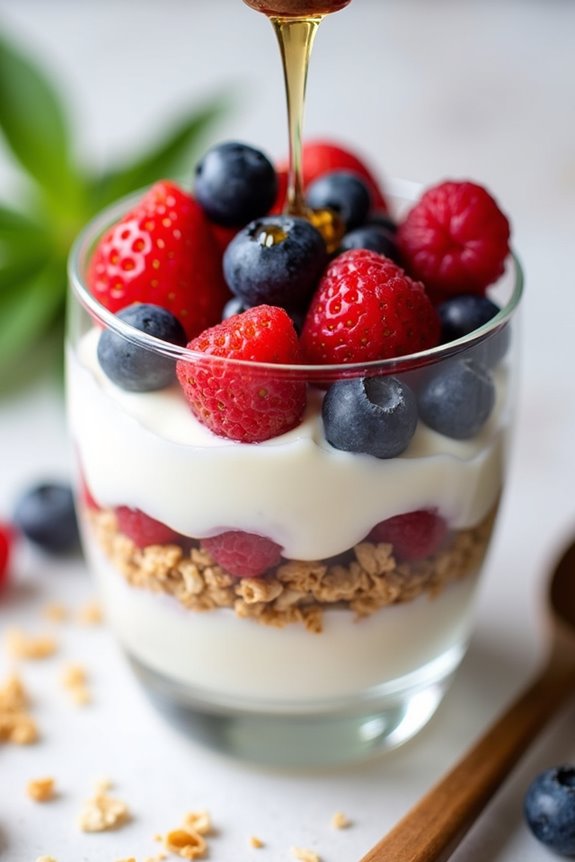
Greek Yogurt and Berry Parfait is a delightful and nutritious dish that brings together the creamy richness of Greek yogurt and the vibrant sweetness of fresh berries. This parfait isn’t only visually appealing but also packed with protein, vitamins, and antioxidants, making it an ideal choice for breakfast, a snack, or even a light dessert.
The layers of yogurt, berries, and crunchy granola create a satisfying texture and flavor combination that everyone will enjoy. This recipe is versatile and can be tailored to suit your taste preferences. You can use a variety of berries such as strawberries, blueberries, raspberries, or blackberries, depending on what you have available.
Additionally, feel free to experiment with different granola types or add nuts and seeds for an extra crunch. This Greek Yogurt and Berry Parfait serves 4-6 people, making it perfect for sharing with family or friends.
Ingredients (Serves 4-6):
- 4 cups Greek yogurt (plain or flavored)
- 2 cups mixed berries (strawberries, blueberries, raspberries, blackberries)
- 1 cup granola
- 2 tablespoons honey or maple syrup (optional)
- Fresh mint leaves (for garnish, optional)
Cooking Instructions:
- Prepare the Berries: Wash the mixed berries thoroughly under cold water. If using strawberries, hull and slice them into smaller pieces. Raspberries and blueberries can be left whole. Allow the berries to drain in a colander to remove any excess water.
- Layer the Yogurt: In a clear glass or bowl, start by spooning a generous amount of Greek yogurt at the bottom. Use about ½ cup of yogurt per serving for a total of 4-6 servings. This forms the first layer of your parfait.
- Add the Berries: Next, add a layer of mixed berries on top of the yogurt. Use about ½ cup of mixed berries for each serving. This not only adds color but also infuses the yogurt with natural sweetness.
- Incorporate Granola: Sprinkle a layer of granola over the berries. Use about ¼ cup of granola per serving. The granola adds a delightful crunch and complements the creaminess of the yogurt and the juiciness of the berries.
- Repeat the Layers: Continue to repeat the layering process until the glasses or bowls are filled to the top. You can do two or three layers, depending on the size of your serving dishes and how many components you want to include.
- Drizzle with Sweetener: If desired, drizzle honey or maple syrup over the top layer for added sweetness. This step is optional, as the natural sweetness from the berries may be sufficient.
- Garnish and Serve: Finally, garnish your parfait with fresh mint leaves for a pop of color and added freshness. Serve immediately or chill in the refrigerator for a short period before serving.
Extra Tips:
When preparing your Greek Yogurt and Berry Parfait, consider using seasonal berries for the best flavor and freshness. You can also make the parfait ahead of time and store it in the refrigerator, but it’s best to add the granola just before serving to maintain its crunchiness.
For added variety, try incorporating different fruits, such as sliced bananas or peaches, or add a touch of cinnamon or vanilla extract to your yogurt for extra flavor. Enjoy this healthy and delicious treat!
Ratatouille With Whole Grain Bread
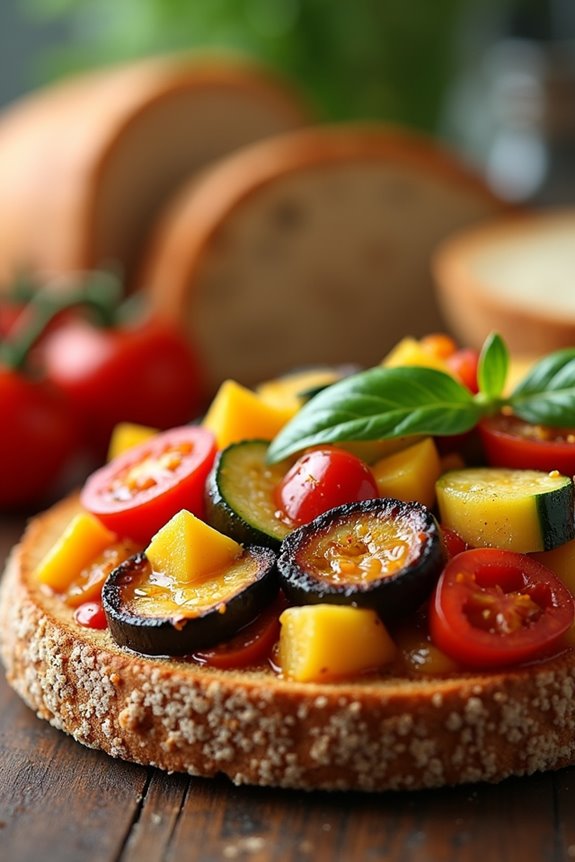
Ratatouille is a classic French dish that celebrates the vibrant flavors of summer vegetables. Originating from the Provence region, this dish isn’t only a feast for the eyes but also a wholesome, healthy option packed with nutrients. It typically includes a medley of fresh vegetables such as eggplant, zucchini, bell peppers, and tomatoes, all simmered together with aromatic herbs and olive oil.
When paired with whole grain bread, ratatouille transforms into a satisfying meal that’s both hearty and nutritious, making it perfect for family dinners or casual gatherings.
Making ratatouille is a straightforward process that allows for creativity and flexibility. You can adjust the vegetables according to what you have on hand or prefer, while the whole grain bread adds a lovely texture and fiber to the dish. This recipe serves 4-6 people and can be enjoyed warm or at room temperature, making it a versatile addition to any meal. Pair it with a fresh salad and a glass of wine for a delightful dining experience.
Ingredients
- 1 medium eggplant, diced
- 2 medium zucchini, sliced
- 1 large bell pepper (red or yellow), chopped
- 1 large onion, chopped
- 3 cloves garlic, minced
- 4 ripe tomatoes, diced
- 1/4 cup olive oil
- 1 teaspoon dried thyme
- 1 teaspoon dried basil
- Salt and pepper to taste
- 1 loaf of whole grain bread
Cooking Instructions
- Prepare the Vegetables: Start by washing and chopping all the vegetables. Dice the eggplant into cubes, slice the zucchini, chop the bell pepper and onion, and dice the tomatoes. Mince the garlic. Prepare your vegetables ahead of time to streamline the cooking process.
- Sauté the Vegetables: In a large skillet or pot, heat the olive oil over medium heat. Add the chopped onion and minced garlic, and sauté for about 3-4 minutes, or until the onion becomes translucent and fragrant. This step builds the flavor base for your ratatouille.
- Add Eggplant and Bell Pepper: Next, add the diced eggplant and chopped bell pepper to the skillet. Stir well and cook for about 5-7 minutes, allowing the vegetables to soften. The eggplant will absorb the oil, giving a rich flavor to the dish.
- Incorporate Zucchini and Tomatoes: Stir in the sliced zucchini and diced tomatoes. Sprinkle in the dried thyme and basil, along with salt and pepper to taste. Mix everything together and let it cook for another 10-15 minutes, stirring occasionally. The vegetables should be tender and the flavors melded together.
- Adjust Seasoning and Simmer: Taste the ratatouille and adjust seasoning as needed. If you prefer a thicker consistency, let it simmer uncovered for an additional 5-10 minutes. This step allows excess moisture to evaporate and intensifies the flavors.
- Prepare the Bread: While the ratatouille is simmering, slice the whole grain bread. You can toast it lightly if desired, which adds a nice crunch and enhances the overall texture of the dish.
- Serve and Enjoy: Once the ratatouille is ready, serve it warm in bowls, accompanied by slices of whole grain bread. Garnish with fresh herbs if desired.
Extra Tips
For an added depth of flavor, consider roasting the vegetables before adding them to the ratatouille. Toss them with olive oil and seasonings, then roast in the oven until caramelized.
Additionally, you can enhance the dish with a splash of balsamic vinegar or a sprinkle of feta cheese before serving. This dish keeps well in the refrigerator for a couple of days, making it perfect for meal prep or leftovers. Enjoy experimenting with different vegetables based on the season and your personal preferences!
Spanish Gazpacho Soup

Spanish Gazpacho Soup is a revitalizing cold soup that hails from the Andalusian region of Spain. It’s made primarily from ripe tomatoes, peppers, cucumbers, garlic, and bread, blended together with olive oil and vinegar to create a smooth, flavorful dish. This vibrant soup is especially popular in the summer months, as it isn’t only delicious but also incredibly nourishing and hydrating. The combination of fresh vegetables makes it a perfect appetizer or light meal, packed with vitamins and antioxidants.
This chilled soup can be customized according to personal preferences by adjusting the ingredients or adding garnishes. Traditional garnishes often include diced vegetables, croutons, or a drizzle of extra virgin olive oil. Gazpacho isn’t only easy to prepare, but it can also be made in advance, allowing the flavors to meld beautifully. With its bright colors and invigorating taste, Spanish Gazpacho Soup is sure to impress your family and friends.
Ingredients (Serving Size: 4-6 people):
- 6 ripe tomatoes, chopped
- 1 cucumber, peeled and chopped
- 1 bell pepper (red or green), chopped
- 1 small red onion, chopped
- 2 cloves of garlic, minced
- 3 cups of vegetable broth
- 1/4 cup of extra virgin olive oil
- 2 tablespoons of red wine vinegar
- 1-2 slices of stale bread (preferably rustic)
- Salt and pepper to taste
- Fresh basil or parsley for garnish (optional)
Cooking Instructions:
- Prepare the Vegetables: Begin by washing and chopping all the vegetables: tomatoes, cucumber, bell pepper, and red onion. Mince the garlic cloves. This step is essential as it guarantees that all ingredients are ready for blending and will contribute to the overall flavor of the soup.
- Soak the Bread: If using stale bread, tear it into pieces and soak it in a small bowl with a little water for about 5 minutes. This will soften the bread, making it easier to blend into the soup, while adding texture.
- Blend the Ingredients: In a large blender or food processor, combine the chopped tomatoes, cucumber, bell pepper, red onion, minced garlic, soaked bread, vegetable broth, olive oil, and red wine vinegar. Blend these ingredients until smooth. Depending on your desired consistency, you can blend for a shorter or longer time.
- Season the Soup: After blending, taste the gazpacho and season with salt and pepper to your preference. If you like a bit of acidity, you can add more vinegar at this stage. Blend again briefly to incorporate the seasoning.
- Chill the Soup: Transfer the gazpacho to a large bowl or pitcher and refrigerate for at least 1-2 hours before serving. This chilling time allows the flavors to meld together and results in a more revitalizing soup.
- Serve the Gazpacho: Once chilled, stir the soup again and pour it into individual bowls. Garnish with fresh basil or parsley and additional diced vegetables if desired. Serve immediately and enjoy!
Extra Tips:
When making Spanish Gazpacho Soup, using the ripest and freshest vegetables will considerably enhance the flavor of the dish. Feel free to experiment with different herbs or spices to tailor the taste to your liking.
Additionally, you can prepare the soup a day ahead of time, as the flavors improve after sitting in the refrigerator overnight. For a creamier texture, you might consider adding a splash of tomato juice or a dollop of Greek yogurt when serving. Enjoy this vibrant dish as a delightful start to any meal or as a light lunch on a warm day!
Italian Zucchini Noodles With Pesto
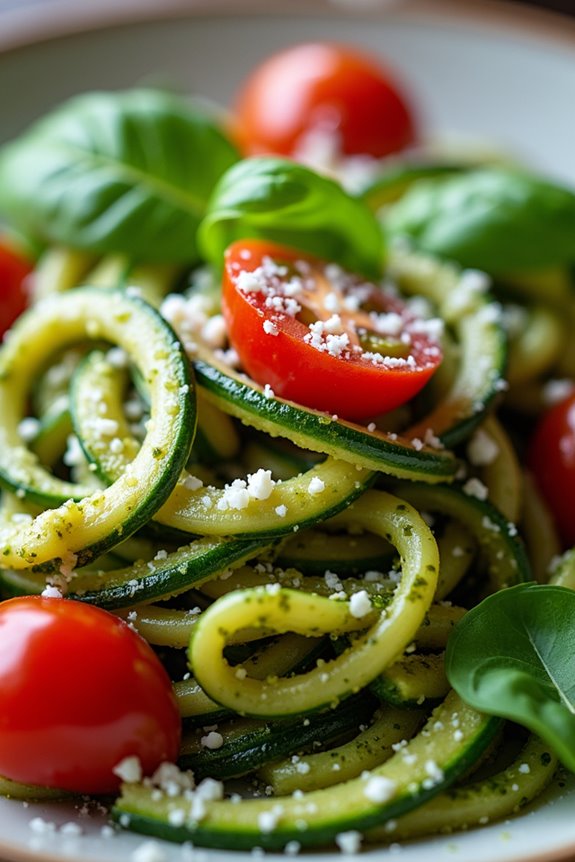
Italian Zucchini Noodles with Pesto is a delicious, healthy twist on traditional pasta dishes. This recipe marries the vibrant flavors of fresh basil pesto with the lightness of zucchini noodles, making it a perfect choice for those looking to enjoy a flavorful meal without the heaviness of traditional pasta.
Zucchini noodles, or “zoodles,” aren’t only low in calories but also rich in vitamins and minerals, making them an excellent alternative for anyone seeking a nutritious option.
This dish is quick and easy to prepare, taking advantage of the natural freshness of the ingredients. With simple preparation techniques, you can create a meal that’s both satisfying and nourishing.
Whether you’re looking for a quick weeknight dinner or a dish to impress your guests, Italian Zucchini Noodles with Pesto is sure to be a hit on your table.
Ingredients (Serves 4-6):
- 4 medium zucchinis
- 2 cups fresh basil leaves
- 1/2 cup grated Parmesan cheese
- 1/3 cup pine nuts
- 2 cloves garlic, minced
- 1/2 cup extra virgin olive oil
- Salt and pepper to taste
- Cherry tomatoes, halved (optional, for garnish)
- Fresh basil leaves (for garnish)
Cooking Instructions:
1. Prepare the Zucchini Noodles: Use a spiralizer or a vegetable peeler to create noodles from the zucchinis. If using a peeler, slice the zucchinis into thin strips.
Place the zoodles in a colander, sprinkle with salt, and let them sit for about 15 minutes to draw out excess moisture. This will help prevent a watery dish.
2. Make the Pesto: In a food processor, combine the fresh basil leaves, grated Parmesan cheese, pine nuts, minced garlic, and a pinch of salt and pepper.
Pulse the mixture until it’s finely chopped. With the processor running, slowly drizzle in the olive oil until the pesto reaches a smooth, creamy consistency. Adjust the seasoning as necessary.
3. Cook the Zucchini Noodles: In a large skillet, heat a splash of olive oil over medium heat. Once hot, add the zucchini noodles and sauté for about 2-3 minutes, tossing occasionally.
The goal is to soften the zoodles while keeping them al dente; avoid overcooking, as they can become mushy.
4. Combine the Ingredients: Remove the skillet from heat and add the prepared pesto to the cooked zucchini noodles.
Toss the zoodles gently until they’re evenly coated with the pesto. If the mixture seems too dry, you can add a bit more olive oil or a splash of pasta water.
5. Serve: Transfer the zucchini noodles to serving plates, garnish with halved cherry tomatoes and additional fresh basil leaves, and sprinkle with extra Parmesan cheese if desired.
Serve immediately while warm.
Extra Tips:
For an added flavor boost, consider toasting the pine nuts before adding them to the pesto for a nuttier taste.
You can also customize your dish by adding grilled chicken or shrimp for additional protein. If you’re looking for a little heat, a pinch of red pepper flakes can elevate the dish.
Enjoy the freshness of the ingredients by using high-quality olive oil and freshly grated Parmesan cheese for the best results.
Hungarian Stuffed Peppers
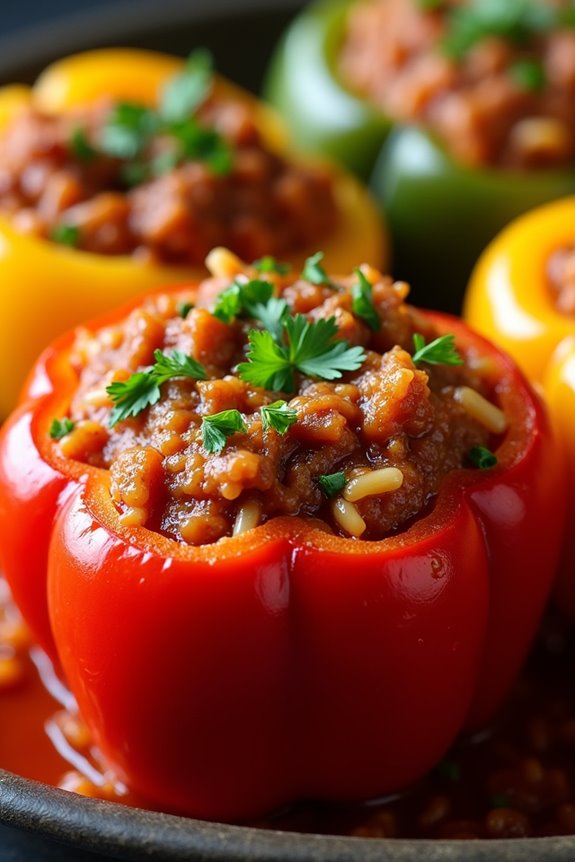
Hungarian Stuffed Peppers, or “Töltött Paprika,” is a beloved classic in Hungarian cuisine that showcases the flavors of the region. This dish features vibrant bell peppers filled with a savory mixture of ground meat, rice, and aromatic spices, all simmered in a flavorful tomato sauce. It’s not only delicious but also a great way to incorporate vegetables into your meal while enjoying the comfort of home-cooked food.
This dish is perfect for family gatherings or meal prep, as it can be easily scaled to serve a larger group. The combination of spices and fresh ingredients brings warmth and richness to the table, making it a wonderful option for any occasion. Serve the stuffed peppers with a dollop of sour cream and some crusty bread for a complete meal that will transport you to the heart of Hungary.
Ingredients (Serves 4-6)
- 4-6 large bell peppers (red, green, or yellow)
- 1 pound ground beef or turkey
- 1 cup cooked rice (white or brown)
- 1 medium onion, finely chopped
- 2 cloves garlic, minced
- 1 can (14 ounces) diced tomatoes
- 2 tablespoons tomato paste
- 1 teaspoon paprika
- 1 teaspoon dried oregano
- 1 teaspoon salt
- ½ teaspoon black pepper
- ½ teaspoon cayenne pepper (optional, for heat)
- 2 cups vegetable or chicken broth
- Fresh parsley, chopped (for garnish)
Cooking Instructions
- Prepare the Peppers: Begin by washing the bell peppers and cutting off the tops. Remove the seeds and membranes inside to create hollow shells. Set aside.
- Make the Filling: In a large mixing bowl, combine the ground meat, cooked rice, chopped onion, minced garlic, diced tomatoes (with their juice), tomato paste, paprika, oregano, salt, black pepper, and cayenne pepper. Mix everything together until well combined, making certain that the spices are evenly distributed throughout the filling.
- Stuff the Peppers: Carefully spoon the meat and rice filling into each hollowed bell pepper, packing it down gently to confirm they’re filled completely. Leave a small space at the top of each pepper to allow for expansion during cooking.
- Prepare the Sauce: In a large pot, pour in the vegetable or chicken broth. Place the stuffed peppers upright in the pot. You may need to arrange them closely together to keep them standing.
- Cook the Peppers: Bring the broth to a gentle boil over medium heat. Once boiling, reduce the heat to low, cover the pot, and let the peppers simmer for about 30-40 minutes, or until they’re tender and the filling is cooked through. You may want to occasionally check to confirm there’s enough liquid in the pot.
- Serve: Once cooked, carefully remove the stuffed peppers from the pot using tongs. Place them on a serving platter and spoon some of the broth over them. Garnish with fresh parsley before serving.
Extra Tips
When preparing Hungarian Stuffed Peppers, feel free to customize the filling to suit your taste preferences. You can use different types of ground meat, such as pork or chicken, and even add in vegetables like grated carrots or zucchini for extra nutrition.
If you enjoy a bit of sweetness, consider adding a teaspoon of sugar to the tomato sauce. For a vegetarian version, substitute the meat with lentils or a mixture of beans and vegetables. Enjoy your cooking adventure!
Swiss Chard and Feta Tarts

Swiss Chard and Feta Tarts are a delicious and nutritious option that showcases the vibrant flavors of fresh greens combined with the tangy richness of feta cheese. These tarts are perfect for a light lunch or as an appetizer for your next gathering.
The flaky pastry pairs beautifully with the savory filling, making it a delightful dish that’s both elegant and easy to prepare. By using Swiss chard, you not only add a pop of color but also boost the nutritional value, providing essential vitamins and minerals.
Making these tarts is a straightforward process that allows you to enjoy a taste of European cuisine right in your kitchen. The combination of Swiss chard, feta, and aromatic herbs creates a harmonious blend of flavors that will impress your family and friends.
Whether served warm or at room temperature, these tarts are sure to be a hit, bringing a touch of Mediterranean flair to your table.
Ingredients (Serves 4-6)
- 1 sheet of puff pastry (thawed if frozen)
- 1 bunch of Swiss chard (about 1 pound), stems removed and leaves chopped
- 1 cup of crumbled feta cheese
- 1 small onion, finely chopped
- 2 cloves of garlic, minced
- 2 large eggs
- 1/2 cup of heavy cream
- 1/4 cup of grated Parmesan cheese
- 2 tablespoons of olive oil
- Salt and pepper to taste
- Fresh herbs (such as dill or parsley) for garnish (optional)
Cooking Instructions
1. Preheat the Oven: Start by preheating your oven to 400°F (200°C). This guarantees that your tarts will bake evenly and come out perfectly golden brown.
2. Prepare the Puff Pastry: Roll out the puff pastry on a lightly floured surface until it’s about 1/8 inch thick. Carefully transfer the rolled pastry to a tart pan or a baking sheet lined with parchment paper, pressing it gently into the corners and trimming any excess.
3. Sauté the Onion and Garlic: In a skillet, heat the olive oil over medium heat. Add the chopped onion and sauté for about 5 minutes until it becomes translucent.
Then, add the minced garlic and cook for an additional minute, stirring frequently to prevent burning.
4. Cook the Swiss Chard: Add the chopped Swiss chard to the skillet with the sautéed onion and garlic. Cook for approximately 5-7 minutes until the chard is wilted and tender.
Season with salt and pepper, then remove from heat and let it cool slightly.
5. Prepare the Filling: In a mixing bowl, combine the crumbled feta cheese, eggs, heavy cream, and grated Parmesan cheese. Mix well until all ingredients are fully incorporated.
Once the Swiss chard mixture has cooled, fold it into the cheese and egg mixture.
6. Fill the Tart: Pour the Swiss chard and feta filling into the prepared pastry shell, spreading it evenly.
7. Bake the Tart: Place the tart in the preheated oven and bake for 25-30 minutes, or until the pastry is golden brown and the filling is set.
8. Cool and Serve: Once baked, remove the tart from the oven and let it cool for a few minutes. Slice it into wedges and serve warm or at room temperature.
Garnish with fresh herbs if desired.
Extra Tips
For an added flavor boost, consider mixing in some fresh herbs like dill, basil, or thyme into the filling.
You can also experiment with other cheeses, such as goat cheese or ricotta, for a different taste. If you prefer a lighter version, you can substitute the heavy cream with Greek yogurt or a plant-based alternative.
Additionally, feel free to customize the filling by adding other vegetables, such as roasted red peppers or caramelized onions, to create your perfect Swiss Chard and Feta Tart.
Danish Open-Faced Sandwiches

Danish Open-Faced Sandwiches, known as “smørrebrød,” are a quintessential part of Danish cuisine, celebrated for their vibrant presentation and variety of flavors. These sandwiches typically consist of a slice of dense rye bread topped with a myriad of ingredients, ranging from pickled herring and cured meats to fresh vegetables and creamy spreads.
The beauty of smørrebrød lies in its versatility; you can easily customize the toppings to suit your taste or dietary preferences. This dish not only makes for a delicious meal but also offers a feast for the eyes, making it perfect for gatherings or casual lunches.
To prepare these open-faced sandwiches, you’ll start with a robust foundation of rye bread, which provides a nutty flavor and hearty texture. The toppings can be as simple or elaborate as you desire, allowing for a delightful mix of flavors and textures. This recipe serves 4-6 people, making it an ideal option for sharing with friends or family.
Whether you opt for traditional toppings or get creative with your own combinations, Danish Open-Faced Sandwiches are sure to impress.
Ingredients (serving size: 4-6 people)
- 8 slices of rye bread
- 200g pickled herring
- 200g smoked salmon
- 150g thinly sliced roast beef
- 1 cup remoulade sauce
- 1 cup cream cheese
- 1 small red onion, thinly sliced
- 1 cup cucumber, thinly sliced
- 1 bunch fresh dill
- 1 lemon, cut into wedges
- Salt and pepper to taste
Cooking Instructions
- Prepare the Bread: Begin by laying out the slices of rye bread on a large serving platter. If desired, you can lightly toast the bread for added texture. Toasting will also enhance the nutty flavor of the rye.
- Spread the Base: Take the cream cheese and spread a generous layer over each slice of rye bread. This not only adds flavor but also acts as a barrier to prevent the bread from becoming soggy from the toppings.
- Add the Toppings: Start with the pickled herring. Place a few pieces on each slice of bread. Follow with the smoked salmon and then the thinly sliced roast beef. You can create a variety of combinations on different slices to cater to various tastes.
- Garnish: Top each sandwich with a few slices of cucumber and some red onion. These fresh vegetables add crunch and a pop of color to your open-faced sandwiches.
- Finish with Sauce and Herbs: Drizzle remoulade sauce over the top of each sandwich. Alternatively, you can serve it on the side as a dip. Finish with a sprinkle of fresh dill and a pinch of salt and pepper.
- Serve: Arrange the sandwiches on a platter and garnish with lemon wedges. Serve immediately for the best flavor and presentation.
Extra Tips
When preparing Danish Open-Faced Sandwiches, feel free to experiment with different toppings based on your preferences. Consider adding ingredients like avocado, radishes, or even boiled eggs for additional flavor and nutrition.
You can also mix and match sauces, like using mustard or horseradish, to complement the toppings. If you have leftover ingredients, these sandwiches make for a quick and satisfying meal the next day.
Enjoy the process of creating these visually appealing and delicious open-faced sandwiches!
Bulgarian Shopska Salad
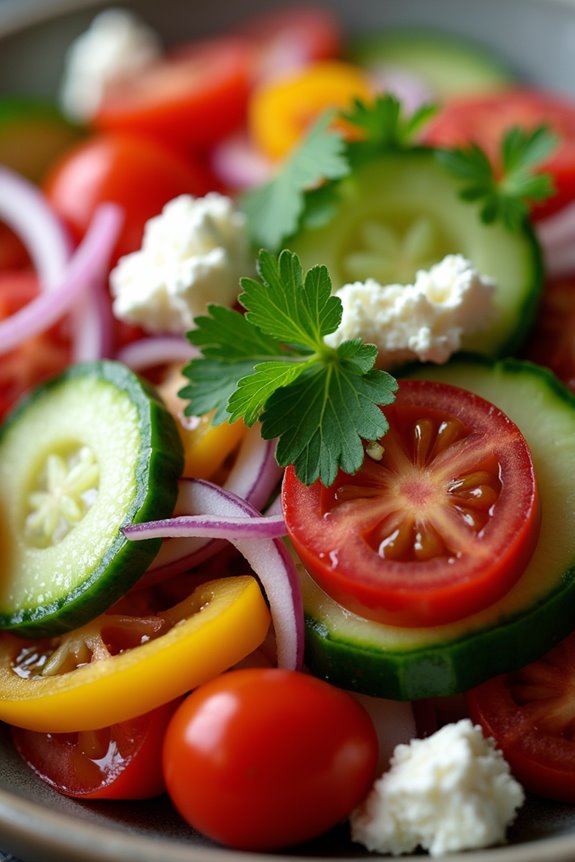
Bulgarian Shopska Salad is a revitalizing and vibrant dish that beautifully showcases the flavors of fresh vegetables, making it a staple in Bulgarian cuisine. This salad is particularly popular during the summer months, as it combines ripe tomatoes, crunchy cucumbers, and bell peppers, all topped with crumbled feta cheese for a delightful taste.
Not only is it visually appealing with its colorful ingredients, but it’s also packed with nutrients, making it a perfect choice for health-conscious eaters or anyone looking to enjoy a light meal.
Preparing Shopska Salad is quick and easy, allowing you to whip up this dish in no time. It’s often enjoyed as an appetizer or a side dish, and its simplicity makes it a versatile option for any occasion. Whether you’re hosting a summer barbecue or just looking for a revitalizing snack, Bulgarian Shopska Salad is sure to please everyone at the table.
Ingredients (serving size: 4-6 people)
- 4 large ripe tomatoes
- 2 medium cucumbers
- 1 large bell pepper (red or green)
- 1 small red onion
- 200g feta cheese
- 4 tablespoons olive oil
- 2 tablespoons white vinegar
- Salt to taste
- Fresh parsley for garnish (optional)
Cooking Instructions
- Prepare the vegetables: Start by washing all the vegetables thoroughly under cold water. Chop the tomatoes into bite-sized pieces, discarding the stem and any tough cores. Peel the cucumbers (if desired) and cut them into small cubes. Remove the seeds from the bell pepper, and chop it into small pieces. Finally, finely slice the red onion.
- Combine the ingredients: In a large mixing bowl, add the chopped tomatoes, cucumbers, bell pepper, and red onion. Gently toss the vegetables together to combine them evenly, ensuring that the colors are well mixed.
- Make the dressing: In a small bowl, whisk together the olive oil and white vinegar. Add salt to taste, mixing well to create a simple vinaigrette.
- Add the feta cheese: Crumble the feta cheese over the mixed vegetables in the large bowl. Be careful not to mash the cheese; you want it to remain in small chunks.
- Dress the salad: Pour the dressing over the salad. Gently toss everything together until the salad is evenly coated with the dressing. Adjust seasoning if needed.
- Garnish and serve: Transfer the salad to a serving platter or bowl. If desired, chop some fresh parsley and sprinkle it on top for a pop of color and added flavor. Serve immediately or allow to chill in the refrigerator for 30 minutes to enhance the flavors.
Extra Tips
When making Bulgarian Shopska Salad, using the freshest ingredients will yield the best results, so visit your local farmer’s market if possible.
Additionally, feel free to customize the salad by adding other vegetables like radishes or olives, or even incorporating some fresh herbs like basil or dill for a unique twist.
This salad is best served fresh, but it can also be stored in the refrigerator for a day if you have leftovers—just keep in mind that the vegetables may release some moisture over time. Enjoy your healthy and delicious Shopska Salad!