

When Sundays roll around, the comforting smell of a roast fills the air, creating a cozy atmosphere that brings everyone together. A perfectly cooked roast, be it juicy beef or tender lamb, makes the day feel truly special. Add in crispy potatoes and fresh seasonal veggies, and you have a meal that’s simply delightful. What if I told you there are 15 mouthwatering variations on these classic recipes that can make your Sunday even more amazing? Get ready to explore some fresh ideas that will surely elevate your next Sunday roast.
Classic Roast Beef With Yorkshire Puddings
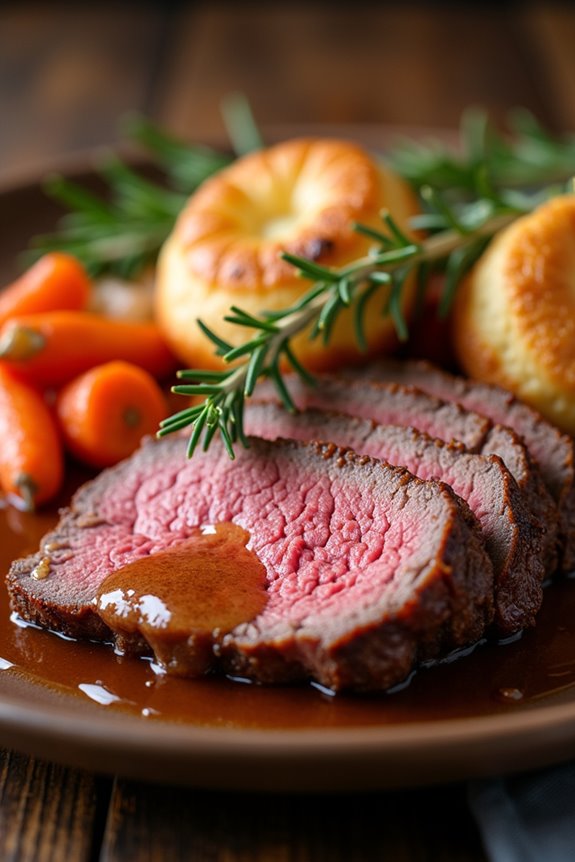
A classic British Sunday roast isn’t complete without the beloved duo of roast beef and Yorkshire puddings. This dish embodies the warmth and comfort of a traditional family gathering, making it a staple on many dining tables across England. Roast beef, cooked to juicy perfection, pairs beautifully with the light and airy Yorkshire puddings that soak up the rich gravy.
When prepared right, this meal can become a cherished family tradition, bringing everyone together to enjoy hearty flavors and wholesome ingredients.
To achieve that perfect roast beef, it’s imperative to choose the right cut of meat, typically a rib of beef or a sirloin. The key is to let the meat rest after cooking, allowing the juices to redistribute and guaranteeing a tender slice every time. Yorkshire puddings, on the other hand, are made from a simple batter that puffs up in the oven, creating a delightful contrast to the savory beef.
This recipe will guide you through every step to make a delicious roast beef with Yorkshire puddings, serving 4-6 people.
Ingredients:
- 1.5 kg (3.3 lbs) beef joint (rib or sirloin)
- 2 tablespoons olive oil
- Salt and freshly ground black pepper
- 1 onion, quartered
- 4-5 carrots, peeled and cut into chunks
- 500 ml (2 cups) beef stock
- 4 large eggs
- 200 g (1 ½ cups) plain flour
- 200 ml (¾ cup) milk
- Fresh herbs (like thyme or rosemary) for garnish
Cooking Instructions:
- Preheat the Oven: Begin by preheating your oven to 220°C (428°F). A hot oven is essential for achieving a beautifully browned exterior on the roast beef.
- Prepare the Beef: Season your beef joint generously with salt and black pepper. Rub the olive oil over the meat to help with browning. Place the beef in a roasting tin, surrounded by the quartered onion and carrot chunks. This will add flavor and moisture to the dish.
- Roast the Beef: Place the roasting tin in the preheated oven. Roast for approximately 20 minutes to develop a nice crust on the outside. After this time, reduce the oven temperature to 180°C (356°F) and continue roasting for an additional 60-90 minutes, depending on your desired doneness (for medium-rare, aim for an internal temperature of 55°C or 130°F).
- Make the Yorkshire Pudding Batter: While the beef is roasting, prepare the Yorkshire pudding batter. In a mixing bowl, combine the flour and a pinch of salt. In another bowl, whisk together the eggs and milk until well blended. Gradually add the egg mixture to the flour, whisking until smooth. Allow the batter to rest for at least 30 minutes.
- Cook the Yorkshire Puddings: Once the beef is nearly done, increase the oven temperature back to 220°C (428°F). Carefully pour a bit of beef dripping or oil into a 12-cup muffin tin, filling each cup about 1/3 full. Place the tin in the oven for about 5-10 minutes until the oil is hot. Quickly pour the rested batter into the hot oil, filling each cup about halfway. Bake for 20-25 minutes until the Yorkshire puddings are puffed up and golden brown.
- Rest the Beef: Once the beef is cooked to your liking, remove it from the oven and transfer it to a cutting board. Tent it loosely with foil and let it rest for at least 15-20 minutes. This resting period is crucial for juicy slices.
- Serve: Slice the roast beef and serve it alongside the Yorkshire puddings, with the roasted vegetables and a generous ladle of beef gravy (made from the pan drippings mixed with beef stock) poured over the top. Garnish with fresh herbs if desired.
Extra Tips:
To enhance the flavor of your roast beef, consider adding garlic cloves and fresh herbs such as thyme or rosemary to the roasting tin.
Additionally, for the Yorkshire puddings to rise beautifully, make sure that your oil is smoking hot before adding the batter, and avoid opening the oven door while they bake to maintain the heat.
Finally, serve your roast beef with a rich gravy, which can be made from the pan drippings mixed with a little flour and beef stock for an extra depth of flavor. Enjoy your traditional British Sunday roast!
Perfectly Roasted Lamb Leg With Mint Sauce
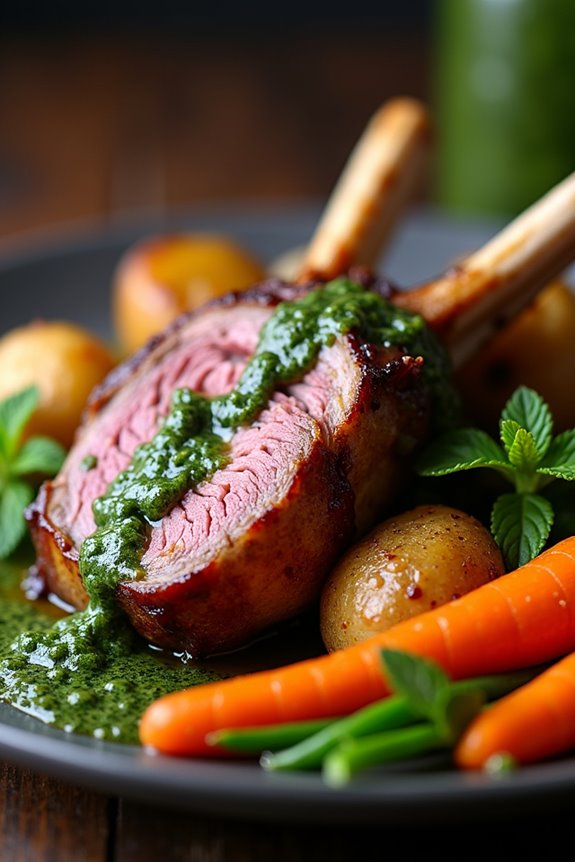
A classic British Sunday roast is incomplete without the succulent flavors of a perfectly roasted lamb leg. This delightful dish pairs wonderfully with crispy roast potatoes, seasonal vegetables, and the invigorating zing of mint sauce. The combination of tender lamb and the bright, herbal notes of mint creates an unforgettable dining experience that embodies the essence of a comforting family meal.
To achieve the perfect roast, it’s crucial to choose the right cut of lamb and allow it to marinate for a few hours, letting the flavors develop. Cooking the lamb low and slow guarantees a juicy interior while achieving that beautifully browned exterior. With simple ingredients and straightforward techniques, you can enjoy a sumptuous roast lamb that’s sure to impress your loved ones.
Ingredients (Serves 4-6):
- 1 leg of lamb (about 1.5-2 kg)
- 4 cloves of garlic, sliced
- 2 tablespoons olive oil
- 2 tablespoons fresh rosemary, chopped
- 2 tablespoons fresh thyme, chopped
- Salt and pepper to taste
- 250 ml red wine (optional)
- 250 ml lamb stock (or beef stock)
- 1 cup fresh mint leaves
- 2 tablespoons sugar
- 2 tablespoons white wine vinegar
Cooking Instructions:
- Preparation of the Lamb: Preheat your oven to 220°C (428°F). Pat the leg of lamb dry with paper towels. Use a sharp knife to make small incisions in the meat and insert the garlic slices into these slits. This will infuse the lamb with rich flavor as it cooks.
- Marinade: In a small bowl, mix the olive oil, chopped rosemary, chopped thyme, salt, and pepper. Rub this mixture all over the lamb, making sure it’s evenly coated. Allow the lamb to marinate for at least 30 minutes at room temperature or for several hours in the fridge for deeper flavor.
- Searing the Lamb: Once marinated, place the lamb in a roasting pan and sear it in the preheated oven for 20 minutes. This high temperature will help develop a beautiful crust on the outside of the meat.
- Roasting: After the initial sear, reduce the oven temperature to 180°C (356°F). Pour the red wine (if using) and lamb stock around the lamb in the roasting pan. Roast for an additional 1 to 1.5 hours, basting occasionally with the pan juices. Use a meat thermometer to check for doneness; aim for 60°C (140°F) for medium-rare.
- Resting: Once cooked to your liking, remove the lamb from the oven and cover it loosely with aluminum foil. Let it rest for about 15-20 minutes before carving. This resting period allows the juices to redistribute throughout the meat, guaranteeing a tender roast.
- Making the Mint Sauce: While the lamb is resting, prepare the mint sauce by finely chopping the fresh mint leaves. In a small bowl, mix the chopped mint with sugar and white wine vinegar, stirring until the sugar dissolves. This should create a fresh, sweet, and tangy sauce to complement the lamb.
- Serving: Slice the lamb leg against the grain and serve it with the mint sauce drizzled over the top. Pair with your choice of sides, such as roast potatoes and seasonal vegetables.
Extra Tips:
For an enhanced flavor profile, consider adding a splash of lemon juice to your mint sauce for an invigorating twist. Additionally, if you have leftover lamb, it makes for a delicious sandwich or can be used in curries and stews.
Always verify your lamb is at room temperature before cooking for the best results, as this promotes even cooking. Enjoy your hearty British Sunday roast!
Herb-Crusted Pork Loin With Apple Sauce

A Sunday roast is a beloved British tradition that brings family and friends together to enjoy hearty meals and warm conversations. One of the standout dishes for such an occasion is Herb-Crusted Pork Loin With Apple Sauce. The combination of a perfectly roasted pork loin, enhanced with a flavorful herb crust, and the sweet tang of homemade apple sauce creates a delightful balance that’s certain to impress your guests. This dish not only highlights the classic elements of a traditional roast but also adds a modern twist with its aromatic herbs and fresh ingredients.
Cooking a Herb-Crusted Pork Loin is relatively straightforward, making it a manageable yet impressive centerpiece for your Sunday feast. The key to a perfect roast lies in the quality of the pork and the freshness of the herbs. As the pork cooks, the aroma of the herbs fills your kitchen, inviting everyone to gather around the table. Paired with seasonal vegetables and crispy roast potatoes, this dish encapsulates the essence of a warm, fulfilling British Sunday dinner.
Ingredients (Serves 4-6)
- 1.5 kg (3.3 lbs) pork loin, boneless
- 2 tablespoons olive oil
- 2 teaspoons salt
- 1 teaspoon black pepper
- 1 tablespoon Dijon mustard
- 2 garlic cloves, minced
- 1 tablespoon fresh rosemary, chopped
- 1 tablespoon fresh thyme, chopped
- 1 tablespoon fresh parsley, chopped
- 2 medium apples, cored and sliced (for the sauce)
- 1 tablespoon brown sugar (for the sauce)
- 1 teaspoon cinnamon (for the sauce)
- 100 ml water (for the sauce)
Cooking Instructions
- Preheat the Oven: Begin by preheating your oven to 200°C (400°F). This guarantees that your pork loin will roast evenly and develop a lovely golden crust.
- Prepare the Pork: Pat the pork loin dry with paper towels to remove excess moisture. This step is essential for achieving a crispy outer layer during roasting.
- Create the Herb Mixture: In a small bowl, combine the olive oil, salt, black pepper, Dijon mustard, minced garlic, rosemary, thyme, and parsley. Mix well to form a paste.
- Coat the Pork: Rub the herb mixture all over the pork loin, making sure to cover all sides evenly. This will infuse the meat with flavor and create a delicious crust as it roasts.
- Roast the Pork: Place the coated pork loin on a roasting tray and transfer it to the preheated oven. Roast for about 1 hour or until the internal temperature reaches 70°C (160°F). Baste the pork with its juices halfway through cooking for added moisture.
- Prepare the Apple Sauce: While the pork is roasting, combine the sliced apples, brown sugar, cinnamon, and water in a saucepan. Cook over medium heat, stirring occasionally, until the apples are soft and slightly caramelized, about 10-15 minutes. Mash the mixture lightly with a fork or potato masher for a chunky sauce.
- Rest the Pork: Once the pork reaches the desired temperature, remove it from the oven and let it rest for 10-15 minutes. This allows the juices to redistribute, resulting in a more tender and flavorful roast.
- Serve: Slice the pork loin and serve it with the apple sauce on the side. Accompany with your favorite roast vegetables and potatoes for a complete meal.
Extra Tips
When cooking Herb-Crusted Pork Loin, consider using a meat thermometer to verify perfect doneness. If you prefer a more intense flavor, marinate the pork in the herb mixture overnight in the refrigerator.
Additionally, feel free to experiment with different herbs or spices based on your taste preferences. A splash of cider vinegar or a hint of chili flakes can add an exciting twist to the apple sauce. Enjoy your Sunday roast with good company and great conversation!
Traditional Roast Chicken With Stuffing
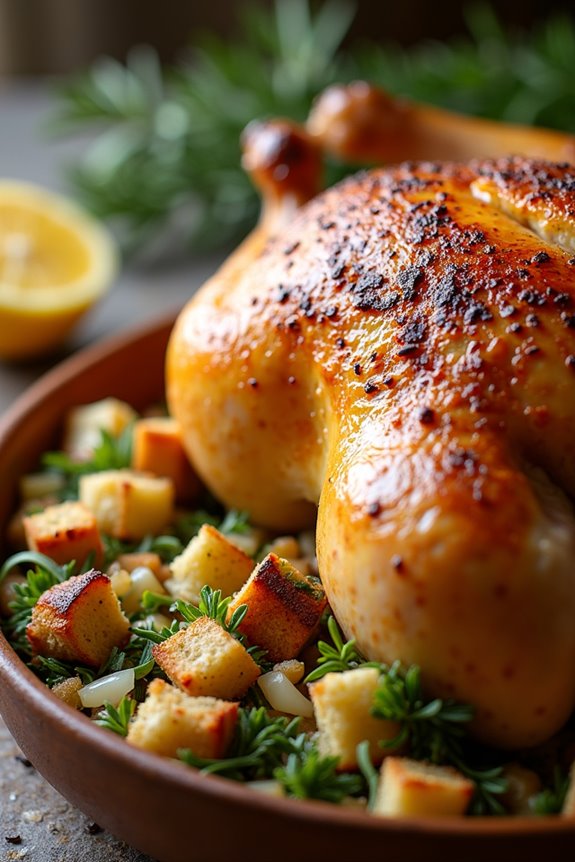
There’s nothing quite like a Traditional Roast Chicken With Stuffing to bring family and friends together for a hearty British Sunday roast. This classic dish features a succulent whole chicken that’s roasted to perfection, paired with a savory stuffing that takes the flavors to the next level. The combination of crispy skin, tender meat, and aromatic stuffing makes for a comforting meal that’s sure to satisfy.
To elevate your Sunday roast experience, this recipe includes a simple yet flavorful stuffing made with bread, herbs, and vegetables. The process of preparing and roasting the chicken may seem intimidating, but with a bit of patience and attention to detail, you can create a mouthwatering centerpiece for your dinner table.
Let’s explore the ingredients and cooking instructions to help you create this beloved dish for 4-6 people.
Ingredients:
- 1 whole chicken (about 4-5 lbs)
- 2 cups stale bread, torn into pieces
- 1 onion, finely chopped
- 2 celery stalks, finely chopped
- 2 cloves garlic, minced
- 1/4 cup unsalted butter, melted
- 1 teaspoon dried sage
- 1 teaspoon dried thyme
- Salt and pepper, to taste
- 1/2 cup chicken stock
- 1 lemon, halved
- Fresh herbs (like rosemary or parsley) for garnish
Cooking Instructions:
- Preheat the Oven: Begin by preheating your oven to 425°F (220°C). A hot oven will help create a crispy skin on the chicken.
- Prepare the Stuffing: In a large mixing bowl, combine the torn bread, chopped onion, celery, and minced garlic. Pour in the melted butter and chicken stock, and sprinkle in the dried sage, thyme, salt, and pepper. Mix until everything is well combined and the bread is soaked with the liquid. Set aside to allow the flavors to meld.
- Stuff the Chicken: Carefully loosen the skin of the chicken breast by gently pushing your fingers underneath it. This will help the flavors of the stuffing permeate the meat. Fill the cavity of the chicken with the prepared stuffing, packing it in gently but not too tightly. If there’s leftover stuffing, you can place it in a small baking dish to cook alongside the chicken.
- Season the Chicken: Rub the outside of the chicken with olive oil, and season generously with salt and pepper. Place the halved lemon inside the cavity along with some fresh herbs for added flavor.
- Roast the Chicken: Transfer the stuffed chicken to a roasting pan, breast side up. Roast in the preheated oven for about 1 hour and 15 minutes, or until the internal temperature reaches 165°F (75°C) and the juices run clear when pierced. If the skin starts to brown too quickly, cover the chicken loosely with aluminum foil.
- Let It Rest: Once the chicken is cooked, remove it from the oven and let it rest for about 15-20 minutes. This allows the juices to redistribute, making the meat more tender and juicy.
- Serve: Carve the chicken and serve it alongside the stuffing, garnished with fresh herbs. Enjoy with your favorite sides!
Extra Tips:
To enhance the flavor of your roast chicken, consider adding additional herbs or spices to the stuffing, such as dried rosemary or nutmeg.
For a richer taste, you can substitute some of the chicken stock with white wine. If you prefer a crispier skin, finish roasting the chicken under the broiler for a few minutes, keeping a close eye on it to avoid burning.
Finally, always verify your chicken is fully cooked by checking the internal temperature, as this is key to serving a safe and delicious meal.
Vegetarian Nut Roast With Cranberry Sauce
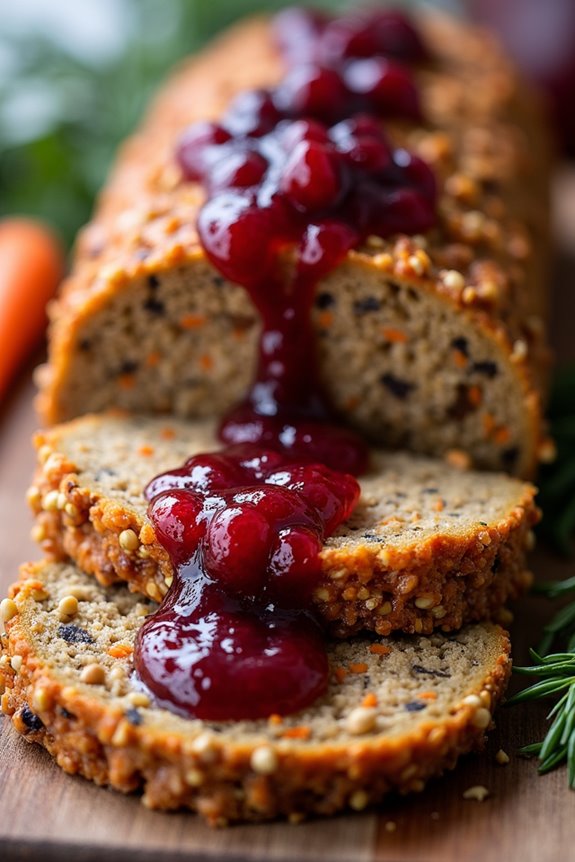
A Vegetarian Nut Roast is a delightful and hearty alternative to traditional meat roasts, making it a perfect centerpiece for a British Sunday dinner. This dish is packed with a variety of nuts, seeds, and vegetables, providing a rich and satisfying flavor that can easily impress both vegetarians and meat-eaters alike. Topped with a tangy cranberry sauce, it brings a festive touch to the table while guaranteeing a nutritious meal that celebrates the essence of British cuisine.
Preparing a nut roast isn’t only straightforward but also allows for creativity with the ingredients. You can experiment with different nuts and vegetables based on your personal taste or what you have available at home. This roast is best served with classic sides like roasted potatoes, seasonal vegetables, and a generous helping of gravy. With its deliciously crispy exterior and moist interior, this Vegetarian Nut Roast is sure to become a family favorite.
Ingredients (Serves 4-6)
- 200g mixed nuts (e.g. walnuts, hazelnuts, almonds)
- 100g breadcrumbs
- 1 medium onion, finely chopped
- 2 cloves garlic, minced
- 2 medium carrots, grated
- 2 celery sticks, finely chopped
- 100g mushrooms, finely chopped
- 2 tablespoons soy sauce
- 2 tablespoons tomato purée
- 1 teaspoon dried thyme
- 1 teaspoon dried rosemary
- 1 teaspoon ground black pepper
- 2 large eggs, beaten
- 50g sunflower seeds
- 50g pumpkin seeds
- Olive oil for frying
- Salt to taste
- For the cranberry sauce:
- 250g fresh or frozen cranberries
- 100g sugar
- 150ml water
- Zest of 1 orange
- Juice of 1 orange
Cooking Instructions
- Prepare the Ingredients: Start by preheating your oven to 180°C (350°F). Roughly chop the mixed nuts and set them aside. In a frying pan, heat a drizzle of olive oil over medium heat. Add the chopped onion and garlic, sautéing until they become translucent and fragrant.
- Cook the Vegetables: Add the grated carrots, chopped celery, and mushrooms to the frying pan. Continue to sauté for about 5-7 minutes, until the vegetables are softened and the mushrooms have released their moisture. Remove from heat and allow to cool slightly.
- Mix the Nut Roast Mixture: In a large mixing bowl, combine the sautéed vegetables with the chopped nuts, breadcrumbs, sunflower seeds, and pumpkin seeds. Stir in the soy sauce, tomato purée, dried thyme, dried rosemary, ground black pepper, and salt. Finally, add the beaten eggs to bind the mixture together, making sure everything is well incorporated.
- Shape the Nut Roast: Line a loaf tin with parchment paper for easy removal. Spoon the nut mixture into the tin, pressing it down firmly to make sure it holds its shape when cooked. Smooth the top with a spatula.
- Bake the Nut Roast: Place the loaf tin in the preheated oven and bake for 45-50 minutes, or until the top is golden brown and firm to the touch. Allow it to cool slightly before carefully removing it from the tin.
- Prepare the Cranberry Sauce: While the nut roast is baking, prepare the cranberry sauce. In a saucepan, combine the cranberries, sugar, water, orange zest, and orange juice. Bring to a boil, then reduce the heat and let it simmer for about 10-15 minutes, stirring occasionally until the cranberries burst and the sauce thickens. Remove from heat and let it cool.
- Serve: Slice the nut roast and serve it warm with a generous spoonful of cranberry sauce on top. Complement with your favorite side dishes for a complete Sunday roast experience.
Extra Tips
To enhance the flavor of your Vegetarian Nut Roast, consider adding a splash of Worcestershire sauce or a dash of smoked paprika for a subtle smokiness.
You can also customize the nuts used in the recipe based on your preference or dietary restrictions. If you’re looking for a gluten-free option, substitute the breadcrumbs with ground oats or gluten-free breadcrumbs.
Make sure to let the nut roast cool for a few minutes before slicing, as this will help it hold its shape better. Enjoy your delicious and wholesome nut roast!
Slow-Cooked Braised Beef With Root Vegetables
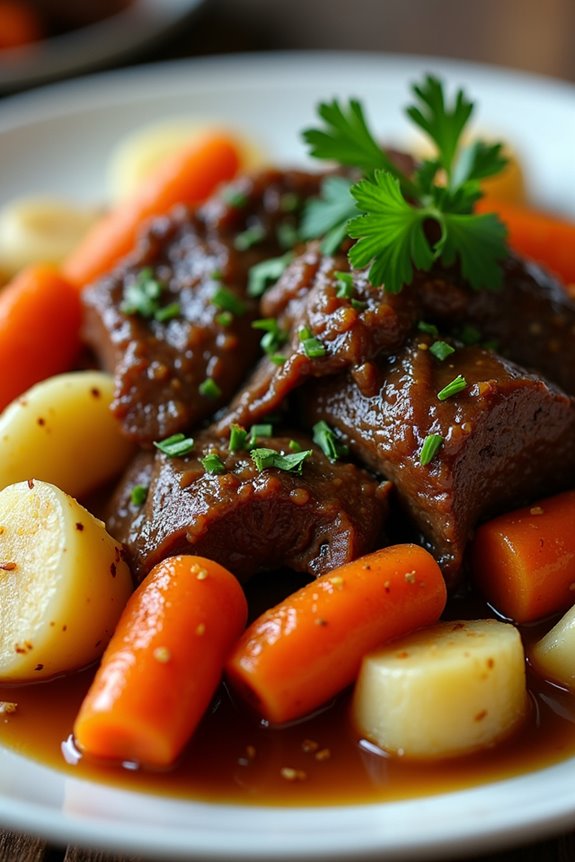
Slow-Cooked Braised Beef With Root Vegetables is a quintessential British dish that exemplifies comfort and warmth, perfect for a hearty Sunday roast. The combination of tender braised beef and a medley of root vegetables creates a delightful symphony of flavors and textures. This dish isn’t only nourishing but also an excellent way to bring family and friends together around the dinner table, where the rich aromas of slow-cooking fill the air and enhance the anticipation of a delicious meal.
The beauty of this recipe lies in its simplicity and the depth of flavor achieved through slow cooking. As the beef cooks low and slow, it becomes incredibly tender, while the root vegetables absorb the savory juices, creating a satisfying accompaniment. By using a variety of root vegetables, such as carrots, parsnips, and potatoes, you add both color and nutrition to the dish, making it a well-rounded meal that’s sure to please everyone.
Ingredients (serves 4-6):
- 2.5 pounds of braising beef (such as chuck or brisket)
- 2 tablespoons of vegetable oil
- 1 large onion, diced
- 2 cloves of garlic, minced
- 4 large carrots, peeled and cut into chunks
- 2 large parsnips, peeled and cut into chunks
- 3 medium potatoes, peeled and cut into chunks
- 2 cups of beef stock
- 1 cup of red wine (optional)
- 2 tablespoons of tomato paste
- 1 tablespoon of Worcestershire sauce
- 1 teaspoon of dried thyme
- 1 bay leaf
- Salt and pepper to taste
- Fresh parsley, chopped (for garnish)
Cooking Instructions:
- Prepare the Beef: Start by patting the braising beef dry with paper towels. This helps to achieve a nice sear. Season generously with salt and pepper on all sides.
- Sear the Beef: In a large, heavy-bottomed pot or Dutch oven, heat the vegetable oil over medium-high heat. Once hot, add the beef and sear it on all sides until browned, about 4-5 minutes per side. This step locks in flavor and creates a caramelized crust.
- Sauté the Aromatics: Remove the beef from the pot and set it aside. In the same pot, add the diced onion and sauté for about 3-4 minutes until softened. Add the minced garlic and cook for an additional minute, stirring frequently to avoid burning.
- Add Vegetables: Return the beef to the pot and add the carrots, parsnips, and potatoes. Stir to combine all the ingredients well.
- Create the Braising Liquid: Pour in the beef stock and red wine (if using), then stir in the tomato paste, Worcestershire sauce, dried thyme, and bay leaf. Confirm that the liquid covers the beef and vegetables about halfway.
- Slow Cook: Bring the mixture to a gentle simmer, then cover the pot with a lid. Reduce the heat to low and let it cook for 3-4 hours, or until the beef is fork-tender. Alternatively, you can transfer everything to a slow cooker and cook on low for 6-8 hours.
- Check for Seasoning: Once the beef is tender, taste the sauce and adjust the seasoning with more salt and pepper if needed. Remove the bay leaf before serving.
- Serve: Ladle the braised beef and vegetables onto plates, spooning the rich sauce over the top. Garnish with freshly chopped parsley for a pop of color.
Extra Tips:
For an even richer flavor, consider adding a few sprigs of fresh thyme or rosemary during the slow cooking process. Additionally, if you’re short on time, you can sear the beef and sauté the vegetables the night before, then refrigerate them separately. On the day of serving, simply combine everything in the pot and cook as directed.
This dish can also be made a day in advance; the flavors deepen as it sits, making leftovers a delightful treat!
Honey-Glazed Carrots and Parsnips
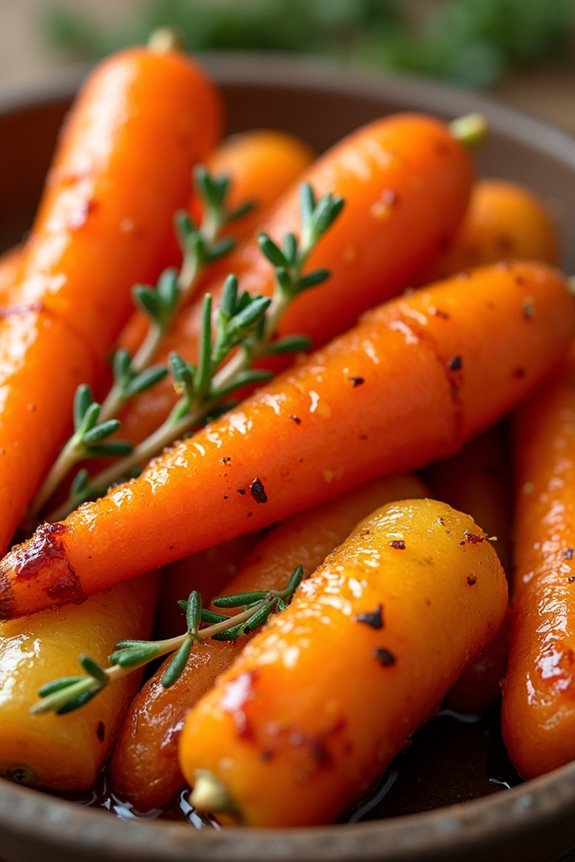
A Sunday roast is incomplete without the delightful addition of Honey-Glazed Carrots and Parsnips. This side dish brings a touch of sweetness and color to the table, perfectly complementing the savory flavors of the roast. The natural sweetness of the carrots and parsnips is enhanced by a glossy honey glaze, making them irresistible.
This dish not only adds a vibrant look to your meal but also provides a lovely contrast to the richness of meats typically served during Sunday dinner.
Preparing Honey-Glazed Carrots and Parsnips is quite simple and can be done in under an hour. With just a few ingredients and straightforward steps, you’ll have a delicious vegetable side dish that your family and guests will love. The combination of honey and butter gives the vegetables a beautiful caramelization, while the herbs add a fragrant touch.
Let’s get started on this scrumptious recipe that serves 4-6 people.
Ingredients:
- 500g carrots, peeled and cut into sticks
- 500g parsnips, peeled and cut into sticks
- 3 tablespoons honey
- 3 tablespoons unsalted butter
- 1 teaspoon fresh thyme leaves (or ½ teaspoon dried thyme)
- Salt and pepper to taste
- 1 tablespoon olive oil
Cooking Instructions:
- Prepare the Vegetables: Begin by peeling the carrots and parsnips. Cut them into uniform sticks, about 1/2 inch thick, to guarantee even cooking. This step is essential as it helps the vegetables cook through at the same rate and develop a nice caramelization.
- Preheat the Oven: Preheat your oven to 200°C (390°F). A hot oven is vital for roasting the vegetables and achieving that perfect golden-brown glaze.
- Toss in Olive Oil: In a large mixing bowl, combine the carrot and parsnip sticks with olive oil. Toss them together until all the pieces are evenly coated. This not only helps in roasting but also adds flavor.
- Roast the Vegetables: Spread the carrots and parsnips out in a single layer on a baking tray lined with parchment paper. This allows for even roasting. Place the tray in the preheated oven and roast for about 25 minutes, or until they’re tender and starting to brown.
- Prepare the Honey Glaze: While the vegetables are roasting, prepare the honey glaze. In a small saucepan, melt the butter over medium heat. Once melted, add the honey and thyme, stirring until combined. Let the mixture simmer for a minute until it thickens slightly.
- Glaze the Vegetables: After the vegetables have roasted for 25 minutes, remove them from the oven. Drizzle the honey glaze over the carrots and parsnips, tossing to coat them evenly. Return the tray to the oven for an additional 10-15 minutes, allowing the glaze to caramelize.
- Season and Serve: Once the vegetables are caramelized and tender, remove them from the oven. Season with salt and pepper to taste. Serve warm as a delightful side dish alongside your Sunday roast.
Extra Tips:
For an added depth of flavor, try incorporating a splash of balsamic vinegar into the honey glaze for a tangy twist. You can also experiment with different herbs, such as rosemary or sage, depending on your preference.
If you’re short on time, you can parboil the carrots and parsnips for a few minutes before roasting to speed up the cooking process. Enjoy your Honey-Glazed Carrots and Parsnips as a delightful addition to your hearty British Sunday roast!
Crispy Roast Potatoes With Garlic and Rosemary
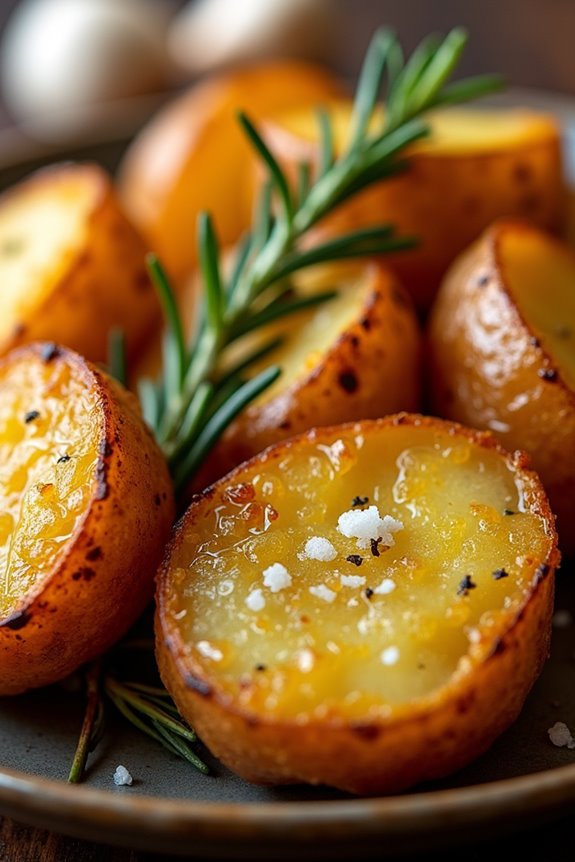
Crispy roast potatoes are a quintessential part of a British Sunday roast, perfectly complementing any meat dish. With their golden, crunchy exterior and fluffy interior, these potatoes are elevated by the fragrant infusion of fresh garlic and rosemary. The combination of these ingredients not only adds a delightful aroma but also enhances the overall flavor, making them a standout side on your Sunday dinner table.
Cooking crispy roast potatoes may seem straightforward, but there are some techniques to guarantee they turn out perfectly every time. The key to achieving that irresistible crunch lies in the way you prepare and roast them. Parboiling the potatoes before roasting helps to create a rough surface that crisps up beautifully in the oven. Following these steps will assure that you serve up a plate of crispy roast potatoes that everyone will rave about.
Ingredients (Serves 4-6):
- 1.5 kg (3.3 lbs) of floury potatoes (such as Maris Piper or King Edward)
- 4 tablespoons of vegetable oil (or duck fat for extra flavor)
- 4 cloves of garlic, peeled and crushed
- 2-3 sprigs of fresh rosemary
- Salt and freshly ground black pepper, to taste
Cooking Instructions:
- Preheat the Oven: Start by preheating your oven to 220°C (425°F). A hot oven is vital for creating that crispy exterior on the potatoes.
- Prepare the Potatoes: Peel the potatoes and cut them into evenly sized chunks, about 4-5 cm (1.5-2 inches) in size. This guarantees they cook evenly.
- Parboil the Potatoes: Place the chopped potatoes into a large pot of salted water and bring it to a boil. Parboil the potatoes for about 10 minutes or until the edges are starting to soften but not fully cooked. This step is key for achieving crispiness later.
- Drain and Steam Dry: Once parboiled, drain the potatoes in a colander and allow them to steam dry for a few minutes. This helps remove excess moisture, which is essential for crispiness.
- Rough Up the Potatoes: Gently shake the colander to roughen the surfaces of the potatoes. This will create more edges for frying and crisping.
- Heat the Oil: In a large roasting tin, add the vegetable oil and place it in the preheated oven for about 5-10 minutes until the oil is hot and shimmering.
- Add Potatoes and Season: Carefully remove the hot oil from the oven, and add the parboiled potatoes to the tin. Toss the potatoes in the hot oil to coat them evenly. Sprinkle the crushed garlic and rosemary over the top, and season with salt and pepper.
- Roast the Potatoes: Return the roasting tin to the oven and roast for about 40-50 minutes. Turn the potatoes halfway through to guarantee they brown evenly and become crispy all around.
- Serve: Once golden brown and crispy, remove the potatoes from the oven and serve immediately as part of your Sunday roast.
Extra Tips:
For even better flavor, consider using duck fat instead of vegetable oil, as it adds a rich taste to the potatoes. Additionally, you can experiment with other herbs such as thyme or parsley for a different flavor profile.
Always verify that the oil is hot before adding the potatoes, as this is vital for that perfect crisp! Finally, don’t overcrowd the roasting tin; this allows the potatoes to roast instead of steam, guaranteeing they stay crispy.
Creamy Mashed Potatoes With Butter

Creamy mashed potatoes are a quintessential side dish that perfectly complements a hearty British Sunday roast. The velvety texture and rich flavor make them an ideal companion to roasted meats and gravies. This recipe focuses on creating a luxurious mash that’s both simple to prepare and incredibly satisfying. By using high-quality ingredients and a few simple techniques, you’ll be able to elevate your Sunday dinner experience.
The key to achieving the perfect creamy mashed potatoes lies in the choice of potatoes and the method of preparation. Opt for starchy potatoes, such as Russets or Yukon Golds, which yield a fluffy texture when mashed. The addition of butter not only enhances the flavor but also adds a silky creaminess that makes each bite irresistible. Whether you serve them alongside a succulent roast chicken or a flavorful beef joint, these mashed potatoes will become a staple at your Sunday table.
Ingredients (serving size: 4-6 people)
- 2 pounds of starchy potatoes (such as Russet or Yukon Gold)
- ½ cup of unsalted butter
- 1 cup of whole milk (or heavy cream for extra richness)
- Salt, to taste
- Freshly ground black pepper, to taste
- Optional: Chives or parsley for garnish
Cooking Instructions
- Prepare the Potatoes: Begin by peeling the potatoes and cutting them into uniform chunks, about 1-2 inches in size. This guarantees even cooking. Place the cut potatoes into a large pot and cover them with cold water, adding a generous pinch of salt to the water.
- Boil the Potatoes: Bring the pot of water to a boil over medium-high heat. Once boiling, reduce the heat to a simmer and cook the potatoes for about 15-20 minutes, or until they’re fork-tender. You should be able to easily slide a fork into the potatoes without resistance.
- Drain and Dry: Once cooked, drain the potatoes in a colander and allow them to sit for a minute or two to let off steam. This step helps to remove excess moisture, which can make the mashed potatoes watery.
- Mash the Potatoes: Return the drained potatoes to the pot or a large mixing bowl. Using a potato masher or a ricer, mash the potatoes until they reach your desired level of smoothness. Avoid over-mashing, which can lead to a gluey texture.
- Add Butter and Milk: In a small saucepan, gently heat the butter and milk together until the butter has melted and the mixture is warm. Pour this mixture into the mashed potatoes while stirring continuously until fully incorporated. Adjust the consistency by adding more milk if necessary.
- Season to Taste: Season the creamy mashed potatoes with salt and freshly ground black pepper. Taste and adjust the seasoning as needed, giving it a final stir to confirm everything is well mixed.
- Serve and Garnish: Transfer the mashed potatoes to a serving bowl. For an elegant touch, garnish with chopped chives or parsley before serving. Enjoy them warm alongside your British Sunday roast.
Extra Tips
For the best results, always use fresh ingredients and avoid pre-packaged mashed potatoes. If you want to add a twist to your creamy mashed potatoes, consider mixing in roasted garlic or a splash of sour cream for added flavor.
Additionally, keeping the butter and milk warm before adding them to the potatoes will help maintain the creamy texture. Finally, if you prefer a lighter version, you can replace some of the butter with olive oil or use low-fat milk without compromising too much on taste.
Rich Beef Gravy for a Flavorful Finish
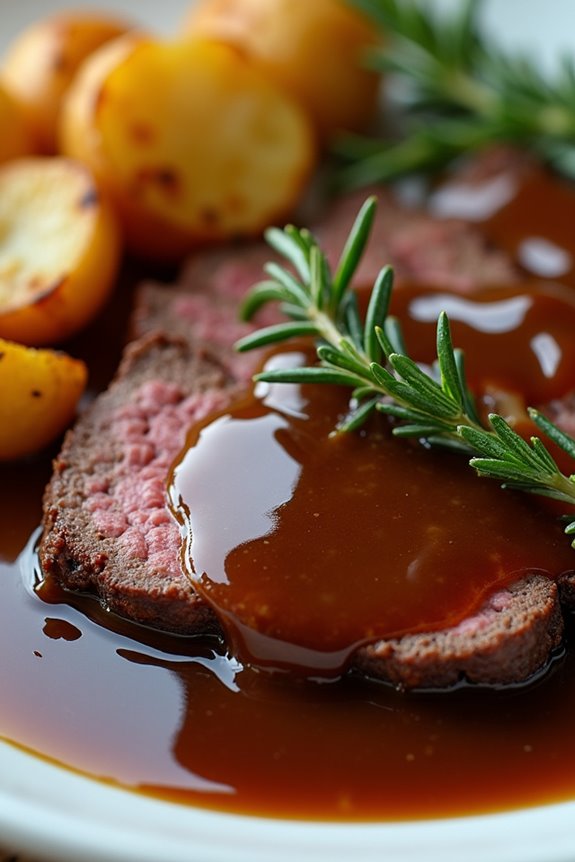
A Sunday roast wouldn’t be complete without a rich and delicious gravy to complement the succulent meat and crispy potatoes. This Rich Beef Gravy is the perfect finishing touch to your Sunday roast, adding depth and flavor to every bite. Made with the drippings from the roasted beef, this gravy captures all the savory goodness of the meal, creating a luxurious sauce that your family and friends will rave about.
It’s an essential component that ties the entire dish together, making it a staple in British cuisine.
To make this gravy truly special, you’ll want to use high-quality beef stock and fresh herbs if possible. The combination of caramelized onions, robust red wine, and the natural juices from the roast creates a complex flavor profile that enhances the overall dining experience.
With just a few simple ingredients and steps, you can whip up a gravy that elevates your Sunday roast from good to absolutely unforgettable.
Ingredients (Serves 4-6):
- 1 cup beef drippings (from the roast)
- 1 medium onion, finely chopped
- 2 tablespoons all-purpose flour
- 2 cups beef stock (preferably homemade or low-sodium)
- 1/2 cup red wine (optional)
- 1 teaspoon Worcestershire sauce
- Salt and black pepper, to taste
- Fresh thyme and rosemary sprigs (optional, for garnish)
Cooking Instructions:
- Collect the Drippings: After roasting your beef, remove it from the roasting pan and let it rest. Pour the drippings from the pan into a measuring jug, allowing the fat to rise to the top. Skim off the excess fat, leaving about 1 cup of drippings in the jug.
- Sauté the Onions: In the same roasting pan (be sure to scrape up any browned bits), place over medium heat and add the chopped onion. Sauté the onions for about 5-7 minutes, or until they’re soft and golden brown. This will add a rich flavor base to your gravy.
- Add Flour: Once the onions are caramelized, sprinkle in the flour. Stir continuously for about 2-3 minutes to cook out the raw flour taste. This will create a roux that thickens the gravy.
- Deglaze the Pan: If using red wine, pour it into the pan to deglaze, scraping up any bits stuck to the bottom. Allow the wine to simmer for a minute or two, reducing slightly. This step adds depth and complexity to the gravy.
- Incorporate the Stock: Gradually whisk in the beef stock, ensuring there are no lumps from the flour. Bring the mixture to a gentle boil, then reduce to a simmer. Allow it to cook for about 10 minutes, stirring occasionally, until it thickens to your desired consistency.
- Add Drippings and Season: Stir in the reserved beef drippings and Worcestershire sauce. Season the gravy with salt and black pepper to taste. Continue to simmer for an additional 5 minutes to allow the flavors to meld.
- Strain (Optional): For a smoother consistency, strain the gravy through a fine sieve into a serving jug, discarding any solids. Garnish with fresh thyme and rosemary sprigs if desired.
Extra Tips:
For a richer flavor, consider roasting the bones from your beef alongside the meat to create a homemade stock. This can be simmered down and used in your gravy for an enhanced depth of flavor.
Additionally, if you find your gravy too thick, simply whisk in a bit more beef stock or water until you reach your desired consistency. Remember, a great gravy is all about balance, so taste and adjust your seasoning as needed!
Seasonal Vegetable Medley With Herbs
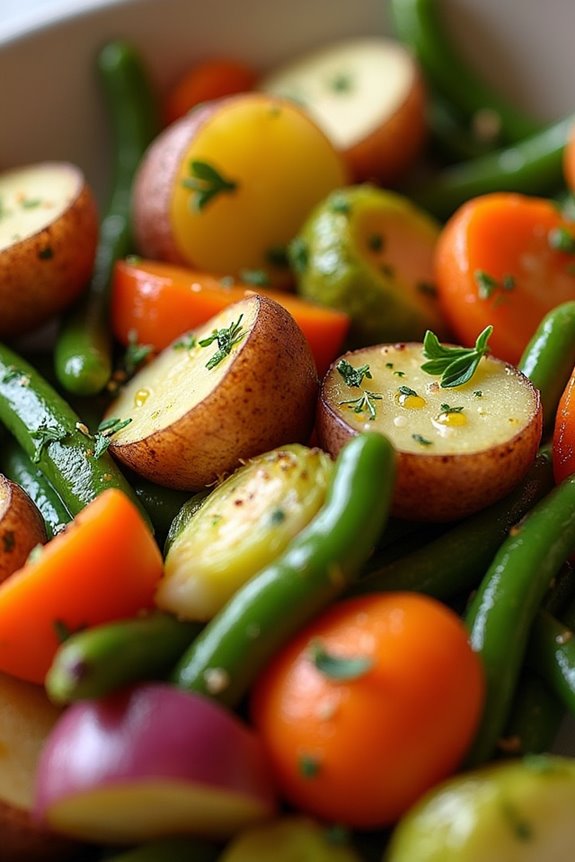
A Seasonal Vegetable Medley with Herbs is the perfect accompaniment to a hearty British Sunday roast. This dish celebrates the best of seasonal produce, bringing vibrant colors and fresh flavors to your dining table. Packed with a variety of vegetables and infused with fragrant herbs, it not only enhances your roast but also provides a deliciously healthy option that everyone will enjoy.
This medley is versatile and can be adjusted based on the vegetables that are in season or your personal preferences. Whether it’s crisp green beans, sweet carrots, or earthy potatoes, each ingredient adds its own unique taste and texture to the dish. Tossed with a light drizzle of olive oil and a sprinkle of herbs, this side dish is bound to impress your guests and elevate your Sunday roast experience.
Ingredients (Serves 4-6)
- 2 cups of new potatoes, halved
- 1 cup of carrots, sliced
- 1 cup of green beans, trimmed
- 1 cup of Brussels sprouts, halved
- 1 red onion, cut into wedges
- 3 cloves of garlic, minced
- 2 tablespoons of olive oil
- 1 teaspoon of dried thyme
- 1 teaspoon of dried rosemary
- Salt and pepper to taste
- Fresh parsley, chopped (for garnish)
Cooking Instructions
- Preheat the Oven: Begin by preheating your oven to 400°F (200°C). This guarantees that the vegetables cook evenly and develop a nice roasted flavor.
- Prepare the Vegetables: Wash and chop all the vegetables as specified in the ingredients list. Make sure the pieces are roughly the same size to guarantee even cooking.
- Mix Ingredients: In a large mixing bowl, combine the halved new potatoes, sliced carrots, trimmed green beans, halved Brussels sprouts, and red onion wedges.
- Season: Drizzle the olive oil over the vegetables, then add the minced garlic, dried thyme, dried rosemary, salt, and pepper. Toss everything together thoroughly until the vegetables are evenly coated with the oil and seasoning.
- Arrange on Baking Tray: Spread the seasoned vegetable mixture in a single layer on a baking tray. This allows the vegetables to roast properly instead of steaming.
- Roast the Vegetables: Place the baking tray in the preheated oven and roast for 25-30 minutes. Halfway through, stir the vegetables to guarantee they cook evenly and get a nice golden color.
- Garnish and Serve: Once the vegetables are tender and slightly caramelized, remove them from the oven. Transfer to a serving dish and sprinkle with fresh chopped parsley before serving alongside your Sunday roast.
Extra Tips
When preparing your Seasonal Vegetable Medley, feel free to mix and match with other seasonal vegetables like parsnips, squash, or even sweet potatoes.
To enhance the flavors further, consider adding a splash of lemon juice or balsamic vinegar before serving, which can brighten up the dish.
Remember to keep an eye on the roasting time, as different ovens may cook differently, and you want to avoid overcooking the vegetables to maintain their vibrant colors and crunch.
Savory Bread Sauce to Complement Your Roast

A traditional British Sunday roast is incomplete without the rich and comforting flavors of bread sauce. This classic accompaniment is a simple yet delicious side that perfectly enhances the savory notes of your roast meat. Made primarily from stale bread, milk, and a few aromatic seasonings, it brings a creamy texture and a mild flavor that balances well against the robust taste of roasted meats, especially poultry.
Making bread sauce is an old-fashioned technique that harks back to the days when nothing went to waste in the kitchen. This dish isn’t only economical but also incredibly easy to prepare. With a handful of ingredients and some patience, you can whip up a delightful sauce that will impress your family and friends at your Sunday dinner table.
Ingredients (serving size of 4-6 people):
- 4 cups whole milk
- 1 onion, peeled and halved
- 4-5 whole cloves
- 2-3 bay leaves
- 3-4 cups stale white bread, crusts removed and torn into pieces
- Salt and pepper, to taste
- 2 tablespoons unsalted butter
- Freshly grated nutmeg (optional)
- Chopped fresh parsley (for garnish)
Cooking Instructions:
- Infuse the Milk: In a medium saucepan, pour the 4 cups of whole milk and add the halved onion, whole cloves, and bay leaves. Heat gently over medium-low heat until the milk is hot but not boiling. Allow it to infuse for about 10-15 minutes. This step is essential as it allows the flavors of the onion and spices to permeate the milk.
- Prepare the Bread: While the milk is infusing, prepare your stale bread by tearing it into small pieces. You want a mix of larger chunks and finer crumbs, which will help create a nice texture in the sauce.
- Combine Bread and Milk: After 15 minutes, remove the milk from heat and strain it into a large bowl or another saucepan to discard the onion, cloves, and bay leaves. Immediately add the bread pieces to the hot milk and stir to combine. Let it sit for about 10 minutes, allowing the bread to soak up the milk.
- Blend the Sauce: Once the bread has soaked, use a whisk or a hand blender to blend the mixture until smooth and creamy. If you prefer a chunkier texture, you can leave it slightly unblended or mash it with a fork.
- Finish the Sauce: Return the blended sauce to the heat and stir in the 2 tablespoons of unsalted butter. Season with salt, pepper, and a pinch of freshly grated nutmeg if desired. Heat the sauce through gently, then taste and adjust the seasoning before serving.
- Garnish and Serve: Transfer the bread sauce to a serving dish and sprinkle with chopped fresh parsley for a touch of color. Serve warm alongside your roast for a delightful and traditional touch.
Extra Tips: For a more robust flavor, consider adding a splash of stock or some finely chopped herbs such as thyme or sage to the milk while it infuses. Additionally, if you have any leftover bread sauce, it can be stored in the fridge for a couple of days or frozen for later use. Simply reheat gently with a splash of milk to restore its creamy consistency. Enjoy your meal!
Golden Roast Duck With Cherry Sauce
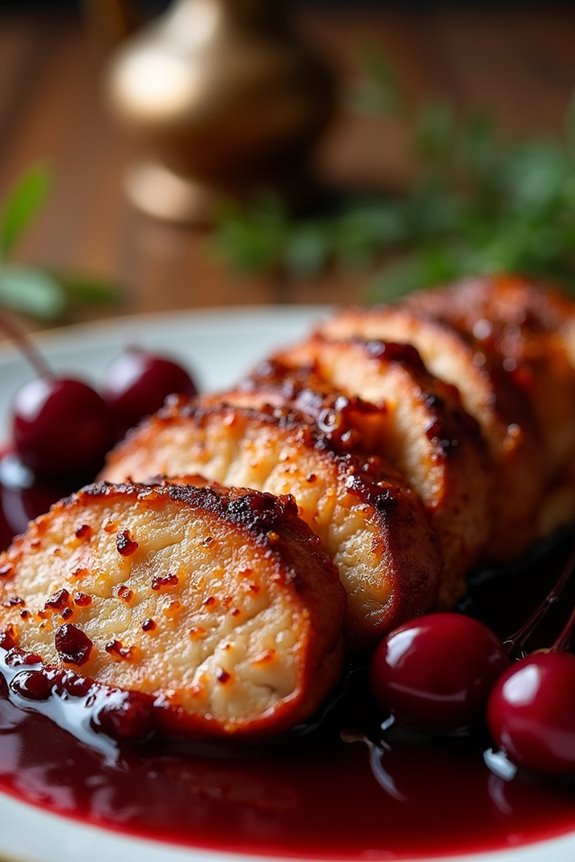
A Golden Roast Duck With Cherry Sauce is a quintessential dish that elevates any Sunday roast. The rich, succulent meat of the duck is beautifully complemented by the sweetness and tartness of the cherry sauce, creating a symphony of flavors that’s both comforting and sophisticated. Perfect for family gatherings or special occasions, this dish is sure to impress your guests and leave them craving more.
The golden skin of the duck isn’t only visually appealing but also adds a delightful crispiness that enhances the overall experience.
Roasting a duck may seem intimidating, but with the right techniques and a bit of patience, you can achieve a perfectly cooked bird with crispy skin and tender meat. The key is to start with a well-seasoned duck and to take your time during the cooking process. As the duck roasts, the fat renders out, resulting in a juicy roast that pairs wonderfully with the homemade cherry sauce.
Follow this recipe to create a stunning centerpiece for your next Sunday dinner.
Ingredients (Serves 4-6):
- 1 whole duck (about 4-5 lbs)
- 2 teaspoons salt
- 1 teaspoon black pepper
- 1 orange, quartered
- 1 onion, quartered
- 4 cloves garlic, crushed
- 2 cups fresh or frozen cherries, pitted
- 1 cup chicken stock
- 1/2 cup red wine
- 1/4 cup sugar
- 1 tablespoon balsamic vinegar
- 1 tablespoon cornstarch (optional, for thickening)
Cooking Instructions:
- Prepare the Duck: Preheat your oven to 375°F (190°C). Rinse the duck under cold water and pat it dry with paper towels. This step is essential, as a dry skin will crisp up better during roasting. Trim any excess fat from the neck and cavity areas.
- Season the Duck: Rub the salt and black pepper all over the duck, including the cavity. This not only adds flavor but also helps to draw out moisture, leading to a crispier skin. Stuff the cavity with the quartered orange, onion, and crushed garlic for added aroma and flavor.
- Roast the Duck: Place the duck breast side up on a rack in a roasting pan. Roast in the preheated oven for about 1 hour and 30 minutes, basting with its own fat every 30 minutes. The duck is done when the internal temperature reaches 165°F (74°C) and the skin is a deep golden brown.
- Make the Cherry Sauce: While the duck is roasting, prepare the cherry sauce. In a saucepan over medium heat, combine the cherries, chicken stock, red wine, sugar, and balsamic vinegar. Bring to a boil, then reduce the heat and let it simmer for about 15-20 minutes until the cherries are soft and the sauce has thickened slightly.
- Thicken the Sauce (Optional): If you prefer a thicker sauce, mix the cornstarch with a little water to create a slurry and add it to the cherry mixture. Stir continuously until the sauce thickens to your desired consistency.
- Rest and Serve: Once the duck is fully cooked, remove it from the oven and let it rest for 15-20 minutes before carving. This resting period allows the juices to redistribute, assuring moist and flavorful meat. Serve the duck with the cherry sauce drizzled on top.
Extra Tips:
To achieve the best results with your Golden Roast Duck, consider using a meat thermometer to check the internal temperature, as this will help you avoid undercooking or overcooking the bird.
Additionally, for maximum flavor, marinate the duck overnight with your favorite herbs and spices. If using frozen cherries for the sauce, make certain they’re fully thawed and drained before cooking to avoid excess water in the sauce.
Finally, save the rendered duck fat for roasting vegetables or making delicious duck fat fries!
Stuffed Bell Peppers for a Unique Twist

When it comes to Sunday roasts, traditional dishes often reign supreme. However, adding a unique twist can elevate your meal and impress your family and friends. Stuffed bell peppers are a delightful way to incorporate classic roast flavors, combining the heartiness of a Sunday roast with the vibrant colors and textures of fresh vegetables. They serve as an excellent canvas for a variety of fillings, allowing you to customize each pepper to suit individual tastes.
This recipe for stuffed bell peppers infuses the essence of a traditional British roast with succulent minced meat, aromatic herbs, and a medley of vegetables. Not only do they offer a feast for the eyes, but they also pack a delicious punch and are perfect for a family gathering. Serve them alongside your favorite roast potatoes and gravy for a complete Sunday dinner that’s both hearty and unique.
Ingredients (Serves 4-6)
- 4 large bell peppers (any color)
- 500g minced beef or lamb
- 1 medium onion, finely chopped
- 2 cloves garlic, minced
- 1 medium carrot, grated
- 100g cooked rice (or quinoa)
- 1 tsp dried oregano
- 1 tsp dried thyme
- 1 tsp salt
- ½ tsp black pepper
- 200g chopped tomatoes (canned or fresh)
- 100g grated cheese (cheddar or your choice)
- 2 tbsp olive oil
- Fresh parsley, for garnish (optional)
Cooking Instructions
- Prepare the Peppers: Preheat your oven to 190°C (375°F). Wash the bell peppers and slice off the tops. Remove the seeds and membranes carefully, ensuring that the peppers remain intact for stuffing. Place them upright in a baking dish.
- Cook the Filling: In a large frying pan, heat the olive oil over medium heat. Add the chopped onion and garlic, and sauté until they become translucent and fragrant, about 3-4 minutes. Stir in the grated carrot and cook for an additional 2 minutes.
- Combine Ingredients: Add the minced meat to the pan, breaking it up with a wooden spoon. Cook until browned, around 5-7 minutes. Once the meat is cooked, stir in the cooked rice, chopped tomatoes, oregano, thyme, salt, and pepper. Mix everything thoroughly and let it simmer for a few minutes to combine the flavors.
- Stuff the Peppers: Carefully spoon the meat mixture into each bell pepper, packing it tightly. Leave a little space at the top to allow for cheese melting. Once filled, sprinkle the grated cheese generously over the top of each stuffed pepper.
- Bake: Cover the baking dish with aluminum foil and place it in the preheated oven. Bake for 25-30 minutes. After this time, remove the foil and bake for an additional 10-15 minutes, or until the peppers are tender and the cheese is bubbly and golden brown.
- Serve: Once done, take the stuffed peppers out of the oven and let them rest for a couple of minutes. Garnish with fresh parsley if desired, then serve hot alongside your favorite sides.
Extra Tips
For an extra flavor boost, consider adding some Worcestershire sauce or a splash of balsamic vinegar to the meat mixture. You can also experiment with different types of cheese, such as mozzarella or feta, for a different taste profile.
If you want to make this dish vegetarian, simply substitute the meat with lentils or a plant-based meat alternative and adjust the seasoning accordingly. Enjoy your unique twist on the classic Sunday roast!
Classic Sticky Toffee Pudding for Dessert
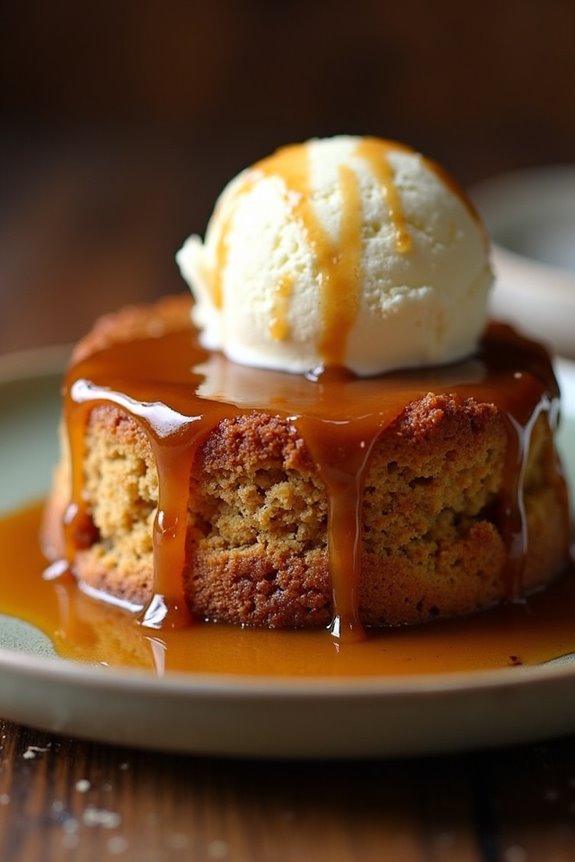
Sticky toffee pudding is a quintessential British dessert that perfectly rounds off a hearty Sunday roast. This indulgent treat features a moist sponge cake made with finely chopped dates, drenched in a luscious toffee sauce, and traditionally served warm with a generous scoop of vanilla ice cream or a dollop of clotted cream. Its rich flavors and comforting texture make it a favorite among many, delivering a sweet finish to your Sunday feast.
Making sticky toffee pudding at home is simpler than it might seem, and the results are incredibly rewarding. The combination of soft, buttery cake and the warm, sticky sauce is sure to please your family and friends. With a few basic ingredients and some careful preparation, you can create this delightful dessert that will have everyone asking for seconds.
Ingredients (Serves 4-6 People):
- 200g (7oz) pitted dates, chopped
- 250ml (1 cup) boiling water
- 1 tsp baking soda
- 100g (1/2 cup) unsalted butter, softened
- 150g (3/4 cup) light brown sugar
- 2 large eggs
- 175g (1 1/2 cups) all-purpose flour
- 1 tsp baking powder
- 1/2 tsp salt
- 1 tsp vanilla extract
For the Toffee Sauce:
- 100g (1/2 cup) unsalted butter
- 200g (1 cup) light brown sugar
- 250ml (1 cup) heavy cream
- 1 tsp vanilla extract
Cooking Instructions:
- Prepare the Dates: Begin by placing the chopped dates in a bowl and pouring the boiling water over them. Stir in the baking soda, which will soften the dates and help create a moist sponge. Allow the mixture to sit for about 15-20 minutes until the dates are softened and the water has cooled slightly.
- Cream the Butter and Sugar: In a mixing bowl, combine the softened butter and light brown sugar. Using an electric mixer or whisk, beat them together until the mixture is light and fluffy, which typically takes about 3-5 minutes. This step incorporates air into the mixture, giving the pudding a light texture.
- Add Eggs and Vanilla: Once the butter and sugar are well combined, add the eggs one at a time, ensuring each is fully incorporated before adding the next. Then mix in the vanilla extract. This will create a smooth batter base for your sticky toffee pudding.
- Combine Dry Ingredients: In another bowl, sift together the all-purpose flour, baking powder, and salt. Gradually add this dry mixture to the butter, sugar, and egg mixture, folding gently until just combined. Be careful not to overmix, as this could result in a denser pudding.
- Incorporate Dates: Fold the softened date mixture into the batter until evenly distributed. The mixture should be thick and slightly sticky. This is what gives the pudding its signature texture and flavor.
- Bake the Pudding: Preheat your oven to 180°C (350°F). Grease a baking dish or individual pudding molds with butter. Pour the batter into the prepared dish and smooth the top. Bake for about 25-30 minutes, or until a skewer inserted into the center comes out clean.
- Make the Toffee Sauce: While the pudding is baking, prepare the toffee sauce. In a saucepan over medium heat, combine the butter, light brown sugar, and heavy cream. Stir continuously until the butter is melted and the sugar is dissolved, then bring to a gentle boil. Allow it to simmer for about 5 minutes until it thickens slightly, then stir in the vanilla extract.
- Serve: Once the pudding is baked, remove it from the oven and let it cool for a few minutes. Using a skewer, poke holes all over the top of the pudding and pour half of the warm toffee sauce over it, allowing it to soak in. Serve the pudding warm with the remaining sauce drizzled on top, alongside vanilla ice cream or clotted cream.
Extra Tips:
For an even richer flavor, consider adding a splash of dark rum or a tablespoon of brewed coffee to the batter or toffee sauce. If you have any leftover pudding, it can be stored in an airtight container in the refrigerator for up to three days. Reheat it gently in the microwave before serving. This dish is best enjoyed fresh and warm, as the contrast between the hot pudding and cold ice cream is simply divine!