

As St. Patrick’s Day draws near, I’m feeling the allure of vibrant green ingredients that perfectly capture the spirit of the holiday. From Spinach and Feta Stuffed Chicken Breasts to refreshing Green Goddess Pasta Salad, each recipe offers a delightful twist on classic flavors. I’ve curated 13 amazing dishes that pay homage to Irish culinary traditions while bringing a fresh burst of flavor to your table. Looking to elevate your holiday menu?
Spinach and Feta Stuffed Chicken Breasts
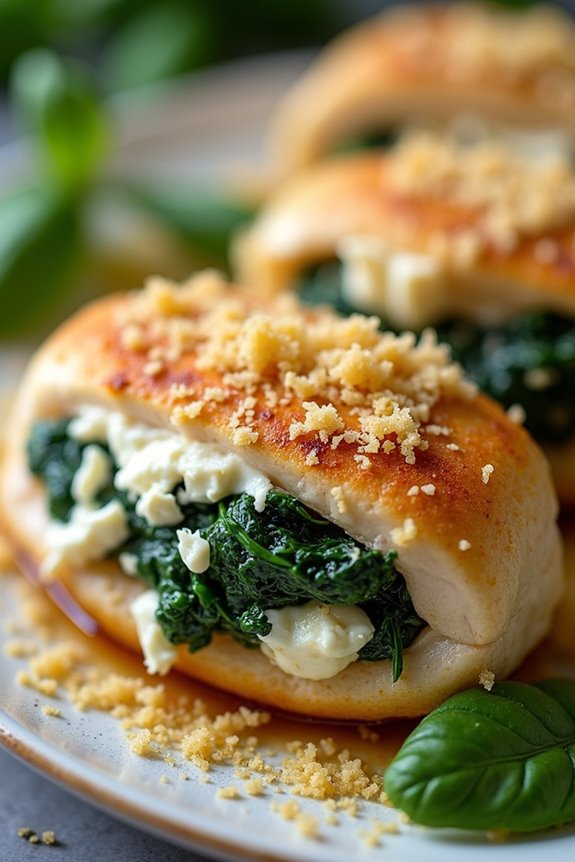
Celebrate St. Patrick’s Day with a delicious and festive meal that’s certain to impress your guests. Spinach and Feta Stuffed Chicken Breasts combines the richness of tender chicken with the vibrant flavors of spinach and tangy feta cheese. This dish not only looks stunning when plated but is also packed with nutrients, making it a perfect option for a holiday feast or any special occasion.
The bright greens of the spinach and the creamy white of the feta create a beautiful contrast, reminiscent of the colors of the Irish flag.
Preparing these stuffed chicken breasts is simpler than it might seem. The dish comes together quickly, allowing you to enjoy the festivities without spending hours in the kitchen. With a few basic ingredients and a little bit of technique, you can create a meal that feels both gourmet and comforting. Serve it alongside some roasted potatoes or a fresh salad for a well-rounded dinner that everyone will love.
Ingredients (Serves 4-6)
- 4-6 boneless, skinless chicken breasts
- 2 cups fresh spinach, chopped
- 1 cup feta cheese, crumbled
- 1/2 cup cream cheese, softened
- 2 cloves garlic, minced
- 1/2 teaspoon dried oregano
- 1/2 teaspoon salt
- 1/4 teaspoon black pepper
- 1 tablespoon olive oil
- 1/4 cup grated Parmesan cheese (for topping)
- Toothpicks or kitchen twine (for securing)
Cooking Instructions
- Preheat the Oven: Begin by preheating your oven to 375°F (190°C). This guarantees that the chicken will cook evenly and thoroughly while you prepare the stuffing.
- Prepare the Filling: In a large mixing bowl, combine chopped spinach, feta cheese, cream cheese, minced garlic, oregano, salt, and black pepper. Mix until all ingredients are well incorporated and the spinach is evenly distributed throughout the cheese mixture.
- Prepare the Chicken Breasts: Pat the chicken breasts dry with paper towels. Using a sharp knife, carefully create a pocket in each chicken breast by slicing horizontally, making sure not to cut all the way through.
- Stuff the Chicken: Generously spoon the spinach and feta filling into each chicken breast pocket. Use toothpicks or kitchen twine to secure the openings, making sure that the filling doesn’t spill out during cooking.
- Sear the Chicken: In a large, oven-safe skillet, heat olive oil over medium-high heat. Once hot, add the stuffed chicken breasts and sear for about 3-4 minutes on each side until golden brown. This step adds flavor and helps seal in the juices.
- Bake the Chicken: After searing, sprinkle the tops of the chicken breasts with grated Parmesan cheese. Transfer the skillet to the preheated oven and bake for 20-25 minutes, or until the chicken is cooked through and reaches an internal temperature of 165°F (74°C).
- Rest and Serve: Once cooked, remove the skillet from the oven and allow the chicken to rest for 5 minutes before slicing. This helps to keep the meat juicy. Serve warm, garnished with fresh herbs if desired.
Extra Tips
For an extra layer of flavor, consider adding sun-dried tomatoes or artichoke hearts to the stuffing mixture. If you want a bit of a kick, a pinch of red pepper flakes can also be a delightful addition.
Make sure to adjust the cooking time based on the thickness of your chicken breasts. If you’re using larger or thicker pieces, they may require additional time in the oven. Enjoy this dish with a side of roasted vegetables to enhance the festive theme of your St. Patrick’s Day celebration!
Irish Soda Bread With Chives
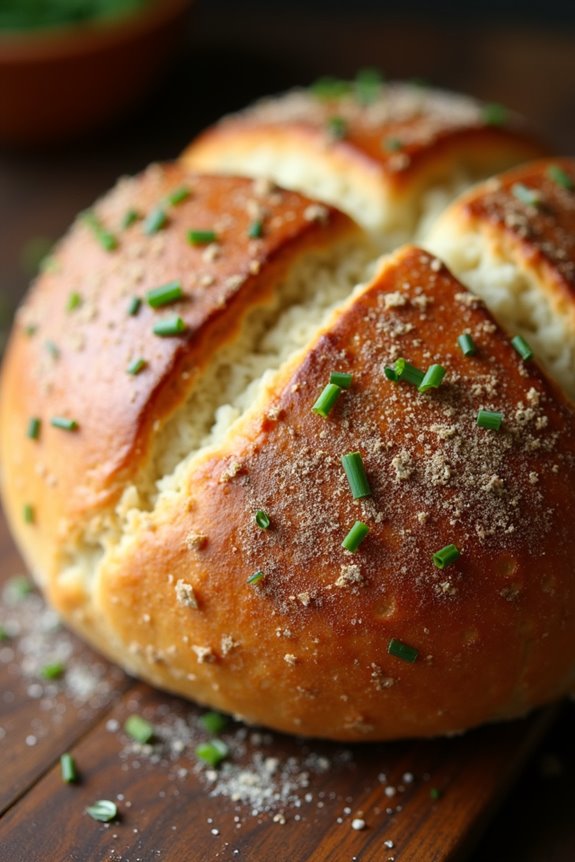
Irish Soda Bread is a traditional quick bread that requires no yeast, making it a fast and easy option for any meal. This version incorporates chives, adding a lovely flavor that pairs perfectly with butter or spreads. The beauty of this bread lies in its simplicity; with just a few ingredients, you can create a delicious loaf that’s perfect for St. Patrick’s Day celebrations or any occasion when you want a comforting homemade bread.
This recipe yields a soft and tender loaf that can be enjoyed warm from the oven or toasted the next day. The chives bring a subtle oniony flavor that elevates the bread while maintaining its classic characteristics. Whether served alongside a hearty stew or as part of a festive brunch, Irish Soda Bread With Chives is sure to impress your guests and bring a taste of Ireland to your table.
Ingredients (Serves 4-6)
- 4 cups all-purpose flour
- 1 teaspoon baking soda
- 1 teaspoon salt
- 1 ¾ cups buttermilk
- ½ cup chopped fresh chives
- 1 tablespoon melted butter (optional, for brushing)
Cooking Instructions
- Preheat the Oven: Begin by preheating your oven to 425°F (220°C). This temperature is ideal for baking the soda bread, ensuring a crisp crust and a soft interior.
- Mix Dry Ingredients: In a large mixing bowl, combine the flour, baking soda, and salt. Whisk the ingredients together until they’re well blended. This step is essential as it evenly distributes the baking soda throughout the flour, ensuring even rising.
- Add Chives: Fold in the chopped fresh chives into the dry mixture. Incorporating the chives at this stage allows their flavor to infuse the bread, making each bite fragrant and tasty.
- Combine Wet Ingredients: Create a well in the center of the dry ingredients and pour in the buttermilk. Using a wooden spoon or your hands, gently mix the ingredients together until a soft dough forms. Be careful not to overmix, as this can result in a tough bread.
- Shape the Dough: Turn the dough out onto a lightly floured surface. Knead it gently for about 30 seconds, just enough to bring it together into a round shape. Then, place the dough onto a baking sheet lined with parchment paper.
- Score the Bread: Using a sharp knife, make a deep cross on the top of the dough. This traditional scoring helps the bread to expand while baking and allows steam to escape, creating a better texture.
- Bake the Bread: Place the baking sheet in the preheated oven and bake for 30-35 minutes, or until the bread is golden brown and sounds hollow when tapped on the bottom. If you like, you can brush the top with melted butter for extra flavor right after taking it out of the oven.
- Cool and Serve: Once baked, remove the bread from the oven and let it cool on a wire rack for about 10-15 minutes. Slice the bread while warm and serve with butter or your favorite spreads.
Extra Tips
To enhance the flavor of your Irish Soda Bread with chives, consider adding other herbs such as parsley or dill for a different twist. You can also substitute some of the all-purpose flour with whole wheat flour for a nuttier taste.
If you don’t have buttermilk on hand, you can make a quick substitute by adding 1 tablespoon of vinegar or lemon juice to a cup of milk and letting it sit for about 5 minutes before use. Enjoy this bread fresh, but if you have leftovers, it toasts beautifully the next day!
Green Goddess Pasta Salad
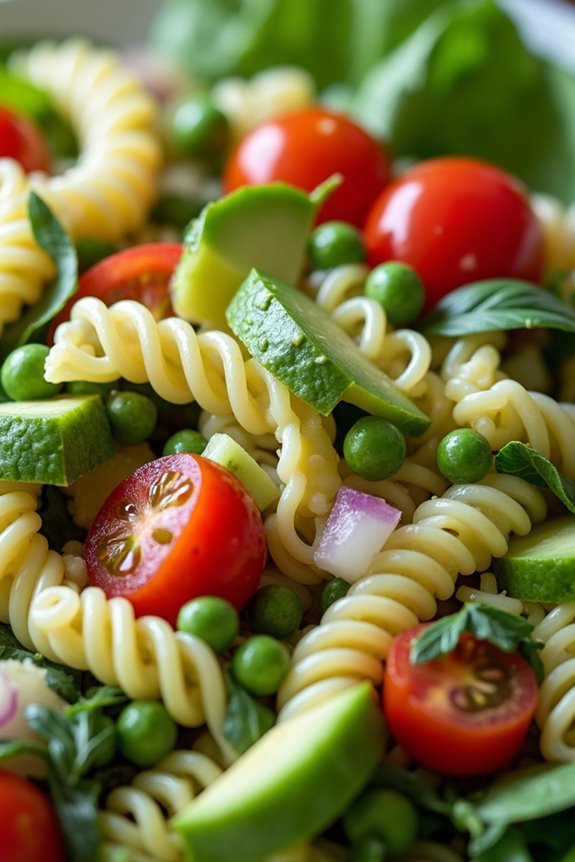
St. Patrick’s Day is the perfect occasion to celebrate with vibrant and delicious food. One dish that stands out for this festive holiday is the Green Goddess Pasta Salad. This invigorating salad not only embodies the spirit of the day with its rich green hues but also combines a medley of flavors that are sure to please your palate. Packed with fresh vegetables, herbs, and a creamy dressing, this pasta salad is an excellent side dish or a light main course that can be enjoyed by everyone.
The Green Goddess Pasta Salad is as versatile as it’s colorful. It can be customized with your favorite seasonal vegetables or even protein sources like chickpeas or grilled chicken. The unique green goddess dressing, made with fresh herbs and creamy elements, brings everything together in a delightful way. Whether you’re hosting a St. Patrick’s Day gathering or simply want to enjoy a healthy meal, this pasta salad is a fantastic choice that will keep you feeling festive and satisfied.
Ingredients (Serves 4-6):
- 12 oz. rotini pasta
- 1 cup cherry tomatoes, halved
- 1 cup cucumber, diced
- 1 cup bell pepper, diced (green or yellow)
- 1 cup frozen peas, thawed
- ½ cup red onion, finely chopped
- ½ cup fresh parsley, chopped
- ½ cup fresh basil, chopped
- ½ cup fresh spinach, chopped
- 1 avocado, diced
- 1 cup Greek yogurt
- ¼ cup mayonnaise
- 2 tablespoons lemon juice
- 2 tablespoons olive oil
- 1 garlic clove, minced
- Salt and pepper to taste
Cooking Instructions:
- Cook the Pasta: Bring a large pot of salted water to a boil. Add the rotini pasta and cook according to package instructions until al dente. Once cooked, drain the pasta and rinse it under cold water to stop the cooking process. This will help the pasta maintain its shape and prevent it from becoming mushy.
- Prepare the Vegetables: While the pasta is cooking, wash and chop all the vegetables. Halve the cherry tomatoes, dice the cucumber and bell pepper, finely chop the red onion, and thaw the peas if they’re frozen. Additionally, chop the fresh herbs (parsley, basil, and spinach) and dice the avocado. Place all the chopped vegetables in a large mixing bowl.
- Make the Green Goddess Dressing: In a separate bowl, combine the Greek yogurt, mayonnaise, lemon juice, olive oil, minced garlic, and season with salt and pepper. Mix well until the dressing is smooth and creamy. Adjust seasoning to taste if needed.
- Combine Ingredients: Add the cooked and cooled pasta to the bowl with the vegetables. Pour the green goddess dressing over the pasta and vegetables. Gently toss everything together until the pasta and veggies are well coated with the dressing.
- Add Avocado: Carefully fold in the diced avocado, being gentle to avoid mashing it. This will add a creamy texture and richness to the pasta salad.
- Chill and Serve: Cover the bowl with plastic wrap or a lid and refrigerate the pasta salad for at least 30 minutes to allow the flavors to meld together. Serve chilled, garnished with extra herbs if desired.
Extra Tips: To elevate your Green Goddess Pasta Salad, consider adding protein such as grilled chicken, shrimp, or chickpeas for a heartier meal. You can also experiment with different types of pasta like farfalle or penne, depending on your preference. If you have any leftovers, store the salad in an airtight container in the refrigerator, but keep in mind that the avocado may brown slightly; add it fresh when serving. Enjoy your delicious and festive dish!
Avocado and Cucumber Sushi Rolls

St. Patrick’s Day is a wonderful occasion to celebrate with friends and family, and what better way to do so than with some fresh and vibrant Avocado and Cucumber Sushi Rolls? These sushi rolls aren’t only invigorating and delicious, but they also bring a pop of green to your festive table, making them a perfect match for the holiday.
This vegetarian option is light yet satisfying, suitable for all your guests, whether they’re sushi enthusiasts or newcomers. Making sushi at home can be a fun and rewarding experience. While it may seem intimidating at first, the process is straightforward and allows you to customize the rolls according to your taste.
The combination of creamy avocado and crunchy cucumber creates a delightful texture that pairs beautifully with the seasoned sushi rice. With just a few ingredients and some simple techniques, you can impress everyone with your homemade sushi!
Ingredients (Serves 4-6)
- 2 cups sushi rice
- 2 ½ cups water
- ½ cup rice vinegar
- 2 tablespoons sugar
- 1 teaspoon salt
- 1 ripe avocado, sliced
- 1 medium cucumber, julienned
- 4 sheets nori (seaweed)
- Soy sauce, for serving
- Pickled ginger and wasabi (optional, for serving)
Instructions
1. Prepare the Sushi Rice: Rinse the sushi rice under cold water until the water runs clear, which helps to remove excess starch. In a medium pot, combine the rinsed rice and water. Bring to a boil over medium-high heat, then reduce to low, cover, and simmer for about 20 minutes or until all the water is absorbed.
Remove from heat and let it sit, covered, for another 10 minutes to steam.
2. Season the Rice: While the rice is steaming, mix the rice vinegar, sugar, and salt in a small saucepan over low heat until the sugar and salt dissolve. Once the rice has finished steaming, transfer it to a large bowl and gently fold in the vinegar mixture using a wooden spatula.
Allow the rice to cool to room temperature.
3. Prepare the Fillings: While the rice cools, slice the avocado and julienne the cucumber into thin strips. This will guarantee that they fit nicely inside the sushi rolls.
4. Assemble the Sushi Rolls: Place a bamboo sushi mat on a clean surface and put a sheet of nori, shiny side down, on the mat. Wet your hands to prevent sticking and take about a cup of sushi rice, spreading it evenly over the nori, leaving a 1-inch border at the top.
Lay a few slices of avocado and cucumber across the center of the rice.
5. Roll the Sushi: Starting from the bottom, lift the bamboo mat and carefully roll it away from you, tucking the filling in tightly as you go. Continue rolling until the sushi is completely rolled up, using a bit of water on the edge of the nori to seal the roll.
6. Slice the Rolls: Use a sharp knife to slice the sushi roll into bite-sized pieces, wiping the knife with a damp cloth between cuts for cleaner edges.
7. Serve: Arrange the sushi rolls on a platter and Serve with soy sauce, pickled ginger, and wasabi, if desired.
Extra Tips
When making your Avocado and Cucumber Sushi Rolls, feel free to get creative with the fillings! You can add other vegetables like bell peppers or carrots for extra crunch, or even include thin slices of tofu if you want to incorporate more protein.
For best results, make sure your avocado is perfectly ripe—too hard and it won’t be creamy, too soft and it may mash easily. Finally, practice makes perfect when it comes to rolling sushi, so don’t be discouraged if your first few rolls aren’t perfect; just enjoy the process and the delicious results!
Pistachio Pesto Crostini

Pistachio Pesto Crostini is a delightful appetizer that perfectly combines the rich, nutty flavor of pistachios with the freshness of basil and the creaminess of cheese. This festive dish brings a touch of elegance to any St. Patrick’s Day gathering and is sure to impress your guests.
With its vibrant green color and unique taste, these crostini aren’t just visually appealing but also incredibly delicious, making them a perfect addition to your holiday spread.
Making the crostini is easy and can be accomplished in just a few simple steps. The crunchy base of toasted bread pairs beautifully with the creamy pistachio pesto, creating a delightful contrast in textures.
Whether you’re hosting a party or simply enjoying a quiet evening at home, these Pistachio Pesto Crostini are a must-try recipe that will elevate your culinary experience.
Ingredients (Serves 4-6):
- 1 cup shelled pistachios
- 2 cups fresh basil leaves
- 1/2 cup grated Parmesan cheese
- 2 garlic cloves, minced
- 1/2 cup olive oil
- 1/2 teaspoon salt
- 1/4 teaspoon black pepper
- 1 loaf of French baguette or ciabatta
- Additional pistachios and basil for garnish (optional)
Cooking Instructions:
- Prepare the Pistachio Pesto: In a food processor, combine the shelled pistachios, fresh basil leaves, grated Parmesan cheese, and minced garlic. Pulse the mixture until finely chopped and well combined, scraping down the sides of the bowl as needed.
- Add Olive Oil: With the food processor running, slowly drizzle in the olive oil until the pesto reaches a smooth and creamy consistency. You may need to adjust the amount of olive oil depending on your desired thickness. Season the pesto with salt and black pepper to taste.
- Toast the Bread: Preheat your oven to 400°F (200°C). Slice the French baguette or ciabatta into 1/2-inch thick slices. Arrange the slices on a baking sheet in a single layer. Brush one side lightly with olive oil. Toast in the preheated oven for about 5-7 minutes, or until the bread is golden and crispy.
- Assemble the Crostini: Once the bread is toasted, remove it from the oven and let it cool slightly. Spread a generous amount of the pistachio pesto on the toasted side of each slice.
- Garnish and Serve: Optionally, sprinkle additional chopped pistachios and fresh basil leaves on top of the pesto for an extra touch of flavor and presentation. Serve immediately, or keep the crostini at room temperature until ready to serve.
Extra Tips:
For a fun twist, consider adding a splash of lemon juice to the pistachio pesto to brighten the flavors.
If you want a creamier texture, you can mix in some cream cheese or ricotta cheese with the pesto before spreading it on the crostini.
Additionally, these crostini can be served warm or at room temperature, making them a versatile option for your St. Patrick’s Day festivities.
Shamrock Spinach Dip

Celebrate St. Patrick’s Day with a vibrant and delicious Shamrock Spinach Dip that’s perfect for serving at parties or gatherings. This festive dish combines the health benefits of spinach with creamy textures and savory flavors, creating a delightful appetizer that everyone will love. The green color not only fits the theme of the holiday but also makes it a visually appealing option on your table, guaranteed to impress your guests.
Making Shamrock Spinach Dip is simple and quick, allowing you to spend more time celebrating and less time in the kitchen. Plus, it can be served with a variety of dippers, from crunchy vegetables to crispy crackers. Whether you’re hosting a big celebration or enjoying a cozy gathering, this dip is sure to be a hit!
Ingredients (Serves 4-6):
- 1 cup fresh spinach, chopped
- 1 cup cream cheese, softened
- 1/2 cup sour cream
- 1/2 cup mayonnaise
- 1 cup shredded mozzarella cheese
- 1/2 cup grated Parmesan cheese
- 2 cloves garlic, minced
- 1 teaspoon onion powder
- 1 teaspoon Worcestershire sauce
- Salt and pepper to taste
- Fresh parsley, chopped (for garnish)
Cooking Instructions:
- Preheat the Oven: Begin by preheating your oven to 350°F (175°C). This will guarantee that your dip is baked evenly and thoroughly, allowing the flavors to meld beautifully.
- Mix the Base: In a large mixing bowl, combine the softened cream cheese, sour cream, and mayonnaise. Use a hand mixer or a spatula to blend these ingredients until they’re smooth and well incorporated, creating a creamy base for your dip.
- Add the Spinach and Cheeses: Fold in the chopped spinach, shredded mozzarella cheese, and grated Parmesan cheese into the creamy mixture. Use a spatula to gently combine the ingredients, ensuring that the spinach and cheeses are evenly distributed throughout the dip.
- Season the Dip: Add the minced garlic, onion powder, Worcestershire sauce, salt, and pepper to the mixture. Stir well to incorporate the seasonings, which will enhance the flavor of the dip.
- Transfer to Baking Dish: Pour the spinach dip mixture into a baking dish, spreading it out evenly. This will allow for even baking and a nice golden top.
- Bake: Place the baking dish in the preheated oven and bake for about 25-30 minutes, or until the dip is bubbling and the top is lightly golden. Keep an eye on it to prevent over-browning.
- Garnish and Serve: Once baked, remove the dip from the oven and let it cool slightly. Garnish with chopped fresh parsley for a pop of color before serving. Enjoy with your choice of dippers!
Extra Tips:
To elevate your Shamrock Spinach Dip, consider adding chopped artichokes or sun-dried tomatoes for additional flavor and texture.
You can also make this dip ahead of time by preparing it up to the baking step and refrigerating it until you’re ready to bake. Just add a few extra minutes to the baking time if you’re starting from cold.
Serve with an assortment of colorful vegetables, crackers, or toasted bread for a festive touch!
Matcha Green Tea Cupcakes

St. Patrick’s Day is a celebration of Irish culture, and what better way to honor it than with a deliciously unique dessert? Matcha Green Tea Cupcakes are a delightful twist on traditional cupcakes, bringing a vibrant green color and an earthy flavor profile that perfectly complements the festive spirit of the day.
With the subtle bitterness of matcha and the sweetness of the frosting, these cupcakes will stand out at any gathering, making them a perfect treat for your St. Patrick’s Day festivities.
These cupcakes aren’t only visually stunning but also simple to make, guaranteeing that even novice bakers can whip up a batch to impress their friends and family. The infusion of matcha provides a boost of antioxidants and a unique taste that pairs beautifully with a creamy frosting.
Whether you’re hosting a festive party or just looking to indulge in something special, these Matcha Green Tea Cupcakes are sure to delight your taste buds.
Ingredients (Serves 4-6 People):
- 1 ½ cups all-purpose flour
- 1 teaspoon baking powder
- ½ teaspoon baking soda
- ½ teaspoon salt
- 2 teaspoons matcha green tea powder
- ½ cup unsalted butter, softened
- 1 cup granulated sugar
- 2 large eggs
- 1 teaspoon vanilla extract
- ½ cup buttermilk
- 1 cup powdered sugar (for frosting)
- ¼ cup unsalted butter, softened (for frosting)
- 1 tablespoon heavy cream (for frosting)
- Additional matcha powder for dusting (optional)
Cooking Instructions:
- Preheat the Oven: Begin by preheating your oven to 350°F (175°C). This guarantees that the cupcakes bake evenly and rise properly. Line a cupcake pan with cupcake liners to prepare for the batter.
- Mix Dry Ingredients: In a medium bowl, whisk together the all-purpose flour, baking powder, baking soda, salt, and matcha powder. This step guarantees that the dry ingredients are well combined and evenly distributed, which is vital for achieving the right texture and flavor in your cupcakes.
- Cream Butter and Sugar: In a large mixing bowl, beat the softened butter and granulated sugar together until light and fluffy, about 3-4 minutes. This process incorporates air into the mixture, helping to create a light and tender cupcake.
- Add Eggs and Vanilla: Add the eggs, one at a time, mixing well after each addition. Then, stir in the vanilla extract. This step adds moisture and flavor to the batter, which is necessary for a delicious cupcake.
- Combine Dry and Wet Ingredients: Gradually add the dry ingredient mixture to the butter mixture, alternating with the buttermilk. Start and end with the dry ingredients, mixing until just combined. Be careful not to overmix, as this can lead to dense cupcakes.
- Fill Cupcake Liners: Spoon the batter into the prepared cupcake liners, filling each about 2/3 full to allow room for rising. This guarantees that the cupcakes will have a nice dome shape once baked.
- Bake: Place the cupcake pan in the preheated oven and bake for 18-20 minutes, or until a toothpick inserted into the center comes out clean. Keep a close eye on them to avoid overbaking.
- Cool Cupcakes: Once baked, remove the cupcakes from the oven and let them cool in the pan for 5 minutes. Then, transfer them to a wire rack to cool completely. This cooling process is necessary before frosting, as hot cupcakes can melt the frosting.
- Prepare Frosting: In a medium bowl, beat together the softened butter and powdered sugar until smooth. Add the heavy cream and mix until the frosting reaches a spreadable consistency. You can adjust the thickness by adding more powdered sugar or cream as needed.
- Frost Cupcakes: Once the cupcakes are completely cool, use a piping bag or a spatula to frost them generously with the matcha buttercream frosting. For an extra touch, dust with additional matcha powder.
Extra Tips:
For the best results, make sure to use high-quality matcha powder, as it greatly affects the flavor of your cupcakes.
Store any leftover cupcakes in an airtight container at room temperature for up to two days or in the refrigerator for up to a week. If you’re looking to elevate the flavor further, consider adding a hint of almond extract to the frosting or incorporating white chocolate chips into the batter.
Enjoy your festive baking!
Key Lime Pie Bars
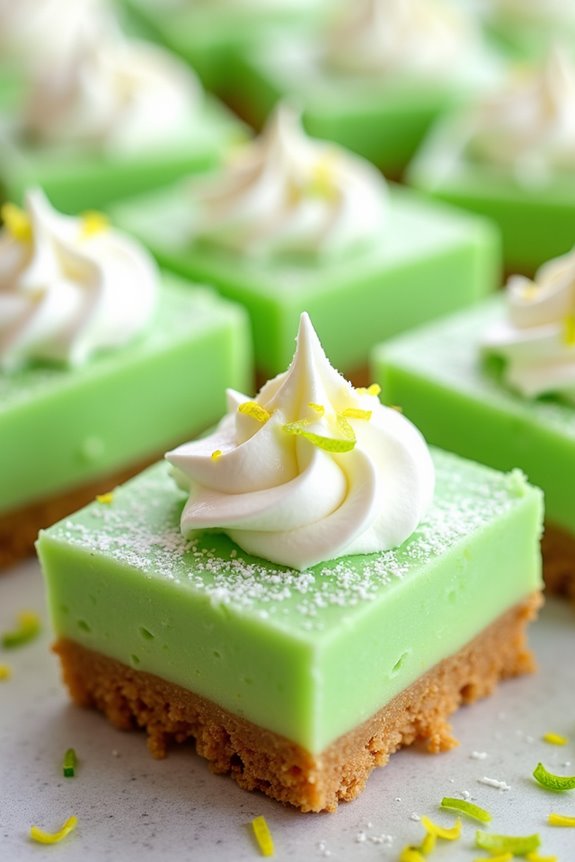
Key Lime Pie Bars are a delightful twist on the classic key lime pie, making them perfect for St. Patrick’s Day festivities. With their bright and tangy flavor, these bars are sure to be a hit with your guests. The creamy, zesty filling is set atop a buttery graham cracker crust, providing a satisfying contrast in texture that makes each bite irresistible.
Whether you’re hosting a gathering or simply want to indulge in a revitalizing dessert, these bars are the ideal choice. Not only are Key Lime Pie Bars easy to prepare, but they also offer a beautiful presentation. The vibrant green color of the key lime filling, paired with a dusting of powdered sugar or a dollop of whipped cream, makes for an eye-catching dessert.
Let’s plunge into the recipe so you can whip up this delightful treat for your friends and family!
Ingredients (Serves 4-6):
- 1 ½ cups graham cracker crumbs
- ½ cup unsalted butter, melted
- ⅓ cup granulated sugar
- 2 large eggs
- 1 can (14 ounces) sweetened condensed milk
- ½ cup freshly squeezed key lime juice (or bottled key lime juice)
- 1 tablespoon lime zest
- Powdered sugar, for dusting (optional)
- Whipped cream, for serving (optional)
Cooking Instructions:
1. Preheat the Oven: Begin by preheating your oven to 350°F (175°C). This guarantees that the bars will bake evenly, creating a perfect crust and a smooth filling.
2. Prepare the Crust: In a medium mixing bowl, combine the graham cracker crumbs, melted butter, and granulated sugar. Mix until the crumbs are well coated and resemble wet sand. Press this mixture firmly into the bottom of a greased 8×8-inch baking dish to form an even layer.
Bake the crust in the preheated oven for 8-10 minutes, or until lightly golden. Let it cool while you prepare the filling.
3. Make the Filling: In a separate bowl, whisk together the eggs and sweetened condensed milk until smooth. Add the freshly squeezed key lime juice and lime zest, and mix until fully incorporated. This combination creates the creamy and tangy filling that will contrast beautifully with the crust.
4. Combine and Bake: Pour the key lime filling over the cooled crust, spreading it evenly with a spatula. Return the baking dish to the oven and bake for an additional 15-20 minutes, or until the filling is set but still slightly jiggly in the center.
5. Cool and Chill: Once baked, remove the dish from the oven and allow it to cool at room temperature for about 30 minutes. After cooling, refrigerate for at least 2 hours, or until fully chilled. This step is critical for the bars to firm up and make them easier to cut.
6. Serve: Once chilled, slice the bars into squares or rectangles. Dust with powdered sugar if desired, and Serve with a dollop of whipped cream for an extra touch of indulgence.
Extra Tips:
When making Key Lime Pie Bars, using fresh key limes can elevate the flavor considerably, but bottled key lime juice works well too. To get the most juice from your limes, roll them on the counter with your palm before cutting.
Additionally, for a more vibrant green color, you can add a few drops of green food coloring to the filling, though this is entirely optional. Make sure to let the bars chill thoroughly for the best texture, and consider garnishing with lime slices or zest for a beautiful presentation!
Green Vegetable Soup
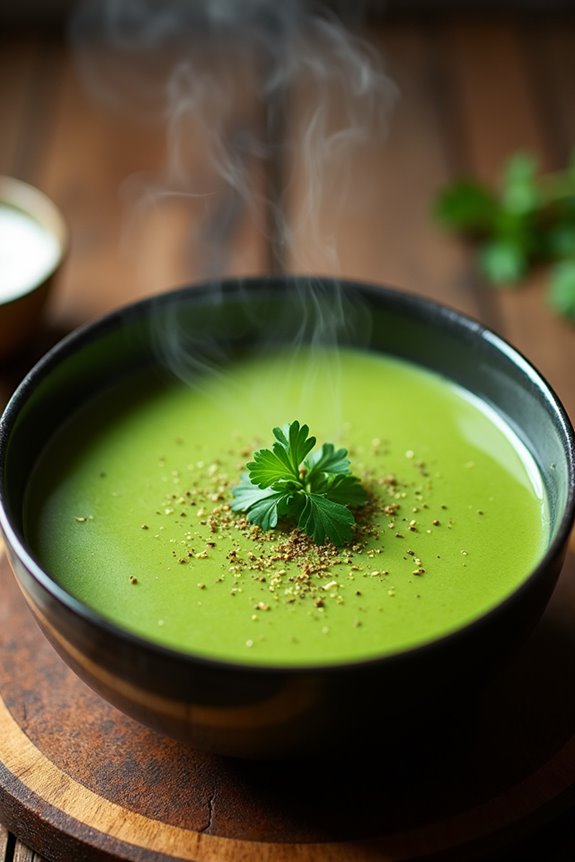
St. Patrick’s Day is a celebration of Irish culture, and what better way to honor this occasion than with a vibrant and hearty Green Vegetable Soup? This dish not only embodies the spirit of the holiday with its delightful green hue, but it’s also packed with nutrients, making it a healthy choice for your feast.
Full of fresh vegetables and a hint of herbs, this soup is both comforting and invigorating, perfect for warming up on a chilly March day. Making Green Vegetable Soup is simple and allows for flexibility regarding ingredients. You can use whatever green vegetables you have on hand, such as spinach, peas, or broccoli, and customize the flavor with your favorite herbs.
This soup can be served as a starter or a main dish, and it pairs wonderfully with crusty bread. Whether you’re hosting a St. Patrick’s Day gathering or just looking for a delicious and nutritious meal, this soup is sure to please everyone at the table.
Ingredients (Serving Size: 4-6 people)
- 2 tablespoons olive oil
- 1 large onion, chopped
- 2 cloves garlic, minced
- 3 medium potatoes, peeled and diced
- 4 cups vegetable broth
- 2 cups broccoli florets
- 2 cups spinach leaves
- 1 cup green peas (fresh or frozen)
- 1 teaspoon dried thyme
- Salt and pepper to taste
- ¼ cup heavy cream (optional, for garnish)
- Fresh parsley, chopped (for garnish)
Cooking Instructions
- Sauté the Aromatics: In a large pot, heat the olive oil over medium heat. Add the chopped onion and sauté for about 5 minutes, or until it becomes translucent. Stir in the minced garlic and cook for an additional minute until fragrant, taking care not to let it burn.
- Cook the Potatoes: Add the diced potatoes to the pot and stir to combine with the onions and garlic. Pour in the vegetable broth, ensuring the potatoes are fully submerged. Bring the mixture to a boil, then reduce the heat and let it simmer for about 10 minutes or until the potatoes are tender.
- Add the Green Vegetables: Once the potatoes are cooked, add the broccoli florets, spinach leaves, and green peas to the pot. Stir in the dried thyme, and season with salt and pepper to taste. Continue to simmer for another 5-7 minutes, or until the broccoli is tender but still bright green.
- Blend the Soup: Remove the pot from heat. Using an immersion blender, carefully blend the soup until smooth. If you don’t have an immersion blender, you can transfer the soup in batches to a regular blender. Just be cautious with hot liquids.
- Finish and Serve: If desired, stir in the heavy cream for added richness. Adjust seasoning if necessary, and reheat gently without boiling. Serve the soup hot, garnished with chopped fresh parsley.
Extra Tips
For a twist on flavor, consider adding a splash of lemon juice or zest just before serving to brighten the soup. You can also incorporate other green vegetables, like zucchini or kale, to boost the nutritional content.
If you prefer a chunkier soup, reserve some of the vegetables before blending and stir them back in for added texture. This soup can be made ahead of time and stored in the fridge for a few days or frozen for later use, making it a convenient option for busy days.
Mint Chocolate Chip Cookies

St. Patrick’s Day is a wonderful occasion to celebrate with festive food and delightful treats. One of the most popular and loved cookies for this holiday is the Mint Chocolate Chip Cookie. The combination of rich chocolate, invigorating mint, and a soft chewy texture makes these cookies a perfect indulgence for anyone looking to add a little sweetness to their St. Patrick’s Day festivities.
With their vibrant green hue and delicious flavor, these cookies are sure to be a hit with both kids and adults alike.
Making Mint Chocolate Chip Cookies is a straightforward process that can be enjoyed as a fun baking activity. Whether you’re hosting a gathering or simply treating your family, these cookies are easy to whip up and can be customized with your favorite mint chocolate chips.
Follow this recipe to create a batch that serves 4-6 people, perfect for sharing or enjoying throughout the day.
Ingredients:
- 1 cup unsalted butter, softened
- 1 cup granulated sugar
- 1 cup packed brown sugar
- 2 large eggs
- 2 teaspoons peppermint extract
- 3 cups all-purpose flour
- 1 teaspoon baking soda
- ½ teaspoon salt
- 1 cup mint chocolate chips
- ½ cup green colored sugar (for decoration, optional)
Cooking Instructions:
- Preheat the Oven: Begin by preheating your oven to 350°F (175°C). This guarantees that your cookies bake evenly and achieve the perfect texture.
- Prepare Baking Sheets: Line two baking sheets with parchment paper. This will prevent the cookies from sticking and make cleanup a breeze.
- Cream Butter and Sugars: In a large mixing bowl, combine the softened unsalted butter, granulated sugar, and brown sugar. Use a hand mixer or stand mixer to cream the mixture on medium speed until it’s light and fluffy, about 2-3 minutes.
- Add Eggs and Mint Extract: Beat in the eggs one at a time, mixing well after each addition. Then, add the peppermint extract, blending until fully incorporated. This will infuse the cookies with a invigorating mint flavor.
- Mix Dry Ingredients: In a separate bowl, whisk together the all-purpose flour, baking soda, and salt. Gradually add this dry mixture to the wet ingredients, mixing on low speed until just combined. Be careful not to overmix, as this can lead to tough cookies.
- Fold in Chocolate Chips: Gently fold in the mint chocolate chips using a spatula. This will guarantee that the chips are evenly distributed throughout the dough.
- Scoop the Dough: Using a tablespoon or cookie scoop, drop rounded balls of dough onto the prepared baking sheets, leaving about 2 inches between each cookie to allow for spreading.
- Sprinkle with Colored Sugar: If desired, sprinkle a pinch of green colored sugar on top of each cookie before baking for an extra festive touch.
- Bake the Cookies: Place the baking sheets in the preheated oven and bake for 10-12 minutes, or until the edges are lightly golden. The centers may look soft but will firm up as they cool.
- Cool and Serve: Once baked, remove the cookies from the oven and let them cool on the baking sheets for about 5 minutes before transferring them to a wire rack to cool completely.
Extra Tips:
To enhance the flavor of your Mint Chocolate Chip Cookies, consider adding a few drops of green food coloring to the dough for a more vibrant appearance.
Additionally, allowing the dough to chill in the refrigerator for 30 minutes before baking can help the cookies maintain their shape and improve their texture.
These cookies can also be stored in an airtight container for up to a week, making them a perfect treat to enjoy long after St. Patrick’s Day has passed!
Broccoli and Cheddar Quiche

Celebrating St. Patrick’s Day calls for delicious food, and a Broccoli and Cheddar Quiche is a perfect addition to your festive table. This savory dish combines the earthy flavors of broccoli with the rich, creamy texture of cheddar cheese, all nestled in a flaky pie crust.
It’s not only a delightful choice for brunch but also works as a light dinner option or a hearty side dish for any gathering. Making a quiche is a wonderful opportunity to get creative in the kitchen. You can customize it by adding other greens or even some diced ham for a protein boost.
The beauty of a quiche lies in its versatility, allowing you to serve it warm, at room temperature, or even chilled. This dish is a wonderful way to incorporate vegetables into your meal and is sure to impress your guests with its vibrant colors and rich flavors.
Ingredients (Serves 4-6):
- 1 pre-made pie crust
- 2 cups fresh broccoli florets, chopped
- 1 cup shredded cheddar cheese
- 4 large eggs
- 1 cup heavy cream
- 1/2 cup milk
- 1/2 teaspoon salt
- 1/4 teaspoon black pepper
- 1/4 teaspoon garlic powder
- 1/4 teaspoon onion powder
- 1 tablespoon olive oil (for sautéing broccoli)
Cooking Instructions:
- Preheat the Oven: Begin by preheating your oven to 375°F (190°C). This step is essential as it guarantees that the quiche cooks evenly and the crust becomes beautifully golden brown.
- Prepare the Pie Crust: Place the pre-made pie crust in a 9-inch pie dish. Press it gently into the bottom and up the sides of the dish. Use a fork to poke several holes in the bottom to prevent the crust from puffing up during baking. Set aside.
- Sauté the Broccoli: In a skillet, heat 1 tablespoon of olive oil over medium heat. Add the chopped broccoli florets and sauté for about 3-4 minutes until they’re bright green and slightly tender. Remove from heat and let cool for a few minutes.
- Mix the Egg Mixture: In a large mixing bowl, whisk together the eggs, heavy cream, milk, salt, pepper, garlic powder, and onion powder until well combined. This mixture will provide the quiche with a creamy texture and rich flavor.
- Combine Ingredients: Stir in the sautéed broccoli and shredded cheddar cheese into the egg mixture. Make sure the broccoli and cheese are evenly distributed throughout the mixture.
- Fill the Pie Crust: Carefully pour the broccoli and cheddar mixture into the prepared pie crust. Use a spatula to spread it out evenly if necessary.
- Bake the Quiche: Place the quiche in the preheated oven and bake for 35-40 minutes, or until the center is set and the top is lightly golden. You can check for doneness by inserting a knife in the center; it should come out clean.
- Cool and Serve: Once baked, remove the quiche from the oven and let it cool for about 10 minutes before slicing. This cooling time allows the filling to set a bit more, making it easier to cut clean slices.
Extra Tips:
When preparing your Broccoli and Cheddar Quiche, feel free to experiment with the cheese; Gruyère or feta can provide a unique twist to the flavor.
Additionally, for a more robust taste, consider adding herbs like thyme or dill to the egg mixture. If you want a crispier crust, you can blind bake the crust for 5-7 minutes before adding the filling.
Finally, this quiche can be made ahead of time and served later, making it a great option for meal prep or entertaining. Enjoy!
Zucchini Noodles With Pesto
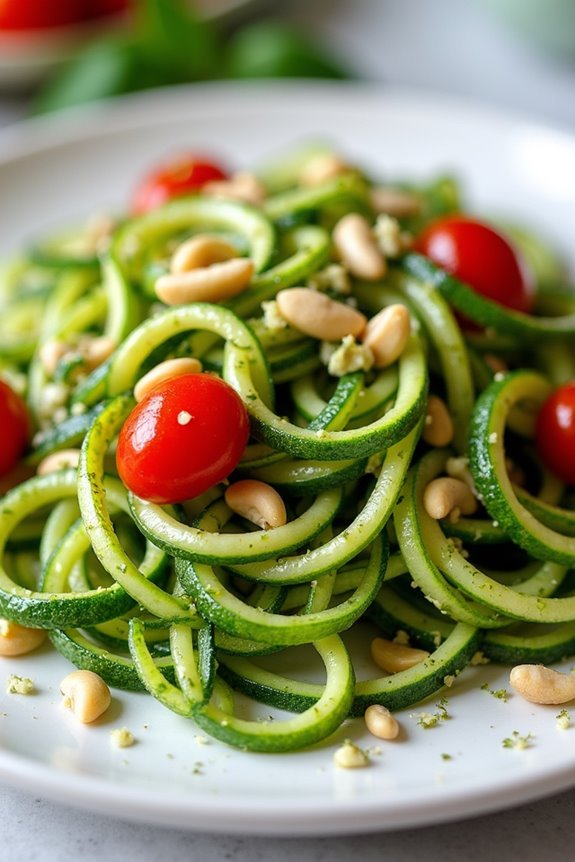
Zucchini Noodles with Pesto is a delicious and healthy dish that brings a burst of flavor to your St. Patrick’s Day celebration. This dish is perfect for those looking to enjoy a lighter meal without sacrificing taste. The vibrant green zucchini noodles, also known as zoodles, are a fantastic low-carb alternative to traditional pasta, while the homemade pesto adds a fresh and aromatic touch.
This recipe isn’t only easy to make but also visually appealing, making it a great addition to your festive feast. Whether you’re a fan of vegetarian dishes or simply looking to incorporate more vegetables into your meals, Zucchini Noodles with Pesto is sure to please everyone at the table.
The combination of the nutty flavor from the pesto, the slight crunch of the zucchini, and the bright notes of garlic and basil creates a delightful harmony of tastes. Serve it as a main dish or a side, and watch it disappear quickly!
Ingredients (Serves 4-6):
- 4 medium zucchinis
- 1 cup fresh basil leaves
- 1/4 cup pine nuts (or walnuts)
- 2 cloves garlic
- 1/2 cup grated Parmesan cheese
- 1/2 cup olive oil
- Salt and pepper to taste
- Optional: Cherry tomatoes and pine nuts for garnish
Cooking Instructions:
- Prepare the Zucchini Noodles: Use a spiralizer or a vegetable peeler to create long, noodle-like strands from the zucchinis. If using a peeler, make thin, flat strips and then slice them into noodle-sized pieces. Set the noodles aside in a large bowl.
- Make the Pesto: In a food processor, combine the fresh basil leaves, pine nuts (or walnuts), garlic, and grated Parmesan cheese. Pulse the ingredients until they’re finely chopped. While the processor is running, slowly drizzle in the olive oil until the mixture is smooth and creamy. Season with salt and pepper to taste.
- Cook the Zoodles: In a large skillet over medium heat, add the zucchini noodles. Sauté the noodles for about 3-5 minutes, stirring frequently until they’re tender but still have a slight crunch. Be careful not to overcook them, as they can become mushy.
- Combine the Ingredients: Once the zucchini noodles are cooked, remove the skillet from the heat. Add the freshly made pesto to the skillet and toss the noodles until they’re evenly coated with the sauce. This will infuse the zoodles with the rich flavors of the pesto.
- Serve and Garnish: Transfer the Zucchini Noodles with Pesto to a serving platter or individual bowls. If desired, garnish with cherry tomatoes and extra pine nuts for a pop of color and crunch. Serve immediately while the dish is warm.
Extra Tips:
When making Zucchini Noodles with Pesto, it’s important to choose firm zucchinis to guarantee they hold up well during cooking. You can also customize the pesto by adding other herbs like parsley or using different nuts according to your preference.
If you prefer a creamier sauce, consider adding a splash of cream or Greek yogurt to the pesto. Finally, this dish can be made ahead of time; simply store the cooked zoodles and pesto separately and combine them just before serving for the best texture. Enjoy your healthy and festive St. Patrick’s Day meal!
Green Apple and Kiwi Smoothie
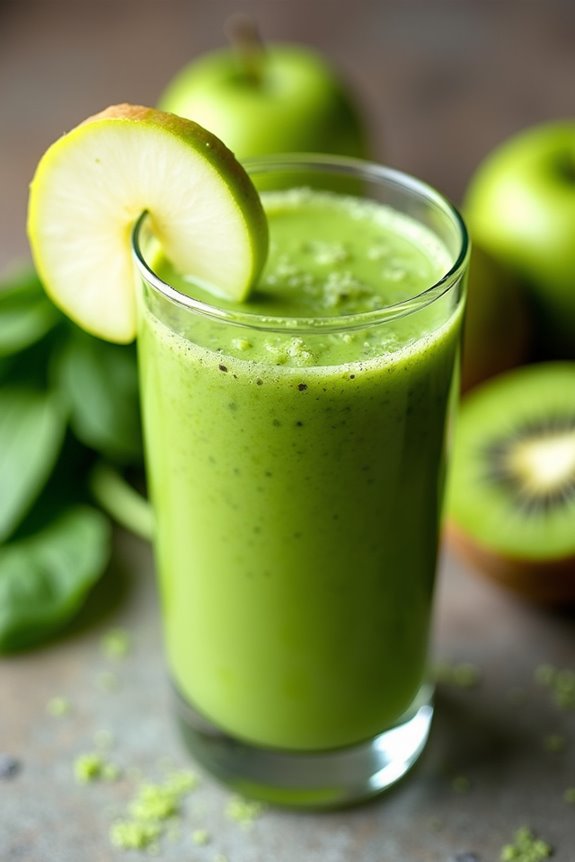
Celebrate St. Patrick’s Day with a revitalizing Green Apple and Kiwi Smoothie that not only captures the spirit of the holiday with its vibrant green hue but also packs a punch of flavor and nutrition. This smoothie is the perfect way to kick off your day or serve as a delightful treat at any party.
The combination of tart green apples and juicy kiwis creates a deliciously tangy base, while the addition of spinach and yogurt provides a creamy texture and boosts the health factor, making it a wholesome choice for all ages.
This recipe isn’t only easy to make but also versatile. You can adjust the sweetness by adding honey or agave syrup, depending on your taste preferences. The Green Apple and Kiwi Smoothie is a fantastic option for those looking to incorporate more fruits into their diet, perfect for both kids and adults alike.
Serve it in clear glasses to showcase the beautiful green color and enjoy this nutritious drink as part of your St. Patrick’s Day festivities!
Ingredients (Serves 4-6):
- 2 large green apples, cored and chopped
- 4 ripe kiwis, peeled and chopped
- 1 cup fresh spinach leaves, washed
- 1 cup plain yogurt (or non-dairy alternative)
- 1 cup apple juice (or coconut water)
- 2 tablespoons honey or agave syrup (optional)
- Ice cubes (optional, for a chilled smoothie)
Cooking Instructions:
- Prepare the Ingredients: Begin by washing and preparing your fruits and spinach. Core and chop the green apples into small pieces, peel and chop the kiwis, and verify the spinach leaves are clean and free from any dirt. This step is essential to guarantee a smooth blend and to remove any bitterness from the spinach.
- Blend the Fruits: In a blender, add the chopped green apples and kiwis. Blend on high speed for about 30 seconds or until the fruits are well combined into a pulp. This will create a base for your smoothie, making sure that the flavors are intense and well-mixed.
- Add Spinach and Yogurt: Next, add the fresh spinach leaves and yogurt to the blender. Blend again for about 30 seconds. The spinach will add a beautiful vibrant color and a nutritious boost without overpowering the taste of the fruits.
- Incorporate Liquid: Pour in the apple juice or coconut water to the blender. This will help to thin out the smoothie and make it easier to blend. Blend everything together for another 30 seconds until the mixture is smooth and creamy.
- Sweeten to Taste: If you prefer a sweeter smoothie, add honey or agave syrup at this stage. Blend again for a few seconds to mix in the sweetener. Taste the smoothie and adjust the sweetness if necessary.
- Serve and Enjoy: If you like your smoothie chilled, add a few ice cubes to the blender and blend until the ice is crushed and mixed in. Pour the smoothie into glasses and serve immediately, garnishing with a slice of kiwi or apple on the rim of the glass for an attractive presentation.
Extra Tips:
For a thicker smoothie, consider using frozen fruit instead of fresh, or adding a banana for creaminess.
If you want to boost the nutritional value even further, consider adding a tablespoon of chia seeds or flaxseeds for added fiber and omega-3 fatty acids.
Experiment with different combinations of greens, such as kale or Swiss chard, to find your perfect blend. Enjoy your Green Apple and Kiwi Smoothie as a rejuvenating, healthful way to celebrate St. Patrick’s Day!