

As the kettle whistles and the aroma of freshly brewed tea fills the air, my mind wanders to the classic British recipes that have been lovingly passed down through generations. There’s something truly special about scones with clotted cream and delicate cucumber sandwiches that connect us to the warmth of tradition. These delightful treats are more than just food; they are a celebration of heritage and togetherness. Join me as we explore these cherished recipes that make afternoon tea an unforgettable experience.
Classic British Scones With Clotted Cream
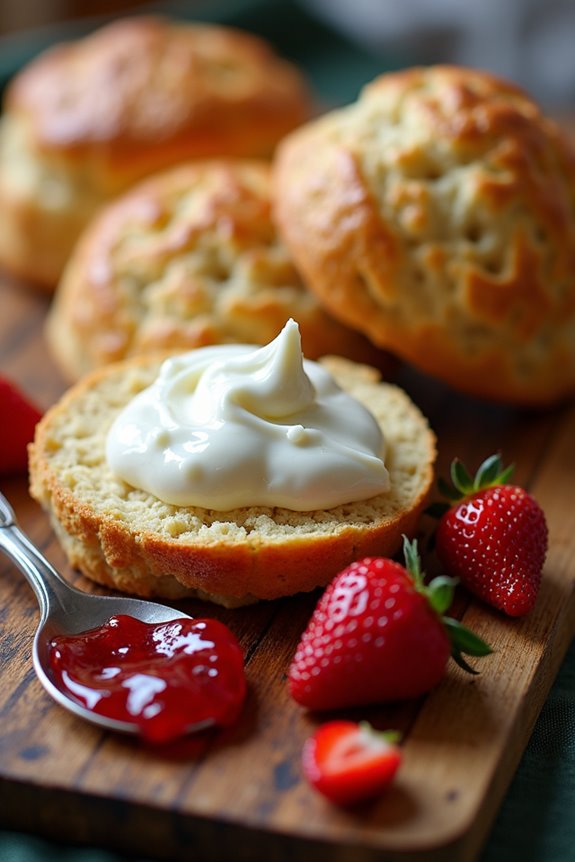
Classic British scones are a quintessential part of tea time in the UK, often enjoyed with a dollop of clotted cream and a generous spoonful of jam. These light and fluffy treats have a rich history, dating back to the 16th century. Traditionally served during afternoon tea, scones can be enjoyed plain or with added ingredients like dried fruits or chocolate chips for a delightful twist. The key to achieving the perfect texture lies in the gentle mixing of ingredients and the careful baking process.
Making scones is an enjoyable and straightforward task, perfect for both novice bakers and those with more experience. With just a handful of ingredients and a little bit of time, you can create a delicious batch of scones that will impress your guests and elevate your tea time experience. Serve them warm, alongside clotted cream and your favorite jam, for a delightful treat that embodies the charm of British tea culture.
Ingredients (Serves 4-6):
- 225g (8oz) self-raising flour
- 55g (2oz) unsalted butter, chilled and cubed
- 30g (1oz) caster sugar
- 150ml (5fl oz) milk
- 1 large egg (for glazing)
- A pinch of salt
- Clotted cream (for serving)
- Strawberry or raspberry jam (for serving)
Cooking Instructions:
- Preheat the Oven: Begin by preheating your oven to 220°C (425°F). This high temperature is essential for creating the perfect rise in your scones, giving them that lovely fluffy texture.
- Prepare the Dry Ingredients: In a large mixing bowl, sift the self-raising flour and add a pinch of salt. Sifting helps to aerate the flour, ensuring your scones will be light and fluffy.
- Rub in the Butter: Add the chilled, cubed butter to the flour mixture. Using your fingertips, gently rub the butter into the flour until the mixture resembles fine breadcrumbs. Be careful not to overwork it; you want to keep some small lumps of butter for flakiness.
- Add Sugar and Milk: Stir in the caster sugar, then make a well in the center of the mixture. Gradually pour in the milk, mixing with a knife until a soft dough begins to form. The dough should be soft but not too sticky.
- Knead the Dough: Turn the dough out onto a lightly floured surface and gently knead it a few times until it comes together. Avoid over-kneading, as this can make the scones tough.
- Roll and Cut: Roll the dough to a thickness of about 2.5cm (1 inch). Use a round cutter to cut out scones and place them on a baking tray lined with parchment paper. Gather any scraps of dough, re-roll, and cut out additional scones.
- Egg Wash: Beat the egg in a small bowl and brush the tops of the scones with the egg wash. This will give them a beautiful golden color when baked.
- Bake: Place the tray in the preheated oven and bake for 12-15 minutes, or until the scones are golden brown and have risen well. Keep an eye on them to avoid over-baking.
- Cool and Serve: Once baked, remove the scones from the oven and let them cool on a wire rack for a few minutes. Serve warm with clotted cream and your choice of jam.
Extra Tips:
For the best results, use chilled ingredients and work quickly to keep the butter cold. If you prefer a sweeter scone, you can add a handful of dried fruits like sultanas or cranberries into the dough.
Additionally, avoid overworking the dough to maintain its lightness, and if you don’t have self-raising flour, you can make your own by adding baking powder to plain flour (for every 150g of plain flour, add 2 teaspoons of baking powder).
Enjoy your delightful scones fresh out of the oven!
Cucumber Sandwiches
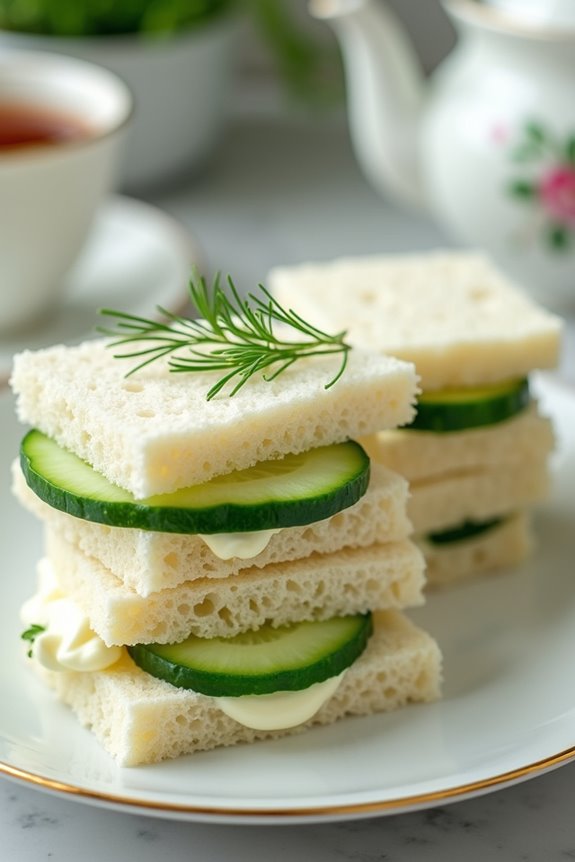
Cucumber sandwiches are a quintessential part of British tea time, perfectly embodying the elegance and simplicity of this delightful tradition. These light and invigorating sandwiches are made with thinly sliced cucumbers, creamy butter or cream cheese, and soft white bread, making them an ideal accompaniment to a cup of tea. Their mild flavor and crisp texture make them incredibly appealing, especially during warm weather or as a light snack.
The beauty of cucumber sandwiches lies in their versatility. You can customize them with various spreads, seasonings, and even additional ingredients like herbs or smoked salmon. However, the classic version remains a favorite for its simplicity and the invigorating taste of the cucumber. Whether served at a garden party or a formal afternoon tea, cucumber sandwiches are sure to impress your guests with their charm and flavor.
Ingredients (serving size: 4-6 people)
- 8 slices of white bread (preferably soft)
- 1 medium cucumber, thinly sliced
- 4 tablespoons unsalted butter or cream cheese (softened)
- Salt, to taste
- Freshly ground black pepper, to taste
- Fresh dill or mint (optional, for garnish)
Cooking Instructions
- Prepare the Bread: Begin by laying out the slices of white bread on a clean cutting board or countertop. If you prefer, you can cut the crusts off the bread to create a more refined look. Using a sharp knife, trim the edges to your desired shape, whether you want squares or triangles.
- Prepare the Cucumber: Wash the cucumber thoroughly and slice it thinly using a sharp knife or a mandoline. Aim for slices that are about 1/8 inch thick to guarantee they’re delicate yet substantial enough to hold the sandwich together. Place the slices in a bowl and sprinkle them lightly with salt to draw out excess moisture. Let them sit for about 5-10 minutes.
- Spread the Butter/Cream Cheese: Take your softened butter or cream cheese and spread an even layer on one side of each slice of bread. Be generous but make sure not to overdo it, as you want the filling to be balanced with the bread.
- Assemble the Sandwiches: After the cucumbers have released some moisture, pat them dry with a paper towel to prevent sogginess. Layer the cucumber slices evenly on half of the bread slices, ensuring they cover the surface but avoid piling them too high. If desired, add a sprinkle of freshly ground black pepper or some chopped dill or mint for added flavor.
- Complete the Sandwiches: Place the remaining slices of bread on top of the cucumber-laden slices, buttered side down. Press them gently to guarantee they stick together. If you prefer, you can cut the sandwiches into triangles or quarters for easy serving.
- Serve: Arrange the sandwiches on a platter and garnish them with additional herbs if desired. Serve immediately or refrigerate for a short while if you’re preparing them in advance. Enjoy your cucumber sandwiches with a pot of freshly brewed tea!
Extra Tips
For the best flavor and texture, use fresh, high-quality ingredients. Opt for organic cucumbers if possible, as they tend to have a better taste and fewer pesticides. Keeping the sandwiches covered until serving time will prevent them from drying out.
If you want to add a twist, consider mixing cream cheese with a little lemon zest or horseradish for a zesty kick. Adjust the seasoning to your preference, and don’t hesitate to experiment with different bread types, such as whole grain or rye, to suit your taste!
Egg and Cress Sandwiches
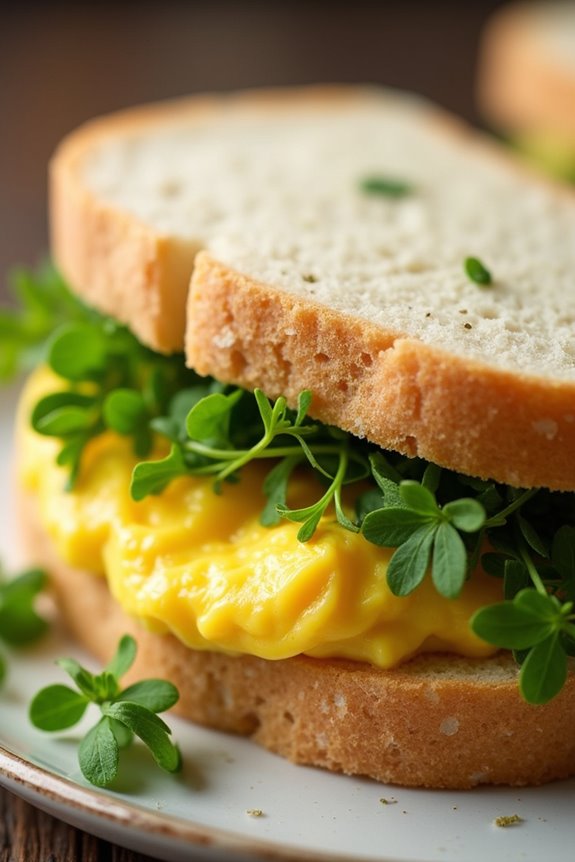
Egg and cress sandwiches are a quintessential part of British tea time, offering a delightful combination of creamy egg filling and the peppery flavor of fresh cress. These sandwiches aren’t only simple to make but also a crowd-pleaser, making them perfect for afternoon tea gatherings or a light lunch.
The soft white bread provides the perfect canvas for the rich filling, while the cress adds an aromatic freshness that elevates the dish.
Making egg and cress sandwiches is a straightforward process that requires only a few ingredients, yet the result is both delicious and elegant. This recipe is designed to serve 4-6 people, ensuring that there are enough sandwiches to go around for your tea time occasion.
The balance of flavors and textures makes these sandwiches a delightful treat that pairs wonderfully with a cup of tea.
Ingredients:
- 6 large eggs
- 4 tablespoons mayonnaise
- 2 tablespoons Dijon mustard
- Salt and pepper, to taste
- 1 bunch of fresh cress (about 100g)
- 8 slices of soft white bread
- Butter, for spreading (optional)
Cooking Instructions:
1. Boil the Eggs: Place the eggs in a saucepan and cover them with cold water. Bring the water to a boil over medium heat. Once boiling, cover the pan and remove it from the heat. Let the eggs sit for about 10-12 minutes for hard-boiled eggs.
After the time is up, transfer the eggs to a bowl of ice water to cool for 5-10 minutes, which will make peeling easier.
2. Prepare the Filling: Once the eggs are cool, peel them and chop them into small pieces. In a mixing bowl, combine the chopped eggs with mayonnaise, Dijon mustard, salt, and pepper. Mix well until all ingredients are evenly combined and the eggs are coated with the dressing.
Adjust seasoning to taste.
3. Prepare the Bread: If desired, lightly butter one side of each slice of bread. This adds flavor and helps prevent the filling from making the bread soggy.
4. Assemble the Sandwiches: Lay four slices of bread, buttered side down, on a clean work surface. Spread an even layer of the egg mixture on each slice. Top with a handful of fresh cress, distributing it evenly over the egg filling.
Place the remaining slices of bread on top, buttered side up.
5. Cut and Serve: Using a sharp knife, cut the sandwiches into quarters or halves, depending on your preference. Arrange them on a serving platter and enjoy them with a pot of tea.
Extra Tips:
When preparing egg and cress sandwiches, consider using the freshest eggs you can find, as this will enhance the flavor of the filling.
Additionally, you can experiment with different types of bread, such as whole grain or sourdough, for a unique twist. If you’re making these sandwiches ahead of time, store them in an airtight container in the refrigerator, and consume them within a day to maintain freshness.
Smoked Salmon and Cream Cheese Sandwiches

Smoked salmon and cream cheese sandwiches are a delightful addition to any tea time spread. The combination of the rich, smoky flavor of the salmon with the creamy, tangy cream cheese creates a perfect balance that can be enjoyed by all.
These sandwiches aren’t only tasty but also elegant, making them a popular choice for gatherings, afternoon tea, or even a light lunch. They’re simple to prepare and can be made ahead of time, allowing you to spend more time enjoying your company.
This classic British recipe is versatile, allowing for variations in bread and garnishes. While traditional recipes often call for white bread, feel free to experiment with whole grain or rye for added texture and flavor.
Additionally, a sprinkle of fresh dill or capers can elevate the flavor profile, making these sandwiches even more sophisticated. With just a few ingredients and minimal preparation, you’ll have a delicious treat ready to impress your guests.
Ingredients (Serves 4-6):
- 8 slices of fresh white or whole grain bread
- 8 oz cream cheese, softened
- 8 oz smoked salmon, thinly sliced
- 1 tablespoon fresh lemon juice
- 1 tablespoon capers, drained (optional)
- Fresh dill, for garnish (optional)
- Salt and pepper, to taste
Cooking Instructions:
- Prepare the Cream Cheese Mixture: In a medium bowl, combine the softened cream cheese with fresh lemon juice. Mix well until smooth and creamy. If desired, season with a pinch of salt and pepper to taste. This step guarantees the cream cheese has a zesty flavor that complements the smoked salmon.
- Assemble the Sandwiches: Lay out the slices of bread on a clean surface. Spread a generous layer of the cream cheese mixture on one side of each slice. Be sure to cover the bread evenly to guarantee every bite is flavorful.
- Add the Smoked Salmon: On half of the cream cheese-covered slices, layer the thinly sliced smoked salmon. You can fold the salmon slices for a more textured look. If using capers, sprinkle them evenly over the salmon for added flavor.
- Top with Remaining Bread: Place the other half of the bread slices, cream cheese side down, on top of the salmon. Press down gently to guarantee they stick together well.
- Cut and Serve: Using a sharp knife, cut each sandwich into quarters or triangles, depending on your preference. Arrange the cut sandwiches on a serving platter and garnish with fresh dill if desired.
Extra Tips:
For the best flavor and texture, use high-quality smoked salmon and fresh bread. If you plan to prepare these sandwiches in advance, wrap them tightly in plastic wrap and refrigerate; however, it’s best to assemble them no more than a few hours before serving to maintain the freshness of the bread.
Additionally, consider pairing these sandwiches with a light tea or a sparkling beverage for an elevated tea time experience.
Victoria Sponge Cake
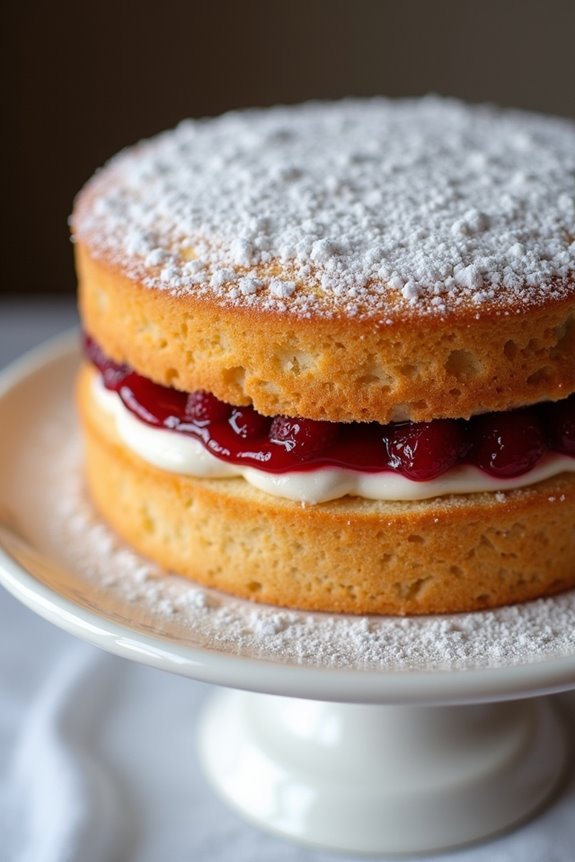
The Victoria Sponge Cake is a quintessential British dessert, perfect for tea time and often enjoyed during special occasions. Named after Queen Victoria, who was known to indulge in a slice with her afternoon tea, this cake is characterized by its light and fluffy texture, typically filled with a layer of jam and whipped cream or buttercream.
The simplicity of the ingredients makes it a delightful treat, while the elegant presentation adds a touch of sophistication to any gathering.
Making a Victoria Sponge Cake is straightforward, and it requires only a few key ingredients. The cake batter consists of equal parts flour, sugar, butter, and eggs, which come together to create a moist sponge.
Once baked, the cake is split in half, generously filled with raspberry or strawberry jam, and topped with a dusting of icing sugar for that classic finish. This cake isn’t only delicious but also visually appealing, making it a favorite among both home bakers and professional patisseries.
Ingredients (Serves 4-6):
- 200g unsalted butter, softened
- 200g granulated sugar
- 4 large eggs
- 200g all-purpose flour
- 2 tsp baking powder
- 1/2 tsp salt
- 4 tbsp raspberry or strawberry jam
- Icing sugar, for dusting
Cooking Instructions:
- Preheat the Oven: Begin by preheating your oven to 180°C (350°F). This guarantees that the cake bakes evenly and rises properly when placed in the oven.
- Prepare the Cake Pans: Grease two 20cm (8-inch) round cake pans with butter or non-stick spray and line the bottoms with parchment paper. This prevents the cakes from sticking and makes for easier removal once baked.
- Cream the Butter and Sugar: In a large mixing bowl, beat together the softened butter and granulated sugar using an electric mixer on medium speed until the mixture is light and fluffy. This process usually takes about 3-5 minutes and incorporates air into the batter, which is essential for a light sponge.
- Add the Eggs: Gradually add the eggs, one at a time, beating well after each addition. This helps to emulsify the mixture, guaranteeing that the eggs are fully incorporated into the batter without causing it to curdle.
- Combine Dry Ingredients: In a separate bowl, sift together the all-purpose flour, baking powder, and salt. Sifting helps to aerate the flour and remove any lumps, which contributes to a lighter cake.
- Mix Dry Ingredients into Wet: Gently fold the dry ingredients into the butter mixture using a spatula or wooden spoon. Be careful not to overmix, as this can lead to a dense cake. The batter should be smooth with no visible flour.
- Divide and Bake: Evenly divide the batter between the two prepared cake pans. Smooth the tops with a spatula and bake in the preheated oven for 25-30 minutes, or until golden brown and a skewer inserted into the center comes out clean.
- Cool the Cakes: Once baked, remove the cakes from the oven and let them cool in the pans for about 10 minutes. Then, carefully turn them out onto a wire rack to cool completely. This prevents the cakes from becoming soggy.
- Assemble the Cake: Once the cakes are completely cool, place one layer on a serving plate. Spread the jam evenly over the top, then place the second cake layer on top.
- Finish with Icing Sugar: Finally, dust the top of the cake with icing sugar for a classic finish. Serve slices with your favorite tea for a delightful afternoon treat.
Extra Tips:
For added flavor, consider incorporating a teaspoon of vanilla extract into the batter or adding lemon zest for a rejuvenating twist.
Confirming your ingredients are at room temperature before starting helps achieve a better emulsion, leading to a lighter sponge. You can also customize the filling with different types of jam or even fresh berries for an extra touch of sweetness. Enjoy your baking!
Bakewell Tart
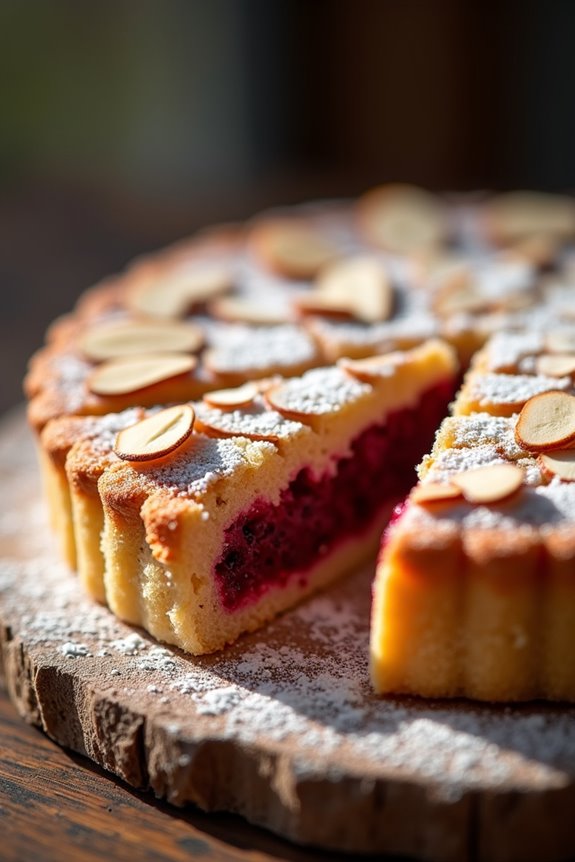
Bakewell Tart is a beloved British dessert that hails from the town of Bakewell in Derbyshire. This delightful treat features a crisp pastry base filled with a layer of fruity jam and topped with a light almond-flavored sponge, often enhanced by a sprinkle of flaked almonds. The combination of textures and flavors makes it a perfect accompaniment for tea time, delighting guests with its rich taste and beautiful presentation.
Traditionally, Bakewell Tart is made with raspberry jam, but you can experiment with other fruits like apricot or cherry to suit your taste. Whether enjoyed as a sweet snack or a dessert, this tart is sure to impress with its elegant appearance and delicious flavor. Let’s plunge into making this classic British treat!
Ingredients (Serves 4-6):
- 225g (8oz) shortcrust pastry
- 100g (3.5oz) raspberry jam
- 125g (4.5oz) unsalted butter, softened
- 125g (4.5oz) caster sugar
- 2 large eggs
- 125g (4.5oz) ground almonds
- 1 tsp almond extract
- 1 tsp baking powder
- Flaked almonds for topping
- Icing sugar for dusting (optional)
Cooking Instructions:
- Preheat the Oven: Begin by preheating your oven to 180°C (350°F). This guarantees that your Bakewell Tart will bake evenly and achieve a lovely golden color.
- Prepare the Pastry Base: Roll out the shortcrust pastry on a lightly floured surface to fit a 23cm (9-inch) tart tin. Carefully transfer the pastry to the tin, pressing it into the edges. Trim any excess pastry from the edges, and prick the base with a fork to prevent it from puffing up during baking. Chill in the fridge for about 15 minutes.
- Blind Bake the Pastry: Place a sheet of baking parchment over the pastry base and fill it with baking beans or rice to weigh it down. Bake in the preheated oven for about 15 minutes, then remove the parchment and beans and bake for an additional 5 minutes until the pastry is lightly golden. Remove from the oven and allow to cool slightly.
- Spread the Jam: Once the pastry has cooled, spread the raspberry jam evenly over the base. This layer adds sweetness and moisture to the tart.
- Make the Almond Filling: In a mixing bowl, cream together the softened butter and caster sugar until light and fluffy. Gradually add the eggs, mixing well after each addition. Then, stir in the ground almonds, almond extract, and baking powder until fully combined, forming a smooth batter.
- Assemble the Tart: Pour the almond mixture over the jam layer in the pastry case. Use a spatula to smooth the top evenly. Sprinkle a handful of flaked almonds over the top for added texture and flavor.
- Bake the Tart: Return the tart to the oven and bake for about 25-30 minutes, or until the top is golden brown and a skewer inserted into the center comes out clean. Keep an eye on it to prevent over-browning.
- Cool and Serve: Once baked, remove the tart from the oven and allow it to cool in the tin for a few minutes before transferring it to a wire rack to cool completely. Once cooled, dust with icing sugar if desired, slice, and serve with a cup of tea.
Extra Tips:
For the best results, make sure your butter is at room temperature before creaming it with the sugar, as this will create a light and airy filling. If you prefer a more intense almond flavor, consider using a few drops of almond extract instead of the standard amount.
Additionally, let your tart cool completely before slicing to guarantee clean cuts. Enjoy your Bakewell Tart fresh, or store it in an airtight container for a few days—if it lasts that long!
Lemon Drizzle Cake
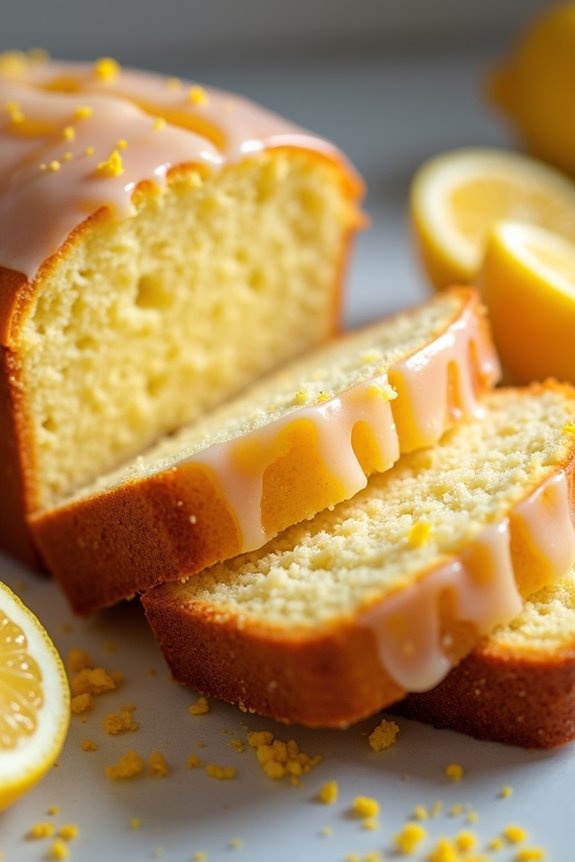
Lemon Drizzle Cake is a classic British treat that perfectly complements a cup of tea during the afternoon. With its zesty flavor, moist crumb, and delectable glaze, this cake isn’t only simple to prepare but also a delightful addition to any tea time gathering. The bright citrus notes of lemon provide a revitalizing contrast to the richness of the cake, making it a favorite among many.
This cake is typically served in slices, allowing everyone to enjoy a piece while sipping their tea. The combination of a light sponge cake topped with a tangy lemon drizzle creates a balance of sweetness and tartness that’s hard to resist. Whether you’re hosting a tea party or simply indulging in a quiet afternoon treat, Lemon Drizzle Cake is sure to impress.
Ingredients (Serves 4-6):
- 225g (8 oz) unsalted butter, softened
- 225g (8 oz) granulated sugar
- 4 large eggs
- Zest of 2 lemons
- 225g (8 oz) all-purpose flour
- 2 tsp baking powder
- 1/2 tsp salt
- 4-5 tbsp freshly squeezed lemon juice (for the drizzle)
- 100g (3.5 oz) icing sugar (for the drizzle)
Cooking Instructions:
- Preheat the Oven: Begin by preheating your oven to 180°C (350°F). This guarantees that when you place your cake in the oven, it will bake evenly and achieve the perfect rise.
- Prepare the Cake Tin: Grease a 2lb loaf tin with a little butter and line the bottom with parchment paper. This step is essential as it prevents the cake from sticking to the tin and makes for easy removal once baked.
- Cream Butter and Sugar: In a large mixing bowl, combine the softened butter and granulated sugar. Using an electric mixer, cream them together on medium speed until the mixture is light and fluffy. This process incorporates air into the batter, which helps the cake rise.
- Add Eggs and Lemon Zest: Beat in the eggs one at a time, mixing well after each addition. Then, add the lemon zest. The zest adds a bright flavor, enhancing the overall lemony taste of the cake.
- Combine Dry Ingredients: In another bowl, whisk together the flour, baking powder, and salt. Gradually fold the dry mixture into the wet mixture using a spatula or wooden spoon. Be careful not to overmix; just combine until there are no dry streaks of flour.
- Transfer to Tin: Pour the batter into the prepared loaf tin, spreading it evenly. Give the tin a gentle tap on the counter to remove any air bubbles, guaranteeing a smooth cake texture.
- Bake the Cake: Place the tin in the preheated oven and bake for 45-50 minutes, or until a skewer inserted into the center comes out clean. Keep an eye on the cake towards the end of the baking time to avoid overbaking.
- Prepare the Drizzle: While the cake is baking, prepare the lemon drizzle. In a small bowl, mix the fresh lemon juice and icing sugar until smooth. This glaze will soak into the warm cake, enhancing its flavor.
- Apply the Drizzle: Once the cake is done baking, remove it from the oven and let it cool in the tin for about 10 minutes. Then, turn it out onto a wire rack. While the cake is still warm, poke holes all over the top with a skewer or toothpick and pour the lemon drizzle over the cake, allowing it to soak in.
- Cool and Serve: Allow the cake to cool completely before slicing. This guarantees the glaze sets properly, making for a beautiful presentation when served.
Extra Tips:
For an even more intense lemon flavor, consider adding a bit of lemon extract to the batter or drizzle. You can also substitute some of the granulated sugar with brown sugar for a deeper flavor profile.
If you’re feeling adventurous, try adding poppy seeds to the batter for a delightful crunch and a beautiful visual contrast. Enjoy your Lemon Drizzle Cake fresh, or store it in an airtight container for up to three days, making sure it remains moist and flavorful.
Shortbread Biscuits

Shortbread biscuits are a classic British treat that perfectly complement a cup of tea. Originating from Scotland, these buttery delights are known for their crumbly texture and rich flavor. With just a few simple ingredients, you can create a batch of these delectable biscuits that are sure to impress your family and friends during tea time.
The beauty of shortbread lies in its simplicity. Traditionally made with just three main ingredients—flour, sugar, and butter—these biscuits are easy to prepare and require minimal effort. Whether enjoyed plain or with a sprinkle of sea salt, they’re versatile and can be tailored to your taste.
So, let’s plunge into the recipe for creating your very own shortbread biscuits, ideal for serving 4-6 people.
Ingredients:
- 1 cup (225g) unsalted butter, softened
- ½ cup (60g) granulated sugar
- 2 cups (250g) all-purpose flour
- ¼ teaspoon salt
- 1 teaspoon vanilla extract (optional)
- Extra sugar for sprinkling (optional)
Cooking Instructions:
- Preheat the Oven: Begin by preheating your oven to 350°F (175°C). This guarantees that your biscuits bake evenly and achieve a lovely golden color.
- Cream the Butter and Sugar: In a large mixing bowl, combine the softened unsalted butter and granulated sugar. Using an electric mixer or a wooden spoon, beat the mixture until it becomes light and fluffy. This process incorporates air into the butter, giving your biscuits a tender texture.
- Add the Flour and Salt: Gradually sift in the all-purpose flour and add the salt to the butter-sugar mixture. If you’re using vanilla extract, add it at this stage. Gently mix the ingredients together using a spatula or your hands until the dough starts to come together. Be careful not to overmix, as this can lead to tough biscuits.
- Form the Dough: Once the dough is well-combined, turn it out onto a lightly floured surface. Knead it gently just until smooth. Shape the dough into a disc about ½ inch thick. If you prefer, you can also roll it out and use cookie cutters to create different shapes.
- Cut the Biscuits: Use a sharp knife or a pastry cutter to cut the dough into rectangular or square shapes. Place the biscuits on a baking sheet lined with parchment paper, leaving some space between each piece. If desired, sprinkle a little extra sugar on top of each biscuit for added sweetness.
- Bake: Place the baking sheet in the preheated oven and bake for 15-20 minutes or until the edges are lightly golden. Keep an eye on them to avoid overbaking, as shortbread should remain pale in color.
- Cool and Serve: Once baked, remove the biscuits from the oven and allow them to cool on the baking sheet for a few minutes before transferring them to a wire rack. Let them cool completely before serving with your favorite tea.
Extra Tips: When making shortbread biscuits, verify your butter is at room temperature for easier mixing. For a unique twist, consider adding lemon zest or chocolate chips to the dough.
Additionally, storing the biscuits in an airtight container will keep them fresh for longer, allowing you to enjoy them with your tea time for several days.
Treacle Tart
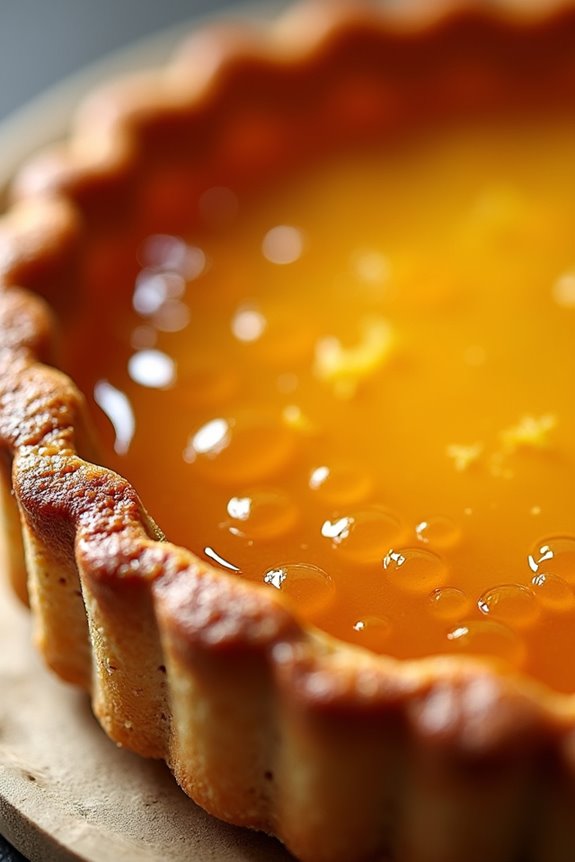
Treacle Tart is a classic British dessert that has been enjoyed for generations, often found at tea time or as a delightful treat during special occasions.
With its sweet, sticky filling made primarily from golden syrup, breadcrumbs, and lemon juice, this tart offers a perfect balance of sweetness and acidity. The buttery pastry crust adds a lovely crunch that complements the gooey filling, making it a favorite among both children and adults alike.
This traditional dessert has its roots in British cuisine and is famously known as one of Harry Potter’s favorite treats. Whether served warm with a dollop of clotted cream or chilled for a rejuvenating bite, Treacle Tart is sure to impress your guests and elevate your tea time experience.
Follow this simple recipe to create your very own Treacle Tart that will bring a taste of Britain to your table.
Ingredients (Serves 4-6)
- 200g digestive biscuits (or shortcrust pastry)
- 75g unsalted butter, melted
- 300g golden syrup
- 150g fresh breadcrumbs
- Zest of 1 lemon
- Juice of 1 lemon
- 1 large egg
- Pinch of salt
Cooking Instructions
1. Prepare the pastry (if using): If you’re using shortcrust pastry, roll it out on a lightly floured surface to fit your tart tin. Line the tin with the pastry, trimming any excess edges. Prick the base with a fork and refrigerate for 30 minutes to prevent shrinking during baking.
2. Preheat the oven: Preheat your oven to 180°C (350°F). This guarantees that the tart will bake evenly and achieve a lovely golden color.
3. Make the biscuit base (if using): If you’re using digestive biscuits, crush them into fine crumbs using a food processor or by placing them in a plastic bag and rolling over them with a rolling pin.
Mix the crumbs with melted butter until well combined, then press this mixture firmly into the base and sides of the prepared tart tin. Bake for 10 minutes until lightly golden and set. Let it cool slightly.
4. Prepare the filling: In a large mixing bowl, combine the golden syrup, fresh breadcrumbs, lemon zest, lemon juice, and a pinch of salt. Mix well until you have a smooth mixture.
Beat in the egg until fully incorporated, which will help to bind the filling.
5. Assemble the tart: Pour the filling mixture into the cooled biscuit base (or pastry shell) and spread it evenly.
6. Bake the tart: Place the tart in the preheated oven and bake for about 25-30 minutes, or until the filling is set and slightly puffed. The top should have a beautiful golden hue.
7. Cool and serve: Once baked, remove the tart from the oven and allow it to cool at room temperature for at least 15 minutes before serving. This will help the filling to firm up a bit more.
Extra Tips
For an extra touch of flavor, consider adding a sprinkle of nutmeg or ginger to the filling mixture.
You can also serve the Treacle Tart with a scoop of vanilla ice cream or a dollop of whipped cream for added richness. If you want to make it ahead of time, the tart can be stored in the refrigerator for up to three days, making it an excellent make-ahead option for gatherings.
Enjoy your baking!
Fruitcake
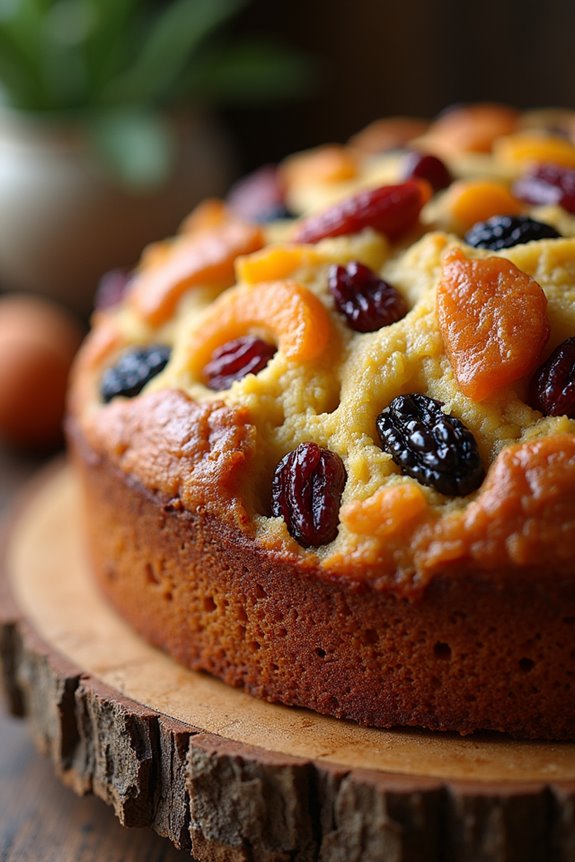
Fruitcake is a traditional British treat that has been enjoyed at tea time for centuries. This rich, moist cake is packed with a variety of dried fruits, nuts, and often a hint of spices, making it a perfect companion for a cup of tea.
While many might associate fruitcake with the holiday season, it’s also a delightful choice for any tea time gathering. The combination of flavors and textures creates a festive experience that’s sure to impress your guests, making it a staple in British baking.
Making a fruitcake is a wonderful way to use up leftover dried fruits that you might’ve in your pantry, and the recipe is quite forgiving, allowing for personal touches and variations. Whether you prefer a classic recipe or want to experiment with different flavors, this fruitcake is easily adaptable.
Let’s explore the ingredients and the step-by-step process to create this delightful cake that serves 4-6 people.
Ingredients:
- 200g mixed dried fruit (such as raisins, sultanas, and currants)
- 100g chopped dried apricots
- 100g mixed nuts (such as walnuts and almonds)
- 150g unsalted butter, softened
- 150g brown sugar
- 3 large eggs
- 200g plain flour
- 1 tsp baking powder
- 1 tsp ground cinnamon
- 1 tsp mixed spice (or nutmeg)
- Zest of 1 lemon
- 2 tbsp fresh orange juice
- 50ml brandy or rum (optional)
Cooking Instructions:
- Preheat the Oven: Preheat your oven to 150°C (300°F). This low temperature is essential to guarantee the fruitcake cooks evenly without burning.
- Prepare the Cake Tin: Grease a round or square cake tin (approximately 8 inches) and line the base and sides with baking paper. This prevents the cake from sticking and helps it retain moisture.
- Soak the Dried Fruits: In a bowl, combine the mixed dried fruit and chopped apricots. If you’re using brandy or rum, add it to the fruits and let them soak for at least 30 minutes. This step enhances the flavor and moisture of the cake.
- Cream the Butter and Sugar: In a large mixing bowl, using an electric mixer, cream the softened butter and brown sugar together until the mixture is light and fluffy. This process incorporates air into the butter, which will help the cake rise.
- Add Eggs: Beat in the eggs one at a time, mixing well after each addition. This ensures that the eggs are fully incorporated into the butter mixture.
- Combine Dry Ingredients: In another bowl, sift together the plain flour, baking powder, ground cinnamon, and mixed spice. This step aerates the flour and evenly distributes the baking powder and spices.
- Mix Dry and Wet Ingredients: Gradually fold the dry ingredients into the butter mixture using a spatula, taking care not to overmix. You want to keep the mixture light and airy.
- Incorporate Fruits and Nuts: Gently fold in the soaked dried fruits, mixed nuts, lemon zest, and orange juice until evenly distributed throughout the batter.
- Transfer to Cake Tin: Pour the batter into the prepared cake tin, smoothing the top with a spatula. Tap the tin lightly on the counter to remove any air bubbles.
- Bake the Cake: Place the cake tin in the preheated oven and bake for approximately 1.5 to 2 hours, or until a skewer inserted into the center comes out clean. If the top starts to brown too quickly, cover it with foil.
- Cool and Serve: Once baked, remove the cake from the oven and allow it to cool in the tin for 15 minutes before transferring it to a wire rack to cool completely. Serve thin slices of the fruitcake with a cup of tea.
Extra Tips:
To enhance the flavors of your fruitcake, consider wrapping it tightly in foil or baking paper and storing it in an airtight container for a few days before serving. This aging process allows the flavors to meld beautifully.
Additionally, you can brush the cooled cake with more brandy or rum for added moisture and flavor. Fruitcake can also be frozen for later enjoyment; just make sure it’s well-wrapped to prevent freezer burn. Enjoy your delightful fruitcake at your next tea time!
Welsh Cakes
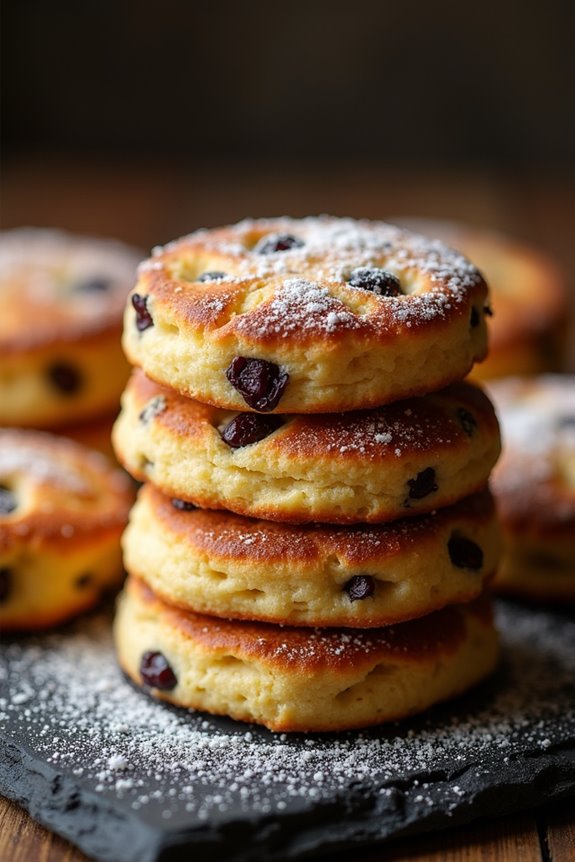
Welsh cakes are a delightful treat that perfectly embody the spirit of traditional British tea time. Originating from Wales, these small, round cakes are a great way to enjoy a taste of Welsh culture. Fluffy yet slightly crisp on the outside, they’re studded with dried fruits and often dusted with sugar, making them an irresistible companion to a steaming cup of tea.
They’re quick to make, and their versatility allows for variations, such as adding spices or different fruits, according to personal taste. Making Welsh cakes is a simple process that involves combining flour, butter, sugar, and spices with dried fruits.
They’re traditionally cooked on a griddle or a heavy frying pan, which gives them their characteristic texture. Whether enjoyed warm or at room temperature, these cakes are perfect for afternoon tea or as a snack any time of day. With a few basic ingredients and minimal equipment, you can whip up a batch that will delight family and friends alike.
Ingredients (Serves 4-6)
- 225g plain flour
- 100g unsalted butter (cold and diced)
- 75g caster sugar
- 1 tsp baking powder
- 1 tsp mixed spice powder (or cinnamon)
- 100g currants or raisins
- 1 large egg (beaten)
- 2-3 tbsp milk (as needed)
- Extra caster sugar (for dusting)
Cooking Instructions
- Prepare the Dry Ingredients: In a large mixing bowl, sift together the plain flour, baking powder, and mixed spice powder. This helps to aerate the flour and guarantees even distribution of the ingredients.
- Incorporate the Butter: Add the cold, diced butter to the flour mixture. Use your fingertips to rub the butter into the flour until the mixture resembles breadcrumbs. This step is essential as it creates the structure and texture of the Welsh cakes.
- Add Sugar and Fruits: Stir in the caster sugar and currants (or raisins) into the flour mixture. This adds sweetness and a delightful chewiness to the cakes.
- Combine Wet Ingredients: Make a well in the center of the dry ingredients and pour in the beaten egg. Gradually add the milk, one tablespoon at a time, mixing until the dough comes together. The dough should be soft but not sticky, so adjust the milk quantity as needed.
- Roll Out the Dough: On a lightly floured surface, roll out the dough to about 1 cm thick. Use a round cutter (about 7.5 cm in diameter) to cut out rounds of dough. Gather the scraps and re-roll them to cut out additional cakes.
- Cook the Cakes: Heat a griddle or heavy frying pan over medium heat. Add the Welsh cakes and cook for about 3-4 minutes on each side until they’re golden brown and cooked through. Be mindful not to have the heat too high, as the cakes need to cook thoroughly without burning.
- Cool and Dust: Once cooked, remove the cakes from the pan and place them on a wire rack to cool slightly. While still warm, dust them with extra caster sugar for a sweet finish.
Extra Tips
When making Welsh cakes, you can experiment with different dried fruits or even add a splash of vanilla extract for extra flavor. Guarantee your butter is cold when mixing into the flour for the best texture.
If you prefer a slightly crispier edge, let the cakes cool slightly longer in the pan before transferring them to the cooling rack. Welsh cakes are best enjoyed fresh but can be stored in an airtight container for a few days. Enjoy them warm or toasted with a bit of butter for an extra treat!
Jam Roly-Poly

Jam Roly-Poly, often referred to as the “dead man’s arm” due to its distinctive shape, is a classic British dessert that brings back fond memories of childhood for many. This delightful pudding consists of a suet pastry rolled up with sweet jam and then steamed or baked until it’s soft and fluffy. Served hot, it’s often accompanied by a generous helping of custard, making it a comforting treat for tea time or any special occasion.
This dish isn’t only simple to prepare but also highly customizable. You can choose your favorite jam, whether it’s raspberry, strawberry, or even a tangy lemon curd, to create a flavor that suits your palate. The process of rolling the pastry and spreading the jam is straightforward, making it an enjoyable experience for both novice and seasoned cooks. With its nostalgic charm and delicious taste, Jam Roly-Poly is sure to be a hit with family and friends.
Ingredients (Serves 4-6):
- 225g (8oz) self-raising flour
- 100g (3.5oz) shredded suet (or cold unsalted butter, cubed)
- 50g (1.75oz) caster sugar
- 150ml (5oz) milk
- 200g (7oz) jam (your choice)
- A pinch of salt
- Extra flour for dusting
Cooking Instructions:
- Prepare the Dough: In a large mixing bowl, combine the self-raising flour, shredded suet (or butter), caster sugar, and a pinch of salt. Mix the dry ingredients together until they’re well combined. Gradually add the milk to the mixture, stirring until a soft dough forms. Be careful not to overwork the dough; it should be soft and slightly sticky.
- Roll Out the Dough: Lightly dust a clean work surface with extra flour. Turn the dough out onto the surface and gently roll it out into a rectangle, about 1cm thick. Aim for a size of about 30cm x 20cm (12in x 8in) to create enough surface area for the jam.
- Spread the Jam: Once you have rolled out the dough, spread your chosen jam evenly over the entire surface of the rectangle, leaving a little space around the edges to prevent spillage during the rolling process.
- Roll the Dough: Starting from one of the longer edges of the rectangle, carefully roll the dough away from you, creating a tight log shape. Make sure the jam stays inside as you roll. Once rolled, pinch the seams to seal the edges, and tuck in the ends to prevent the jam from leaking out.
- Wrap the Roly-Poly: Lay a piece of parchment paper on a flat surface and place a large piece of aluminum foil on top. Transfer the rolled dough onto the foil and carefully wrap it, making sure to tuck in the ends and create a tight parcel, leaving some space inside for the pudding to expand during cooking.
- Cook the Roly-Poly: Place the wrapped pudding in a large steamer or a pot with a steaming rack. Fill the pot with boiling water, making sure it doesn’t touch the pudding. Cover with a lid and steam for about 1.5 hours, checking occasionally to verify the water level is maintained.
- Serve: Once cooked, carefully unwrap the Jam Roly-Poly and transfer it to a serving platter. Cut into slices and serve warm with custard poured over the top.
Extra Tips:
For a richer flavor, you can add a pinch of vanilla extract or a bit of lemon zest to the dough. If you prefer a baked version, you can place the wrapped pudding in a preheated oven at 180°C (350°F) for about 45-50 minutes. Be sure to keep an eye on it to avoid overcooking.
This dessert can also be made in advance; simply reheat it in the steamer before serving to enjoy its delightful taste and texture!
Eton Mess
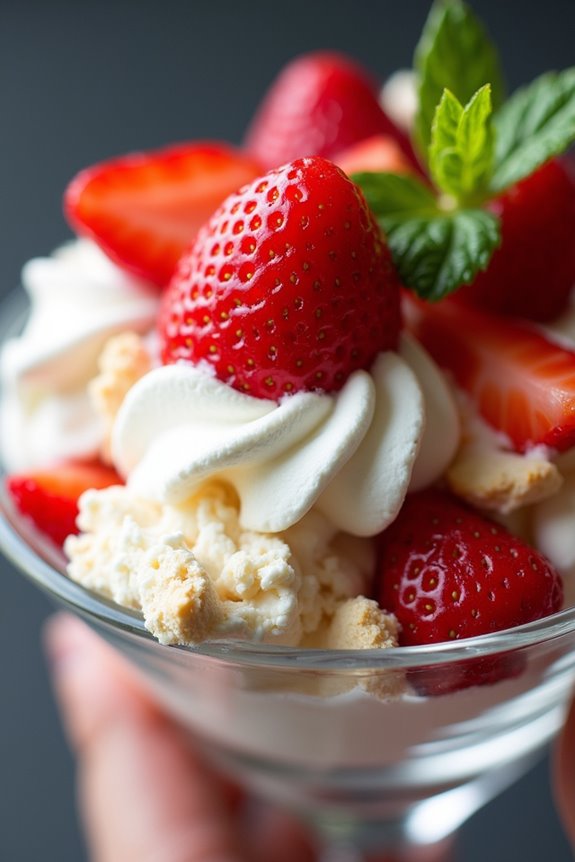
Eton Mess is a traditional British dessert that combines the delightful flavors of fresh strawberries, sweet meringue, and whipped cream. Its origins can be traced back to Eton College, where it’s typically served at the annual cricket match against Harrow School. The dish isn’t only simple to prepare, but it also allows for a delightful presentation, making it a popular choice for tea time or any celebratory occasion.
The light and airy texture of the meringue paired with the juicy strawberries and creamy whipped cream creates a delightful harmony of flavors that’s sure to impress. This dessert is perfect for warm afternoons when you want something sweet yet invigorating.
The beauty of Eton Mess lies in its versatility; you can easily substitute strawberries with other seasonal fruits or even mix in a variety of berries for a colorful twist. Whether you’re preparing it for a casual gathering or a more formal tea time, Eton Mess is sure to be a crowd-pleaser.
Ingredients (Serves 4-6):
- 2 cups fresh strawberries, hulled and halved
- 2 tablespoons granulated sugar
- 1 ½ cups heavy cream
- 1 teaspoon vanilla extract
- 4-5 store-bought meringue nests (or homemade, if preferred)
- Mint leaves for garnish (optional)
Cooking Instructions:
- Prepare the Strawberries: In a medium bowl, combine the halved strawberries with the granulated sugar. Toss them gently to coat the strawberries evenly. Allow this mixture to sit for about 15-20 minutes. This process will help to macerate the strawberries, drawing out their natural juices and enhancing their sweetness.
- Whip the Cream: In a large mixing bowl, pour in the heavy cream and add the vanilla extract. Using a hand mixer or stand mixer, whip the cream on medium-high speed until soft peaks form. Be careful not to overwhip the cream; it should be smooth and creamy, with just the right amount of stiffness.
- Prepare the Meringue: If you’re using store-bought meringue nests, break them into bite-sized pieces. If you prefer homemade meringues, make sure they’re fully cooled and crisp before breaking them apart. The texture of the meringue should be light and airy to contrast beautifully with the creamy and fruity components.
- Assemble the Eton Mess: In a large serving bowl or individual glasses, layer the strawberries, whipped cream, and broken meringue pieces. Start with a layer of strawberries, then add a layer of whipped cream followed by meringue. Repeat the layers until all ingredients are used, finishing with a dollop of whipped cream on top.
- Garnish and Serve: If desired, garnish the Eton Mess with fresh mint leaves for a pop of color and added freshness. Serve immediately to enjoy the delightful textures before the meringue softens.
Extra Tips:
When making Eton Mess, it’s vital to serve it right after assembling to maintain the delightful crunch of the meringue. If you prepare the components in advance, store the whipped cream, strawberries, and meringue separately until you’re ready to serve.
This way, you can enjoy the contrasting textures and flavors at their best. Additionally, feel free to experiment with different fruits like raspberries, blueberries, or peaches, depending on what’s in season, for a unique twist on this classic dessert.