

I’m absolutely smitten with the cozy and joyful flavors of Irish appetizers. These little bites, like crispy potato cakes and savory shepherd’s pie puffs, are simply irresistible. As we explore these 13 charming recipes together, think about the happiness they’ll spread at your next gathering. Let’s embrace the magic of the Emerald Isle and see how these appetizers can make any occasion extra special.
Traditional Irish Potato Cakes
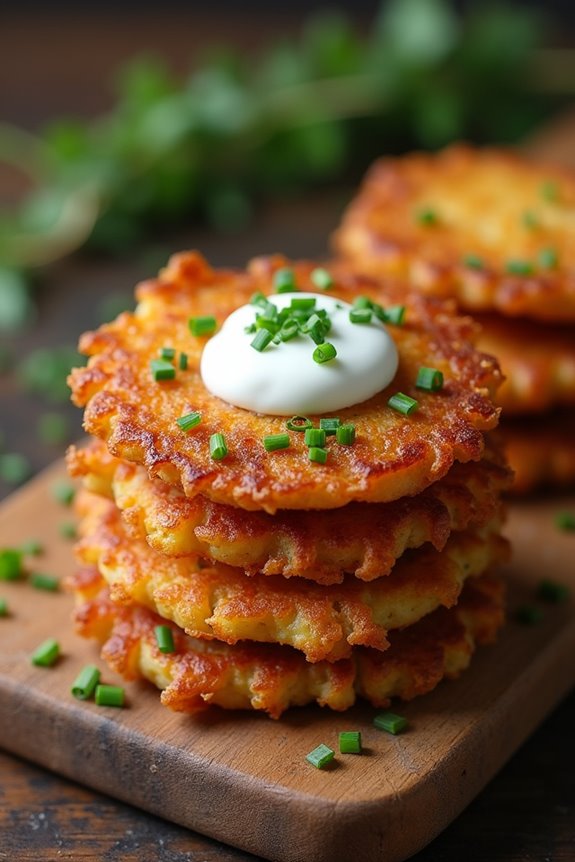
Traditional Irish Potato Cakes, known as “Boxty,” are a delightful and comforting appetizer that highlights the humble potato, a staple of Irish cuisine. These cakes are crispy on the outside, soft on the inside, and can be served as a side dish or a standalone snack. The simplicity of the ingredients allows the flavor of the potatoes to shine through, making them a favorite among locals and visitors alike.
Whether enjoyed with a dollop of sour cream, a sprinkling of chives, or even a bit of cheese, these potato cakes are sure to please any crowd. Making potato cakes is a straightforward process that requires minimal preparation. With just a few basic ingredients, you can whip up a batch that feeds 4-6 people in no time.
This recipe combines both grated raw and mashed potatoes for a delightful texture that’s both crispy and hearty. Perfect for gatherings or a cozy night in, Traditional Irish Potato Cakes will transport you straight to the Emerald Isle.
Ingredients
- 1 cup grated raw potatoes (about 2 medium potatoes)
- 1 cup mashed potatoes (about 2 medium potatoes)
- 1/4 cup all-purpose flour
- 1/4 cup milk
- 1 large egg
- 1 teaspoon baking powder
- 1/2 teaspoon salt
- 1/4 teaspoon black pepper
- 2 tablespoons butter (for frying)
- Chopped chives or green onions (for garnish, optional)
- Sour cream (for serving, optional)
Cooking Instructions
- Prepare the Potatoes: Start by peeling and grating the raw potatoes. Use a box grater or a food processor to achieve fine shreds. After grating, place the raw potatoes in a clean kitchen towel and squeeze out excess moisture. This step is vital to guarantee the potato cakes are crispy.
- Make the Mashed Potatoes: If you don’t have leftover mashed potatoes, boil peeled potatoes in salted water until tender, then mash them until smooth. Allow them to cool slightly before using them in the recipe.
- Combine Ingredients: In a large mixing bowl, combine the grated raw potatoes, mashed potatoes, flour, milk, egg, baking powder, salt, and black pepper. Mix until everything is well incorporated, but don’t over-mix; a few lumps are fine.
- Heat the Pan: In a large skillet, heat the butter over medium heat. Make sure the butter is melted and bubbling but not burnt, as this will affect the flavor of the cakes.
- Form and Cook the Cakes: Using a spoon or your hands, form patties from the potato mixture, about 1/2 inch thick. Carefully place them in the hot skillet, making sure not to overcrowd the pan. Cook for about 4-5 minutes on each side, or until they’re golden brown and crispy.
- Drain and Serve: Once cooked, transfer the potato cakes to a paper towel-lined plate to drain any excess grease. Serve warm, garnished with chopped chives or green onions, and with a side of sour cream if desired.
Extra Tips
When making Traditional Irish Potato Cakes, it’s important to use starchy potatoes like Russets or Yukon Golds for the best texture. If you’re looking to add more flavor, consider incorporating herbs such as thyme or parsley into the mixture.
Additionally, for a bit of a kick, you can mix in some cooked bacon or cheese. Always verify your pan is adequately heated before adding the cakes to achieve that perfect golden crust. If you’re not serving them immediately, keep them warm in a low oven until ready to enjoy!
Cheesy Dublin Coddle Bites

Cheesy Dublin Coddle Bites are a delightful twist on the traditional Irish stew, combining the rich flavors of Dublin coddle with the convenience of bite-sized appetizers. This dish features tender sausages, crispy bacon, and creamy cheese, all wrapped in a crispy golden crust. Perfect for a gathering or as a fun snack, these cheesy bites capture the essence of traditional Irish comfort food while adding a modern flair.
Creating these savory bites is a straightforward process that requires basic cooking skills and a few simple ingredients. The combination of sautéed onions, hearty sausages, and the melting goodness of cheese stuffed into flaky pastry will tantalize your taste buds and impress your guests.
Whether served on their own or paired with a tangy dipping sauce, Cheesy Dublin Coddle Bites are certain to be a hit at your next event!
Ingredients (Serves 4-6):
- 1 pound pork sausages
- 6 slices of bacon, chopped
- 1 medium onion, finely chopped
- 2 cups shredded cheddar cheese
- 1 tablespoon fresh parsley, chopped
- 1 teaspoon garlic powder
- 1 package of puff pastry (2 sheets), thawed
- 1 egg, beaten (for egg wash)
- Salt and pepper to taste
Cooking Instructions:
1. Prepare the Filling****: In a large skillet over medium heat, add the chopped bacon and cook until it starts to become crispy. Remove the bacon and drain on paper towels, leaving a little grease in the pan.
In the same skillet, add the finely chopped onion and sauté until translucent. Slice the sausages into bite-sized pieces and add them to the skillet, cooking until browned. Once cooked, mix in the crispy bacon, shredded cheddar cheese, parsley, garlic powder, salt, and pepper until well combined. Set the mixture aside to cool slightly.
2. Roll Out the Pastry: Preheat your oven to 400°F (200°C). On a lightly floured surface, roll out the sheets of puff pastry until they’re about 1/8 inch thick. Cut the pastry into squares (around 3×3 inches) to create the base for your bites.
3. Fill the Pastry: Take a square of the puff pastry and place about a tablespoon of the sausage and cheese mixture in the center. Be careful not to overfill, as this will make sealing the pastry difficult. Fold the corners of the pastry over the filling to create a sealed pocket, pinching the edges to guarantee they’re well sealed.
Repeat this process with the remaining pastry squares and filling.
4. Bake the Bites: Place the filled pastry bites on a baking sheet lined with parchment paper. Brush the tops with the beaten egg to give them a beautiful golden color when baked. Bake in the preheated oven for about 15-20 minutes or until the pastry is golden and puffed.
5. Serve: Once baked, remove the Cheesy Dublin Coddle Bites from the oven and let them cool slightly before serving. They can be served warm with a side of mustard or your favorite dipping sauce.
Extra Tips:
To enhance the flavor of your Cheesy Dublin Coddle Bites, consider adding a dash of Worcestershire sauce to the filling for an extra kick.
You can also experiment with different types of cheese, such as colby jack or a sharp Irish cheddar, to suit your taste. If you want to make these bites ahead of time, you can prepare and fill the pastry, then freeze them before baking.
When ready to serve, simply bake them straight from the freezer, adding a few extra minutes to the cooking time. Enjoy your delicious Irish appetizer!
Mini Irish Soda Bread Sliders
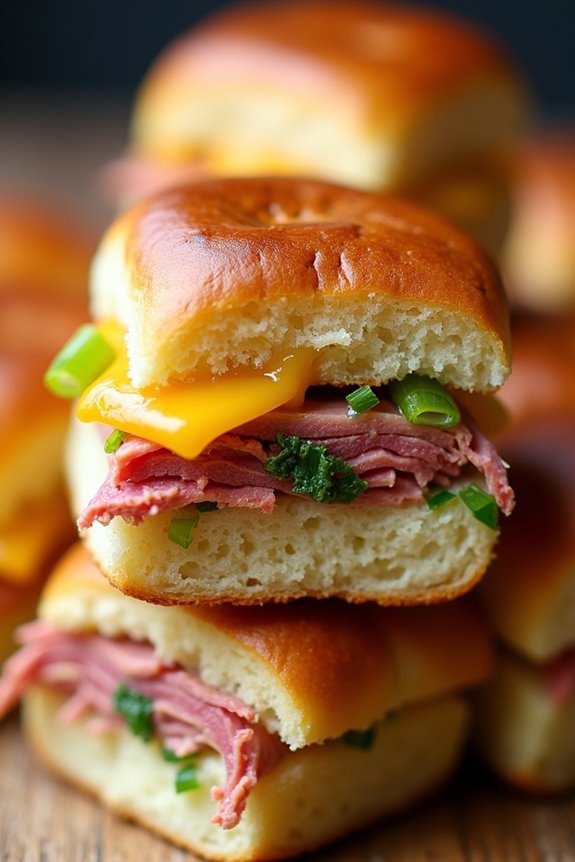
Mini Irish Soda Bread Sliders are a delightful and unique twist on traditional Irish soda bread, making them perfect for gatherings or as an appetizer. These bite-sized treats aren’t only easy to prepare but are also bursting with flavor, thanks to the addition of savory fillings.
The combination of the soft, slightly tangy bread and the rich fillings creates a comforting snack that will transport your taste buds straight to Ireland. Whether served at a party or as a cozy family dinner option, these sliders are sure to please everyone.
In this recipe, we’ll guide you through making mini soda bread that serves as the perfect base for your favorite fillings. You can customize these sliders with a variety of ingredients, such as corned beef, cheese, or sautéed vegetables, making them versatile for any occasion.
Let’s explore the ingredients and steps needed to create these scrumptious Mini Irish Soda Bread Sliders for 4-6 people!
Ingredients:
- 2 cups all-purpose flour
- 1 teaspoon baking soda
- 1/2 teaspoon salt
- 3/4 cup buttermilk
- 2 tablespoons melted butter
- 1 cup cooked corned beef, shredded
- 1/2 cup shredded cheddar cheese
- 1/4 cup chopped green onions
- Optional: mustard or horseradish sauce for serving
Cooking Instructions:
- Preheat the Oven: Begin by preheating your oven to 425°F (220°C). This guarantees that your soda bread will bake evenly and develop a nice golden crust.
- Mix Dry Ingredients: In a large mixing bowl, combine the all-purpose flour, baking soda, and salt. Whisk together until well combined, ensuring there are no lumps.
- Add Wet Ingredients: Make a well in the center of the dry ingredients and pour in the buttermilk and melted butter. Using a wooden spoon or your hands, mix the ingredients until just combined. Be careful not to overmix, as this can lead to a dense bread.
- Shape the Dough: Turn the dough out onto a lightly floured surface. Gently knead it a few times until it comes together into a cohesive ball. Flatten the dough slightly to form a thick disc, about 1 inch high.
- Cut the Sliders: Using a sharp knife, cut the dough disc into small rounds, about 2-3 inches in diameter. You can use a biscuit cutter for perfectly shaped sliders if desired. Place the rounds on a baking sheet lined with parchment paper.
- Bake the Bread: Place the baking sheet in the preheated oven and bake for 15-20 minutes, or until the sliders are golden brown on top and sound hollow when tapped on the bottom.
- Prepare the Fillings: While the bread is baking, mix the shredded corned beef, cheddar cheese, and chopped green onions in a bowl. This will serve as the delicious filling for your sliders.
- Assemble the Sliders: Once the soda bread is done and cooled slightly, slice each mini round in half. Spoon some of the corned beef mixture onto the bottom half, and replace the top half to complete the sliders.
- Serve: Arrange your Mini Irish Soda Bread Sliders on a platter and serve with mustard or horseradish sauce on the side, if desired. Enjoy!
Extra Tips:
To make your Mini Irish Soda Bread Sliders even more special, consider adding some fresh herbs like parsley or thyme to the dough for extra flavor.
You can also experiment with different fillings such as sautéed mushrooms, grilled vegetables, or even a spread of cream cheese for a vegetarian option. Remember to serve these sliders warm for the best taste and texture, and feel free to mix and match the fillings to cater to different preferences!
Savory Shepherd’s Pie Puffs

Savory Shepherd’s Pie Puffs are a delightful twist on the traditional Irish dish, perfect for serving as appetizers at gatherings or as a comforting snack at home. These golden, flaky pastry puffs are filled with a hearty mixture of seasoned ground meat, vegetables, and creamy mashed potatoes, all baked to perfection. They’re bound to impress your guests with their irresistible aroma and taste, making them a hit at any occasion.
The combination of tender, savory filling encased in crispy pastry makes these puffs a must-try. They aren’t only easy to prepare, but they also allow for customization based on your preferences or dietary requirements. Whether you’re using lamb, beef, or even a vegetarian substitute, these Shepherd’s Pie Puffs are versatile and can cater to a range of palates.
Ingredients (Serves 4-6):
- 1 pound ground lamb or beef
- 1 medium onion, diced
- 2 cloves garlic, minced
- 1 cup carrots, diced
- 1 cup peas (fresh or frozen)
- 1 tablespoon tomato paste
- 1 tablespoon Worcestershire sauce
- 1 teaspoon dried thyme
- Salt and pepper, to taste
- 1 sheet of puff pastry, thawed
- 1 cup mashed potatoes (prepared)
- 1 egg, beaten (for egg wash)
Cooking Instructions:
- Preheat the Oven: Begin by preheating your oven to 400°F (200°C). This guarantees that your pastry puffs will bake evenly and achieve a lovely golden color.
- Cook the Meat and Vegetables: In a large skillet over medium heat, add the ground lamb or beef. Cook until browned, breaking it up with a spatula. Once browned, drain any excess fat. Add the diced onion and minced garlic to the skillet, cooking until the onion becomes translucent.
- Then, stir in the diced carrots and cook for about 5 minutes until they soften.
- Add Seasonings and Peas: Stir in the tomato paste, Worcestershire sauce, dried thyme, salt, and pepper. Mix well to combine all the flavors. Finally, add the peas, and cook for an additional 2-3 minutes. Remove from heat and let the mixture cool slightly.
- Prepare the Puff Pastry: On a lightly floured surface, roll out the thawed puff pastry sheet to about ¼ inch thick. Cut the pastry into squares or circles, depending on your desired shape, making sure they’re large enough to hold a tablespoon of filling.
- Fill the Pastry: Place about 1 tablespoon of the meat and vegetable mixture in the center of each pastry piece. Top with a small dollop of mashed potatoes, then fold the pastry over to enclose the filling. Use a fork to crimp the edges and seal securely.
- Apply Egg Wash: Place the filled pastry puffs on a parchment-lined baking sheet. Brush the tops with the beaten egg to give them a beautiful golden color when baked.
- Bake: Bake in the preheated oven for about 20-25 minutes, or until the pastry is puffed and golden brown. Keep an eye on them to avoid over-baking.
- Serve: Once done, remove from the oven and let them cool slightly before serving. Enjoy your Savory Shepherd’s Pie Puffs warm or at room temperature.
Extra Tips:
When making Savory Shepherd’s Pie Puffs, feel free to get creative with the filling by adding your favorite vegetables or spices to enhance the flavor. For a richer taste, consider using a mix of meats.
If you want to prepare them in advance, you can assemble the puffs and freeze them before baking; just add a few extra minutes to the baking time if cooking from frozen. These puffs are also delicious served with a side of gravy or a tangy dipping sauce for added flavor!
Zesty Irish Cheese Dip
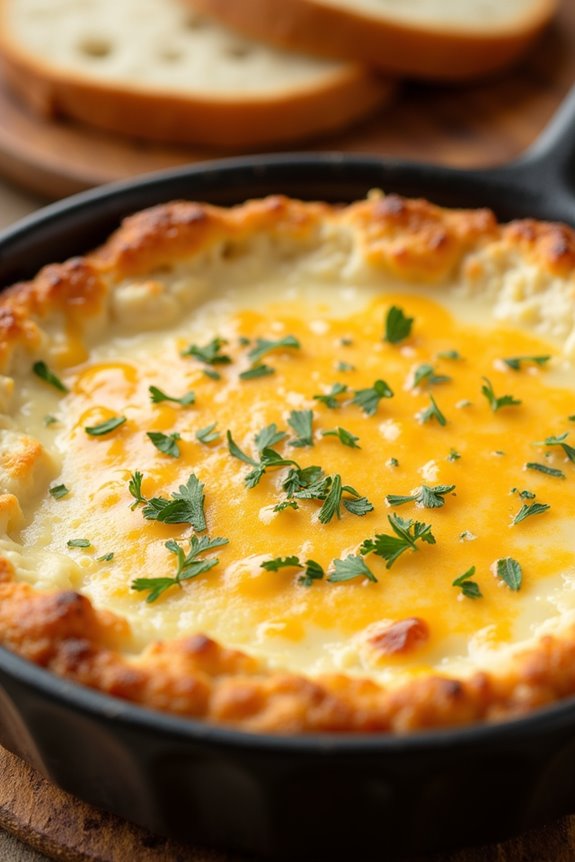
Zesty Irish Cheese Dip is a delightful and creamy appetizer that captures the essence of traditional Irish flavors in a modern twist. This dish combines sharp Irish cheddar cheese with aromatic herbs and spices, creating a luxurious dip that’s perfect for gatherings or a cozy night in.
Served warm with crusty bread or crispy crackers, this cheese dip will surely be a crowd-pleaser, bringing everyone together around the table to enjoy its rich and tangy goodness.
This dip isn’t only simple to make but can also be easily customized to suit your taste preferences. You can incorporate additional ingredients such as sautéed onions, garlic, or even a splash of Irish stout to enhance the flavor profile.
Whether you’re hosting a party for St. Patrick’s Day or just want a delicious treat for your family, Zesty Irish Cheese Dip is bound to impress.
Ingredients (Serves 4-6):
- 2 cups shredded sharp Irish cheddar cheese
- 1 cup cream cheese, softened
- 1/2 cup sour cream
- 1/4 cup mayonnaise
- 1 tablespoon Dijon mustard
- 1 tablespoon Worcestershire sauce
- 1 teaspoon garlic powder
- 1 teaspoon onion powder
- 1 teaspoon dried parsley
- 1/2 teaspoon cayenne pepper (optional, for heat)
- Salt and pepper to taste
- Crusty bread or crackers for serving
Cooking Instructions:
- Preheat the Oven: Begin by preheating your oven to 350°F (175°C). This will guarantee that your cheese dip bakes evenly and gets nice and bubbly.
- Mix the Base: In a large mixing bowl, combine the softened cream cheese, sour cream, and mayonnaise. Use a hand mixer or a whisk to blend these ingredients until smooth and creamy. This will create a rich base for your dip.
- Add the Cheese: Gradually stir in the shredded Irish cheddar cheese to the cream mixture. Mix until the cheese is evenly distributed. The cheese will melt beautifully, giving your dip that cheesy goodness.
- Season the Mixture: Add the Dijon mustard, Worcestershire sauce, garlic powder, onion powder, dried parsley, and cayenne pepper (if using) to the cheese mixture. Season with salt and pepper to taste. Stir until all ingredients are well incorporated.
- Transfer to Baking Dish: Spoon the cheese mixture into a baking dish (approximately 8×8 inches). Smooth the top with a spatula to create an even surface.
- Bake the Dip: Place the baking dish in the preheated oven and bake for 20-25 minutes, or until the dip is bubbling and golden on top. Keep an eye on it to make sure it doesn’t burn.
- Serve Warm: Once done, remove the dip from the oven and let it cool for a few minutes. Serve warm with crusty bread or crackers for dipping.
Extra Tips:
For an even more robust flavor, consider adding cooked and crumbled bacon or sautéed mushrooms to the cheese mixture before baking.
If you want to add a touch of freshness, garnish the finished dip with chopped chives or a sprinkle of paprika.
This dip can be prepared ahead of time and stored in the refrigerator; simply reheat it in the oven before serving. Enjoy your delicious Zesty Irish Cheese Dip at your next gathering!
Smoked Salmon and Cream Cheese Bites

Smoked Salmon and Cream Cheese Bites are a delightful Irish appetizer that combines rich flavors with a touch of elegance. These bite-sized treats are perfect for gatherings, parties, or as a sophisticated starter for a dinner. The creamy texture of the cream cheese pairs beautifully with the smoky, savory notes of the salmon, while the fresh dill and capers add a burst of flavor that elevates this dish to new heights.
Easy to prepare and visually appealing, these bites are sure to impress your guests and leave them wanting more.
To make these delectable appetizers, you’ll need a few simple ingredients that come together quickly. The beauty of this recipe lies in its versatility; you can customize the toppings or base to suit your preferences. Whether you choose to serve them on crackers, cucumber rounds, or toasted baguette slices, the result is a delicious and satisfying appetizer that truly reflects the essence of Irish cuisine.
Ingredients (Serves 4-6):
- 8 ounces cream cheese, softened
- 8 ounces smoked salmon, sliced
- 1 tablespoon capers, drained and chopped
- 1 tablespoon fresh dill, chopped
- 1 tablespoon lemon juice
- Salt and pepper to taste
- 12-16 crackers, cucumber rounds, or toasted baguette slices for serving
Cooking Instructions:
- Prepare the Cream Cheese Mixture: In a medium bowl, combine the softened cream cheese, chopped capers, chopped dill, and lemon juice. Use a fork or a spatula to mix the ingredients until well blended and smooth. Confirm the mixture is creamy and evenly distributed.
- Season the Mixture: Taste the cream cheese mixture and add salt and pepper as needed. Be cautious with the salt as the smoked salmon and capers can add their own saltiness.
- Assemble the Bites: On a serving platter, begin by placing your base of choice (crackers, cucumber rounds, or toasted baguette slices). Using a spoon or a piping bag, dollop or pipe a generous amount of the cream cheese mixture onto each base.
- Add the Smoked Salmon: Take the sliced smoked salmon and cut it into smaller pieces, if needed. Gently place a piece of salmon on top of each cream cheese dollop, confirming it covers the mixture and looks appetizing.
- Garnish: Finish off your bites by sprinkling a bit of extra dill on top of the salmon for garnish. If desired, you can also add a few whole capers on top for an added touch of elegance.
- Serve Immediately: These bites are best served fresh, so arrange them on a platter and enjoy right away or refrigerate briefly before serving if you need to prepare them ahead of time.
Extra Tips:
For the best flavor and presentation, confirm that all ingredients are fresh. When using cucumbers as a base, slice them just before serving to prevent them from becoming watery.
You can also experiment with different herbs such as chives or parsley to give your bites a personal twist. If you’re making these in advance, prepare the cream cheese mixture ahead of time and store it in the refrigerator, then assemble just before serving for peak freshness.
Enjoy your Smoked Salmon and Cream Cheese Bites!
Colcannon Croquettes

Colcannon Croquettes are a delightful twist on the traditional Irish dish of colcannon, which is a creamy mixture of mashed potatoes and kale or cabbage. These croquettes provide a crispy, golden exterior that contrasts beautifully with the soft, flavorful filling. They make for a perfect appetizer or side dish for any gathering, bringing a taste of Ireland to your table.
With a blend of comforting ingredients and a satisfying crunch, Colcannon Croquettes are guaranteed to impress your guests and leave them wanting more.
To prepare these delicious croquettes, you’ll start by making a colcannon mixture using boiled potatoes, sautéed greens, and a hint of butter and cream. Once your filling is ready, you’ll form it into small balls, coat them in breadcrumbs, and fry them until they’re golden brown. This recipe yields about 4-6 servings, making it ideal for sharing or enjoying as a hearty snack.
Ingredients (Serves 4-6):
- 2 cups mashed potatoes (about 4 medium potatoes)
- 1 cup chopped kale or cabbage
- 1/2 cup chopped green onions
- 1/2 cup heavy cream
- 2 tablespoons unsalted butter
- Salt and pepper to taste
- 1 cup all-purpose flour
- 2 large eggs, beaten
- 2 cups breadcrumbs (panko or regular)
- Vegetable oil for frying
Cooking Instructions:
1. Prepare the Colcannon Mixture: In a large pot, boil the potatoes until fork-tender. Drain and mash them in a bowl.
In a pan, melt the butter over medium heat, then add the chopped kale or cabbage and sauté until wilted. Combine the sautéed greens, chopped green onions, heavy cream, and season with salt and pepper into the mashed potatoes, mixing until well combined. Allow the mixture to cool completely.
2. Shape the Croquettes: Once the colcannon mixture has cooled, take a handful and form it into small balls or patties, about the size of a golf ball. Make sure they hold together well; if the mixture is too soft, you can add a bit more mashed potato to help bind it.
3. Coat the Croquettes: Set up a breading station with three bowls: one with flour, one with beaten eggs, and one with breadcrumbs. Roll each croquette first in the flour, then dip it into the beaten eggs, and finally coat it with breadcrumbs, making sure they’re evenly covered.
4. Fry the Croquettes: In a large skillet, heat vegetable oil over medium-high heat. Once the oil is hot, carefully add the croquettes in batches, making sure not to overcrowd the pan. Fry them for about 3-4 minutes on each side or until they’re golden brown and crispy.
Remove them from the skillet and place them on paper towels to drain excess oil.
5. Serve and Enjoy: Serve the Colcannon Croquettes warm, alongside a dipping sauce or simply on their own. They pair wonderfully with a sharp Irish cheddar or a tangy dipping sauce.
Extra Tips:
To enhance the flavor of your Colcannon Croquettes, consider adding other ingredients like grated cheese or cooked bacon to the colcannon mixture for an extra kick of flavor.
Verify the oil is at the right temperature before frying to achieve that perfect crispy exterior; if the oil is too cool, the croquettes will absorb too much oil and become greasy. You can also prepare the colcannon mixture a day in advance to save time, making the croquette assembly and frying process quicker when you’re ready to serve.
Irish Garlic Butter Mushrooms
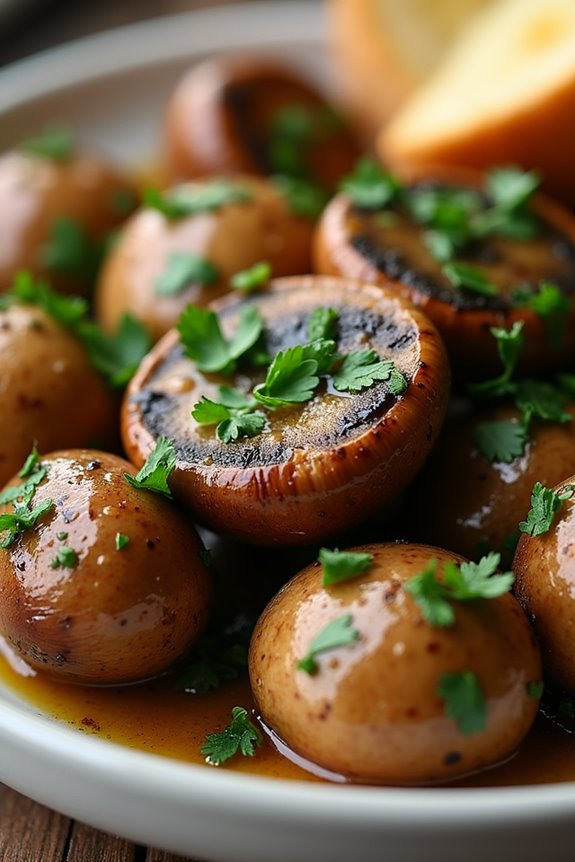
Irish Garlic Butter Mushrooms are a delightful appetizer that showcases the rich flavors of garlic and earthy mushrooms, making them the perfect start to any meal. This dish is simple yet elegant, highlighting the natural taste of the mushrooms while enhancing them with a luscious garlic butter sauce.
These mushrooms aren’t only easy to prepare but also offer a comforting taste of traditional Irish cuisine, perfect for gatherings with family and friends.
To make this dish even more enjoyable, serve the mushrooms warm, garnished with fresh parsley or chives for a pop of color. You can pair them with crusty bread, which is perfect for soaking up the delicious garlic butter sauce. Whether you’re hosting a dinner party or simply looking for a tasty snack, Irish Garlic Butter Mushrooms are sure to impress your guests and warm their hearts.
Ingredients (Serves 4-6):
- 500g (1 lb) button mushrooms, cleaned and trimmed
- 4 tablespoons unsalted butter
- 4 cloves garlic, minced
- 2 tablespoons fresh parsley, chopped
- 1 teaspoon fresh thyme leaves
- Salt and pepper to taste
- 1 tablespoon lemon juice (optional)
Cooking Instructions:
- Prepare the Mushrooms: Begin by cleaning the button mushrooms under cold water and gently patting them dry with a paper towel. Trim the stems if necessary to guarantee they’re uniform in size for even cooking.
- Melt the Butter: In a large skillet, melt the unsalted butter over medium heat. Allow it to foam and bubble but make sure it doesn’t brown, as you want to maintain its creamy texture for the garlic butter sauce.
- Sauté the Garlic: Once the butter is melted, add the minced garlic to the skillet. Sauté the garlic for about 1-2 minutes, stirring frequently until it becomes fragrant. Be cautious not to burn the garlic, as it can turn bitter.
- Cook the Mushrooms: Add the cleaned mushrooms to the skillet, stirring to coat them in the garlic butter. Cook the mushrooms for about 5-7 minutes, allowing them to release their moisture and become tender. Stir occasionally to guarantee even cooking.
- Season the Mixture: Once the mushrooms are cooked through, add salt, pepper, fresh thyme leaves, and lemon juice (if using) to the skillet. Stir well to combine all the flavors, cooking for an additional minute.
- Garnish and Serve: Remove the skillet from heat and sprinkle the chopped fresh parsley over the mushroom mixture. Give it a gentle stir before transferring the mushrooms to a serving dish. Serve warm, ideally with crusty bread to soak up the delicious sauce.
Extra Tips:
For an added depth of flavor, consider using a mix of mushrooms, such as cremini or portobello, alongside the button mushrooms. This will give the dish a more complex taste and texture.
Additionally, feel free to adjust the amount of garlic according to your preference, and for a spicy kick, consider adding a pinch of red pepper flakes. Enjoy your Irish Garlic Butter Mushrooms as part of a cozy gathering or as a comforting treat any time of year!
Spicy Irish Sausage Rolls

Spicy Irish Sausage Rolls are a fantastic appetizer that brings together the rich flavors of traditional Irish sausage with a kick of spice. These delightful pastry bites are perfect for gatherings, parties, or even as a hearty snack at home. The flaky pastry envelops a seasoned sausage filling, making each bite a burst of flavor that will satisfy your taste buds and keep your guests coming back for more.
Making these delicious sausage rolls is simpler than you might think. With just a few ingredients and some straightforward steps, you can create a dish that’s certain to impress. Whether you choose to serve them with a tangy dipping sauce or on their own, these Spicy Irish Sausage Rolls are guaranteed to be a hit at any event.
Ingredients (Serves 4-6):
- 500g Irish sausage meat
- 1 tablespoon olive oil
- 1 small onion, finely chopped
- 2 cloves garlic, minced
- 1 teaspoon dried thyme
- 1 teaspoon smoked paprika
- 1/2 teaspoon cayenne pepper (adjust to taste)
- Salt and pepper to taste
- 1 sheet of puff pastry (thawed if frozen)
- 1 egg, beaten (for egg wash)
Cooking Instructions:
- Preheat the Oven: Begin by preheating your oven to 200°C (400°F). This guarantees that the sausage rolls will cook evenly and become golden brown and crispy on the outside.
- Prepare the Filling: In a skillet, heat the olive oil over medium heat. Add the finely chopped onion and sauté until it becomes soft and translucent, about 5 minutes. Stir in the minced garlic and cook for an additional minute until fragrant. Remove from heat and let it cool slightly.
- Mix the Ingredients: In a large mixing bowl, combine the Irish sausage meat, sautéed onion and garlic, dried thyme, smoked paprika, cayenne pepper, salt, and pepper. Use your hands to mix everything together until well combined, making certain that the spices are evenly distributed throughout the meat.
- Roll Out the Pastry: On a lightly floured surface, roll out the puff pastry sheet to make it evenly thin. You want it to be large enough to cut into strips that can encase the sausage filling.
- Fill the Pastry: Cut the puff pastry into strips, approximately 10cm wide. Place a line of the sausage filling along one edge of each strip. Be careful not to overfill, as this will make it difficult to seal the rolls.
- Roll and Seal: Carefully roll the pastry over the filling, starting from the edge with the filling. Roll until you reach the other edge of the pastry. Use a little water to seal the edge of the pastry so it sticks together.
- Cut and Prepare for Baking: Cut the rolled sausage rolls into desired lengths, usually around 5-7cm each. Place them seam side down on a baking tray lined with parchment paper. Brush the tops with the beaten egg to give them a golden finish when baked.
- Bake: Place the tray in the preheated oven and bake for about 20-25 minutes, or until the pastry is puffed and golden brown. Keep an eye on them to make sure they don’t over-bake.
- Serve: Once baked, remove from the oven and let them cool for a few minutes before serving. These rolls are best enjoyed warm and can be served with a side of mustard or your favorite dipping sauce.
Extra Tips:
For an extra flavor boost, consider adding some chopped fresh herbs such as parsley or chives to the sausage filling. If you prefer a milder version, adjust the amount of cayenne pepper according to your taste.
Feel free to experiment with the spices to create your own unique blend. These sausage rolls can also be made ahead of time and frozen before baking; just add a few extra minutes to the baking time if cooking from frozen. Enjoy your Spicy Irish Sausage Rolls!
Bangers and Mash Skewers

Bangers and Mash Skewers are a delightful twist on the classic Irish dish that combines savory sausages and creamy mashed potatoes into a fun and portable appetizer. This recipe is perfect for parties or casual gatherings, allowing you to enjoy the beloved flavors of bangers and mash in a bite-sized format. These skewers not only look appealing but also pack a flavorful punch that will leave your guests craving more.
To make Bangers and Mash Skewers, you’ll need high-quality sausages, which can range from traditional pork to more adventurous varieties. The mashed potatoes should be creamy and rich, serving as the perfect counterpart to the savory sausages. Once assembled, these skewers can be grilled or baked, adding a touch of smokiness that enhances the overall taste. Serve them with a side of rich onion gravy or a tangy mustard for dipping, and you have a crowd-pleasing appetizer that captures the essence of Irish cuisine.
Ingredients (Serves 4-6):
- 12-15 Irish sausages (pork or your choice)
- 3 cups mashed potatoes
- 1/2 cup milk
- 1/4 cup butter
- Salt and pepper to taste
- Fresh parsley, chopped (for garnish)
- Wooden skewers (soaked in water for 30 minutes)
Cooking Instructions:
- Prepare the Mashed Potatoes: Start by boiling peeled and diced potatoes in salted water until tender, about 15-20 minutes. Drain the potatoes and return them to the pot. Add the milk, butter, salt, and pepper. Mash until smooth and creamy, then set aside to cool slightly.
- Cook the Sausages: While the potatoes are cooking, heat a skillet over medium heat. Add the sausages and cook until browned and cooked through, about 10-12 minutes, turning occasionally to guarantee even cooking. Once cooked, remove them from the heat and let them cool slightly before cutting them into 1-inch pieces.
- Assemble the Skewers: Take your soaked wooden skewers and thread a piece of sausage, followed by a spoonful of mashed potatoes, then another sausage piece. Repeat this process until all ingredients are used up, making sure to leave some space at the ends of the skewers for easy handling.
- Cook the Skewers: You can grill or bake the skewers. If grilling, preheat the grill to medium heat and cook the skewers for about 5-7 minutes, turning occasionally until heated through and slightly charred. If baking, preheat your oven to 400°F (200°C) and place the skewers on a baking sheet. Bake for about 15-20 minutes, turning halfway through, until golden brown and heated through.
- Garnish and Serve: Once cooked, remove the skewers from the grill or oven and let them cool for a minute. Garnish with freshly chopped parsley and serve warm with onion gravy or mustard for dipping.
Extra Tips:
When preparing Bangers and Mash Skewers, feel free to experiment with different types of sausages to suit your taste preferences; chicken or vegetarian sausages can work well too.
Additionally, make sure your mashed potatoes aren’t too runny to prevent them from sliding off the skewers. If you want to add extra flavor, mixing in some grated cheese, garlic, or herbs into the mashed potatoes can elevate the dish even further. Enjoy your delicious and hearty appetizer!
Herb-Infused Irish Flatbreads

Herb-infused Irish flatbreads are a delightful addition to any appetizer spread, offering a warm, soft texture that pairs beautifully with dips, cheeses, or simply enjoyed on their own.
These flatbreads aren’t only easy to make but also allow for a variety of herbs and spices to customize the flavor to your liking. The aroma of fresh herbs fills your kitchen, making this dish a wonderful way to bring a taste of Ireland into your home.
Perfect for gatherings or family dinners, these flatbreads can be served alongside a selection of dips such as hummus, tzatziki, or a rich Irish cheese. The simplicity of the ingredients makes it easy to whip up a batch, and with a serving size that caters to 4-6 people, they’re sure to please a crowd.
Let’s explore the recipe!
Ingredients:
- 2 cups all-purpose flour
- 1 teaspoon baking powder
- 1/2 teaspoon salt
- 2 tablespoons olive oil
- 3/4 cup warm water
- 1/4 cup fresh parsley, finely chopped
- 2 tablespoons fresh chives, finely chopped
- 1 tablespoon fresh rosemary, finely chopped
- Optional: Extra olive oil for brushing and sea salt for sprinkling
Cooking Instructions:
- Prepare the Dough: In a large mixing bowl, combine the all-purpose flour, baking powder, and salt. Mix the dry ingredients together until they’re evenly combined. Create a well in the center and add the olive oil and warm water. Mix with a wooden spoon until a shaggy dough forms.
- Incorporate the Herbs: Once the dough begins to come together, add the finely chopped parsley, chives, and rosemary. Knead the dough in the bowl or on a clean, floured surface for about 5 minutes, or until it becomes smooth and elastic. If the dough feels too sticky, add a little more flour as needed.
- Rest the Dough: Shape the dough into a ball and place it in a lightly oiled bowl. Cover the bowl with a damp cloth or plastic wrap and let it rest for about 30 minutes at room temperature. This allows the gluten to relax, making the dough easier to roll out.
- Roll Out the Flatbreads: After resting, divide the dough into 6 equal pieces. On a floured surface, roll each piece into a flat circle about 1/4 inch thick. If the dough is springing back, let it rest for a few more minutes before rolling.
- Cook the Flatbreads: Heat a non-stick skillet or griddle over medium heat. Place one flatbread in the skillet and cook for 2-3 minutes on each side, or until golden brown and cooked through. Repeat with the remaining flatbreads, adjusting the heat as necessary to avoid burning.
- Serve: Once all flatbreads are cooked, you can brush them lightly with olive oil and sprinkle with sea salt, if desired. Serve warm with your choice of dips or toppings.
Extra Tips:
For an added layer of flavor, feel free to experiment with different herbs such as thyme or oregano, or even add grated cheese into the dough.
If you want a crispy texture, consider cooking the flatbreads on a grill for a couple of minutes on each side. These flatbreads are best enjoyed fresh, but they can also be stored in an airtight container for a day or two, just reheat them briefly in a skillet before serving for the best taste.
Dublin Bay Prawn Cocktail
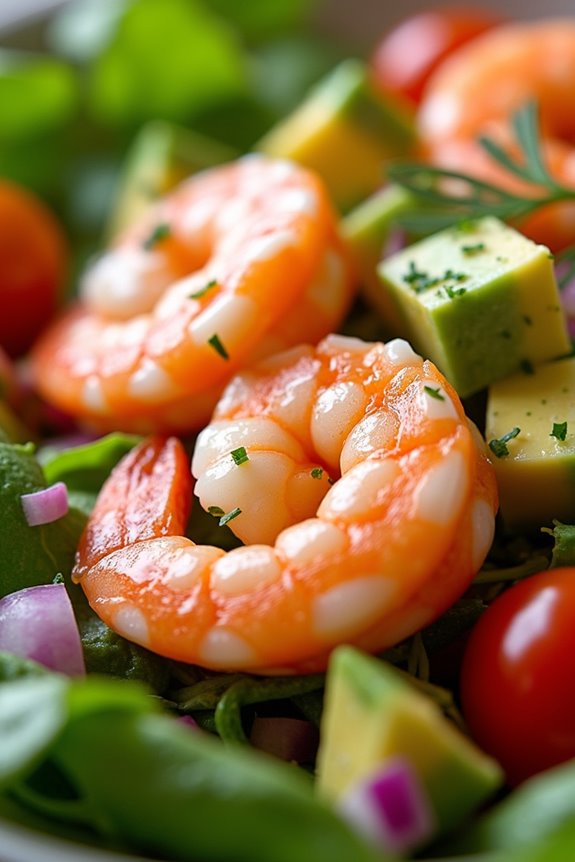
Dublin Bay Prawn Cocktail is a classic Irish appetizer that beautifully showcases the delicate flavors of fresh seafood. This dish combines succulent Dublin Bay prawns with a zesty cocktail sauce, making it a revitalizing starter perfect for any gathering or celebration. The prawns, known for their sweet taste and firm texture, are often regarded as one of the finest seafood offerings from the Irish coast.
Preparing this delightful cocktail is simple and requires only a few ingredients. The key to a great prawn cocktail lies in the quality of the prawns and the balance of flavors in the sauce. Whether you’re hosting a dinner party or enjoying a casual meal with family, Dublin Bay Prawn Cocktail is sure to impress your guests with its vibrant presentation and delicious taste.
Ingredients (Serving Size: 4-6 people)
- 500g Dublin Bay prawns, cooked and peeled
- 1 cup mixed salad greens
- 1 ripe avocado, diced
- 1/2 cup cherry tomatoes, halved
- 1/4 cup red onion, finely chopped
- 1 lemon, juiced
- 1 tbsp Worcestershire sauce
- 1/2 cup mayonnaise
- 1 tbsp ketchup
- Salt and pepper to taste
- Fresh dill or parsley for garnish
Cooking Instructions
- Prepare the Prawns: If not pre-cooked, bring a pot of salted water to a boil. Add the Dublin Bay prawns and cook for about 2-3 minutes until they turn pink. Remove them immediately and place them in an ice bath to stop the cooking process. Once cooled, peel the prawns and set aside.
- Make the Cocktail Sauce: In a medium bowl, combine the mayonnaise, ketchup, Worcestershire sauce, lemon juice, salt, and pepper. Mix well until all the ingredients are thoroughly combined. Adjust the seasoning according to your taste preferences.
- Prepare the Salad Base: In a large serving platter or individual cocktail glasses, lay down a bed of mixed salad greens. This will provide a fresh and crunchy base for your prawns and sauce.
- Assemble the Prawn Cocktail: Layer the diced avocado and halved cherry tomatoes over the salad greens. Then, arrange the cooked Dublin Bay prawns on top of the salad.
- Top with Sauce: Generously drizzle the prepared cocktail sauce over the prawns and salad base. Make sure each prawn is coated with the sauce for maximum flavor.
- Garnish and Serve: Finally, sprinkle some finely chopped red onion on top and garnish with fresh dill or parsley. Serve immediately to enjoy the prawns at their freshest.
Extra Tips
When preparing Dublin Bay Prawn Cocktail, freshness is key. Try to source your prawns from a reputable fishmonger to guarantee they’re as fresh as possible.
You can also add a splash of hot sauce to the cocktail sauce for an extra kick if you enjoy a bit of heat. Additionally, feel free to customize the salad base with your favorite greens or even add in some cucumber for a revitalizing crunch. Enjoy your culinary creation!
Baileys Irish Cream Chocolate Truffles

Indulge in the rich, velvety delight of Baileys Irish Cream Chocolate Truffles, a perfect Irish appetizer that embodies the essence of creamy, chocolatey goodness.
These decadent treats aren’t only easy to prepare but also make for an exquisite addition to any gathering or celebration. With the smooth flavor of Baileys Irish Cream combined with luscious chocolate, they’re sure to impress your guests and leave them craving more.
Making these truffles is a delightful experience in itself, as the process involves melting chocolate and incorporating the creamy liqueur. The result is a rich, smooth filling that’s rolled into bite-sized balls and dusted with cocoa powder or chopped nuts.
Whether you serve them at a party or enjoy them as a sweet treat at home, these Baileys Irish Cream Chocolate Truffles are a luxurious and fun way to highlight the flavors of Ireland.
Ingredients (Serves 4-6)
- 8 oz bittersweet chocolate, finely chopped
- 1/2 cup heavy cream
- 1/4 cup Baileys Irish Cream
- 1 tsp vanilla extract
- 1/2 cup cocoa powder (for dusting)
- 1/4 cup finely chopped nuts (optional, for dusting)
Cooking Instructions
- Melt the Chocolate: Place the finely chopped bittersweet chocolate in a heatproof bowl. In a small saucepan, heat the heavy cream over medium heat until it begins to simmer. Pour the hot cream over the chocolate and let it sit for a minute. This will help melt the chocolate evenly.
- Combine Ingredients: After a minute, stir the chocolate and cream together until smooth and fully combined. Add in the Baileys Irish Cream and vanilla extract, mixing until everything is well incorporated.
- Chill the Mixture: Cover the bowl with plastic wrap and refrigerate the chocolate mixture for about 2 hours, or until it’s firm enough to handle.
- Form the Truffles: Once the mixture is firm, use a small cookie scoop or your hands (dusted with cocoa powder to prevent sticking) to scoop out small portions of the chocolate mixture. Roll each portion between your palms to form a smooth ball.
- Coat the Truffles: Roll each truffle in cocoa powder or finely chopped nuts to coat them evenly. Make sure to shake off any excess coating.
- Chill Again: Place the finished truffles on a parchment-lined tray and return them to the refrigerator to set for another 30 minutes before serving.
Extra Tips
For a more intense chocolate flavor, consider using dark chocolate instead of bittersweet chocolate.
You can also experiment with different coatings such as shredded coconut, crushed candy canes, or melted chocolate drizzled on top for a decorative finish.
If you’re feeling adventurous, add a pinch of sea salt on top of the truffles after coating them to enhance the flavors.
These truffles can be stored in an airtight container in the refrigerator for up to a week, making them a convenient make-ahead option for your next gathering.