

When it comes to holiday cookies, Scandinavian recipes are always at the top of my list. They are rich, buttery, and filled with unique spices like cardamom and ginger. Each cookie tells a story, reflecting the cultural traditions of the region. I can just imagine Santa enjoying a plate of these delicious treats after a busy night. Want to know which cookies Santa would choose first? Let’s explore these delightful recipes together.
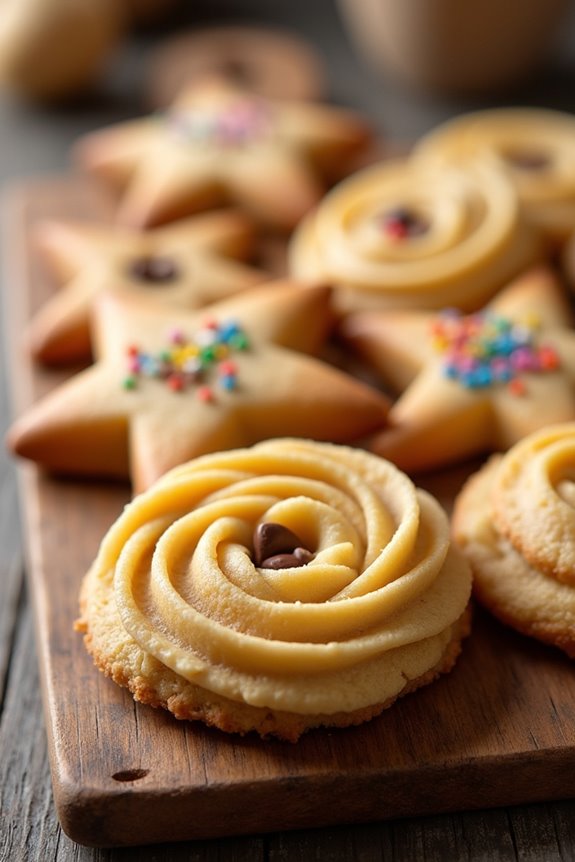
Buttery Ginger Snaps
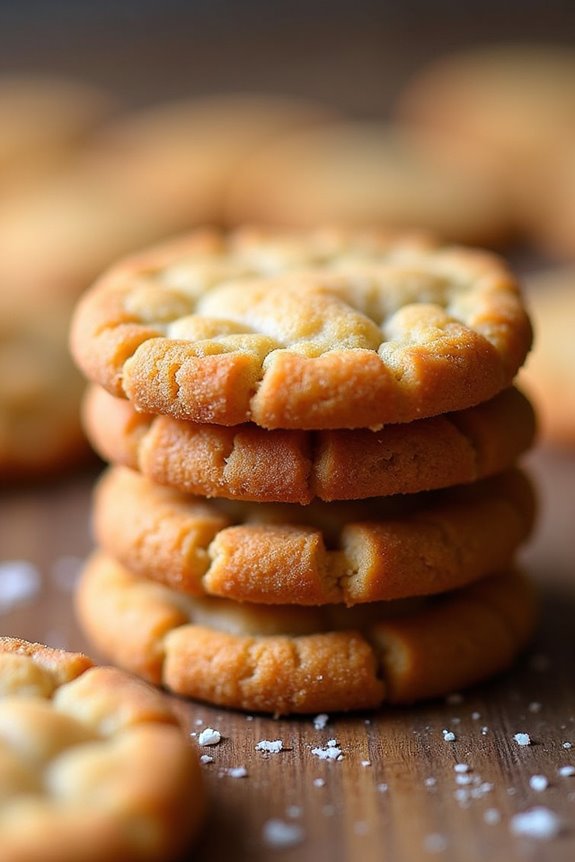
Buttery Ginger Snaps are a delightful Scandinavian treat that combines the warmth of ginger and the richness of butter to create a cookie that’s both crisp and chewy. These cookies are perfect for winter gatherings, holiday celebrations, or simply enjoying with a cup of tea. The combination of spices gives them a unique flavor that’s both comforting and aromatic, making them a favorite among cookie lovers.
Making Buttery Ginger Snaps is a simple process that involves mixing dry ingredients with wet ingredients, rolling the dough, and baking it to perfection. The result is a batch of cookies that aren’t only delicious but also visually appealing with their golden-brown hue. With their distinctive snap and buttery texture, these cookies are sure to become a staple in your baking repertoire.
Ingredients (Servings: 4-6 people)
- 2 cups all-purpose flour
- 1 tablespoon ground ginger
- 1 teaspoon ground cinnamon
- 1/2 teaspoon ground cloves
- 1/2 teaspoon baking soda
- 1/4 teaspoon salt
- 3/4 cup unsalted butter, softened
- 1 cup brown sugar, packed
- 1 large egg
- 1/4 cup molasses
- 1/4 cup granulated sugar (for rolling)
Cooking Instructions
- Preheat the Oven: Begin by preheating your oven to 350°F (175°C). This guarantees that your cookies will bake evenly and achieve that perfect golden-brown color.
- Mix Dry Ingredients: In a medium bowl, whisk together the flour, ground ginger, ground cinnamon, ground cloves, baking soda, and salt. This step is vital as it evenly distributes the spices and leavening agent throughout the flour.
- Cream Butter and Sugar: In a large mixing bowl, use an electric mixer to cream the softened butter and brown sugar together until the mixture is light and fluffy. This process incorporates air into the butter, which helps create a tender cookie.
- Add Egg and Molasses: Beat in the egg and molasses to the creamed mixture until fully combined. The molasses adds a rich flavor and gives the cookies their signature chewy texture.
- Combine Mixtures: Gradually add the dry ingredient mixture to the wet ingredients, mixing until just combined. Be careful not to overmix, as this can lead to tough cookies.
- Shape the Dough: Using your hands, scoop out tablespoon-sized balls of dough and roll them into smooth balls. Then, roll each ball in granulated sugar to coat them lightly.
- Bake the Cookies: Place the sugar-coated dough balls on a baking sheet lined with parchment paper, leaving space between each cookie for spreading. Bake in the preheated oven for 10-12 minutes, or until the edges are set but the centers are still soft.
- Cool and Enjoy: Remove the cookies from the oven and allow them to cool on the baking sheet for 5 minutes before transferring them to a wire rack to cool completely. This helps them set and develop their characteristic snap.
Extra Tips
For an extra burst of flavor, consider adding a teaspoon of grated fresh ginger to your dough. Additionally, if you prefer your cookies a little softer, you can reduce the baking time by a minute or two.
Store your Buttery Ginger Snaps in an airtight container at room temperature for up to a week, or freeze them for longer storage. Enjoy them fresh out of the oven or allow them to sit for a day, as the flavors will continue to develop!
Cardamom-Spiced Cookies
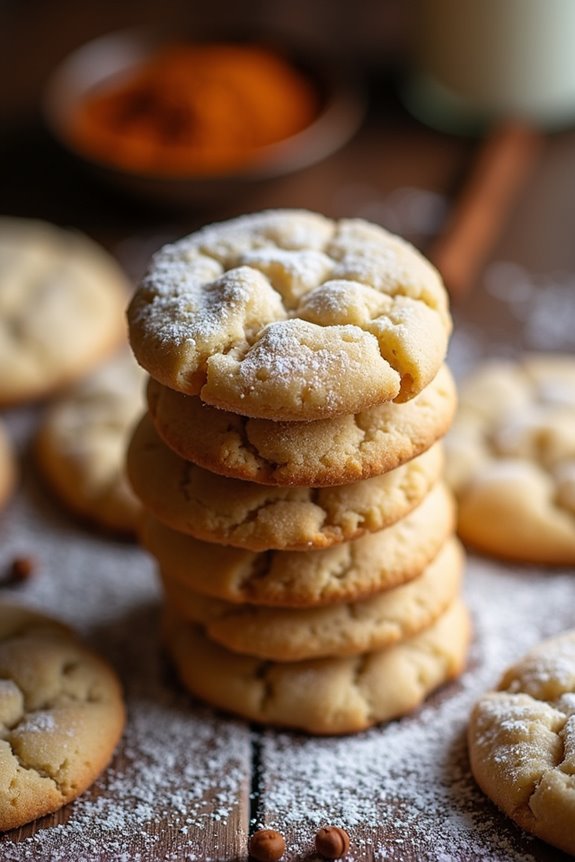
Cardamom-Spiced Cookies are a delightful treat that perfectly encapsulates the warm, inviting flavors of Scandinavian baking. With the aromatic essence of cardamom, these cookies aren’t only delicious but also carry a sense of nostalgia, reminiscent of cozy gatherings and festive celebrations. Their slightly chewy texture combined with the warmth of spices makes them a favorite among both adults and children alike.
These cookies are versatile and can be enjoyed at any time of the year. Whether served at holiday gatherings, afternoon tea, or as a sweet snack, Cardamom-Spiced Cookies are bound to impress. They’re best enjoyed fresh from the oven but can also be stored for several days in an airtight container, allowing you to savor their flavor long after they’ve cooled.
Ingredients (Serves 4-6):
- 2 cups all-purpose flour
- 1 teaspoon baking powder
- 1/2 teaspoon baking soda
- 1/2 teaspoon salt
- 1 teaspoon ground cardamom
- 1/2 teaspoon ground cinnamon
- 3/4 cup unsalted butter, softened
- 1 cup granulated sugar
- 1 large egg
- 1 teaspoon vanilla extract
- 1/2 cup powdered sugar (for dusting, optional)
Cooking Instructions:
- Preheat the Oven: Begin by preheating your oven to 350°F (175°C). This guarantees that your cookies will bake evenly and achieve the perfect texture.
- Mix Dry Ingredients: In a medium-sized bowl, whisk together the flour, baking powder, baking soda, salt, ground cardamom, and ground cinnamon. This step is essential for evenly distributing the leavening agents and spices throughout the flour.
- Cream the Butter and Sugar: In a large mixing bowl, use an electric mixer to cream together the softened butter and granulated sugar until the mixture is light and fluffy. This usually takes about 3-5 minutes. Properly creaming these ingredients helps incorporate air into the dough, resulting in a lighter cookie.
- Add Egg and Vanilla: Beat in the egg and vanilla extract into the butter and sugar mixture until fully combined. This adds moisture and flavor to the cookies.
- Combine Wet and Dry Ingredients: Gradually add the dry mixture to the wet mixture, stirring gently until just combined. Be careful not to overmix as this can lead to tougher cookies.
- Shape the Cookies: Using a tablespoon or cookie scoop, form balls of dough and place them on a baking sheet lined with parchment paper, leaving enough space between each cookie for spreading.
- Bake: Place the baking sheet in the preheated oven and bake for 10-12 minutes, or until the edges are lightly golden. The centers may look slightly underbaked, which is okay as they’ll continue to cook on the baking sheet once removed from the oven.
- Cool and Dust: Once baked, remove the cookies from the oven and let them cool on the baking sheet for about 5 minutes before transferring them to a wire rack to cool completely. If desired, dust the cooled cookies with powdered sugar for an extra touch of sweetness.
Extra Tips:
For an added twist, consider mixing in some chopped nuts or chocolate chips to the batter for additional texture and flavor. If you prefer a more intense cardamom flavor, feel free to adjust the amount of ground cardamom in the recipe.
Additionally, these cookies can be frozen; simply place them in an airtight container once cooled and they can last for up to three months. Enjoy your baking!
Swedish Pepparkakor

Swedish Pepparkakor, also known as gingerbread cookies, are a beloved holiday treat in Sweden, enjoyed during the festive season and often served with hot beverages. These spiced cookies aren’t only delicious but also carry a rich tradition, often made in various shapes and sizes, including hearts, stars, and traditional Swedish symbols.
The combination of warm spices like ginger, cinnamon, and cloves gives these cookies their signature flavor, while the crisp texture makes them irresistible.
Making Pepparkakor is a delightful activity that can be enjoyed with family and friends, especially during the holiday season. The dough can be prepared in advance and chilled, allowing the flavors to meld beautifully. Once you’re ready to bake, the dough is rolled out and cut into shapes, then baked until golden brown.
Whether you choose to decorate them with icing or enjoy them plain, these cookies are sure to bring warmth and joy to your festive gatherings.
Ingredients (Serves 4-6 people):
- 3 ½ cups all-purpose flour
- 1 teaspoon baking soda
- 1 tablespoon ground ginger
- 1 tablespoon ground cinnamon
- 1 teaspoon ground cloves
- 1 teaspoon ground cardamom
- ½ teaspoon salt
- ¾ cup unsalted butter, softened
- 1 cup granulated sugar
- 1 cup molasses
- 1 large egg
Cooking Instructions:
- Prepare the Dry Ingredients: In a large mixing bowl, whisk together the flour, baking soda, ginger, cinnamon, cloves, cardamom, and salt until well combined. This step guarantees that all the spices are evenly distributed throughout the flour, which is vital for the flavor of the cookies.
- Cream the Butter and Sugar: In another bowl, beat the softened butter and granulated sugar together with an electric mixer until the mixture is light and fluffy. This should take about 3-5 minutes. Creaming the butter and sugar properly will create a nice texture in your cookies.
- Incorporate Molasses and Egg: Add the molasses and the egg to the butter-sugar mixture, and mix until fully combined. The molasses not only adds sweetness but also gives the cookies their rich, dark color.
- Combine Wet and Dry Ingredients: Gradually add the dry flour mixture to the wet mixture, stirring until the dough comes together. It may seem a bit crumbly at first, but with continued mixing, it will form a cohesive dough.
- Chill the Dough: Wrap the dough in plastic wrap and refrigerate for at least 2 hours, or overnight if possible. Chilling the dough helps to firm it up, making it easier to roll out and cut into shapes.
- Preheat the Oven: Before you’re ready to bake, preheat your oven to 350°F (175°C). This guarantees that your cookies will bake evenly.
- Roll and Cut the Dough: On a lightly floured surface, roll out the chilled dough to about 1/8 inch thickness. Use cookie cutters to cut out shapes and place them on a baking sheet lined with parchment paper, leaving space between the cookies.
- Bake the Cookies: Bake in the preheated oven for 8-10 minutes, or until the edges are lightly browned. Keep a close eye on them, as they can go from perfectly baked to overdone quickly.
- Cool and Decorate: Once baked, remove the cookies from the oven and allow them to cool on the baking sheet for a few minutes before transferring them to a wire rack to cool completely. Once cooled, you can decorate them with royal icing or enjoy them plain.
Extra Tips:
When making Swedish Pepparkakor, it’s essential to verify that your butter is properly softened for best mixing. If you want to make the cookies even spicier, consider increasing the amount of ginger or cinnamon.
These cookies also store well in an airtight container, allowing you to enjoy them for weeks. For added flair, you can even experiment with different cookie shapes or designs, making them perfect for holiday gifting or festive decoration!
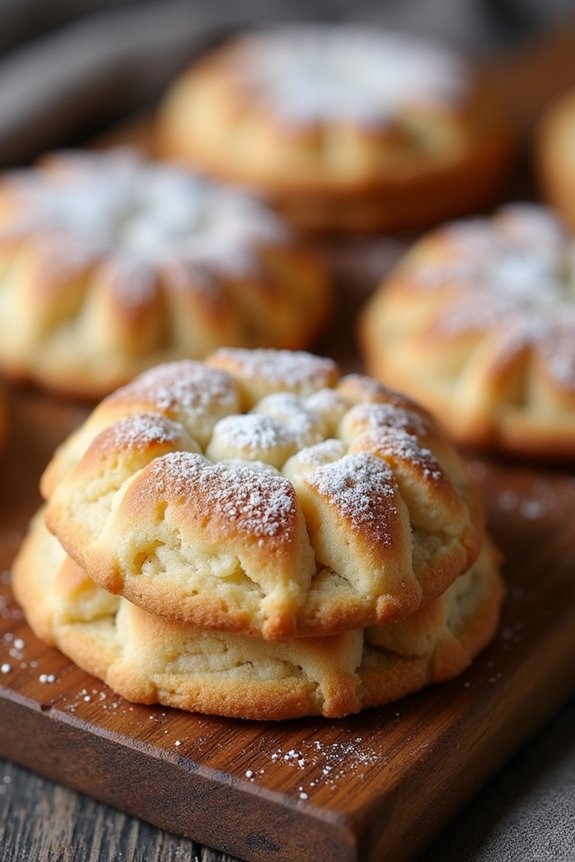
Norwegian Krumkake
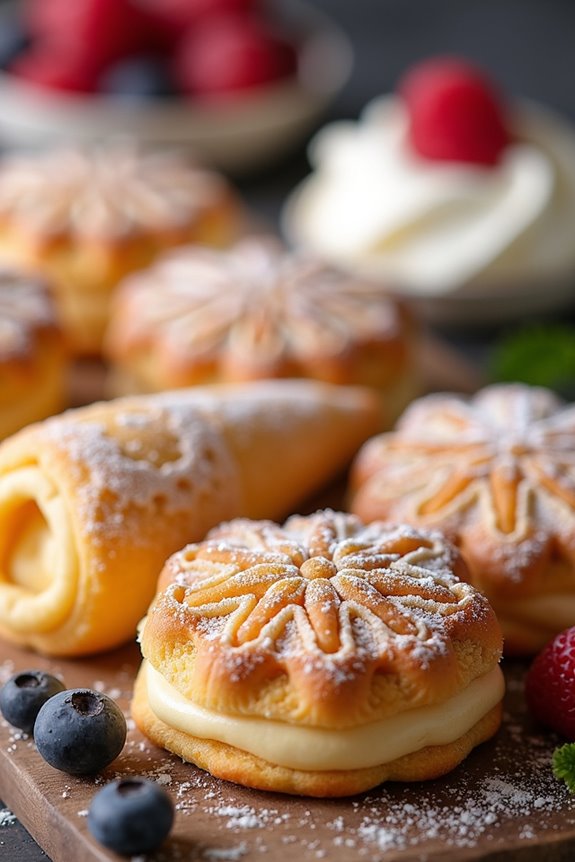
Krumkake, a traditional Norwegian delicacy, is a delicate, crisp cookie that’s as beautiful as it’s delicious. The name “krumkake” translates to “bent cake,” which refers to the cookie’s unique shape. Traditionally baked in a special iron, krumkake is characterized by its intricate patterns and is often rolled into cones, making it perfect for filling with whipped cream or other sweet treats. This festive cookie is especially popular during the Christmas season, but its delightful taste and texture make it a year-round favorite.
Making krumkake is a rewarding experience that brings a taste of Norway into your kitchen. The combination of simple ingredients creates a subtle flavor that pairs wonderfully with a variety of fillings. Once you master the technique of using the kakejern, or krumkake iron, you’ll be able to impress your family and friends with this stunning dessert. Gather your ingredients, and let’s get started!
Ingredients (serves 4-6 people):
- 3 large eggs
- 1 cup granulated sugar
- 1 cup all-purpose flour
- 1/2 cup unsalted butter, melted and cooled
- 1 teaspoon vanilla extract
- 1/2 teaspoon ground cardamom (optional)
- Powdered sugar, for dusting (optional)
Cooking Instructions:
1. Prepare Your Equipment: Start by preheating your krumkake iron according to the manufacturer’s instructions. If you don’t have a krumkake iron, you can use a pizzelle maker as an alternative. Make sure to grease the iron lightly with butter to prevent sticking.
2. Mix the Batter: In a medium-sized mixing bowl, whisk together the eggs and granulated sugar until the mixture becomes light and fluffy. This should take about 3-5 minutes.
Next, gently fold in the all-purpose flour, melted butter, vanilla extract, and ground cardamom if using. Mix until just combined; be careful not to overmix, as this could lead to tough cookies.
3. Bake the Krumkake: Once your batter is ready and the iron is preheated, spoon about a tablespoon of batter onto the center of the hot iron. Close the iron and cook for about 30-40 seconds, or until the cookie is golden brown.
Carefully remove the cookie and immediately shape it by rolling it around a wooden cone or a similar object. Allow it to hold its shape as it cools.
4. Continue Baking: Repeat the process with the remaining batter, making sure to grease the iron as needed between batches. You should be able to make around 12-15 krumkake with this recipe, depending on the size of your cookies.
5. Serve and Enjoy: Once all the cookies are baked and shaped, you can dust them with powdered sugar if desired. Serve them filled with whipped cream, fresh berries, or any filling of your choice, or simply enjoy them as they are!
Extra Tips:
When making krumkake, patience is key. Confirm that your iron is at the right temperature before adding the batter, as this will help achieve the perfect golden color and crisp texture.
If you’re new to shaping the cookies, practice a few times; they can be a bit tricky at first, but with time, you’ll master the technique! To store any leftovers, keep the cookies in an airtight container to maintain their crispness. Enjoy your delightful Norwegian treat!
Finnish Joulutorttu
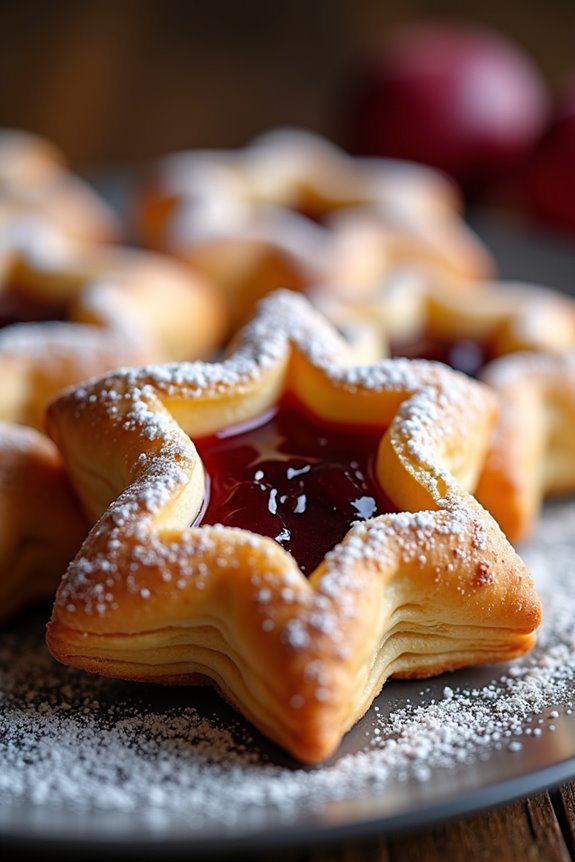
Finnish Joulutorttu, also known as Christmas Tart, is a delightful pastry traditionally enjoyed during the holiday season in Finland. This delectable treat is made with puff pastry and filled with a sweet plum jam, often dusted with powdered sugar for an elegant finish. The star-shaped design not only makes it visually appealing but also adds to the festive spirit, making it a beloved favorite for family gatherings and celebrations.
Creating Joulutorttu at home is a rewarding experience that brings the warm flavors of winter right to your kitchen. The buttery pastry combined with the rich fruit filling creates a perfect balance of textures and flavors that everyone will love. Whether served as a dessert or a sweet snack with coffee, these pastries are sure to impress your guests and evoke the cozy atmosphere of Finnish Christmas traditions.
Ingredients (Serves 4-6)
- 1 package of puff pastry (2 sheets, thawed)
- 1 cup of plum jam (or any preferred fruit jam)
- 1 egg (beaten, for egg wash)
- Powdered sugar (for dusting)
- Flour (for dusting the work surface)
Cooking Instructions
- Preheat the Oven: Begin by preheating your oven to 400°F (200°C). This guarantees that your pastries will bake evenly and achieve a golden-brown color.
- Prepare the Puff Pastry: On a lightly floured surface, roll out each sheet of thawed puff pastry to smooth out any creases. Then, cut each sheet into squares, approximately 4×4 inches in size.
- Create the Star Shape: To form the star shape, make diagonal cuts from each corner of the squares, stopping about 1 inch from the center. This will create four points that can be folded over the jam filling.
- Add the Filling: Place a spoonful of plum jam in the center of each pastry square. Be careful not to add too much jam, as it may overflow during baking.
- Fold Over the Points: Gently lift each point of the pastry and fold it over the jam in the center. You can alternate the points to create a beautiful star shape, pressing the edges lightly to seal them.
- Apply the Egg Wash: Brush the tops of each pastry with the beaten egg. This will give the Joulutorttu a beautiful golden color as it bakes.
- Bake the Pastries: Place the pastries on a parchment-lined baking sheet and bake in the preheated oven for about 15-20 minutes, or until they’re puffed and golden brown.
- Cool and Dust: Once baked, remove the pastries from the oven and let them cool slightly. Before serving, dust with powdered sugar for a festive touch.
Extra Tips
For an extra layer of flavor, consider adding a sprinkle of cinnamon or cardamom to the jam before filling the pastries. This will enhance the festive aroma and taste of your Joulutorttu.
Additionally, you can experiment with different fruit fillings, such as berry preserves or apple compote, to create variations that suit your palate. Enjoy these pastries warm or at room temperature, and they can also be made ahead of time and frozen before baking for convenience!
Danish Butter Cookies
Danish Butter Cookies, known as “Smørrebrød” in Denmark, are a beloved treat that combines a rich buttery flavor with a delightful crunch. These cookies are often enjoyed during the holiday season or any special occasion, and they make an excellent accompaniment to tea or coffee.
With their simple yet indulgent ingredients, these cookies are easy to make and are certain to impress family and friends alike. The beauty of Danish Butter Cookies lies in their versatility; you can shape them into various forms, sprinkle them with sugar, or even dip them in chocolate for an extra touch of decadence.
Whether you prefer classic round shapes or fancy star designs, the dough can be easily piped into any desired shape. Once baked, the cookies develop a lovely golden hue and a melt-in-your-mouth texture that will leave everyone wanting more.
Ingredients (serving size of 4-6 people):
- 1 cup (226g) unsalted butter, softened
- 1/2 cup (100g) granulated sugar
- 1/4 cup (50g) powdered sugar
- 1 teaspoon vanilla extract
- 2 cups (240g) all-purpose flour
- 1/4 teaspoon salt
- 1/2 cup (85g) chocolate chips or sprinkles for decoration (optional)
Cooking Instructions:
- Prepare the Oven and Baking Sheets: Preheat your oven to 350°F (175°C). Line two baking sheets with parchment paper to prevent the cookies from sticking and to make cleanup easier.
- Cream the Butter and Sugars: In a large mixing bowl, combine the softened unsalted butter, granulated sugar, and powdered sugar. Using an electric mixer or a wooden spoon, cream the mixture together until it becomes light and fluffy. This process usually takes about 2-3 minutes.
- Add Vanilla and Mix: Once the butter and sugars are properly creamed, add the vanilla extract to the mixture. Continue mixing until well incorporated.
- Combine Dry Ingredients: In a separate bowl, whisk together the all-purpose flour and salt. Slowly add this dry mixture to the butter mixture, stirring gently until just combined. Be careful not to overmix; the dough should come together but still remain soft.
- Shape the Cookies: Transfer the dough into a piping bag fitted with a star or round tip. Pipe the dough onto the prepared baking sheets in desired shapes, such as rosettes, stars, or simple rounds. Leave some space between each cookie as they’ll spread slightly while baking.
- Decorate (Optional): If desired, sprinkle the tops of the cookies with chocolate chips or colorful sprinkles before baking for an extra touch of sweetness and visual appeal.
- Bake the Cookies: Place the baking sheets in the preheated oven and bake for 12-15 minutes, or until the edges of the cookies are lightly golden. Keep an eye on them, as baking times may vary depending on your oven.
- Cool and Serve: Once baked, remove the cookies from the oven and allow them to cool on the baking sheets for a few minutes before transferring them to a wire rack to cool completely. Enjoy your delicious Danish Butter Cookies with a cup of tea or coffee!
Extra Tips: To guarantee the best results, make sure your butter is at room temperature before starting the recipe, as this will help achieve a smoother texture when creaming.
If you want a more festive flavor, consider adding a touch of almond extract or finely grated lemon zest to the dough. These cookies can be stored in an airtight container for up to a week, but they’re best enjoyed fresh!
Spiced Oatmeal Cookies

Spiced Oatmeal Cookies are a delightful treat that perfectly embodies the warm, cozy flavors of Scandinavian baking. These cookies aren’t only delicious but also packed with wholesome oats and fragrant spices, making them a heartwarming option for any occasion. The combination of cinnamon, nutmeg, and ginger adds a comforting warmth, while the oats provide a hearty texture that makes these cookies satisfying and filling.
Perfect for sharing with friends and family, they can be enjoyed with a cup of coffee or tea, bringing a little taste of Scandinavia to your home.
These cookies are simple to make and can be prepared in just about an hour, making them an ideal choice for both novice and experienced bakers. The recipe yields about 4-6 servings, depending on how generously you scoop your dough. Whether you’re looking for a cozy dessert to enjoy by the fireplace or a delicious snack to take on a winter hike, these Spiced Oatmeal Cookies are sure to warm your heart and fill your home with delightful aromas.
Ingredients
- 1 cup rolled oats
- 1 cup all-purpose flour
- 1/2 cup brown sugar, packed
- 1/2 cup granulated sugar
- 1/2 cup unsalted butter, softened
- 1 large egg
- 1 teaspoon baking soda
- 1 teaspoon cinnamon
- 1/2 teaspoon nutmeg
- 1/2 teaspoon ground ginger
- 1/4 teaspoon salt
- 1 teaspoon vanilla extract
- 1/2 cup raisins or chopped nuts (optional)
Cooking Instructions
- Preheat the Oven: Begin by preheating your oven to 350°F (175°C). This guarantees that the cookies bake evenly and achieve a lovely golden color.
- Cream the Butter and Sugars: In a large mixing bowl, combine the softened butter, brown sugar, and granulated sugar. Using an electric mixer or a whisk, beat the mixture until it’s light and fluffy. This process incorporates air into the mixture, helping your cookies rise and giving them a soft texture.
- Add the Egg and Vanilla: Beat in the egg and vanilla extract until fully combined. This helps to bind the ingredients together and adds flavor to the dough.
- Combine Dry Ingredients: In a separate bowl, whisk together the rolled oats, all-purpose flour, baking soda, cinnamon, nutmeg, ginger, and salt. This step guarantees that the spices and leavening agent are evenly distributed throughout the flour.
- Mix Dry and Wet Ingredients: Gradually add the dry ingredient mixture to the wet mixture, stirring until just combined. Be careful not to overmix, as this can result in tough cookies.
- Fold in Optional Ingredients: If desired, fold in the raisins or chopped nuts for added texture and flavor. This is the time to get creative – you can also substitute with chocolate chips or dried fruit.
- Scoop the Dough: Using a tablespoon or cookie scoop, drop spoonfuls of dough onto a baking sheet lined with parchment paper, leaving some space between each cookie to allow for spreading.
- Bake the Cookies: Place the baking sheet in the preheated oven and bake for about 10-12 minutes, or until the edges are lightly golden. Keep an eye on them to avoid overbaking.
- Cool and Serve: Once baked, remove the cookies from the oven and let them cool on the baking sheet for a few minutes before transferring them to a wire rack to cool completely. This allows the cookies to set and makes them easier to handle.
Extra Tips
For the best results, make sure your butter is at room temperature before creaming it with the sugars; this will help create a better texture in your cookies.
Additionally, if you prefer a chewier cookie, slightly underbake them, as they’ll continue to firm up while cooling. Feel free to experiment with different spices or add-ins based on your personal preference, and enjoy the delightful aroma that fills your kitchen as these cookies bake!
Almond Biscotti
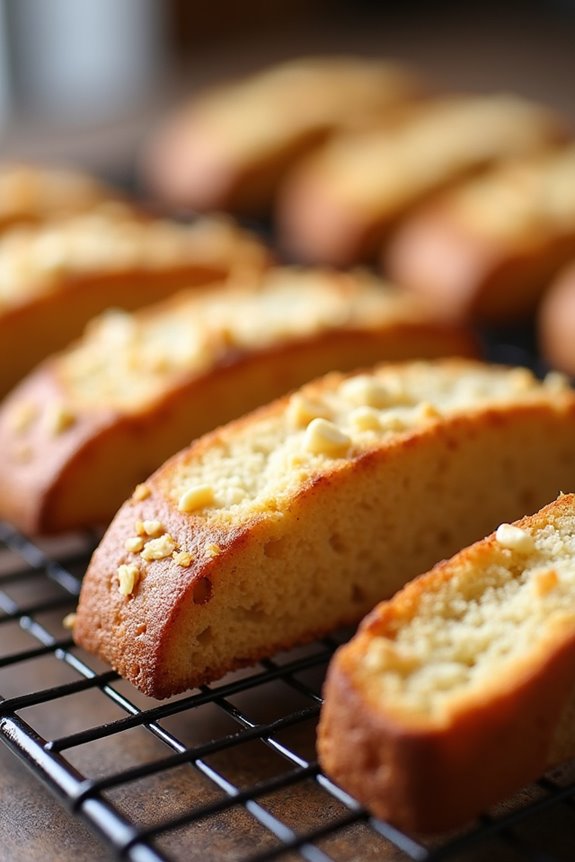
Almond Biscotti is a delightful Italian cookie that has found a special place in Scandinavian baking traditions. These twice-baked cookies aren’t only crunchy but also packed with the rich flavor of almonds. Perfect for dipping in coffee or tea, they make a wonderful addition to any dessert table or can be enjoyed as a simple snack throughout the day.
The process of making biscotti may seem a bit lengthy, but the end result is well worth the effort, providing a satisfying crunch and a nutty aroma that fills your kitchen.
The beauty of Almond Biscotti lies in its simplicity and versatility. You can customize the recipe by adding ingredients such as chocolate chips, dried fruits, or even spices like cinnamon to suit your taste. Whether you enjoy them plain or with a twist, these cookies are sure to impress family and friends alike.
Bake a batch today, and you’ll have a delightful treat that pairs perfectly with your favorite hot beverage.
Ingredients (Serves 4-6):
- 2 cups all-purpose flour
- 1 cup granulated sugar
- 1 teaspoon baking powder
- 1/4 teaspoon salt
- 3 large eggs
- 1 teaspoon vanilla extract
- 1/2 teaspoon almond extract
- 1 cup whole almonds, toasted and roughly chopped
Instructions:
- Preheat the Oven: Begin by preheating your oven to 350°F (175°C). Line a baking sheet with parchment paper to prevent the biscotti from sticking during baking.
- Mix Dry Ingredients: In a large mixing bowl, whisk together the all-purpose flour, granulated sugar, baking powder, and salt. This helps to evenly distribute the leavening agents throughout the flour, guaranteeing your biscotti rise properly.
- Combine Wet Ingredients: In a separate bowl, beat together the eggs, vanilla extract, and almond extract until well combined. The eggs will provide moisture and act as a binder for the dry ingredients.
- Form the Dough: Gradually add the wet mixture to the dry ingredients, stirring until just combined. Fold in the toasted almonds. The dough will be sticky but should hold together well. You may need to use your hands to knead the dough slightly.
- Shape the Biscotti: Divide the dough in half and shape each half into a log about 12 inches long and 2 inches wide on the prepared baking sheet. Confirm the logs are spaced apart, as they’ll spread during baking.
- First Bake: Bake the logs in the preheated oven for 25-30 minutes, or until they’re lightly golden and firm to the touch. Allow them to cool on the baking sheet for about 10 minutes.
- Slice and Second Bake: Carefully transfer the logs to a cutting board and slice them diagonally into 1/2-inch thick pieces. Arrange the slices cut-side down back on the baking sheet. Bake for an additional 15-20 minutes or until the biscotti are crisp and golden, flipping them halfway through.
- Cool and Store: Once done, remove the biscotti from the oven and let them cool completely on a wire rack. Store them in an airtight container at room temperature for up to two weeks.
Extra Tips:
For an added touch, consider dipping half of each biscotti in melted dark or white chocolate after they’ve cooled. This not only enhances the flavor but also adds a beautiful presentation.
Additionally, feel free to experiment with other nuts or flavorings—try pistachios, hazelnuts, or even a hint of orange zest for a unique twist on the classic almond biscotti. Enjoy your baking!
Hazelnut Cookies
Hazelnut cookies are a delightful treat that brings a touch of Scandinavian charm to your dessert table. With their rich, nutty flavor and wonderful texture, these cookies are perfect for any occasion, whether it’s a cozy family gathering or a festive celebration.
The combination of ground hazelnuts and a buttery dough creates a cookie that’s both crisp on the outside and soft on the inside, making them incredibly satisfying to bite into. These cookies aren’t only delicious but also easy to make, allowing you to whip up a batch in no time.
They can be enjoyed on their own or paired with a cup of tea or coffee, making them a versatile option for those who love baked goods. The addition of a dusting of powdered sugar on top gives them a lovely finish, making them even more appealing to the eye. Let’s explore the recipe!
Ingredients (serving size: 4-6 people):
- 1 cup ground hazelnuts
- 1 cup all-purpose flour
- 1/2 cup unsalted butter, softened
- 1/2 cup granulated sugar
- 1/4 cup powdered sugar (for dusting)
- 1 large egg
- 1 teaspoon vanilla extract
- 1/2 teaspoon baking powder
- 1/4 teaspoon salt
Cooking Instructions:
1. Preheat the Oven: Begin by preheating your oven to 350°F (175°C). This guarantees that your cookies will bake evenly and gives them a nice golden-brown color.
2. Prepare the Hazelnuts: If you haven’t purchased pre-ground hazelnuts, you can grind whole hazelnuts in a food processor until they reach a fine consistency. Be careful not to over-process them into a paste.
3. Mix Wet Ingredients: In a large mixing bowl, combine the softened butter and granulated sugar. Use an electric mixer or a whisk to cream them together until the mixture is light and fluffy.
This process incorporates air into the butter, leading to a lighter cookie texture.
4. Add Egg and Vanilla: Next, crack in the large egg and add the vanilla extract. Mix again until everything is well combined. This will add moisture and flavor to your cookie dough.
5. Combine Dry Ingredients: In a separate bowl, whisk together the ground hazelnuts, all-purpose flour, baking powder, and salt. This ensures that the leavening agent and salt are evenly distributed throughout the flour.
6. Combine Wet and Dry Ingredients: Gradually add the dry ingredients to the wet mixture, mixing gently until just combined. Be careful not to overmix, as this can result in tough cookies.
7. Form Cookies: Using a tablespoon or cookie scoop, drop rounded balls of dough onto a baking sheet lined with parchment paper. Leave some space between each cookie, as they’ll spread a little while baking.
8. Bake the Cookies: Place the baking sheet in the preheated oven and bake for about 12-15 minutes, or until the edges are lightly golden. Keep an eye on them, as baking times can vary depending on your oven.
9. Cool and Dust: Once baked, remove the cookies from the oven and let them cool on the baking sheet for a few minutes before transferring them to a wire rack. After they’ve cooled completely, dust them with powdered sugar for an elegant finish.
Extra Tips: For a richer flavor, you can toast the ground hazelnuts in a dry skillet over medium heat for a few minutes before adding them to the dough. This enhances their nuttiness and adds depth to the cookies.
Additionally, feel free to experiment by adding a pinch of cinnamon or a handful of chocolate chips for a twist on the classic hazelnut cookie! Enjoy your baking adventure!
Saffron Infused Cookies

Saffron Infused Cookies are a delightful treat that brings a touch of Scandinavian elegance to your dessert table. The unique flavor of saffron, combined with a buttery cookie base, creates a warm and aromatic experience that’s perfect for special occasions or a cozy afternoon snack.
These cookies aren’t only visually appealing with their vibrant yellow hue, but they also have a delicate taste that can be enjoyed by all ages. Baking these cookies is a straightforward process that will fill your kitchen with a lovely fragrance. The infusion of saffron adds a luxurious twist to the traditional cookie recipe, making them ideal for celebrations or simply for indulging oneself.
Gather your ingredients and get ready to impress your friends and family with these delightful Saffron Infused Cookies that are sure to be a hit!
Ingredients (serves 4-6 people):
- 1/2 cup unsalted butter, softened
- 1/2 cup granulated sugar
- 1/4 cup brown sugar
- 1 large egg
- 1 teaspoon vanilla extract
- 1/4 teaspoon salt
- 1 teaspoon baking powder
- 1 3/4 cups all-purpose flour
- 1/4 teaspoon saffron threads
- 2 tablespoons warm milk
- 1/2 cup chopped nuts (optional)
Cooking Instructions:
- Prepare the Saffron Infusion: Begin by placing the saffron threads in a small bowl. Pour the warm milk over the saffron and let it steep for about 10-15 minutes. This will help to release the flavor and color from the saffron.
- Cream the Butters and Sugars: In a large mixing bowl, cream together the softened butter, granulated sugar, and brown sugar until the mixture is light and fluffy. This usually takes about 3-5 minutes with an electric mixer.
- Add Egg and Vanilla: Beat in the egg and vanilla extract to the butter and sugar mixture, making sure everything is well combined. The mixture should be smooth and creamy.
- Combine Dry Ingredients: In a separate bowl, whisk together the flour, salt, and baking powder. Gradually add this dry mixture to the wet mixture, mixing until just combined to avoid overworking the dough.
- Incorporate Saffron Milk: Slowly add the saffron-infused milk into the cookie dough, mixing gently until it’s fully incorporated. If you’re using nuts, fold them in at this stage.
- Chill the Dough: Cover the cookie dough with plastic wrap and refrigerate for at least 30 minutes. Chilling the dough helps the cookies maintain their shape while baking.
- Preheat the Oven: Preheat your oven to 350°F (175°C) and line a baking sheet with parchment paper.
- Shape and Bake: Once the dough is chilled, scoop tablespoon-sized portions onto the prepared baking sheet, spacing them about 2 inches apart. Bake in the preheated oven for 10-12 minutes or until the edges are lightly golden.
- Cool and Serve: Remove the cookies from the oven and let them cool on the baking sheet for a few minutes before transferring them to a wire rack to cool completely. Enjoy your Saffron Infused Cookies with a cup of tea or coffee!
For best results, make sure that your ingredients—especially the butter—are at room temperature before you start. This helps achieve a smooth batter that will yield soft, chewy cookies.
If you want to enhance the saffron flavor, consider adding a pinch more saffron to the warm milk or experimenting with different nuts. Finally, store any leftover cookies in an airtight container to keep them fresh, but they’re so delicious, they probably won’t last long!
Lingonberry Thumbprint Cookies
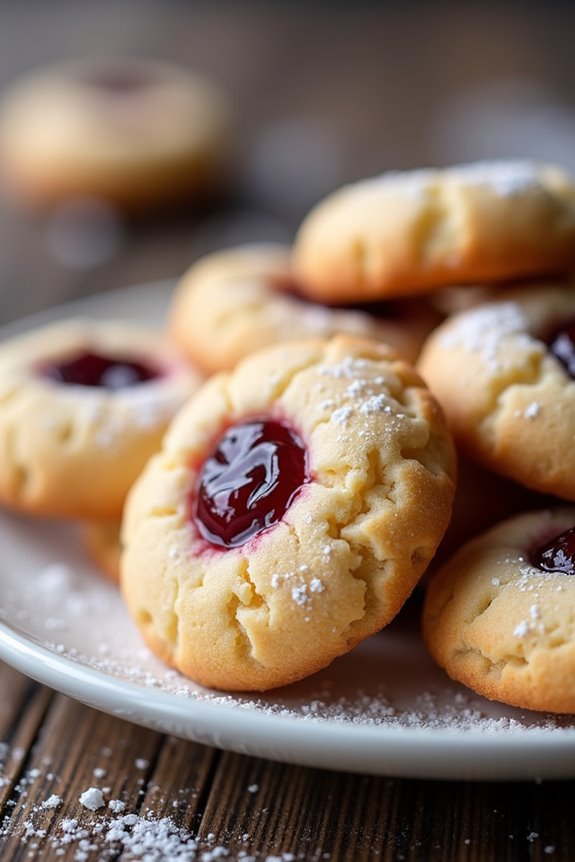
Lingonberry Thumbprint Cookies are a delightful Scandinavian treat that combines the tart sweetness of lingonberries with a buttery, melt-in-your-mouth cookie base. These cookies aren’t only visually appealing with their charming thumbprint design but also offer a perfect balance of flavors that’s certain to please anyone with a sweet tooth.
Ideal for any occasion, they make a wonderful addition to holiday cookie trays or a cozy afternoon snack paired with tea or coffee.
The recipe is simple yet rewarding, allowing you to showcase the unique flavor of lingonberries, which are reminiscent of cranberries but with a distinctive tartness. While traditional thumbprint cookies often use fruit preserves, the use of lingonberry jam elevates these cookies, giving them a Scandinavian twist.
With a few basic ingredients and a little bit of time, you can create a batch of these delightful cookies that are perfect for sharing or enjoying on your own.
Ingredients (serving size: 4-6 people)
- 1 cup unsalted butter, softened
- 1/2 cup granulated sugar
- 1/4 cup brown sugar, packed
- 1 teaspoon vanilla extract
- 2 cups all-purpose flour
- 1/2 teaspoon baking powder
- 1/4 teaspoon salt
- 1/2 cup lingonberry jam
- Optional: powdered sugar for dusting
Cooking Instructions
- Preheat the Oven: Begin by preheating your oven to 350°F (175°C). This guarantees that your cookies bake evenly and thoroughly.
- Prepare the Dough: In a large mixing bowl, cream together the softened butter, granulated sugar, and brown sugar until the mixture is light and fluffy. This process should take about 2-3 minutes using an electric mixer. Add in the vanilla extract and mix until fully incorporated.
- Combine Dry Ingredients: In a separate bowl, whisk together the all-purpose flour, baking powder, and salt. Gradually add the dry mixture to the wet mixture, stirring until a soft dough forms. Be careful not to overmix, as this can lead to tough cookies.
- Shape the Cookies: Using your hands, roll the dough into small balls, about 1 inch in diameter. Place the dough balls on a baking sheet lined with parchment paper, spacing them about 2 inches apart.
- Create the Thumbprint: Gently press your thumb (or the back of a teaspoon) into the center of each cookie ball to create an indentation. Be sure not to press too hard; you want to create a well that can hold the lingonberry jam.
- Fill with Jam: Spoon a small amount of lingonberry jam into the center of each thumbprint. Aim to fill them without overflowing, as the jam can bubble during baking.
- Bake the Cookies: Place the baking sheet in the preheated oven and bake for about 12-15 minutes, or until the edges are lightly golden. Keep an eye on them to avoid overbaking.
- Cool and Serve: Once baked, remove the cookies from the oven and allow them to cool on the baking sheet for a few minutes before transferring them to a wire rack to cool completely. If desired, dust with powdered sugar before serving.
Extra Tips
For the best results, confirm that your butter is at room temperature for easier creaming with the sugars. If you can’t find lingonberry jam, you can substitute it with cranberry or raspberry jam, but keep in mind that the flavor will differ slightly.
Also, these cookies can be stored in an airtight container for up to a week, making them a great make-ahead treat for gatherings. Enjoy the delightful mix of textures and flavors, and feel free to experiment with different jams for a personalized touch!
Coconut Macaroons

Coconut macaroons are a delightful treat that brings the taste of the tropics to your kitchen. These sweet, chewy cookies are made primarily from shredded coconut, sugar, and egg whites, creating a chewy texture that contrasts beautifully with a crisp exterior.
Their simplicity allows for versatility, making them a popular choice for those looking to impress guests or simply indulge in a sweet snack. Whether enjoyed on their own or dipped in chocolate, coconut macaroons are bound to become a favorite in your dessert repertoire.
This recipe serves 4-6 people and is perfect for gatherings or as a sweet treat to enjoy throughout the week. With minimal ingredients and straightforward steps, you’ll be able to create these delicious cookies in no time. Follow this guide to make coconut macaroons that are both satisfying and easy to prepare.
Ingredients:
- 2 ½ cups shredded sweetened coconut
- 2/3 cup granulated sugar
- 1/4 teaspoon salt
- 2 large egg whites
- 1 teaspoon vanilla extract
- 1/2 cup semi-sweet chocolate chips (optional, for dipping)
Cooking Instructions:
1. Preheat the Oven: Start by preheating your oven to 325°F (160°C). This guarantees that the macaroons will bake evenly and develop a nice golden color.
2. Prepare the Baking Sheet: Line a baking sheet with parchment paper. This will prevent the macaroons from sticking and make cleanup easier.
3. Mix Ingredients: In a large mixing bowl, combine the shredded coconut, granulated sugar, and salt. Stir until well mixed.
In a separate bowl, whisk the egg whites and vanilla extract until frothy, then pour them into the coconut mixture. Stir until all the dry ingredients are fully incorporated and the mixture is sticky.
4. Shape the Macaroons: Using a tablespoon or a small cookie scoop, portion out the mixture and form small mounds on the prepared baking sheet, leaving about an inch of space between each mound. This will allow them to spread slightly while baking.
5. Bake: Place the baking sheet in the preheated oven and bake for 20-25 minutes or until the macaroons are golden brown on the edges. Keep an eye on them to prevent over-baking.
6. Cool: Once baked, remove the baking sheet from the oven and allow the macaroons to Cool on the sheet for about 5 minutes. Then, transfer them to a wire rack to cool completely.
7. Optional Chocolate Dip: If you decide to dip the macaroons in chocolate, melt the chocolate chips in a microwave-safe bowl in 30-second intervals, stirring until smooth. Once the macaroons are cool, dip the bottoms into the melted chocolate and place them back on the parchment paper to set.
Extra Tips:
To enhance the flavor of your coconut macaroons, consider adding a pinch of almond extract or orange zest to the mixture.
Additionally, for a more gourmet touch, you can drizzle melted chocolate over the tops of the cooled macaroons instead of dipping them. Store any leftovers in an airtight container at room temperature for up to a week, guaranteeing they remain chewy and delicious.
Chocolate-Dipped Biscuit Sticks

Chocolate-Dipped Biscuit Sticks are a delightful treat that perfectly combines the crunchiness of biscuits with the rich, smooth flavor of chocolate. These snacks aren’t only easy to make but also versatile, allowing you to enjoy them at any time of the day.
Whether you’re hosting a gathering or simply craving something sweet, these biscuit sticks are sure to captivate. The process involves baking simple biscuit dough that’s then cut into sticks and dipped into melted chocolate for a delicious finish.
Serve them on a platter for your guests or enjoy them as an afternoon snack with a cup of tea or coffee. With a preparation time of just about 30 minutes, and a little patience while the chocolate sets, you’ll have a charming dessert that everyone will love.
Ingredients (Serves 4-6):
- 1 cup all-purpose flour
- 1/4 cup granulated sugar
- 1/2 teaspoon baking powder
- 1/4 teaspoon salt
- 1/2 cup unsalted butter, softened
- 1 teaspoon vanilla extract
- 1/4 cup milk
- 1 cup semi-sweet chocolate chips
- Optional: sprinkles or crushed nuts for decoration
Cooking Instructions:
1. Preheat the Oven: Start by preheating your oven to 350°F (175°C). This guarantees that the biscuits will bake evenly when placed in the oven later on.
2. Mix Dry Ingredients: In a mixing bowl, combine the all-purpose flour, granulated sugar, baking powder, and salt. Whisk them together until they’re well blended.
3. Cream Butter and Add Wet Ingredients: In a separate bowl, cream the softened butter until it’s light and fluffy. Add the vanilla extract and milk to the butter, mixing until smooth.
4. Combine Mixtures: Gradually add the dry mixture to the butter mixture, stirring until a dough forms. Make sure not to overmix; just combine until you can no longer see the flour.
5. Shape the Dough: On a lightly floured surface, roll out the dough to about 1/4 inch thick. Cut the dough into strips approximately 1 inch wide and 4-5 inches long.
Place the strips on a lined baking sheet, leaving space between each stick.
6. Bake the Biscuit Sticks: Bake in the preheated oven for 10-12 minutes, or until the edges are lightly golden. Keep an eye on them to avoid overbaking.
7. Cool the Biscuit Sticks: Once baked, remove the biscuit sticks from the oven and let them cool on a wire rack for about 10 minutes.
8. Melt the Chocolate: While the sticks cool, melt the chocolate chips in a microwave-safe bowl in 30-second intervals, stirring in between until fully melted and smooth.
9. Dip Biscuit Sticks in Chocolate: Once the biscuit sticks are cooled, dip one end of each stick into the melted chocolate, allowing any excess to drip off.
10. Set the Chocolate: Place the dipped sticks onto parchment paper. If desired, sprinkle with crushed nuts or sprinkles before the chocolate sets.
Allow the chocolate to cool and harden completely, which may take about 30 minutes.
Extra Tips:
For an extra flavor twist, consider adding a dash of almond extract to the dough or using white chocolate for dipping. You can also experiment with different toppings such as coconut flakes or sea salt for added texture.
To store your chocolate-dipped biscuit sticks, keep them in an airtight container at room temperature for up to a week. Enjoy the delightful crunch and rich chocolate flavor!
Lemon Poppy Seed Cookies
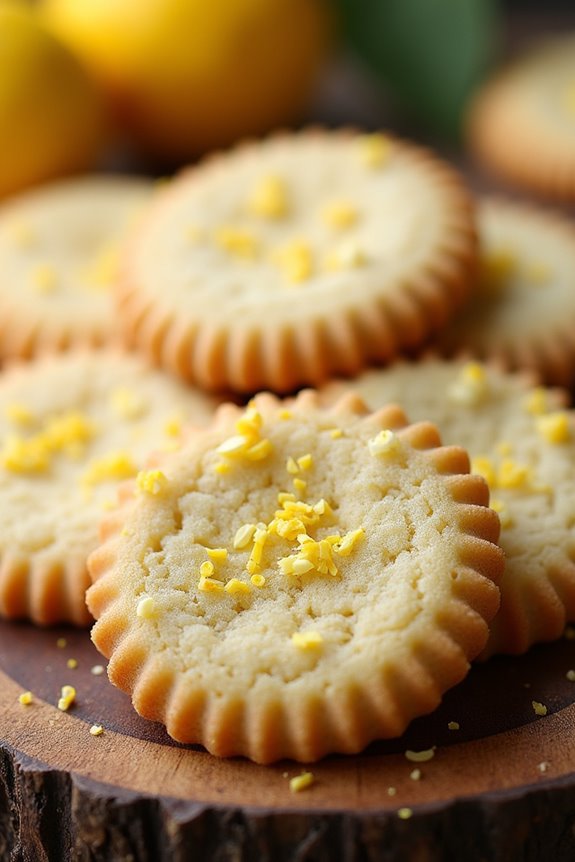
Lemon Poppy Seed Cookies are a delightful treat that perfectly embodies the Scandinavian spirit of fresh, vibrant flavors. The combination of zesty lemon and crunchy poppy seeds creates a unique texture and tang that makes these cookies irresistible. They’re perfect for a light dessert, an afternoon pick-me-up, or a special addition to any gathering.
With their rejuvenating taste and cheerful appearance, these cookies will surely brighten your day. These cookies aren’t only simple to make but also come together quickly, making them a great choice for both novice and experienced bakers. The bright lemon flavor balances beautifully with the nutty notes of the poppy seeds, resulting in a cookie that’s both tender and flavorful.
Serve them with a cup of tea or coffee for the ultimate Scandinavian experience.
Ingredients (Serving Size: 4-6 people):
- 1 cup all-purpose flour
- 1/2 teaspoon baking powder
- 1/4 teaspoon baking soda
- 1/4 teaspoon salt
- 1/4 cup unsalted butter, softened
- 1/2 cup granulated sugar
- 1 large egg
- Zest of 1 large lemon
- 2 tablespoons fresh lemon juice
- 1 tablespoon poppy seeds
- 1/2 teaspoon vanilla extract
Cooking Instructions:
- Preheat the Oven: Begin by preheating your oven to 350°F (175°C). This makes sure that the cookies bake evenly and achieve a golden color.
- Prepare Baking Sheet: Line a baking sheet with parchment paper. This will prevent the cookies from sticking and make for easy cleanup.
- Mix Dry Ingredients: In a medium bowl, whisk together the flour, baking powder, baking soda, and salt. This step makes sure that the leavening agents are evenly distributed throughout the flour.
- Cream Butter and Sugar: In a large bowl, use an electric mixer to cream together the softened butter and granulated sugar until the mixture is light and fluffy, about 2-3 minutes. This incorporates air into the mixture, helping the cookies rise.
- Add Egg and Flavorings: Beat in the egg, lemon zest, lemon juice, and vanilla extract into the creamed butter and sugar mixture until well combined. The lemon zest and juice will provide that bright flavor that characterizes these cookies.
- Combine Mixtures: Gradually add the dry ingredients to the wet ingredients, mixing just until combined. Be careful not to overmix, as this can lead to tough cookies.
- Fold in Poppy Seeds: Gently fold in the poppy seeds using a spatula. This will make sure that the seeds are evenly distributed throughout the cookie dough.
- Scoop Dough: Using a cookie scoop or tablespoon, drop rounded balls of dough onto the prepared baking sheet, spacing them about 2 inches apart to allow for spreading.
- Bake: Place the baking sheet in the preheated oven and bake for 10-12 minutes, or until the edges are lightly golden and the centers are set.
- Cool: Remove the cookies from the oven and allow them to cool on the baking sheet for 5 minutes before transferring them to a wire rack to cool completely.
Extra Tips: For an extra burst of flavor, consider adding a lemon glaze on top of the cooled cookies. Simply mix powdered sugar with a little lemon juice until you reach your desired consistency, then drizzle it over the cookies.
Additionally, make sure your butter is at room temperature for easier creaming, and feel free to adjust the amount of lemon juice or zest to suit your taste preferences. Enjoy your baking!