

Spring is just around the corner, and with it comes the joy of Easter celebrations.
Europe offers a treasure trove of traditional Easter recipes that are as delightful as they are meaningful.
From Italy’s Colomba Pasquale to Greece’s Tsoureki, each dish tells its own unique story.
These recipes are perfect for bringing families together and adding a touch of European charm to your festivities.
Let’s explore these authentic dishes and maybe you’ll find a new favorite to share with your loved ones.
Italian Colomba Pasquale
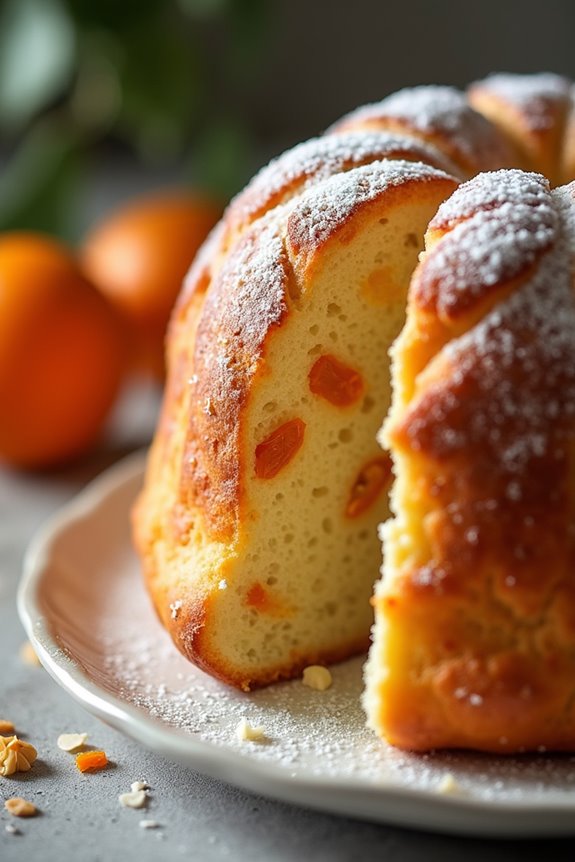
Colomba Pasquale, or Easter Dove Cake, is a traditional Italian dessert that’s often enjoyed during the Easter season. Shaped like a dove, this sweet bread is rich in flavor and has a delightful texture, making it a perfect centerpiece for any Easter celebration. Its soft, fluffy interior is enhanced with candied fruits, almonds, and a light, sugary glaze that adds a touch of sweetness and crunch.
Preparing Colomba Pasquale is a labor of love, as the dough requires careful kneading and proofing, but the end result is a stunning and delicious treat that embodies the spirit of Easter. This cake not only represents the end of Lent but also symbolizes hope and renewal. The shape of the dove signifies peace, making it a meaningful addition to any festive table.
Whether served with a cup of coffee or as a sweet treat after dinner, Colomba Pasquale is sure to be a hit among family and friends. So, gather your ingredients and get ready to create this beautiful Italian Easter classic that will definitely impress your guests.
Ingredients (Serves 4-6):
- 500g all-purpose flour
- 150g sugar
- 200ml whole milk, lukewarm
- 100g unsalted butter, softened
- 4 large eggs
- 15g fresh yeast or 7g active dry yeast
- 100g candied orange peel, chopped
- 100g candied lemon peel, chopped
- 100g slivered almonds
- 1 teaspoon vanilla extract
- 1/2 teaspoon salt
- Zest of 1 lemon
- Zest of 1 orange
- 1 egg (for egg wash)
- Confectioners’ sugar (for dusting)
Cooking Instructions:
- Activate the Yeast: If using fresh yeast, crumble it into a small bowl and mix with a tablespoon of the lukewarm milk and a pinch of sugar. Let it sit for about 10 minutes until frothy. If using active dry yeast, combine it with the lukewarm milk and a pinch of sugar in a bowl and let it sit until bubbly.
- Prepare the Dough: In a mixing bowl, combine the flour, sugar, and salt. Create a well in the center and add the activated yeast, eggs, vanilla extract, and remaining lukewarm milk. Mix until a rough dough forms.
- Knead the Dough: Transfer the dough to a floured surface and knead for about 10-15 minutes until smooth and elastic. Gradually add the softened butter and continue kneading until fully incorporated.
- First Rise: Place the dough in a lightly greased bowl, cover it with plastic wrap or a damp cloth, and let it rise in a warm place for about 2 hours or until doubled in size.
- Incorporate Fruits and Zests: Once the dough has risen, punch it down gently to remove air bubbles. Fold in the candied orange and lemon peels, almond slivers, and the zests of lemon and orange. Knead lightly to distribute the fruits evenly.
- Shape the Dough: Divide the dough into two equal parts. Shape each part into a dove shape or place it in a dove-shaped mold. Cover it loosely and let it rise again for about 1 hour, until puffy.
- Prepare for Baking: Preheat your oven to 180°C (350°F). Brush the top of the dough with the beaten egg for an egg wash and sprinkle slivered almonds on top.
- Bake: Bake in the preheated oven for about 30-35 minutes, or until golden brown and a skewer inserted in the center comes out clean.
- Cool and Decorate: Allow the cake to cool in the mold for about 15 minutes, then transfer to a wire rack to cool completely. Once cooled, dust with confectioners’ sugar before serving.
Extra Tips:
To achieve the best flavor and texture, ascertain all ingredients are at room temperature before starting. If you want to enhance the flavor, consider adding a splash of rum or brandy to the dough.
Additionally, Colomba Pasquale can be stored in an airtight container for several days, making it a fantastic make-ahead dessert for your Easter festivities. Enjoy sharing this beautiful cake with loved ones, as it not only tastes delicious but also carries a rich tradition of Italian culture.
Greek Tsoureki
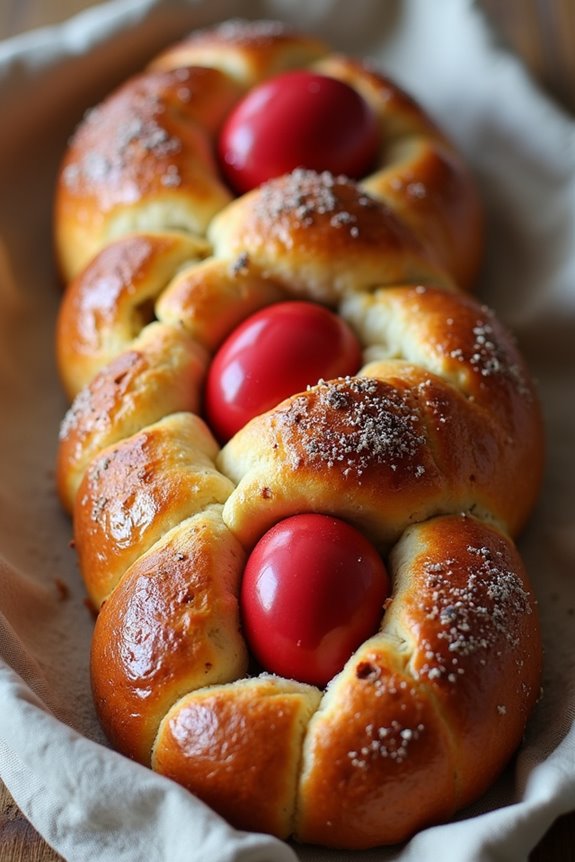
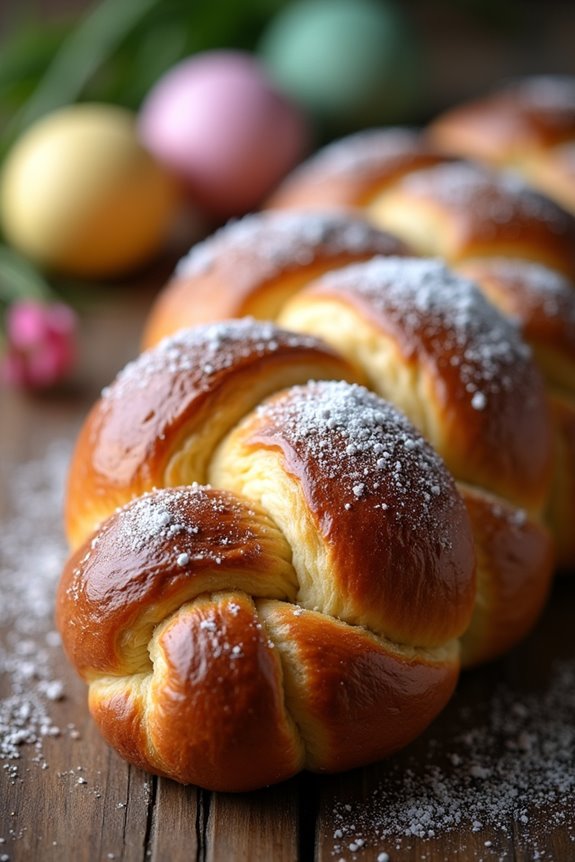
Greek Tsoureki is a traditional sweet bread that’s typically baked during the Easter season. Its soft, fluffy texture and delightful aroma make it a favorite among families celebrating the holiday. Tsoureki is often braided and can be flavored with aromatic spices such as mahleb and mastic, which enhance its unique taste. This recipe will guide you through making a delicious Tsoureki that will surely impress your family and friends.
The process of making Greek Tsoureki involves preparing a rich dough that’s left to rise, then shaped and baked to perfection. This festive bread is often adorned with dyed red eggs, symbolizing the resurrection. While it may take some time to prepare, the result is a stunning and delectable centerpiece for your Easter celebrations.
Ingredients (serving size: 4-6 people):
- 4 cups all-purpose flour
- 1 cup milk, warmed
- 2/3 cup granulated sugar
- 1/2 cup unsalted butter, softened
- 2 large eggs
- 1 packet (2 1/4 tsp) active dry yeast
- 1/2 tsp salt
- 1 tsp ground mahleb (optional)
- 1/2 tsp ground mastic (optional)
- 1 egg (for egg wash)
- Red-dyed eggs (for decoration, optional)
Cooking Instructions:
- Activate the Yeast: In a small bowl, combine the warm milk (about 110°F or 43°C) with 1 tablespoon of sugar and the active dry yeast. Stir gently and let it sit for about 5-10 minutes until it becomes frothy. This indicates that the yeast is active and ready to use.
- Prepare the Dough: In a large mixing bowl, combine the flour, remaining sugar, salt, ground mahleb, and ground mastic (if using). Make a well in the center and add the activated yeast mixture, softened butter, and eggs. Mix the ingredients together until they form a shaggy dough.
- Knead the Dough: Transfer the dough onto a floured surface and knead it for about 10-15 minutes until it becomes smooth and elastic. If the dough is too sticky, add a little extra flour, a tablespoon at a time, until it reaches the right consistency.
- First Rise: Place the kneaded dough in a greased bowl, cover it with a clean kitchen towel, and let it rise in a warm place for about 1-2 hours, or until it has doubled in size.
- Shape the Bread: Once the dough has risen, punch it down to release the air. Divide the dough into three equal parts. Roll each part into a long rope (about 12-15 inches long). Braid the three ropes together, pinching the ends to seal. Optionally, tuck in red-dyed eggs into the braid for decoration.
- Second Rise: Place the braided dough on a parchment-lined baking sheet. Cover it with a kitchen towel and allow it to rise again for another 30-45 minutes, until it puffs up.
- Preheat the Oven: While the dough is rising, preheat your oven to 350°F (175°C).
- Egg Wash: Beat the remaining egg and brush it over the surface of the braided dough to give it a lovely golden color when baked.
- Bake the Tsoureki: Place the baking sheet in the preheated oven and bake for 25-30 minutes, or until the bread is golden brown and sounds hollow when tapped on the bottom.
- Cool and Serve: Once baked, remove the Tsoureki from the oven and allow it to cool on a wire rack before slicing and serving.
Extra Tips: When making Tsoureki, be patient with the rising times, as they’re essential for achieving the perfect texture. If you can’t find mahleb or mastic, don’t worry; it still tastes wonderful without them. Experiment with different flavors by adding orange or lemon zest to the dough for an invigorating twist.
Finally, serve slices of Tsoureki with butter or jam, or enjoy it plain—it’s delicious either way!
Spanish Torrijas
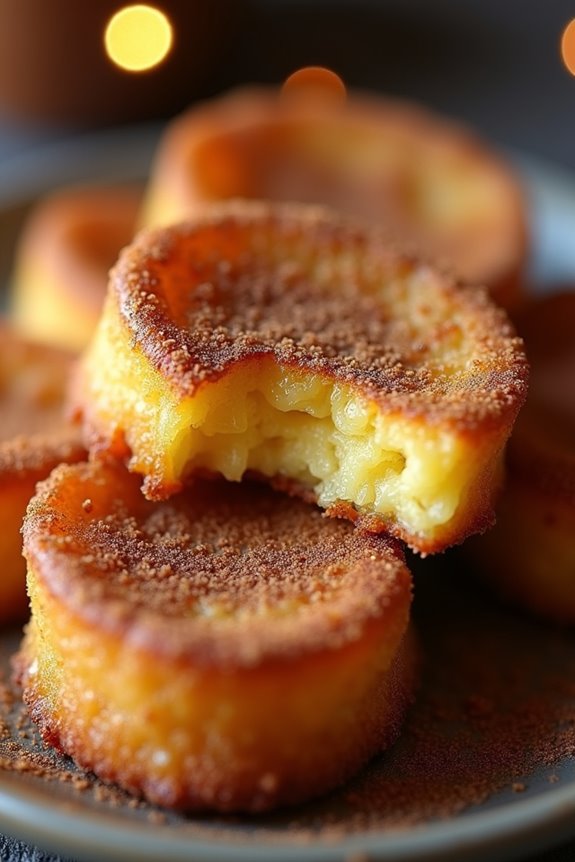
Spanish Torrijas are a delightful Easter treat traditionally enjoyed in Spain. These sweet, custard-soaked slices of bread are reminiscent of French toast but with a unique twist that sets them apart. Torrijas are typically made using stale bread, allowing it to soak up the rich mixture of milk, sugar, and spices before being fried to golden perfection.
Often dusted with cinnamon and sugar, these indulgent morsels are perfect for sharing with family and friends during the festive season. The origins of Torrijas date back to medieval times, where they were seen as a way to use up leftover bread.
Today, they’re a beloved dessert during Holy Week, celebrated for their comforting flavors and the nostalgic memories they evoke. Whether enjoyed at breakfast, as a dessert, or even as a snack, Torrijas are certain to bring warmth and joy to your Easter celebrations.
Ingredients (serving size: 4-6 people):
- 1 loaf of stale bread (preferably French or rustic bread)
- 2 cups whole milk
- 1/2 cup sugar
- 1 cinnamon stick
- Zest of 1 lemon
- 3 large eggs
- 1/2 cup all-purpose flour
- Vegetable oil (for frying)
- Ground cinnamon (for dusting)
- Extra sugar (for dusting)
Cooking Instructions:
- Prepare the Milk Mixture: In a saucepan, combine the whole milk, sugar, cinnamon stick, and lemon zest. Heat the mixture over medium heat until it just begins to simmer, stirring occasionally to dissolve the sugar. Once simmering, remove from heat and let it cool slightly, allowing the flavors to infuse.
- Slice the Bread: Cut the stale bread into thick slices, about 1 inch each. The thickness helps the bread to soak up the milk without falling apart during cooking.
- Soak the Bread: Place the bread slices in a shallow dish and pour the cooled milk mixture over them. Allow the bread to soak for about 10-15 minutes, turning the slices halfway through to guarantee even absorption. The bread should be saturated but not overly soggy.
- Prepare the Egg Wash: In a separate bowl, beat the three large eggs until well combined. In another shallow dish, place the flour. This will be used for coating the bread before frying.
- Coat the Bread: Remove each soaked slice from the milk mixture, allowing excess liquid to drip off. Dip each slice into the flour, guaranteeing both sides are coated, then into the beaten eggs, allowing any excess to drip off.
- Fry the Torrijas: In a large frying pan, heat about 1/2 inch of vegetable oil over medium heat. Once the oil is hot, carefully place the coated bread slices into the pan, frying in batches to avoid overcrowding. Fry each side for about 2-3 minutes or until golden brown, then transfer to a plate lined with paper towels to drain excess oil.
- Dust with Cinnamon and Sugar: While the Torrijas are still warm, mix ground cinnamon with extra sugar in a bowl. Dust the fried Torrijas generously with the cinnamon-sugar mixture to enhance their sweetness.
- Serve and Enjoy: Serve the Torrijas warm or at room temperature, either as is or with a drizzle of honey or a dollop of whipped cream if desired.
Extra Tips: For an even richer flavor, consider adding a splash of vanilla extract to the milk mixture or using almond milk for a nutty twist. If you prefer a less sweet version, reduce the amount of sugar in the milk mixture and the dusting.
Serve your Torrijas with fresh fruits or a side of chocolate sauce for an extra indulgence. Enjoy your homemade Spanish Torrijas, and don’t forget to share the love with your family and friends!
Polish Babka Wielkanocna
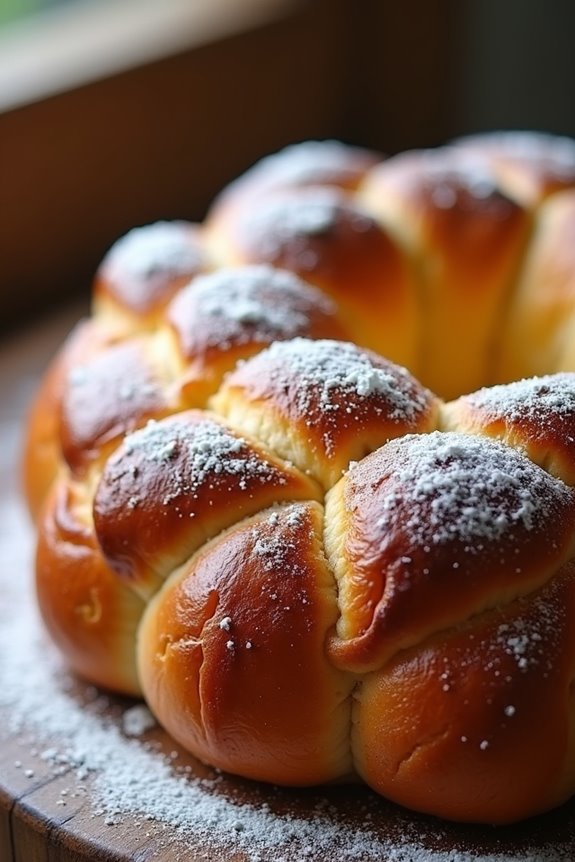
Polish Babka Wielkanocna, also known as Easter Babka, is a traditional sweet bread that’s often prepared during the Easter season in Poland. This delightful yeast-based cake is characterized by its light, airy texture and rich flavor, usually enhanced with the addition of citrus zest, raisins, or nuts.
The name “Babka” translates to “grandmother” in Polish, which harks back to the traditional recipes often passed down through generations, making this cake not just a treat, but a symbol of family and heritage.
Making Babka Wielkanocna is a labor of love, requiring patience and care to achieve the perfect rise and texture. The dough is typically braided or shaped in a bundt pan, lending it a beautiful appearance that’s both festive and inviting.
Once baked, it can be topped with a simple glaze or dusted with powdered sugar, making it not only delicious but also visually appealing for Easter gatherings.
Ingredients (Serves 4-6):
- 4 cups all-purpose flour
- 1/2 cup sugar
- 1 package (2 1/4 teaspoons) active dry yeast
- 1/2 cup warm milk (110°F)
- 1/2 cup unsalted butter, melted
- 3 large eggs
- 1 teaspoon vanilla extract
- Zest of 1 lemon
- 1/2 teaspoon salt
- 1 cup raisins (optional)
- Powdered sugar for dusting (optional)
Cooking Instructions:
- Activate the Yeast: In a small bowl, combine the warm milk and sugar, then sprinkle the yeast on top. Allow it to sit for about 5-10 minutes until it becomes frothy. This indicates that the yeast is active and ready to use.
- Prepare the Dough: In a large mixing bowl, combine the flour and salt. Make a well in the center and add the melted butter, eggs, vanilla extract, lemon zest, and the activated yeast mixture. Mix everything together until a dough forms.
- Knead the Dough: Transfer the dough to a floured surface and knead it for about 8-10 minutes until it becomes smooth and elastic. If the dough is too sticky, add a little more flour as needed.
- First Rise: Place the kneaded dough into a lightly greased bowl, cover it with a clean kitchen towel, and let it rise in a warm place for about 1-2 hours, or until it has doubled in size.
- Incorporate Add-ins: Once the dough has risen, punch it down to release the air. If using, fold in the raisins gently into the dough.
- Shape the Babka: Divide the dough into two equal portions. Roll each portion into a long rope, then braid them together or shape them into a bundt form, placing them into a greased bundt pan.
- Second Rise: Cover the shaped dough with a towel and let it rise for another 30-45 minutes until puffed up.
- Bake the Babka: Preheat the oven to 350°F (175°C). Bake the Babka for 30-40 minutes or until golden brown and a toothpick inserted into the center comes out clean.
- Cool and Glaze: Once baked, allow the Babka to cool in the pan for about 10 minutes before transferring it to a wire rack. Once cooled, you can dust it with powdered sugar or drizzle with a simple glaze made from powdered sugar and milk.
Extra Tips:
For the best flavor and texture, be sure to use fresh yeast and high-quality ingredients. If you’re short on time, you can prepare the dough the night before and let it rise in the refrigerator overnight.
Additionally, feel free to experiment with flavors by adding spices like cinnamon or nutmeg, or incorporating different dried fruits or nuts. This Babka can be enjoyed fresh, but it also makes a delightful treat toasted the next day!
German Osterbrot
German Osterbrot is a traditional sweet bread that’s often enjoyed during the Easter season in Germany. This delightful bread, known for its soft texture and sweet aroma, is a cherished part of many families’ holiday celebrations. The bread is typically enriched with milk, butter, and eggs, making it a rich and satisfying treat.
It’s often braided into a lovely shape and topped with a dusting of powdered sugar or adorned with colorful eggs, symbolizing the renewal of life. Making Osterbrot is a wonderful way to bring the family together during the festive season. The process of kneading the dough and shaping it into a braided loaf allows for creativity and fun.
Once baked, the warm aroma fills the home, creating a comforting atmosphere that’s perfect for sharing with loved ones during Easter brunch or as a sweet treat throughout the holiday.
Ingredients (Serves 4-6)
- 500g all-purpose flour
- 75g granulated sugar
- 10g active dry yeast
- 250ml milk, warmed
- 100g unsalted butter, melted
- 2 large eggs
- 1 teaspoon vanilla extract
- 1 teaspoon ground cinnamon
- 1/2 teaspoon salt
- 100g raisins or currants (optional)
- Powdered sugar for dusting (optional)
Cooking Instructions
- Prepare the Yeast Mixture: In a small bowl, combine the warm milk, sugar, and active dry yeast. Allow the mixture to sit for about 5-10 minutes until it becomes frothy. This step activates the yeast, which is essential for the bread to rise properly.
- Mix the Dry Ingredients: In a large mixing bowl, sift together the all-purpose flour, ground cinnamon, and salt. This guarantees an even distribution of the ingredients, which helps in achieving a uniform texture in the bread.
- Combine Wet Ingredients: In another bowl, whisk together the melted butter, eggs, and vanilla extract until well combined. This mixture adds richness and flavor to the dough.
- Create the Dough: Pour the yeast mixture and the wet ingredient mixture into the bowl with the dry ingredients. If you’re using raisins or currants, add them at this stage. Stir with a wooden spoon until the dough starts to come together.
- Knead the Dough: Transfer the dough to a lightly floured surface and knead it for about 8-10 minutes until it becomes smooth and elastic. Kneading develops the gluten, which gives the bread its structure.
- First Rise: Place the kneaded dough in a greased bowl, cover it with a clean kitchen towel, and let it rise in a warm place for about 1-2 hours, or until it has doubled in size. This step allows the dough to become light and airy.
- Shape the Bread: After the dough has risen, punch it down to release the air. Divide the dough into three equal pieces, roll each piece into long strands, and braid them together. Pinch the ends to secure the braid.
- Second Rise: Place the braided loaf on a baking sheet lined with parchment paper. Cover it again with a kitchen towel and let it rise for another 30-45 minutes until puffed up.
- Preheat the Oven: While the dough is rising, preheat your oven to 180°C (350°F). This guarantees that the bread bakes evenly.
- Bake the Bread: Once the dough has risen, bake it in the preheated oven for about 25-30 minutes, or until golden brown. The internal temperature should reach around 90°C (190°F) to verify it’s fully cooked.
- Cool and Serve: Remove the bread from the oven and let it cool on a wire rack. Once cooled, dust with powdered sugar if desired, and serve with butter or jam.
Extra Tips
When preparing German Osterbrot, it’s vital to use fresh yeast for the best results, as stale yeast can lead to a denser bread. Additionally, be mindful of the temperature of the milk; it should be warm but not hot, as excessive heat can kill the yeast.
If you want to add an extra festive touch, consider incorporating colored eggs into the braid before baking, or serve the bread with seasonal fruit preserves. Enjoy your baking experience and the delicious results!
French Lamb With Spring Vegetables

French Lamb With Spring Vegetables is a classic dish that beautifully showcases the vibrant flavors of spring. This dish features tender lamb, seasoned to perfection, served alongside a medley of seasonal vegetables that add both color and nutrition. The combination of herbs and fresh produce embodies the essence of French cuisine, creating a hearty yet elegant meal that’s perfect for Easter gatherings or any special occasion.
Cooking this dish not only brings the delightful flavors of France to your table but also allows you to enjoy the bounty of springtime produce. The lamb is typically slow-cooked to achieve a melt-in-your-mouth tenderness, while the vegetables are lightly sautéed to preserve their crispness and vibrant colors. This recipe is sure to impress your guests and become a cherished addition to your culinary repertoire.
Ingredients (Serves 4-6):
- 2 lbs lamb shoulder or leg, bone-in
- 4 cloves garlic, minced
- 2 tablespoons fresh rosemary, chopped
- 2 tablespoons fresh thyme, chopped
- 1 tablespoon Dijon mustard
- 3 tablespoons olive oil
- Salt and pepper, to taste
- 1 cup chicken or vegetable broth
- 1 pound new potatoes, halved
- 1 cup carrots, sliced
- 1 cup asparagus, trimmed and cut into bite-sized pieces
- 1 cup green peas (fresh or frozen)
- 1 tablespoon lemon juice
- 1 tablespoon fresh parsley, chopped (for garnish)
Cooking Instructions:
- Prepare the Lamb: Begin by preheating your oven to 325°F (160°C). In a small bowl, combine the minced garlic, rosemary, thyme, Dijon mustard, olive oil, salt, and pepper to create a marinade. Rub this mixture all over the lamb, making sure it’s well-coated. Let it marinate for at least 30 minutes, or ideally, refrigerate it overnight for deeper flavor.
- Sear the Lamb: In a large oven-safe skillet or Dutch oven, heat a bit of olive oil over medium-high heat. Once hot, add the marinated lamb and sear it on all sides until browned (about 4-5 minutes per side). This step enhances the flavor through caramelization.
- Add Broth and Vegetables: After searing, pour in the chicken or vegetable broth. Then, add the halved new potatoes and sliced carrots around the lamb in the skillet. Bring the broth to a simmer before covering the skillet with a lid or aluminum foil.
- Slow Cook the Lamb: Transfer the skillet to the preheated oven and let it cook for about 2 hours, or until the lamb is fork-tender. Check halfway through; if the liquid is evaporating too quickly, add a bit more broth or water to keep it moist.
- Prepare the Spring Vegetables: While the lamb is cooking, prepare the asparagus and green peas. In a separate pan, heat a tablespoon of olive oil over medium heat. Add the asparagus and sauté for about 3-4 minutes until tender-crisp. Then, add the green peas and cook for another 2 minutes. Season with salt, pepper, and a splash of lemon juice for brightness.
- Combine and Serve: Once the lamb is cooked, remove it from the oven and let it rest for 10 minutes before slicing. Serve the sliced lamb on a large platter, surrounded by the potatoes, carrots, and sautéed spring vegetables. Garnish with fresh parsley for a pop of color.
Extra Tips: When cooking French Lamb With Spring Vegetables, consider using a meat thermometer to verify the lamb reaches an internal temperature of 145°F (63°C) for best tenderness. Additionally, feel free to customize the vegetables based on seasonal availability or personal preferences. If you enjoy a richer sauce, you can reduce the cooking liquid on the stovetop after removing the lamb by simmering it until thickened, adding a delicious glaze to the final dish.
Portuguese Folar De Pascoa
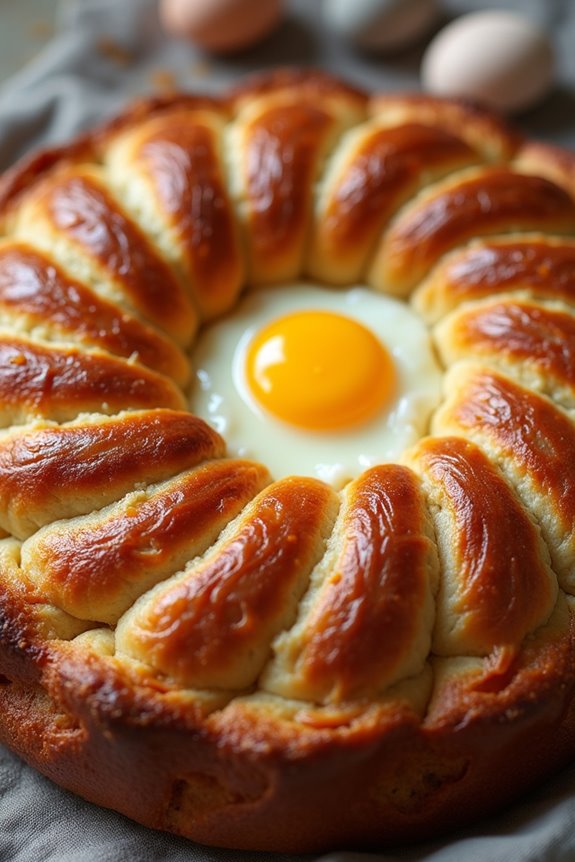
Folar de Pascoa is a traditional Portuguese Easter bread that embodies the essence of celebration and family gatherings. This sweet and savory loaf is typically enriched with eggs, spices, and sometimes even cured meats, making it a unique centerpiece for the festive table.
The bread’s distinctive flavor profile, combined with its beautiful presentation, makes it a beloved dish during the Easter season in Portugal. It symbolizes the arrival of spring and new beginnings, and each family often has its own cherished recipe passed down through generations.
The preparation of Folar de Pascoa is a labor of love, requiring a bit of time and effort, but the result is well worth it. The dough is soft and pliable, allowing for a variety of fillings that reflect personal preferences or regional traditions.
Whether you enjoy it sweet with a hint of cinnamon and sugar or savory with chorizo and eggs, this bread brings a delightful taste of Portugal to your Easter celebrations, creating memories that last well beyond the holiday.
Ingredients (serving size: 4-6 people)
- 500g all-purpose flour
- 100g sugar
- 10g salt
- 10g dry yeast
- 200ml warm milk
- 100g unsalted butter, melted
- 3 large eggs
- 1 tsp ground cinnamon
- 100g chorizo, diced (optional)
- 2 boiled eggs, for decoration
- Zest of 1 lemon
- 1 tsp vanilla extract
Cooking Instructions
- Activate the Yeast: In a small bowl, combine the warm milk and dry yeast. Let it sit for about 5-10 minutes until frothy. This indicates that the yeast is active and ready to use.
- Mix the Dry Ingredients: In a large mixing bowl, whisk together the all-purpose flour, sugar, salt, and ground cinnamon. Make a well in the center to prepare for the liquid ingredients.
- Combine Wet Ingredients: In a separate bowl, beat together the melted butter, eggs, lemon zest, and vanilla extract. Pour the activated yeast mixture into this bowl and mix well.
- Form the Dough: Gradually pour the wet mixture into the well of the dry ingredients while mixing with a wooden spoon or your hands. Knead the dough until it’s smooth and elastic, about 10 minutes. If the dough is too sticky, add a little extra flour as needed.
- Incorporate Fillings: If using, add the diced chorizo to the dough and knead until evenly distributed. Form the dough into a ball and place it in a lightly greased bowl. Cover with a damp cloth and let it rise in a warm place for about 1-2 hours or until it has doubled in size.
- Shape the Bread: Once the dough has risen, punch it down to release the air. Divide the dough into two parts: one larger piece for the base and a smaller piece for the top decoration. Shape the larger piece into a round or oval loaf and place it on a baking sheet lined with parchment paper.
- Prepare for Baking: Roll out the smaller piece and cut it into strips to create a lattice pattern or decorative swirls on top of the loaf. Place the boiled eggs in the center of the loaf as decoration, and cover the dough again. Let it rise for an additional 30-45 minutes.
- Bake: Preheat the oven to 180°C (350°F). Brush the top of the loaf with an egg wash (beaten egg) for a golden finish. Bake for 30-40 minutes or until the bread is golden brown and sounds hollow when tapped on the bottom.
- Cool and Serve: Once baked, remove the Folar de Pascoa from the oven and let it cool on a wire rack. Serve warm or at room temperature, sliced to enjoy.
Extra Tips
When making Folar de Pascoa, feel free to customize the fillings based on your taste preferences. Some families even include nuts or dried fruits for added texture and flavor.
Ascertain you keep the dough in a warm environment while it rises, as temperatures can affect the yeast’s activity. If you find the dough is too sticky, don’t hesitate to add a little more flour, but be careful not to overdo it, as this can make the bread dense.
Enjoy the process and the aroma of your kitchen as this beautiful bread bakes!
Swedish Påskmust
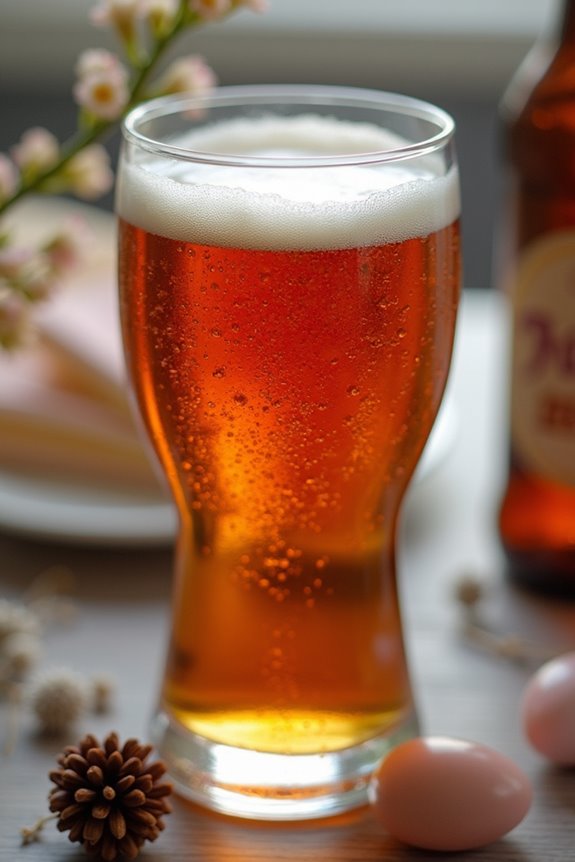
Swedish Påskmust, a traditional Easter drink, is a beloved part of Swedish culture that many look forward to each spring. This dark, sweet beverage is often compared to a spiced root beer or a malt drink, and it’s typically enjoyed during festive occasions, particularly Easter meals.
With its unique blend of flavors, Påskmust is a staple that complements the delicious dishes served during the holiday, making every gathering even more special.
Making your own Påskmust at home can be a fun and rewarding experience. While many people opt for store-bought versions, creating this drink from scratch allows you to customize the flavors to your liking.
With a few key ingredients and some simple steps, you can whip up this delightful beverage to share with family and friends. Whether you’re hosting an Easter feast or simply looking to try something new, Swedish Påskmust is sure to impress.
Ingredients (Serves 4-6 people)
- 4 cups water
- 1 cup brown sugar
- 1/2 cup white sugar
- 1 teaspoon molasses
- 1 teaspoon ground cinnamon
- 1 teaspoon ground ginger
- 1/2 teaspoon ground clove
- 1/2 teaspoon ground cardamom
- 1/2 teaspoon vanilla extract
- 1/4 teaspoon salt
- 1/4 teaspoon citric acid (or juice of 1 lemon)
- 1/2 cup dark malt extract
- 4 cups carbonated water (or soda water)
Cooking Instructions
1. Prepare the Base: In a large pot, bring 4 cups of water to a boil. This will serve as the base for your Påskmust. Make sure the water reaches a rolling boil to guarantee the sugars dissolve properly.
2. Add Sugars and Spices: Once the water is boiling, reduce the heat to medium and add 1 cup of brown sugar, 1/2 cup of white sugar, and 1 teaspoon of molasses. Stir the mixture until the sugars completely dissolve.
Then, add in the ground cinnamon, ginger, clove, cardamom, vanilla extract, and salt. Stir well to combine all the flavors.
3. Incorporate Malt Extract: After the spices are well mixed, add the 1/2 cup of dark malt extract to the pot. This ingredient is essential for giving the Påskmust its distinctive flavor and color. Stir continuously until the malt extract is fully dissolved into the mixture.
4. Add Citric Acid: Next, stir in the citric acid or the juice from one lemon. This will balance the sweetness of the sugars and add a revitalizing tang to the drink. Allow the mixture to simmer on low heat for about 10 minutes, stirring occasionally.
5. Cool the Mixture: Once the mixture has simmered, remove the pot from the heat and let it cool to room temperature. This step is important as it will prevent the carbonation from dissipating when you mix in the soda water.
6. Combine with Carbonated Water: After the mixture has cooled, pour it into a large pitcher. Slowly add in the 4 cups of carbonated water, stirring gently to combine. Be careful not to stir too vigorously, as this could cause excessive fizzing.
7. Serve: Chill the Påskmust in the refrigerator for a few hours before serving. Once it’s chilled, pour it into glasses and enjoy this invigorating Swedish Easter beverage with your favorite holiday dishes.
Extra Tips
When making Swedish Påskmust, feel free to adjust the spices according to your taste preferences. Some may enjoy a spicier flavor, while others might prefer a more subtle profile.
Additionally, you can experiment with different types of sugars or sweeteners, such as honey or agave syrup, to give your Påskmust a unique twist. If you find the drink too sweet, simply add a bit more lemon juice or citric acid to balance it out.
Enjoy your homemade Påskmust as an exceptional addition to your Easter celebrations!
Czech Easter Egg Decorating
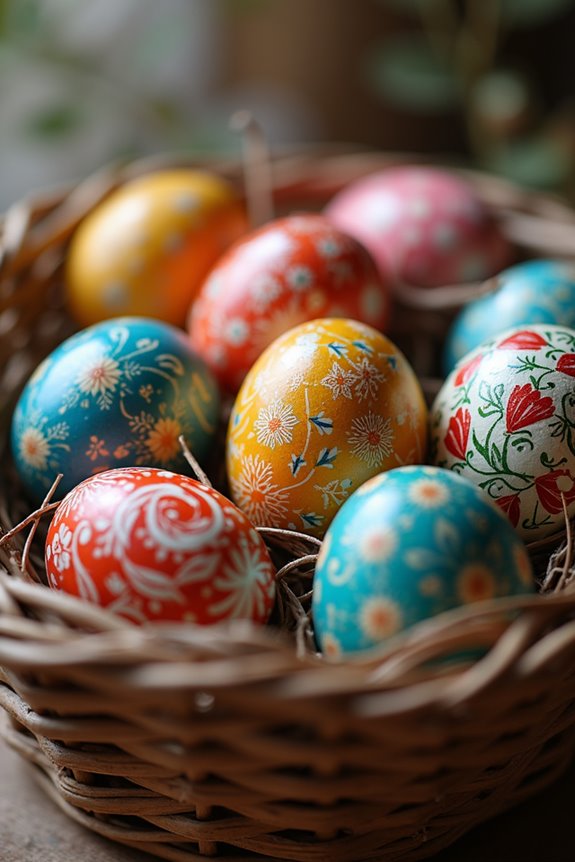
Czech Easter Egg Decorating, or “kraslice,” is a cherished tradition that showcases the creativity and artistry of Czech culture. During Easter, families gather to decorate eggs using various techniques that have been passed down through generations. This festive activity not only allows for personal expression but also serves as a delightful way to celebrate the arrival of spring. The decorated eggs are often used to adorn Easter baskets, give as gifts, or simply display as beautiful pieces of art.
The process of decorating eggs can be both fun and relaxing, making it an ideal activity for families or friends to enjoy together. While some techniques may require special tools and materials, many can be accomplished with simple household items. Whether you choose to dye eggs, use wax resist, or create intricate patterns, the results are sure to be beautiful and memorable.
Ingredients (Serving Size: 4-6 people)
- 6-12 hard-boiled eggs (white or brown)
- Food coloring or natural dyes (e.g., onion skins, beet juice, turmeric)
- White vinegar
- Water
- Wax (for wax resist technique, such as beeswax)
- Fine-tipped paintbrush or stylus (for applying wax)
- Rubber bands or string (for creating patterns)
- Paper towels (for drying)
- Bowls (for dyeing)
Cooking Instructions
- Prepare the Eggs: Start by hard-boiling the eggs. Place them in a pot, cover with cold water, and bring to a boil. Once boiling, let them cook for 9-12 minutes, then transfer them to an ice bath to cool completely. This guarantees they’re easy to handle and prevents cracking during decorating.
- Create Dyes: While the eggs are cooling, prepare your dyes. For commercial food coloring, mix equal parts of water and vinegar in a bowl, then add a few drops of food coloring until you achieve your desired shade. For natural dyes, place your chosen ingredients (like onion skins or turmeric) in a pot with water, boil for about 30 minutes, and strain the mixture. Add a tablespoon of vinegar to help set the color.
- Dye the Eggs: Once the eggs are cooled, dip them into your prepared dye solutions. Allow them to soak for at least 5-10 minutes for vibrant colors. For lighter shades, soak for a shorter duration. Remove the eggs and place them on a paper towel to dry completely.
- Apply Wax (Optional): If using the wax resist technique, melt beeswax in a small container. Using a fine-tipped brush or stylus, apply the melted wax to the areas of the egg you want to preserve in the original color. This technique allows for intricate designs, which will show through after dyeing.
- Final Dyeing: After applying the wax, dye the egg in a contrasting color. The wax will resist the dye, allowing the original color to show through. Once dyed, place the egg back on the paper towel to dry.
- Remove Wax (Optional): If you used wax, carefully remove it by holding the egg near a heat source (like a candle flame) while wiping it off with a paper towel. This will reveal the beautiful designs you’ve created underneath.
- Display Your Eggs: Once all eggs are decorated and dried, display them in an Easter basket or use them as decorations around your home.
Extra Tips
When decorating Czech Easter eggs, it’s essential to embrace the creative process and enjoy the time spent with loved ones. Don’t worry about achieving perfection; each egg is a unique work of art.
Experiment with different dye techniques, patterns, and colors to find what resonates with you. Additionally, consider preserving your decorated eggs by applying a clear varnish once they’re dry, which will enhance their colors and protect them for future displays. Happy decorating!
Hungarian Kifli
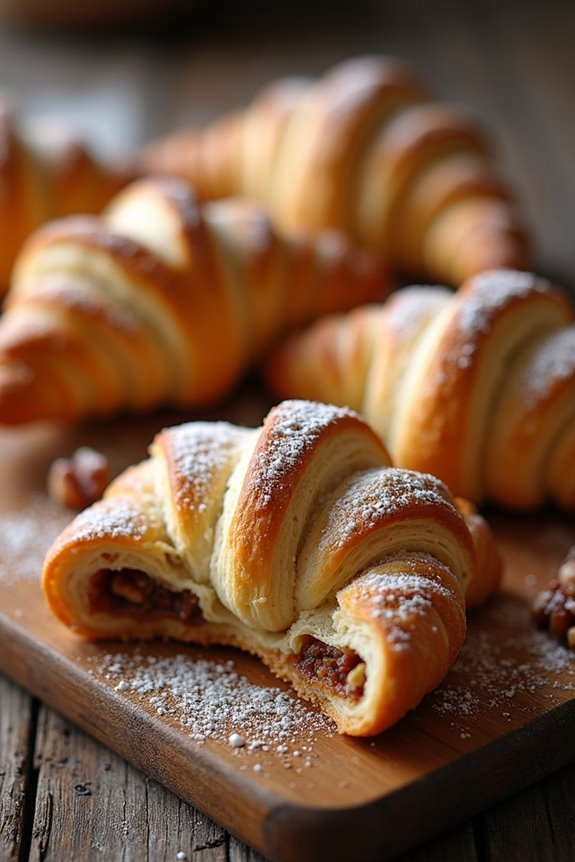
Hungarian Kifli, a delightful crescent-shaped pastry, is a cherished traditional treat often enjoyed during Easter celebrations in Hungary. These soft, buttery rolls are typically filled with a variety of sweet or savory fillings, making them versatile for any meal or occasion. The word “kifli” itself translates to “crescent,” referring to the shape of the pastry, which is reminiscent of a moon. This recipe will guide you through making Kifli filled with a sweet walnut mixture, perfect for indulging during the festive season.
The dough for Hungarian Kifli is rich and tender, thanks to the addition of sour cream, which provides a unique flavor and texture. When baked, these pastries turn golden brown and have a delightful aroma that fills the kitchen, inviting everyone to gather around the table. Whether enjoyed with coffee, tea, or as a snack, Hungarian Kifli is sure to be a hit with your family and friends this Easter.
Ingredients (Serves 4-6):
- 3 cups all-purpose flour
- 1 cup unsalted butter, softened
- 1 cup sour cream
- 1/4 cup granulated sugar
- 1/2 teaspoon salt
- 1 cup ground walnuts
- 1/4 cup powdered sugar (for dusting)
- 1 teaspoon vanilla extract
- 1 egg (for egg wash)
- 1 tablespoon milk (for egg wash)
Cooking Instructions:
1. Prepare the Dough: In a large mixing bowl, cream together the softened butter and granulated sugar until light and fluffy. Add in the sour cream and mix until well combined.
In another bowl, sift together the all-purpose flour and salt. Gradually add the flour mixture to the butter mixture, stirring until a soft dough forms. Cover the dough with plastic wrap and refrigerate for at least 1 hour to allow it to firm up.
2. Make the Filling: While the dough is chilling, prepare the walnut filling. In a medium bowl, combine the ground walnuts, powdered sugar, and vanilla extract. Mix until the ingredients are well incorporated. Set aside the filling until you’re ready to assemble the Kifli.
3. Roll Out the Dough: Preheat your oven to 350°F (175°C). Once the dough is chilled, divide it into four equal portions. Keep the remaining portions in the refrigerator while you work with one.
On a lightly floured surface, roll out one portion of dough into a circle, about 1/4 inch thick. Cut the circle into 8 equal wedges.
4. Fill and Shape the Kifli: Place a small spoonful of the walnut filling at the wide end of each wedge. Starting from the wide end, carefully roll the dough towards the pointed end to form a crescent shape. Make sure the filling is secure inside.
Repeat this process with the remaining dough and filling.
5. Prepare for Baking: Place the shaped Kifli on a baking sheet lined with parchment paper. In a small bowl, whisk together the egg and milk to create an egg wash. Brush the tops of the Kifli with the egg wash to give them a beautiful golden color while baking.
6. Bake: Bake the Kifli in the preheated oven for 20-25 minutes or until they’re golden brown. Once baked, remove them from the oven and allow them to cool slightly on a wire rack.
7. Dust with Powdered Sugar: After the Kifli have cooled for about 10 minutes, dust them with powdered sugar for an added touch of sweetness and presentation.
Extra Tips:
When making Hungarian Kifli, make sure that your butter is softened but not melted, as this will help achieve the right texture for the dough.
If you prefer different fillings, feel free to experiment with poppy seeds, fruit preserves, or even chocolate. Additionally, you can make the dough a day ahead and keep it in the refrigerator, allowing you to quickly assemble and bake the Kifli when you’re ready to serve them.
Enjoy your delicious homemade pastries!
Irish Lamb and Vegetable Stew
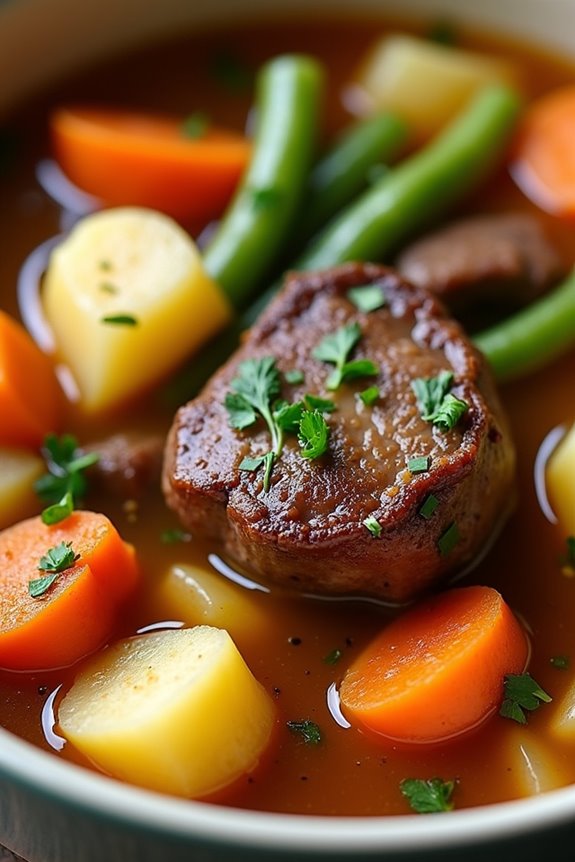
Irish Lamb and Vegetable Stew is a hearty and comforting dish that captures the essence of traditional Irish cooking. Rich in flavor and deeply satisfying, this stew is perfect for celebrating the Easter holiday with family and friends. The combination of tender lamb, fresh vegetables, and aromatic herbs creates a dish that warms the soul and fills the belly.
Often enjoyed with a crusty slice of bread, this stew is a wonderful way to gather around the table during the festive season. This recipe is straightforward to follow, making it an ideal choice for both experienced cooks and beginners alike. The key to a successful Irish Lamb and Vegetable Stew lies in slow-cooking the ingredients to allow the flavors to develop fully.
As the lamb simmers, it becomes tender and combines beautifully with the vegetables, resulting in a deliciously rich broth that’s simply irresistible.
Ingredients (Serves 4-6)
- 2 lbs lamb shoulder, cut into 1-inch cubes
- 4 tablespoons olive oil
- 1 large onion, chopped
- 3 cloves garlic, minced
- 4 carrots, sliced
- 3 parsnips, sliced
- 2 potatoes, diced
- 1 cup green beans, trimmed and cut into 1-inch pieces
- 4 cups beef or lamb stock
- 2 teaspoons fresh thyme, chopped
- 2 teaspoons fresh rosemary, chopped
- Salt and pepper, to taste
- 1 tablespoon Worcestershire sauce
- 1 bay leaf
- Fresh parsley, for garnish
Cooking Instructions
- Brown the Lamb: In a large pot or Dutch oven, heat 2 tablespoons of olive oil over medium-high heat. Add the lamb cubes in batches, being careful not to overcrowd the pot. Brown the lamb on all sides, which should take about 5-7 minutes. This step is essential as it adds a depth of flavor to the stew.
- Sauté the Aromatics: Once the lamb is browned, remove it from the pot and set aside. Add the remaining 2 tablespoons of olive oil to the pot. Add the chopped onion and sauté for about 3-4 minutes until it becomes translucent. Then, add the minced garlic and cook for an additional minute until fragrant.
- Add the Vegetables: Stir in the sliced carrots, parsnips, and potatoes. Cook these vegetables for about 5 minutes, stirring occasionally. This will help to soften them slightly and enhance their flavor before adding the liquids.
- Combine Ingredients: Return the browned lamb to the pot. Pour in the beef or lamb stock, making sure that the meat and vegetables are fully submerged. Add the fresh thyme, rosemary, Worcestershire sauce, bay leaf, salt, and pepper. Stir well to combine all the ingredients.
- Simmer the Stew: Bring the stew to a gentle boil, then reduce the heat to low. Cover the pot and let it simmer for about 1.5 to 2 hours, or until the lamb is tender and the flavors are well blended. Stir occasionally to prevent sticking.
- Add the Green Beans: In the last 15 minutes of cooking, add the trimmed green beans to the pot. This will guarantee they retain their bright color and crunch while still absorbing the delicious flavors of the stew.
- Serve: Once the stew is finished cooking, remove the bay leaf and taste for seasoning, adjusting with more salt and pepper if necessary. Ladle the stew into bowls and garnish with fresh parsley before serving.
Extra Tips
For an even richer flavor, consider marinating the lamb overnight in a mixture of olive oil, garlic, and herbs before cooking. This allows the meat to soak up the flavors, resulting in a more robust stew.
Additionally, feel free to customize the vegetables based on what’s in season or what you have on hand, such as adding turnips or peas. Pair the stew with hearty soda bread for a complete Irish experience!
Russian Kulich
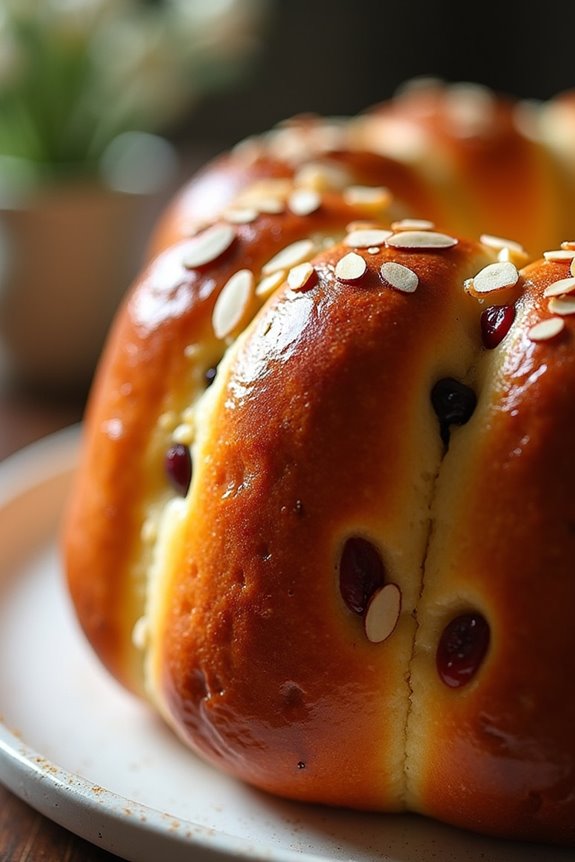
Russian Kulich is a traditional Easter bread that’s rich, sweet, and often adorned with a delightful glaze and colorful toppings. This festive treat is usually tall and cylindrical, resembling a loaf, and is typically made with a rich dough that incorporates ingredients like butter, eggs, and milk. The potently fragrant bread is often flavored with cardamom and citrus zest, making it a standout centerpiece for any Easter celebration.
Kulich isn’t only delicious but also symbolizes the resurrection, representing new life, which is why it holds a special place in Russian Orthodox Easter traditions.
The preparation of Kulich is a labor of love, often taking hours to rise and bake to perfection. Traditionally, it’s served alongside Paskha, a creamy cheese dessert, and is enjoyed with family and friends during the joyous Easter feast. The bread is often shared among loved ones as a gesture of goodwill and unity, making it an essential part of the holiday celebration.
Whether you’re celebrating Easter or simply looking to try your hand at a new baking project, Russian Kulich is sure to impress.
Ingredients (Serves 4-6)
- 4 cups all-purpose flour
- 1 cup milk
- 1/2 cup sugar
- 1/2 cup unsalted butter, softened
- 3 large eggs
- 1/4 cup active dry yeast
- 1/2 teaspoon salt
- 1 teaspoon ground cardamom
- Zest of 1 lemon
- Zest of 1 orange
- 1 cup mixed dried fruits (raisins, apricots, candied citrus peel)
- 1/2 cup slivered almonds (for topping)
- 1 cup powdered sugar (for glaze)
- 2 tablespoons lemon juice (for glaze)
- 1-2 tablespoons water (for glaze)
Cooking Instructions
- Prepare the Yeast Mixture: In a small bowl, combine the warm milk (about 110°F) and active dry yeast. Stir in 1 tablespoon of sugar and let it sit for about 10 minutes until foamy. This activates the yeast, guaranteeing your Kulich rises properly.
- Mix the Dry Ingredients: In a large mixing bowl, sift together the flour, remaining sugar, salt, and ground cardamom. The sifting helps to aerate the flour and combine the dry ingredients evenly.
- Combine Wet Ingredients: In another bowl, whisk together the softened butter, eggs, and the citrus zests. Once the yeast mixture is ready, combine it with the wet ingredients and mix well.
- Combine Wet and Dry Mixtures: Gradually add the yeast mixture to the dry ingredients, mixing until a sticky dough forms. You may need to use your hands to knead the dough until it’s smooth and elastic, about 8-10 minutes.
- Incorporate Fruits: Gently fold in the mixed dried fruits until evenly distributed throughout the dough. This adds natural sweetness and flavor to your Kulich.
- First Rise: Lightly grease a large bowl and place the dough inside, covering it with a damp cloth. Let it rise in a warm, draft-free area until it doubles in size, about 1-2 hours.
- Shape and Second Rise: Punch down the dough gently to release the air, then shape it into a cylindrical loaf. Place it in a greased Kulich mold or a tall cake pan. Cover and let it rise again for about 30-45 minutes until puffed.
- Bake the Kulich: Preheat your oven to 350°F (175°C). Bake the Kulich for 35-45 minutes or until golden brown and a toothpick inserted in the center comes out clean. If the top browns too quickly, cover it loosely with foil.
- Prepare the Glaze: While the Kulich is baking, whisk together the powdered sugar, lemon juice, and enough water to achieve a smooth, drizzling consistency.
- Cool and Decorate: Once baked, allow the Kulich to cool in the mold for about 10 minutes before transferring it to a wire rack. Once completely cool, drizzle the glaze over the top and sprinkle with slivered almonds for decoration.
Extra Tips
When making Russian Kulich, patience is key. Confirm that you allow adequate time for each rising stage, as this is vital for achieving the light, fluffy texture that Kulich is known for.
Additionally, feel free to experiment with different dried fruits or nuts based on your preference. If you want a more intense flavor, you can also soak the fruits in rum or brandy prior to adding them to the dough.
Finally, if you don’t have a traditional Kulich mold, using a standard cake pan works just as well, though the shape may vary. Enjoy the process and the delightful aroma that fills your kitchen!
Danish Easter Cake
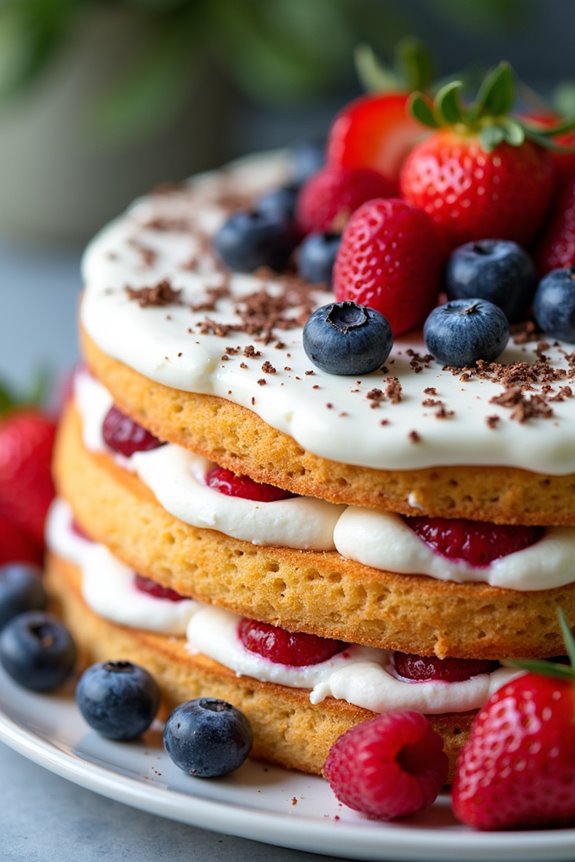
Danish Easter Cake, known as “Påskekage,” is a delightful treat that celebrates the arrival of spring and the Easter holiday in Denmark. This beautiful cake is often adorned with a creamy frosting and colorful decorations, symbolizing the vibrant spirit of the season.
Traditionally made with a light sponge cake, it’s typically filled and topped with whipped cream, fresh fruits, and sometimes even marzipan. The cake not only looks stunning on the table but also offers a deliciously sweet and rich flavor that everyone will enjoy.
Making a Danish Easter Cake is a fun and rewarding process that can be a wonderful activity for families to undertake together. As you prepare this cake, you’ll find that the combination of flavors and textures—soft sponge, luscious cream, and fresh fruits—creates a memorable dessert that pairs beautifully with coffee or tea.
Whether you’re celebrating Easter or simply indulging in a springtime treat, this cake is sure to impress your guests and become a beloved recipe in your collection.
Ingredients (Serves 4-6)
- 4 large eggs
- 1 cup granulated sugar
- 1 cup all-purpose flour
- 1 tsp baking powder
- 1/2 cup unsalted butter, melted
- 1 cup heavy cream
- 2 tbsp powdered sugar
- 1 tsp vanilla extract
- Fresh berries (strawberries, blueberries, raspberries, etc.)
- Optional: Marzipan decorations, chocolate shavings, or edible flowers for garnish
Cooking Instructions
- Prepare the Cake Batter: Preheat your oven to 350°F (175°C). In a large mixing bowl, beat the eggs and granulated sugar together until the mixture is pale and fluffy. This should take about 3-5 minutes using an electric mixer. The air incorporated during this process will help the cake rise.
- Combine Dry Ingredients: In a separate bowl, sift together the all-purpose flour and baking powder. Gently fold the dry ingredients into the egg mixture. Be careful not to overmix; you want to maintain the light and airy texture.
- Add Butter: Slowly drizzle the melted butter into the batter while gently folding it in. This adds moisture and richness to the cake. Once fully combined, your batter should be smooth and slightly thick.
- Bake the Cake: Pour the batter into a greased and floured round cake pan (9 inches works well). Bake in the preheated oven for about 25-30 minutes, or until a toothpick inserted in the center comes out clean. Let the cake cool in the pan for about 10 minutes before transferring it to a wire rack to cool completely.
- Prepare the Whipped Cream: In a chilled mixing bowl, combine heavy cream, powdered sugar, and vanilla extract. Using a hand mixer, whip the cream until soft peaks form. This should take about 3-4 minutes. Be careful not to overwhip, as this can turn the cream into butter.
- Assemble the Cake: Once the cake is completely cool, slice it in half horizontally to create two layers. Spread a generous layer of whipped cream on the bottom half and top it with an assortment of fresh berries. Place the top half of the cake back on and cover the entire cake with the remaining whipped cream.
- Decorate: Finish decorating your Danish Easter Cake with additional fresh berries, chocolate shavings, or marzipan decorations as desired. This is where you can get creative and make the cake visually appealing.
Extra Tips
When making a Danish Easter Cake, it’s important to verify all your ingredients are at room temperature for the best results. This will help the cake achieve a fluffy texture.
Additionally, feel free to customize the cake with your favorite fruits or flavors—citrus zest or a splash of liqueur in the whipped cream can add a delightful twist. If you plan to make the cake in advance, consider storing the layers separately and assembling it just before serving to maintain the cake’s freshness and prevent the cream from becoming soggy.
Enjoy your baking!