

When I think about Swedish cuisine, I instantly feel the cozy warmth of a kitchen filled with the scent of traditional dishes.
Each recipe is like a little story, from the savory meatballs to the delicate gravlax, featuring flavors that have endured through generations.
These meals do more than satisfy hunger; they bring families together and create lasting connections.
Join me as we explore these beloved recipes and the cherished memories they hold.
Swedish Meatballs (Köttbullar)
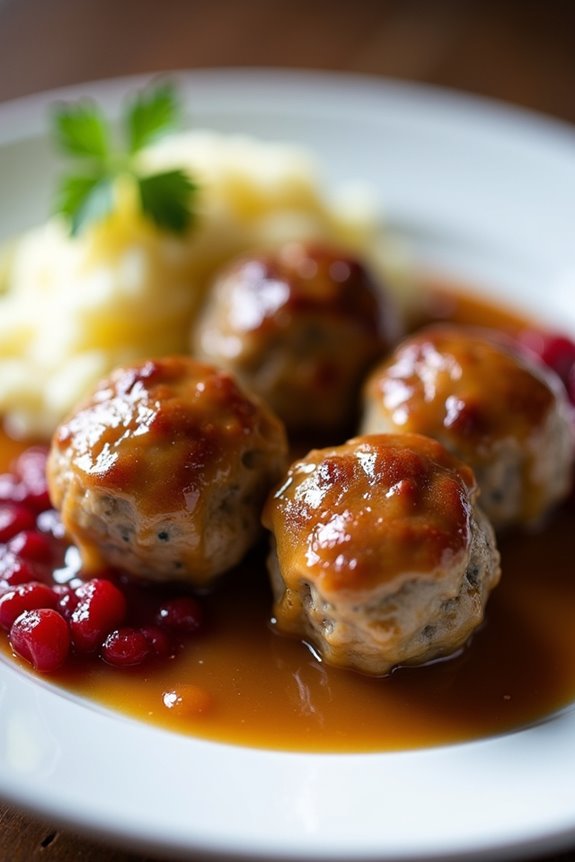
Swedish Meatballs, or Köttbullar, are a beloved dish that has made its way beyond Sweden’s borders to become a staple in many households around the world. Known for their rich flavor and tender texture, these meatballs are typically served with creamy gravy, lingonberry sauce, and mashed potatoes, making them a comforting meal perfect for any occasion.
Traditionally enjoyed during festive gatherings, Swedish meatballs have a unique blend of spices that lend them a distinct taste, often making them a favorite among both children and adults alike.
Making Swedish meatballs at home is an enjoyable and rewarding experience. The process may take some time, but the end result is a delicious dish that will impress your family and friends. With a few simple ingredients and some easy-to-follow steps, you can create authentic Swedish meatballs that capture the essence of Swedish cuisine.
Whether you’re preparing a cozy dinner or just craving a hearty meal, this recipe will guide you through each step to guarantee your meatballs come out perfectly.
Ingredients (Serves 4-6)
- 1 pound ground beef
- 1 pound ground pork
- 1/2 cup breadcrumbs
- 1/2 cup milk
- 1/4 cup finely chopped onion
- 1 egg
- 1 teaspoon salt
- 1/2 teaspoon black pepper
- 1/2 teaspoon ground allspice
- 1/2 teaspoon ground nutmeg
- 1 tablespoon fresh parsley, finely chopped (optional)
- 4 tablespoons butter (for frying)
For the Gravy:
- 2 tablespoons all-purpose flour
- 2 cups beef broth
- 1/2 cup heavy cream
- Salt and pepper to taste
Cooking Instructions
1. Prepare the Meatball Mixture: In a large mixing bowl, combine the ground beef and ground pork. Add the breadcrumbs and milk, guaranteeing the breadcrumbs are fully soaked.
Then, incorporate the finely chopped onion, egg, salt, black pepper, allspice, nutmeg, and parsley. Mix everything together using your hands or a spoon until just combined, being careful not to overmix.
2. Shape the Meatballs: With your hands, take a small amount of the meat mixture and roll it into a ball about 1 inch in diameter. Repeat this process until all the mixture is shaped into meatballs. You should end up with around 20-24 meatballs.
3. Cook the Meatballs: In a large skillet, melt 2 tablespoons of butter over medium heat. Once the butter is melted and bubbling, add the meatballs to the skillet, making sure not to overcrowd them.
Cook for 5-7 minutes, turning occasionally, until they’re browned on all sides and cooked through. Remove the meatballs from the skillet and set them aside on a plate.
4. Make the Gravy: In the same skillet, add the remaining 2 tablespoons of butter and allow it to melt. Whisk in the flour and cook for 1-2 minutes until it’s lightly golden.
Gradually pour in the beef broth while whisking continuously to avoid lumps. Allow the mixture to simmer for 5 minutes until it thickens slightly. Stir in the heavy cream and season with salt and pepper to taste.
5. Combine Meatballs and Gravy: Return the cooked meatballs to the skillet, gently coating them in the gravy. Simmer on low heat for an additional 5-10 minutes, allowing the flavors to meld together.
6. Serve: Serve the meatballs hot, drizzled with the gravy, alongside lingonberry sauce and creamy mashed potatoes, if desired. Enjoy your authentic Swedish meal!
Extra Tips
When making Swedish meatballs, you can easily customize the flavors by adjusting the spices according to your taste. For a richer taste, consider adding a splash of Worcestershire sauce or soy sauce to the meat mixture.
If you have leftovers, these meatballs reheat well and can be stored in the refrigerator for up to 3 days. They also freeze beautifully, making them a great make-ahead meal option. Enjoy trying your hand at this comforting classic!
Gravlax
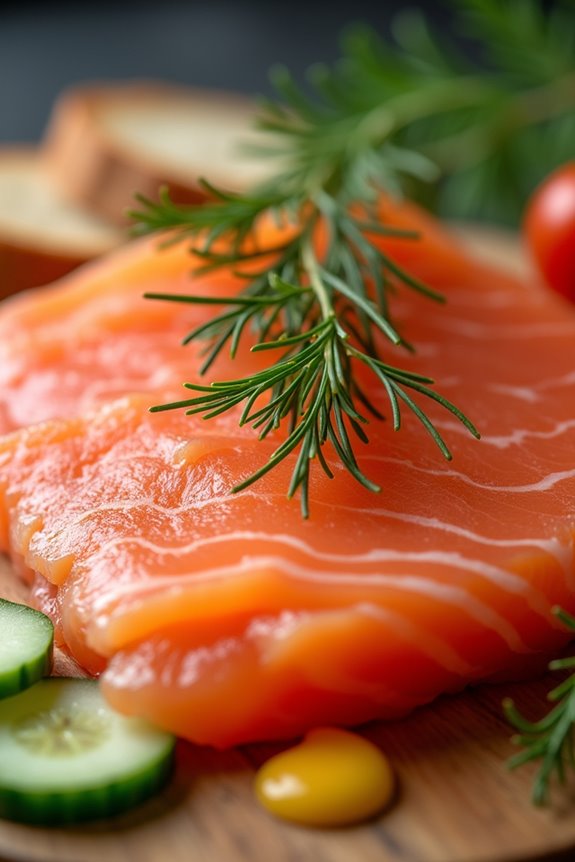
Gravlax is a traditional Swedish dish that consists of salmon cured with a mixture of sugar, salt, and dill. This delectable preparation highlights the natural flavors of the fish while allowing the herbs to infuse their aromatic qualities, resulting in a dish that’s both elegant and easy to prepare.
Served thinly sliced, gravlax is often accompanied by mustard sauce and crisp bread, making it a popular choice for gatherings and special occasions.
The origins of gravlax date back to the Middle Ages, when fishermen would cure their catch in a mixture of sugar and salt before burying it in the sand to ferment. Today, this method has evolved into a simple yet refined culinary technique that can be easily replicated at home.
By following this recipe, you’ll be able to impress your family and friends with a taste of authentic Swedish cuisine.
Ingredients (serving size: 4-6 people):
- 1 pound (450g) fresh salmon fillet, skin on
- 2 tablespoons sea salt
- 2 tablespoons granulated sugar
- 1 teaspoon black pepper, freshly cracked
- 1 bunch fresh dill, chopped
- 1 tablespoon vodka (optional)
Instructions:
- Prepare the Salmon: Start by selecting a high-quality, fresh salmon fillet that’s free of bones. Rinse the salmon under cold water and pat it dry with paper towels. Make certain the skin is intact, as this will help keep the fish moist during the curing process.
- Mix the Curing Mixture: In a small bowl, combine the sea salt, granulated sugar, and black pepper. If desired, add the vodka to the mixture for an extra layer of flavor. Mix well until the ingredients are fully combined.
- Coat the Salmon: Lay the salmon skin-side down on a large piece of plastic wrap. Evenly sprinkle the curing mixture over the flesh of the salmon, making sure that the entire surface is covered. Then, liberally add the chopped dill on top of the curing mixture, pressing it gently into the fish.
- Wrap and Refrigerate: Carefully wrap the salmon tightly in the plastic wrap, making sure that the curing mixture and dill are sealed inside. Place the wrapped salmon in a shallow dish to catch any liquid that may seep out during the curing process. Refrigerate the salmon for 24 to 48 hours, depending on how cured you prefer your gravlax. Flip the salmon halfway through the curing time to guarantee even curing.
- Slice and Serve: Once the curing time is complete, remove the salmon from the refrigerator and unwrap it. Rinse off the curing mixture under cold water and pat the salmon dry with paper towels. Using a sharp knife, slice the gravlax thinly at a diagonal angle, serving it on a platter with your choice of accompaniments such as mustard sauce, rye bread, or pickled cucumbers.
Extra Tips: When making gravlax, it’s important to use the freshest salmon possible; look for sushi-grade fish from a trusted source. The longer you cure the salmon, the firmer and saltier it will become, so feel free to adjust the curing time based on your taste preferences.
Additionally, you can experiment with flavor variations by adding other herbs or spices, such as zest from citrus fruits or crushed garlic, to the curing mixture for a unique twist on this classic dish.
Janssons Frestelse
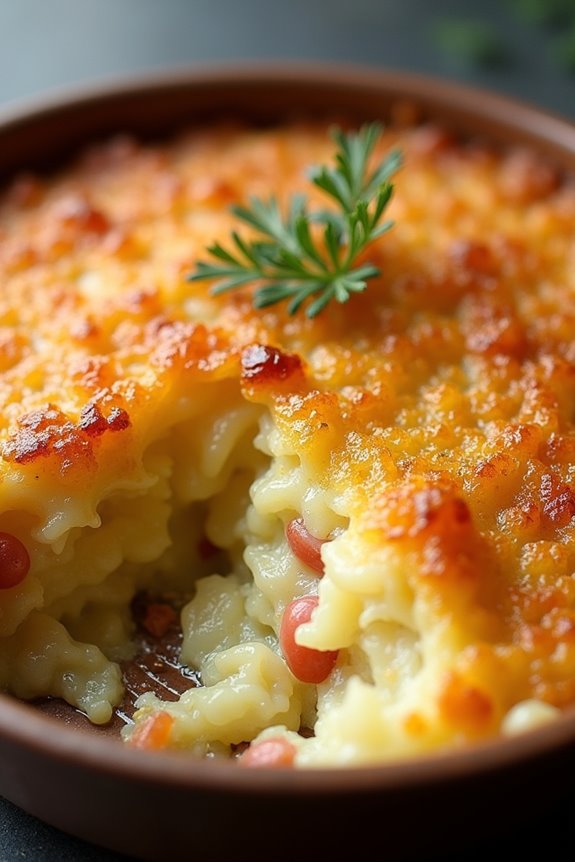
Janssons Frestelse, also known as Jansson’s Temptation, is a traditional Swedish casserole that combines the rich flavors of potatoes, onions, anchovies, and cream. It’s a beloved dish often served during festive occasions, such as Christmas and Easter, as well as family gatherings. The combination of creamy textures and savory elements creates a comforting dish that appeals to many palates.
Janssons Frestelse isn’t only delicious but also relatively easy to prepare, making it a perfect addition to your Swedish dining experience. This dish beautifully showcases the simplicity of Scandinavian cooking, where high-quality ingredients take center stage. The anchovies lend a unique umami flavor that complements the sweetness of the onions and the creaminess of the potatoes.
When baked, the top of the casserole becomes golden and crispy, while the inside remains soft and flavorful, creating a delightful contrast in textures. Whether you’re new to Swedish cuisine or a seasoned home cook, Janssons Frestelse will surely impress and satisfy.
Ingredients (Serves 4-6):
- 1 kg (2.2 lbs) of potatoes (preferably waxy)
- 2 medium onions
- 1 can (125g) of anchovy fillets (with the oil)
- 300 ml (1.25 cups) of heavy cream
- 300 ml (1.25 cups) of milk
- 50 g (3-4 tablespoons) of butter
- 1 teaspoon of salt
- 1 teaspoon of black pepper
- Breadcrumbs (for topping, optional)
Cooking Instructions:
- Preheat the Oven: Begin by preheating your oven to 200°C (390°F). This guarantees that your Janssons Frestelse will cook evenly and develop a lovely golden crust.
- Prepare the Potatoes: Peel the potatoes and slice them thinly, about 2-3 mm thick. You can use a mandoline for uniformity. Place the sliced potatoes in a bowl of cold water to prevent them from browning while you prepare the other ingredients.
- Slice the Onions: Peel and thinly slice the onions. Aim for a size similar to the potato slices to maintain consistency in texture throughout the dish.
- Layer the Ingredients: In a large, buttered baking dish, create layers starting with a third of the potato slices. Add half of the sliced onions on top, followed by half of the anchovy fillets (draining the excess oil). Repeat this layering process once more: another third of the potatoes, the rest of the onions, and the remaining anchovies. Finish with the final layer of the remaining potato slices on top.
- Mix the Cream and Milk: In a separate bowl, combine the heavy cream and milk. Season with salt and black pepper. Pour this mixture evenly over the layered potatoes, ensuring that it seeps down through the layers for maximum flavor.
- Add Butter and Bake: Dot the top of the casserole with small pieces of butter. If using, sprinkle breadcrumbs over the top for added crunch. Place the dish in the preheated oven and bake for about 45-60 minutes, or until the potatoes are tender and the top is golden brown.
- Rest Before Serving: Once baked, remove the casserole from the oven and let it rest for about 10-15 minutes. This allows the flavors to meld together and makes serving easier.
Extra Tips:
When preparing Janssons Frestelse, it’s important to choose the right type of potatoes, as waxy potatoes hold their shape better and create a nice texture. You can also experiment with the amount of anchovies according to your taste preferences; if you prefer a milder flavor, you can reduce the quantity.
Additionally, consider adding a sprinkle of fresh herbs, like dill or parsley, on top before serving for a touch of freshness. Enjoy your Janssons Frestelse with a side of pickled herring or a crisp salad for a complete Swedish meal!
Kanelbullar (Cinnamon Buns)
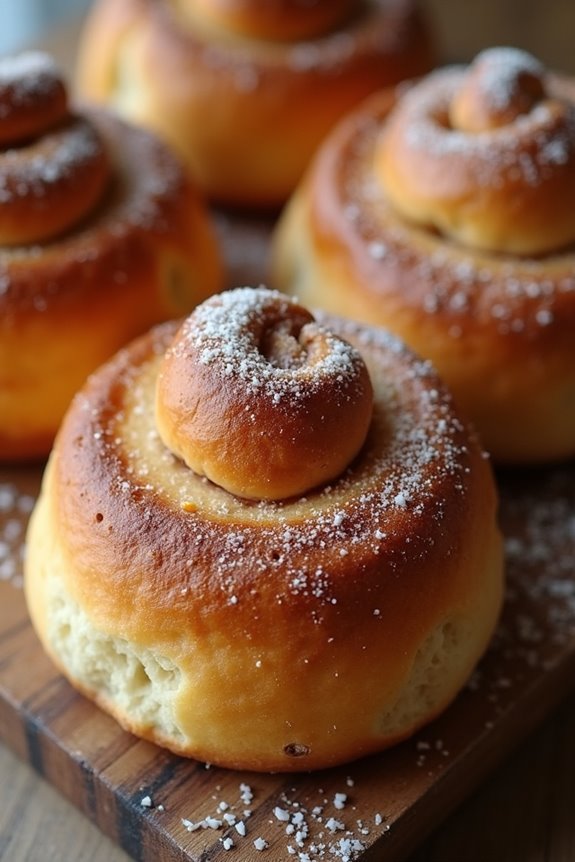
Kanelbullar, or Swedish cinnamon buns, are a beloved treat in Sweden, cherished for their soft, fluffy texture and aromatic flavor. These delightful pastries are often enjoyed during “fika,” a traditional coffee break, and are perfect for sharing with friends and family.
The combination of cinnamon, sugar, and butter wrapped in a sweet dough makes for an irresistible dessert or snack that will transport your taste buds straight to Scandinavia.
The process of making Kanelbullar is both rewarding and enjoyable, as you knead the dough and roll it out, filling it with a sweet cinnamon mixture. Once baked, these buns are often brushed with melted butter and sprinkled with sugar, giving them a beautiful shine and added sweetness.
Whether you’re an experienced baker or a novice in the kitchen, this recipe will guide you step-by-step to create your very own Kanelbullar that are sure to impress.
Ingredients (Serves 4-6)
- 4 cups all-purpose flour
- 1/2 cup sugar
- 1 packet (2 1/4 teaspoons) active dry yeast
- 1/2 teaspoon salt
- 1 cup milk
- 1/2 cup unsalted butter
- 1 large egg
- 1 tablespoon ground cinnamon
- 1/4 cup brown sugar
- 1/4 cup melted butter (for filling)
- 1 egg (for egg wash)
- Pearl sugar (for topping)
Cooking Instructions
- Prepare the Dough: In a small saucepan, heat the milk and butter over low heat until the butter has melted and the mixture is warm (about 110°F). In a large mixing bowl, combine 2 cups of flour, sugar, yeast, and salt. Pour in the warm milk mixture and add the egg. Mix until well combined.
- Knead the Dough: Gradually add the remaining flour, one cup at a time, mixing until a soft dough forms. Transfer the dough to a floured surface and knead for about 5-10 minutes until smooth and elastic. Place the dough in a greased bowl, cover with a kitchen towel, and let it rise in a warm place for about 1 hour, or until doubled in size.
- Prepare the Filling: While the dough is rising, mix the ground cinnamon and brown sugar in a small bowl. Set aside.
- Roll Out the Dough: After the dough has risen, punch it down to release the air. Transfer it to a floured surface and roll it out into a rectangle about 1/4 inch thick. Brush the surface with melted butter, then sprinkle the cinnamon and sugar mixture evenly over the dough.
- Shape the Buns: Starting from one long edge, roll the dough tightly into a log. Cut the log into 12 equal pieces. Place each piece cut-side up on a baking sheet lined with parchment paper, ensuring there’s space between each bun to allow for rising.
- Second Rise: Cover the buns with a kitchen towel and let them rise for another 30 minutes until puffy. Preheat your oven to 375°F (190°C).
- Egg Wash and Bake: Beat the remaining egg and brush it over the tops of the buns. Sprinkle with pearl sugar. Bake in the preheated oven for about 15-20 minutes or until golden brown.
- Cool and Serve: Once baked, remove the Kanelbullar from the oven and let them cool on a wire rack. Serve warm or at room temperature.
Extra Tips
For the best results, make sure your ingredients are at room temperature, especially the egg and butter, as this will help the dough rise better.
If you want to add a twist, consider incorporating cardamom into the dough for a unique flavor. Additionally, you can experiment with different fillings such as chocolate or almond paste for a creative variation on the classic Kanelbullar.
Enjoy your baking!
Raggmunk (Potato Pancakes)
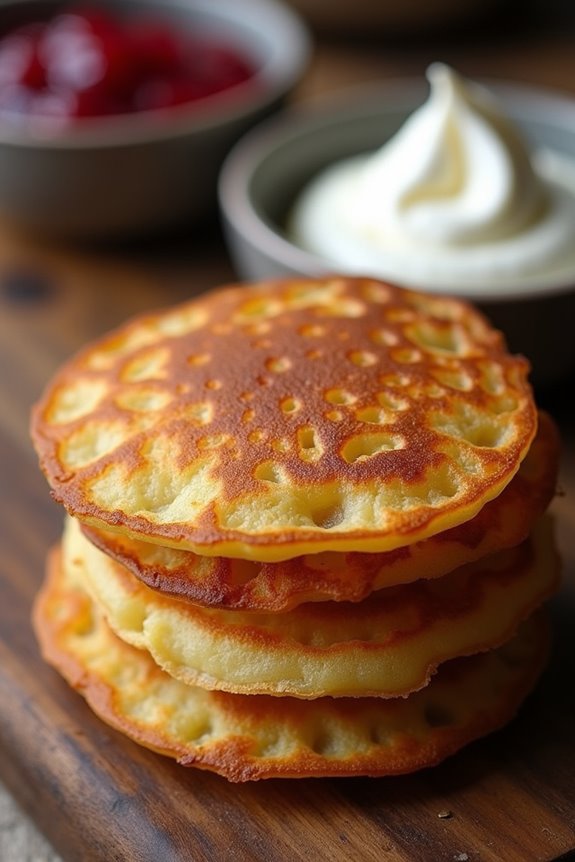
Raggmunk, a traditional Swedish dish, captures the essence of simple, hearty cooking. These crispy potato pancakes are beloved for their golden-brown exterior and soft, flavorful interior. Typically enjoyed as a savory treat, they’re often served with lingonberry jam and sour cream, adding a delightful contrast of flavors. Raggmunk can be enjoyed at any time of the day, whether as a breakfast item, a side dish, or even a satisfying snack.
The key to an authentic raggmunk lies in the quality of the potatoes and the technique used to achieve the perfect crispness. Using a combination of grated raw potatoes and a bit of flour helps them hold together while still allowing the natural flavors to shine. When cooked to perfection, these pancakes deliver a satisfying crunch that complements their soft interior, making them a favorite among both locals and visitors to Sweden.
Ingredients (Serves 4-6):
- 1 kg (about 2.2 lbs) of potatoes (preferably starchy)
- 1 small onion, finely grated
- 2 large eggs
- 100 g (about ¾ cup) of all-purpose flour
- 1 tsp salt
- 1/2 tsp black pepper
- 1/2 tsp baking powder
- 100 ml (about 1/2 cup) of milk
- Butter or vegetable oil for frying
- Lingonberry jam (for serving)
- Sour cream (for serving)
Cooking Instructions:
- Prepare the Potatoes: Start by peeling the potatoes and then grating them using a box grater or a food processor with a grating attachment. Place the grated potatoes in a clean kitchen towel and squeeze out excess moisture. This step is essential for achieving a crispy texture.
- Mix the Ingredients: In a large mixing bowl, combine the grated potatoes with the finely grated onion. Add the eggs, flour, salt, black pepper, baking powder, and milk to the bowl. Mix everything together until well combined but don’t overmix; you want to maintain some texture from the potatoes.
- Heat the Pan: Place a large frying pan over medium heat and add a generous amount of butter or vegetable oil, enough to coat the bottom of the pan. Allow the fat to heat up until it’s shimmering but not smoking.
- Fry the Pancakes: Using a ladle or a spoon, drop portions of the potato mixture into the hot pan, flattening them slightly with the back of the ladle to form round pancakes. Fry for about 4-5 minutes on one side until they’re golden brown, then carefully flip them over and cook for an additional 4-5 minutes on the other side until crispy.
- Drain and Serve: Once cooked, transfer the pancakes to a plate lined with paper towels to drain any excess oil. Keep them warm in a low oven while you cook the remaining batter. Serve the raggmunk hot, accompanied by lingonberry jam and a dollop of sour cream.
Extra Tips:
For an even more authentic flavor, consider adding a pinch of nutmeg or fresh herbs like dill to the batter.
Make sure to keep the pan at a consistent temperature; too hot will burn the pancakes while too cool will make them greasy.
You can also experiment with different types of potatoes for varied textures and flavors, but starchy potatoes like Russets are typically recommended for the best results.
Enjoy your raggmunk with a side of pickled herring for a true Swedish feast!
Köttfärslimpa (Meatloaf)
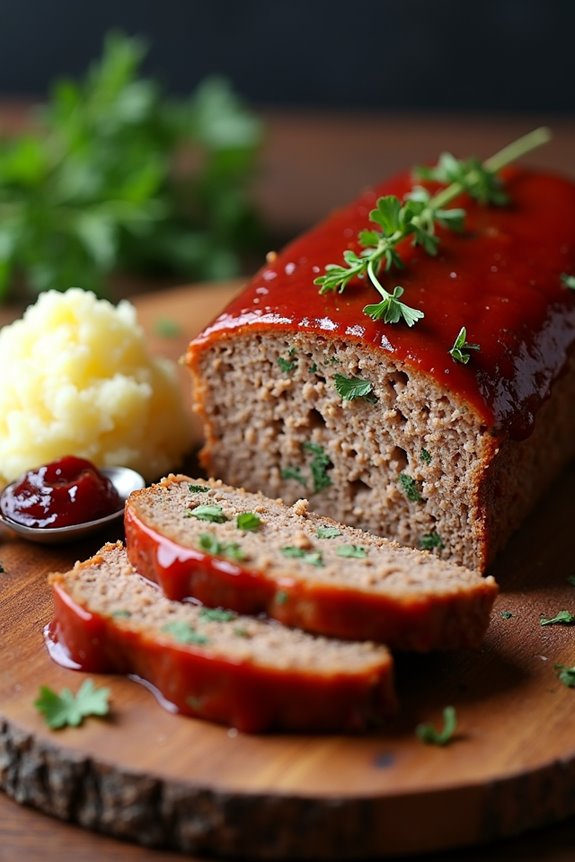
Köttfärslimpa, or Swedish meatloaf, is a beloved traditional dish that combines ground meat with a delightful mix of spices and vegetables. This hearty meal is typically served with a creamy sauce, mashed potatoes, and lingonberry jam, creating a comforting and satisfying experience for any family dinner.
The dish’s origins can be traced back to the early 20th century when it gained popularity as a way to stretch meat and make it more economical while still delivering robust flavors.
This meatloaf isn’t only delicious but also versatile, allowing for various adaptations based on personal preferences or what you have available in your pantry. In Sweden, it’s common to use a combination of ground beef and pork, which provides a rich flavor and moist texture.
Whether enjoyed on a chilly evening or served during a festive gathering, Köttfärslimpa is sure to be a crowd-pleaser.
Ingredients (Serves 4-6 people):
- 500g ground beef
- 500g ground pork
- 1 cup breadcrumbs
- 1 small onion, finely chopped
- 2 cloves garlic, minced
- 2 eggs
- 1/2 cup milk
- 1/4 cup fresh parsley, chopped
- 1 teaspoon dried thyme
- 1 teaspoon salt
- 1/2 teaspoon black pepper
- 1 tablespoon Worcestershire sauce
- 1/4 cup ketchup (for topping)
- Optional: Lingonberry jam (for serving)
Cooking Instructions:
1. Preheat the Oven: Begin by preheating your oven to 180°C (350°F). This guarantees that your meatloaf cooks evenly and thoroughly.
2. Prepare the Meat Mixture: In a large mixing bowl, combine the ground beef and ground pork. Add the breadcrumbs, finely chopped onion, minced garlic, eggs, milk, parsley, thyme, salt, black pepper, and Worcestershire sauce.
Using your hands, mix all the ingredients together until just combined; be careful not to overmix, as this can result in a dense texture.
3. Shape the Meatloaf: Transfer the meat mixture to a loaf pan or shape it into a loaf on a baking sheet lined with parchment paper. If using a loaf pan, press the mixture firmly into the pan to hold its shape.
4. Add the Topping: Spread the ketchup evenly over the top of the meatloaf. This adds moisture and sweetness to the dish, creating a delicious glaze as it cooks.
5. Bake the Meatloaf: Place the meatloaf in the preheated oven and bake for about 1 hour, or until the internal temperature reaches 70°C (160°F). The meatloaf should be firm to the touch and slightly browned on the outside.
6. Rest and Serve: Once cooked, remove the meatloaf from the oven and let it rest for about 10 minutes before slicing. This allows the juices to redistribute, resulting in a moist and flavorful meatloaf.
Extra Tips:
For an even more flavorful Köttfärslimpa, consider adding grated carrots or finely diced bell peppers to the meat mixture. These not only enhance the flavor but also add a touch of sweetness and extra moisture.
Additionally, you can substitute the ketchup with a mix of mustard and brown sugar for a different glaze. Serve with creamy mashed potatoes and a side of lingonberry jam for a truly authentic Swedish experience!
Herring in Mustard Sauce (Senapssill)
Herring in Mustard Sauce, or Senapssill, is a beloved traditional Swedish dish that showcases the rich flavors of the Scandinavian sea. This dish is particularly popular during festive occasions, such as Midsummer and Christmas, where it often finds its place on the smorgasbord table.
The combination of pickled herring with a creamy mustard sauce creates a unique flavor profile that balances the salty tang of the fish with the sweetness and warmth of mustard. It’s a dish that not only delights the palate but also embodies the essence of Swedish culinary traditions.
Preparing Herring in Mustard Sauce is relatively simple, making it an accessible option for both seasoned cooks and kitchen novices alike. The key to a successful Senapssill lies in the quality of the herring and the balance of ingredients in the mustard sauce. This dish is typically served cold and can be made ahead of time, allowing the flavors to meld beautifully.
Whether served as an appetizer or a part of a larger meal, Herring in Mustard Sauce is sure to impress your guests and bring a taste of Sweden to your table.
Ingredients (Serves 4-6):
- 400g pickled herring fillets
- 1 cup sour cream
- 2 tablespoons Dijon mustard
- 1 tablespoon coarse mustard
- 2 tablespoons sugar
- 1 tablespoon white vinegar
- 1 small red onion, finely chopped
- 2 tablespoons fresh dill, chopped
- 1 tablespoon capers (optional)
- Freshly ground black pepper, to taste
- Boiled potatoes or crispbread, for serving
Cooking Instructions:
- Prepare the Herring: Begin by draining the pickled herring fillets thoroughly. If they’re too salty for your taste, you can rinse them under cold running water. Pat dry with a paper towel, then cut the fillets into bite-sized pieces. Place them in a bowl and set aside.
- Make the Mustard Sauce: In a separate mixing bowl, combine the sour cream, Dijon mustard, coarse mustard, sugar, and white vinegar. Whisk the ingredients together until they’re fully incorporated and the sauce is smooth. This sauce will serve as the base flavor for the herring.
- Add Aromatics: Once the mustard sauce is ready, add the finely chopped red onion, fresh dill, and capers (if using) to the bowl. Gently fold the ingredients into the sauce, ensuring an even distribution of flavors. Season with freshly ground black pepper to taste.
- Combine Herring and Sauce: Carefully add the herring pieces to the mustard sauce mixture. Gently stir to coat the herring evenly with the sauce, being careful not to break the fish pieces. Cover the bowl with plastic wrap or a lid, and refrigerate for at least 1-2 hours to allow the flavors to meld. For an even more intense flavor, letting it sit overnight is ideal.
- Serve: When ready to serve, give the mixture a gentle stir. Serve the Herring in Mustard Sauce chilled, alongside boiled potatoes or crispbread. Garnish with additional dill if desired.
Extra Tips:
For a more personalized touch, feel free to adjust the balance of mustard and sugar in the sauce according to your taste preferences—some may prefer it sweeter while others might enjoy a stronger mustard flavor.
Additionally, fresh dill is key to achieving that authentic Swedish flavor, but if you don’t have any on hand, dried dill can be used as a substitute, although fresh is always recommended for the best results. You can also experiment with adding other ingredients like chopped apples or grated horseradish for a unique twist on this classic dish.
Smörgåstårta (Sandwich Cake)
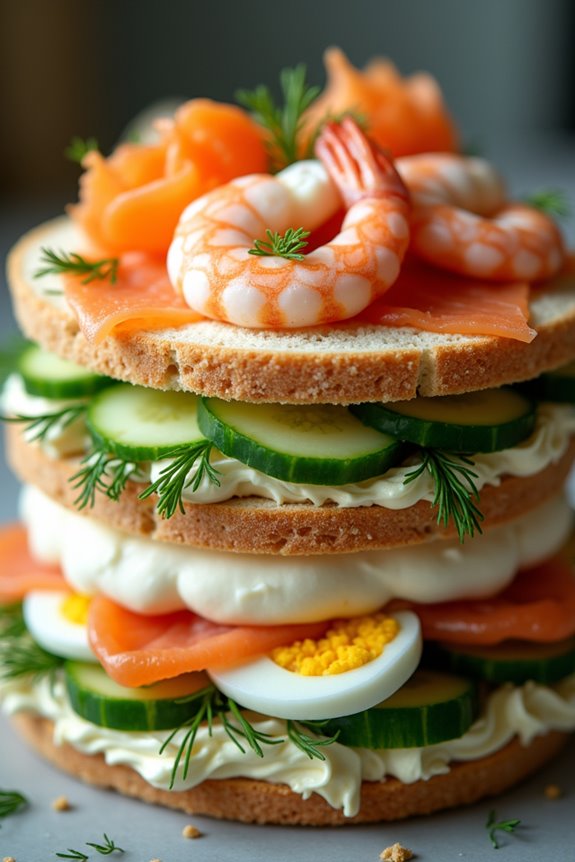
Smörgåstårta, often referred to as Swedish sandwich cake, is a delightful and visually striking dish that has become a staple at celebrations and gatherings in Sweden. This multilayered savory cake incorporates various fillings and toppings, making it a versatile option for any occasion. Traditionally, it features layers of bread interspersed with creamy fillings, meats, seafood, and fresh vegetables, all beautifully decorated to create an impressive centerpiece for your table.
Creating a Smörgåstårta isn’t only about the flavors but also about the presentation. It can be customized with your choice of ingredients to suit your taste preferences. Whether you opt for classic flavors like shrimp and egg or go for a vegetarian alternative with roasted vegetables and cream cheese, the options are endless.
Once assembled, this cake is typically chilled before serving, allowing the flavors to meld together, resulting in a revitalizing dish that’s perfect for warm gatherings.
Ingredients (Serves 4-6)
- 12 slices of white or whole wheat bread
- 200g cream cheese, softened
- 200g sour cream
- 200g mayonnaise
- 200g smoked salmon
- 200g cooked shrimp, peeled and deveined
- 3 hard-boiled eggs, sliced
- 1 cucumber, thinly sliced
- 1 bell pepper, diced
- Fresh dill, for garnish
- Salt and pepper, to taste
- Lemon wedges, for serving
Cooking Instructions
- Prepare the Base: Begin by laying out the 12 slices of bread on a clean surface. You can trim the crusts if you prefer a neater appearance, but it’s not necessary. Choose a large plate or serving platter to assemble your sandwich cake.
- Make the Filling: In a mixing bowl, combine the softened cream cheese, sour cream, and mayonnaise. Mix until smooth and creamy. Season with salt and pepper to taste. This will be the primary filling and icing for your sandwich cake.
- Layer the Bread: Take 4 slices of bread and place them on the serving platter as your base. Spread a generous layer of the cream cheese mixture over the first layer of bread, ensuring even coverage.
- Add Fillings: On top of the cream cheese layer, add a layer of smoked salmon, followed by a layer of sliced hard-boiled eggs. Spread another layer of the cream cheese mixture over the eggs.
- Repeat the Layers: Place another 4 slices of bread on top, followed by more cream cheese mixture, shrimp, diced bell pepper, and another layer of the cream cheese mixture. Repeat this process until all the bread and fillings are used, finishing with a top layer of bread.
- Frost the Cake: Use the remaining cream cheese mixture to frost the top and sides of the sandwich cake. This will help seal in the fillings and create a beautiful presentation.
- Decorate: Arrange the cucumber slices and any leftover fillings on top of the cake for decoration. You can also add fresh dill for a pop of color and flavor.
- Chill and Serve: Cover the sandwich cake with plastic wrap and refrigerate for at least 2 hours, or overnight if possible. This allows the flavors to meld together. When ready to serve, cut into wedges like a cake and garnish with lemon wedges.
Extra Tips
When making Smörgåstårta, consider experimenting with different fillings based on personal preferences or dietary restrictions. You can substitute the seafood with roasted vegetables for a vegetarian option, or use different meats like chicken or ham.
Additionally, feel free to get creative with garnishes—edible flowers, capers, or microgreens can elevate the visual appeal of your sandwich cake. Remember to let the cake chill adequately, as this not only enhances the flavor but also helps the layers hold together when sliced.
Enjoy this beautiful dish at your next gathering!
Knäckebröd (Crispbread)

Knäckebröd, or crispbread, is a traditional Swedish flatbread that’s known for its crunchy texture and versatile nature. This beloved staple has been enjoyed for centuries, often served alongside various toppings such as cheese, cured meats, or spreads. Its unique flavor and satisfying crunch make it a favorite not just in Sweden, but around the world.
Preparing knäckebröd at home allows you to experience the delightful aroma and taste of freshly baked crispbread, and with a few simple ingredients, you can create a batch that perfectly complements any meal.
Making knäckebröd is an enjoyable process that brings a bit of Swedish culture into your kitchen. This recipe yields a delicious batch of crispbread that serves 4-6 people, making it perfect for a gathering or a cozy night in. You’ll find that these crispbreads not only taste fantastic but are also a healthier alternative to regular bread, as they’re typically made with whole grain flours.
Follow this straightforward recipe to whip up your own batch of knäckebröd, and impress your family and friends with this authentic Swedish treat.
Ingredients (Serves 4-6 People)
- 2 cups whole wheat flour
- 1 cup all-purpose flour
- 1 teaspoon salt
- 1 teaspoon baking powder
- 3 tablespoons butter, softened
- 1 cup water (approximately)
- Additional flour for dusting
Cooking Instructions
- Preheat the Oven: Begin by preheating your oven to 450°F (230°C). This high temperature is crucial for achieving that perfect crispy texture in your knäckebröd.
- Mix Dry Ingredients: In a large mixing bowl, combine the whole wheat flour, all-purpose flour, salt, and baking powder. Whisk these dry ingredients together until they’re evenly mixed. This step guarantees that the leavening agent is distributed throughout the flour mixture.
- Incorporate Butter: Add the softened butter to the flour mixture. Use your fingers or a pastry cutter to blend the butter into the flour until the mixture resembles coarse crumbs. This process will help create a tender texture in the final product.
- Add Water: Gradually pour in the water, stirring until a soft dough forms. You may need to adjust the amount of water slightly, depending on the humidity and the flour you’re using. Aim for a dough that’s pliable but not too sticky.
- Knead the Dough: Turn the dough out onto a lightly floured surface and knead it gently for a minute or two until it’s smooth. Be careful not to over-knead, as this can make the crispbread tough.
- Roll Out the Dough: Divide the dough into smaller portions and roll each one out thinly (about 1/8 inch thick) on a floured surface. The thinner you roll the dough, the crisper your knäckebröd will be.
- Cut and Prick: Use a sharp knife or a pizza cutter to cut the rolled-out dough into squares or rectangles. Then, use a fork to prick holes all over each piece. This prevents the bread from puffing up too much while baking.
- Bake: Place the cut pieces on a baking sheet lined with parchment paper. Bake in the preheated oven for about 5-7 minutes, or until they’re golden brown and crisp. Keep an eye on them, as they can burn quickly.
- Cool: Once baked, remove the knäckebröd from the oven and allow them to cool on a wire rack. This will help them maintain their crispness.
Extra Tips
When making knäckebröd, you can experiment with different flours such as rye or spelt for varying flavors. Additionally, consider adding seeds like sesame or flaxseed to the dough for added texture and nutrition.
Store the crispbread in an airtight container to keep them fresh and crispy. They can also be enjoyed with a variety of toppings, so feel free to get creative and try different combinations!
Pytt I Panna (Hash)
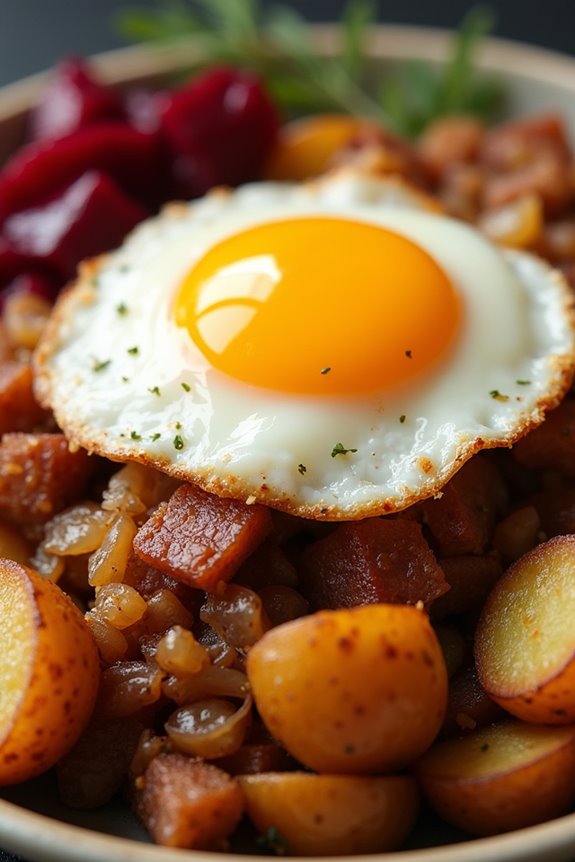
Pytt I Panna is a beloved traditional Swedish dish that embodies the spirit of comfort food. Originating from the need to utilize leftover ingredients, this rustic hash is a delightful combination of diced meat, potatoes, and onions, all pan-fried until crispy and golden. It’s often served with a sunny-side-up egg on top and accompanied by pickled beets, making it both a hearty and visually appealing meal.
The beauty of Pytt I Panna lies in its versatility; you can use any leftover meats you have on hand, be it beef, pork, or even sausage. This dish not only highlights the Swedish penchant for minimizing food waste but also brings families together around the dinner table. Each bite of Pytt I Panna is a nostalgic reminder of simpler times, where meals were crafted with love and creativity.
Whether enjoyed as a cozy breakfast, lunch, or dinner, this hash is sure to warm your heart and satisfy your hunger.
Ingredients (serves 4-6):
- 4 medium potatoes, peeled and diced
- 1 large onion, finely chopped
- 2 cups cooked meat (beef, pork, or sausage), diced
- 4 tablespoons butter or oil
- Salt and pepper, to taste
- 4-6 eggs (for frying)
- Pickled beets, for serving
Cooking Instructions:
- Prepare the Ingredients: Begin by peeling and dicing the potatoes into small cubes, about half an inch in size. Chop the onion finely. Make sure the cooked meat is also diced into small pieces to guarantee even cooking and mixing in the hash.
- Cook the Potatoes: In a large skillet or frying pan, heat 2 tablespoons of butter or oil over medium-high heat. Once hot, add the diced potatoes and season with salt and pepper. Fry the potatoes until they’re golden brown and crispy, approximately 10-15 minutes. Stir occasionally to guarantee even cooking and prevent sticking.
- Add the Onions: After the potatoes have started to crisp, add the chopped onions to the pan. Continue to cook for another 5-7 minutes, stirring frequently until the onions are soft and translucent, and the potatoes are fork-tender.
- Incorporate the Meat: Once the potatoes and onions are ready, add the diced cooked meat to the skillet. Stir everything together and cook for an additional 5 minutes, allowing the flavors to meld and the meat to heat through.
- Fry the Eggs: While the hash is finishing, you can fry the eggs in a separate pan. Heat the remaining 2 tablespoons of butter or oil over medium heat, and crack the eggs into the pan. Cook to your desired doneness (sunny-side up is traditional).
- Serve: To serve, plate generous portions of the Pytt I Panna hash and top each serving with a fried egg. Accompany it with pickled beets on the side for a burst of color and flavor.
Extra Tips:
When making Pytt I Panna, feel free to customize the dish based on what leftovers you have available. For an extra layer of flavor, consider adding herbs like thyme or parsley.
If you enjoy a bit of heat, a sprinkle of chili flakes can add a nice kick. Remember to keep the potatoes and meat uniformly diced for even cooking, and don’t hesitate to experiment with different types of meats or even vegetarian alternatives like mushrooms or tempeh for a meatless version!
Äppelkaka (Apple Cake)

Äppelkaka, or Swedish Apple Cake, is a delightful dessert that showcases the beloved apple in a moist and flavorful cake. This traditional recipe has been passed down through generations, celebrated for its simplicity and comforting taste. The cake is often served warm, making it a perfect treat during the colder months when apples are in season.
With its tender crumb and rich apple flavor, Äppelkaka pairs beautifully with a scoop of vanilla ice cream or a dollop of whipped cream. This cake isn’t only delicious but also easy to prepare, making it an ideal choice for gatherings with friends and family.
The combination of cinnamon and apples creates a warm and inviting aroma as it bakes, filling your kitchen with a sense of home and nostalgia. Whether you’re a seasoned baker or a novice in the kitchen, this Äppelkaka recipe is straightforward and rewarding, guaranteeing a lovely dessert that everyone will enjoy.
Ingredients (serving size: 4-6 people)
- 3 medium-sized apples, peeled, cored, and sliced
- 100g (1/2 cup) unsalted butter, softened
- 150g (3/4 cup) granulated sugar
- 2 large eggs
- 1 teaspoon vanilla extract
- 200g (1 2/3 cups) all-purpose flour
- 2 teaspoons baking powder
- 1 teaspoon ground cinnamon
- A pinch of salt
- Optional: powdered sugar for dusting
Cooking Instructions
- Preheat the Oven: Begin by preheating your oven to 180°C (350°F). This guarantees that the cake bakes evenly and achieves a beautiful golden color.
- Prepare the Baking Pan: Grease a round cake pan (approximately 9 inches in diameter) with butter and lightly dust it with flour. This will help the cake release easily after baking.
- Mix the Butter and Sugar: In a large mixing bowl, cream together the softened butter and granulated sugar until the mixture is light and fluffy. This process incorporates air into the batter, resulting in a lighter cake.
- Add the Eggs and Vanilla: Beat in the eggs, one at a time, making sure to fully incorporate each egg before adding the next. Stir in the vanilla extract, which adds a wonderful flavor to the cake.
- Combine Dry Ingredients: In a separate bowl, whisk together the flour, baking powder, ground cinnamon, and salt. This helps to evenly distribute the baking powder and spices throughout the flour.
- Combine Wet and Dry Ingredients: Gradually add the dry ingredient mixture to the wet ingredients, stirring gently until just combined. Be careful not to overmix, as this can lead to a denser cake.
- Fold in the Apples: Gently fold the sliced apples into the batter, ensuring they’re evenly distributed. The apples will add moisture and flavor to the cake.
- Pour into the Pan: Transfer the batter into the prepared cake pan, smoothing the top with a spatula.
- Bake the Cake: Place the cake in the preheated oven and bake for 35-40 minutes, or until a toothpick inserted into the center comes out clean.
- Cool and Serve: Once baked, allow the cake to cool in the pan for about 10 minutes before transferring it to a wire rack to cool completely. Serve warm, dusted with powdered sugar if desired.
Extra Tips
For an added flavor twist, consider incorporating nuts such as walnuts or almonds into the batter, or sprinkle some on top before baking for a crunchy texture.
You can also experiment with different apple varieties; tart apples like Granny Smith complement the sweetness of the cake beautifully. If you have leftover cake, it can be stored in an airtight container at room temperature for a few days or refrigerated for longer freshness.
Enjoy your homemade Äppelkaka with a warm cup of coffee or tea for a truly Swedish experience!
Swedish Pancakes (Svenska Plättar)

Swedish pancakes, or Svenska plättar, are a delightful twist on traditional pancakes, featuring a thinner, more delicate texture that makes them perfect for breakfast or dessert. These pancakes are often served with a variety of toppings such as fresh berries, whipped cream, or a sprinkle of powdered sugar. The batter is easy to prepare and yields a flavorful, slightly sweet pancake that can be enjoyed by the whole family.
In Sweden, pancakes are typically enjoyed on special occasions or as a comforting treat. They’re commonly served rolled up and filled with jam or fruit, providing a delicious and versatile meal option. Preparing Swedish pancakes is a wonderful way to introduce a bit of Swedish culture into your kitchen, and they’re sure to impress both guests and family members alike.
Ingredients (Serves 4-6)
- 1 cup all-purpose flour
- 1 tablespoon granulated sugar
- 1/4 teaspoon salt
- 2 large eggs
- 2 cups milk
- 2 tablespoons melted butter
- Additional butter for greasing the pan
- Toppings of your choice (e.g., jam, fresh berries, whipped cream, powdered sugar)
Cooking Instructions
1. Prepare the Batter: In a large mixing bowl, whisk together the flour, sugar, and salt until well combined. In another bowl, beat the eggs and then gradually whisk in the milk and melted butter.
Slowly pour the wet ingredients into the dry ingredients, mixing until just combined. The batter should be smooth and slightly runny; if it seems too thick, add a splash more milk.
2. Heat the Pan: Place a non-stick skillet or crepe pan over medium heat. Add a small amount of butter to the pan, allowing it to melt and coat the bottom evenly.
You want the pan to be hot but not smoking, so adjust the heat as necessary.
3. Cook the Pancakes: Pour about 1/4 cup of batter into the hot pan, tilting the pan in a circular motion to spread the batter evenly into a thin layer.
Cook for 1-2 minutes until the edges begin to lift and the bottom is lightly browned. Use a spatula to gently flip the pancake and cook for another minute on the other side until golden brown.
4. Repeat and Stack: Remove the cooked pancake from the pan and place it on a plate. Repeat the process with the remaining batter, adding more butter to the pan as needed to prevent sticking.
Stack the cooked pancakes on the plate and keep them warm by covering with a clean kitchen towel.
5. Serve: Once all the pancakes are cooked, serve them warm with your choice of toppings. You can roll them up with jam, sprinkle with fresh berries, or simply dust with powdered sugar for a sweet finish.
Extra Tips
For the best results, let the batter sit for about 10-15 minutes before cooking; this allows the flour to absorb the liquid fully and results in a more tender pancake.
Additionally, feel free to experiment with flavors by adding vanilla extract or a pinch of cinnamon to the batter for a unique twist. If you have leftovers, they can be refrigerated and reheated in a skillet or microwave, making them a convenient option for busy mornings!
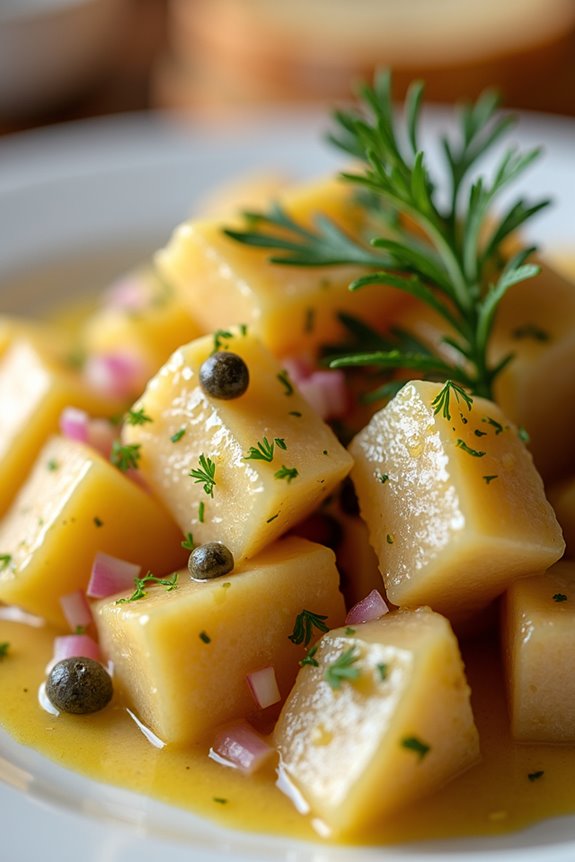
Kalops (Beef Stew)
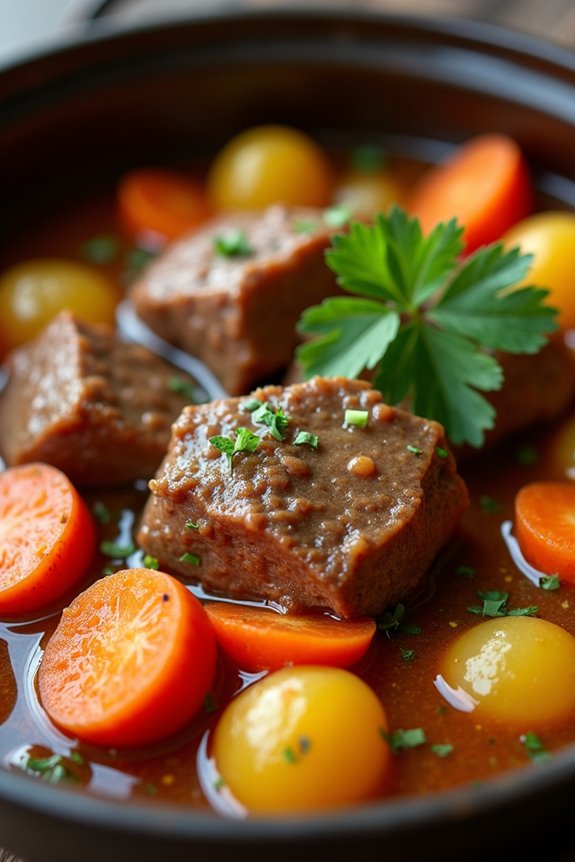
Kalops is a traditional Swedish beef stew that embodies the essence of comfort food. With tender chunks of beef simmered to perfection, this dish is often infused with aromatic spices and vegetables, making it a beloved staple among Swedish families. The slow-cooking process allows the flavors to meld beautifully, resulting in a rich, hearty meal that warms you from the inside out.
Traditionally served with boiled potatoes and pickled beets, Kalops isn’t only delicious but also a great way to experience a taste of Swedish culinary heritage. This stew is perfect for gatherings or a cozy dinner at home. Its simplicity and the use of readily available ingredients make it accessible for both novice and experienced cooks alike.
Enjoying Kalops isn’t just about the food; it’s about sharing a moment with friends and family, savoring the warmth and flavors that come from a pot simmering on the stove.
Ingredients (Serves 4-6)
- 1.5 kg (3.3 lbs) beef chuck, cut into 2-inch cubes
- 3 tablespoons vegetable oil
- 2 large onions, chopped
- 4 carrots, sliced
- 4 potatoes, peeled and diced
- 4 cups beef broth
- 2 tablespoons tomato paste
- 2 bay leaves
- 1 teaspoon whole allspice berries
- 1 teaspoon black peppercorns
- 1 teaspoon salt (to taste)
- Fresh parsley, chopped (for garnish)
Cooking Instructions
- Prepare the ingredients: Start by cutting the beef chuck into 2-inch cubes. Chop the onions, slice the carrots, and dice the potatoes. Having everything prepared beforehand will make the cooking process smoother and more efficient.
- Brown the beef: In a large pot or Dutch oven, heat the vegetable oil over medium-high heat. Once hot, add the beef cubes in batches, ensuring not to overcrowd the pan. Brown the beef on all sides, which helps to develop a rich flavor. Remove the browned beef and set it aside.
- Sauté the onions: In the same pot, add the chopped onions. Cook them for about 5-7 minutes until they become translucent and soft. This step builds a flavorful base for your stew.
- Combine ingredients: Return the browned beef to the pot with the onions. Add the sliced carrots, diced potatoes, beef broth, tomato paste, bay leaves, allspice berries, black peppercorns, and salt. Stir to combine all the ingredients well.
- Simmer the stew: Bring the mixture to a gentle boil, then reduce the heat to low. Cover the pot and let it simmer for about 2 to 2.5 hours. This slow cooking allows the beef to become tender and the flavors to deepen.
- Check for seasoning: After simmering, taste the stew and adjust the seasoning if necessary. You can add more salt if needed, but be cautious as the broth may already have salt.
- Serve and garnish: Once the beef is tender, remove the bay leaves and allspice berries. Ladle the stew into bowls and garnish with chopped fresh parsley. Serve with boiled potatoes and pickled beets on the side for a traditional touch.
Extra Tips
For an even deeper flavor, consider marinating the beef overnight in a mixture of red wine, garlic, and herbs before cooking. This not only enhances the taste of the meat but also tenderizes it.
When serving, you can also add a dollop of sour cream on top for a creamy texture that complements the savory stew beautifully. Enjoy your homemade Kalops with a side of crusty bread to soak up the delicious sauce!
Lutfisk
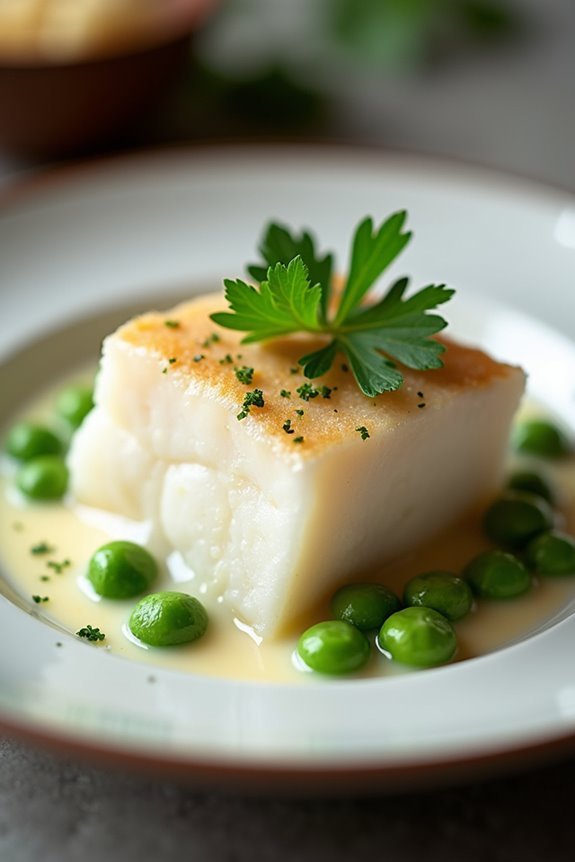
Lutfisk is a traditional Swedish dish, particularly popular during the Christmas season. This unique dish is made from dried fish, typically cod, which is soaked in a lye solution, giving it a gelatinous texture and a distinctive flavor. The name “lutfisk” translates to “lye fish,” reflecting its preparation method.
While it may seem unusual to those unfamiliar with it, lutfisk holds a cherished place in Swedish culinary traditions and is often served with a variety of accompaniments.
Preparing lutfisk requires some time and patience, as the fish must be properly rehydrated and neutralized before cooking. The end result is a dish that’s tender and delicate, often served with white sauce, butter, or a sprinkle of peas. Whether you’re looking to explore Swedish cuisine or simply want to try something different, lutfisk is an experience worth savoring.
Ingredients (Serves 4-6)
- 1 lb dried cod (lutfisk)
- 1 cup cold water
- 1 cup lye solution (food-grade sodium hydroxide)
- 1/4 cup unsalted butter
- 1/4 cup all-purpose flour
- 2 cups milk
- Salt and pepper to taste
- Fresh parsley for garnish (optional)
- Peas or mashed potatoes for serving (optional)
Cooking Instructions
- Soak the Fish: Begin by soaking the dried cod in cold water for 2-3 days, changing the water every 12 hours. This process helps rehydrate the fish and prepares it for the lye solution. Confirm the fish is fully submerged in the water for ideal results.
- Prepare the Lye Solution: After soaking, prepare a lye solution by mixing the food-grade sodium hydroxide with water according to package instructions. Always follow safety precautions when handling lye, as it can be caustic.
- Lye Soak: Submerge the soaked fish in the lye solution and let it sit for 30 minutes. This step is essential as it alters the texture of the fish. After 30 minutes, remove the fish and rinse it thoroughly under cold running water to remove any excess lye.
- Cook the Fish: Place the rinsed fish in a large pot and cover it with fresh water. Bring the water to a gentle simmer and cook for about 15-20 minutes, or until the fish is tender and flakes easily with a fork. Be careful not to overcook.
- Make the White Sauce: While the fish is cooking, melt the unsalted butter in a saucepan over medium heat. Stir in the flour to create a roux, cooking for 1-2 minutes until lightly golden. Gradually whisk in the milk, stirring constantly until the sauce thickens. Season with salt and pepper to taste.
- Serve: Once the lutfisk is cooked, carefully remove it from the pot and place it on a serving platter. Pour the white sauce over the fish and garnish with freshly chopped parsley if desired. Serve immediately with peas or mashed potatoes on the side.
Extra Tips
When preparing lutfisk, it’s important to verify that you use food-grade lye to avoid any harmful effects. Additionally, the soaking and rinsing process is essential to achieve the right texture and flavor, so don’t rush it.
If you find the lutfisk’s flavor to be too strong, serving it with a side of butter, cream sauce, or sweet peas can help balance it out. Enjoy this unique dish with an open mind, as it’s a beloved part of Swedish heritage!
Ostkaka (Swedish Cheesecake)
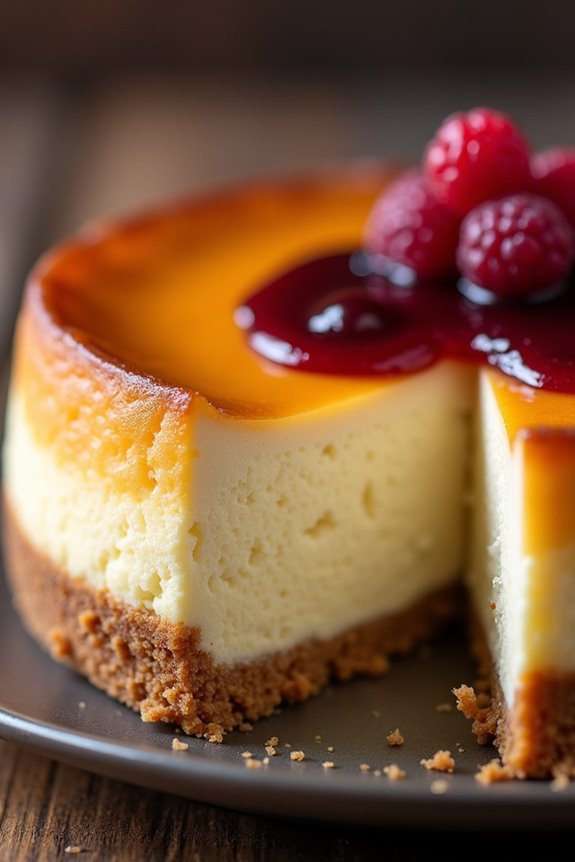
Ostkaka, or Swedish cheesecake, is a traditional treat that has been enjoyed in Sweden for centuries. This delightful dessert is distinct from its American counterpart, often featuring a unique texture and flavor profile. Made with a base of quark or cottage cheese, Ostkaka is rich and creamy, yet light, thanks to the addition of eggs and sugar. It’s typically flavored with almond essence and served with a dollop of jam, making it a perfect end to any meal or a sweet afternoon snack.
The origins of Ostkaka can be traced back to the provinces of Hälsingland and Gästrikland, where it was originally made with leftover whey from cheese production. Over time, variations of the recipe have emerged, and it has become a beloved staple in Swedish cuisine. The combination of a slightly tangy cheesecake base paired with the sweetness of jam creates a flavor harmony that’s truly irresistible.
Ingredients (Serves 4-6)
- 500g quark or cottage cheese
- 100g granulated sugar
- 1 teaspoon almond extract
- 3 large eggs
- 100g heavy cream
- 50g all-purpose flour
- 1 teaspoon baking powder
- 1 pinch of salt
- Butter (for greasing the baking dish)
- Jam (for serving, such as raspberry or lingonberry)
Cooking Instructions
- Preheat the Oven: Start by preheating your oven to 175°C (350°F). This will guarantee that your cheesecake bakes evenly when it’s time to put it in the oven.
- Prepare the Baking Dish: Grease a round springform pan (approximately 23cm in diameter) with butter. This will prevent the Ostkaka from sticking to the sides, making it easier to remove once baked.
- Mix the Cheese Base: In a large mixing bowl, combine the quark or cottage cheese with granulated sugar and almond extract. Use a hand mixer or a whisk to blend until smooth. This mixture will be the creamy base of your cheesecake.
- Add the Eggs: Beat in the eggs, one at a time, making sure each is fully incorporated before adding the next. This will help create a light texture in the final product.
- Incorporate Cream and Dry Ingredients: Gradually stir in the heavy cream, followed by the all-purpose flour, baking powder, and a pinch of salt. Mix until everything is well combined, but don’t overmix, as this can make the cheesecake dense.
- Pour into the Pan: Carefully pour the mixture into the prepared springform pan. Use a spatula to smooth the top if necessary.
- Bake: Place the pan in the preheated oven and bake for approximately 45-55 minutes, or until the surface is golden and a toothpick inserted in the center comes out clean. Keep an eye on it towards the end to avoid overbaking.
- Cool and Serve: Once baked, remove the Ostkaka from the oven and let it cool in the pan for about 10 minutes before carefully removing the sides of the springform. Allow it to cool completely before refrigerating for at least an hour. Serve chilled or at room temperature with your choice of jam.
Extra Tips
For a more authentic taste, consider using Swedish quark if you can find it, as it offers a unique flavor profile. Additionally, Ostkaka can be made a day in advance, which allows the flavors to meld and improves the overall taste.
When serving, a sprinkle of sliced almonds or fresh berries can enhance both presentation and flavor. Enjoy this delightful Swedish dessert with friends and family for a truly authentic experience!