

There’s a comforting charm in British baking that makes it simply irresistible. The buttery classics like Victoria Sponge Cake and Chocolate Fudge Cake have a special place in our hearts. They evoke memories of family gatherings and cozy afternoons. If you’re looking to bring a touch of old-world magic into your home, these timeless recipes are sure to delight. Let’s explore some cherished favorites that will fill your kitchen with warmth and joy.
Classic Victoria Sponge Cake
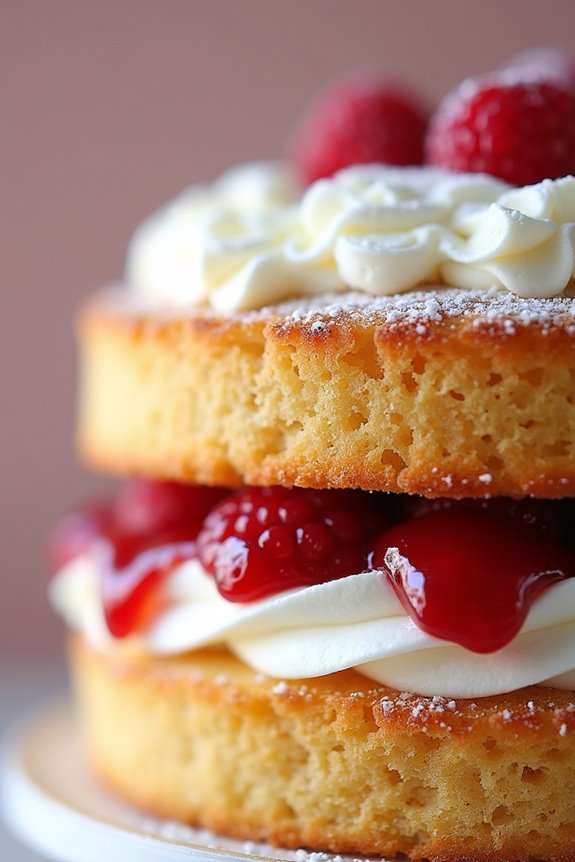
The Classic Victoria Sponge Cake is a timeless British dessert that epitomizes the essence of simple yet elegant baking. Named after Queen Victoria, who was known to enjoy a slice with her afternoon tea, this cake features a light and fluffy texture that melts in your mouth. The traditional recipe consists of two layers of sponge cake, filled with a luscious layer of jam and whipped cream or buttercream, making it a delightful treat for any occasion.
This cake isn’t only a staple at tea time, but it also serves as a beautiful centerpiece for celebrations such as birthdays and anniversaries. The beauty of the Victoria Sponge lies in its versatility; you can easily adapt it with different fillings or toppings to suit your taste. With its straightforward method and minimal ingredients, anyone can master this classic recipe and enjoy the satisfaction of homemade baking.
Ingredients (Serves 4-6)
- 200g unsalted butter, softened
- 200g caster sugar
- 4 large eggs
- 200g self-raising flour
- 1 teaspoon baking powder
- 2 tablespoons milk
- 100g raspberry or strawberry jam
- 150ml double cream, whipped (or buttercream for filling)
- Icing sugar, for dusting (optional)
Cooking Instructions
- Preheat the Oven: Begin by preheating your oven to 180°C (350°F). This guarantees that your cake bakes evenly and rises perfectly when placed in the oven.
- Prepare the Cake Pans: Grease two 20cm (8-inch) round cake pans with butter and line the bottoms with parchment paper. This prevents the cake from sticking and makes it easier to remove once baked.
- Cream the Butter and Sugar: In a large mixing bowl, beat together the softened butter and caster sugar until the mixture is light and fluffy. This process incorporates air into the batter, helping the cake rise beautifully.
- Add the Eggs: Crack the eggs into the mixture one at a time, beating well after each addition. This helps to emulsify the ingredients and creates a smooth batter.
- Combine the Dry Ingredients: Sift the self-raising flour and baking powder together in a separate bowl. Gradually fold the dry ingredients into the wet mixture using a spatula, taking care not to over-mix as this can make the cake dense.
- Add Milk: Gently stir in the milk to loosen the batter, making it easier to pour into the cake pans. The consistency should be soft but not runny.
- Bake the Cakes: Divide the batter evenly between the prepared cake pans. Bake in the preheated oven for 20-25 minutes, or until the cakes are golden brown and a skewer inserted into the center comes out clean.
- Cool the Cakes: Once baked, remove the cakes from the oven and allow them to cool in the pans for 10 minutes. Then, turn them out onto a wire rack to cool completely.
- Assemble the Cake: Once cooled, place one layer of the cake on a serving plate. Spread a generous layer of jam over the top, followed by the whipped cream (or buttercream). Place the second layer on top.
- Finish and Serve: Dust the top of the cake with icing sugar for a touch of elegance. Slice and serve the Classic Victoria Sponge Cake with a cup of tea.
Extra Tips
To elevate your Classic Victoria Sponge Cake, consider adding a splash of vanilla extract to the batter for extra flavor. Additionally, you can enhance the filling by adding fresh berries or sliced fruit along with the jam and cream.
For a more modern twist, experiment with flavored jams or even citrus zest in the batter. Always verify that your ingredients are at room temperature for the best results, and remember that baking times may vary based on your oven, so keep an eye on your cakes towards the end of the baking time. Enjoy your baking experience!
Rich Chocolate Fudge Cake
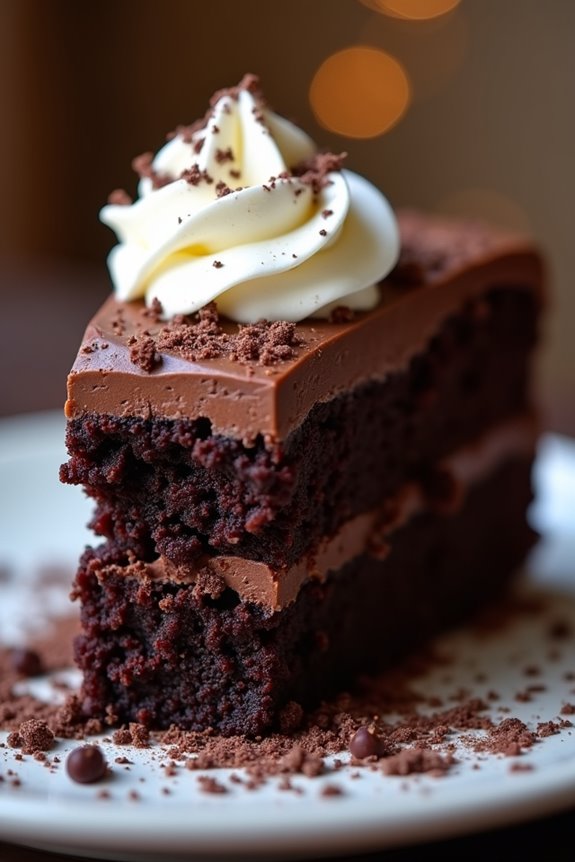
Indulging in a slice of Rich Chocolate Fudge Cake is like embracing a warm hug on a chilly day. This decadent dessert is perfect for any occasion, whether it’s a birthday celebration, a family gathering, or simply a treat to satisfy your chocolate cravings. With its moist layers and rich, fudgy texture, this cake is sure to impress both friends and family.
The best part is, you don’t need to be a professional baker to recreate this delightful treat in your own kitchen. This cake combines the intense flavor of dark chocolate with the sweetness of sugar and a hint of vanilla, resulting in a deeply satisfying dessert that pairs beautifully with a scoop of vanilla ice cream or a dollop of whipped cream.
Follow this straightforward recipe to make a luscious Rich Chocolate Fudge Cake that serves 4-6 people. Your taste buds will thank you!
Ingredients
- 200g dark chocolate (at least 70% cocoa)
- 150g unsalted butter
- 250g granulated sugar
- 4 large eggs
- 100g all-purpose flour
- 30g cocoa powder
- 1 tsp vanilla extract
- 1/2 tsp baking powder
- Pinch of salt
Cooking Instructions
- Preheat the Oven: Start by preheating your oven to 180°C (350°F). This guarantees that your cake will bake evenly and rise properly. Prepare a 9-inch round cake pan by greasing it with butter and lining the bottom with parchment paper.
- Melt the Chocolate and Butter: In a heatproof bowl, combine the dark chocolate and unsalted butter. Place the bowl over a pot of simmering water (double boiler method), stirring occasionally until both ingredients are completely melted and smooth. This gentle melting process helps to preserve the chocolate’s rich flavor.
- Whisk the Eggs and Sugar: In a separate mixing bowl, whisk together the granulated sugar and eggs until the mixture becomes pale and fluffy. This process incorporates air into the eggs, leading to a lighter cake texture. You can use an electric mixer for ease.
- Combine Chocolate Mixture with Egg Mixture: Once the chocolate and butter mixture has cooled slightly, pour it into the egg and sugar mixture. Add the vanilla extract and gently fold the ingredients together using a spatula until they’re fully combined. Be careful not to overmix, as you want to retain the airy texture.
- Sift and Fold in Dry Ingredients: In another bowl, sift together the all-purpose flour, cocoa powder, baking powder, and a pinch of salt. Gradually fold the dry ingredients into the chocolate mixture using a spatula, making sure everything is well incorporated without overworking the batter.
- Bake the Cake: Pour the batter into the prepared cake pan and smooth the top with a spatula. Bake in the preheated oven for 25-30 minutes or until a skewer inserted into the center comes out with a few moist crumbs (not wet batter). Avoid overbaking, as the cake should remain fudgy.
- Cool and Serve: Once baked, remove the cake from the oven and allow it to cool in the pan for about 10 minutes. Then, carefully transfer it to a wire rack to cool completely. Once cooled, you can dust the top with cocoa powder or powdered sugar before slicing and serving.
Extra Tips
For an even richer flavor, consider adding a splash of espresso coffee to the chocolate mixture, as it enhances the chocolate taste beautifully. You can also experiment by adding chocolate chips or nuts to the batter for added texture.
If you want to make the cake even more indulgent, serve it with a homemade chocolate ganache or a scoop of ice cream on top! Store any leftovers in an airtight container at room temperature for up to three days, or refrigerate for longer freshness. Enjoy your baking experience!
Traditional Bakewell Tart

The Bakewell Tart is a quintessential British dessert that hails from the picturesque town of Bakewell in Derbyshire. This delightful pastry features a crisp, buttery crust filled with a layer of sweet raspberry jam and a rich almond sponge, known as frangipane, which is topped with flaked almonds.
Originating in the 19th century, the tart has become a beloved treat enjoyed by many, often served with a dollop of clotted cream or a cup of tea. Its combination of textures and flavors makes it a perfect dessert for any occasion.
To create a traditional Bakewell Tart, you’ll need to balance the buttery pastry with the tartness of the jam and the nutty sweetness of the frangipane. It’s a straightforward recipe that can be made in about an hour, plus chilling and baking time. The result is a beautiful tart that not only looks impressive but also delivers on flavor, making it a favorite for family gatherings and special events.
Ingredients (serves 4-6):
- 225g plain flour
- 175g unsalted butter, chilled and diced
- 75g icing sugar
- 1 large egg
- 200g raspberry jam
- 150g ground almonds
- 100g caster sugar
- 2 large eggs
- 1 tsp almond extract
- Flaked almonds, for topping
- A pinch of salt
Cooking Instructions:
1. Prepare the Pastry: In a large mixing bowl, combine the plain flour, diced butter, icing sugar, and a pinch of salt. Using your fingertips, rub the butter into the flour until the mixture resembles breadcrumbs.
Add the egg and mix until the dough comes together. Wrap it in cling film and refrigerate for at least 30 minutes.
2. Roll Out the Pastry: Preheat your oven to 180°C (350°F). On a floured surface, roll out the chilled pastry to about 3mm thick. Carefully lift it into a 23cm tart tin, trimming any excess.
Prick the base with a fork to prevent bubbling and chill in the fridge for another 15 minutes.
3. Blind Bake the Pastry: Line the tart shell with baking parchment and fill with baking beans or rice. Bake in the preheated oven for 15 minutes.
Remove the parchment and beans, then bake for an additional 5-10 minutes until the base is light golden. Allow to cool slightly.
4. Prepare the Frangipane Filling: In a mixing bowl, beat together the ground almonds, caster sugar, eggs, and almond extract until well combined.
The mixture should be smooth and creamy.
5. Assemble the Tart: Spread the raspberry jam evenly over the cooled pastry base. Pour the frangipane mixture over the jam, smoothing it out with a spatula.
Sprinkle flaked almonds on top for added texture.
6. Bake the Tart: Place the assembled tart in the oven and bake for 25-30 minutes, or until the frangipane is golden brown and a skewer inserted into the center comes out clean.
Allow the tart to cool in the tin for 10 minutes before transferring to a wire rack to cool completely.
7. Serve: Once cooled, slice the Bakewell Tart into wedges and serve it plain, or with a drizzle of icing or a dollop of clotted cream.
Extra Tips:
For added depth of flavor, consider adding a splash of lemon juice or zest to the frangipane mixture. This will brighten the flavors and complement the raspberry jam beautifully.
Additionally, you can experiment with different types of jam, such as apricot or cherry, to create your unique twist on this classic tart. Always make certain your ingredients are at room temperature for the best results, particularly for the butter in the pastry and the eggs in the frangipane. Enjoy your baking!
Creamy Bread and Butter Pudding
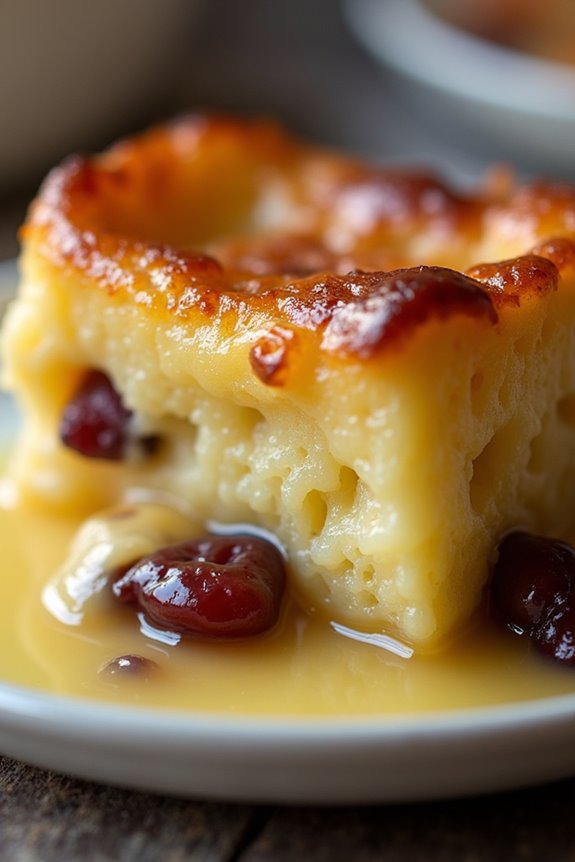
Bread and butter pudding is a classic British dessert that has been enjoyed for generations. It’s a delightful way to use up stale bread, transforming it into a rich and comforting dish. The pudding is typically made with slices of buttered bread, often layered with raisins or currants, and soaked in a creamy custard made from eggs, milk, and sugar. This results in a beautifully baked pudding that has a golden crust and a soft, custardy inside, making it a beloved treat for family gatherings and cozy evenings.
This dessert isn’t only delicious but also incredibly versatile. You can experiment with different types of bread, such as brioche or croissants, to add a unique twist to the traditional recipe. Additionally, you can enhance the flavor with spices like nutmeg or cinnamon or even add a splash of vanilla or orange zest. Whether served warm with a drizzle of cream or cold with a scoop of ice cream, this creamy bread and butter pudding is sure to satisfy everyone at the table.
Ingredients (Serves 4-6):
- 6 slices of stale bread (white or brioche)
- 50g unsalted butter, softened
- 100g raisins or currants
- 300ml whole milk
- 200ml double cream
- 3 large eggs
- 100g caster sugar
- 1 tsp vanilla extract
- A pinch of nutmeg (optional)
- A pinch of salt
Cooking Instructions:
- Preheat the Oven: Begin by preheating your oven to 180°C (350°F). This guarantees that your pudding will bake evenly and develop a lovely golden crust.
- Prepare the Bread: Take your slices of stale bread and spread a generous layer of softened butter on one side of each slice. Then, cut the slices into triangles or quarters. This will help them fit nicely in the baking dish and allow for more surface area to soak up the custard.
- Layer the Bread: In a greased baking dish, arrange half of the buttered bread slices with the buttered side facing up. Sprinkle half of the raisins or currants over this layer. Then, place the remaining bread on top, again buttered side up, and finish with the remaining dried fruits.
- Make the Custard: In a mixing bowl, whisk together the eggs, caster sugar, and a pinch of salt until well combined. In a separate saucepan, gently heat the milk and double cream until just below boiling. Gradually pour the hot milk mixture into the egg mixture, whisking continuously to avoid curdling. Add vanilla extract and nutmeg if using, then mix until smooth.
- Soak the Bread: Carefully pour the custard mixture over the layered bread in the baking dish, ensuring that it’s evenly soaked. Allow it to sit for about 15-20 minutes, giving the bread time to absorb the custard.
- Bake: Place the baking dish in the preheated oven and bake for 30-40 minutes, or until the top is golden brown and the custard is set. You can gently shake the dish to check if the pudding wobbles slightly but isn’t liquid.
- Serve: Once baked, remove the pudding from the oven and let it cool for a few minutes before serving. It can be enjoyed warm or at room temperature, possibly with a drizzle of cream or a scoop of ice cream.
Extra Tips:
When making creamy bread and butter pudding, using stale bread is key for achieving the best texture. Fresh bread may become too mushy when soaked in custard. If you don’t have stale bread, you can lightly toast fresh bread in the oven to dry it out a bit.
Also, feel free to customize your pudding by adding spices or citrus zest for an extra flavor dimension. A sprinkle of powdered sugar on top before serving can add a lovely finishing touch.
Flaky Cornish Pasty
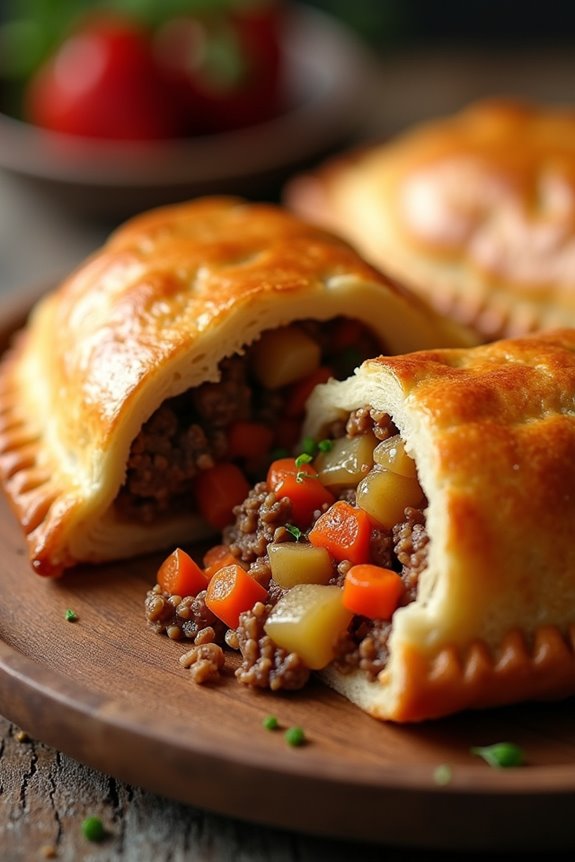
The Flaky Cornish Pasty is a classic British dish that originates from Cornwall, where it was traditionally a portable meal for miners. This hearty pastry is filled with a savory mixture of meat, potatoes, and vegetables, all encased in a deliciously flaky pastry. The combination of flavors and textures makes it a comforting and satisfying dish, perfect for a family meal or a picnic.
Making a Flaky Cornish Pasty at home might seem challenging, but with the right ingredients and a bit of patience, you can create a delicious version of this iconic dish. The key to achieving that perfect flaky crust lies in the technique of handling the pastry and guaranteeing that the butter remains cold until it’s baked. Serve your pasties with a side of your favorite chutney or pickles for an authentic experience!
Ingredients (Serves 4-6):
- 500g (3 ½ cups) all-purpose flour
- 250g (1 cup) unsalted butter, chilled and cubed
- 1 tsp salt
- 1 large egg (for egg wash)
- 6 tbsp cold water
- 300g (10 oz) minced beef or lamb
- 1 medium potato, diced
- 1 medium onion, finely chopped
- 1 medium carrot, diced
- 1 tsp Worcestershire sauce
- Salt and pepper, to taste
Cooking Instructions:
- Prepare the Pastry: In a large mixing bowl, combine the flour and salt. Add the chilled, cubed butter and use your fingertips to rub it into the flour until the mixture resembles breadcrumbs. This step is essential for achieving a flaky texture.
- Form the Dough: Gradually add the cold water, mixing until the dough starts to come together. Avoid overworking the dough; it should be smooth and slightly sticky. Wrap the dough in plastic wrap and refrigerate for at least 30 minutes to allow it to rest and chill.
- Make the Filling: In a separate bowl, mix the minced meat, diced potato, chopped onion, diced carrot, Worcestershire sauce, salt, and pepper. Confirm that the ingredients are well combined for even flavor distribution.
- Roll Out the Pastry: Once the dough has chilled, preheat your oven to 200°C (400°F). On a floured surface, roll out the pastry to about 3mm (1/8 inch) thickness. Using a plate or cutter, cut out circles of dough approximately 20cm (8 inches) in diameter.
- Fill the Pasties: Place a generous spoonful of the filling onto one half of each pastry circle, leaving a border around the edge. Be careful not to overfill, as this can cause the pastry to burst during baking.
- Seal the Pasties: Fold the pastry over the filling to create a semi-circle. Press the edges together with your fingers, then use a fork to crimp the edges securely. This not only seals the pasty but also adds a decorative touch.
- Apply Egg Wash: Beat the egg in a small bowl and brush it over the top of each pasty. This will give them a beautiful golden color when baked.
- Bake the Pasties: Place the pasties on a baking tray lined with parchment paper and bake in the preheated oven for 30-35 minutes or until golden brown and crisp. Make sure to turn the tray halfway through for even baking.
- Cool and Serve: Once baked, remove the pasties from the oven and let them cool slightly before serving. They can be enjoyed warm or at room temperature.
Extra Tips:
For the best results, confirm that all your ingredients, especially the butter and water, are as cold as possible. This helps create that flaky texture.
You can also experiment with different fillings, such as adding swede or leeks, or even making a vegetarian version with mushrooms and spinach. If you’re preparing these in advance, they freeze well; simply bake them from frozen, adding a few extra minutes to the cooking time.
Enjoy your homemade Flaky Cornish Pasties!
Decadent Sticky Toffee Pudding
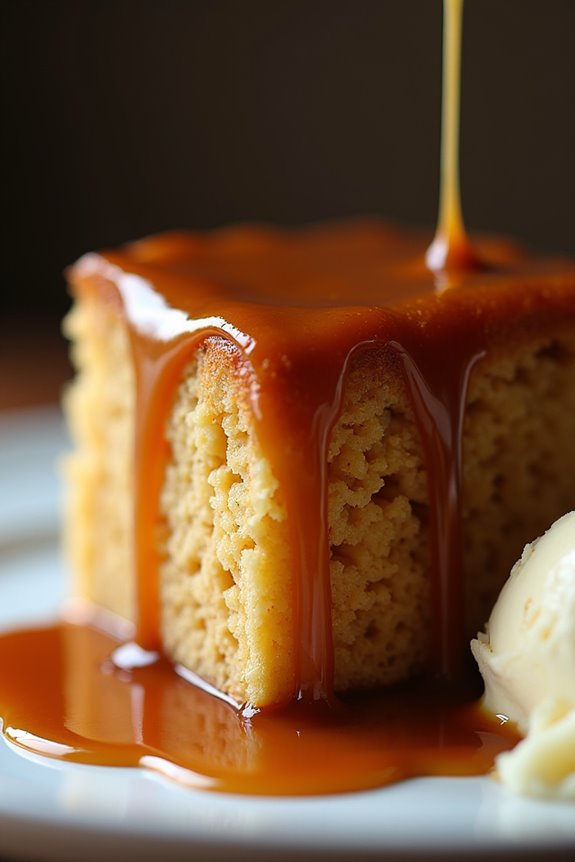
Sticky toffee pudding is a beloved British dessert that perfectly combines a moist sponge cake with a rich, luscious toffee sauce. This indulgent treat is often served warm, accompanied by a scoop of vanilla ice cream or a generous dollop of clotted cream, creating a heavenly experience that’s hard to resist.
Originating from the Lake District, this dessert has become a staple in British cuisine and is cherished by many for its comforting flavors and delightful texture.
The beauty of sticky toffee pudding lies in its simplicity, making it accessible for home bakers of all skill levels. With a few key ingredients and a bit of time, you can create a show-stopping dessert that will impress your family and friends.
Whether it’s a special occasion or just a cozy night in, this decadent treat is sure to satisfy your sweet tooth and leave you craving more.
Ingredients (Serves 4-6):
- 200g (7 oz) Medjool dates, pitted and chopped
- 250ml (1 cup) boiling water
- 1 tsp baking soda
- 75g (⅓ cup) unsalted butter, softened
- 150g (¾ cup) brown sugar
- 2 large eggs
- 175g (1 ½ cups) self-raising flour
- 1 tsp vanilla extract
- 1 tsp treacle or molasses (optional, for extra flavor)
For the Toffee Sauce:
- 150g (¾ cup) brown sugar
- 100g (½ cup) unsalted butter
- 200ml (¾ cup) double cream
- A pinch of sea salt
Cooking Instructions:
- Prepare the Dates: In a mixing bowl, combine the chopped Medjool dates and boiling water. Stir in the baking soda, and let the mixture sit for about 15-20 minutes to allow the dates to soften and release their natural sweetness.
- Make the Batter: In a separate mixing bowl, cream together the softened butter and brown sugar until light and fluffy. This should take about 3-5 minutes. Add the eggs one at a time, mixing well after each addition. Then, stir in the vanilla extract and treacle or molasses if using.
- Combine Ingredients: Once the date mixture has cooled slightly, mash the dates into a smooth paste using a fork. Fold this mixture into the butter and sugar mixture until well combined. Gradually sift in the self-raising flour, folding gently until just incorporated.
- Bake the Pudding: Preheat your oven to 180°C (350°F). Grease a medium-sized baking dish or individual ramekins. Pour the batter into the prepared dish, smoothing the top with a spatula. Bake for 30-35 minutes or until a skewer inserted into the center comes out clean.
- Prepare the Toffee Sauce: While the pudding is baking, prepare the toffee sauce. In a saucepan over medium heat, combine the brown sugar, butter, double cream, and sea salt. Stir continuously until the sugar has dissolved and the sauce is smooth and slightly thickened. Remove from heat and set aside.
- Serve: Once the pudding is baked, remove it from the oven and let it cool for a few minutes. Serve warm, drizzling generously with the toffee sauce. For an extra treat, add a scoop of vanilla ice cream or a spoonful of clotted cream on the side.
Extra Tips:
For the best results, make sure to use Medjool dates, as they provide a rich flavor and moist texture that’s essential for this dessert.
Feel free to prepare the toffee sauce in advance and reheat it gently before serving. If you prefer a more intense toffee flavor, consider adding a splash of dark rum or whiskey to the sauce.
Finally, be careful not to overmix the batter once the flour is added, as this can lead to a denser pudding. Enjoy your baking!
Buttery Shortbread Fingers
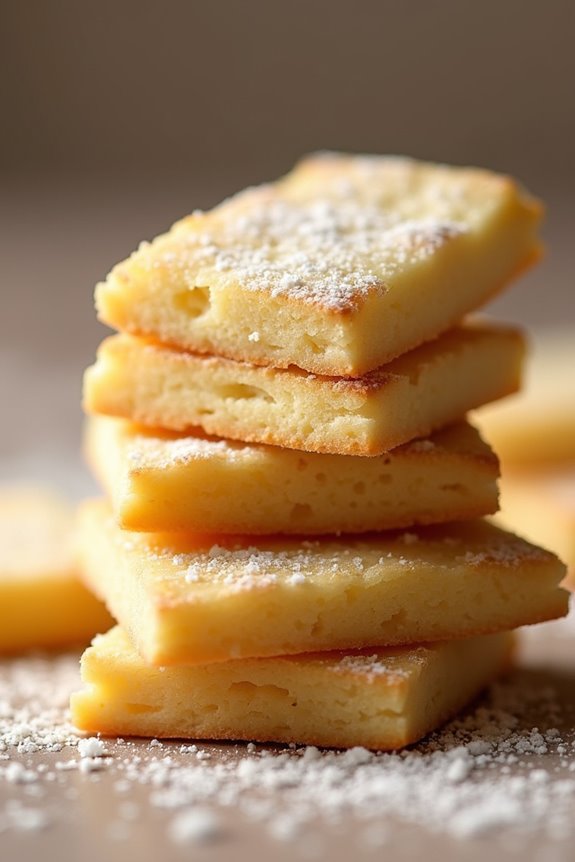
Buttery Shortbread Fingers are a classic treat that embodies the essence of British baking with their rich, melt-in-your-mouth texture. These delightful cookies are made with just a few basic ingredients, yet they deliver a flavor that’s both simple and incredibly satisfying. Perfect for afternoon tea or as a sweet snack, these shortbread fingers are bound to impress family and friends alike.
With their crisp edges and tender centers, they’re a comforting reminder of home baking at its finest. The beauty of Buttery Shortbread Fingers lies in their simplicity. Made primarily from butter, sugar, and flour, these cookies require minimal effort and time to prepare, making them an ideal choice for both novice bakers and seasoned pros.
They can be customized with various flavorings or additions, such as a hint of vanilla or a sprinkle of sea salt, but the traditional version remains a favorite for its pure buttery goodness. Gather your ingredients and let’s get started on this quintessential British recipe!
Ingredients (Serves 4-6)
- 250g unsalted butter, softened
- 125g caster sugar
- 250g plain flour
- 125g cornstarch
- 1 tsp vanilla extract (optional)
- A pinch of salt
- Extra sugar for sprinkling (optional)
Cooking Instructions
- Preheat the Oven: Begin by preheating your oven to 160°C (320°F). This guarantees that your Buttery Shortbread Fingers bake evenly, creating a lovely golden color and texture.
- Cream the Butter and Sugar: In a large mixing bowl, add the softened unsalted butter and caster sugar. Using an electric mixer or a wooden spoon, cream the mixture together until it becomes light and fluffy. This process incorporates air into the butter, helping to create a tender texture in the finished cookies.
- Combine the Dry Ingredients: In a separate bowl, sift together the plain flour, cornstarch, and a pinch of salt. Sifting helps to break up any lumps and evenly distribute the salt and cornstarch throughout the flour.
- Mix Dry Ingredients with Butter Mixture: Gradually add the sifted dry ingredients to the creamed butter and sugar mixture. If using, add the vanilla extract at this stage. Stir until the mixture comes together to form a soft dough. Be careful not to overmix, as this can lead to tough cookies.
- Shape the Dough: Turn the dough out onto a lightly floured surface. Using your hands, gently shape the dough into a rectangle about 1cm thick. This will help you achieve uniform shortbread fingers when cut.
- Cut into Fingers: Using a sharp knife, cut the dough into fingers (about 5cm x 2cm in size). Transfer the cut pieces onto a baking tray lined with parchment paper, leaving a little space between each one as they’ll spread slightly while baking.
- Bake: Place the baking tray in the preheated oven and bake for 20-25 minutes, or until the edges are just starting to turn golden. Keep an eye on them to avoid over-baking, as you want them to remain pale in color.
- Cool and Serve: Once baked, remove the tray from the oven and allow the shortbread fingers to cool on the tray for 5 minutes before transferring them to a wire rack to cool completely. If desired, sprinkle with extra sugar while they’re still warm for added sweetness.
Extra Tips
When making Buttery Shortbread Fingers, using high-quality unsalted butter is key to achieving a rich flavor. For an added twist, feel free to experiment with flavors by incorporating lemon zest, almond extract, or even finely chopped herbs like rosemary.
Remember to store your shortbread in an airtight container to maintain their freshness and crispness. Enjoy them with a cup of tea for the perfect afternoon treat!
Light and Airy Angel Cake

Light and Airy Angel Cake is a classic dessert that embodies the essence of fluffy and delicate baking. Originating from the United States, this cake is known for its ethereal texture and is often enjoyed during celebrations or as a delightful treat for afternoon tea. Made primarily with egg whites, sugar, and flour, it’s a low-fat cake that’s both delicious and visually appealing, often topped with fresh fruits or whipped cream for added flavor.
The secret to achieving the perfect angel cake lies in the gentle folding technique and the careful incorporation of air into the batter. This cake is baked in a tube pan, allowing it to rise beautifully and maintain its light structure. Once baked, the cake must be inverted to cool, which helps preserve its airy quality. This recipe serves 4-6 people, making it perfect for a small gathering or family dessert.
Ingredients:
- 1 cup (120g) cake flour
- 1 1/2 cups (300g) granulated sugar
- 1/4 teaspoon salt
- 1 teaspoon cream of tartar
- 1 cup (240ml) egg whites (about 8-10 large eggs)
- 1 teaspoon vanilla extract
- 1/2 teaspoon almond extract (optional)
Instructions:
- Preheat the Oven: Begin by preheating your oven to 350°F (175°C). Make sure to have an ungreased 10-inch tube pan ready, as this cake relies on the structure of the pan for its rise.
- Sift Dry Ingredients: In a large mixing bowl, sift together the cake flour, 3/4 cup of the granulated sugar, and salt. Sifting helps to aerate the flour and remove any lumps, ensuring a light cake.
- Beat Egg Whites: In a separate bowl, use an electric mixer to beat the egg whites on medium speed until frothy. Add the cream of tartar and continue to beat until soft peaks form. Gradually add the remaining 3/4 cup of granulated sugar, a tablespoon at a time, until stiff peaks form and the mixture is glossy.
- Incorporate Flavors: Gently fold in the vanilla extract and almond extract (if using) into the beaten egg whites. Be careful not to deflate the egg whites, as they provide the structure for the cake.
- Combine Mixtures: Carefully fold the sifted flour mixture into the egg whites in three additions. Use a large spatula and a gentle folding motion to combine, ensuring not to overmix. The batter should remain light and airy.
- Transfer to Pan: Pour the batter into the ungreased tube pan, smoothing the top with a spatula. Don’t grease the pan, as the batter needs to cling to the sides for proper rising.
- Bake the Cake: Bake in the preheated oven for 35 to 40 minutes, or until the cake is golden brown and springs back when lightly touched. A toothpick inserted into the center should come out clean.
- Cool the Cake: Once baked, remove the cake from the oven and immediately invert the pan onto a cooling rack. This allows the cake to cool completely without collapsing. Let it cool for about 1-2 hours.
- Remove from Pan: After cooling, use a knife to gently loosen the edges of the cake from the pan. Carefully remove the cake from the tube pan and place it on a serving plate.
- Serve: Slice the cake and serve it plain or with toppings such as fresh fruit, whipped cream, or a dusting of powdered sugar.
Extra Tips:
To achieve the best results with your Light and Airy Angel Cake, make sure your mixing bowls and utensils are completely clean and free of any grease, as this can hinder the egg whites from whipping properly.
Additionally, using room temperature egg whites can help them whip up to a greater volume. For an extra touch of flavor, consider adding a splash of citrus zest or a hint of your favorite extract in addition to the vanilla.
Always allow the cake to cool completely before slicing to maintain its delicate structure. Enjoy your baking!
Zesty Lemon Drizzle Cake

Indulge in the invigorating taste of a Zesty Lemon Drizzle Cake, a delightful British classic that’s perfect for afternoon tea or as a light dessert. This cake is known for its moist texture and vibrant lemon flavor, complemented by a sweet and tangy drizzle that seeps into the cake, enhancing its zestiness. The combination of fresh lemon juice and zest creates an aromatic experience that will brighten any gathering.
Baking this cake is a straightforward process that requires minimal ingredients, making it an excellent choice for both novice and seasoned bakers. Its simplicity doesn’t compromise on flavor; the cake is light, fluffy, and bursting with citrus goodness. So gather your ingredients and get ready to create a delightful treat that’s sure to impress your family and friends.
Ingredients (Serves 4-6):
- 225g (8 oz) unsalted butter, softened
- 225g (8 oz) granulated sugar
- 4 large eggs
- 225g (8 oz) all-purpose flour
- 1 teaspoon baking powder
- Zest of 2 lemons
- 3 tablespoons fresh lemon juice
- 100g (3.5 oz) icing sugar (for drizzle)
- 2 tablespoons fresh lemon juice (for drizzle)
Cooking Instructions:
- Preheat the Oven: Begin by preheating your oven to 180°C (350°F). Grease and line a 2lb loaf tin with parchment paper to guarantee the cake doesn’t stick during baking and to facilitate easy removal.
- Cream the Butter and Sugar: In a large mixing bowl, beat the softened butter and granulated sugar together using an electric mixer on medium speed until the mixture is pale and fluffy. This process should take about 4-5 minutes, as it incorporates air into the mixture, which is essential for a light cake.
- Add the Eggs: Gradually add the eggs one at a time to the butter and sugar mixture, mixing well after each addition. If the mixture appears to curdle, add a tablespoon of flour to help bind it together.
- Incorporate Dry Ingredients: Sift the all-purpose flour and baking powder into the bowl, then fold it gently into the mixture using a spatula. Take care not to overmix, as this can lead to a dense cake.
- Add Lemon Zest and Juice: Gently fold in the lemon zest and 3 tablespoons of fresh lemon juice until evenly distributed throughout the batter. The lemon adds a bright flavor that will shine through in the finished cake.
- Bake the Cake: Pour the batter into the prepared loaf tin and smooth the top with a spatula. Bake in the preheated oven for 45-50 minutes, or until a skewer inserted into the center comes out clean. Keep an eye on the cake towards the end of the baking time to prevent over-baking.
- Prepare the Drizzle: While the cake is baking, prepare the lemon drizzle. In a small bowl, mix the icing sugar with 2 tablespoons of fresh lemon juice until you achieve a smooth consistency. Set aside.
- Cool and Drizzle: Once the cake is baked, remove it from the oven and let it cool in the tin for about 10 minutes. Then, transfer it to a wire rack. While the cake is still warm, poke small holes in the top using a skewer or toothpick and pour the lemon drizzle over it, allowing it to soak in.
- Serve: Once the cake has completely cooled, slice it and serve. Enjoy the zesty flavor with a cup of tea or coffee!
Extra Tips:
For an added touch of flavor, consider incorporating poppy seeds into the batter for a delightful crunch. You can also experiment with different citrus fruits such as oranges or limes for a unique twist on the classic lemon drizzle cake.
Confirm that your ingredients, particularly the butter and eggs, are at room temperature for the best results, as this will help create a smoother batter and a more uniform texture in the final cake.
Finally, if you want to store the cake, keep it in an airtight container at room temperature for up to 3 days, or refrigerate it for longer freshness.
Sumptuous Fruit Scones
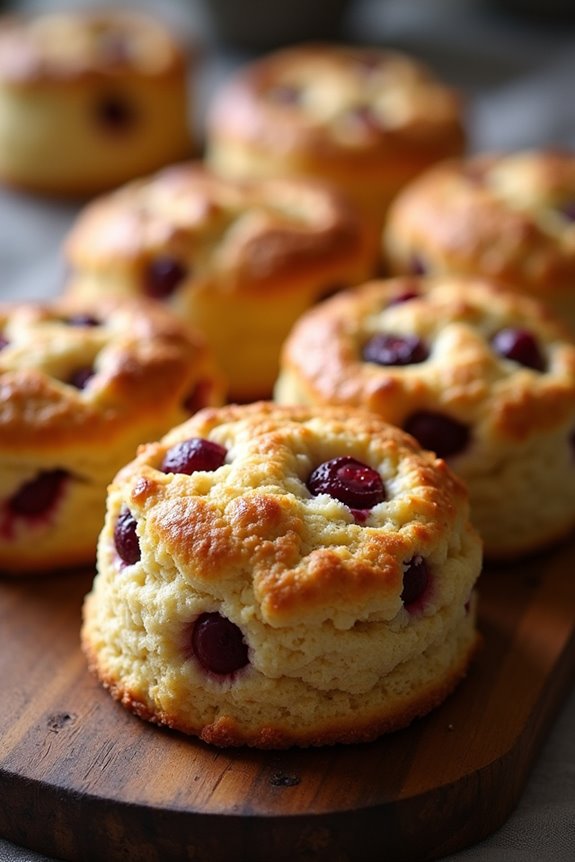
Indulging in a warm, freshly baked scone is one of life’s simple pleasures, and when it comes to sumptuous fruit scones, the experience is elevated even further. These delightful treats are perfect for afternoon tea or as a sweet snack throughout the day. Made with a rich buttery dough and studded with plump fruits, they offer a perfectly balanced flavor that pairs beautifully with clotted cream and jam.
With a crumbly texture and a golden crust, these scones are sure to impress family and friends alike. The beauty of fruit scones lies in their versatility. You can choose your favorite fruits, whether it be juicy raisins, tart cranberries, or sweet blueberries, to customize the recipe to your liking.
They’re easy to prepare, making them an approachable baking project even for novice bakers. Once you master the basic technique, feel free to experiment with different flavor combinations and additions, such as lemon zest or spices, to create your own signature scone.
Ingredients (Serves 4-6)
- 225g all-purpose flour
- 1 tablespoon baking powder
- 50g unsalted butter, chilled and cubed
- 30g granulated sugar
- 150ml milk
- 1 large egg
- 100g mixed dried fruits (e.g. raisins, currants, cranberries)
- A pinch of salt
Cooking Instructions
- Preheat the Oven: Begin by preheating your oven to 220°C (425°F). This guarantees that the scones will bake evenly and achieve a lovely golden color.
- Mix Dry Ingredients: In a large mixing bowl, combine the all-purpose flour, baking powder, sugar, and salt. Whisk these ingredients together until they’re well mixed.
- Incorporate Butter: Add the chilled, cubed butter to the dry ingredients. Using your fingertips, rub the butter into the flour mixture until it resembles coarse breadcrumbs. This step creates the flaky texture of the scones.
- Add Fruits: Stir in the mixed dried fruits, ensuring they’re evenly distributed throughout the mixture.
- Combine Wet Ingredients: In a separate bowl, whisk together the milk and egg. Make a well in the center of the dry mixture and pour in the wet ingredients. Gently mix until just combined; be careful not to overwork the dough.
- Shape the Dough: Turn the dough out onto a lightly floured surface. Gently knead it a couple of times until it comes together, then pat it into a round shape about 2.5 cm thick.
- Cut the Scones: Use a sharp knife or a round cutter to cut out the scones from the dough. Place them on a baking sheet lined with parchment paper, leaving space between each scone.
- Bake: Bake in the preheated oven for 12-15 minutes or until the scones are golden brown on top. Keep an eye on them to avoid over-baking.
- Cool and Serve: Once baked, remove the scones from the oven and let them cool slightly on a wire rack. Serve them warm with clotted cream and jam for a delightful treat.
Extra Tips
For the best results, make sure all your ingredients are at room temperature before you start baking, as this helps with the mixing process.
When adding the wet ingredients to the dry mixture, be careful not to over-mix; a little lumpiness is okay. If you prefer a sweeter scone, feel free to increase the sugar slightly, and consider adding a sprinkle of sugar on top before baking for a nice finish.
Enjoy your baking adventure with these sumptuous fruit scones!
Irresistible Eton Mess
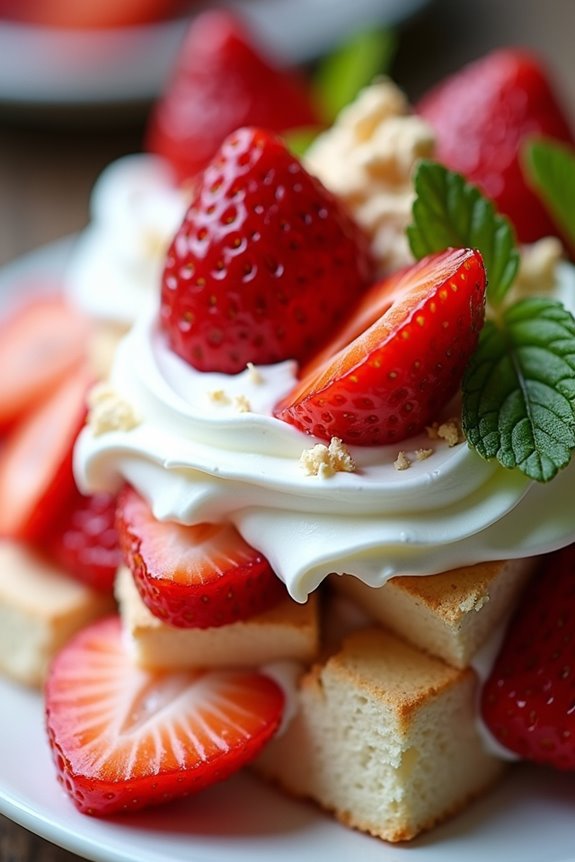
Eton Mess is a classic British dessert that perfectly encapsulates the essence of summer with its light, airy textures and vibrant flavors. Traditionally made with a delightful combination of crushed meringue, fresh strawberries, and whipped cream, this dessert isn’t only simple to prepare but also highly customizable. The contrast of the crunchy meringue, soft whipped cream, and juicy strawberries creates an irresistible treat that’s sure to impress your guests or provide a sweet ending to a family meal.
This dessert is believed to have originated from Eton College, where it was served at the annual cricket match against Harrow School. The beauty of Eton Mess lies in its versatility; while strawberries are the classic choice, feel free to experiment with other berries such as raspberries or blueberries, or even mix in some seasonal fruits. Ready to whip up this delightful dessert? Let’s gather our ingredients and get started!
Ingredients (Serves 4-6)
- 4 large egg whites
- 250g caster sugar
- 600ml double cream
- 1 tsp vanilla extract
- 500g fresh strawberries (hulled and halved)
- 2 tbsp icing sugar (for strawberries)
- Fresh mint leaves (for garnish, optional)
Cooking Instructions
- Preheat the Oven: Begin by preheating your oven to 120°C (250°F). This low temperature is essential for making the meringues, as it allows them to dry out slowly and become crisp without browning.
- Make the Meringue: In a clean, dry mixing bowl, whisk the egg whites until they form stiff peaks. Gradually add the caster sugar, a spoonful at a time, continuing to whisk until the mixture is glossy and the sugar has completely dissolved. This may take about 5-7 minutes.
- Pipe or Spoon Meringue: Line a baking tray with parchment paper. Using a piping bag or a spoon, dollop or pipe the meringue mixture onto the tray in small, rough shapes. Aim for a mix of sizes to create texture in your dessert. Bake in the preheated oven for about 1.5 hours until the meringues are dry and crisp. Once done, turn off the oven and let them cool inside.
- Prepare the Strawberries: While the meringues are baking, place the hulled and halved strawberries in a bowl. Sprinkle them with icing sugar and gently toss to coat. Allow them to sit for about 30 minutes, which will draw out their juices and enhance their sweetness.
- Whip the Cream: In a separate bowl, use an electric mixer to whip the double cream and vanilla extract until soft peaks form. Be careful not to over-whip, as you want the cream to be smooth and fluffy.
- Assemble the Eton Mess: Once the meringues have cooled, break them into bite-sized pieces. In a large serving bowl or individual glasses, layer the broken meringue, whipped cream, and strawberries. Repeat the layers until all ingredients are used, finishing with a layer of cream and strawberries on top.
- Garnish and Serve: If desired, garnish the top with fresh mint leaves for a pop of color. Serve immediately to enjoy the contrast of textures before the meringues soften.
Extra Tips
For an added twist, consider incorporating other fruits like raspberries or blueberries for a mixed berry Eton Mess. You can also experiment with flavored whipped cream by adding a touch of citrus zest or a splash of liqueur for an adult version.
To make this dessert ahead of time, prepare the meringues and strawberries in advance, and assemble just before serving to maintain the meringue’s crunchiness. Enjoy this delightful dessert fresh for the best experience!
Warm Treacle Tart

Treacle tart is a classic British dessert that combines a sweet and sticky filling with a buttery pastry crust. This indulgent treat is made from golden syrup, breadcrumbs, and lemon juice, which gives it a delightful balance of flavors. Traditionally served warm, treacle tart is often accompanied by clotted cream or a scoop of vanilla ice cream, making it the perfect ending to any meal.
Preparing a warm treacle tart is a lovely way to celebrate British baking heritage. While the recipe may seem simple, the combination of textures and flavors creates a truly comforting dessert that evokes memories of home and hearth.
Whether you’re making this for a family gathering or a cozy night in, this warm treacle tart is sure to satisfy your sweet tooth and impress your guests.
Ingredients (Serves 4-6):
- 225g (8oz) shortcrust pastry (homemade or store-bought)
- 300g (10oz) golden syrup
- 150g (5oz) fresh white breadcrumbs
- 1 medium lemon (zested and juiced)
- 1 large egg
- 1 tablespoon double cream
- A pinch of salt
- Optional: Clotted cream or ice cream for serving
Cooking Instructions:
1. Preheat the Oven: Begin by preheating your oven to 190°C (375°F). This guarantees that your tart will bake evenly and develop a beautifully golden crust.
2. Prepare the Pastry Case: Roll out the shortcrust pastry on a lightly floured surface until it’s about 3mm thick. Carefully line a 23cm (9-inch) tart tin with the pastry, pressing it into the edges and trimming any excess. Prick the base with a fork to prevent bubbling during baking.
3. Blind Bake the Pastry: Line the pastry with baking parchment and fill with baking beans or uncooked rice. Bake in the preheated oven for 15 minutes. This process, known as blind baking, helps to set the pastry and prevent it from becoming soggy.
After 15 minutes, remove the parchment and beans, and return to the oven for an additional 5 minutes until lightly golden.
4. Prepare the Filling: In a saucepan over low heat, combine the golden syrup, breadcrumbs, lemon zest, lemon juice, and a pinch of salt. Stir gently until the mixture is warmed through and well combined.
Remove from heat and allow it to cool slightly before adding the egg and double cream. Mix until smooth.
5. Assemble the Tart: Pour the treacle filling into the pre-baked pastry case, smoothing the top with a spatula. Make sure it’s evenly distributed.
6. Bake the Tart: Place the tart back in the oven and bake for 25-30 minutes, or until the filling is set but still slightly jiggly in the center. The edges should be lightly caramelized and golden.
7. Cool and Serve: Once baked, remove the tart from the oven and let it cool for a few minutes before slicing. Serve warm with clotted cream or a scoop of vanilla ice cream for an extra indulgent treat.
Extra Tips:
When making warm treacle tart, be sure to keep an eye on the baking time to avoid overcooking the filling, as it can become too firm.
If you prefer a more intense lemon flavor, feel free to increase the amount of lemon juice or zest. Additionally, the tart can be made ahead of time and reheated in the oven for a few minutes before serving, making it a convenient option for entertaining.
Enjoy this classic dessert with your loved ones and savor the rich flavors of British baking!