

Picture a cozy setting, filled with delightful treats and warm conversations. British tea time brings to mind classic cucumber sandwiches and the sweet allure of scones with clotted cream. Each recipe offers a taste of tradition, perfect for elevating your next gathering. From fragrant Earl Grey tea-infused shortbread to other charming delights, let’s explore these delicious recipes together.
Classic Cucumber Sandwiches
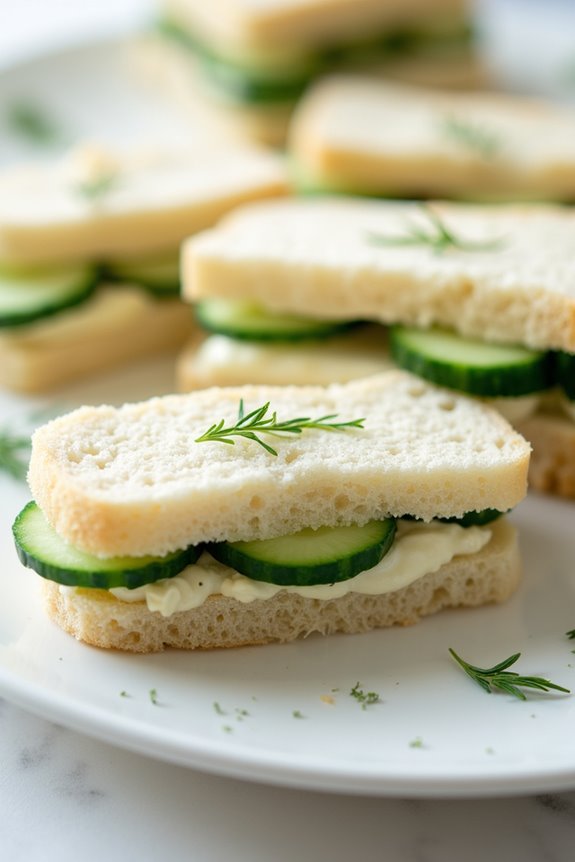
Classic cucumber sandwiches are a quintessential part of British tea time, bringing a revitalizing and delicate touch to the table. These sandwiches are light, easy to prepare, and bursting with flavor, making them an ideal accompaniment to a lovely cup of tea. The combination of crisp cucumbers and creamy spread nestled between soft bread creates a delightful contrast that’s both satisfying and elegant.
Traditionally served with the crusts removed, these sandwiches can be cut into various shapes, including triangles or fingers, making them perfect for afternoon gatherings or special occasions. Their simplicity is part of their charm, and they’re an excellent way to showcase the freshness of the cucumbers. Enjoying these sandwiches with tea isn’t only a delicious treat but also a way to embrace a charming British tradition.
Ingredients (Serves 4-6)
- 1 large cucumber
- 8 slices of white or whole grain bread
- 4 oz (113g) cream cheese
- 2 tbsp unsalted butter, softened
- 1 tbsp fresh dill or mint, chopped (optional)
- Salt and pepper, to taste
- Lemon juice (optional, for a hint of acidity)
Cooking Instructions
1. Prepare the Cucumber: Start by washing the cucumber thoroughly. Using a vegetable peeler, remove the skin if desired, although leaving it on adds color and texture. Slice the cucumber thinly using a sharp knife or a mandoline, aiming for even, delicate slices.
Lay the cucumber slices on a paper towel to absorb excess moisture, preventing the sandwiches from becoming soggy.
2. Make the Spread: In a mixing bowl, combine the cream cheese and softened butter. Using a fork or a spatula, mix them until they’re well blended and creamy. If you’re using fresh herbs like dill or mint, add them to the mixture along with a pinch of salt and pepper.
Optionally, add a few drops of lemon juice for a zesty flavor. Mix until everything is evenly incorporated.
3. Assemble the Sandwiches: Lay out the slices of bread on a clean surface. Spread a generous layer of the cream cheese mixture onto one side of each slice of bread. Make sure to cover the entire surface for maximum flavor.
On half of the slices, layer the cucumber slices evenly and sprinkle a little salt and pepper on top for added seasoning.
4. Complete the Sandwiches: Place the remaining bread slices on top of the ones with the cucumbers, cream cheese side down, to create sandwiches. Gently press down to help them stick together.
5. Trim and Cut: Using a sharp knife, carefully trim off the crusts of each sandwich to create neat edges. Cut each sandwich into quarters or fingers, depending on your preference.
Arrange the sandwiches on a platter for serving.
Extra Tips
When making classic cucumber sandwiches, it’s important to use fresh, firm cucumbers for the best texture and flavor. If the cucumbers are too watery, they can make the sandwiches soggy, so drying the slices is essential.
Additionally, consider letting the cream cheese spread come to room temperature before mixing, as this will make it easier to spread on the bread. For added flair, you can experiment with different types of bread or include other fillings like smoked salmon or sliced radishes for a delightful twist. Enjoy your elegant tea time!
Scones With Clotted Cream and Jam
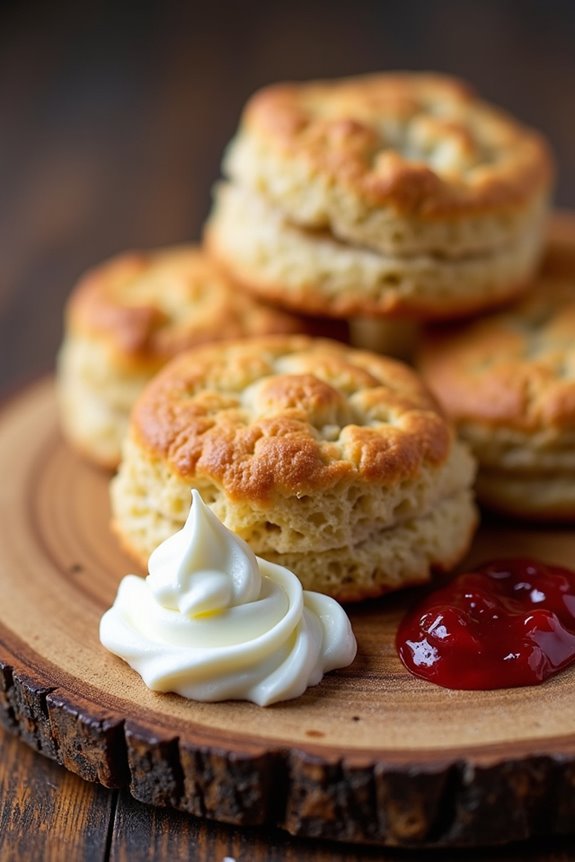
Scones are a quintessential part of British tea time, offering a delightful balance of sweetness and texture that pairs beautifully with clotted cream and jam. Traditionally enjoyed in the afternoon, these light, fluffy treats are perfect for a gathering with friends or a special family occasion. The combination of a warm scone, rich clotted cream, and a dollop of your favorite jam creates a deliciously indulgent experience that’s hard to resist.
The beauty of making scones lies in their simplicity. With just a handful of ingredients and minimal preparation, you can have freshly baked scones ready in no time. They can be served plain or with various add-ins like dried fruit or chocolate chips. Regardless of how you choose to make them, serving scones with clotted cream and jam will surely elevate your tea time to a new level.
Ingredients (serving size: 4-6 people)
- 2 cups all-purpose flour
- 1 tablespoon baking powder
- 1/4 teaspoon salt
- 1/4 cup granulated sugar
- 1/4 cup cold unsalted butter, diced
- 3/4 cup whole milk
- 1 teaspoon vanilla extract
- Clotted cream, for serving
- Jam (strawberry or raspberry), for serving
Instructions
- Preheat the Oven: Begin by preheating your oven to 400°F (200°C). This guarantees that your scones will bake evenly and develop a lovely golden crust.
- Mix Dry Ingredients: In a large mixing bowl, combine the all-purpose flour, baking powder, salt, and sugar. Whisk together until well combined. This step is vital as it distributes the leavening agent evenly throughout the flour.
- Cut in Butter: Add the cold, diced butter to the dry ingredients. Using a pastry cutter or your fingertips, cut the butter into the flour mixture until it resembles coarse crumbs. The small pieces of butter will create flaky layers in the scones as they bake.
- Combine Wet Ingredients: In a separate bowl, mix the whole milk and vanilla extract together. Pour this mixture into the flour and butter mixture. Stir gently with a wooden spoon or spatula until just combined. Be careful not to overmix, as this can make the scones tough.
- Form the Dough: Turn the dough out onto a lightly floured surface. Gently knead the dough a few times to bring it together, then pat it into a circle about 1-inch thick.
- Cut the Scones: Use a floured biscuit cutter or knife to cut the dough into rounds or triangles. Place the scones on a baking sheet lined with parchment paper, leaving some space between each piece to allow for rising.
- Bake: Place the baking sheet in the preheated oven and bake for about 15-20 minutes, or until the scones are golden brown on top. Keep an eye on them during the last few minutes to avoid over-baking.
- Cool and Serve: Once baked, remove the scones from the oven and let them cool slightly on a wire rack. Serve warm with generous dollops of clotted cream and your favorite jam.
Extra Tips
When making scones, it’s important to use cold butter and avoid overworking the dough to maintain their light and fluffy texture. You can experiment with flavors by adding dried fruit like raisins or cranberries, or even zests of citrus for an added twist.
Serve the scones warm for the best experience, and consider pairing them with a nice cup of tea for a classic British tea time treat!
Earl Grey Tea Infused Shortbread
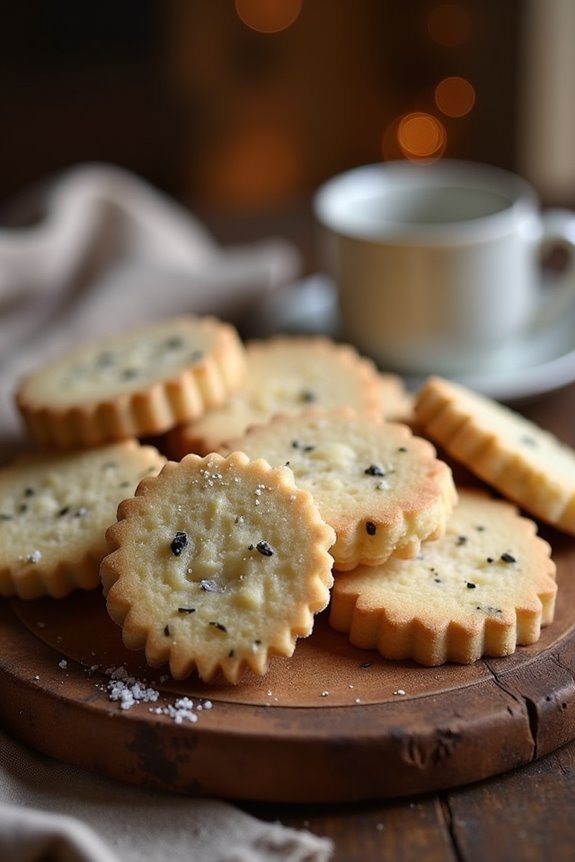
Earl Grey Tea Infused Shortbread is a delightful twist on the classic buttery shortbread, perfect for any tea time. The subtle notes of bergamot from the Earl Grey tea elevate this traditional treat, creating a sophisticated flavor profile that pairs beautifully with a warm cup of tea.
The crumbly texture and rich buttery taste make these cookies irresistible, and they’re sure to impress your guests or simply bring a touch of elegance to your afternoon snack.
Making these shortbread cookies is a straightforward process, ideal for both novice and experienced bakers. With just a handful of ingredients, you can create a batch that will have everyone asking for seconds. The infusion of Earl Grey tea not only adds flavor but also a lovely aroma that fills your kitchen as they bake.
Get ready to enjoy a taste of British tradition with these delightful cookies!
Ingredients (Serves 4-6):
- 1 cup unsalted butter, softened
- ½ cup powdered sugar
- 2 cups all-purpose flour
- 2 tablespoons loose Earl Grey tea leaves
- ¼ teaspoon salt
- 1 teaspoon vanilla extract
Cooking Instructions:
- Preheat the Oven: Begin by preheating your oven to 350°F (175°C). This guarantees that your shortbread will bake evenly and develop a perfect golden color.
- Prepare the Butter Mixture: In a medium-sized bowl, cream together the softened unsalted butter and powdered sugar until the mixture is light and fluffy. This usually takes about 2-3 minutes using an electric mixer or a whisk.
- Incorporate Flavorings: Add the loose Earl Grey tea leaves, salt, and vanilla extract to the butter mixture. Mix until everything is well combined. The tea leaves will break down slightly as you mix, releasing their flavor and aroma.
- Add Flour: Gradually add the all-purpose flour to the butter mixture, mixing until just combined. Be careful not to overwork the dough; it should be soft and slightly crumbly.
- Shape the Dough: Turn the dough out onto a lightly floured surface and shape it into a disk about 1 inch thick. Wrap the dough in plastic wrap and refrigerate for 30 minutes. This chilling step helps the cookies retain their shape during baking.
- Cut into Shapes: After chilling, remove the dough from the refrigerator and roll it out to about ¼ inch thick. Use cookie cutters to cut the dough into your desired shapes, or simply cut it into squares with a knife.
- Bake: Place the shaped cookies onto a parchment-lined baking sheet, spacing them apart. Bake in the preheated oven for 12-15 minutes, or until the edges are lightly golden. Keep an eye on them to avoid overbaking.
- Cool and Serve: Once baked, remove the cookies from the oven and let them cool on the baking sheet for a few minutes before transferring them to a wire rack to cool completely. Enjoy with your favorite tea!
Extra Tips:
To enhance the flavor of your Earl Grey Tea Infused Shortbread, consider using high-quality loose-leaf Earl Grey tea for a more pronounced taste.
Additionally, for a decorative touch, you can sprinkle a little sugar on top of the cookies before baking or drizzle them with a light icing once they’ve cooled.
These cookies can be stored in an airtight container for up to a week, making them a perfect treat to prepare in advance for gatherings or as a special afternoon snack.
Miniature Beef Wellington Bites
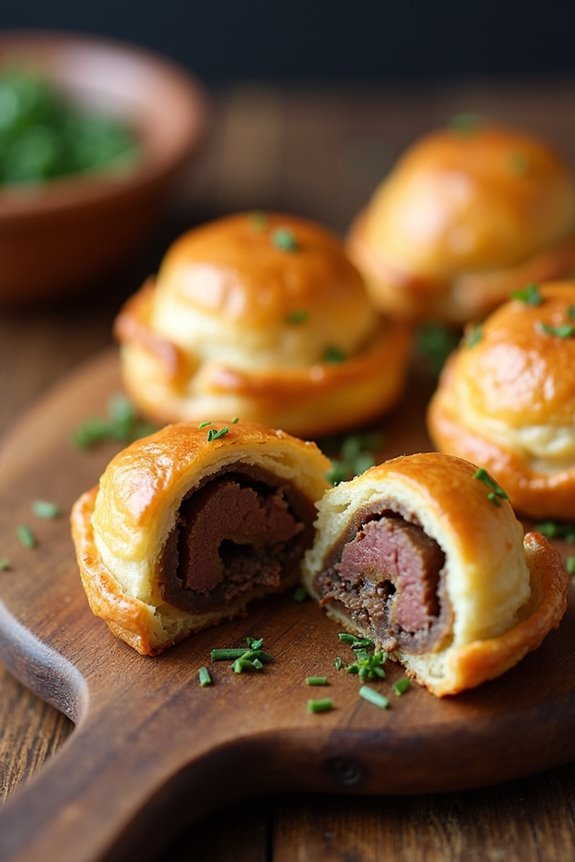
Miniature Beef Wellington Bites are a delightful and elegant addition to any British tea time spread. These bite-sized treats encapsulate the classic flavors of a traditional Beef Wellington, making them perfect for entertaining or simply enjoying a sophisticated snack. The tender beef fillet is enveloped in a rich mushroom duxelles and wrapped in flaky puff pastry, delivering a burst of flavor in every mouthful.
These bites aren’t only delicious but also visually appealing, sure to impress your guests. Preparing these Miniature Beef Wellington Bites is relatively straightforward, making it an excellent option for both novice and experienced cooks. The key is to guarantee that the beef is cooked to perfection and that the pastry is golden and crisp.
Serve them warm with a side of horseradish sauce or a tangy mustard dip for an added kick, and watch as they disappear quickly from the platter!
Ingredients (Serves 4-6):
- 1 pound beef tenderloin, trimmed
- Salt and pepper, to taste
- 2 tablespoons olive oil
- 8 ounces cremini or button mushrooms, finely chopped
- 2 cloves garlic, minced
- 1 tablespoon Dijon mustard
- 1 sheet of puff pastry, thawed
- 1 egg, beaten (for egg wash)
- Fresh thyme leaves, for garnish (optional)
Cooking Instructions:
- Sear the Beef: Season the beef tenderloin with salt and pepper. In a large skillet, heat the olive oil over medium-high heat. Once hot, add the beef and sear for about 2-3 minutes on each side until nicely browned. Remove from the skillet and let it cool. Once cooled, brush the beef with Dijon mustard.
- Prepare the Mushroom Duxelles: In the same skillet, add the chopped mushrooms and garlic. Cook over medium heat, stirring frequently, until the mushrooms release their moisture and become dry (around 8-10 minutes). Remove from heat and let cool slightly.
- Assemble the Bites: Roll out the puff pastry on a lightly floured surface to about 1/8-inch thickness. Cut the pastry into small squares (about 3 inches). Place a spoonful of the mushroom mixture in the center of each pastry square, followed by a piece of the seared beef. Fold the corners of the pastry over the filling to create a pocket, pressing to seal.
- Brush and Bake: Preheat the oven to 400°F (200°C). Place the assembled Wellington bites on a baking sheet lined with parchment paper. Brush the tops with the beaten egg for a golden finish. Bake in the preheated oven for 15-20 minutes, or until the pastry is golden brown.
- Garnish and Serve: Remove from the oven and let cool slightly. If desired, garnish with fresh thyme leaves before serving. Serve warm as an elegant addition to your tea time.
Extra Tips:
For the best results, make sure to use high-quality beef tenderloin and allow it to rest after searing to maintain its juiciness. You can prepare the mushroom duxelles ahead of time, allowing the flavors to meld together beautifully.
Additionally, work quickly with the puff pastry to keep it cold, which helps achieve a flaky texture when baked. If you want to add a bit of flair, consider serving these bites with a homemade dipping sauce or a sprinkle of truffle oil for an elevated taste experience.
Lemon Drizzle Cake
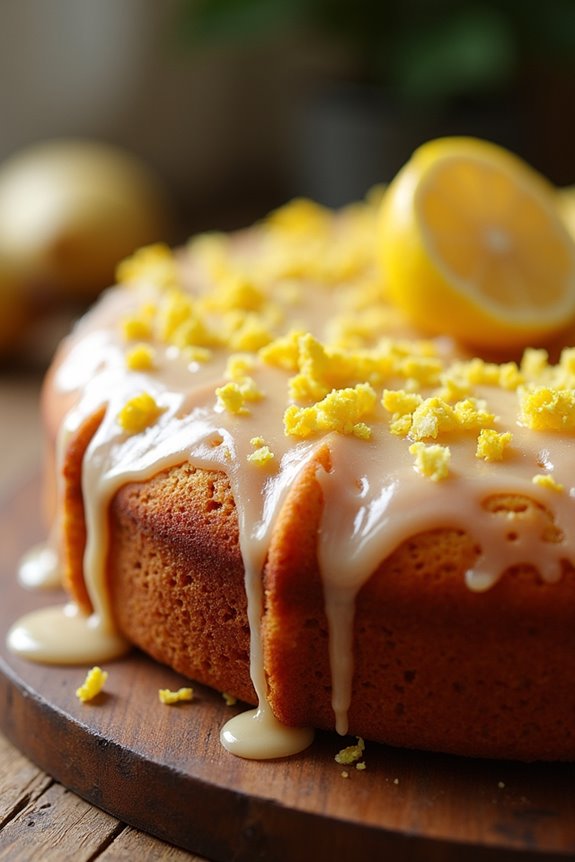
Lemon Drizzle Cake is a quintessential British treat that perfectly complements the afternoon tea experience. This moist, zesty cake is infused with the invigorating flavor of lemons and topped with a sweet and tangy drizzle, making it a delightful addition to any tea time gathering. The combination of a soft sponge and a bright lemon syrup creates a pleasing contrast that will have your guests coming back for seconds.
Making Lemon Drizzle Cake is simple and straightforward, making it an excellent choice for both novice and experienced bakers alike. With just a handful of ingredients and a bit of patience, you can whip up this delicious cake that embodies the spirit of British tea time. Serve it alongside your favorite tea for a truly enjoyable experience.
Ingredients (Serves 4-6):
- 200g unsalted butter, softened
- 200g granulated sugar
- 4 large eggs
- 200g all-purpose flour
- 1 tsp baking powder
- Zest of 2 lemons
- 4 tbsp lemon juice
- 150g icing sugar (for drizzle)
- 2-3 tbsp lemon juice (for drizzle)
Cooking Instructions:
- Preheat the Oven: Begin by preheating your oven to 180°C (350°F). This guarantees that the cake bakes evenly and thoroughly.
- Prepare the Cake Tin: Grease a loaf tin (approximately 2lb capacity) with butter or line it with parchment paper. This will prevent the cake from sticking and make it easier to remove once baked.
- Cream Butter and Sugar: In a large mixing bowl, combine the softened butter and granulated sugar. Using an electric mixer, cream them together until the mixture is light and fluffy. This process incorporates air into the batter, resulting in a lighter cake.
- Add Eggs: Gradually add the eggs to the butter-sugar mixture, one at a time, mixing well after each addition. This helps to create a smooth and homogenous batter without curdling.
- Incorporate Dry Ingredients: Sift the all-purpose flour and baking powder together and add them to the mixing bowl. Mix gently until just combined, being careful not to overmix as this can lead to a dense cake.
- Add Lemon Zest and Juice: Stir in the lemon zest and 4 tablespoons of lemon juice. This will add a zesty citrus flavor to the cake.
- Bake the Cake: Pour the batter into the prepared loaf tin and smooth the top with a spatula. Bake in the preheated oven for approximately 45-50 minutes, or until a skewer inserted into the center comes out clean.
- Prepare the Drizzle: While the cake is baking, prepare the lemon drizzle. In a small bowl, mix the icing sugar with 2-3 tablespoons of lemon juice until smooth. Adjust the amount of lemon juice according to your taste preference – more for a tangier drizzle.
- Cool and Drizzle: Once the cake is baked, remove it from the oven and let it cool in the tin for about 10 minutes. Carefully transfer it to a wire rack to cool completely. Once cooled, poke small holes in the top of the cake with a skewer and pour the lemon drizzle over it, allowing it to soak in.
- Serve and Enjoy: Slice the cake and serve it alongside your favorite tea. Enjoy the delightful combination of flavors!
Extra Tips:
For an even more intense lemon flavor, consider adding a teaspoon of lemon extract to the batter. Additionally, you can garnish the cake with thin slices of lemon or a dusting of icing sugar for an elegant presentation.
This cake can be stored in an airtight container for several days, but it’s best enjoyed fresh for the ultimate taste experience.
Raspberry and Almond Tart
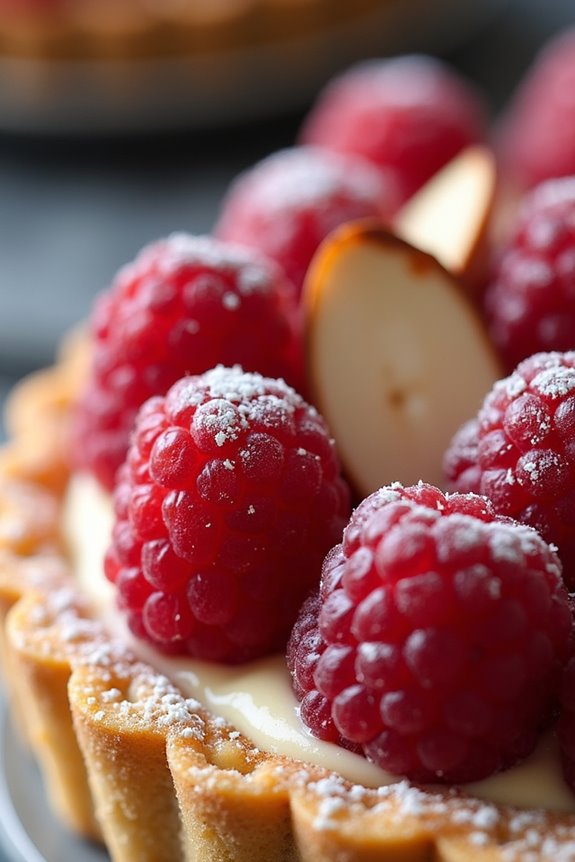
A Raspberry and Almond Tart is a delightful addition to any British tea time, offering a perfect balance of sweet and nutty flavors. This dessert features a buttery almond crust, filled with a rich almond cream and topped with fresh raspberries, making it not only a visual treat but also a delicious one.
The combination of tart berries and sweet almond notes creates a harmonious blend that’s sure to impress your guests. Making this tart is simpler than it seems, and the result is a stunning dish that can be enjoyed warm or chilled.
Whether you serve it with a dollop of whipped cream or a scoop of vanilla ice cream, it’s the perfect ending to a lovely tea party. Let’s explore the recipe so you can bring this exquisite treat to your table for a delightful serving size of 4-6 people.
Ingredients:
- 1 ½ cups all-purpose flour
- ½ cup unsalted butter, softened
- ¼ cup powdered sugar
- 1 large egg yolk
- 1 cup ground almonds (almond meal)
- 1 cup granulated sugar
- 2 large eggs
- 1 teaspoon almond extract
- 1 cup fresh raspberries
- ¼ cup sliced almonds (for topping)
- Powdered sugar (for dusting)
Cooking Instructions:
1. Prepare the Tart Crust: In a mixing bowl, combine the softened butter and powdered sugar. Cream them together until light and fluffy. Gradually mix in the egg yolk, followed by the flour.
Once combined, knead the dough lightly on a floured surface until smooth. Press the dough into a 9-inch tart pan evenly across the bottom and up the sides. Prick the bottom with a fork to prevent bubbling.
2. Pre-bake the Crust: Preheat your oven to 350°F (175°C). Place the prepared tart shell in the oven and bake for about 10-12 minutes, or until lightly golden. Remove from the oven and allow it to cool slightly while you prepare the filling.
3. Make the Almond Cream Filling: In a large bowl, mix the ground almonds and granulated sugar together. Add the eggs one at a time, mixing well after each addition. Stir in the almond extract until all ingredients are well incorporated.
The mixture should be smooth and creamy.
4. Assemble the Tart: Pour the almond cream filling into the pre-baked tart shell, spreading it evenly. Gently press the fresh raspberries into the filling, ensuring they’re evenly distributed. Sprinkle the sliced almonds on top for added crunch and flavor.
5. Bake the Tart: Return the assembled tart to the oven and bake for an additional 25-30 minutes, or until the filling is set and a golden color. Once done, remove from the oven and let cool to room temperature.
6. Serve: Dust the cooled tart with powdered sugar before slicing. Serve it with a dollop of whipped cream or a scoop of vanilla ice cream, if desired.
Extra Tips:
For an even more intense almond flavor, consider toasting the ground almonds before adding them to the mixture. Be cautious not to burn them, as just a light toast will enhance the nuttiness.
Additionally, feel free to experiment by adding other seasonal fruits such as blueberries or sliced peaches for a delightful variation. This tart can also be made a day in advance and refrigerated; just bring it to room temperature before serving for the best taste and texture.
Coronation Chicken Salad Cups
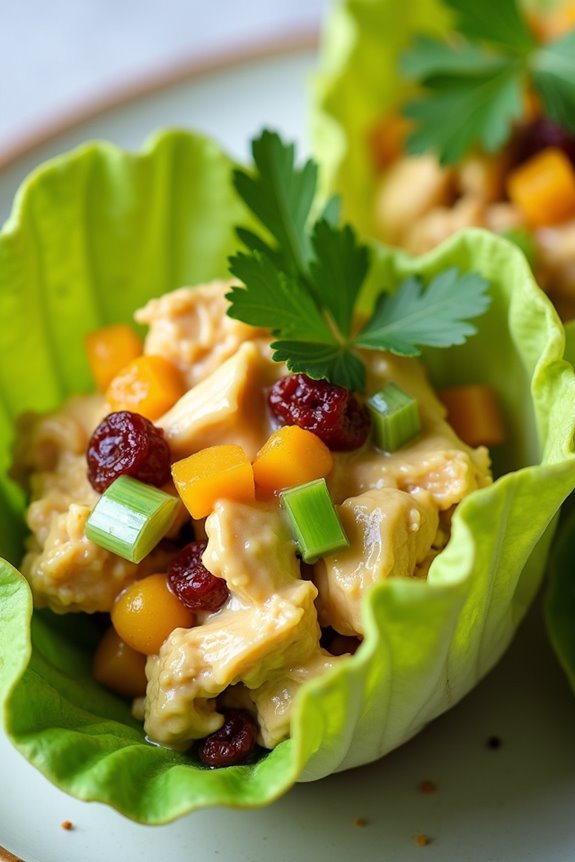
Coronation Chicken Salad Cups are a delightful twist on the classic British dish that combines tender chicken with a rich, creamy curry-flavored sauce. This dish was originally created for the coronation of Queen Elizabeth II in 1953 and has since become a staple at tea times, picnics, and gatherings.
The combination of flavors and textures in this dish makes it not only delicious but also visually appealing when served in crisp lettuce cups or mini pastry shells. These salad cups are perfect for serving at any British tea time or garden party. The aromatic spices, sweet dried fruits, and the crunch of fresh vegetables create a harmonious blend that will tantalize your taste buds.
Preparing Coronation Chicken Salad Cups is straightforward and can be made ahead of time, making it an excellent choice for entertaining guests.
Ingredients (Serves 4-6)
- 2 cups cooked chicken, shredded or diced
- 1/2 cup mayonnaise
- 1/4 cup plain yogurt
- 1 tablespoon curry powder
- 1 tablespoon mango chutney
- 1/4 cup dried apricots, chopped
- 1/4 cup raisins
- 1/4 cup green onions, sliced
- Salt and pepper, to taste
- 1 tablespoon lemon juice
- 1 head of butter lettuce or 12 mini pastry shells
- Fresh cilantro or parsley, for garnish (optional)
Cooking Instructions
- Prepare the Chicken: Begin by shredding or dicing the cooked chicken into bite-sized pieces. You can use leftover roast chicken or poach chicken breasts until they’re fully cooked. Confirm the chicken is cool before mixing it with the other ingredients.
- Make the Dressing: In a large mixing bowl, combine the mayonnaise, yogurt, curry powder, mango chutney, and lemon juice. Whisk the ingredients together until they’re smooth and well blended. Adjust the seasoning with salt and pepper according to your taste.
- Add the Chicken and Fruits: Gently fold the shredded chicken into the dressing mixture. Then, add the chopped dried apricots, raisins, and sliced green onions. Mix everything carefully to confirm the chicken is evenly coated with the creamy dressing and the fruits are well distributed.
- Assemble the Cups: If using lettuce, carefully separate the leaves and wash them. Pat them dry with a paper towel. Spoon the chicken salad mixture into the center of each lettuce leaf to create salad cups. Alternatively, if using mini pastry shells, fill each shell generously with the chicken salad.
- Garnish and Serve: If desired, garnish the filled salad cups with fresh cilantro or parsley for added flavor and color. Arrange the cups on a serving platter and enjoy them immediately or refrigerate until ready to serve.
Extra Tips
When preparing Coronation Chicken Salad Cups, feel free to customize the ingredients to suit your preferences. You can add diced celery for extra crunch or substitute the dried fruits with others like cranberries or raisins.
Additionally, if you prefer a spicier kick, consider adding a pinch of cayenne pepper to the dressing. These salad cups are best served chilled, so make sure to allow them to rest in the refrigerator for at least 30 minutes before serving for peak flavor.
Victoria Sponge Cake
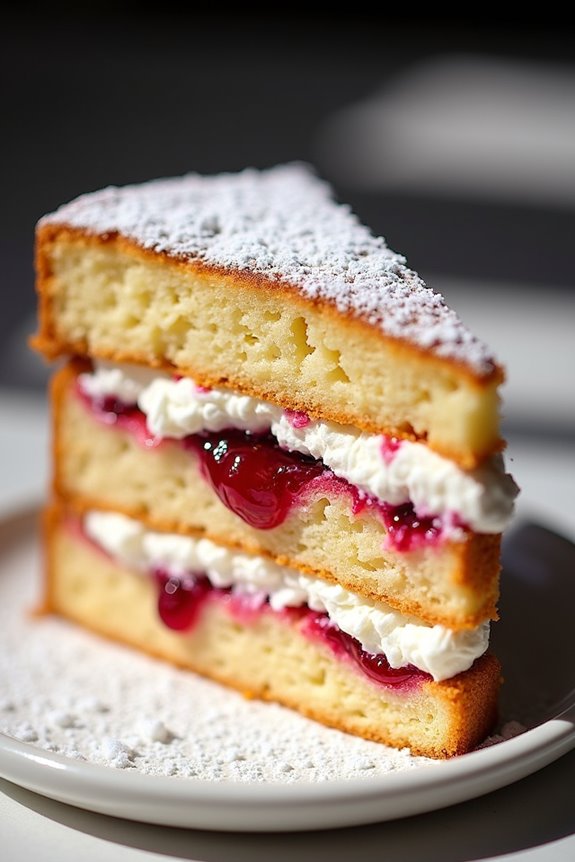
The Victoria Sponge Cake is a quintessential British dessert that has been enjoyed for generations. Named after Queen Victoria, who was known to enjoy a slice with her afternoon tea, this cake is characterized by its light and airy texture, making it a delightful treat for any occasion.
The classic version consists of two layers of soft sponge cake filled with a layer of jam and whipped cream or buttercream, often topped with a dusting of powdered sugar for a beautiful finish.
Baking a Victoria Sponge Cake is a straightforward process that even novice bakers can master. With just a few simple ingredients, you can create a cake that isn’t only delicious but also impressively elegant. The key to achieving the perfect sponge is to guarantee that your butter and sugar are creamed together until light and fluffy, which incorporates air into the mixture and results in a light cake.
Ingredients (Serves 4-6)
- 200g unsalted butter, softened
- 200g caster sugar
- 4 large eggs
- 200g self-raising flour
- 1 tsp baking powder
- 2 tbsp milk
- 100g strawberry or raspberry jam
- 150ml double cream, whipped
- Icing sugar, for dusting
Cooking Instructions
- Preheat the Oven: Begin by preheating your oven to 180°C (350°F). This guarantees that the cake will bake evenly and rise properly once it’s placed in the oven.
- Prepare the Cake Tins: Grease two 20cm (8-inch) round cake tins with butter and line the bottoms with parchment paper. This prevents the cake from sticking and allows for easy removal after baking.
- Cream Butter and Sugar: In a large mixing bowl, combine the softened butter and caster sugar. Using an electric mixer, beat the mixture on medium speed until it becomes pale and fluffy, which should take about 5-7 minutes. This step is essential for incorporating air into the batter.
- Add Eggs: Crack the eggs into a separate bowl and beat them lightly before adding them to the creamed mixture, one at a time. Mix well after each addition to guarantee that the eggs are fully incorporated.
- Incorporate Dry Ingredients: Sift the self-raising flour and baking powder over the mixture and gently fold it in using a spatula or wooden spoon. Be careful not to overmix, as this can lead to a dense cake.
- Add Milk: Pour in the milk and fold it into the batter until just combined. The milk helps to achieve a lighter texture in the sponge.
- Divide and Bake: Evenly divide the batter between the prepared cake tins. Smooth the tops with a spatula, then place them in the preheated oven. Bake for 20-25 minutes or until a skewer inserted in the center comes out clean.
- Cool the Cakes: Once baked, remove the cakes from the oven and allow them to cool in the tins for about 10 minutes. Then, carefully turn them out onto a wire rack to cool completely.
- Assemble the Cake: Once the cakes are completely cool, place one layer on a serving plate. Spread the jam over the top, and then add the whipped cream. Place the second layer on top and gently press down.
- Finish: Dust the top of the cake with icing sugar for a classic finish. Slice and serve with your favorite cup of tea!
Extra Tips
For the best results, make sure all your ingredients are at room temperature before you start baking. This includes the butter, eggs, and milk, as it helps them to combine more easily and creates a smoother batter.
Additionally, for a twist on the classic Victoria Sponge, consider adding some fresh berries between the layers or infusing the cream with a bit of vanilla extract for added flavor. Enjoy your delightful creation with a cup of tea for the perfect British tea time experience!
Cheese and Chive Biscuits

Cheese and Chive Biscuits are a delightful addition to any British tea time spread. These savory treats combine the rich, buttery flavor of cheese with the fresh, herbaceous notes of chives, making them a perfect pairing for your favorite tea.
Light and fluffy, these biscuits aren’t only delicious but also incredibly easy to prepare, allowing you to enjoy a taste of British tradition right in your own home. Ideal for serving between 4 to 6 people, these biscuits can be enjoyed warm or at room temperature.
They’re versatile enough to be served as part of a larger tea time array or as a standalone snack. With their crisp exterior and tender interior, Cheese and Chive Biscuits are sure to impress your guests and become a staple in your tea time repertoire.
Ingredients:
- 225g all-purpose flour
- 1 tablespoon baking powder
- 1/2 teaspoon salt
- 75g unsalted butter, chilled and cubed
- 100g cheddar cheese, grated
- 3 tablespoons fresh chives, finely chopped
- 150ml milk
- 1 egg, beaten (for egg wash)
Cooking Instructions:
- Preheat the Oven: Begin by preheating your oven to 200°C (400°F). This guarantees that your biscuits will bake evenly and achieve a lovely golden color.
- Prepare the Dry Ingredients: In a large mixing bowl, sift together the all-purpose flour, baking powder, and salt. This step not only combines the ingredients but also aerates the flour, leading to lighter biscuits.
- Incorporate the Butter: Add the chilled and cubed unsalted butter to the flour mixture. Using your fingertips, rub the butter into the flour until the mixture resembles coarse breadcrumbs. This process creates a flaky texture in the biscuits.
- Add Cheese and Chives: Stir in the grated cheddar cheese and finely chopped chives into the flour-butter mixture. Confirm that they’re evenly distributed throughout the mixture for consistent flavor in every bite.
- Combine with Milk: Pour in the milk gradually, mixing gently until the dough just comes together. Be careful not to overmix; you want the dough to be moist but still slightly sticky.
- Shape the Biscuits: Turn the dough out onto a lightly floured surface. Gently knead the dough a couple of times to bring it together, then roll it out to a thickness of about 2.5cm (1 inch). Use a round cutter to cut out the biscuits, placing them on a baking sheet lined with parchment paper.
- Apply Egg Wash: Brush the tops of the biscuits with the beaten egg. This will give them a beautiful, glossy finish once baked.
- Bake: Place the baking sheet in the preheated oven and bake for 12-15 minutes or until the biscuits are golden brown and risen. Keep an eye on them to confirm they don’t overbake.
- Cool and Serve: Once baked, remove the biscuits from the oven and transfer them to a wire rack to cool slightly before serving. Enjoy them warm or at room temperature.
Extra Tips:
For the best results, use a sharp cheddar cheese to enhance the flavor of your biscuits. If you prefer a bit of a kick, consider adding a pinch of cayenne pepper or some finely chopped jalapeños.
These biscuits are best enjoyed fresh, but if you have leftovers, store them in an airtight container at room temperature for up to two days. You can also reheat them in the oven for a few minutes to regain their crispness before serving.
Fruit and Nut Tea Loaf

Fruit and Nut Tea Loaf is a delightful British classic that embodies the essence of tea time. This moist, flavorful loaf is packed with dried fruits and nuts, making it a perfect accompaniment to a steaming cup of tea. The combination of rich flavors and textures will transport you to a quaint English tearoom with every bite.
Whether enjoyed as a snack or a dessert, this recipe is bound to become a favorite in your home. The beauty of Fruit and Nut Tea Loaf lies in its simplicity. It requires minimal ingredients and straightforward preparation, making it an accessible treat for both novice and seasoned bakers alike.
The loaf can be made ahead of time and keeps well, allowing you to savor its delightful flavors over multiple tea sessions. Follow this recipe to create a scrumptious loaf that will impress your guests and family during your next tea time gathering.
Ingredients (serves 4-6):
- 200g mixed dried fruits (such as raisins, sultanas, and currants)
- 100g mixed nuts (such as walnuts and almonds), roughly chopped
- 250ml hot tea (black or herbal)
- 150g brown sugar
- 1 large egg
- 200g all-purpose flour
- 1 tsp baking powder
- 1 tsp ground cinnamon
- ½ tsp salt
- 50g unsalted butter, melted
- Zest of 1 lemon
Instructions:
- Prepare the Dried Fruits: Begin by placing the mixed dried fruits in a bowl and pouring the hot tea over them. Allow them to soak for about 30 minutes. This will help to plump the fruits and infuse them with flavor, resulting in a moist loaf.
- Preheat the Oven: Preheat your oven to 160°C (320°F). Grease and line a loaf tin with parchment paper to prevent the loaf from sticking and to guarantee easy removal after baking.
- Mix Wet Ingredients: In a large mixing bowl, combine the soaked dried fruits (with the tea), brown sugar, and melted butter. Stir the mixture until well combined. Then, add the egg and lemon zest, mixing thoroughly until the egg is fully incorporated.
- Combine Dry Ingredients: In a separate bowl, whisk together the all-purpose flour, baking powder, ground cinnamon, and salt. This helps to evenly distribute the leavening agent and spices throughout the dry ingredients.
- Combine Wet and Dry Mixtures: Gradually fold the dry ingredients into the wet mixture using a spatula or wooden spoon. Be careful not to overmix; you want to combine them until just blended.
- Add Nuts: Gently fold in the chopped mixed nuts until they’re evenly distributed throughout the batter. This will add a lovely crunch and flavor to your loaf.
- Bake the Loaf: Pour the batter into the prepared loaf tin, smoothing the top with the back of a spoon. Bake in the preheated oven for 50-60 minutes or until a skewer inserted into the center comes out clean. Keep an eye on it, as baking times may vary.
- Cool and Serve: Once baked, remove the loaf from the oven and let it cool in the tin for about 10 minutes before transferring it to a wire rack to cool completely. Slice and serve with a cup of tea.
Extra Tips:
For added flavor, consider using flavored tea such as Earl Grey or chai when soaking the dried fruits. You can also experiment with different combinations of fruits and nuts according to your preference.
If you prefer a sweeter loaf, feel free to increase the amount of sugar slightly. To enhance the loaf’s shelf life, wrap it in parchment paper and store it in an airtight container. This will keep it moist and delicious for several days.
Chocolate Dipped Biscotti
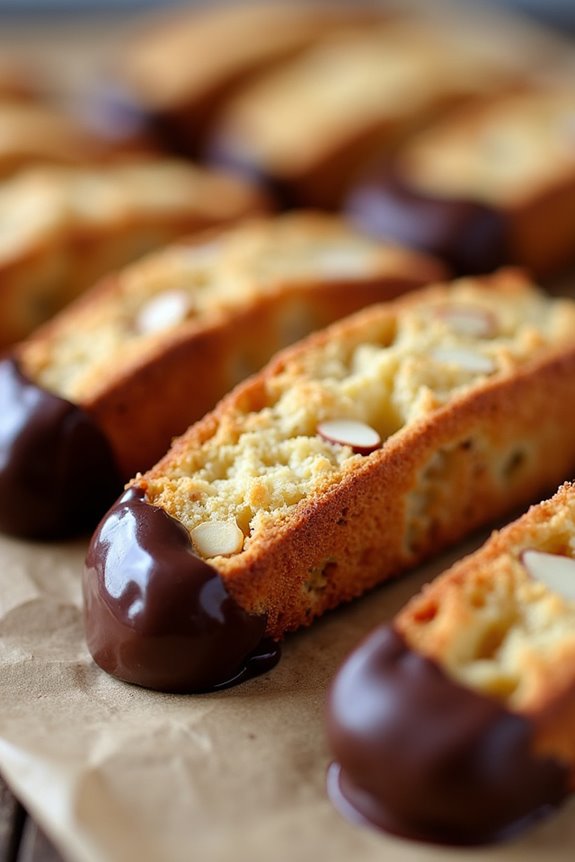
Biscotti, a traditional Italian cookie, has become a beloved treat at British tea time, especially when paired with a steaming cup of tea. These twice-baked cookies are known for their crunchy texture and delightful flavors. The added touch of chocolate makes them a decadent choice that elevates any tea experience.
Whether you enjoy them plain or dipped in rich chocolate, these biscotti are sure to impress your guests and enhance your afternoon tea.
Making chocolate dipped biscotti is a straightforward process that rewards you with a deliciously crunchy cookie that’s perfect for dipping. The combination of almonds and chocolate creates a delightful contrast in taste and texture, making these biscotti an irresistible treat. This recipe yields 4-6 servings, so you can share them with friends and family or indulge in a few yourself.
Ingredients:
- 1 cup all-purpose flour
- 1 cup almond flour
- 1 teaspoon baking powder
- 1/4 teaspoon salt
- 1/2 cup granulated sugar
- 2 large eggs
- 1 teaspoon vanilla extract
- 1/2 cup sliced almonds
- 1 cup dark chocolate chips (for dipping)
- 1 tablespoon coconut oil (optional, for smooth melting)
Cooking Instructions:
- Preheat the Oven: Preheat your oven to 350°F (175°C). Prepare a baking sheet by lining it with parchment paper. This will prevent the biscotti from sticking and make for easier cleanup.
- Mix Dry Ingredients: In a bowl, whisk together the all-purpose flour, almond flour, baking powder, and salt. This guarantees that the leavening agent is evenly distributed throughout the flour, which is important for the biscotti to rise properly.
- Combine Wet Ingredients: In a separate bowl, beat together the granulated sugar, eggs, and vanilla extract until well combined. The mixture should be light and slightly frothy, which helps incorporate air for a lighter texture in the biscotti.
- Combine Wet and Dry Mixtures: Gradually add the dry flour mixture to the wet ingredients, stirring until just combined. Be careful not to overmix, as this can make the biscotti tough. Gently fold in the sliced almonds to add a delightful crunch.
- Shape the Dough: On a lightly floured surface, divide the dough in half and shape each half into a log about 12 inches long and 3 inches wide. Place the logs on the prepared baking sheet, leaving space between them as they’ll expand during baking.
- First Bake: Bake the logs in the preheated oven for 25-30 minutes, or until they’re golden brown. The logs should be firm to the touch. Remove them from the oven and allow them to cool for about 10 minutes.
- Slice the Biscotti: Once the logs have cooled slightly, use a sharp knife to slice them diagonally into 1-inch thick pieces. The angle creates a larger surface area for dipping and enhances the presentation.
- Second Bake: Place the sliced biscotti back on the baking sheet, cut side up, and bake for an additional 10-15 minutes, or until they’re dry and crisp. Keep an eye on them to avoid burning, as the biscotti can brown quickly.
- Prepare Chocolate Dip: While the biscotti cools, melt the dark chocolate chips in a microwave-safe bowl, adding coconut oil if desired for a smoother consistency. Heat in 30-second intervals, stirring in between, until fully melted.
- Dip Biscotti: Once the biscotti are completely cooled, dip the ends in the melted chocolate, allowing the excess to drip off. Place the dipped biscotti on parchment paper to set.
- Let Set: Allow the chocolate to harden completely at room temperature or in the refrigerator for faster setting.
Extra Tips:
When making chocolate dipped biscotti, consider varying the mix-ins to suit your taste. You can add dried fruits like cranberries or apricots for a fruity twist, or substitute different nuts if you prefer.
For an extra touch, sprinkle sea salt on the chocolate before it sets for a delightful contrast of flavors. Store your biscotti in an airtight container to keep them fresh and crunchy for up to two weeks, and they can even be frozen for longer storage. Enjoy your homemade chocolate dipped biscotti with your favorite tea!
Savory Spinach and Feta Quiches

Savory Spinach and Feta Quiches are a delightful addition to any British tea time spread. These mini quiches offer a perfect balance of flavors, combining the earthy taste of fresh spinach with the tangy richness of feta cheese.
They’re easy to prepare and can be served warm or at room temperature, making them ideal for gatherings or as a light snack. These quiches aren’t only delicious but also visually appealing, with their golden crust and vibrant green filling.
This recipe is designed to serve 4-6 people, making it perfect for a small gathering or family brunch. You can customize the filling by adding other ingredients such as sun-dried tomatoes or herbs to augment the flavor profile.
Whether you enjoy them with a cup of tea or as part of a larger meal, these Savory Spinach and Feta Quiches are sure to impress your guests and satisfy your taste buds.
Ingredients
- 1 pre-made shortcrust pastry (for a 9-inch tart)
- 200g fresh spinach, washed and chopped
- 150g feta cheese, crumbled
- 3 large eggs
- 200ml heavy cream
- 1 small onion, finely chopped
- 2 cloves garlic, minced
- Salt and pepper to taste
- Olive oil for cooking
- Optional: Fresh herbs (such as dill or parsley) for garnish
Cooking Instructions
1. Preheat the Oven: Begin by preheating your oven to 180°C (350°F). This guarantees that your quiches will bake evenly and achieve a golden-brown crust.
2. Prepare the Pastry Shell: Roll out the pre-made shortcrust pastry on a floured surface, then carefully fit it into a 9-inch tart pan. Trim off any excess pastry hanging over the edges. Prick the base with a fork to prevent it from puffing up during baking.
3. Blind Bake the Pastry: Line the pastry shell with parchment paper and fill it with baking beans or rice. Bake in the preheated oven for about 15 minutes. After that, remove the parchment paper and beans, and bake for an additional 5 minutes until the base is lightly golden. Set aside to cool slightly.
4. Sauté the Vegetables: In a skillet, heat a tablespoon of olive oil over medium heat. Add the finely chopped onion and minced garlic, and sauté until they’re soft and translucent, about 3-4 minutes.
Then add the chopped spinach and cook until wilted, about 2-3 minutes. Remove from heat and let it cool.
5. Prepare the Filling: In a mixing bowl, whisk together the eggs and heavy cream until well combined. Stir in the crumbled feta cheese, the sautéed spinach mixture, and season with salt and pepper to taste.
Mix until all ingredients are evenly incorporated.
6. Fill the Pastry Shell: Pour the spinach and feta filling into the pre-baked pastry shell, spreading it evenly. Make sure it’s filled to the top without overflowing.
7. Bake the Quiches: Place the filled quiche back in the oven and bake for 25-30 minutes or until the filling is set and the top is lightly golden. A toothpick inserted in the center should come out clean.
8. Cool and Serve: Once baked, remove the quiche from the oven and allow it to cool for a few minutes before slicing. Garnish with fresh herbs if desired, and serve warm or at room temperature.
Extra Tips
To elevate the flavors of your Savory Spinach and Feta Quiches, consider adding a pinch of nutmeg to the egg and cream mixture for a warm, aromatic touch.
You can also experiment with different types of cheese, such as goat cheese or cheddar, for a unique twist. For added texture, try incorporating some pine nuts or chopped walnuts into the filling.
Finally, these quiches can be made ahead of time and stored in the refrigerator, making them a convenient option for busy days. Enjoy your baking!