

As the holiday season approaches, I find myself reminiscing about the cozy charm of a thatched cottage in Ireland. The air is filled with the aroma of traditional dishes like warm Irish Soda Bread and rich Beef and Guinness Stew. Each recipe is a celebration of heritage and togetherness. I’m excited to share these delightful creations with you. Let’s start with a festive favorite that’s sure to warm your heart.
Traditional Irish Soda Bread

Traditional Irish Soda Bread is a staple in Irish households, especially during the festive season. This quick bread relies on baking soda as a leavening agent instead of yeast, which makes it easy to prepare and perfect for making fresh bread in a short amount of time. The texture is dense yet tender, and the crust is beautifully golden, often served warm with butter and jam or alongside hearty soups and stews.
This rustic bread has a rich history, with its origins tracing back to the 19th century when baking soda became widely available. The simplicity of the ingredients—flour, baking soda, salt, and buttermilk—reflects the frugality of traditional Irish cooking. As you commence on making this delightful bread, you’ll not only enjoy its delicious taste but also connect with the culinary heritage of Ireland.
Ingredients (Serves 4-6):
- 4 cups all-purpose flour
- 1 teaspoon baking soda
- 1 teaspoon salt
- 1 ½ cups buttermilk
Cooking Instructions:
- Preheat the Oven: Begin by preheating your oven to 425°F (220°C). A hot oven is essential for creating the perfect crust on your soda bread.
- Mix Dry Ingredients: In a large mixing bowl, combine the all-purpose flour, baking soda, and salt. Whisk them together until they’re thoroughly mixed, ensuring an even distribution of the baking soda and salt throughout the flour.
- Form the Dough: Make a well in the center of the dry ingredients and pour in the buttermilk. Using your hands or a wooden spoon, gently mix the ingredients together until a rough dough forms. Be careful not to overwork the dough; it should be soft and slightly sticky.
- Shape the Bread: Turn the dough out onto a lightly floured surface. With floured hands, gently shape the dough into a round loaf. Aim for a thickness of about 1.5 inches.
- Score the Loaf: Using a sharp knife, make a deep cross on the top of the loaf. This scoring allows the bread to expand while baking and adds a decorative touch.
- Bake the Bread: Place the shaped loaf onto a baking sheet lined with parchment paper. Bake in the preheated oven for 25-30 minutes, or until the bread is golden brown and sounds hollow when tapped on the bottom.
- Cool and Serve: Once baked, remove the bread from the oven and allow it to cool on a wire rack for at least 10 minutes before slicing. This cooling period helps the bread finish cooking and improves texture.
Extra Tips:
For an added depth of flavor, consider incorporating a handful of raisins or caraway seeds into the dough during the mixing step. Additionally, make sure your buttermilk is fresh, as it provides the acidity needed to activate the baking soda.
If you don’t have buttermilk on hand, you can easily make a substitute by mixing regular milk with a tablespoon of vinegar or lemon juice and letting it sit for about 5-10 minutes before using. Enjoy your warm soda bread with butter, or pair it with your favorite Irish dishes!
Spiced Irish Mulled Wine
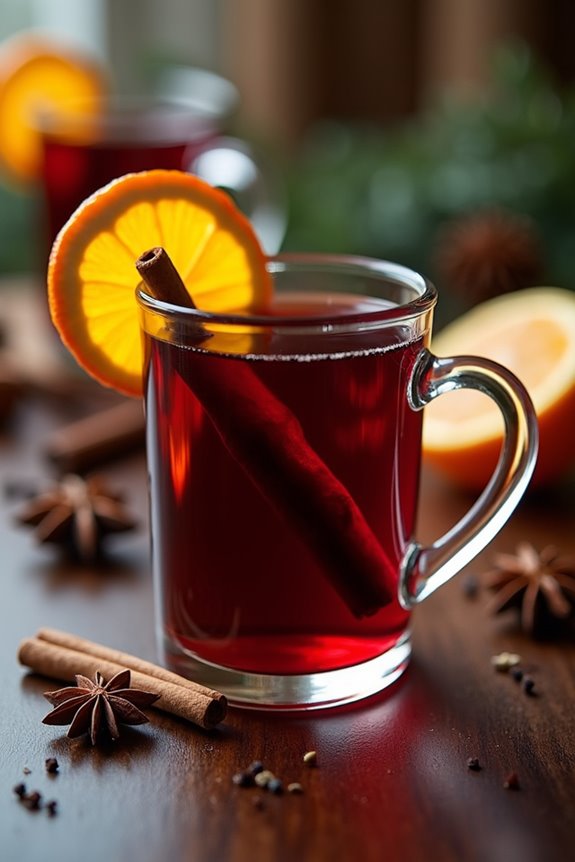
As the chilly winter evenings settle in, there’s nothing quite like a warm and inviting glass of Spiced Irish Mulled Wine to bring a festive spirit to your home. This delightful concoction combines the rich flavors of red wine with aromatic spices, making it a perfect choice for holiday gatherings or a cozy night in.
The essence of this delightful drink lies in its ability to warm not just your body but also your heart, evoking memories of joyous celebrations with family and friends.
To create this traditional Irish drink, you’ll need a blend of spices that are commonly associated with the holiday season, such as cinnamon, cloves, and star anise. These spices infuse the wine with a comforting warmth that’s sure to please your palate.
While the base of the drink is red wine, feel free to experiment with different varieties to find the perfect flavor profile that suits your taste. Enjoy the process of brewing this delightful drink, and let the sweet and spicy aromas fill your kitchen!
Ingredients (serves 4-6 people)
- 1 bottle (750 ml) of red wine (preferably a fruity variety)
- 1 orange, sliced
- 1 lemon, sliced
- 1/4 cup honey or sugar (to taste)
- 2 cinnamon sticks
- 4-6 whole cloves
- 2-3 star anise
- 1/2 teaspoon grated nutmeg
- Optional: 1/2 cup brandy for an extra kick
Cooking Instructions
- Prepare the Fruit: Begin by washing the orange and lemon thoroughly. Slice them into rounds, making certain you have enough pieces to float in the wine later. The citrus not only adds flavor but also brightens the visual appeal of your mulled wine.
- Combine Ingredients in a Pot: In a large saucepan, pour in the bottle of red wine, followed by the sliced orange and lemon. Add the honey or sugar to sweeten the mixture. Start with 1/4 cup and adjust to your taste later.
- Add Spices: Toss in the cinnamon sticks, whole cloves, star anise, and grated nutmeg into the mixture. These spices are essential for creating that warm, spiced aroma characteristic of mulled wine.
- Heat the Mixture: Place the saucepan over low to medium heat. It’s important to gently warm the wine rather than boil it, as boiling can evaporate the alcohol and alter the flavors. Keep a close watch and stir occasionally to guarantee the honey or sugar dissolves completely.
- Simmer: Allow the wine to simmer for about 20-30 minutes. This will give the spices time to infuse their flavors into the wine. Taste it halfway through; if you prefer a sweeter drink, add more honey or sugar as needed.
- Strain and Serve: After simmering, remove the pot from the heat. Use a fine-mesh strainer to pour the mulled wine into a heatproof pitcher or directly into mugs, making sure to strain out the spices and fruit slices.
- Garnish and Enjoy: Optionally, garnish each serving with a fresh slice of orange or a cinnamon stick for a festive touch. Serve warm and enjoy the delightful flavors of your homemade Spiced Irish Mulled Wine!
Extra Tips
When making Spiced Irish Mulled Wine, feel free to customize the recipe to suit your preferences. Experiment with different spices like cardamom or ginger for added depth, or try using different types of wine for varied flavor profiles.
Additionally, if you want to make it a little more decadent, adding a splash of brandy can enhance the warmth and richness of the drink. Keep it warm in a slow cooker for longer gatherings, making sure that your guests can enjoy a comforting cup whenever they desire.
Irish Beef and Guinness Stew
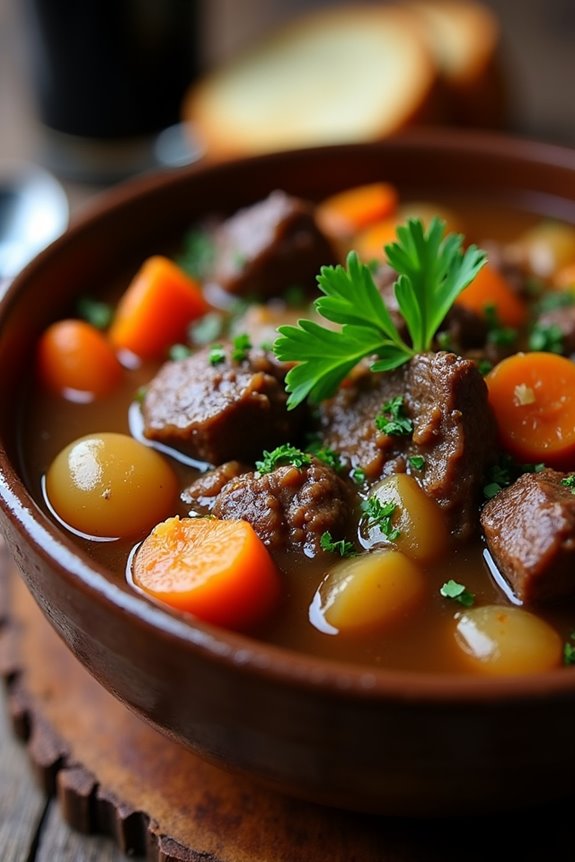
Irish Beef and Guinness Stew is a hearty and flavorful dish that embodies the spirit of Irish cuisine. This comforting stew is perfect for chilly evenings, combining tender beef, rich Guinness stout, and a medley of vegetables. The slow-cooking process allows the flavors to meld beautifully, resulting in a dish that’s both satisfying and soul-warming.
Traditionally served with crusty bread or over creamy mashed potatoes, this stew is a staple in Irish households, especially during the festive season.
To create the perfect Irish Beef and Guinness Stew, you’ll want to choose good quality beef that can withstand long cooking times—chuck or brisket are excellent choices. The addition of Guinness not only enhances the flavor of the beef but also adds a deep, rich color to the stew. As it simmers, the alcohol cooks off while leaving behind a lovely maltiness that complements the savory ingredients.
Gather your family around the table and enjoy this classic dish that brings everyone together.
Ingredients (Serves 4-6):
- 2 lbs beef chuck, cut into 1-inch cubes
- 3 tablespoons vegetable oil
- 2 medium onions, diced
- 3 cloves garlic, minced
- 4 medium carrots, sliced
- 2 medium potatoes, diced
- 2 tablespoons tomato paste
- 1 teaspoon dried thyme
- 1 bay leaf
- 1 bottle (11.2 oz) Guinness stout
- 4 cups beef broth
- Salt and pepper, to taste
- Fresh parsley, chopped (for garnish)
Cooking Instructions:
- Brown the Beef: In a large pot or Dutch oven, heat the vegetable oil over medium-high heat. Season the beef cubes with salt and pepper, then add them to the pot in batches, making sure not to overcrowd. Brown the beef on all sides for about 5-7 minutes until a nice crust forms. Remove the beef from the pot and set aside.
- Sauté the Vegetables: In the same pot, add the diced onions and cook for about 3-4 minutes until they start to soften. Add the minced garlic and cook for an additional minute until fragrant. Stir in the sliced carrots and diced potatoes, cooking for another 5 minutes, allowing the vegetables to absorb some of the beef flavor.
- Add Tomato Paste and Seasonings: Stir in the tomato paste, dried thyme, and bay leaf. Cook everything together for 1-2 minutes to let the flavors meld. This step adds depth to the stew.
- Deglaze with Guinness: Pour in the Guinness stout, scraping the bottom of the pot to release any browned bits. This adds a rich flavor to the stew. Allow the beer to simmer for a couple of minutes to reduce slightly.
- Combine Ingredients: Return the browned beef to the pot and pour in the beef broth. Stir well to combine all ingredients. Bring the mixture to a boil, then reduce the heat to low, cover, and let it simmer for about 2 to 2.5 hours, or until the beef is tender.
- Final Adjustments and Serve: After the cooking time, check the stew for seasoning and adjust with salt and pepper as needed. Remove the bay leaf before serving. Ladle the stew into bowls and garnish with chopped fresh parsley. Serve hot with crusty bread or over mashed potatoes.
Extra Tips:
For an even richer flavor, you can add a tablespoon of Worcestershire sauce to the stew while it simmers. If you prefer a thicker stew, consider adding a cornstarch slurry (1 tablespoon cornstarch mixed with 2 tablespoons of cold water) in the last 30 minutes of cooking.
Additionally, this stew can be made a day in advance; the flavors deepen overnight, making it even more delicious when reheated. Enjoy your Irish Beef and Guinness Stew!
Creamy Colcannon
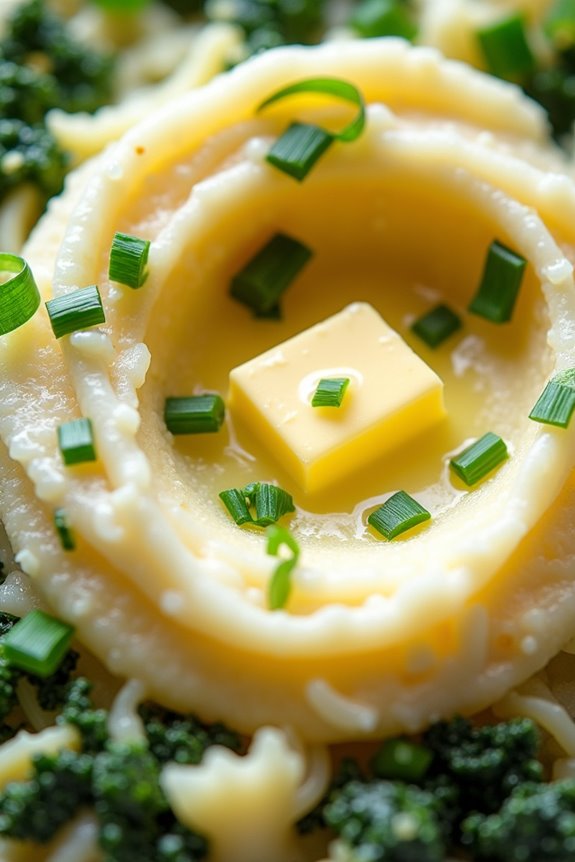
Creamy Colcannon is a traditional Irish dish that combines mashed potatoes with creamy ingredients and vibrant greens, typically kale or cabbage. This comforting recipe is often enjoyed during the festive season, bringing warmth and cheer to holiday tables.
Originating from the rustic kitchens of Ireland, it showcases the simplicity of local ingredients while delivering rich flavors that are certain to please everyone. The blend of fluffy potatoes and tender greens creates a delightful side dish that pairs beautifully with roasts or stews.
In addition to being a staple on Irish Christmas tables, Creamy Colcannon is versatile enough to be enjoyed year-round. The creamy texture and savory taste make it a perfect accompaniment to a variety of meats, or even a hearty meal on its own.
With its vibrant green hues and buttery richness, this dish not only satisfies the palate but also adds a festive touch to your dining experience.
Ingredients (serving size: 4-6 people)
- 2 pounds of potatoes (Yukon Gold or Russet)
- 1 cup of chopped kale or cabbage
- 1/2 cup of heavy cream
- 1/4 cup of unsalted butter
- 1/2 cup of milk
- 1/2 cup of chopped green onions (scallions)
- Salt and pepper to taste
Cooking Instructions
- Prepare the Potatoes: Begin by peeling the potatoes and cutting them into evenly sized chunks. This guarantees they cook uniformly. Place the potatoes in a large pot, cover them with cold water, and add a generous pinch of salt. Bring the pot to a boil over medium-high heat.
- Cook the Greens: While the potatoes are boiling, rinse and chop the kale or cabbage into small pieces. In a separate pot, bring a small amount of water to a boil and add the greens. Cook them for about 3-4 minutes until they’re tender but still vibrant. Drain the greens and set them aside.
- Mash the Potatoes: Once the potatoes are fork-tender (about 15-20 minutes), drain them well and return them to the pot. Using a potato masher or a ricer, mash the potatoes until they’re smooth and creamy.
- Combine Ingredients: In a small saucepan, heat the heavy cream and milk over low heat until warm. Add the butter to the potato mixture, followed by the warmed cream and milk. Mix well until the butter is melted and fully incorporated into the potatoes.
- Add the Greens and Season: Fold in the cooked greens and chopped green onions into the mashed potatoes. Season generously with salt and pepper, adjusting to taste. Mix until everything is well combined and creamy.
- Serve: Transfer the Creamy Colcannon to a serving bowl. For an extra touch, you can create a small well in the center and add a pat of butter to melt on top. Serve hot as a delightful side dish.
Extra Tips
When making Creamy Colcannon, feel free to experiment with the greens you use; both cabbage and kale work wonderfully, but you can also try adding spinach or even a touch of leeks for a different flavor profile.
For added richness, consider using buttermilk instead of regular milk, or even a splash of Irish whiskey in the cream mixture for an authentic twist. Remember to taste as you go, adjusting the seasoning to your liking for the best results. Enjoy your Creamy Colcannon with your favorite holiday main dishes!
Dublin Coddle
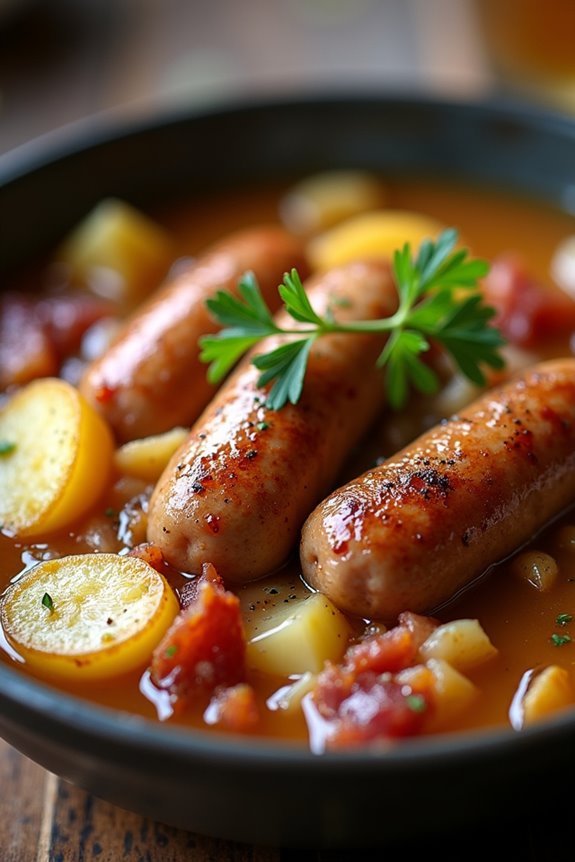
Dublin Coddle is a traditional Irish dish that has been a staple in Dublin households for centuries. Known for its hearty and comforting nature, this dish combines simple ingredients such as sausages, bacon, potatoes, and onions, simmered together to create a rich and flavorful one-pot meal.
Often enjoyed on cold winter evenings, it’s particularly popular during the festive season, making it a perfect addition to your Irish Christmas recipes. This dish not only warms the body but also the soul, as it reflects the essence of Irish cuisine—utilizing humble ingredients to create something truly comforting and satisfying.
While variations of Coddle exist, this classic recipe stays true to its roots. Serve it with crusty bread or Irish soda bread to soak up the delicious broth, and you have a meal that will please the whole family.
Ingredients (Serves 4-6):
- 4 large pork sausages
- 4 slices of bacon or rashers
- 4 large potatoes, peeled and sliced
- 2 large onions, sliced
- 2 cups of chicken or vegetable broth
- 1 teaspoon of fresh thyme (or ½ teaspoon dried thyme)
- Salt and pepper to taste
- Fresh parsley for garnish (optional)
Cooking Instructions:
- Prepare the Ingredients: Start by slicing the potatoes and onions. Peel the potatoes and cut them into even slices to guarantee they cook uniformly. Slice the onions thinly to allow them to caramelize and infuse flavor into the dish.
- Cook the Bacon and Sausages: In a large pot or Dutch oven, cook the bacon over medium heat until it’s crispy. Remove the bacon from the pot and set it aside on a plate, leaving the rendered fat in the pot. Add the sausages to the same pot and brown them on all sides. This step enhances the flavor of the sausages and adds depth to the broth.
- Layer the Ingredients: Once the sausages are browned, remove them from the pot and cut them into thick slices. In the same pot, layer half of the sliced potatoes and onions. Then, add the sliced sausages and crumbled bacon on top. Finally, layer the remaining potatoes and onions on top.
- Add Broth and Seasonings: Pour the chicken or vegetable broth over the layered ingredients, guaranteeing they’re mostly submerged. Sprinkle the thyme, salt, and pepper evenly over the top. The broth won’t only cook the ingredients but also create a delicious sauce that ties everything together.
- Simmer the Coddle: Cover the pot with a lid and bring the mixture to a gentle simmer over medium heat. Once it begins to bubble, reduce the heat to low and let it simmer for about 1 hour. This slow cooking allows the flavors to meld and the potatoes to become tender.
- Serve: Once cooked, check the seasoning and adjust with extra salt or pepper if needed. Ladle the Dublin Coddle into bowls and garnish with fresh parsley if desired. Serve hot with crusty bread for a complete meal.
Extra Tips:
When cooking Dublin Coddle, consider using quality sausages, as they greatly affect the dish’s overall flavor. You can also experiment with adding other vegetables such as carrots or celery to enhance the taste and nutritional value.
For an added depth of flavor, try using a splash of dark beer or cider in the broth. Letting the Coddle sit for a short time after cooking can also allow the flavors to deepen, making it even more delicious when served. Enjoy this authentic Irish dish as a hearty meal that brings warmth and comfort to your holiday celebrations.
Irish Christmas Cake
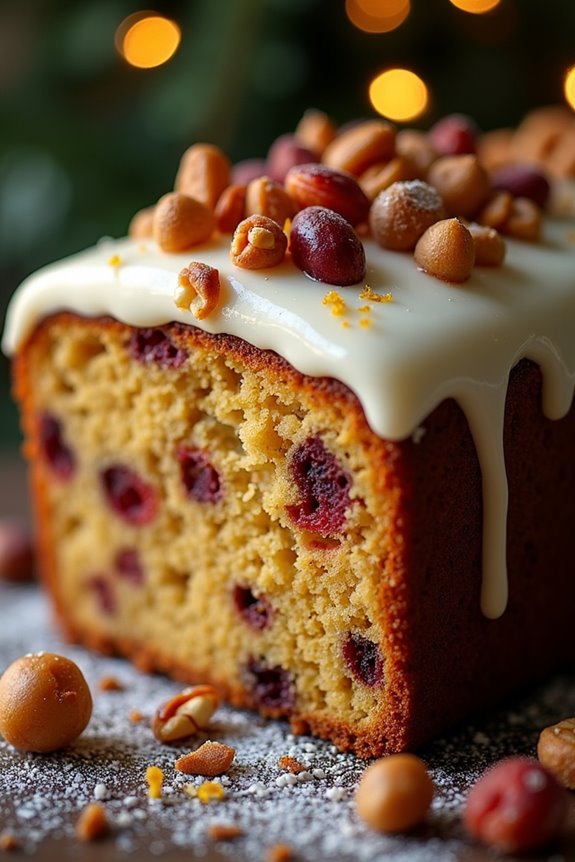
The Irish Christmas Cake is a beloved tradition that brings warmth and joy to the holiday season. This rich, dense fruitcake is packed with a variety of dried fruits, nuts, and spices, creating a delightful medley of flavors that celebrate the spirit of Christmas.
Often adorned with marzipan and royal icing, this cake isn’t only delicious but also visually stunning, making it a centerpiece for any festive table. Preparing this cake can take some time, as it benefits from being made well in advance, allowing the flavors to meld and mature.
As you commence on this baking journey, it’s vital to gather all your ingredients and prepare your baking tools. The process of making an Irish Christmas Cake is both rewarding and enjoyable, with each step bringing you closer to a delicious treat that family and friends will cherish.
Traditionally, the cake is enjoyed on Christmas day, but it can also be a delightful gift or a sweet indulgence throughout the holiday season.
Ingredients (serving size: 4-6 people)
- 8 oz (225 g) mixed dried fruits (raisins, sultanas, currants)
- 4 oz (113 g) chopped dried figs or dates
- 4 oz (113 g) mixed nuts (walnuts, almonds, hazelnuts)
- 1 tsp baking powder
- 1 tsp ground cinnamon
- ½ tsp ground nutmeg
- ½ tsp ground ginger
- 4 oz (113 g) unsalted butter, softened
- 4 oz (113 g) brown sugar
- 2 large eggs
- 1 tbsp treacle or molasses
- 1 oz (28 g) whiskey or brandy (optional)
- 8 oz (225 g) plain flour
- Zest of 1 lemon
- Zest of 1 orange
Cooking Instructions
- Prepare the Fruit and Nuts: Begin by soaking the mixed dried fruits and chopped figs or dates in whiskey or brandy overnight. This step enhances their flavor and keeps them moist. If you prefer not to use alcohol, you can soak them in orange juice instead.
- Preheat the Oven: Preheat your oven to 325°F (160°C). Line an 8-inch (20 cm) round cake tin with baking parchment and grease it well to prevent sticking.
- Mix Dry Ingredients: In a medium bowl, combine the plain flour, baking powder, ground cinnamon, nutmeg, and ginger. Whisk these ingredients together to guarantee they’re evenly distributed.
- Cream Butter and Sugar: In a large mixing bowl, cream together the softened butter and brown sugar until the mixture is light and fluffy. This will take about 3-5 minutes.
- Incorporate Eggs and Treacle: Add the eggs one at a time to the butter-sugar mixture, beating well after each addition. Stir in the treacle or molasses, ensuring everything is well combined.
- Combine Dry and Wet Ingredients: Gradually add the dry ingredient mixture to the wet mixture, stirring gently until just combined. Be cautious not to overmix, as this can make the cake dense.
- Add Fruits and Nuts: Fold in the soaked fruits, chopped nuts, lemon zest, and orange zest into the batter, ensuring they’re evenly distributed throughout the mixture.
- Bake the Cake: Pour the batter into the prepared cake tin and smooth the top with a spatula. Bake in the preheated oven for approximately 1 hour and 15 minutes, or until a skewer inserted into the center comes out clean.
- Cool and Decorate: Once baked, allow the cake to cool in the tin for about 10 minutes, then transfer it to a wire rack to cool completely. Once cooled, you can cover it with marzipan and royal icing if desired.
Extra Tips
When making Irish Christmas Cake, consider wrapping it in parchment paper and storing it in an airtight container to maintain its moisture.
It’s best to prepare the cake several weeks before Christmas to allow the flavors to develop. Additionally, you may brush the cake with whiskey or brandy every week to keep it moist and flavorful.
For an added touch, when decorating, you can personalize the cake with festive designs or even edible glitter for a magical holiday look!
Mince Pies With Irish Whiskey
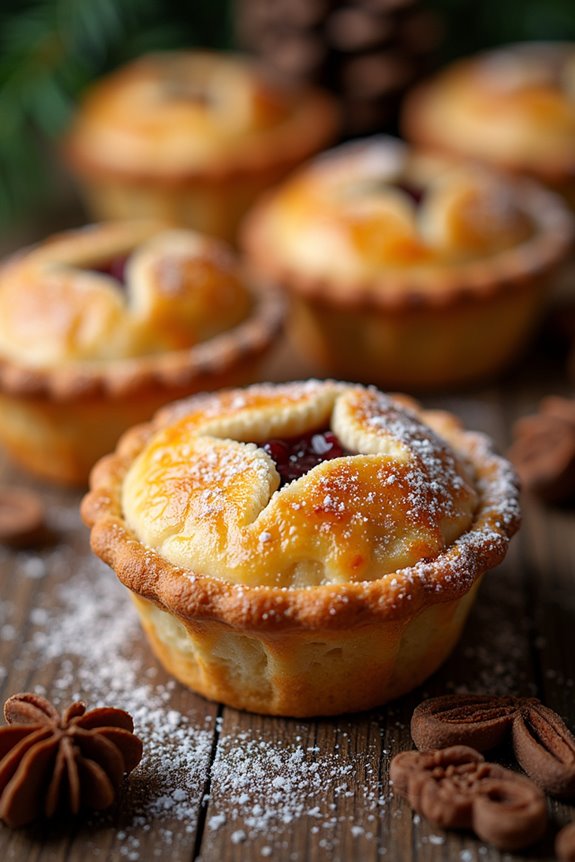
Mince pies are a beloved staple of Irish Christmas traditions, filled with a rich mixture of dried fruits, spices, and a splash of Irish whiskey for an extra depth of flavor. These delightful pastries aren’t only delicious but also evoke a sense of warmth and nostalgia, making them perfect for the festive season.
Preparing mince pies is a wonderful activity to share with family or friends, allowing everyone to get involved in the holiday spirit. The combination of the sweet, spiced filling and the flaky pastry creates a delightful treat that pairs beautifully with a cup of warm mulled wine or a rich cup of tea.
Whether served at a festive gathering or enjoyed as a cozy dessert on a winter’s evening, these mince pies are sure to impress your guests and bring joy to your holiday celebrations.
Ingredients (Serves 4-6):
- 1 cup mixed dried fruit (raisins, currants, sultanas)
- 1/2 cup apple, finely chopped
- 1/4 cup brown sugar
- 1/4 cup Irish whiskey
- 1 teaspoon ground cinnamon
- 1/2 teaspoon ground nutmeg
- 1/4 teaspoon ground cloves
- Zest of 1 lemon
- Zest of 1 orange
- 1 pre-made shortcrust pastry (or homemade)
- 1 egg, beaten (for egg wash)
- Icing sugar, for dusting (optional)
Cooking Instructions:
1. Prepare the Filling: In a medium bowl, combine the mixed dried fruit, chopped apple, brown sugar, Irish whiskey, ground cinnamon, ground nutmeg, ground cloves, lemon zest, and orange zest. Stir the mixture well to ascertain that all the ingredients are evenly distributed and the dried fruit is fully coated in the spices and sugar.
Allow the filling to sit for about 30 minutes to let the flavors meld together.
2. Preheat the Oven: Preheat your oven to 375°F (190°C). This guarantees that the oven is at the right temperature when the pies are ready to bake, resulting in a perfect golden crust.
3. Roll Out the Pastry: On a lightly floured surface, roll out the shortcrust pastry until it’s about 1/8 inch thick. Use a round cutter or a glass to cut out circles of pastry. You’ll need larger circles for the base of the pies and smaller circles for the tops.
4. Assemble the Pies: Grease a muffin tin or pie tin. Place the larger pastry circles into the bottom of each muffin cup, pressing them in gently. Spoon the prepared filling into each pastry base, filling them about 3/4 full.
Take the smaller pastry circles and place them on top of the filling, sealing the edges with your fingers or a fork.
5. Egg Wash: Brush the tops of the pies with the beaten egg to give them a lovely golden shine when baked. You can also make a small slit in the top of each pie to allow steam to escape during baking.
6. Bake: Place the muffin tin in the preheated oven and bake for 20-25 minutes or until the pastry is golden brown. Keep an eye on them to avoid over-baking, as this can lead to a dry filling.
7. Cool and Serve: Once baked, remove the pies from the oven and allow them to cool in the tin for a few minutes. Then, transfer them to a wire rack to cool completely. Dust with icing sugar if desired before serving.
Extra Tips:
When making mince pies, feel free to customize the filling by adding your favorite dried fruits or nuts for added texture and flavor. For an even richer experience, let the filling sit overnight to soak up the whiskey and spices.
Additionally, if you prefer a sweeter pie, you can adjust the amount of brown sugar based on your taste. These pies can be made ahead of time and frozen; just reheat them in the oven when you’re ready to serve!
Baked Salmon With Lemon and Dill
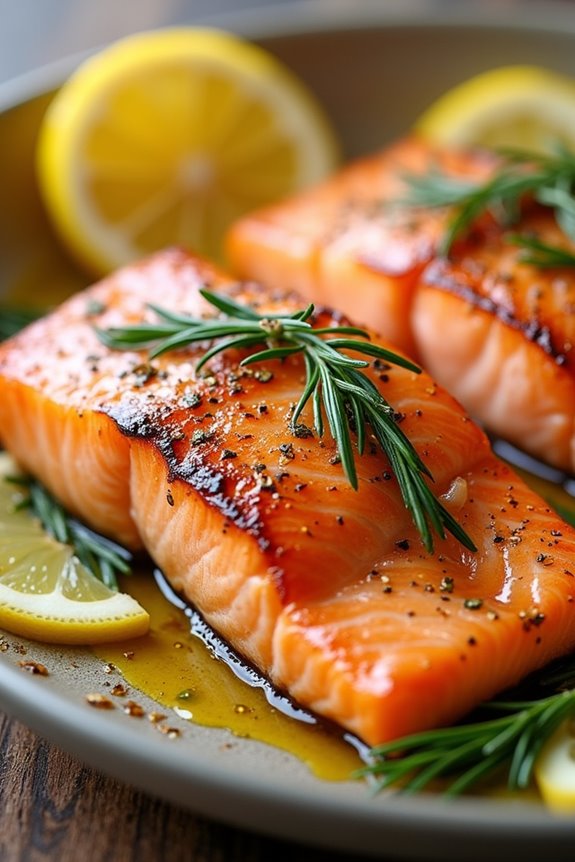
Baked Salmon With Lemon and Dill is a delightful and healthy dish that perfectly captures the essence of an Irish Christmas celebration. This dish not only showcases the fresh flavors of the sea but also brings a bright and zesty twist with the addition of lemon and dill. Ideal for a festive gathering, this recipe is sure to impress your guests while being simple enough for home cooks to master.
The preparation and baking of salmon are straightforward, allowing the natural flavors of the fish to shine through. The lemon adds an invigorating acidity that balances the richness of the salmon, while the dill provides an aromatic herbaceous note that elevates the dish. Whether served as a main course at a holiday dinner or as part of a festive buffet, Baked Salmon With Lemon and Dill is a must-try recipe that embodies the spirit of a joyous Irish Christmas.
Ingredients (Serves 4-6):
- 4-6 salmon fillets (about 6 oz each)
- 2 tablespoons olive oil
- 1 lemon (zested and juiced)
- 1 tablespoon fresh dill (chopped, or 1 teaspoon dried dill)
- 2 cloves garlic (minced)
- Salt and pepper to taste
- Lemon slices (for garnish)
- Fresh dill sprigs (for garnish)
Cooking Instructions:
- Preheat the Oven: Begin by preheating your oven to 375°F (190°C). This guarantees that the salmon will cook evenly and thoroughly, resulting in a perfectly baked dish.
- Prepare the Baking Dish: Lightly grease a baking dish with a bit of olive oil or line it with parchment paper to prevent the salmon from sticking. This step is important for easy cleanup and to maintain the integrity of the fish.
- Mix the Marinade: In a small bowl, combine the olive oil, lemon zest, lemon juice, chopped dill, minced garlic, salt, and pepper. Whisk these ingredients together until well blended. The marinade will infuse the salmon with flavor as it bakes.
- Coat the Salmon: Place the salmon fillets in the prepared baking dish, skin-side down. Pour the marinade over the fillets, ensuring they’re well coated. Let the salmon marinate for about 15-20 minutes at room temperature to absorb the flavors.
- Bake the Salmon: Once marinated, place the baking dish in the preheated oven. Bake the salmon for 15-20 minutes, or until the fish flakes easily with a fork. Cooking time may vary based on the thickness of the fillets, so keep an eye on them.
- Garnish and Serve: Once baked, remove the salmon from the oven and let it rest for a few minutes. Garnish with fresh lemon slices and dill sprigs before serving. This adds a beautiful presentation and enhances the flavors.
Extra Tips:
For the best results, choose high-quality, fresh salmon, as it will greatly impact the flavor of the dish. If you can, opt for wild-caught salmon, which tends to be richer in taste.
Additionally, feel free to experiment with different herbs or spices to personalize the dish. Pairing this salmon with roasted vegetables or a light salad can complement the meal beautifully, making it a well-rounded festive feast.
Potato Farls
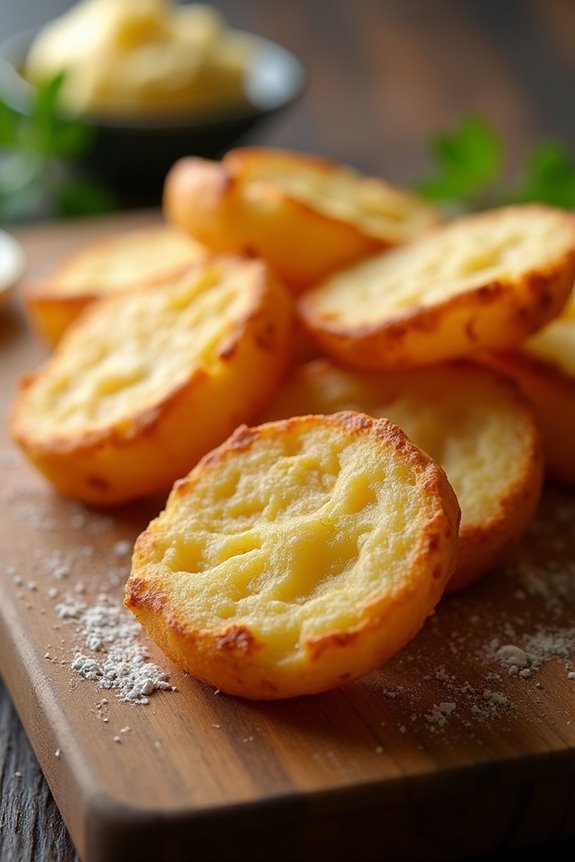
Potato farls are a traditional Irish dish that showcases the humble potato in a delightful form. These flatbreads are made primarily from mashed potatoes and flour, resulting in a tender, slightly crispy exterior that pairs perfectly with breakfast or can be served as a side dish. Often enjoyed with butter, jam, or even a hearty Irish breakfast, potato farls are a comforting addition to any holiday table and are particularly popular during festive occasions.
The beauty of potato farls lies in their simplicity and versatility. They can be made with leftover mashed potatoes, making them an ideal way to reduce waste while creating something delicious. With just a few ingredients and straightforward steps, you can whip up these delightful treats in no time, adding a touch of Irish charm to your Christmas meal or any gathering throughout the year.
Ingredients (Serves 4-6)
- 2 cups of mashed potatoes (preferably cold, leftover)
- 1 cup of all-purpose flour, plus extra for dusting
- 1 teaspoon of baking powder
- 1 teaspoon of salt
- 2 tablespoons of unsalted butter, melted
- 1/4 cup of milk (or more if needed for consistency)
Cooking Instructions
- Prepare the Dough: In a large mixing bowl, combine the cold mashed potatoes, all-purpose flour, baking powder, and salt. Mix well until the ingredients are evenly distributed. The mixture should be fairly dry but still hold together. If necessary, add a bit more flour to achieve the right consistency.
- Incorporate Wet Ingredients: Pour the melted butter and milk into the potato mixture. Stir until the dough starts to come together. If it feels too sticky, sprinkle in a little more flour until it’s manageable. The dough should be soft but not overly sticky.
- Shape the Farls: Transfer the dough onto a floured surface. Gently knead it just for a minute to bring it together, then flatten it into a round disc about 1/2 inch thick. Cut the disc into quarters, creating four wedges. These wedges are your farls.
- Cook the Farls: Heat a skillet or griddle over medium heat. Add a little butter or oil to coat the pan. Place the potato farls on the skillet, cooking for about 5-7 minutes on each side or until golden brown. You may need to adjust the heat to prevent burning. Flip them carefully to guarantee they cook evenly.
- Serve Warm: Once cooked, remove the farls from the skillet and place them on a plate lined with paper towels to absorb any excess grease. Serve them warm with butter, jam, or alongside your favorite breakfast items.
Extra Tips
For the best results, use cold, leftover mashed potatoes, as they hold their shape better and provide a great texture. If you don’t have leftover mashed potatoes, you can boil and mash fresh potatoes, letting them cool before using.
You can also experiment by adding herbs or cheese to the dough for an extra flavor boost. Finally, potato farls can be kept warm in an oven set to low heat if you’re preparing them for a larger gathering. Enjoy your delicious Irish potato farls!
Irish Apple Cake
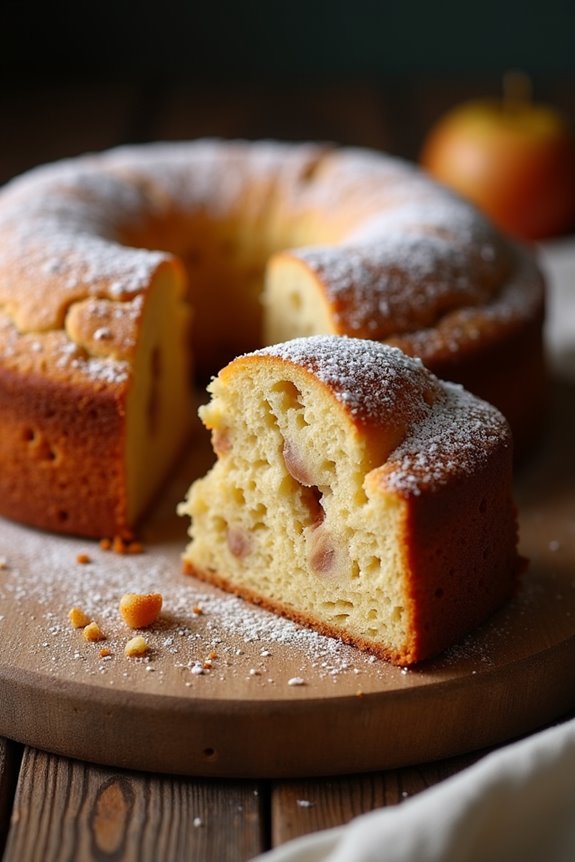
Irish Apple Cake is a delightful dessert that embodies the spirit of traditional Irish baking. This cake is a comforting blend of tart apples and warm spices, making it a perfect treat during the festive season. The soft, moist cake is often served warm, accompanied by a generous dollop of whipped cream or a scoop of vanilla ice cream, making it an irresistible choice for any holiday gathering.
As you initiate making this classic Irish dessert, you’ll appreciate how simple yet satisfying it is. The apples, typically Granny Smith or Bramley, provide a tartness that beautifully balances the sweetness of the cake. Whether you’re sharing it with family around the Christmas table or enjoying it as an afternoon snack, this Irish Apple Cake is sure to become a beloved recipe in your collection.
Ingredients (Serves 4-6):
- 225g (8 oz) all-purpose flour
- 1 tsp baking powder
- 1/2 tsp baking soda
- 1/2 tsp ground cinnamon
- 1/4 tsp ground nutmeg
- 100g (3.5 oz) unsalted butter, softened
- 150g (5.3 oz) granulated sugar
- 2 large eggs
- 150ml (5 fl oz) milk
- 3 medium apples, peeled, cored, and chopped
- Optional: 50g (1.75 oz) raisins or sultanas
- Optional: Icing sugar for dusting
Cooking Instructions:
- Preheat the Oven: Begin by preheating your oven to 180°C (350°F). This guarantees that the cake will bake evenly and rise properly as soon as it goes in.
- Prepare the Baking Dish: Grease and flour a round cake tin (approximately 20cm or 8 inches) to prevent the cake from sticking. You can also line the bottom with parchment paper for added certainty.
- Mix the Dry Ingredients: In a mixing bowl, sift together the flour, baking powder, baking soda, ground cinnamon, and ground nutmeg. This not only combines the ingredients but also aerates the flour, resulting in a lighter cake.
- Cream the Butter and Sugar: In a separate large bowl, beat the softened butter and granulated sugar together until the mixture is light and fluffy. This will take about 3-5 minutes and is vital for incorporating air into your batter.
- Add the Eggs: Add the eggs one at a time, mixing well after each addition. This helps to confirm that the eggs are fully incorporated and contributes to a richer cake.
- Combine the Wet and Dry Ingredients: Gradually add the dry mixture to the creamed butter and sugar, alternating with the milk. Start and finish with the dry ingredients, mixing until just combined to avoid overworking the batter.
- Fold in the Apples and Optional Ingredients: Gently fold in the chopped apples and raisins or sultanas (if using) into the batter. Be careful not to over-mix; you want to keep the apples intact for a lovely texture.
- Pour the Batter into the Tin: Carefully pour the batter into your prepared cake tin, smoothing the top with a spatula to confirm even baking.
- Bake the Cake: Place the cake in the preheated oven and bake for approximately 40-50 minutes, or until a skewer inserted into the center comes out clean. Keep an eye on it to prevent over-browning.
- Cool and Serve: Once baked, remove the cake from the oven and let it cool in the tin for about 10 minutes before transferring it to a wire rack to cool completely. Serve warm with whipped cream or ice cream, and dust with icing sugar if desired.
Extra Tips:
To elevate your Irish Apple Cake, consider experimenting with different types of apples for varied flavors and textures. You can also add a splash of Irish whiskey or vanilla extract to the batter for an extra depth of flavor.
For a festive touch, sprinkle some chopped nuts on top before baking for added crunch. Enjoy your baking, and don’t hesitate to share this warm and comforting cake with loved ones during the holiday season!
Whiskey-Glazed Carrots
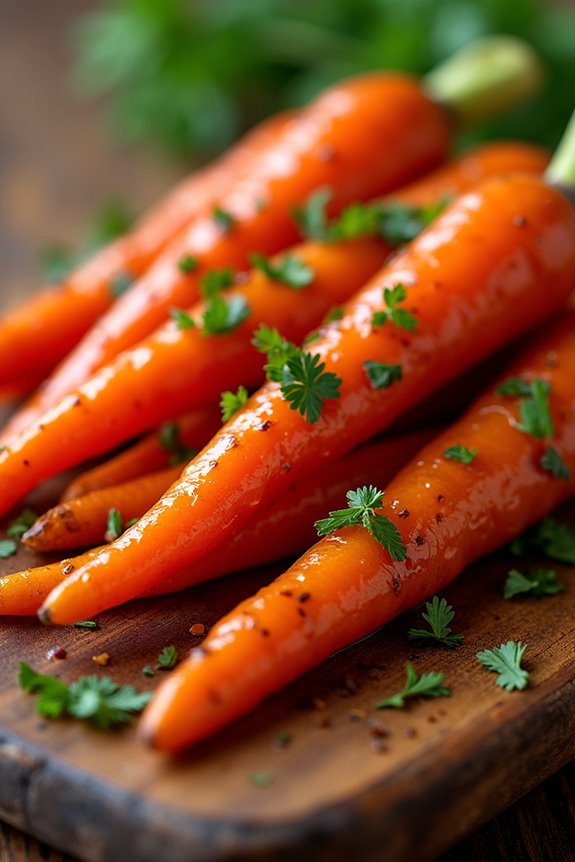
Whiskey-Glazed Carrots are a delightful side dish that brings a touch of Irish flair to your holiday table. The sweet and savory combination of glazed carrots, infused with the warm notes of whiskey, creates a dish that’s as festive as it’s delicious.
Perfect for Christmas gatherings or any special occasion, these carrots not only add a vibrant color to your plate but also a depth of flavor that enhances the overall meal.
The preparation is simple and quick, making it an ideal addition to your holiday cooking repertoire. With just a few ingredients, you can elevate the humble carrot into a gourmet side that will impress your guests.
Whether served alongside roasted meats or vegetarian dishes, Whiskey-Glazed Carrots are sure to become a favorite in your holiday traditions.
Ingredients (Serves 4-6):
- 1 pound baby carrots (or sliced regular carrots)
- 2 tablespoons butter
- 2 tablespoons brown sugar
- 1/4 cup Irish whiskey
- 1/2 teaspoon salt
- 1/4 teaspoon black pepper
- 1 tablespoon chopped fresh parsley (for garnish)
Cooking Instructions:
- Prepare the Carrots: If using regular carrots, peel and slice them into uniform pieces, about 1 inch long. Baby carrots can be used whole, but make sure they’re washed and cleaned thoroughly. This guarantees even cooking and a tender texture.
- Cook the Carrots: In a large saucepan, bring water to a boil. Add the carrots and cook for about 5-7 minutes until they’re just tender but still crisp. Drain the carrots and set aside. Blanching them first helps to maintain their vibrant color and ensure they cook evenly during glazing.
- Make the Whiskey Glaze: In the same saucepan, melt the butter over medium heat. Once melted, add the brown sugar, stirring continuously until it dissolves and the mixture becomes bubbly. This creates a sweet base that will coat the carrots nicely.
- Add Whiskey and Seasonings: Carefully pour in the Irish whiskey, stirring to combine. Be cautious as the mixture may bubble up. Add salt and black pepper to taste. Allow the glaze to simmer for about 2-3 minutes, reducing slightly. This step infuses the flavors and creates a rich glaze.
- Combine Carrots and Glaze: Add the cooked carrots back into the saucepan, tossing them gently to coat them evenly with the whiskey glaze. Cook for an additional 2-3 minutes, stirring occasionally, until the carrots are heated through and fully glazed.
- Serve and Garnish: Transfer the glazed carrots to a serving dish. Sprinkle with freshly chopped parsley for a pop of color and added freshness. Enjoy your Whiskey-Glazed Carrots warm as a perfect festive side dish.
Extra Tips:
For an added layer of flavor, consider incorporating a splash of orange juice or zest into the whiskey glaze for a citrusy twist.
You can also experiment with different types of whiskey for varying flavor profiles. If you prefer a thicker glaze, allow it to simmer a bit longer after adding the whiskey.
Finally, keep an eye on the sweetness; adjust the amount of brown sugar based on your personal preference and the natural sweetness of the carrots. Enjoy your cooking and festive celebrations!
Baileys Irish Cream Cheesecake

Indulging in a Baileys Irish Cream Cheesecake is the perfect way to bring a festive touch to your holiday celebrations. This rich and creamy dessert combines the smooth, velvety flavor of Baileys Irish Cream with a classic cheesecake base, creating an irresistible treat that’s guaranteed to impress your guests.
The combination of chocolate and coffee flavors meld beautifully with the creaminess of the cheesecake, making it a delightful ending to any holiday meal. In addition to its delicious flavor, this cheesecake is relatively easy to prepare, allowing you to focus on enjoying your time with family and friends.
With a buttery graham cracker crust and a luscious filling, the Baileys Irish Cream Cheesecake isn’t only a feast for the palate but also a visual delight. Serve it chilled with a drizzle of chocolate sauce or a sprinkle of cocoa powder for an extra touch of elegance.
Ingredients (Serves 4-6)
- 1 ½ cups graham cracker crumbs
- ½ cup unsalted butter, melted
- 2 cups cream cheese, softened
- 1 cup powdered sugar
- ¾ cup Baileys Irish Cream
- 1 teaspoon vanilla extract
- 2 large eggs
- ½ cup sour cream
- ¼ cup cocoa powder (for dusting, optional)
- Chocolate shavings or curls (for garnish, optional)
Cooking Instructions
1. Prepare the crust: Preheat your oven to 325°F (160°C). In a mixing bowl, combine the graham cracker crumbs and melted butter, mixing until the crumbs are evenly coated. Press the mixture firmly into the bottom of a 9-inch springform pan to create an even layer.
Bake in the preheated oven for about 10 minutes, then remove and allow to cool while you prepare the filling.
2. Make the filling: In a large mixing bowl, beat the softened cream cheese using an electric mixer until smooth and creamy. Gradually add in the powdered sugar, mixing until well combined and fluffy.
Pour in the Baileys Irish Cream and vanilla extract, continuing to beat until everything is incorporated.
3. Add eggs and sour cream: Add the eggs, one at a time, mixing on low speed after each addition until just combined. Be careful not to overmix.
Next, fold in the sour cream gently until the mixture is smooth, making sure there are no lumps.
4. Pour and bake: Pour the cheesecake filling over the cooled crust in the springform pan. Use a spatula to smooth the top if necessary.
Bake in the oven for 50-60 minutes, or until the edges are set and the center has a slight jiggle. Turn off the oven, crack the door open, and let the cheesecake cool in the oven for about an hour to prevent cracking.
5. Chill and serve: Once cooled, cover the cheesecake with plastic wrap and refrigerate for at least 4 hours, preferably overnight.
Before serving, dust the top with cocoa powder if desired, and garnish with chocolate shavings or curls for a festive touch.
Extra Tips
For a creamier texture, make sure your cream cheese is at room temperature before mixing, as this will help to eliminate lumps and guarantee a smooth batter.
Additionally, if you want to enhance the flavor of the cheesecake, consider adding a splash of espresso or coffee liqueur to the filling. When serving, allow the cheesecake to sit at room temperature for about 15 minutes before slicing; this will make it easier to cut and enhance the flavors.
Enjoy this decadent dessert with your loved ones during the holiday season!
Irish Cream Hot Chocolate

Irish Cream Hot Chocolate is a delightful twist on the classic winter beverage that combines rich chocolate with the smooth, velvety flavors of Irish cream liqueur. This indulgent drink is perfect for cozy evenings by the fire or festive gatherings with friends and family.
The luscious combination of cocoa, milk, and Irish cream creates a warming drink that’s both comforting and a little bit decadent. This recipe is easy to prepare and can be enjoyed by everyone, making it a great addition to your holiday celebrations.
Whether you’re hosting a holiday party or simply treating yourself after a long day, Irish Cream Hot Chocolate is bound to bring a smile to your face. The creamy texture and the hint of whiskey make it a truly special treat that’s perfect for the Christmas season.
Ingredients (Serves 4-6)
- 4 cups whole milk
- 1 cup heavy cream
- 1 cup semi-sweet chocolate chips
- 1/2 cup Irish cream liqueur (such as Baileys)
- 1/4 cup unsweetened cocoa powder
- 1/4 cup sugar (adjust to taste)
- 1 teaspoon vanilla extract
- Whipped cream (for topping)
- Chocolate shavings or cocoa powder (for garnish)
Cooking Instructions
1. Heat the Milk and Cream: In a medium saucepan over medium heat, combine the whole milk and heavy cream. Heat the mixture until it’s hot but not boiling, stirring occasionally to prevent scorching.
This step creates a rich base for your hot chocolate.
2. Add the Chocolate: Once the milk and cream are heated, reduce the heat to low, and add the semi-sweet chocolate chips and cocoa powder. Stir continuously until the chocolate is fully melted and the mixture is smooth.
This guarantees that the chocolate is well incorporated and enhances the overall flavor of the hot chocolate.
3. Sweeten the Mixture: Stir in the sugar and vanilla extract, adjusting the sweetness to your preference. Continue stirring until the sugar is completely dissolved.
This step adds a touch of sweetness that balances the richness of the chocolate.
4. Incorporate Irish Cream: Remove the saucepan from the heat and carefully stir in the Irish cream liqueur. This ingredient adds a distinctive flavor that makes the drink special.
Be sure to mix well for an even distribution of flavors.
5. Serve: Pour the hot chocolate into mugs. Top each serving with a generous dollop of whipped cream and sprinkle with chocolate shavings or a dusting of cocoa powder for garnish.
This final touch adds visual appeal and extra flavor to your hot chocolate.
Extra Tips
For an even more indulgent experience, consider adding a splash of espresso or a pinch of cinnamon to your hot chocolate to elevate the flavors.
If you prefer a non-alcoholic version, you can simply omit the Irish cream and replace it with a splash of vanilla or almond extract.
This recipe can also be made in larger batches to serve at holiday gatherings; just adjust the quantities accordingly. Enjoy your warm, festive drink!
Festive Figgy Pudding
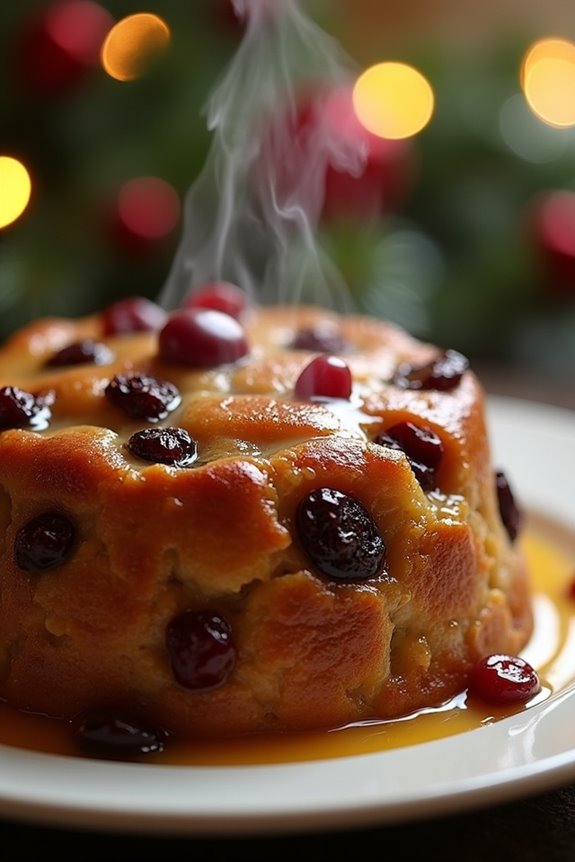
Figgy pudding is a traditional Irish dessert that has been enjoyed for centuries, particularly during the holiday season. This rich and flavorful steamed pudding, made with dried fruits, spices, and often a splash of alcohol, is a delightful way to celebrate Christmas.
The origins of figgy pudding can be traced back to medieval times, and it has since become a beloved staple in many Irish households. Serving this dish during festive gatherings creates a warm and inviting atmosphere, reminiscent of times spent with family and friends.
Preparing figgy pudding can be a rewarding experience, as the process allows for the melding of flavors that improve with time. While the recipe may seem intimidating, it’s actually quite straightforward. The pudding is best made a day or two in advance, allowing it to set and develop its flavors.
When it’s time to serve, simply steam it again until warmed through, and present it with a dash of brandy or a drizzle of warm custard.
Ingredients (serves 4-6):
- 200g mixed dried fruits (e.g., raisins, currants, and chopped figs)
- 100g unsweetened applesauce
- 100g brown sugar
- 100g breadcrumbs
- 100g all-purpose flour
- 2 teaspoons baking powder
- 1 teaspoon mixed spice (a blend of cinnamon, nutmeg, and allspice)
- 2 large eggs
- 100ml milk
- 50ml brandy (optional)
- A pinch of salt
- Butter (for greasing the pudding basin)
Cooking Instructions:
- Prepare the Fruit Mixture: In a large bowl, combine the mixed dried fruits with the applesauce and brandy (if using). Stir well to confirm the fruits are evenly coated. Set this mixture aside to allow the flavors to meld while you prepare the rest of the pudding.
- Mix the Dry Ingredients: In a separate bowl, whisk together the breadcrumbs, flour, baking powder, mixed spice, and a pinch of salt. Make sure there are no lumps, as this will help create a smooth texture in the final pudding.
- Combine the Wet Ingredients: In another bowl, beat the eggs and then add the brown sugar and milk. Mix until smooth. This will create a rich base for your pudding.
- Combine All Ingredients: Gradually fold the dry ingredients into the wet mixture, being careful not to overmix. Once combined, gently fold in the fruit mixture until everything is evenly distributed.
- Prepare the Pudding Basin: Grease a pudding basin or a heatproof bowl with butter to prevent sticking. Pour the pudding mixture into the basin, leaving some space at the top as it will expand while cooking.
- Steam the Pudding: Cover the basin with a layer of parchment paper, then secure it with a piece of aluminum foil, creating a tight seal. Place the basin in a large pot with boiling water, confirming the water reaches halfway up the side of the basin. Steam for about 2 hours, checking occasionally to confirm the water doesn’t evaporate completely.
- Cool and Store: Once cooked, carefully remove the pudding from the pot and let it cool for a few minutes before turning it out onto a serving plate. If not serving immediately, wrap it tightly in parchment paper and store it in a cool, dry place for up to a week.
- Reheat and Serve: To serve, steam the pudding again for about 30 minutes until heated through. Serve warm, optionally flambéed with a little extra brandy for a festive touch.
Extra Tips:
When making figgy pudding, feel free to customize the dried fruits to your taste, such as adding cherries or apricots. The pudding can also be made ahead of time and stored in the refrigerator or freezer, making it a convenient dessert option during the busy holiday season.
For an extra festive presentation, consider serving it with a side of warm custard or whipped cream, and don’t forget to light the pudding with brandy for a show-stopping effect!