

Growing up, my grandmother’s kitchen was my sanctuary filled with warmth and the comforting aromas of paprika and freshly baked pastries. Every dish she made had a story, reminding me of laughter and family gatherings. From hearty goulash to sweet strudel, these Central European recipes are brimming with nostalgia. Let me share some of these cherished dishes that can bring a taste of home to your table. Let’s explore these cozy, grandma-style recipes together.
Hearty Goulash: A Taste of Hungary
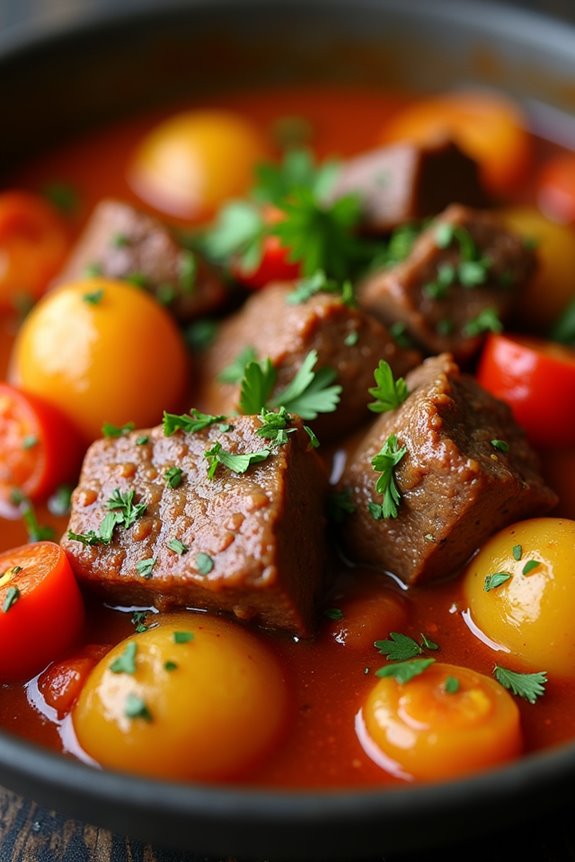
Hearty Goulash is a traditional Hungarian dish that warms the soul and fills the belly with its rich flavors and aromatic spices. This beloved meal combines tender chunks of beef with a robust medley of vegetables, all simmered together in a savory paprika-infused broth.
Originating from Hungary, goulash has become a staple in Central European cuisine and is celebrated for its unique blend of spices, particularly the sweet Hungarian paprika that gives it both color and depth.
Cooking goulash isn’t only about the ingredients but also about the technique and time. The secret to a delicious goulash lies in allowing the flavors to meld together through slow cooking, resulting in a hearty stew that’s perfect for family gatherings or a cozy dinner on a chilly evening.
Serve it with crusty bread or over egg noodles to make it a complete meal that everyone will love.
Ingredients (Serves 4-6)
- 2 lbs beef chuck, cut into 1-inch cubes
- 2 tablespoons vegetable oil
- 2 large onions, finely chopped
- 4 cloves garlic, minced
- 2 tablespoons sweet Hungarian paprika
- 1 teaspoon caraway seeds
- 1 teaspoon dried oregano
- 1 bell pepper, diced (red or green)
- 2 medium carrots, sliced
- 3 medium potatoes, peeled and diced
- 1 can (14 oz) diced tomatoes (with juice)
- 4 cups beef broth
- Salt and pepper to taste
- Fresh parsley, chopped (for garnish)
Cooking Instructions
- Heat the Oil: In a large heavy-bottomed pot or Dutch oven, heat the vegetable oil over medium-high heat. This will help to brown the beef, creating a rich flavor base for the goulash.
- Brown the Beef: Add the beef cubes to the pot in batches, ensuring not to overcrowd. Sear each piece until browned on all sides, about 5-7 minutes. Remove the beef and set aside. Browning the meat enhances the flavor of the goulash.
- Sauté Onions and Garlic: In the same pot, add the chopped onions and cook until they’re translucent, about 5 minutes. Add the minced garlic and cook for an additional minute until fragrant. This step builds the foundation of flavors.
- Add Spices: Stir in the sweet Hungarian paprika, caraway seeds, and dried oregano. Cook for about 1-2 minutes, stirring constantly to prevent burning. This will release the essential oils in the spices, intensifying the flavors of the dish.
- Combine Ingredients: Return the browned beef to the pot and add the diced bell pepper, sliced carrots, diced potatoes, and canned tomatoes with their juice. Stir everything together to evenly distribute the ingredients.
- Pour in Broth: Add the beef broth to the pot, ensuring all ingredients are submerged. Bring the mixture to a boil, then reduce the heat to low and cover the pot. This slow cooking will tenderize the beef and allow the flavors to meld together beautifully.
- Simmer: Let the goulash simmer for 1.5 to 2 hours, stirring occasionally. If it gets too thick, you can add a little more broth or water. The longer it cooks, the more flavorful it becomes.
- Season: After simmering, taste the goulash and add salt and pepper as needed. Remember to adjust seasoning gradually, as the flavors will become more concentrated as it cooks.
- Serve: Ladle the goulash into bowls, garnishing with freshly chopped parsley. Serve hot with bread or over egg noodles for a comforting meal.
Extra Tips
For an extra depth of flavor, consider adding a splash of red wine to the goulash during the simmering stage. It pairs beautifully with the beef and enhances the overall taste.
Additionally, feel free to customize your goulash by incorporating other vegetables such as peas or mushrooms, or even adding a dollop of sour cream before serving for a creamy finish.
Classic Pierogi: Polish Comfort Dumplings

Pierogi are traditional Polish dumplings that have earned a special place in the hearts and stomachs of people all over Central Europe. These delightful pockets can be filled with a variety of ingredients, ranging from creamy mashed potatoes and cheese to sauerkraut or even sweet fruit fillings. The versatility of pierogi makes them perfect for any occasion, whether it’s a cozy family dinner or a festive gathering.
The dough is tender yet sturdy, allowing for a satisfying bite that pairs beautifully with toppings like sautéed onions, crispy bacon, or a dollop of sour cream.
Making pierogi from scratch may seem challenging, but with a little practice, you’ll find that the process is quite rewarding. The key to perfect pierogi lies in the dough: it should be soft and pliable, yet strong enough to hold the filling without tearing. Once you master the basic dough recipe, the filling possibilities are endless.
So roll up your sleeves and get ready to enjoy a taste of Poland right in your kitchen!
Ingredients (serving size: 4-6 people):
- 2 cups all-purpose flour
- 1 large egg
- 1/2 cup water (plus more as needed)
- 1/2 teaspoon salt
- 2 cups mashed potatoes (cooked and cooled)
- 1 cup cottage cheese or farmer’s cheese
- 1/2 onion, finely chopped
- 2 tablespoons butter (for sautéing)
- Sour cream (for serving)
- Fresh herbs (like chives or dill, optional for garnish)
Cooking Instructions:
1. Prepare the Dough: In a large mixing bowl, combine the all-purpose flour and salt. Make a well in the center and crack the egg into it. Gradually add the water while mixing with a fork or your hands until the dough begins to come together. Knead the dough on a floured surface for about 5-7 minutes until smooth and elastic. If the dough is too sticky, add a little more flour as needed.
Cover the dough with a kitchen towel and let it rest for at least 30 minutes.
2. Make the Filling: In a separate bowl, mix together the cooled mashed potatoes and cottage cheese until well combined. For added flavor, sauté the chopped onion in butter over medium heat until golden brown, then mix it into the potato and cheese filling. Season with salt and pepper to taste.
3. Roll Out the Dough: After the dough has rested, divide it into smaller portions for easier handling. Roll out one portion on a floured surface to about 1/8 inch thickness. Use a round cutter or a glass to cut out circles of dough, about 3 inches in diameter.
4. Fill the Pierogi: Place a small spoonful of the potato and cheese filling in the center of each dough circle. Be careful not to overfill them. Fold the dough over to create a half-moon shape and pinch the edges firmly to seal. You can also crimp the edges with a fork for a decorative touch.
5. Cook the Pierogi: Bring a large pot of salted water to a boil. Carefully drop the filled pierogi into the boiling water in batches, being careful not to overcrowd the pot. Cook for about 3-4 minutes or until they float to the surface.
Once they float, allow them to cook for an additional minute. Use a slotted spoon to remove the pierogi and transfer them to a plate.
6. Sauté the Pierogi (optional): For a crispy finish, heat some butter in a skillet over medium heat. Add the boiled pierogi and sauté until golden brown on both sides.
7. Serve: Plate the pierogi warm and serve with a dollop of sour cream and a sprinkle of fresh herbs if desired.
Extra Tips: To save time, you can prepare the filling a day in advance and store it in the refrigerator. Additionally, pierogi freeze very well; if you have leftovers or want to make a big batch, simply freeze them on a baking sheet before transferring to a freezer bag.
When ready to cook, you can boil them straight from the freezer; just add a couple of extra minutes to the cooking time. Enjoy your homemade pierogi!
Savory Sarmale: Stuffed Cabbage Rolls

Sarmale, or stuffed cabbage rolls, are a beloved dish across Central Europe, cherished for their comforting flavors and hearty nature. This dish typically consists of tender cabbage leaves wrapped around a savory filling of meat, rice, and spices. Each bite delivers a delightful combination of textures and tastes, often enhanced by a rich tomato sauce. Sarmale is often served during special occasions and family gatherings, making it a staple in many households.
The beauty of making sarmale lies in the preparation and the love put into each roll. While the process may seem intricate, the reward is a dish that warms the heart and satisfies the soul. The filling can vary based on personal preferences and regional recipes, but the classic version remains a favorite. Let’s immerse ourselves in this delicious recipe that serves 4-6 people and brings a taste of Central Europe to your table.
Ingredients:
- 1 large head of cabbage (green or savoy)
- 500g ground pork (or a mix of pork and beef)
- 100g rice (uncooked)
- 1 large onion, finely chopped
- 2 cloves garlic, minced
- 1 teaspoon dried thyme
- 1 teaspoon paprika
- Salt and pepper to taste
- 1 can (400g) diced tomatoes (or 2 cups of homemade tomato sauce)
- 3 cups water or broth
- 2 tablespoons vegetable oil
- Fresh dill (for garnish, optional)
Cooking Instructions:
- Prepare the Cabbage: Start by removing the core from the cabbage head. Bring a large pot of water to a boil and carefully submerge the entire cabbage. Boil for about 5-7 minutes, or until the leaves begin to soften. Remove the cabbage from the pot and let it cool. Once cool enough to handle, gently peel off the leaves, setting them aside. You’ll need about 12-15 leaves for rolling.
- Make the Filling: In a skillet, heat the vegetable oil over medium heat. Add the finely chopped onion and sauté until translucent. Add the minced garlic and cook for another minute. In a large mixing bowl, combine the ground meat, cooked onion and garlic, rice, thyme, paprika, salt, and pepper. Mix everything well until fully incorporated.
- Roll the Sarmale: Take a cabbage leaf and place about 2 tablespoons of the filling at the base of the leaf. Fold the sides in and roll it up tightly from the bottom to the top. Repeat this process until all the filling is used.
- Prepare the Cooking Liquid: In a large Dutch oven or heavy pot, pour in the canned tomatoes and water or broth. Stir to combine. You can also add a pinch of salt and pepper to the liquid for extra flavor.
- Layer the Sarmale: Place a few of the leftover cabbage leaves at the bottom of the pot to prevent the rolls from sticking. Then, arrange the stuffed cabbage rolls seam-side down in the pot, packing them tightly. If there’s any remaining filling, you can sprinkle it over the rolls.
- Cook the Sarmale: Pour the remaining tomato mixture over the rolls, making sure they’re mostly covered. Bring the pot to a gentle boil, then reduce the heat to low. Cover the pot and let it simmer for about 1.5 to 2 hours. Check occasionally to confirm there’s enough liquid, adding more water or broth if necessary.
- Serve: Once cooked, carefully transfer the sarmale to a serving dish. Garnish with fresh dill if desired, and serve hot with a dollop of sour cream on the side.
Extra Tips:
When making sarmale, you can enhance the flavor by adding smoked bacon or ham to the filling for an extra depth of taste. Additionally, feel free to experiment with different herbs and spices based on your preferences.
For a vegetarian version, you can substitute the meat with a mix of mushrooms, lentils, and nuts. Finally, letting the sarmale sit for a few hours or overnight in the fridge can improve the flavors, making them even tastier when reheated. Enjoy your cooking adventure!
Traditional Schnitzel: A Crispy Delight

Schnitzel is a beloved dish that hails from Central Europe, particularly popular in countries like Austria and Germany. This delightful recipe features thinly sliced meat, typically pork, veal, or chicken, which is tenderized and coated in a crispy breadcrumb crust. The result is a dish that’s both satisfying and indulgent, perfect for a cozy family dinner or a festive gathering.
With its golden-brown exterior and tender interior, schnitzel is often served with a slice of lemon, fresh parsley, and a side of potato salad or spaetzle for a truly authentic experience.
Making schnitzel at home is easier than you might think. The key to achieving that iconic crunch lies in the double breading process, which guarantees a thick, crispy coating that holds up beautifully during frying. In this recipe, we’ll guide you through the steps to create a traditional schnitzel that will have everyone coming back for seconds.
Get ready to impress your friends and family with this classic Central European dish that’s sure to warm their hearts and appetites.
Ingredients (Serves 4-6)
- 4-6 boneless pork chops or veal cutlets (about 1/2 inch thick)
- Salt and pepper, to taste
- 1 cup all-purpose flour
- 2 large eggs
- 1 cup breadcrumbs (preferably fresh)
- 1 teaspoon paprika (optional)
- 1/2 teaspoon garlic powder (optional)
- Vegetable oil or clarified butter, for frying
- Lemon wedges, for serving
- Fresh parsley, for garnish
Cooking Instructions
- Prepare the Meat: Begin by placing the pork chops or veal cutlets between two sheets of plastic wrap or parchment paper. Using a meat mallet or rolling pin, gently pound the meat to about 1/4 inch thickness. This will help tenderize the meat and guarantee even cooking. Season both sides of the meat with salt and pepper.
- Set Up the Breading Station: In three separate shallow dishes, prepare your breading station. In the first dish, place the flour. In the second, beat the eggs until smooth. In the third dish, mix the breadcrumbs with paprika and garlic powder, if using, to add flavor.
- Coat the Meat: Take each piece of meat and first dredge it in the flour, guaranteeing it’s fully coated. Shake off any excess flour, then dip it into the beaten eggs, allowing any extra egg to drip off. Finally, press the meat into the breadcrumb mixture, making sure to cover it completely. For an extra crispy coating, you can repeat the egg and breadcrumb steps for a double coating.
- Heat the Oil: In a large skillet, pour enough vegetable oil or clarified butter to cover the bottom of the pan, about 1/4 inch deep. Heat the oil over medium-high heat until it shimmers but isn’t smoking. You can test if the oil is ready by dropping a small piece of breadcrumb into it; if it sizzles right away, the oil is hot enough.
- Fry the Schnitzel: Carefully place the breaded schnitzels in the hot oil, making sure not to overcrowd the pan. Fry for about 3-4 minutes on each side, or until golden brown and crispy. Use tongs to flip the schnitzels, taking care not to break the coating. Once cooked, transfer the schnitzels to a paper towel-lined plate to drain any excess oil.
- Serve and Enjoy: Arrange the schnitzels on a serving platter and garnish with lemon wedges and fresh parsley. Serve immediately while hot, alongside your choice of sides like potato salad, spaetzle, or a simple green salad.
Extra Tips
For the best results, verify that the oil is at the right temperature before frying, as this will help achieve that coveted crispy texture without absorbing too much oil.
If you’re making a larger batch, you can keep the cooked schnitzels warm in a low oven while you finish frying the rest. Additionally, feel free to experiment with different types of meat or even try a vegetarian version using eggplant or zucchini slices for a delightful twist on this traditional dish.
Enjoy your schnitzel with a revitalizing salad or some tangy pickles for a flavorful meal!
Creamy Mushroom Stroganoff: A Rich Vegetarian Dish
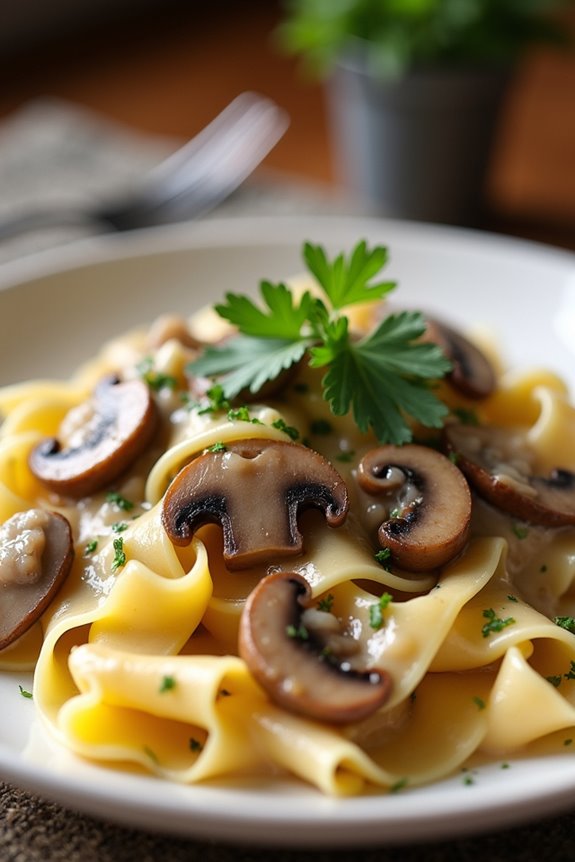
If you’re searching for a comforting meal that warms the soul and satisfies the palate, search no more than Creamy Mushroom Stroganoff. This rich and hearty dish is perfect for a cozy dinner, showcasing the earthy flavors of mushrooms paired with a creamy sauce that clings to pasta or rice.
While traditionally made with beef, this vegetarian variation is just as delightful, offering a depth of flavor and richness that will please even the most devoted meat lovers.
Mushrooms are the star of this dish, bringing a meaty texture and umami taste. Combined with onions, garlic, and a blend of spices, this Creamy Mushroom Stroganoff isn’t only simple to prepare but also packs a punch of flavor.
Serve it over egg noodles or rice for a comforting dinner that’s sure to impress family and friends. Whether it’s a chilly evening or a special occasion, this dish is a fantastic way to enjoy the flavors of Central Europe in your own home.
Ingredients (serves 4-6):
- 12 oz (340 g) wide egg noodles or rice
- 1 tablespoon olive oil
- 1 medium onion, finely chopped
- 3 cloves garlic, minced
- 16 oz (450 g) assorted mushrooms (cremini, button, shiitake), sliced
- 1 teaspoon dried thyme
- 1 teaspoon paprika
- Salt and pepper, to taste
- 1 tablespoon soy sauce
- 1 cup vegetable broth
- 1 cup sour cream or vegan alternative
- 2 tablespoons all-purpose flour
- Fresh parsley, chopped (for garnish)
Cooking Instructions:
1. Cook the Egg Noodles or Rice: Begin by boiling a large pot of salted water. Once boiling, add the egg noodles or rice and cook according to package instructions until al dente. Drain and set aside, making sure to reserve a little pasta water if using noodles.
2. Sauté the Vegetables: In a large skillet or frying pan, heat the olive oil over medium heat. Add the chopped onion and sauté for about 3-4 minutes until translucent.
Then add the minced garlic and cook for an additional minute, stirring constantly to avoid burning.
3. Cook the Mushrooms: Add the sliced mushrooms to the skillet, stirring well to combine. Cook for about 8-10 minutes, allowing the mushrooms to release their moisture and become nicely browned.
Season with thyme, paprika, salt, and pepper during this step for enhanced flavor.
4. Make the Sauce: Sprinkle the flour over the mushroom mixture and stir well to coat the mushrooms evenly. Gradually pour in the vegetable broth and soy sauce, stirring continuously to avoid lumps.
Bring the mixture to a simmer and let it thicken for about 3-5 minutes.
5. Add the Creaminess: Once the sauce has thickened, reduce the heat to low and stir in the sour cream. Mix until well combined and creamy.
If the sauce is too thick, add a splash of the reserved pasta water or more broth to reach your desired consistency.
6. Combine and Serve: Gently toss the cooked egg noodles or rice into the mushroom sauce, making sure they’re well coated.
Let everything warm through for a couple of minutes. Remove from heat and garnish with fresh parsley before serving.
Extra Tips:
For an extra layer of flavor, consider adding a splash of white wine or a tablespoon of Dijon mustard to the sauce.
You can also experiment with different types of mushrooms for varying textures and flavors. If you’re aiming to make this dish vegan, simply substitute the sour cream with a plant-based alternative and verify your noodles or rice aren’t made with eggs.
Enjoy your cozy meal, and feel free to customize it with your favorite herbs and spices!
Fluffy Knödel: German Potato Dumplings

Fluffy Knödel, or German potato dumplings, are a beloved staple in Central European cuisine. These soft and pillowy dumplings are typically made from a mixture of potatoes and flour, creating a comforting dish that can accompany a variety of meals. Often served with rich gravies or alongside hearty meats, Knödel are a versatile side dish that adds warmth and satisfaction to any table.
The process might seem intimidating at first, but with a little patience and practice, you’ll be able to create these delightful dumplings with ease. The key to achieving the perfect Fluffy Knödel lies in the type of potatoes used and the right balance of ingredients. Starchy potatoes work best as they yield a lighter texture, while the dough should be handled gently to prevent it from becoming dense.
Once you master this recipe, you can experiment with different fillings or toppings, such as sautéed onions or crispy bacon, to elevate your Knödel experience. Gather your ingredients, roll up your sleeves, and get ready to enjoy a taste of Germany in your own kitchen!
Ingredients (serving size: 4-6 people)
- 1 kg starchy potatoes (such as Russets or Yukon Gold)
- 200 g all-purpose flour
- 2 large eggs
- 100 g stale bread, cut into small cubes
- Salt, to taste
- Nutmeg, a pinch (optional)
- Butter, for tossing (optional)
- Fresh parsley, chopped (for garnish, optional)
Cooking Instructions
1. Prepare the Potatoes: Begin by washing the potatoes thoroughly to remove any dirt. Place them in a large pot and cover with water. Add a pinch of salt and bring to a boil. Cook the potatoes in their skins until they’re fork-tender, which should take about 20-30 minutes.
Once cooked, drain and let them cool slightly.
2. Peel and Mash the Potatoes: When the potatoes are cool enough to handle, peel them and pass them through a potato ricer or mash them well until smooth. It’s important to guarantee there are no lumps, as these will affect the texture of the dumplings.
Allow the mashed potatoes to cool completely.
3. Make the Dough: In a large mixing bowl, combine the cooled mashed potatoes with the flour, eggs, a pinch of salt, and nutmeg if you’re using it. Mix until a soft dough forms, being careful not to overwork it, as this can make the dumplings tough.
4. Prepare the Bread Cubes: In a small pan, lightly toast the bread cubes in butter until golden brown. This adds flavor and texture to the dumplings.
Once toasted, set them aside to cool slightly.
5. Form the Dumplings: With floured hands, take a portion of the dough and flatten it in your palm. Place a few toasted bread cubes in the center and fold the dough over to encase the filling completely.
Gently roll the dumpling into a ball shape. Repeat this process with the remaining dough and filling.
6. Cook the Dumplings: Bring a large pot of salted water to a gentle boil. Carefully drop the dumplings into the water, being careful not to overcrowd the pot.
Cook the dumplings for about 15 minutes, or until they float to the surface. This indicates they’re cooked through.
7. Serve: Once cooked, remove the dumplings from the water using a slotted spoon. If desired, you can toss them in melted butter and sprinkle with chopped parsley for added flavor before serving.
Extra Tips
When making Fluffy Knödel, the choice of potatoes is vital; using a mix of starchy and waxy potatoes can also yield a delightful texture. Make sure to let the mashed potatoes cool completely before mixing with the other ingredients to avoid cooking the eggs.
If the dough feels too sticky, add a bit more flour, but be cautious not to add too much, as it can lead to dense dumplings. Finally, for a fun twist, consider adding herbs or spices to the dough for added flavor, or serve them with a rich gravy or sautéed mushrooms for an authentic German experience. Enjoy your cooking!
Aromatic Paprikash: Chicken in Paprika Sauce

Aromatic Paprikash is a classic Central European dish that embodies the rich flavors and comforting essence of traditional cooking. Originating from Hungary, this dish features tender chicken simmered in a fragrant paprika sauce, creating a delightful combination of flavors that’s both robust and comforting. The key to a great Paprikash lies in the quality of paprika used, as it truly defines the dish’s character.
Whether served over egg noodles, rice, or with crusty bread, this dish is sure to warm your heart and fill your belly. This recipe calls for simple ingredients that come together beautifully, making it ideal for family dinners or gatherings with friends. The process allows the spices to meld together, resulting in a sauce that’s bursting with flavor.
As you cook, the aroma will fill your kitchen, inviting everyone to gather around the table. Prepare to impress your loved ones with this cozy, hearty meal that captures the essence of Central European cuisine.
Ingredients (Serves 4-6):
- 2 lbs chicken thighs, bone-in and skin-on
- 2 tablespoons olive oil
- 1 large onion, finely chopped
- 3 cloves garlic, minced
- 2 tablespoons sweet paprika
- 1 teaspoon smoked paprika
- 1 teaspoon salt
- ½ teaspoon black pepper
- 1 cup chicken broth
- 1 cup sour cream
- 2 tablespoons flour
- 1 tablespoon fresh parsley, chopped (for garnish)
Cooking Instructions:
- Prepare the Chicken: Pat the chicken thighs dry with paper towels and season them with salt and pepper. This step guarantees that the chicken browns nicely and develops a rich flavor.
- Brown the Chicken: In a large skillet or Dutch oven, heat the olive oil over medium-high heat. Add the chicken thighs, skin-side down, and sear them for about 5-7 minutes until golden brown. Flip the chicken and brown the other side for an additional 5 minutes. Remove the chicken from the skillet and set it aside.
- Sauté the Aromatics: In the same skillet, reduce the heat to medium and add the chopped onion. Sauté until the onions become translucent, about 5 minutes. Next, add the minced garlic and cook for an additional minute until fragrant, being careful not to burn it.
- Add the Paprika: Stir in the sweet and smoked paprika, making sure to coat the onions and garlic evenly. Cooking the paprika briefly enhances its flavor and aroma.
- Deglaze the Pan: Pour in the chicken broth, scraping the bottom of the pan to release any browned bits. This adds extra flavor to your sauce. Bring the mixture to a gentle simmer.
- Return Chicken to the Skillet: Place the browned chicken thighs back into the skillet, skin side up. Cover and let it simmer on low heat for about 30-35 minutes, or until the chicken is cooked through and tender.
- Prepare the Sauce: In a small bowl, mix the sour cream and flour together until smooth. Gradually add a ladle of the hot cooking liquid to the sour cream mixture to temper it, then stir the mixture back into the skillet. This will thicken the sauce and give it a creamy texture. Cook for an additional 5-10 minutes, allowing the flavors to meld.
- Serve: Remove the skillet from heat and garnish with chopped fresh parsley. Serve the Paprikash with your choice of egg noodles, rice, or crusty bread to soak up the delicious sauce.
Extra Tips:
For an even richer flavor, consider marinating the chicken in a mixture of paprika, salt, and olive oil for a few hours or overnight before cooking. Additionally, feel free to customize the dish by adding bell peppers, mushrooms, or other vegetables to enhance its heartiness.
The key to a successful Paprikash is patience; allow the flavors to develop fully, and don’t rush the cooking process for the best results. Finally, always taste and adjust seasoning as needed before serving. Enjoy your cozy meal!
Sweet Strudel: Layers of Apple and Cinnamon

Sweet strudel is a delightful pastry that brings together the warm flavors of apples and cinnamon, encased in delicate, flaky layers of dough. This traditional Central European dessert isn’t only a treat for the taste buds but also a feast for the eyes. The thin layers of dough, lovingly wrapped around sweet apple filling, create a beautiful presentation that’s perfect for any gathering or family dinner.
Whether enjoyed warm from the oven or at room temperature, sweet strudel is a comforting dish that evokes the charm of cozy European bakeries.
Making sweet strudel at home may seem intimidating, but with a little patience and practice, you can master this classic recipe. The key to a successful strudel lies in the dough, which should be stretched as thin as possible to achieve that signature flakiness. The filling can be adjusted to your taste, but the combination of tart apples, fragrant cinnamon, and a hint of sugar is a timeless favorite.
So gather your ingredients, roll up your sleeves, and let’s get started!
Ingredients (Serves 4-6):
- 1 ½ cups all-purpose flour
- ½ teaspoon salt
- 1 tablespoon vegetable oil
- 1 large egg
- ¾ cup lukewarm water
- 4 medium apples (preferably tart varieties like Granny Smith)
- ½ cup granulated sugar
- 1 teaspoon ground cinnamon
- ½ cup breadcrumbs
- 4 tablespoons unsalted butter (melted)
- Powdered sugar (for dusting)
Cooking Instructions:
- Prepare the Dough: In a mixing bowl, combine the flour and salt. Make a well in the center and add the vegetable oil, egg, and lukewarm water. Mix until combined and form a soft dough. Knead on a floured surface for about 10 minutes until smooth. Wrap the dough in plastic wrap and let it rest for at least 30 minutes at room temperature.
- Make the Filling: While the dough is resting, peel, core, and slice the apples into thin wedges. In a large bowl, mix the apple slices with granulated sugar and ground cinnamon, ensuring the apples are evenly coated. Set aside to allow the flavors to meld.
- Roll Out the Dough: After resting, place the dough on a large, lightly floured surface. Using a rolling pin, roll the dough out as thin as possible, maintaining a rectangular shape. If you want to stretch it even further, use your hands to gently pull and stretch the dough from the center outwards.
- Assemble the Strudel: Once the dough is stretched, brush the entire surface with melted butter. Sprinkle breadcrumbs evenly over the dough, leaving about an inch around the edges. This will help absorb moisture from the apples. Carefully spoon the apple filling onto the breadcrumbs, spreading it out evenly.
- Roll the Strudel: Starting from one end, carefully lift the edge of the dough and begin to roll it over the filling, tucking in the sides as you go to create a log shape. Make sure it’s rolled tightly but not too tight to avoid tearing the dough.
- Bake the Strudel: Preheat your oven to 375°F (190°C). Place the rolled strudel seam-side down on a baking sheet lined with parchment paper. Brush the top with remaining melted butter and bake for 25-30 minutes or until golden brown and flaky.
- Cool and Serve: Once baked, remove the strudel from the oven and let it cool for a few minutes. Dust with powdered sugar before slicing and serving warm or at room temperature.
Extra Tips:
When preparing sweet strudel, it’s essential to keep the dough as thin as possible to achieve that flaky texture. If you find the dough is too elastic and difficult to stretch, let it rest a little longer.
Additionally, feel free to customize your filling by adding nuts or dried fruits for added flavor and texture. Serve the strudel with a scoop of vanilla ice cream or a dollop of whipped cream for an extra indulgent treat!
Warm Borscht: Beetroot Soup With Sour Cream
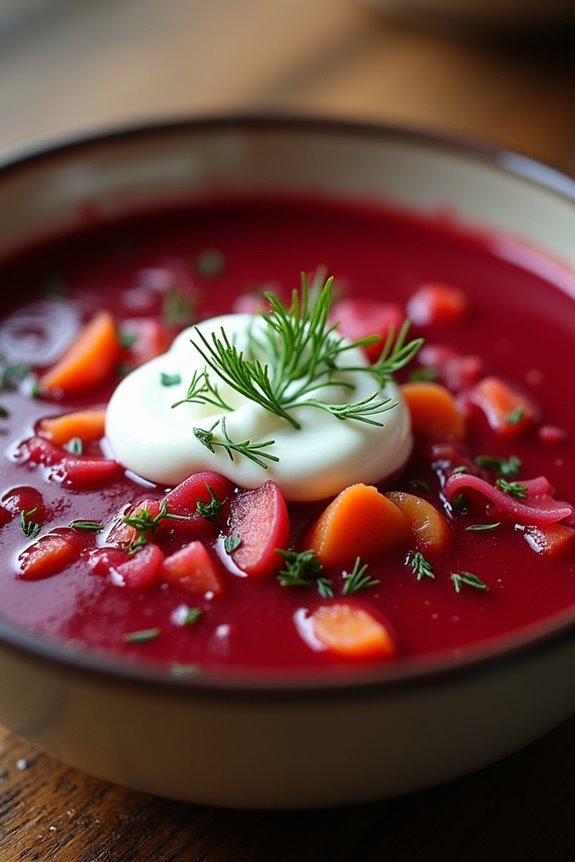
Warm Borscht is a traditional Eastern European dish that warms the soul with its vibrant color and rich flavors. This hearty beetroot soup has a slightly sweet and tangy taste, often enhanced by the addition of sour cream, which gives it a creamy texture and a delightful balance of flavors.
Borscht isn’t only comforting but also packed with nutrients, making it an excellent choice for any meal, especially during the colder months. This dish is versatile and can be served hot or cold, with variations across different regions, showcasing the culinary diversity of Central Europe.
Making Warm Borscht at home is a rewarding experience that fills your kitchen with the beautiful aroma of simmering beets, vegetables, and herbs. It can be enjoyed as a starter or a main course, and it pairs wonderfully with crusty bread.
The following recipe outlines how to prepare this delicious soup, guaranteeing that you can serve 4-6 people for a cozy gathering or family dinner.
Ingredients (Serves 4-6):
- 4 medium beets, peeled and grated
- 1 large onion, diced
- 2 carrots, grated
- 2 medium potatoes, diced
- 1/2 head of cabbage, shredded
- 4 cups vegetable or beef broth
- 2 tablespoons olive oil
- 2 tablespoons tomato paste
- 1 tablespoon vinegar (apple cider or white)
- 1 teaspoon sugar
- Salt and pepper, to taste
- Fresh dill, for garnish
- Sour cream, for serving
Cooking Instructions:
- Prepare the Vegetables: Start by peeling and grating the beets, as well as grating the carrots and dicing the onion and potatoes. Shred the cabbage and set all vegetables aside. This preparation will guarantee that everything is ready to go when it’s time to cook.
- Sauté the Aromatics: In a large pot, heat the olive oil over medium heat. Add the diced onion and sauté for about 5 minutes until it becomes translucent. This step is important as it builds the flavor base for your borscht.
- Cook the Beets and Carrots: Add the grated beets and carrots to the pot. Stir them into the onions and cook for an additional 10 minutes, allowing the natural sweetness of the beets to develop and the mixture to soften.
- Add the Remaining Vegetables: Incorporate the diced potatoes and shredded cabbage into the pot. Stir well to combine all the ingredients, then add the tomato paste. This will give the borscht its characteristic depth of flavor. Cook for another 5 minutes.
- Simmer the Soup: Pour in the vegetable or beef broth, and add vinegar and sugar. Season with salt and pepper to taste. Bring the soup to a boil, then reduce the heat and let it simmer for about 30-40 minutes, or until all vegetables are tender. Stir occasionally to prevent sticking.
- Final Adjustments: Taste the borscht and adjust the seasoning if necessary. If you desire a richer flavor, you may add a bit more vinegar or sugar, depending on your taste preference.
- Serve the Borscht: Ladle the warm borscht into bowls. Top each serving with a dollop of sour cream and a sprinkle of fresh dill for added freshness and flavor.
Extra Tips:
To enhance the flavor of your Warm Borscht, consider using homemade broth if possible, as it adds depth to the soup. Additionally, let the borscht sit for a few hours or even overnight in the refrigerator; the flavors meld beautifully and often taste even better the next day.
When serving, you can offer additional toppings like chopped green onions or crispy bacon bits for added texture and flavor variation. Enjoy this quintessential Central European dish with a side of crusty bread or rye for a complete meal!
Decadent Kolaczki: Polish Cream Cheese Pastries

Kolaczki, traditional Polish pastries, are a delightful treat that brings a taste of Central Europe right to your kitchen. These little pockets of joy are filled with sweet fruit preserves and wrapped in a rich cream cheese dough, creating a perfect balance of flavors and textures. Often enjoyed during festive occasions or as a sweet snack, Kolaczki are sure to impress family and friends with their deliciousness and charming presentation.
Making Kolaczki might seem challenging at first, but with a little patience and practice, you’ll find that they’re quite simple to prepare. The key to achieving that melt-in-your-mouth texture lies in the dough, which is made with cream cheese for a rich and flaky result. The filling can vary based on personal preference, but traditional options include apricot, raspberry, or poppy seed preserves. Let’s explore the delightful process of making these decadent treats!
Ingredients (serving size: 4-6 people)
- 8 oz cream cheese, softened
- 1 cup unsalted butter, softened
- 2 cups all-purpose flour
- 1/4 cup granulated sugar
- 1/2 teaspoon vanilla extract
- 1/4 teaspoon salt
- 1 cup fruit preserves (apricot, raspberry, or your choice)
- Powdered sugar (for dusting)
Cooking Instructions
1. Prepare the Dough: In a large mixing bowl, combine the softened cream cheese and unsalted butter. Using an electric mixer, beat them together until the mixture is smooth and creamy. This should take about 2-3 minutes.
Then, add the granulated sugar, vanilla extract, and salt, mixing until well combined.
2. Incorporate the Flour: Gradually add the all-purpose flour to the cream cheese mixture, stirring gently until the dough comes together. It should be soft and slightly sticky, but not overly wet.
Once combined, cover the bowl with plastic wrap and refrigerate the dough for at least 1 hour. This chilling step is vital for easier handling later on.
3. Preheat and Roll Out the Dough: Preheat your oven to 350°F (175°C). On a lightly floured surface, roll out the chilled dough to about 1/8 inch thickness. Use a cookie cutter or a knife to cut the dough into squares, approximately 2-3 inches in size.
4. Fill the Pastries: Place a teaspoon of your chosen fruit preserves in the center of each square. Be careful not to overfill, as the preserves may leak out during baking.
Fold the corners of each square over the filling to form a triangle or rectangle shape and press the edges to seal.
5. Bake: Arrange the filled pastries on a parchment-lined baking sheet, leaving some space between each one. Bake in the preheated oven for about 15-20 minutes or until they’re lightly golden.
Keep an eye on them to prevent overbaking.
6. Cool and Dust: Once baked, remove the Kolaczki from the oven and allow them to cool on a wire rack. After they’ve cooled completely, dust them generously with powdered sugar for a sweet finishing touch.
Extra Tips: For an extra layer of flavor, you can experiment with different flavorings in the dough, such as almond extract or lemon zest.
When choosing fruit preserves, consider mixing flavors for a delightful twist. Always verify the preserves you use are thick enough to avoid leaks during baking.
If you want to make a larger batch, this recipe can easily be doubled; just remember to adjust your baking time if needed. Enjoy your homemade Kolaczki with a cup of coffee or tea for a perfectly cozy treat!
Rustic Beef Stroganoff: A Comforting Classic
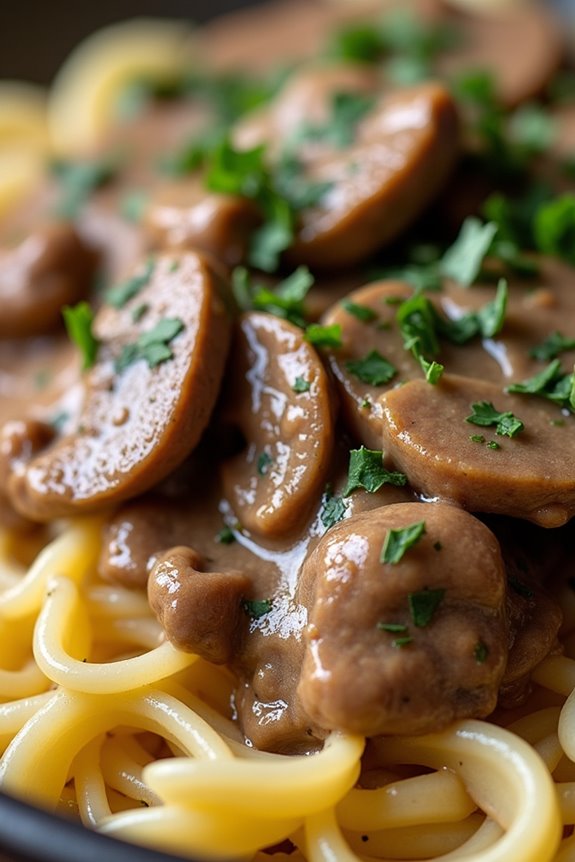
Beef Stroganoff is a beloved dish that has its roots in Russia, but it has been embraced by many cultures, particularly in Central Europe. This comforting classic combines tender strips of beef with a luscious creamy sauce and is often served over egg noodles or rice, making it a staple for cozy family dinners.
The rich flavors and satisfying texture of the dish make it perfect for chilly evenings when you crave something hearty and indulgent.
To create a Rustic Beef Stroganoff, the key lies in selecting the right cut of meat and allowing the flavors to meld together beautifully. Using tenderloin or sirloin helps achieve the desired tenderness, while a combination of mushrooms, onions, and sour cream adds depth to the sauce.
Whether you’re cooking for a special occasion or just a weeknight meal, this dish is sure to please everyone at the table.
Ingredients (Serves 4-6)
- 1.5 lbs beef tenderloin or sirloin, cut into thin strips
- 2 tablespoons olive oil
- 1 medium onion, finely chopped
- 2 cloves garlic, minced
- 8 oz mushrooms, sliced
- 1 teaspoon paprika
- 1 cup beef broth
- 1 tablespoon Worcestershire sauce
- 1 tablespoon Dijon mustard
- 1 cup sour cream
- Salt and pepper, to taste
- Fresh parsley, chopped (for garnish)
- 12 oz egg noodles or rice (for serving)
Cooking Instructions
- Prepare the Ingredients: Begin by cutting the beef into thin strips, ensuring they’re uniform for even cooking. Slice the mushrooms and chop the onion and garlic. Having all your ingredients prepped will make the cooking process smoother.
- Brown the Beef: In a large skillet, heat the olive oil over medium-high heat. Once hot, add the beef strips in batches, making sure not to overcrowd the skillet. Sear the beef for about 2-3 minutes until browned on all sides. Remove the beef from the skillet and set aside. This step locks in the flavors and prevents the meat from becoming tough.
- Sauté the Vegetables: In the same skillet, add the chopped onion and sauté for about 3-4 minutes until translucent. Add the minced garlic and sliced mushrooms, cooking for an additional 5-6 minutes until the mushrooms are softened and golden brown. This will create a flavorful base for your sauce.
- Add Seasonings and Broth: Sprinkle the paprika over the sautéed vegetables and stir well to combine. Then, pour in the beef broth, Worcestershire sauce, and Dijon mustard. Stir everything together, scraping any browned bits from the bottom of the skillet to incorporate all the flavors. Bring the mixture to a gentle simmer.
- Return the Beef and Finish the Sauce: Return the browned beef to the skillet, stirring to combine. Let the mixture simmer for about 5 minutes, allowing the beef to absorb the flavors. Reduce the heat to low and stir in the sour cream, mixing until the sauce is creamy and well blended. Season with salt and pepper to taste.
- Serve: While the stroganoff is simmering, cook the egg noodles or rice according to the package instructions. Once ready, serve the beef stroganoff over a bed of noodles or rice, and garnish with fresh chopped parsley for a touch of color and flavor.
Extra Tips
For an even richer flavor, consider marinating the beef in a bit of Worcestershire sauce and garlic for an hour before cooking. You can also experiment with adding a splash of white wine to the sauce for additional depth.
If you prefer a thicker sauce, let it simmer a bit longer before adding the sour cream. Finally, feel free to customize the dish by adding vegetables like bell peppers or peas for added nutrition and color. Enjoy your Rustic Beef Stroganoff!