

As the holiday season draws near, I’m captivated by the rich culinary traditions from all over Europe. The enticing aroma of glögg fills my kitchen, and the delightful taste of panettone is a favorite. Each recipe is a cherished story, bringing back memories of joyful family gatherings. I’m excited to see which dish will shine as the highlight of my next celebration. Let’s explore these festive European holiday recipes together.
Glögg: The Swedish Mulled Wine
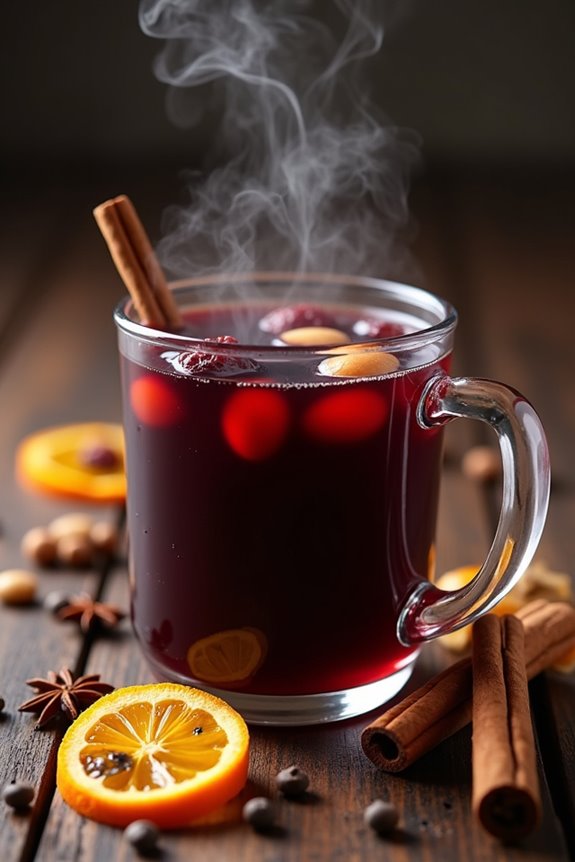
Glögg is a beloved Swedish holiday drink that warms the soul and brings a festive spirit to gatherings. Traditionally enjoyed during the Christmas season, this spiced mulled wine is infused with aromatic spices, citrus, and sometimes even nuts or dried fruits. Its sweet, rich flavor and inviting aroma make it the perfect accompaniment to chilly winter nights and holiday celebrations.
Making Glögg at home allows you to customize the spice blend and sweetness to your liking, ensuring a unique and personal touch to this classic beverage. Serve it warm in mugs, garnished with raisins or almonds, and enjoy the cozy ambiance it creates. Whether you’re hosting a holiday party or simply looking to indulge in a comforting drink, Glögg is sure to delight everyone around.
Ingredients (Serves 4-6)
- 1 bottle (750 ml) of dry red wine
- 1 cup of water
- 1/2 cup of sugar (adjust to taste)
- 1 cinnamon stick
- 4-5 whole cloves
- 2-3 cardamom pods, slightly crushed
- 1 star anise
- Zest of 1 orange
- Zest of 1 lemon
- 1/4 cup of brandy (optional)
- 1/4 cup of raisins (for garnish)
- 1/4 cup of blanched almonds (for garnish)
Cooking Instructions
- Combine the Base Ingredients: In a large saucepan, combine the bottle of dry red wine and 1 cup of water. This mixture forms the base of your Glögg. The water helps to dilute the wine slightly, balancing the flavors.
- Add Sweetness and Spice: Stir in the sugar until it dissolves completely. Add the cinnamon stick, whole cloves, crushed cardamom pods, star anise, orange zest, and lemon zest to the wine mixture. These spices will infuse their flavors into the Glögg as it heats.
- Heat the Mixture: Place the saucepan over medium heat and warm the mixture gently. Don’t let it come to a boil, as boiling can cook off the alcohol and alter the flavors. Keep the heat low and stir occasionally for about 10-15 minutes, allowing the spices to steep.
- Incorporate Brandy (Optional): If you prefer a stronger Glögg, add the brandy at this stage. It enhances the richness and complexity of the drink. Stir to combine and continue to heat for an additional 5 minutes.
- Strain and Serve: Once the Glögg is fragrant and heated through, remove the saucepan from the heat. Use a fine-mesh strainer to strain the mixture into a serving pot or directly into mugs, discarding the spices and zest.
- Garnish and Enjoy: Serve the Glögg warm, and for an authentic touch, add a few raisins and blanched almonds to each mug. These garnishes not only add texture but also enhance the festive presentation.
Extra Tips
When preparing Glögg, feel free to experiment with different spices and sweeteners according to your taste preferences. For a twist, consider adding a splash of apple juice or a few slices of fresh ginger for added warmth.
Remember to serve your Glögg warm but not boiling, as this helps maintain the flavors without losing the alcohol content. You can also prepare it in advance and reheat it gently before serving, making it a convenient option for holiday entertaining. Enjoy the cozy warmth and festive flavors of your homemade Glögg!
Panettone: Italian Holiday Bread

Panettone is a traditional Italian holiday bread that has become a beloved festive treat across the globe. Characterized by its tall, dome-shaped structure and fluffy, airy texture, this sweet bread is typically studded with candied fruits, raisins, and sometimes even chocolate. The origins of panettone date back to ancient Milan, and it’s a staple centerpiece during Christmas and New Year celebrations in Italy, symbolizing abundance and good fortune.
The preparation of panettone involves a lengthy fermentation process, which contributes to its unique flavor and luxurious texture, making it a labor of love that’s well worth the effort. Making panettone at home requires patience and attention to detail, as the dough needs time to rise and develop its characteristic flavors. However, the reward is a beautifully golden, fragrant bread that can be enjoyed fresh or toasted with butter, or even used to make decadent French toast.
Whether you’re sharing it with family and friends or savoring it alone, this Italian holiday bread is sure to bring a festive spirit to your table.
Ingredients (Serves 4-6):
- 4 cups all-purpose flour
- 1 cup sugar
- 1 teaspoon salt
- 1 tablespoon active dry yeast
- 1 cup warm milk (110°F)
- 4 large eggs
- 1/2 cup unsalted butter, softened
- 1 teaspoon vanilla extract
- 1 teaspoon orange zest
- 1 teaspoon lemon zest
- 1 cup candied orange peel
- 1 cup raisins
- 1/2 cup mixed candied fruits (optional)
Cooking Instructions:
- Activate the Yeast: In a small bowl, combine the warm milk and active dry yeast. Allow it to sit for about 5-10 minutes until it becomes frothy. This step guarantees that the yeast is active and ready to help the dough rise.
- Mix Dry Ingredients: In a large mixing bowl, whisk together the flour, sugar, and salt. Make a well in the center and add the frothy yeast mixture along with the eggs, softened butter, vanilla extract, orange zest, and lemon zest.
- Knead the Dough: Using your hands or a stand mixer with a dough hook, mix the ingredients until they’re combined. Knead the dough for about 10-15 minutes until it becomes smooth and elastic. If the dough is too sticky, add a little more flour as needed.
- First Rise: Place the kneaded dough in a lightly greased bowl, cover it with a clean kitchen towel, and let it rise in a warm place for about 2 hours or until it has doubled in size.
- Incorporate Fruits: Once the dough has risen, gently punch it down to release the air. Fold in the candied orange peel, raisins, and mixed candied fruits until evenly distributed throughout the dough.
- Shape the Dough: Form the dough into a ball and place it in a panettone mold or a parchment-lined round cake pan. Confirm the dough fills the mold about halfway, allowing room for it to rise.
- Second Rise: Cover the mold with a kitchen towel and let it rise again in a warm spot for about 1-2 hours, or until it has risen to the top of the mold.
- Bake the Panettone: Preheat your oven to 350°F (175°C). Bake the panettone for 45-60 minutes, or until it’s golden brown on top and sounds hollow when tapped. If the top browns too quickly, cover it loosely with aluminum foil.
- Cool and Serve: Remove the panettone from the oven and let it cool in the mold for about 10 minutes. Carefully transfer it to a wire rack to cool completely before slicing.
Extra Tips:
When making panettone, be patient with the rising times as they’re vital for developing the bread’s texture. If your kitchen is cool, you can create a warmer environment by placing the dough in an oven with the light on or near a heating source.
Additionally, the quality of the ingredients, especially the dried fruits and butter, can greatly enhance the flavor of your panettone, so opt for high-quality products if possible. Finally, panettone can be wrapped tightly and stored for several days, making it perfect for gifting or enjoying over the holiday season!
Bûche De Noël: French Yule Log Cake
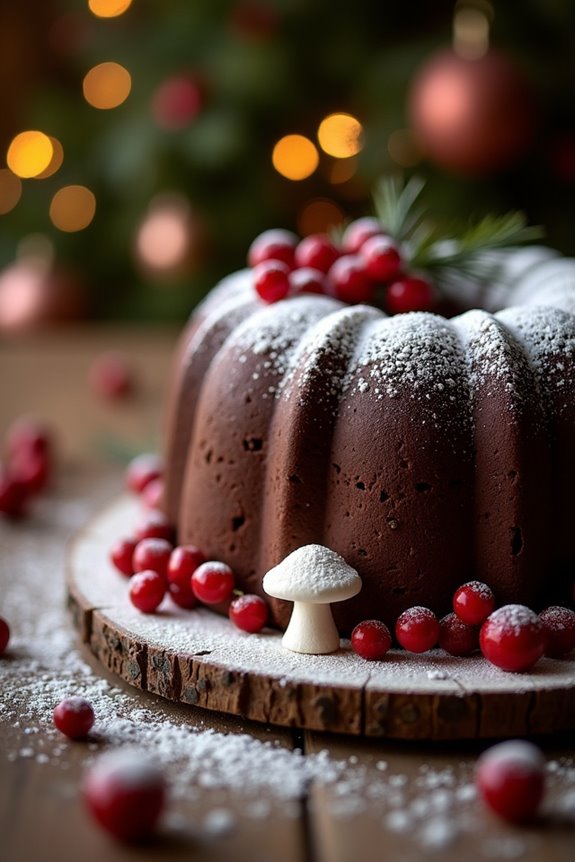
Bûche De Noël, or Yule Log Cake, is a traditional French dessert enjoyed during the Christmas season. This delectable cake is designed to resemble a log, symbolizing the Yule log that was historically burned in the fireplace on Christmas Eve. The cake is typically made from a light and airy sponge, rolled with a rich and creamy filling, and then frosted with chocolate ganache to resemble the bark of a tree.
Decorated with festive touches like powdered sugar, berries, or even meringue mushrooms, this dessert isn’t only delicious but also a stunning centerpiece for any holiday gathering.
Making a Bûche De Noël may seem intimidating, but with a little patience and precision, you can create this festive treat at home. The process involves baking the sponge cake, preparing the filling, rolling the cake, and finally decorating it. Each step contributes to the cake’s overall flavor and presentation, making it a labor of love that’s well worth the effort.
Gather your ingredients and roll up your sleeves; it’s time to bring a piece of French holiday tradition to your table.
Ingredients (serving size: 4-6 people)
- 4 large eggs
- 100g (1/2 cup) granulated sugar
- 70g (1/2 cup) all-purpose flour
- 30g (1/4 cup) unsweetened cocoa powder
- 1/4 tsp salt
- 1 tsp vanilla extract
- 300ml (1 1/4 cups) heavy cream
- 100g (3.5 oz) dark chocolate, chopped
- 50g (1/4 cup) unsalted butter, room temperature
- 60g (1/4 cup) powdered sugar
- 1 tbsp milk
- Optional decorations: fresh berries, meringue mushrooms, and powdered sugar for dusting
Instructions
- Preheat the Oven: Begin by preheating your oven to 180°C (350°F). This guarantees that your cake will bake evenly and rise properly.
- Prepare the Baking Pan: Line a 10×15 inch (or similar size) jelly roll pan with parchment paper, making sure to leave some overhang on the sides. This will help you easily lift the cake out after baking.
- Whip the Eggs and Sugar: In a large mixing bowl, whisk together the eggs and granulated sugar using an electric mixer on high speed until the mixture is thick, pale, and tripled in volume, about 5-7 minutes. This aeration is essential for a light sponge.
- Combine Dry Ingredients: In a separate bowl, sift together the flour, cocoa powder, and salt. This step helps to eliminate lumps and guarantees even distribution of the dry ingredients.
- Fold Dry Ingredients into Egg Mixture: Gently fold the dry ingredients into the egg mixture using a rubber spatula, being careful not to deflate the batter. The goal is to maintain the volume for a fluffy cake.
- Add Vanilla: Stir in the vanilla extract until just combined.
- Bake the Sponge: Pour the batter into the prepared pan and spread it evenly. Bake in the preheated oven for 12-15 minutes, or until the cake springs back when lightly touched and is slightly golden.
- Cool the Cake: Once baked, remove the cake from the oven and allow it to cool in the pan for about 5 minutes. Then, invert it onto a clean kitchen towel dusted with powdered sugar. Remove the parchment paper and roll the cake tightly in the towel from one short end to the other. Let it cool completely in this rolled shape.
- Prepare the Filling: In a small saucepan, heat the heavy cream over medium heat until it begins to simmer. Remove from heat and add the chopped dark chocolate and butter, stirring until melted and smooth. Allow this ganache to cool slightly.
- Make the Whipped Cream: In a mixing bowl, whip the remaining heavy cream with powdered sugar and milk until soft peaks form. Fold half of the whipped cream into the ganache to lighten it, then fold in the remaining whipped cream gently.
- Unroll and Fill the Cake: Once the sponge has cooled completely, carefully unroll it. Spread a generous layer of the chocolate cream filling over the surface, leaving a small border around the edges.
- Roll the Cake Again: Starting from one end, carefully roll the cake back up without the towel, forming a log shape. Place it seam side down on a serving platter.
- Frost the Cake: Use the remaining ganache to frost the outside of the log, smoothing it out with a spatula to create a bark-like texture.
- Decorate: Finish your Bûche De Noël with optional decorations such as fresh berries, meringue mushrooms, and a dusting of powdered sugar to mimic snow.
Extra Tips
When making the Bûche De Noël, be sure to work quickly once the cake is out of the oven, as the sponge can become difficult to roll if it cools too much.
If you’re not confident in rolling the cake, practice with a small towel before assembling the final product. Additionally, consider making the chocolate filling a day in advance to enhance the flavors and allow for easier spreading. Enjoy your holiday baking!
Stollen: German Christmas Cake
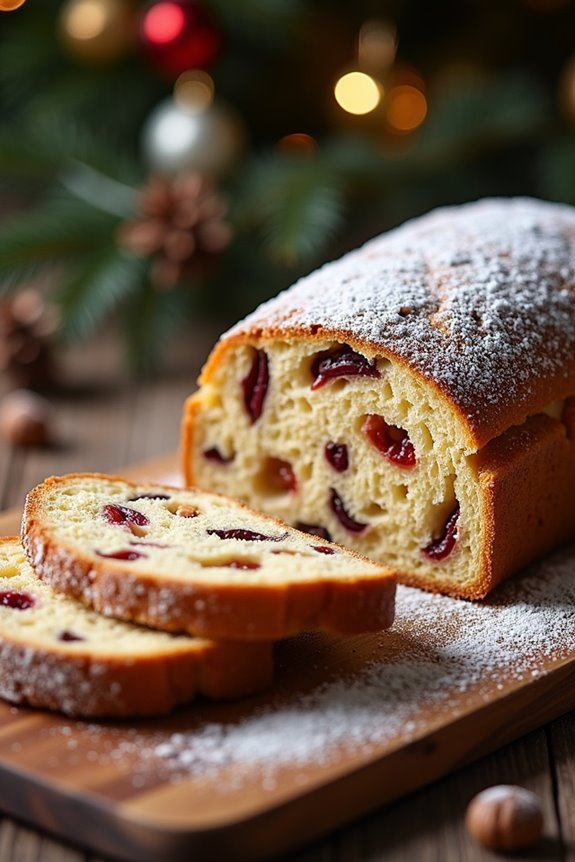
Stollen is a traditional German Christmas cake that’s rich, dense, and packed with delightful flavors. Originating from Dresden, this festive treat is often filled with dried fruits, nuts, and a hint of spice, making it an aromatic centerpiece for holiday gatherings. The cake is typically dusted with powdered sugar, giving it a snowy appearance that perfectly complements the winter season.
Baking stollen at home is a rewarding experience, as the scent of spices and sweet fruits fills your kitchen, bringing a sense of warmth and joy during the holidays. Making stollen requires some preparation as the dough needs time to rise and develop its flavors. Traditionally, stollen is made several weeks in advance to allow the flavors to meld together, but it can also be enjoyed fresh.
Whether served as a dessert or enjoyed alongside a cup of tea or coffee, stollen is sure to become a cherished holiday tradition in your home.
Ingredients (Serving Size: 4-6 People)
- 4 cups all-purpose flour
- 1 cup milk, warmed
- 1/2 cup granulated sugar
- 1/2 cup unsalted butter, softened
- 1 packet (2 1/4 teaspoons) active dry yeast
- 1 teaspoon salt
- 1 teaspoon ground cinnamon
- 1/4 teaspoon ground nutmeg
- 1/4 teaspoon ground cloves
- 1 cup mixed dried fruits (raisins, currants, sultanas)
- 1/2 cup chopped almonds or walnuts
- 1/4 cup candied citrus peel (optional)
- 1/4 cup rum or orange juice (for soaking fruits)
- Powdered sugar for dusting
Cooking Instructions
- Prepare the Dried Fruits: In a small bowl, soak the mixed dried fruits in rum or orange juice for at least 30 minutes. This step helps to plump the fruits and infuse them with flavor.
- Activate the Yeast: In a large mixing bowl, combine the warmed milk and granulated sugar. Sprinkle the active dry yeast over the milk mixture and let it sit for about 5-10 minutes, or until it becomes frothy. This indicates that the yeast is active and ready to use.
- Mix the Dough: Add the softened butter, salt, cinnamon, nutmeg, and cloves to the yeast mixture, followed by the flour. Mix until a dough forms. You can use a wooden spoon or your hands to combine the ingredients. The dough should be slightly sticky but manageable.
- Knead the Dough: Transfer the dough to a floured surface and knead it for about 10 minutes until it becomes smooth and elastic. If the dough is too sticky, sprinkle in a little more flour as needed.
- Incorporate the Fruits and Nuts: After kneading, flatten the dough and add the soaked dried fruits, nuts, and candied citrus peel (if using). Fold the dough over the fruits and nuts, kneading gently to fully incorporate them.
- First Rise: Shape the dough into a ball and place it in a greased bowl, covering it with a clean kitchen towel. Allow it to rise in a warm, draft-free area for about 1-2 hours, or until it has doubled in size.
- Shape the Stollen: Once risen, punch down the dough and turn it out onto a floured surface. Shape it into an oval or rectangle and fold one side over the other to create a slight hump, resembling a loaf. Place it on a baking sheet lined with parchment paper.
- Second Rise: Cover the shaped dough again with a kitchen towel and allow it to rise for another 30-45 minutes.
- Bake the Stollen: Preheat your oven to 350°F (175°C). Bake the stollen for 30-40 minutes, or until it’s golden brown and sounds hollow when tapped on the bottom.
- Cool and Dust: Remove the stollen from the oven and let it cool on a wire rack. Once cooled, generously dust the top with powdered sugar before slicing and serving.
Extra Tips
When baking stollen, it’s essential to ascertain that your ingredients are at room temperature, particularly the butter and eggs, as this helps the dough come together smoothly.
For added depth of flavor, consider letting the stollen sit for a few days before serving, as this allows the flavors to deepen and mellow. Store your stollen wrapped in foil or in an airtight container to maintain its freshness.
If you’d like to enhance the festive touch, you can also brush a little melted butter on the warm stollen before dusting it with powdered sugar. Enjoy this delightful treat with family and friends during the holiday season!
Cotechino Con Lenticchie: Italian Pork and Lentils
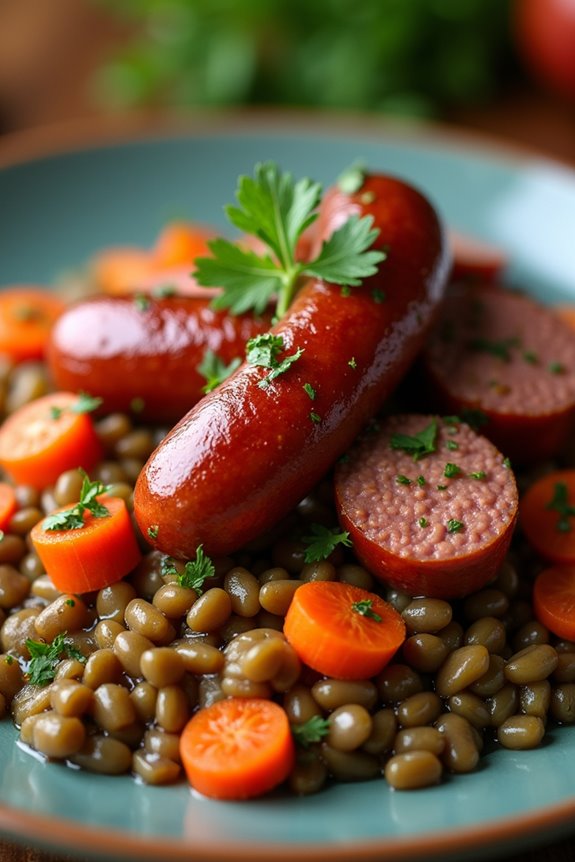
Cotechino con lenticchie is a traditional Italian dish often enjoyed during the New Year celebrations, symbolizing wealth and prosperity for the year ahead. The dish features cotechino, a flavorful pork sausage that’s typically slow-cooked to enhance its rich, savory flavors, paired with lentils, which represent coins. This combination makes for a hearty and comforting meal that warms you up during the cold winter months and brings a festive touch to your holiday table.
Preparing cotechino con lenticchie is a delightful experience, as the aroma of the cooking sausage and lentils fills the kitchen with inviting scents. The dish isn’t only delicious but also straightforward to prepare, making it perfect for gatherings with family and friends. It’s best served with crusty bread and a glass of Italian red wine.
Ingredients (Serves 4-6):
- 1 cotechino sausage (about 1 pound)
- 1 cup dried lentils (preferably green or brown)
- 1 medium onion, diced
- 2 cloves garlic, minced
- 2 medium carrots, diced
- 1 stalk celery, diced
- 4 cups vegetable or chicken broth
- 2 tablespoons olive oil
- Salt and pepper to taste
- Fresh parsley, chopped (for garnish)
Cooking Instructions:
- Prepare the Lentils: Rinse the lentils under cold water and check for any debris. In a medium pot, combine the lentils with 3 cups of broth and bring to a boil. Reduce the heat and let them simmer for about 20-25 minutes, or until tender. If they become too thick, add more broth as needed.
- Cook the Cotechino: While the lentils are cooking, place the cotechino in a large pot and cover it with water. Bring the water to a gentle simmer and cook the sausage for about 45 minutes. This slow cooking helps to render the fat and enhance the flavors of the sausage.
- Sauté the Vegetables: In a large skillet, heat the olive oil over medium heat. Add the diced onion, garlic, carrots, and celery. Sauté for about 5-7 minutes, or until the vegetables are soft and fragrant.
- Combine the Ingredients: Once the lentils are cooked, drain any excess liquid and add them to the skillet with the sautéed vegetables. Stir to combine and season with salt and pepper to taste. If desired, you can add a splash of the broth to keep the mixture moist.
- Slice the Cotechino: After the cotechino has cooked, remove it from the pot and let it cool slightly before slicing it into rounds. This will make it easier to serve.
- Serve the Dish: On a large serving platter, arrange the lentil mixture and top it with the sliced cotechino. Garnish with freshly chopped parsley for a pop of color and flavor. Serve warm, alongside crusty bread and your favorite red wine.
Extra Tips:
When preparing cotechino con lenticchie, feel free to experiment with additional herbs and spices, such as bay leaves or thyme, to enhance the flavor profile of the lentils. If you prefer a bit of heat, consider adding a pinch of red pepper flakes.
Additionally, verify the cotechino is cooked thoroughly but not overcooked, as it can become too greasy. Leftovers can be stored in the refrigerator for up to three days and reheated for a quick, comforting meal.
Kransekake: Norwegian Almond Cake
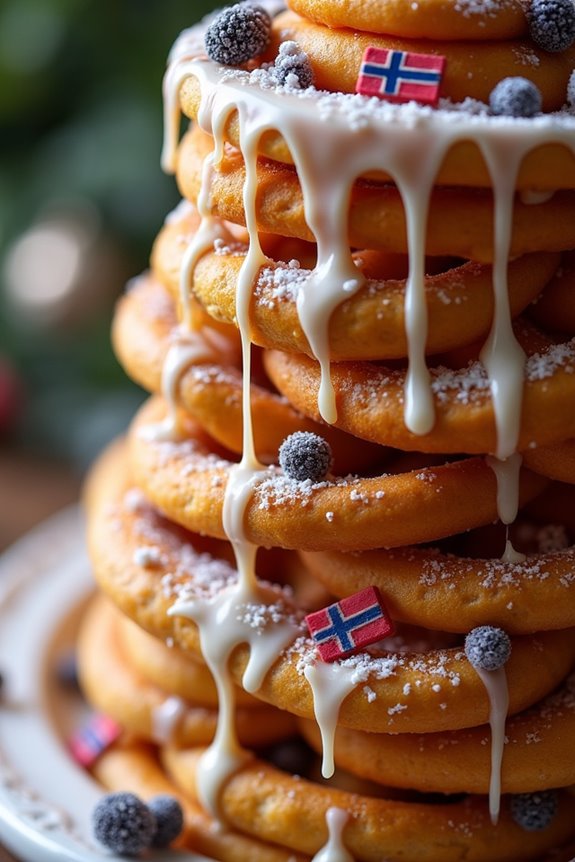
Kransekake, often translated as “ring cake,” is a traditional Norwegian dessert that’s a star feature at celebrations, particularly during Christmas and weddings. This elegant cake is made primarily from almond flour, sugar, and egg whites, resulting in a delightful combination of crunch and chewiness.
Its striking appearance, typically shaped into towering rings that stack upon one another, makes it not only a treat for the palate but also a feast for the eyes. Traditionally, the cake is adorned with icing and sometimes decorated with small flags, flowers, or marzipan figures, adding to its festive charm.
Baking Kransekake may seem intimidating, but with the right preparation and a bit of patience, you can create this show-stopping dessert at home. The key to a successful Kransekake is to guarantee the almond flour is finely ground, as this will greatly influence the texture of the cake.
Additionally, using a piping bag to shape the rings will give you the clean lines and precision that this cake is known for. Once you master this classic recipe, you’ll be able to impress your friends and family at any holiday gathering.
Ingredients (Serves 4-6 people)
- 250g almond flour
- 250g powdered sugar
- 2 large egg whites
- 1 teaspoon almond extract
- A pinch of salt
- Icing sugar (for decoration)
- Water (for icing)
- Optional: Decorative items such as small flags or marzipan figures
Cooking Instructions
- Prepare the Dough: In a mixing bowl, combine the almond flour, powdered sugar, and a pinch of salt. Mix well until the ingredients are evenly distributed. Then, add the egg whites and almond extract. Mix until a smooth dough forms. The dough should be pliable and not sticky.
- Shape the Rings: Preheat your oven to 200°C (390°F). Prepare your baking sheets by lining them with parchment paper. Transfer the dough into a piping bag fitted with a large round tip. Pipe circles onto the baking sheets, creating rings that gradually get smaller in diameter. Aim for about 8-10 rings, depending on the size you desire for your Kransekake.
- Bake the Rings: Place the baking sheets in the preheated oven and bake for approximately 10-12 minutes or until the rings are lightly golden. Keep an eye on them to prevent over-baking, as they can quickly go from perfect to burnt.
- Cool the Rings: Once baked, remove the rings from the oven and allow them to cool on the baking sheets for a few minutes before transferring them to a wire rack. Let them cool completely before assembling.
- Assemble the Cake: Once the rings are cool, stack them from largest to smallest on a serving platter. You can use a dab of icing to help them stick together.
- Decorate the Cake: To make the icing, mix icing sugar with a small amount of water until you achieve a thick, but spreadable consistency. Drizzle or pipe the icing over the Kransekake, and add any decorative items like flags or marzipan figures to finish the look.
Extra Tips
When making Kransekake, guarantee that your almond flour is finely ground for the best texture. If using store-bought almond flour, you may want to pulse it in a food processor to achieve a finer consistency.
Additionally, be cautious with the baking time, as each oven varies; check the rings frequently to confirm they don’t over-bake. Finally, if you have extra dough, you can make small almond cookies or bites, which are a delightful treat on their own!
Gingerbread Cookies: Classic Holiday Treat
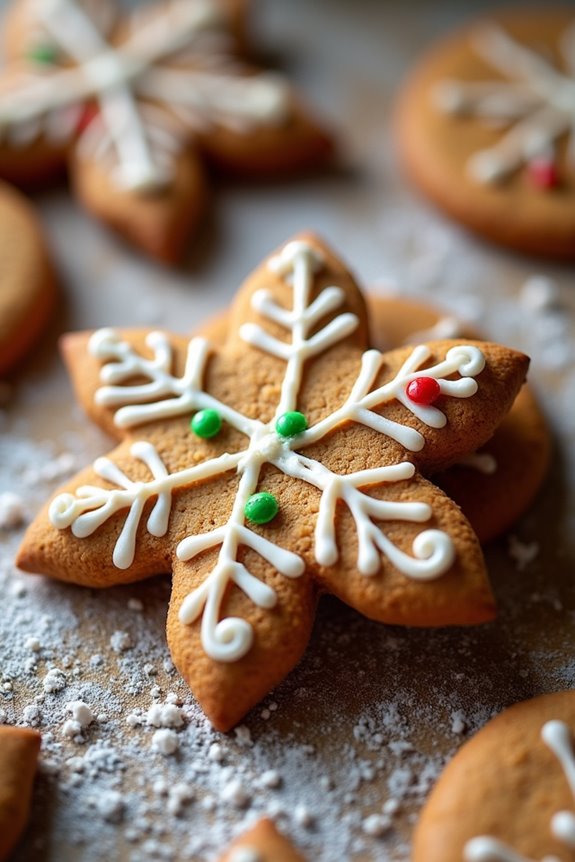
Gingerbread cookies are a quintessential part of holiday festivities across Europe, offering a warm, spicy flavor that’s perfect for the winter season. These delightful cookies aren’t only delicious but also provide a wonderful opportunity for creativity as they can be decorated with icing, candies, and other festive embellishments.
The aroma of ginger, cinnamon, and molasses wafting through your kitchen will surely evoke the spirit of the holidays, making them a beloved treat for family and friends alike.
Making gingerbread cookies is a fun and engaging activity that can involve everyone in the household. Whether you’re baking alone or with children, this recipe is straightforward and yields a batch of flavorful cookies that can be enjoyed fresh or stored for later.
Once decorated, they can also serve as charming gifts or festive decorations for your home.
Ingredients (Serves 4-6 people):
- 3 cups all-purpose flour
- 1 teaspoon baking soda
- 1 tablespoon ground ginger
- 1 tablespoon ground cinnamon
- 1 teaspoon ground cloves
- 1/2 teaspoon salt
- 1/2 cup unsalted butter, softened
- 1/2 cup brown sugar, packed
- 1/2 cup molasses
- 1 large egg
- Royal icing (for decoration)
- Assorted candies (for decoration)
Cooking Instructions:
- Prepare the Dough: In a large mixing bowl, combine the flour, baking soda, ground ginger, ground cinnamon, ground cloves, and salt. Whisk these dry ingredients together until they’re well mixed. This step guarantees that the spices and leavening agent are evenly distributed throughout the dough.
- Cream the Butter and Sugar: In another bowl, cream together the softened butter and brown sugar until the mixture is light and fluffy. This usually takes about 2-3 minutes with an electric mixer. Creaming incorporates air into the mixture, which will help the cookies rise and achieve a nice texture.
- Add the Molasses and Egg: Once the butter and sugar are creamed, add the molasses and egg to the mixture. Beat until well combined. The molasses not only adds flavor but also helps to keep the cookies moist.
- Combine Wet and Dry Ingredients: Gradually add the flour mixture to the wet ingredients, mixing on low speed until combined. Once the dough starts to form, you may need to use your hands to bring it together. If the dough feels too sticky, sprinkle in a little more flour.
- Chill the Dough: Shape the dough into a ball, wrap it in plastic wrap, and refrigerate for at least 1 hour. Chilling the dough makes it easier to roll out and helps the cookies maintain their shape while baking.
- Roll and Cut the Cookies: Preheat your oven to 350°F (175°C). On a floured surface, roll out the chilled dough to about 1/4 inch thick. Use cookie cutters to cut out shapes, and place them on a baking sheet lined with parchment paper. Leave some space between each cookie to allow for spreading.
- Bake the Cookies: Bake in the preheated oven for 8-10 minutes, or until the edges are firm but the centers are still soft. Keep a close eye on them to prevent over-baking, as they’ll continue to firm up as they cool.
- Cool and Decorate: Allow the cookies to cool on the baking sheet for a few minutes before transferring them to a wire rack to cool completely. Once cooled, decorate with royal icing and assorted candies as desired.
Extra Tips:
When making gingerbread cookies, consider using a mix of different spices to suit your taste—some people enjoy adding nutmeg or cardamom for an extra layer of flavor.
Additionally, if you plan to hang the cookies as ornaments, make sure to create a hole in each cookie before baking, using a straw or a skewer.
Finally, properly store the cookies in an airtight container to maintain their freshness, or freeze them for longer storage. Enjoy your festive baking!
Punsch: Scandinavian Spiced Punch

Punsch is a beloved festive drink throughout Scandinavia, especially during the cold winter months when the holiday spirit comes alive. This aromatic punch combines the warmth of spices with the sweetness of citrus and the kick of alcohol, making it a perfect beverage for cozy gatherings or holiday parties. Traditionally, it’s served warm, allowing the flavors to meld beautifully, creating a delightful experience for those who sip it.
With its roots tracing back to the 18th century, Punsch has become synonymous with celebration in countries like Sweden and Denmark. The beauty of Punsch lies in its versatility; you can easily adapt the recipe to suit your taste preferences by adjusting the spices or sweeteners.
Whether you’re hosting a festive gathering or simply looking to warm up on a chilly evening, this Scandinavian spiced punch will surely impress your guests. In just a few simple steps, you can create a deliciously fragrant beverage that embodies the essence of the holiday season.
Ingredients (serving size: 4-6 people)
- 1 liter water
- 200 grams sugar
- 250 ml dark rum
- 250 ml red wine
- 1 lemon, sliced
- 1 orange, sliced
- 4 whole cloves
- 2 cinnamon sticks
- 1 star anise
- 1 vanilla pod (split)
- 1/4 teaspoon freshly grated nutmeg
- Optional: fresh mint leaves for garnish
Cooking Instructions
- Prepare the Syrup: In a medium saucepan, combine the water and sugar over medium heat. Stir until the sugar dissolves completely. This will create a simple syrup that will sweeten the punch.
- Add the Spices: Once the sugar is dissolved, add the cloves, cinnamon sticks, star anise, vanilla pod, and freshly grated nutmeg to the syrup. Allow the mixture to simmer for about 10 minutes, letting the spices infuse their flavors into the syrup.
- Combine the Liquids: After the spices have infused, remove the saucepan from the heat. Strain out the spices using a fine mesh sieve or cheesecloth, discarding the solids. Return the syrup to the saucepan, then add the dark rum and red wine. Stir well to combine all the ingredients.
- Incorporate the Citrus: Add the sliced lemon and orange to the punch. These fruits will add a revitalizing acidity that balances the sweetness of the syrup and enhances the overall flavor profile.
- Heat the Punch: Place the saucepan back on the stove over low heat. Allow the punch to warm gently for about 15-20 minutes, ensuring it doesn’t reach a boil. This step is essential to keep the flavors vibrant without evaporating the alcohol.
- Serve: Once heated, ladle the Punsch into heatproof glasses or mugs. If desired, garnish each serving with fresh mint leaves for an added touch of freshness and aroma.
Extra Tips
When preparing Punsch, feel free to experiment with different types of wine or rum to suit your taste. If you prefer a less sweet punch, reduce the amount of sugar or use a sugar substitute.
Additionally, for a non-alcoholic version, simply omit the rum and wine and replace them with additional fruit juices or sparkling water. Punsch can also be made ahead of time; just reheat gently before serving, and always taste before serving to adjust the sweetness or spice levels as needed.
Enjoy this festive drink as a delightful way to celebrate the season!
Sernik: Polish Cheesecake
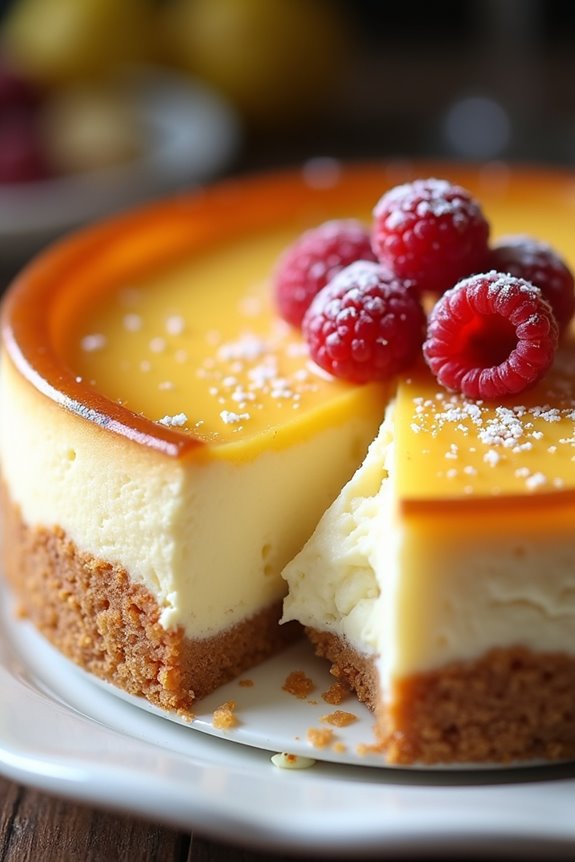
Sernik, or Polish cheesecake, is a beloved dessert that embodies the spirit of Polish culinary tradition. This creamy and rich cheesecake is made with twaróg, a type of fresh cheese that’s similar to ricotta but has a firmer texture and a more distinctive flavor. The dessert is often enjoyed during festive occasions and family gatherings, making it a perfect addition to any holiday table.
With a crust that beautifully complements the filling, Sernik is bound to impress with its delightful taste and elegant presentation.
The beauty of Sernik lies in its simplicity, allowing the flavors of the cheese to shine through. While there are many variations of this classic dessert, traditional recipes typically include a hint of vanilla and a touch of lemon zest to enhance the flavors.
Whether served plain or topped with fruit or chocolate, Sernik is a wonderful way to celebrate the holidays with a sweet treat that captures the essence of Polish cuisine.
Ingredients (Serves 4-6)
- 1 ½ cups graham cracker crumbs
- ½ cup unsalted butter, melted
- 2 cups twaróg cheese (or farmer’s cheese)
- 1 cup cream cheese, softened
- 1 cup granulated sugar
- 3 large eggs
- 1 teaspoon vanilla extract
- 1 tablespoon lemon zest
- 1 tablespoon lemon juice
- 1 tablespoon all-purpose flour
Instructions
1. Prepare the Crust: Preheat your oven to 350°F (175°C). In a mixing bowl, combine the graham cracker crumbs and melted butter. Mix until the crumbs are evenly coated with butter. Press this mixture firmly into the bottom of a 9-inch springform pan to create an even layer.
Bake the crust for about 10 minutes until it’s slightly golden. Remove from the oven and let it cool while you prepare the filling.
2. Make the Filling: In a large mixing bowl, combine the twaróg cheese and cream cheese. Using an electric mixer, blend them together until smooth and creamy, guaranteeing there are no lumps. This step is essential to achieve a velvety texture for your Sernik.
3. Add Remaining Ingredients: To the cheese mixture, add the granulated sugar, eggs, vanilla extract, lemon zest, lemon juice, and flour. Blend again until the mixture is fully combined and smooth. Be careful not to overmix, as this may incorporate too much air into the filling.
4. Combine Crust and Filling: Pour the cheese filling over the cooled crust in the springform pan. Use a spatula to spread it evenly. Tap the pan gently on the counter to eliminate any air bubbles.
5. Bake the Cheesecake: Place the Sernik in the preheated oven and bake for about 50-60 minutes, or until the center is set but still slightly jiggly. The edges should be firm and the top should be lightly golden.
Turn off the oven and crack the door open, allowing the cheesecake to cool down gradually inside the oven for about 1 hour.
6. Cool and Chill: Remove the Sernik from the oven and let it cool to room temperature. Once cooled, refrigerate for at least 4 hours, or overnight, to allow the flavors to meld and the cheesecake to set completely.
7. Serve: Before serving, carefully remove the sides of the springform pan. Slice the cheesecake into wedges and enjoy it plain or with your choice of toppings like fresh fruit, chocolate sauce, or whipped cream.
Extra Tips
When making Sernik, verify that all your dairy ingredients are at room temperature before you begin mixing. This helps to create a smoother filling without lumps.
Additionally, for a more intense flavor, consider adding a sprinkle of almond extract or a dash of sour cream to the filling. If you’re looking for a festive touch, top your Sernik with seasonal fruits like cranberries or raspberries before serving.
Enjoy your delicious slice of Polish tradition!
Spanakopita: Greek Spinach Pie
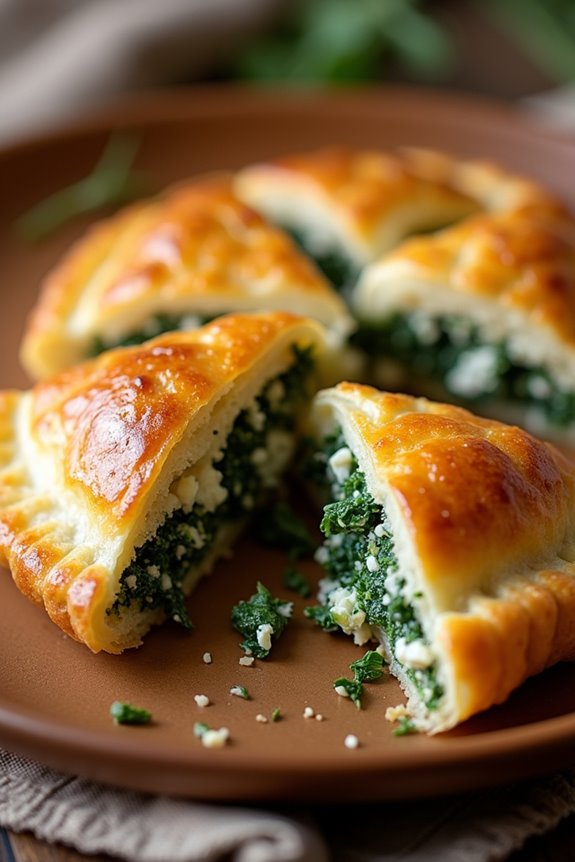
Spanakopita is a classic Greek dish that perfectly embodies the essence of Mediterranean cuisine with its flaky pastry and flavorful spinach filling. This delightful pie combines fresh spinach, aromatic herbs, and creamy feta cheese, all wrapped in layers of crispy phyllo dough.
Traditionally served as a snack, appetizer, or even a light main course, spanakopita isn’t only a crowd-pleaser but also a great way to incorporate greens into your diet. Whether you’re hosting a holiday gathering or simply want to indulge in a taste of Greece, this recipe is sure to impress.
Making spanakopita may seem challenging due to the use of phyllo dough, but with a little patience and practice, you’ll find it’s easier than it looks. The key is to keep the phyllo sheets covered with a damp cloth while you work to prevent them from drying out.
This recipe yields a generous serving for 4-6 people, making it perfect for sharing. Prepare to enjoy a savory slice of this delightful pie that will transport your taste buds straight to the heart of Greece.
Ingredients (Serves 4-6):
- 1 lb fresh spinach, washed and chopped
- 1 cup feta cheese, crumbled
- 1/2 cup ricotta cheese
- 1/2 cup onion, finely chopped
- 2 cloves garlic, minced
- 1/4 cup fresh parsley, chopped
- 1/4 cup fresh dill, chopped
- 1/4 cup olive oil
- 1 package (16 oz) phyllo dough, thawed
- Salt and pepper, to taste
- 1 egg, beaten (for egg wash)
Cooking Instructions:
- Prepare the Spinach Filling: In a large skillet over medium heat, add a drizzle of olive oil. Sauté the chopped onion and minced garlic until the onion becomes translucent, about 5 minutes. Add the chopped spinach and cook until wilted, approximately 3-4 minutes. Remove from heat and let cool slightly.
- Mix the Filling: In a large mixing bowl, combine the cooked spinach mixture with crumbled feta, ricotta cheese, chopped parsley, chopped dill, and season with salt and pepper to taste. Mix well until all ingredients are evenly incorporated.
- Prepare the Phyllo Dough: Preheat your oven to 375°F (190°C). Unroll the phyllo dough and cover it with a slightly damp cloth to prevent it from drying out. Take one sheet and lay it on a clean surface, brushing it lightly with olive oil. Layer another sheet on top and brush with oil again. Repeat this process until you have 5-6 sheets stacked.
- Fill and Fold: Place about 1/3 cup of the spinach filling along one edge of the phyllo dough. Fold the sides over the filling and roll it up tightly into a log shape. Place the rolled spanakopita on a baking sheet lined with parchment paper. Repeat this process with the remaining phyllo sheets and filling.
- Egg Wash and Bake: Brush the tops of the spanakopita with the beaten egg for a golden finish. Bake in the preheated oven for 25-30 minutes or until the pastries are crispy and golden brown.
- Serve: Once baked, remove from the oven and allow to cool slightly. Cut the spanakopita into triangles or serve whole. Enjoy warm or at room temperature.
Extra Tips:
When working with phyllo dough, it’s important to keep the unused sheets covered with a damp towel to maintain their moisture. If you want to add an extra layer of flavor, consider mixing in some grated nutmeg into the filling, as it complements the spinach beautifully.
Spanakopita can also be made ahead of time; simply assemble the pies, freeze them, and bake them directly from the freezer when ready to serve, adding a few extra minutes to the baking time. Enjoy this festive dish that’s sure to be a highlight at any gathering!
Figgy Pudding: Traditional British Dessert
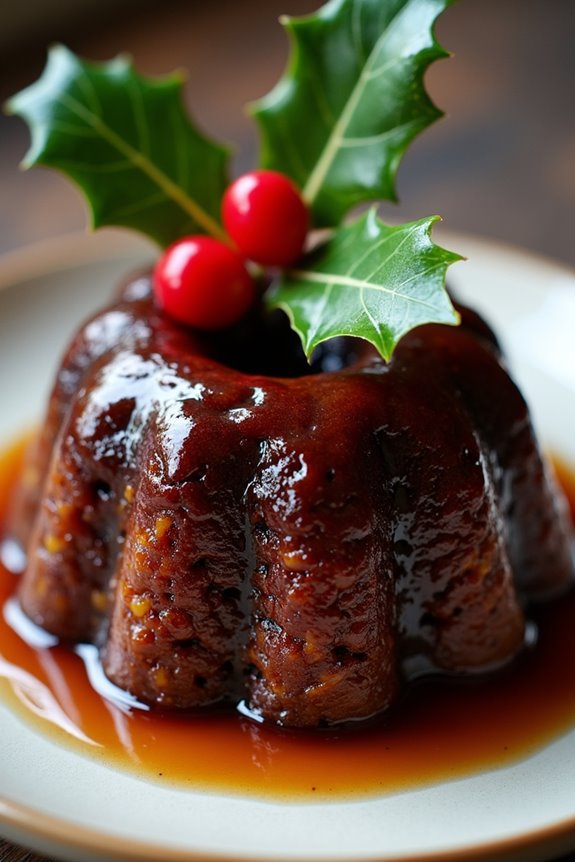
Figgy pudding, also known as Christmas pudding, is a classic British dessert that has been enjoyed for centuries, particularly during the festive season. This rich and dense steamed pudding is traditionally made with a combination of dried fruits, spices, and often a splash of alcohol. Its origins trace back to medieval England, where it was originally made with meat and later evolved into the sweet version we recognize today.
Often served with a sprig of holly on top, figgy pudding is a symbol of Christmas cheer, and its preparation is steeped in tradition and custom. Making figgy pudding requires a bit of time and patience, but the end result is a delightful dessert that captures the essence of the holiday season. The pudding is often steamed for several hours, allowing the flavors to meld beautifully.
It’s usually served warm, often accompanied by a rich sauce, such as brandy butter or cream. The ritual of making figgy pudding can be a wonderful family activity, as everyone can take turns stirring in the ingredients while making a wish, preserving the spirit of goodwill and togetherness.
Ingredients (Serves 4-6):
- 200g dried figs, chopped
- 150g raisins
- 150g currants
- 100g mixed peel
- 100g brown sugar
- 100g breadcrumbs
- 100g all-purpose flour
- 1 tsp baking powder
- 1 tsp ground cinnamon
- 1 tsp ground nutmeg
- 1/2 tsp salt
- 3 large eggs
- 150ml milk
- 100ml brandy or dark beer
- Zest of 1 lemon
- Zest of 1 orange
- 50g unsalted butter, melted
Cooking Instructions:
- Prepare the Dried Fruits: In a large mixing bowl, combine chopped figs, raisins, currants, and mixed peel. Pour in the brandy or dark beer and let the mixture soak for at least 1 hour, or overnight if possible. This step helps to plump the fruits and infuse them with flavor.
- Mix Dry Ingredients: In another bowl, sift together the flour, baking powder, ground cinnamon, ground nutmeg, and salt. Add the breadcrumbs and brown sugar to this mixture, stirring until everything is evenly combined.
- Combine Wet Ingredients: In a separate bowl, whisk together the eggs, milk, melted butter, and the zests of lemon and orange. Confirm that the ingredients are well-blended to create a smooth mixture.
- Combine All Ingredients: Slowly add the wet ingredients to the bowl of dry ingredients, mixing gently to combine. Then, fold in the soaked dried fruits, ensuring an even distribution throughout the batter.
- Prepare the Pudding Basin: Grease a 1.2-liter pudding basin or heatproof bowl with butter. Spoon the pudding mixture into the basin, filling it about three-quarters full. Cover the top with a piece of parchment paper, followed by a layer of aluminum foil, securing it with string around the rim.
- Steam the Pudding: Place the pudding basin in a large pot with a lid. Add boiling water to the pot until it reaches halfway up the sides of the basin. Cover the pot and steam the pudding for 6-8 hours, checking occasionally to confirm that the water doesn’t evaporate. Add more boiling water as needed.
- Cool and Store: After steaming, carefully remove the pudding from the pot and let it cool completely. Once cooled, you can store it in a cool, dark place until you’re ready to serve it, ideally for a few weeks to allow the flavors to develop.
- Reheat and Serve: To serve, steam the pudding again for about 1-2 hours until heated through. Turn it out onto a serving plate, garnish as desired, and serve with brandy butter or cream.
Extra Tips:
When making figgy pudding, feel free to customize the dried fruits to your liking, as you can substitute or add other favorites like apricots or sultanas. If you want to make the pudding even richer, consider adding chopped nuts or a tablespoon of treacle for added depth of flavor.
Remember to make your wish while stirring the mixture, as this tradition adds a little extra joy to the holiday spirit!
Pannetone French Toast: Festive Breakfast Delight
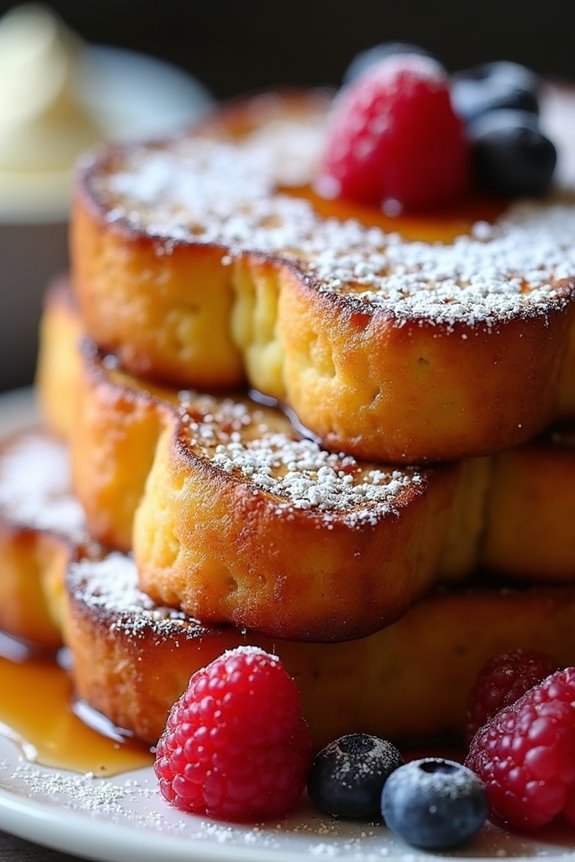
Pannetone French Toast is a delightful twist on the traditional breakfast favorite, perfect for holiday gatherings and special occasions. This dish transforms the sweet, fruity Italian bread known as panettone into a rich and indulgent breakfast treat.
With its fluffy texture and festive flavors, this French toast is certain to impress family and friends alike. The combination of vanilla, cinnamon, and the unique taste of panettone elevates this classic dish, making it a memorable centerpiece for any holiday brunch.
To create this festive breakfast delight, you’ll need a few simple ingredients and some basic kitchen tools. The process is straightforward, and with a little preparation, you can whip up this delicious dish in no time. Serve it warm with a dusting of powdered sugar, a drizzle of maple syrup, or a dollop of whipped cream for an extra festive touch!
Ingredients (Serves 4-6):
- 1 large panettone (about 1 pound)
- 4 large eggs
- 1 cup whole milk
- 1 teaspoon vanilla extract
- 1 teaspoon ground cinnamon
- 2 tablespoons granulated sugar
- 2 tablespoons unsalted butter (for cooking)
- Powdered sugar (for serving)
- Maple syrup (for serving)
Cooking Instructions:
- Prepare the Panettone: Slice the panettone into thick slices, about 1 to 1.5 inches each. This thickness will guarantee that the slices hold their shape during cooking while allowing them to soak up the custard mixture.
- Make the Custard Mixture: In a large mixing bowl, whisk together the eggs, whole milk, vanilla extract, ground cinnamon, and granulated sugar until well combined. This custard mixture will give the French toast its rich flavor and help achieve that delightful custardy center.
- Soak the Panettone Slices: Dip each slice of panettone into the custard mixture, allowing it to soak for about 30 seconds on each side. Be careful not to soak them too long, as panettone can become too soggy and break apart.
- Cook the French Toast: In a large skillet or griddle over medium heat, melt 1 tablespoon of unsalted butter. Once the butter is melted and bubbling, add the soaked panettone slices to the skillet, cooking in batches if necessary. Cook each slice for about 4-5 minutes on each side, or until golden brown and slightly crispy.
- Serve: Once cooked, transfer the French toast to a serving platter. Dust with powdered sugar and serve warm with maple syrup on the side for drizzling.
Extra Tips:
For an added touch of festive flavor, consider incorporating your favorite toppings, such as fresh berries, sliced bananas, or a sprinkle of chopped nuts.
You can also infuse the custard mixture with additional spices like nutmeg or cloves for a deeper holiday flavor. If you’re serving a large group, you can prepare the custard mixture and soak the panettone slices the night before, then cook them fresh in the morning for a hassle-free breakfast experience!
Baklava: Sweet Nut Pastry From the Balkans
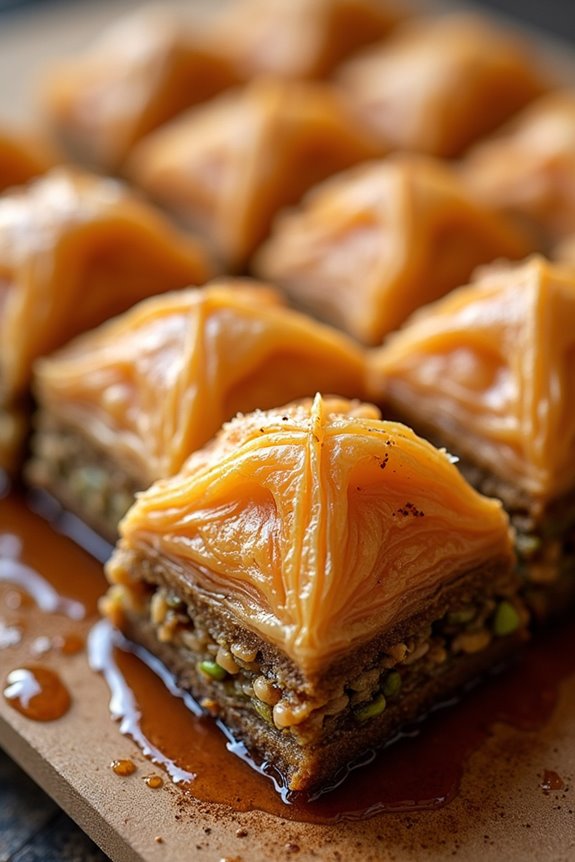
Baklava is a traditional pastry that has its roots in the Balkans and the Middle East, known for its rich, sweet layers of flaky phyllo dough, nuts, and honey syrup. This beloved dessert has become a staple during festive occasions, showcasing the culinary heritage of various cultures. The combination of nuts, typically walnuts or pistachios, and the delicate crunch of phyllo create a delightful texture, while the syrup adds an irresistible sweetness that brings the dish to life.
Making baklava may seem intimidating, but with a little patience and attention to detail, you can create a stunning and delicious dessert that will impress family and friends. It’s perfect for gatherings, celebrations, or even just a cozy night in. This recipe serves 4-6 people, making it an ideal choice for sharing. Now, let’s explore the ingredients and cooking instructions needed to create this delightful treat.
Ingredients
- 1 package (16 oz) phyllo dough, thawed
- 1 cup unsalted butter, melted
- 2 cups walnuts or pistachios, finely chopped
- 1 teaspoon ground cinnamon
- 1 cup granulated sugar
- 1 cup water
- 1 cup honey
- 1 teaspoon vanilla extract
Cooking Instructions
- Prepare the Nut Mixture: In a mixing bowl, combine the finely chopped walnuts or pistachios with the ground cinnamon. This mixture will provide the filling for the baklava, so make sure it’s evenly blended for consistent flavor throughout.
- Prepare the Phyllo Dough: Preheat your oven to 350°F (175°C). Unroll the phyllo dough and cover it with a damp kitchen towel to prevent it from drying out. You’ll need to work with one sheet at a time, brushing each with melted butter before layering.
- Layer the Phyllo Dough: Grease a 9×13-inch baking dish with some melted butter. Place one sheet of phyllo in the dish, brush it with melted butter, and repeat this process with 8 sheets, ensuring each one is well-buttered. This will form the base of your baklava.
- Add the Nut Filling: After layering 8 sheets, spread a thin layer of the nut mixture over the phyllo. Repeat the layering process: add 2 more sheets of phyllo (buttered between each) followed by another layer of the nut mixture. Continue this process until the nuts are used up, finishing with a final layer of 8 more sheets of phyllo, each brushed with butter.
- Cut the Baklava: Before baking, use a sharp knife to cut the baklava into diamond or square shapes. Make sure to cut through all the layers, as this will help the syrup soak in later.
- Bake the Baklava: Place the baking dish in the preheated oven and bake for 45-50 minutes, or until the baklava is golden brown and crisp on top. Keep an eye on it to confirm it doesn’t burn.
- Prepare the Syrup: While the baklava is baking, combine the sugar, water, honey, and vanilla extract in a saucepan over medium heat. Stir until the sugar dissolves, then bring the mixture to a boil. Reduce heat and simmer for about 10 minutes, then remove from heat and let it cool.
- Soak the Baklava: Once the baklava is done baking, immediately pour the cooled syrup over the hot pastry. Allow it to soak in for at least 4 hours, or ideally overnight, to confirm each piece is saturated with sweetness.
Extra Tips
When making baklava, it’s important to confirm your phyllo dough stays covered to prevent it from drying out and cracking. If you’re short on time, consider using a food processor to chop the nuts quickly.
Additionally, feel free to experiment with different types of nuts or add a splash of orange blossom water or rose water to the syrup for a unique flavor twist. Baklava can be stored in an airtight container at room temperature for several days, making it perfect for preparing in advance for gatherings. Enjoy your delicious homemade baklava!
Roast Duck With Red Cabbage: a German Holiday Main Dish
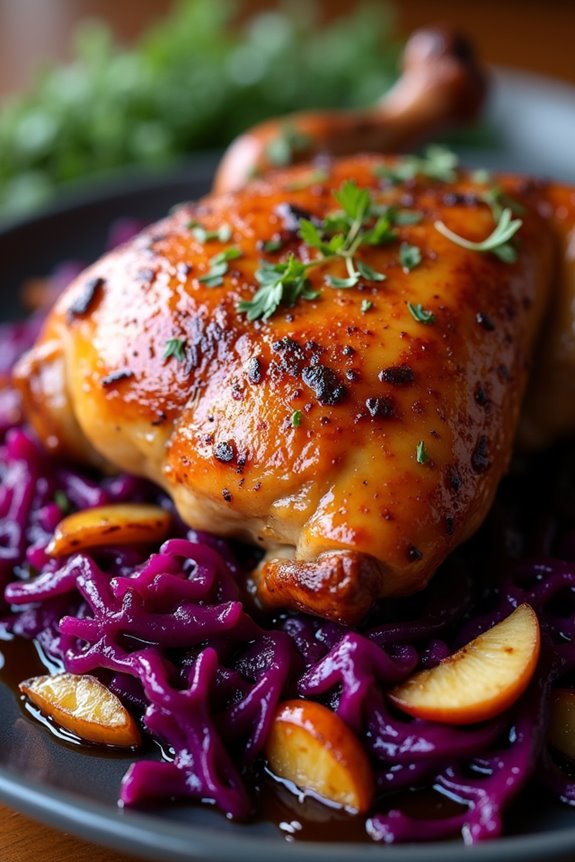
Roast Duck With Red Cabbage is a traditional German dish that perfectly embodies the festive spirit of the holiday season. This delightful main course features succulent duck that’s beautifully roasted until the skin is crisp and golden brown, paired with sweet and tangy red cabbage that adds a vibrant color and robust flavor to the plate. The rich flavors of the duck combined with the slightly sweet and sour notes of the cabbage make this dish a true centerpiece for any holiday gathering.
Preparing Roast Duck With Red Cabbage may seem intimidating, but with a little patience and attention to detail, you can create an impressive dish that will wow your guests. The process involves seasoning the duck, roasting it to perfection, and cooking the red cabbage with apples and spices to complement the rich flavors of the meat. Serve this dish with roasted potatoes or dumplings for a complete German holiday feast.
Ingredients (serving size: 4-6 people):
- 1 whole duck (approximately 4-5 pounds)
- 2 teaspoons salt
- 1 teaspoon black pepper
- 1 teaspoon dried thyme
- 1 tablespoon olive oil
- 1 medium onion, chopped
- 1 red cabbage, shredded
- 2 apples, peeled and diced
- 1 cup apple cider vinegar
- 1/2 cup sugar
- 1/2 teaspoon ground cinnamon
- 1/4 teaspoon ground cloves
- 1/4 teaspoon allspice
- 1/2 cup water
Cooking Instructions:
- Preheat the Oven: Begin by preheating your oven to 375°F (190°C). This is essential to guarantee that the duck cooks evenly and achieves a crispy skin.
- Prepare the Duck: Clean the duck by removing any remaining feathers and innards. Pat the skin dry with paper towels. Season the duck inside and out with salt, pepper, and thyme. Rub the skin with olive oil to help achieve a crispy finish when roasted.
- Roast the Duck: Place the seasoned duck breast side up on a roasting rack in a large roasting pan. Roast in the preheated oven for about 1.5 to 2 hours, or until the internal temperature reaches 165°F (74°C). Baste the duck with its own juices every 30 minutes for peak flavor and moisture.
- Prepare the Red Cabbage: While the duck is roasting, heat a large pot over medium heat and add the chopped onion. Sauté until translucent, about 5 minutes. Then, add the shredded red cabbage and diced apples. Stir to combine.
- Add the Flavorings: Pour the apple cider vinegar over the cabbage mixture, followed by the sugar, cinnamon, cloves, allspice, and water. Stir well to combine all the ingredients. Bring the mixture to a simmer, cover, and cook for 30-40 minutes until the cabbage is tender, stirring occasionally.
- Finish Roasting the Duck: Once the duck has reached the desired temperature and is golden brown, remove it from the oven and let it rest for at least 15 minutes before carving. This resting period helps the juices redistribute, ensuring a moist and flavorful result.
- Serve: Carve the duck and serve it alongside the sweet and tangy red cabbage. Garnish with fresh herbs if desired, and enjoy your festive holiday meal!
Extra Tips: To enhance the flavor of the duck, consider stuffing it with fresh herbs like rosemary or thyme before roasting. Additionally, if you prefer a less sweet red cabbage, reduce the amount of sugar in the recipe. Keep an eye on the duck while it roasts; if the skin begins to brown too quickly, cover it loosely with aluminum foil to prevent burning. Finally, pairing this dish with a good German beer or a fruity red wine can elevate the dining experience.