

Gather around and let the aroma of Portuguese Christmas fill your home. These recipes, from the comforting Bacalhau À Brás to the delightful Aletria, are cherished traditions. Each dish is a little piece of my family’s holiday story. I’m thrilled to share these flavors that make the season special. Let’s explore these festive Portuguese dishes together.
Bacalhau À Brás
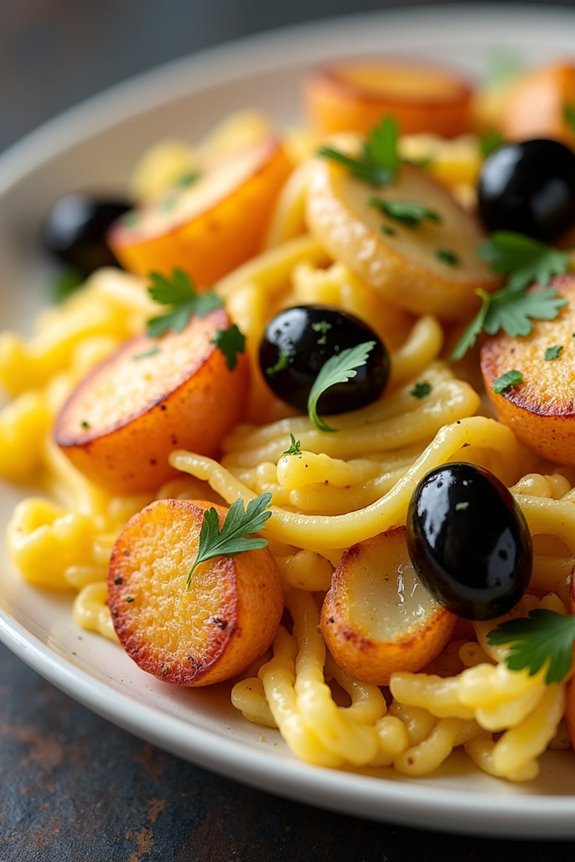
Bacalhau À Brás is a traditional Portuguese dish that beautifully combines the flavors of salted cod, potatoes, and eggs into a hearty meal that’s especially popular during the Christmas season.
Originating from Lisbon, this dish is known for its unique texture and comforting taste, making it a staple in many Portuguese homes during the holidays. The combination of shredded cod, finely cut fried potatoes, and creamy scrambled eggs creates a wonderful harmony of flavors that’s sure to please your family and guests alike.
This dish is often garnished with black olives and chopped parsley, which add a hint of freshness and a touch of elegance. Bacalhau À Brás isn’t only delicious but also represents the rich culinary heritage of Portugal, showcasing the country’s love for seafood and comfort food.
Whether you’re celebrating Christmas or just looking to enjoy a taste of Portugal, this dish is a must-try that’s sure to impress.
Ingredients (Serves 4-6):
- 500g salted cod (bacalhau)
- 500g potatoes (preferably starchy potatoes)
- 1 medium onion, finely chopped
- 3 cloves of garlic, minced
- 6 large eggs
- 100ml olive oil
- Black olives, for garnish
- Fresh parsley, chopped, for garnish
- Salt and pepper, to taste
Cooking Instructions:
- Prepare the Cod: Start by soaking the salted cod in water for about 24-48 hours, changing the water several times to remove excess salt. Once desalted, boil the cod in fresh water for about 10-15 minutes until it’s cooked through. Let it cool, then shred the fish into bite-sized pieces, removing any bones and skin.
- Fry the Potatoes: Peel the potatoes and cut them into thin matchstick shapes or use a mandoline slicer for even pieces. Heat olive oil in a large frying pan over medium heat. Once the oil is hot, add the potatoes and fry them until they’re golden and crispy. This should take about 10-15 minutes. Once done, remove the potatoes from the pan and drain on paper towels to remove excess oil.
- Sauté the Onion and Garlic: In the same frying pan, add a little more olive oil if necessary, and then add the chopped onion. Sauté the onion over medium heat until it becomes translucent, about 5 minutes. Add the minced garlic and sauté for an additional minute until fragrant.
- Combine Ingredients: Lower the heat and add the shredded cod to the pan with the sautéed onions and garlic, mixing everything together gently. Next, add the fried potatoes, stirring to combine all the ingredients evenly.
- Scramble the Eggs: In a separate bowl, whisk the eggs together with salt and pepper. Pour the eggs over the cod and potato mixture in the pan. Cook gently, stirring continuously until the eggs are just set and have a creamy consistency. This should take about 3-5 minutes.
- Serve: Once the eggs are cooked to your liking, remove the pan from heat. Garnish with black olives and chopped parsley. Serve warm, and enjoy your Bacalhau À Brás!
Extra Tips:
When preparing Bacalhau À Brás, it’s important to adjust the seasoning carefully, especially since the cod can be quite salty even after soaking.
If you find that the dish is too salty, you can serve it with a side of salad to balance the flavors. Additionally, using a mix of different types of potatoes can add a unique texture to the dish. Don’t hesitate to experiment with additional ingredients like bell peppers or spices to personalize your Bacalhau À Brás!
Polvo À Lagareiro
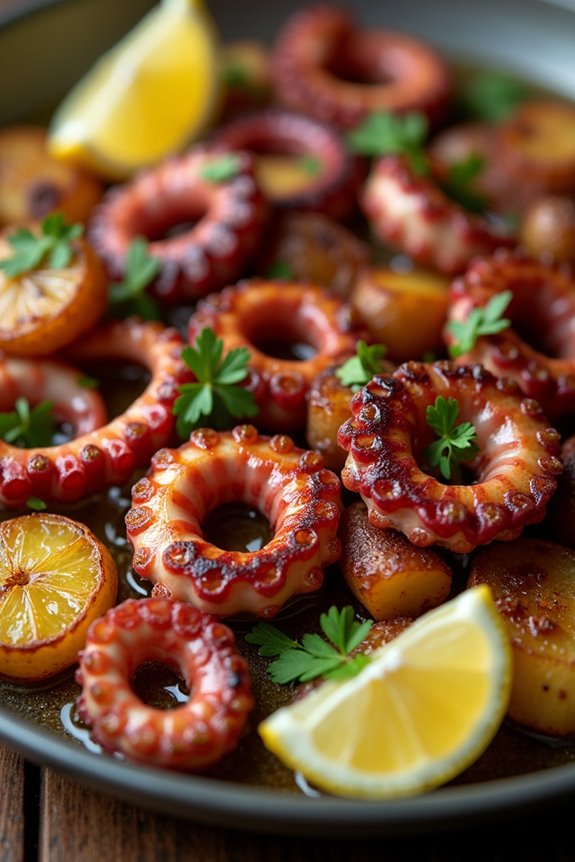
Polvo À Lagareiro is a traditional Portuguese dish that showcases the delightful flavors of octopus, often enjoyed during festive occasions, including Christmas. This dish is renowned for its tender and flavorful octopus, which is roasted to perfection, then drizzled with olive oil, garlic, and parsley. The combination of these ingredients creates a savory and aromatic experience that has made this dish a favorite among seafood lovers.
The name “À Lagareiro” refers to the style of preparation that involves olive oil and garlic, reminiscent of the rustic cooking methods in Portugal. Served alongside boiled potatoes and a fresh salad, Polvo À Lagareiro isn’t only a feast for the palate but also a feast for the eyes, making it a perfect centerpiece for any holiday table. This dish brings warmth and comfort, embodying the spirit of Portuguese hospitality.
Ingredients (serving size: 4-6 people):
- 1.5 kg (3.3 lbs) octopus, cleaned
- 4 medium-sized potatoes
- 6 cloves of garlic, minced
- 100 ml (about 1/2 cup) extra virgin olive oil
- 1 bunch of fresh parsley, chopped
- 1 teaspoon paprika (optional)
- Salt, to taste
- Black pepper, to taste
- Lemon wedges, for serving
Cooking Instructions:
- Prepare the Octopus: Start by bringing a large pot of salted water to a boil. Once boiling, add the cleaned octopus and cook for about 45-60 minutes, or until it becomes tender. To check for doneness, insert a fork or knife into the thickest part of the tentacle; it should slide in easily. Once cooked, remove the octopus and let it cool slightly.
- Boil the Potatoes: In the same pot used for the octopus, add the whole potatoes (with skin on) and boil them until they’re fork-tender, usually around 20-25 minutes. Drain and allow them to cool, then peel and cut them into halves or quarters.
- Preheat the Oven: Preheat your oven to 200°C (400°F). This will guarantee that your octopus gets a nice crispy exterior while roasting.
- Prepare the Octopus for Roasting: Once the octopus is cool enough to handle, chop it into manageable pieces (you can cut it into halves or quarters). Place the octopus pieces in a large mixing bowl and add minced garlic, olive oil, paprika (if using), salt, and black pepper. Toss well to coat all the pieces evenly.
- Roast the Octopus and Potatoes: In a baking dish, arrange the octopus pieces and the boiled potatoes. Drizzle any remaining olive oil from the mixing bowl over the top. Roast in the preheated oven for about 25-30 minutes, or until the octopus is slightly charred and the potatoes are golden brown, turning once halfway through.
- Garnish and Serve: Once done, remove from the oven and sprinkle with freshly chopped parsley. Serve the Polvo À Lagareiro hot with lemon wedges on the side for an added zesty flavor.
Extra Tips: To enhance the flavor of your Polvo À Lagareiro, consider marinating the octopus in olive oil, garlic, and herbs for a few hours or overnight before cooking. This allows the flavors to penetrate the meat more deeply. Additionally, using a good quality extra virgin olive oil will make a significant difference in the dish’s overall taste. When serving, pair it with a crisp white wine for a truly authentic Portuguese experience.
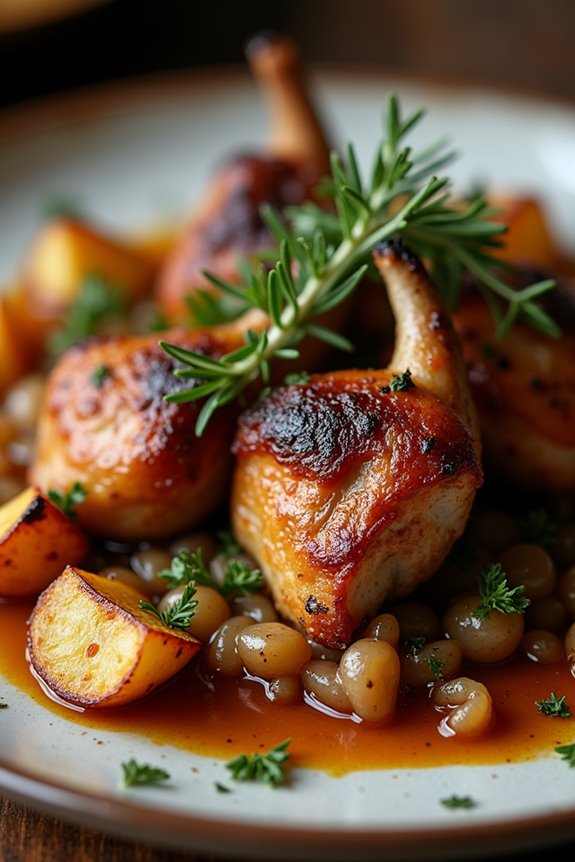
Pernil De Porco Assado
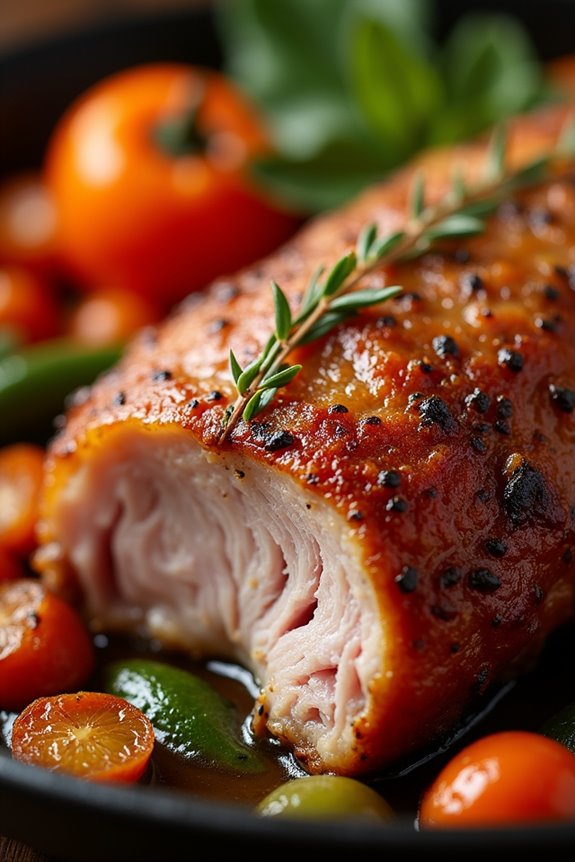
Pernil De Porco Assado, or roasted pork leg, is a beloved dish in Portuguese cuisine, especially during the festive Christmas season. Its succulent and tender meat, infused with aromatic spices and herbs, creates a centerpiece that brings family and friends together around the table.
The crispy skin and the rich flavor of the pork, combined with the delightful aromas wafting through your kitchen, make this dish a must-try for anyone looking to celebrate the holiday with a traditional Portuguese flair.
To prepare Pernil De Porco Assado, you’ll need to marinate the pork leg ahead of time to allow the flavors to penetrate the meat. This dish isn’t only a feast for the taste buds but also a visual delight with its golden-brown surface. Serve it alongside roasted vegetables or a fresh salad to create a complete meal that resonates with the warmth of the season.
Ingredients (serving size: 4-6 people)
- 1 pork leg (approximately 4-5 lbs)
- 6 garlic cloves, minced
- 2 tablespoons olive oil
- 2 tablespoons paprika
- 1 tablespoon salt
- 1 tablespoon black pepper
- 1 tablespoon dried oregano
- 1 tablespoon fresh rosemary, chopped
- 1 lemon, juiced
- 1 cup white wine
- 1 onion, quartered
- 2 cups vegetable broth
Cooking Instructions
- Prepare the Marinade: In a bowl, combine the minced garlic, olive oil, paprika, salt, black pepper, oregano, rosemary, and lemon juice. Mix well to form a paste. This marinade will infuse the pork with rich flavors.
- Marinate the Pork: Rub the marinade all over the pork leg, making sure that it gets into all the nooks and crannies. Place the pork in a large resealable plastic bag or a covered dish and refrigerate for at least 4 hours, preferably overnight. This step is essential for maximizing the flavor.
- Preheat the Oven: About 30 minutes before cooking, preheat your oven to 350°F (175°C). A properly preheated oven will help achieve that crispy skin.
- Prepare the Roasting Pan: In a large roasting pan, scatter the quartered onion and pour in the white wine and vegetable broth. This mixture will keep the pork moist while adding depth to the flavor.
- Roast the Pork: Place the marinated pork leg on a rack in the roasting pan, skin side up. Roast in the preheated oven for about 2 to 2.5 hours, or until the internal temperature reaches 145°F (63°C). Baste the pork with the pan juices every 30 minutes to guarantee even cooking and to enhance the flavor of the skin.
- Crisp the Skin: For the final 20-30 minutes of cooking, increase the oven temperature to 425°F (220°C) to crisp up the skin. Keep a close eye to prevent burning.
- Rest the Meat: Once the pork is done, remove it from the oven and let it rest for at least 15-20 minutes before carving. This allows the juices to redistribute, making sure the meat remains juicy.
- Serve: Slice the pork leg and serve it hot, accompanied by the pan juices and your choice of sides.
Extra Tips
When preparing Pernil De Porco Assado, consider using a meat thermometer to check for doneness, as cooking times can vary based on the size of the pork leg.
Additionally, allowing the pork to rest after cooking is essential; it will make a significant difference in the juiciness of the meat. For added flavor, you can also include herbs such as thyme or bay leaves in the roasting pan.
To conclude, don’t hesitate to experiment with side dishes; traditional accompaniments like roasted potatoes or sautéed greens can elevate your festive meal even further. Enjoy the process and the celebration!
Arroz De Pato
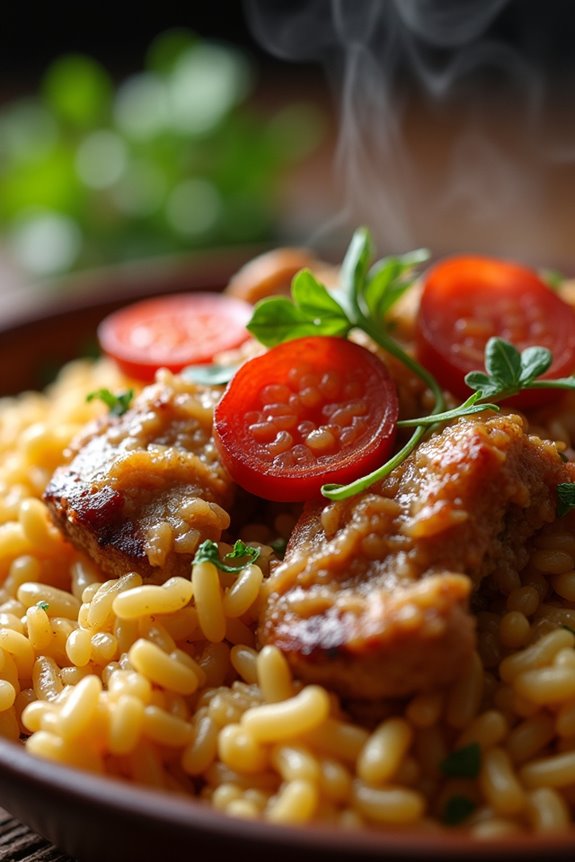
Arroz De Pato, or Duck Rice, is a beloved dish from Portugal that showcases the rich flavors and textures that define traditional Portuguese cuisine. This hearty meal is perfect for festive occasions, particularly during Christmas, when families come together to celebrate with food that warms the heart. The dish combines tender duck meat with seasoned rice, infused with aromatic spices, and topped with crispy chorizo for an additional depth of flavor.
This recipe highlights the importance of slow cooking to guarantee that the duck is tender and the rice absorbs all the wonderful flavors. The combination of herbs and spices not only enhances the dish but also brings a wonderful aroma that fills the kitchen as it cooks. Whether you’re cooking for a family gathering or just a cozy dinner at home, Arroz De Pato is sure to impress your guests and create a memorable dining experience.
Ingredients (Serves 4-6):
- 1 whole duck (approximately 4-5 lbs)
- 2 cups long-grain rice
- 1 large onion, chopped
- 3 cloves garlic, minced
- 1 bay leaf
- 1 teaspoon paprika
- 1 teaspoon dried thyme
- 1 teaspoon salt
- ½ teaspoon black pepper
- 4 cups chicken or duck broth
- 1 cup chorizo, sliced
- 2 tablespoons olive oil
- Fresh parsley, chopped (for garnish)
Cooking Instructions:
- Prepare the Duck: Start by rinsing the duck under cold water and patting it dry with paper towels. Season the duck generously with salt, pepper, and paprika, ensuring it’s evenly coated. Place the duck in a large pot and cover it with water. Bring to a boil, then reduce the heat and let it simmer for about 1 hour until tender. Once cooked, remove the duck from the pot, reserving the broth.
- Sauté Aromatics: In a large skillet or Dutch oven, heat the olive oil over medium heat. Add the chopped onion and sauté until translucent, about 5 minutes. Stir in the minced garlic, bay leaf, thyme, and cook for an additional minute until fragrant.
- Cook the Rice: Add the rice to the skillet, stirring to coat it in the aromatics. Pour in 4 cups of the reserved duck broth (or chicken broth) and bring it to a boil. Reduce the heat to low and cover the pot, allowing the rice to simmer for about 15-20 minutes or until the rice is tender and has absorbed the liquid.
- Prepare the Duck Meat: While the rice is cooking, debone the cooked duck and shred the meat into bite-sized pieces, discarding the skin and bones.
- Combine Ingredients: Once the rice is cooked, gently fold in the shredded duck meat and half of the sliced chorizo. Mix well to guarantee everything is combined and evenly distributed.
- Finish Cooking: Preheat your oven to 375°F (190°C). Transfer the duck rice mixture to a large oven-safe dish. Top with the remaining chorizo slices. Bake in the preheated oven for about 20-25 minutes until the top is crispy and golden.
- Serve: Remove from the oven and let it cool for a few minutes. Garnish with freshly chopped parsley before serving. This dish can be served warm as a main course.
Extra Tips: Make sure to taste the broth before cooking the rice, as the seasoning of the broth will greatly affect the flavor of the dish. If you prefer a bit more richness, you can add a splash of white wine to the broth while simmering the duck. Additionally, feel free to customize the dish by adding vegetables such as peas or carrots for added color and nutritional value. Enjoy your Arroz De Pato with a side of crusty bread to soak up the delicious flavors!
Cabrito Assado
Cabrito Assado, or roasted goat, is a traditional Portuguese dish often enjoyed during festive occasions, particularly around Christmas. The tender meat is seasoned and slow-roasted to perfection, resulting in a beautifully succulent dish that’s bursting with flavor.
This classic recipe is a celebration of rustic Portuguese cooking, showcasing the rich culinary heritage of the country. The combination of fresh herbs and spices elevates the dish, making it a centerpiece that will impress your guests.
Preparing Cabrito Assado requires some planning but is well worth the effort. The key to achieving the perfect roast lies in marinating the goat meat beforehand, allowing the flavors to penetrate deeply.
Served alongside roasted potatoes and seasonal vegetables, this dish embodies the spirit of a hearty Portuguese meal, bringing family and friends together around the table.
Ingredients (Serves 4-6)
- 1.5 kg (3-4 lbs) young goat (cabrito), cleaned and cut into pieces
- 4 cloves of garlic, minced
- 1 tablespoon of fresh rosemary, chopped
- 1 tablespoon of fresh thyme, chopped
- 1 tablespoon of fresh parsley, chopped
- 1 teaspoon of paprika
- 1 teaspoon of black pepper
- 1 teaspoon of salt
- 1/2 cup of olive oil
- 1 cup of white wine
- 2 large onions, sliced
- 4 medium potatoes, cut into wedges
- 2 bay leaves
- Zest of 1 lemon
Cooking Instructions
1. Marinate the Goat: In a large bowl, combine the minced garlic, rosemary, thyme, parsley, paprika, black pepper, salt, olive oil, white wine, and lemon zest. Mix well to form a marinade.
Add the goat pieces, guaranteeing they’re well coated with the marinade. Cover the bowl and refrigerate for at least 4 hours, preferably overnight, to allow the flavors to meld.
2. Preheat the Oven: Preheat your oven to 180°C (350°F). This temperature is ideal for slow-roasting the goat, guaranteeing it becomes tender while developing a beautiful golden crust.
3. Prepare the Baking Dish**: In a large roasting pan, spread the sliced onions evenly across the bottom. This will create a flavorful base** for the goat and prevent it from sticking to the pan.
4. Arrange the Goat: Remove the goat from the marinade and place the pieces on top of the onions in the roasting pan. Pour any remaining marinade over the meat, then tuck the bay leaves around the goat.
5. Add Potatoes: Scatter the potato wedges around the goat in the roasting pan. This allows them to absorb the delicious juices as they cook, resulting in flavorful roasted potatoes.
6. Roast in the Oven: Cover the roasting pan with aluminum foil and place it in the preheated oven. Roast for approximately 1.5 to 2 hours, or until the meat is tender and thoroughly cooked.
Remove the foil for the last 30 minutes to allow the goat to brown beautifully.
7. Rest and Serve: Once cooked, remove the roasting pan from the oven and let the goat rest for about 10-15 minutes before serving. This helps retain the juices and guarantee a moist, tender meal.
Serve hot with the roasted potatoes and any additional sides you desire.
Extra Tips
For the best flavor, choose a young goat, as it’s more tender and has a milder taste compared to older goats.
Consider adding seasonal vegetables such as carrots or Brussels sprouts to the roasting pan for additional flavor and color.
If you want a richer sauce, you can deglaze the roasting pan with a bit of stock or more wine after removing the goat, scraping up the brown bits for a delicious gravy.
Enjoy your Cabrito Assado with a glass of Portuguese red wine for the perfect festive meal!
Frango À Piri-Piri
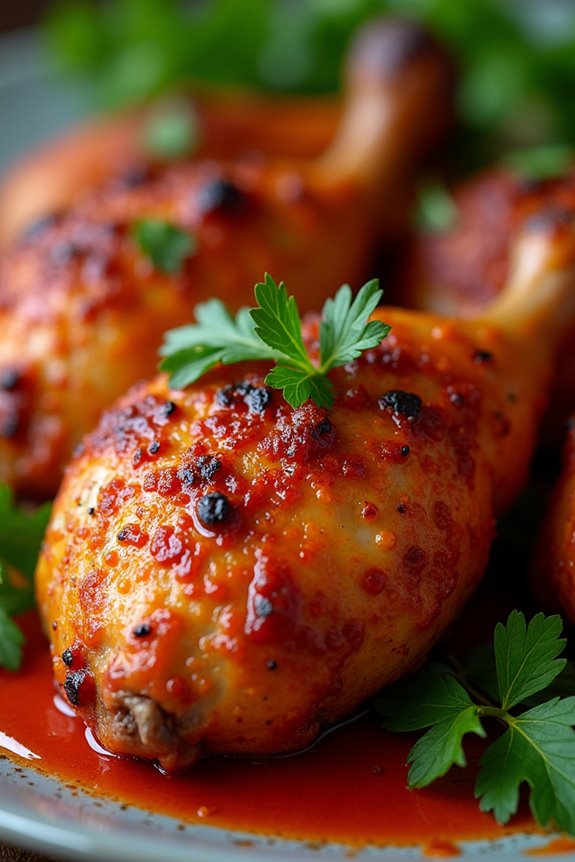
Frango À Piri-Piri is a beloved Portuguese dish that combines tender chicken with a spicy, flavorful marinade made from Piri-Piri sauce. This dish isn’t only a staple in Portuguese cuisine but also a favorite in various regions of Africa, where the Piri-Piri chili originates. The vibrant mix of flavors makes it perfect for festive occasions, including Christmas, where it can be served as a delightful centerpiece for gatherings.
The dish is known for its easy preparation and the ability to adapt to your spice tolerance, making it a versatile option for any holiday feast.
To create Frango À Piri-Piri, the chicken is marinated in a blend of spices, garlic, and lemon juice, allowing it to soak up all the delicious flavors before being grilled or roasted to perfection. The result is juicy, succulent chicken with a crispy skin and a perfectly balanced heat that will tantalize your taste buds.
Serve it with some traditional sides like rice or roasted potatoes, and you’ll have a meal that’s certain to impress your guests this holiday season.
Ingredients (Serves 4-6):
- 1 whole chicken (about 4-5 pounds)
- 4 tablespoons Piri-Piri sauce
- 4 cloves garlic, minced
- 2 tablespoons olive oil
- 1 lemon, juiced
- 1 teaspoon smoked paprika
- 1 teaspoon salt
- 1 teaspoon black pepper
- 1 teaspoon dried oregano
- Fresh parsley, for garnish (optional)
Cooking Instructions:
- Prepare the Chicken: Start by cleaning the chicken thoroughly under cold running water. Remove any excess fat and pat it dry with paper towels. This step is vital as dry skin helps achieve a crispy finish when cooking.
- Make the Marinade: In a mixing bowl, combine the Piri-Piri sauce, minced garlic, olive oil, lemon juice, smoked paprika, salt, black pepper, and dried oregano. Whisk the ingredients together until well combined, creating a flavorful marinade that will enhance the chicken’s taste.
- Marinate the Chicken: Place the chicken in a large resealable plastic bag or a deep dish. Pour the marinade over the chicken, making sure it’s well coated both inside and out. Seal the bag or cover the dish and refrigerate for at least 2 hours, or preferably overnight. This allows the flavors to penetrate the meat fully.
- Preheat the Oven or Grill: If you’re roasting the chicken, preheat your oven to 425°F (220°C). If grilling, prepare your grill for medium-high heat. This step is critical to guarantee even cooking and that beautiful char marks when grilling.
- Cook the Chicken: If roasting, place the marinated chicken on a roasting rack in a baking tray. Roast for about 1 hour and 15 minutes, or until the internal temperature reaches 165°F (75°C). If grilling, cook the chicken for approximately 30-40 minutes, turning occasionally, until fully cooked and the skin is crispy and golden brown.
- Rest the Chicken: Once cooked, remove the chicken from the oven or grill and let it rest for about 10-15 minutes before carving. This helps the juices redistribute, keeping the meat juicy and tender.
- Serve: Carve the chicken into pieces and arrange on a serving platter. Garnish with fresh parsley if desired, and serve with your favorite sides.
Extra Tips: For an even deeper flavor, consider spatchcocking the chicken before marinating; this allows for more even cooking and better absorption of the marinade.
If you prefer a milder dish, reduce the amount of Piri-Piri sauce or use a less spicy variety. Additionally, serving with a side of cooling yogurt or a fresh salad can help balance the heat from the dish. Enjoy your festive cooking!
Sopa De Pedra
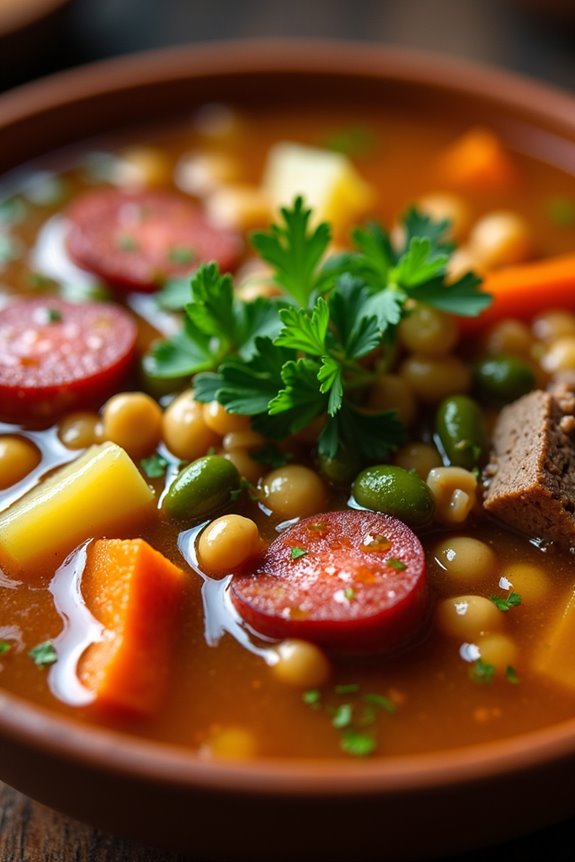
Sopa De Pedra, or Stone Soup, is a traditional Portuguese dish that embodies the spirit of resourcefulness and community. Originating from a folk tale, this hearty soup combines humble ingredients into a delightful dish that warms both the body and soul.
The beauty of Sopa De Pedra lies not just in its flavors but in its narrative—how a simple stone can inspire a feast through collaboration and sharing. This festive recipe is perfect for gatherings, especially during the Christmas season, where sharing a meal is at the heart of the celebration.
This soup is rich in flavor and can be tailored to individual preferences, making it a versatile dish for any occasion. Traditionally, the soup includes a variety of meats, vegetables, and legumes, simmered together to create a comforting and satisfying meal.
With its roots in Portuguese culture, Sopa De Pedra is sure to bring a touch of warmth and togetherness to your holiday table.
Ingredients (Serves 4-6):
- 200g beef (cut into small pieces)
- 100g pork (cut into small pieces)
- 100g chorizo sausage (sliced)
- 1 onion (chopped)
- 2 cloves garlic (minced)
- 2 carrots (diced)
- 2 potatoes (diced)
- 150g green beans (trimmed and cut)
- 1 can (400g) chickpeas (drained and rinsed)
- 1 liter beef or vegetable broth
- 2 tablespoons olive oil
- Salt and pepper (to taste)
- Fresh parsley (for garnish)
Cooking Instructions:
- Prepare the Meat: In a large pot, heat the olive oil over medium heat. Add the beef and pork pieces, cooking until they’re browned on all sides. This step will enhance the flavor of the meat and create a rich base for the soup.
- Sauté Aromatics: Once the meat is browned, add the chopped onion and minced garlic to the pot. Sauté until the onion becomes translucent, which should take about 3-4 minutes. This will infuse the oil with flavor and create a fragrant base for the soup.
- Add Vegetables: Next, stir in the diced carrots, potatoes, and green beans. Cook the vegetables for about 5 minutes, stirring occasionally. This step helps to soften the vegetables and allows their flavors to meld with the meat and aromatics.
- Incorporate Broth and Chickpeas: Pour in the beef or vegetable broth, followed by the drained chickpeas. Bring the mixture to a boil, then reduce the heat to low. Allow the soup to simmer gently for about 30 minutes, letting the flavors develop and the ingredients soften.
- Add Chorizo and Season: After 30 minutes, add the sliced chorizo to the pot. Season the soup with salt and pepper to taste. Continue to simmer for another 10-15 minutes, which will allow the chorizo to infuse its smoky flavor into the soup.
- Serve: Once all the ingredients are well-cooked and the flavors are combined, ladle the soup into bowls. Garnish with freshly chopped parsley for a burst of color and freshness.
Extra Tips:
For a more authentic touch, consider adding a “stone” to your Sopa De Pedra—a clean, smooth rock that symbolizes the legend behind the dish. Just remember to remove it before serving!
Additionally, feel free to customize the soup with any seasonal vegetables or leftovers you may have. The beauty of Sopa De Pedra is in its adaptability, making it a perfect choice for using what’s available in your kitchen. Enjoy it with crusty bread for a complete meal!
Bolo Rei

Bolo Rei, or King Cake, is a traditional Portuguese dessert that’s especially popular during the Christmas season and the Epiphany celebrations. This festive cake is renowned for its vibrant colors, rich flavors, and hidden surprises, making it a delightful addition to any holiday table.
With its origins dating back to the time of the Three Wise Men, Bolo Rei is adorned with candied fruits, nuts, and sometimes even a small figurine or a bean, symbolizing the gifts brought to Jesus. The cake isn’t only a treat for the taste buds but also a centerpiece for family gatherings, fostering a sense of togetherness and celebration.
The preparation of Bolo Rei can be a labor of love, but the results are well worth the effort. The cake has a soft, brioche-like texture that’s slightly sweet and flavored with hints of orange and lemon zest. As you slice into it, the bright colors of the candied fruits and the crunch of the nuts create a feast for the eyes as well.
Whether enjoyed with a cup of coffee or as a dessert after a festive meal, Bolo Rei captures the essence of Portuguese Christmas spirit and tradition.
Ingredients (Serves 4-6 people):
- 500g all-purpose flour
- 100g sugar
- 10g salt
- 20g fresh yeast (or 7g active dry yeast)
- 3 large eggs
- 150ml milk, warmed
- 100g unsalted butter, softened
- Zest of 1 orange
- Zest of 1 lemon
- 100g mixed candied fruits, chopped
- 50g chopped nuts (e.g., almonds and walnuts)
- 1 tablespoon rum or brandy (optional)
- 1 small figurine (optional, for tradition)
- 1 dried bean (optional, for tradition)
- Additional candied fruits for decoration
- Powdered sugar for dusting
Cooking Instructions:
- Prepare the Yeast Mixture: In a small bowl, dissolve the fresh yeast in the warm milk along with a tablespoon of sugar. Let it sit for about 10 minutes until it becomes frothy. If using active dry yeast, mix it directly with the flour.
- Mix the Dry Ingredients: In a large mixing bowl, combine the flour, sugar, and salt. Make a well in the center of the flour mixture to add the yeast mixture once it’s ready.
- Combine Wet Ingredients: Add the eggs, softened butter, orange zest, lemon zest, and rum (if using) into the flour mixture. Pour in the frothy yeast mixture and mix until the dough starts to come together.
- Knead the Dough: Transfer the dough to a floured surface and knead for about 10 minutes until it becomes smooth and elastic. If the dough is too sticky, sprinkle a little more flour as needed.
- First Rise: Form the dough into a ball and place it in a lightly greased bowl. Cover it with a clean cloth or plastic wrap and let it rise in a warm place for about 1 to 2 hours, or until it has doubled in size.
- Incorporate Fruits and Nuts: Once the dough has risen, punch it down and incorporate the chopped candied fruits and nuts into the dough. If you’re using the figurine and bean, hide them within the dough at this stage.
- Shape the Cake: Shape the dough into a ring (like a crown) and place it on a baking sheet lined with parchment paper. Make sure to leave a hole in the center for a classic Bolo Rei look.
- Second Rise: Cover the shaped dough again and let it rise for another 30 minutes to 1 hour until it puffs up.
- Preheat the Oven: While the dough is rising, preheat your oven to 180°C (350°F).
- Bake the Cake: Bake the Bolo Rei in the preheated oven for about 25-30 minutes, or until golden brown. A toothpick inserted into the center should come out clean.
- Cool and Decorate: Once baked, allow the cake to cool slightly on a wire rack. Decorate the top with additional candied fruits and dust with powdered sugar before serving.
Extra Tips:
To achieve the best flavor and texture for your Bolo Rei, make sure all your ingredients are at room temperature before starting. This helps in better mixing and rising of the dough.
You can also experiment with different types of nuts or dried fruits according to your taste preferences. If you’re making the cake a day in advance, store it wrapped in plastic wrap to keep it moist.
Enjoy this delightful treat with family and friends, and remember to keep an eye out for the hidden surprises inside!
Rabanadas

Rabanadas are a beloved Portuguese dessert often enjoyed during the Christmas season. These delicious treats are similar to French toast but with a unique twist that makes them a festive favorite. Traditionally, they’re made using stale bread soaked in a sweetened mixture of milk, eggs, and sugar, then fried until golden brown and coated in cinnamon sugar.
Rabanadas are typically served warm, drizzled with honey or sprinkled with powdered sugar, making them the perfect indulgence for holiday gatherings. The origins of rabanadas date back centuries and have evolved over time, with various regional adaptations throughout Portugal. They aren’t just a holiday treat but also enjoyed during other celebrations and family gatherings.
Making rabanadas is a delightful way to honor tradition while bringing a sweet treat to your Christmas table that everyone will enjoy.
Ingredients (Serves 4-6):
- 6 slices of stale bread (preferably thick-cut white bread)
- 2 cups of milk
- 4 large eggs
- 1 cup of granulated sugar
- 1 teaspoon of vanilla extract
- 1 teaspoon of ground cinnamon (plus extra for dusting)
- 1 cup of vegetable oil (for frying)
- Honey or powdered sugar (for serving, optional)
Cooking Instructions:
- Prepare the Bread: Begin by slicing your stale bread into thick slices, about 1 inch each. This thickness will help them hold up better when soaked in the milk mixture.
- Make the Soaking Mixture: In a medium-sized mixing bowl, whisk together the milk, eggs, granulated sugar, vanilla extract, and ground cinnamon until the mixture is well combined and slightly frothy.
- Soak the Bread: Dip each slice of bread into the milk mixture, allowing it to soak for about 15-20 seconds per side. Make sure the bread is saturated but not falling apart.
- Heat the Oil: In a large skillet or frying pan, heat the vegetable oil over medium heat. You want enough oil to cover the bottom of the pan but not too much that it will splatter.
- Fry the Rabanadas: Once the oil is hot, carefully add the soaked bread slices to the pan. Fry them for about 2-3 minutes on each side, or until they’re golden brown and crispy. You may need to fry in batches to avoid overcrowding the pan.
- Drain and Coat: Using a slotted spoon, remove the rabanadas from the oil and let them drain on paper towels. While still warm, sprinkle the fried rabanadas with a mixture of granulated sugar and ground cinnamon for a sweet finish.
- Serve: Arrange the rabanadas on a serving platter and drizzle with honey or sprinkle with powdered sugar before serving. Enjoy them warm for the best flavor.
Extra Tips:
When making rabanadas, using stale bread is key to achieving the right texture; fresh bread can become too mushy. If you only have fresh bread, consider lightly toasting it first to dry it out a bit.
Additionally, feel free to experiment with flavored milk, such as almond or coconut, for a unique twist. For a crunchier exterior, you can also dip the soaked bread in breadcrumbs before frying. Enjoy your rabanadas as a delightful dessert or a sweet breakfast treat during the holiday season!
Filhoses

Filhoses are a beloved Portuguese Christmas treat, often enjoyed during festive gatherings and family celebrations. These delicious, deep-fried pastries are traditionally made with a simple dough that’s flavored with orange zest and sometimes a hint of cinnamon. Dusted with powdered sugar, filhoses have a light and airy texture that contrasts beautifully with their crispy exterior.
They’re perfect for sharing and are a delightful addition to any holiday dessert table. Making filhoses at home is a wonderful way to bring a taste of Portugal to your Christmas celebrations. While they may seem a bit intimidating at first, the process is quite straightforward and rewarding.
With a few basic ingredients and a bit of patience, you can create these scrumptious treats that will have everyone asking for seconds.
Ingredients (Serves 4-6 people)
- 2 cups all-purpose flour
- 1/2 cup sugar
- 1 tablespoon baking powder
- 1 teaspoon ground cinnamon
- Zest of 1 large orange
- 1/2 cup milk
- 2 large eggs
- 1 teaspoon vanilla extract
- 1/4 cup butter, melted
- Vegetable oil for frying
- Powdered sugar for dusting
Cooking Instructions
- Prepare the Dough: In a large mixing bowl, combine the flour, sugar, baking powder, ground cinnamon, and orange zest. Mix these dry ingredients well to guarantee even distribution of flavors.
- Mix Wet Ingredients: In a separate bowl, whisk together the milk, eggs, vanilla extract, and melted butter until the mixture is smooth and well combined.
- Combine Mixtures: Gradually pour the wet mixture into the dry ingredients. Stir with a wooden spoon or spatula until a soft dough forms. Be careful not to overmix; it’s okay if there are a few lumps.
- Heat the Oil: In a deep frying pan or pot, pour enough vegetable oil to submerge the filhoses (about 2-3 inches deep). Heat the oil over medium heat until it reaches around 350°F (175°C). You can check the temperature by dropping a small amount of dough into the oil; it should sizzle and rise to the surface.
- Fry the Filhoses: Once the oil is hot, use a spoon or a small ice cream scoop to drop spoonfuls of dough into the oil. Don’t overcrowd the pan; fry them in batches if necessary. Fry for about 2-3 minutes on each side or until they’re golden brown.
- Drain and Dust: Once cooked, carefully remove the filhoses with a slotted spoon and place them on a plate lined with paper towels to drain excess oil. While they’re still warm, dust them generously with powdered sugar.
- Serve and Enjoy: Allow the filhoses to cool slightly before serving. They can be enjoyed warm or at room temperature and are best shared with family and friends during the festive season.
Extra Tips
To elevate your filhoses, consider adding a touch of nutmeg or cardamom to the dough for extra flavor. If you want to experiment, try incorporating a splash of orange juice into the batter for enhanced citrus notes.
Keep an eye on the oil temperature while frying, as too hot oil can cause the outside to burn while leaving the inside raw. Finally, store any leftovers in an airtight container at room temperature, but be aware that they’re best enjoyed fresh on the day they’re made.
Aletria
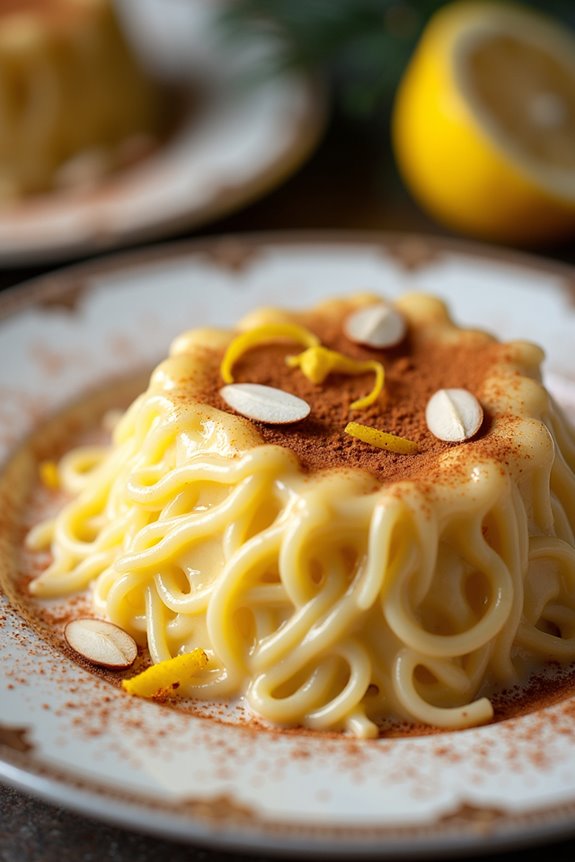
Aletria is a traditional Portuguese dessert that’s commonly enjoyed during the Christmas season. This sweet noodle pudding is infused with cinnamon and lemon, creating a warm and inviting flavor that captures the essence of holiday celebrations.
Aletria is often served as a comforting dish to share with family and friends, making it a perfect addition to any festive gathering. The dish is simple to prepare, yet it has a rich taste that delights the palate.
The base of Aletria consists of fine vermicelli noodles, which are cooked in a creamy mixture of milk and sugar. Once the noodles have absorbed the flavors and thickened, the dessert is typically garnished with cinnamon powder and occasionally topped with slivered almonds or a sprinkle of lemon zest. Its delightful aroma and creamy texture make Aletria an irresistible holiday treat that everyone will love.
Ingredients (Serves 4-6):
- 200g fine vermicelli noodles
- 1 liter whole milk
- 200g granulated sugar
- 1 stick of cinnamon
- Zest of 1 lemon
- 2 egg yolks
- 1 teaspoon vanilla extract
- Ground cinnamon (for garnish)
- Slivered almonds (optional, for garnish)
Cooking Instructions:
- Prepare the Base: In a large saucepan, combine the whole milk, sugar, stick of cinnamon, and lemon zest. Heat the mixture over medium heat, stirring occasionally until it reaches a gentle simmer. This will infuse the milk with the flavors of cinnamon and lemon.
- Cook the Vermicelli: Once the milk mixture is simmering, add the fine vermicelli noodles to the saucepan. Stir well to confirm that the noodles are fully submerged. Cook for about 8-10 minutes, stirring frequently until the noodles are tender and have absorbed most of the milk. Be careful not to overcook the noodles as they can become mushy.
- Thicken the Pudding: In a small bowl, whisk together the egg yolks and vanilla extract. Once the noodles are cooked, remove the saucepan from heat. Gradually add a ladle of the hot noodle mixture into the egg yolks while whisking continuously to temper the eggs. This prevents the yolks from scrambling when added to the hot mixture.
- Combine and Serve: Pour the egg yolk mixture back into the saucepan with the noodles, stirring constantly until everything is well combined. Return the saucepan to low heat for about 2-3 minutes, making sure the pudding thickens slightly. Remove from heat and let it cool for a few minutes before transferring it to a serving dish.
- Garnish and Enjoy: Once the Aletria has cooled slightly, sprinkle ground cinnamon over the top and add slivered almonds if desired. Serve warm or at room temperature, allowing everyone to enjoy this delightful holiday treat.
Extra Tips:
When preparing Aletria, it’s important to stir the noodles frequently to prevent them from sticking together.
If you prefer a creamier consistency, you can add more milk toward the end of cooking. For added flavor, consider infusing the milk with additional spices like nutmeg or cloves.
Aletria can be stored in the refrigerator for a couple of days, and it tastes great even when served chilled.
Pão De Ló

Pão De Ló is a traditional Portuguese sponge cake that’s light, airy, and incredibly versatile. Often enjoyed during the festive Christmas season, this cake is known for its delicate texture and subtle sweetness. It can be served plain, dusted with powdered sugar, or paired with fresh fruits and whipped cream.
The history of Pão De Ló dates back to the 18th century, and it has since become a beloved staple in Portuguese households, symbolizing warmth and togetherness during the holidays.
Making Pão De Ló requires only a few simple ingredients, making it an accessible recipe for bakers of all skill levels. The key to achieving the perfect cake lies in the whisking technique, guaranteeing that the eggs are beaten to a fluffy consistency before baking. This cake isn’t only a delight to the palate but also a wonderful centerpiece during Christmas celebrations, inviting everyone to indulge in a slice of happiness.
Ingredients (Serves 4-6):
- 4 large eggs
- 1 cup granulated sugar
- 1 cup all-purpose flour
- 1 teaspoon baking powder
- A pinch of salt
- 1 teaspoon vanilla extract (optional)
- Powdered sugar for dusting (optional)
Cooking Instructions:
- Preheat the Oven: Begin by preheating your oven to 350°F (175°C). This step is essential as it guarantees that the cake bakes evenly and rises properly.
- Prepare the Pan: Grease and flour a round cake pan (approximately 9 inches) to prevent the cake from sticking. You can also line the bottom with parchment paper for added certainty.
- Whisk the Eggs and Sugar: In a large mixing bowl, combine the eggs and granulated sugar. Using an electric mixer, beat the mixture on high speed until it becomes thick, pale, and doubles in volume. This process typically takes about 5-7 minutes. The air incorporated into the eggs is what gives the cake its light texture.
- Combine Dry Ingredients: In a separate bowl, mix the all-purpose flour, baking powder, and salt. This step guarantees that the leavening agent is evenly distributed throughout the flour.
- Fold in Dry Ingredients: Gently fold the dry ingredients into the egg mixture using a spatula. Be careful not to deflate the batter; use a figure-eight motion to maintain the fluffiness. If using vanilla extract, add it at this stage.
- Pour Batter into Pan: Once the mixture is well combined and smooth, pour it into the prepared cake pan. Spread it evenly with a spatula.
- Bake the Cake: Place the cake in the preheated oven and bake for about 25-30 minutes, or until the top is golden brown and a toothpick inserted into the center comes out clean.
- Cool the Cake: After baking, remove the cake from the oven and allow it to cool in the pan for about 10 minutes. Then, carefully invert it onto a wire rack to cool completely.
- Serve: Once cooled, dust the top with powdered sugar if desired, and slice the cake. Pão De Ló can be served plain or accompanied by fresh fruits or whipped cream.
Extra Tips:
When making Pão De Ló, guarantee that your eggs are at room temperature for better volume when whisked. Additionally, avoid opening the oven door while the cake is baking, as this can cause it to collapse.
If you want to add a twist to your Pão De Ló, consider incorporating lemon zest or almond extract for extra flavor. Store any leftover cake in an airtight container at room temperature to keep it fresh for several days.
Queijadas De Sintra

Queijadas De Sintra are delightful Portuguese cheese tarts that embody the essence of traditional Portuguese cuisine. Originating from the picturesque town of Sintra, these sweet treats are made with a rich blend of fresh cheese, sugar, and spices, all enveloped in a delicate pastry shell.
They’re often enjoyed during festive occasions, including Christmas, and are a perfect representation of the country’s love for decadent desserts. The combination of creamy cheese and aromatic cinnamon makes Queijadas De Sintra an irresistible treat.
The crust is typically flaky yet sturdy enough to hold the luscious filling, making them ideal for sharing with family and friends during the holiday season. Whether served warm or at room temperature, these tarts are sure to impress your guests and bring a taste of Portugal to your holiday celebrations.
Ingredients (Serves 4-6)
- 1 cup of fresh cheese (ricotta or cottage cheese)
- 1 cup of granulated sugar
- 2 large eggs
- 1 teaspoon of vanilla extract
- 1 teaspoon of ground cinnamon
- 1 cup of milk
- 1/2 cup of all-purpose flour
- 1/4 cup of unsalted butter, melted
- 1/2 teaspoon of baking powder
- Pinch of salt
- Pre-made pastry dough for tart shells
Cooking Instructions
1. Prepare the Pastry Shells: Roll out the pre-made pastry dough on a lightly floured surface until it’s about 1/8 inch thick. Cut the dough into circles large enough to fit into your tartlet pans. Press the dough into the pans, making certain there are no air pockets and that the edges are even.
Refrigerate the lined pans while you prepare the filling.
2. Mix the Cheese Filling****: In a mixing bowl, combine the fresh cheese, sugar, and eggs. Use a hand mixer or a whisk to blend the ingredients until smooth and creamy. This guarantees that the cheese is well-mixed with the sugar and eggs, creating a uniform texture.
3. Add Flavors and Liquids: Stir in the vanilla extract, ground cinnamon, milk, and melted butter. Mix until fully incorporated. The milk will help create a smoother filling, while the cinnamon adds a warm flavor that’s characteristic of Queijadas De Sintra.
4. Incorporate Dry Ingredients****: Gradually add the flour, baking powder, and salt to the cheese mixture. Fold these dry ingredients into the wet mixture gently until just combined. Be careful not to overmix, as this can make the tarts dense.
5. Fill the Pastry Shells: Remove the tartlet pans from the refrigerator and evenly distribute the cheese filling into each shell. Fill them about three-quarters full to allow for some rising during baking.
6. Bake the Tarts: Preheat your oven to 350°F (175°C). Place the filled tartlet pans in the oven and bake for 25-30 minutes, or until the edges are golden brown and the filling is set. You can check doneness by gently shaking the pan; the filling should be slightly firm and not jiggly.
7. Cool and Serve: Once baked, remove the tarts from the oven and let them cool in the pans for about 10 minutes. Carefully transfer them to a wire rack to cool completely. These tarts can be enjoyed warm or at room temperature.
Extra Tips
When making Queijadas De Sintra, using high-quality fresh cheese is essential for achieving the best flavor and texture. If you can’t find fresh cheese, ricotta works well as a substitute.
Additionally, you can experiment with flavors by adding a hint of lemon zest or nutmeg for a different twist. Be sure to keep an eye on the tarts while baking, as oven temperatures can vary, and you want to avoid overbaking. Enjoy your homemade Queijadas De Sintra with a sprinkle of powdered sugar on top for a festive touch!
Biscoitos De Natal

Biscoitos De Natal are traditional Portuguese Christmas cookies that bring warmth and joy to the holiday season. These delightful treats are often made with simple ingredients and are flavored with spices such as cinnamon and anise, which are reminiscent of festive gatherings. The cookies can be decorated with sugar or icing, adding a personal touch to each batch, making them perfect for sharing with family and friends or even leaving out for Santa.
The preparation of Biscoitos De Natal is a cherished tradition in many Portuguese households. Children and adults alike enjoy the process of rolling, cutting, and decorating the cookies, which often leads to wonderful memories and laughter in the kitchen. Whether you choose to enjoy them with a cup of tea or gift them to loved ones, these cookies are sure to bring a festive spirit to your holiday celebrations.
Ingredients (serving size: 4-6 people):
- 3 cups all-purpose flour
- 1 cup granulated sugar
- 1/2 cup unsalted butter, softened
- 2 large eggs
- 1/4 cup milk
- 1 tablespoon baking powder
- 1 teaspoon ground cinnamon
- 1 teaspoon anise seeds (or 1/2 teaspoon anise extract)
- 1/4 teaspoon salt
- Powdered sugar for dusting (optional)
- Decorative icing (optional)
Cooking Instructions:
- Preheat the Oven: Begin by preheating your oven to 350°F (175°C). This guarantees that the cookies will bake evenly and achieve the perfect texture.
- Mix Dry Ingredients: In a large mixing bowl, combine the flour, baking powder, ground cinnamon, anise seeds, and salt. Whisk the ingredients together thoroughly to guarantee that the baking powder and spices are evenly distributed throughout the flour.
- Cream Butter and Sugar: In a separate bowl, cream together the softened butter and granulated sugar until the mixture is light and fluffy. This process usually takes about 3-5 minutes and is essential for the texture of the cookies.
- Add Eggs and Milk: Beat in the eggs one at a time, mixing well after each addition. Then, add the milk and continue to mix until everything is well combined and smooth.
- Combine Mixtures: Gradually add the dry ingredient mixture to the wet ingredients, stirring gently until a dough forms. Be careful not to over-mix; you want the dough to be cohesive but not tough.
- Roll and Cut Cookies: Lightly flour your work surface and roll out the dough to about 1/4 inch thick. Use cookie cutters to cut out shapes, and place them on a baking sheet lined with parchment paper. Leave a little space between each cookie to allow for spreading.
- Bake the Cookies: Place the baking sheet in the preheated oven and bake for 10-12 minutes, or until the edges are lightly golden. Keep an eye on them to prevent over-baking, as they can quickly become too hard.
- Cool and Decorate: Once baked, remove the cookies from the oven and let them cool on a wire rack. Once cooled, dust them with powdered sugar or decorate with icing as desired.
Extra Tips:
When making Biscoitos De Natal, feel free to experiment with different spices or extracts to suit your taste preferences. If you want a more festive appearance, consider adding colored sprinkles or edible glitter to the icing.
These cookies can also be stored in an airtight container for up to a week, making them perfect for holiday gatherings or as a sweet treat to enjoy over the season.