

Embarking on the journey to recreate Portuguese classics with a gluten-free twist was an adventure I wasn’t sure would succeed.
To my delight, dishes like Bacalhau À Brás and Pastéis De Nata turned out just as tasty, if not more.
Each recipe embodies the rich flavors of Portugal’s culinary tradition, leaving everyone pleasantly surprised.
For those eager to explore these delightful gluten-free creations that cater to dietary needs while bursting with flavor, I’m thrilled to share them with you.
Bacalhau À Brás (Codfish With Potatoes and Eggs)

Bacalhau À Brás is a traditional Portuguese dish that beautifully combines shredded salt cod, crispy potatoes, and eggs into a comforting meal that’s both hearty and satisfying. Originating from Lisbon, this dish showcases the versatility of bacalhau (salt cod), which is a staple in Portuguese cuisine, and transforms it into a delightful mixture of flavors and textures.
The dish is often garnished with black olives and fresh parsley, adding a touch of elegance to its rustic charm.
Preparing Bacalhau À Brás requires a bit of planning, especially when it comes to soaking and desalting the cod. This step is essential to guarantee the fish has the right balance of saltiness. Once the cod is ready, the rest of the preparation comes together quickly, making it an excellent option for both family dinners and special occasions.
With its gluten-free attributes, this dish can be enjoyed by many, providing a taste of Portugal without the gluten.
Ingredients (serving size: 4-6 people)
- 500g (1 lb) of salt cod, soaked and desalted
- 4 medium potatoes, peeled and cut into matchsticks
- 6 large eggs
- 1 large onion, finely chopped
- 2 cloves of garlic, minced
- 100ml (1/2 cup) of olive oil
- Salt and pepper, to taste
- Chopped fresh parsley, for garnish
- Black olives, for garnish
Cooking Instructions
- Prepare the Cod: If you haven’t already, soak the salt cod in cold water for 24-48 hours, changing the water several times. This process desalts the cod and rehydrates it. After soaking, drain the cod and boil it in fresh water for about 15 minutes until cooked through. Let it cool, then shred the fish into bite-sized pieces, removing any skin and bones.
- Fry the Potatoes: In a large frying pan, heat a generous amount of olive oil over medium heat. Once hot, add the matchstick potatoes and fry them until they’re golden brown and crispy, about 8-10 minutes. Remove the potatoes from the pan and drain them on paper towels to absorb excess oil. Set aside.
- Sauté the Onions and Garlic: In the same pan, add a bit more olive oil if needed, then sauté the chopped onion and minced garlic over medium heat until they’re soft and translucent, about 5 minutes. Be careful not to let the garlic burn as it can become bitter.
- Combine Ingredients: Add the shredded cod to the pan with the sautéed onions and garlic. Stir well to combine and cook for another 2-3 minutes until everything is heated through.
- Add Eggs: In a separate bowl, beat the eggs and season them with salt and pepper. Pour the beaten eggs over the cod mixture in the frying pan. Stir gently to scramble the eggs, incorporating them evenly with the cod and onion mixture. Cook for about 3-4 minutes until the eggs are just set, making sure not to overcook them.
- Incorporate Potatoes: Gently fold in the crispy potatoes into the cod and egg mixture. Allow them to combine for another minute, making certain the potatoes maintain their texture.
- Serve and Garnish: Transfer the Bacalhau À Brás to a serving platter. Garnish with chopped fresh parsley and black olives. Serve hot and enjoy!
Extra Tips
For an extra flavor boost, consider adding a bit of smoked paprika or a splash of vinegar to the mixture while cooking.
It’s also important to adjust the amount of salt according to your preference, particularly since the cod can vary in saltiness depending on how long it was soaked.
Pair this dish with a fresh green salad or steamed vegetables for a complete meal. Enjoy the wonderful flavors of this Portuguese classic!
Caldo Verde (Portuguese Green Soup)
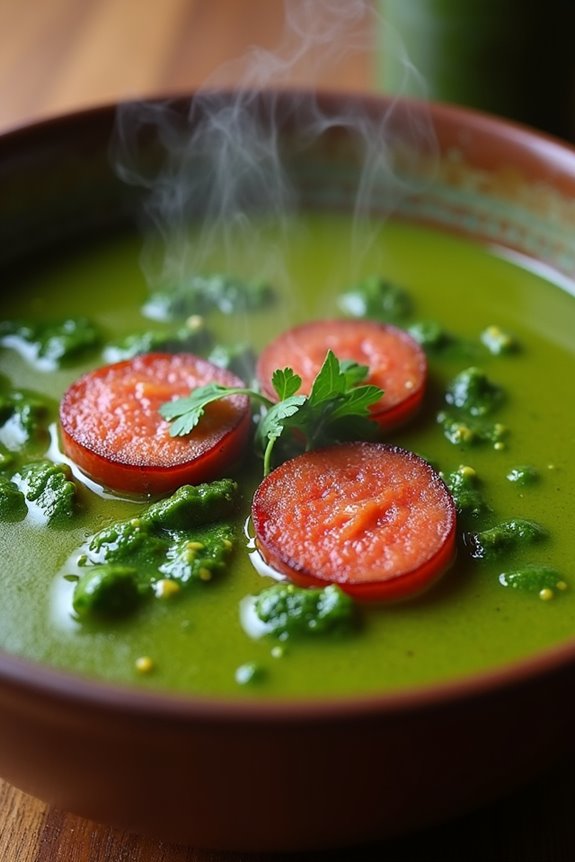
Caldo Verde, a traditional Portuguese green soup, is a comforting dish that has been enjoyed for generations. This vibrant and flavorful soup is typically made with simple ingredients and is known for its beautiful green color, which comes from the kale or collard greens used in the recipe. It’s a staple in Portuguese households, often served at family gatherings and celebrations. The soup isn’t only gluten-free but also nourishing, making it a perfect option for those seeking healthy meal options.
This delightful soup is usually accompanied by slices of chorizo sausage, which adds a rich, smoky flavor to the dish. However, you can easily modify the recipe to suit your dietary preferences by using a gluten-free sausage or omitting it altogether for a vegetarian version. The combination of potatoes and greens creates a creamy texture without the need for heavy cream, making Caldo Verde a wholesome and satisfying dish.
Ingredients (Serves 4-6 people):
- 1 medium onion, chopped
- 2 cloves garlic, minced
- 2 tablespoons olive oil
- 4 medium potatoes, peeled and diced
- 6 cups vegetable broth
- 4 cups kale or collard greens, cleaned and finely chopped
- Salt and pepper to taste
- 1-2 chorizo sausages, sliced (optional)
Cooking Instructions:
- Sauté the Aromatics: In a large pot, heat the olive oil over medium heat. Add the chopped onion and minced garlic, sautéing until the onion is translucent and fragrant, about 5-7 minutes. This step builds the base flavor for the soup.
- Cook the Potatoes: Add the diced potatoes to the pot, stirring to coat them in the onion and garlic mixture. Pour in the vegetable broth and increase the heat to bring the mixture to a boil. Once boiling, reduce the heat to a simmer and cook for approximately 15-20 minutes, or until the potatoes are tender.
- Blend the Soup: Once the potatoes are cooked, use an immersion blender to puree the soup until smooth. If you don’t have an immersion blender, you can carefully transfer the soup to a blender in batches. This step creates a creamy texture for the base of the soup.
- Add the Greens: Stir in the chopped kale or collard greens into the pureed potato base. Let the soup simmer for an additional 5-10 minutes until the greens are tender. This guarantees that the greens retain their vibrant color and nutritional value.
- Season and Serve: Taste the soup and season with salt and pepper as needed. If using, add the sliced chorizo to the soup and let it cook for a few more minutes to infuse the flavors. Serve the Caldo Verde hot, garnished with additional chorizo if desired.
Extra Tips: When preparing Caldo Verde, feel free to experiment with different types of greens based on your preference. If you prefer a thicker soup, you can mash some of the potatoes with a fork instead of blending them entirely. Additionally, serve the soup with a drizzle of olive oil on top for added richness, and pair it with gluten-free bread for a complete meal. Enjoy the warmth and comfort of this traditional Portuguese dish!
Polvo À Lagareiro (Baked Octopus With Garlic and Olive Oil)
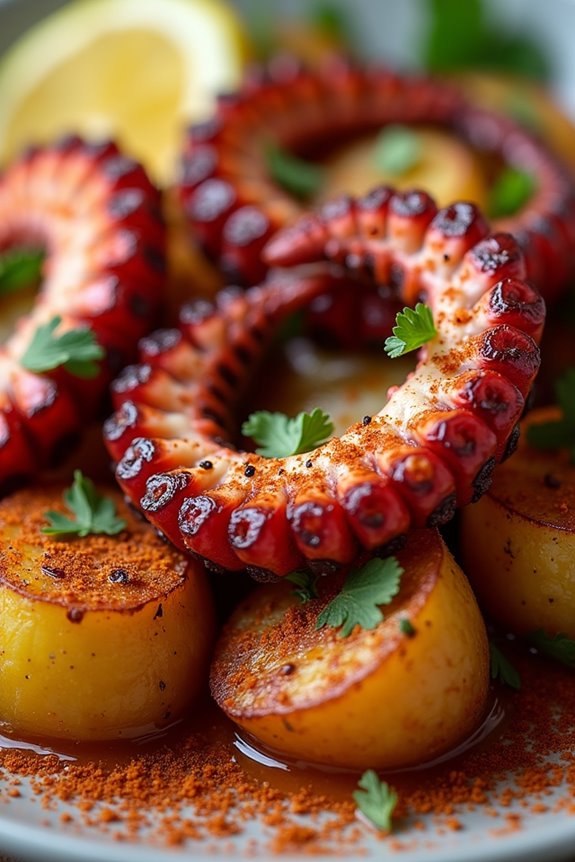
Polvo À Lagareiro is a traditional Portuguese dish that highlights the rich flavors of octopus, perfectly complemented by garlic and olive oil. The name itself translates to “Octopus in the Lagareiro Style,” referring to the rustic way of preparing this seafood delicacy, typically found in coastal regions of Portugal.
This gluten-free recipe emphasizes the simplicity and heartiness of the ingredients, allowing the natural flavors of the octopus to shine through, making it a delightful dish for seafood lovers.
Preparing Polvo À Lagareiro may seem intimidating, but with the right techniques, you can create a mouthwatering meal that will impress your family and friends. The octopus is first boiled to tenderize it and then baked with a generous amount of garlic and olive oil, resulting in a succulent dish that can be served with potatoes or a fresh salad.
This dish isn’t only a feast for the taste buds but also a beautiful representation of Portuguese culinary traditions.
Ingredients (serves 4-6 people):
- 1.5 kg (3-4 lbs) octopus, cleaned
- 4-6 medium potatoes, peeled and cut into halves or quarters
- 1 cup extra virgin olive oil
- 6-8 cloves garlic, minced
- 1 onion, sliced
- 1 tsp paprika (preferably smoked)
- Fresh parsley, chopped (for garnish)
- Salt and pepper to taste
- Lemon wedges (for serving)
Cooking Instructions:
- Boil the Octopus: In a large pot, bring salted water to a boil. Carefully add the cleaned octopus and reduce the heat to a simmer. Cook for about 45 minutes to 1 hour, or until the octopus is tender. You can test for doneness by piercing it with a fork. Once cooked, remove the octopus from the pot and let it cool. Reserve the cooking liquid.
- Prepare the Potatoes: In the same pot of reserved cooking liquid, add the potatoes and cook them until fork-tender, about 20-25 minutes. Drain the potatoes and set them aside.
- Preheat the Oven: While the potatoes are cooking, preheat your oven to 200°C (400°F). This will guarantee a crispy finish when you bake the octopus.
- Slice the Octopus: Once the octopus has cooled, slice it into tentacles or pieces, depending on your preference.
- Arrange in Baking Dish: In a large baking dish, layer the cooked potatoes and arrange the octopus pieces on top. Sprinkle the sliced onion evenly over the dish.
- Add Garlic and Olive Oil: In a small bowl, mix the minced garlic, olive oil, smoked paprika, salt, and pepper. Drizzle this mixture generously over the octopus and potatoes, making sure everything is well coated.
- Bake the Dish: Place the baking dish in the preheated oven and bake for 25-30 minutes, or until the octopus is slightly crispy around the edges and the garlic is fragrant.
- Serve: Once done, remove from the oven and garnish with fresh parsley. Serve hot with lemon wedges on the side for an extra zing.
Extra Tips: When cooking octopus, it’s essential not to overcook it, as it can become rubbery. If you’re unsure about the tenderness, you can always test a piece while boiling.
Additionally, the dish can be made ahead of time and baked just before serving, making it a convenient option for entertaining. Don’t hesitate to experiment with herbs and spices according to your taste preferences, as this dish is versatile and can be adapted in various ways!
Arroz De Marisco (Seafood Rice)
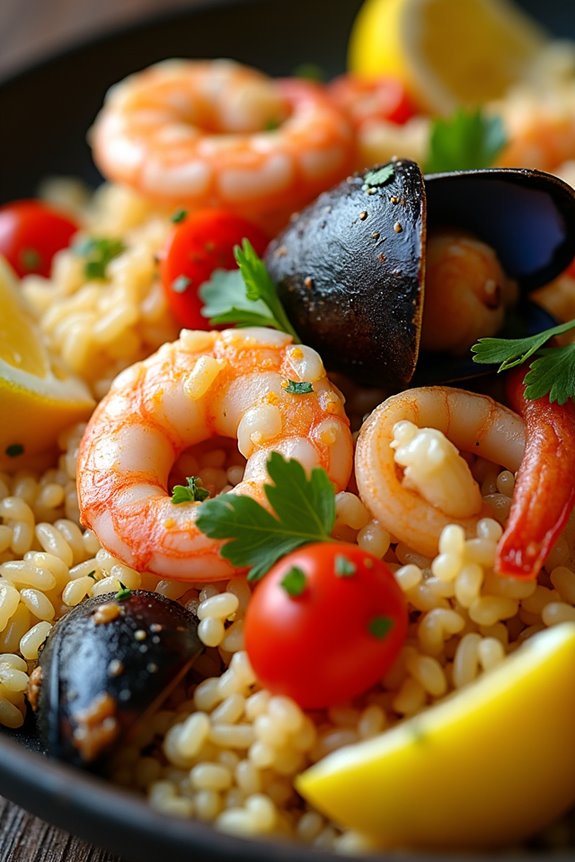
Arroz De Marisco is a traditional Portuguese dish that celebrates the bounty of the sea, combining tender rice with an array of fresh seafood. This comforting and flavorful dish is perfect for gatherings, bringing together family and friends to enjoy a taste of Portugal in the heart of your home. The gluten-free version guarantees that everyone can indulge in this delectable meal without worry, making it a fantastic option for those with dietary restrictions.
Making Arroz De Marisco is a delightful culinary adventure that combines the rich flavors of seafood with aromatic spices and fresh herbs. The dish is typically prepared in a single pot, allowing the rice to absorb the flavors of the broth and the seafood, resulting in a creamy and satisfying meal. With its vibrant colors and enticing aroma, Arroz De Marisco isn’t only a feast for the palate but also for the eyes.
Ingredients (Serves 4-6)
- 2 cups of Arborio rice (gluten-free)
- 1 lb of shrimp, peeled and deveined
- 1 lb of squid, cleaned and sliced into rings
- 1 lb of mussels, cleaned and debearded
- 1 large onion, finely chopped
- 3 cloves of garlic, minced
- 1 red bell pepper, diced
- 1 cup of diced tomatoes (fresh or canned)
- 4 cups of fish or seafood stock
- 1/2 cup of white wine (optional)
- 1 teaspoon of paprika
- 1/2 teaspoon of saffron threads (optional)
- 1/4 cup of fresh parsley, chopped
- 2 tablespoons of olive oil
- Salt and pepper to taste
- Lemon wedges for serving
Cooking Instructions
- Prepare the Broth: In a medium saucepan, heat the fish or seafood stock over medium heat. If using, add the white wine and bring to a gentle simmer. This will be used to cook the rice later.
- Sauté the Vegetables: In a large pot or deep skillet, heat the olive oil over medium heat. Add the chopped onion, and sauté for about 5 minutes until it becomes translucent. Stir in the minced garlic and diced red bell pepper, cooking for an additional 3 minutes until softened.
- Add Tomatoes and Spices: Stir in the diced tomatoes, paprika, and saffron (if using). Cook for about 5 minutes, allowing the tomatoes to break down and the flavors to meld. Season with salt and pepper to taste.
- Cook the Rice: Add the Arborio rice to the pot, stirring to coat it with the vegetable mixture. Pour in 4 cups of the simmering broth gradually, one cup at a time, stirring frequently. Allow the rice to absorb the liquid before adding the next cup. This process should take about 15-20 minutes until the rice is creamy and cooked al dente.
- Add the Seafood: Once the rice is nearly done, gently fold in the shrimp, squid, and mussels. Cover the pot and cook for an additional 5-7 minutes until the seafood is cooked through and the mussels have opened. Discard any mussels that remain closed.
- Finish and Serve: Remove the pot from heat and stir in the chopped parsley. Let the dish rest for a few minutes before serving. Serve hot, garnished with lemon wedges for an extra burst of flavor.
Extra Tips
When making Arroz De Marisco, feel free to customize the seafood based on what’s available or your personal preferences. You can also add other ingredients such as clams or fish fillets for more variety.
For a richer flavor, consider adding a splash of seafood sauce or a few drops of hot sauce to the broth. Remember to taste and adjust the seasoning throughout the cooking process to create a dish that’s perfectly suited to your palate. Enjoy this hearty meal with a glass of Portuguese wine for an authentic experience!
Piri-Piri Chicken

Piri-Piri chicken is a vibrant and flavorful dish that hails from Portugal, where the fiery heat of the piri-piri peppers meets the succulent taste of grilled chicken. This dish isn’t only gluten-free but also a fantastic option for gatherings and family dinners. The marinade is a blend of spices, garlic, and citrus that brings out the natural flavors of the chicken while infusing it with a spicy kick.
Whether you choose to grill, bake, or roast the chicken, the result will be a tender, juicy meal that’s certain to impress. To make your Piri-Piri chicken, you’ll want to prepare a marinade that allows the flavors to penetrate the meat. Allowing the chicken to rest in the marinade for a few hours, or even overnight, will enhance the taste and tenderness.
Pair this dish with sides like grilled vegetables, rice, or a fresh salad to create a well-rounded meal. Get ready to savor the heat and the unique flavors of Portugal in your very own kitchen!
Ingredients (Serves 4-6)
- 4-6 chicken thighs or drumsticks
- 4 tablespoons olive oil
- 4 cloves garlic, minced
- 2-3 tablespoons piri-piri sauce
- 1 tablespoon smoked paprika
- 1 tablespoon lemon juice
- 1 teaspoon salt
- 1 teaspoon black pepper
- 1 teaspoon dried oregano
- 1 teaspoon cayenne pepper (optional, for extra heat)
- Fresh lemon wedges (for serving)
- Fresh cilantro or parsley (for garnish)
Cooking Instructions
1. Prepare the Marinade: In a large bowl, combine the olive oil, minced garlic, piri-piri sauce, smoked paprika, lemon juice, salt, black pepper, oregano, and cayenne pepper (if using). Whisk the ingredients together until well blended.
2. Marinate the Chicken: Add the chicken thighs or drumsticks to the bowl, making certain they’re fully coated in the marinade. Cover the bowl with plastic wrap or transfer the chicken to a resealable plastic bag. Refrigerate for at least 1 hour, or ideally overnight, to allow the flavors to infuse.
3. Preheat the Grill or Oven: If grilling, preheat your grill to medium-high heat. If baking, preheat your oven to 400°F (200°C).
4. Cook the Chicken: For grilling, place the marinated chicken directly on the grill grates and cook for about 6-8 minutes per side, or until the internal temperature reaches 165°F (74°C) and the chicken is nicely charred.
For baking, place the chicken on a baking sheet lined with parchment paper and bake for about 35-40 minutes, flipping halfway through, until cooked through.
5. Rest and Serve: Once cooked, remove the chicken from the grill or oven and let it rest for about 5-10 minutes. This helps the juices redistribute within the meat. Serve with fresh lemon wedges and garnish with chopped cilantro or parsley for a burst of color and flavor.
Extra Tips
For the best results, consider using a meat thermometer to confirm your chicken reaches the perfect internal temperature without overcooking. If you prefer a milder flavor, you can adjust the amount of piri-piri sauce and cayenne pepper to your liking.
Additionally, this dish can easily be made in advance and reheated, making it a great option for meal prepping or entertaining!
Feijoada (Portuguese Bean Stew)

Feijoada is a hearty and flavorful stew that has become a beloved dish in Portuguese cuisine. Traditionally made with a variety of meats and beans, this gluten-free version stays true to its roots while accommodating those with dietary restrictions. The warm and comforting nature of this dish makes it perfect for gatherings or a cozy family dinner, and the combination of spices will leave your taste buds dancing.
This stew isn’t only delicious but also packed with protein and fiber, thanks to the beans and the variety of meats used. In this gluten-free adaptation, we utilize black beans and a medley of smoked meats, which impart a rich depth of flavor to the dish. Serve it with some fluffy rice or gluten-free cornbread for a complete meal that everyone can enjoy.
Ingredients (Serves 4-6):
- 2 cups black beans (soaked overnight and drained)
- 1 lb smoked sausage (like chorizo or linguica), sliced
- 1 lb pork shoulder, cut into chunks
- 1 cup diced bacon
- 1 large onion, chopped
- 4 cloves garlic, minced
- 2 bay leaves
- 1 tsp smoked paprika
- 1 tsp cumin
- 6 cups chicken or vegetable broth
- Salt and pepper to taste
- Fresh parsley, chopped (for garnish)
- Cooked rice or gluten-free cornbread (for serving)
Cooking Instructions:
- Prepare the Beans: Begin by soaking the black beans in water overnight. This softens them and reduces the cooking time. The next day, rinse and drain the beans before using them in the stew.
- Cook the Bacon: In a large pot or Dutch oven, cook the diced bacon over medium heat until crispy. This will render some fat, which will add flavor to the stew. Once cooked, remove the bacon and set aside, leaving the fat in the pot.
- Sauté the Meats: In the same pot, add the sliced smoked sausage and pork shoulder chunks. Brown the meats on all sides, which should take about 5-7 minutes. This step adds a rich flavor to the stew.
- Add Aromatics: Once the meats are browned, add the chopped onion and minced garlic to the pot. Sauté for about 3-4 minutes, or until the onion becomes translucent and fragrant.
- Combine Ingredients: Return the cooked bacon to the pot, then add the soaked black beans, bay leaves, smoked paprika, cumin, and broth. Stir everything together to combine, ensuring the beans and meats are well distributed.
- Simmer the Stew: Bring the mixture to a boil, then reduce the heat to low. Cover the pot and let the stew simmer for about 2 hours, stirring occasionally. The beans should become tender and the flavors well incorporated.
- Season to Taste: After the cooking time, taste the stew and season with salt and pepper as needed. If the stew is too thick, you can add a little more broth or water to reach your desired consistency.
- Serve: Remove the bay leaves before serving. Ladle the feijoada into bowls, garnish with chopped fresh parsley, and serve hot with cooked rice or gluten-free cornbread on the side.
Extra Tips:
When making feijoada, feel free to customize the meats based on your preference or what you have on hand. You can also add additional vegetables like carrots or bell peppers for extra flavor and nutrition.
For a slightly spicier version, consider adding a pinch of red pepper flakes or chopped jalapeños. Letting the stew sit for a few hours or even overnight will deepen the flavors, making it an excellent dish to prepare in advance!
Bifana (Pork Sandwich)

Bifana is a beloved Portuguese dish that consists of marinated pork served in a crusty bread roll. Traditionally, this sandwich is known for its tender, flavorful meat, which is infused with a delicious mixture of spices and served with a variety of condiments. The gluten-free version allows everyone to enjoy this classic without compromising on taste or texture.
To prepare gluten-free Bifanas, we substitute traditional bread with gluten-free rolls and guarantee that all the seasonings used are gluten-free. The result is a hearty and satisfying sandwich that maintains the authentic flavors of Portugal. Whether enjoyed as a quick lunch or a delightful dinner, Bifanas are sure to please your taste buds and impress your guests.
Ingredients (Serves 4-6):
- 1 lb pork loin, thinly sliced
- 4 cloves garlic, minced
- 1 teaspoon paprika
- 1 teaspoon ground cumin
- 1 teaspoon black pepper
- 1 teaspoon salt
- 1/4 cup white wine vinegar
- 1/4 cup olive oil
- 6 gluten-free rolls
- Sliced pickles (optional, for serving)
- Sliced onions (optional, for serving)
- Mustard (optional, for serving)
Cooking Instructions:
- Marinate the Pork: In a large bowl, combine the minced garlic, paprika, cumin, black pepper, salt, white wine vinegar, and olive oil to create a marinade. Add the thinly sliced pork loin and mix thoroughly to guarantee all pieces are coated. Cover the bowl and refrigerate for at least 1 hour, or preferably overnight, to allow the flavors to meld.
- Cook the Pork: Heat a large skillet or grill over medium-high heat. Once hot, add the marinated pork slices in a single layer, ensuring not to overcrowd the pan. Cook for about 3-4 minutes on each side or until the pork is cooked through and has a nice golden-brown color. Depending on the thickness of the slices, you may need to adjust the cooking time.
- Prepare the Rolls: While the pork is cooking, slice the gluten-free rolls in half. You can toast the rolls on a skillet or grill for added texture and flavor. This step is optional but recommended for a crispy exterior.
- Assemble the Sandwiches: Once the pork is fully cooked, remove it from the heat and let it rest for a few minutes. Place a generous portion of the cooked pork onto the bottom half of each gluten-free roll. Add sliced pickles and onions, if desired, and finish with a smear of mustard on the top half of the roll. Close the sandwich and press down gently.
- Serve: Serve the Bifanas warm with your choice of sides, such as potato chips or a fresh salad. Enjoy your delicious gluten-free Portuguese pork sandwich!
Extra Tips:
When preparing Bifanas, feel free to customize the marinade to suit your taste preferences. You can add a bit of cayenne pepper for heat or experiment with different herbs and spices.
Additionally, guarantee that all your ingredients, especially the gluten-free bread and condiments, are certified gluten-free to avoid any cross-contamination. Enjoy these sandwiches fresh, as they’re best served right after assembly for maximum flavor and texture.
Pastéis De Nata (Custard Tarts)

Pastéis De Nata, also known as Portuguese custard tarts, are a beloved dessert that has captured the hearts of many worldwide. These delectable tarts feature a flaky pastry crust filled with a rich, creamy custard that’s baked until golden and slightly caramelized on top. Traditionally made with wheat flour, this gluten-free version allows those with dietary restrictions to enjoy this classic treat without compromising on taste or texture.
The origins of Pastéis De Nata can be traced back to the early 19th century in Lisbon, where monks at the Jerónimos Monastery created them. Over time, they’ve become a staple in Portuguese cuisine, often served with a sprinkle of cinnamon or powdered sugar. This gluten-free recipe maintains the essence of the original, guaranteeing that you can indulge in these sweet delights with every bite.
Ingredients (Serves 4-6):
- 1 cup gluten-free all-purpose flour
- 1/2 cup unsalted butter, melted
- 1/4 cup sugar
- 1/2 teaspoon salt
- 1/2 cup milk
- 1/2 cup heavy cream
- 3 large egg yolks
- 1/4 cup cornstarch
- 1 teaspoon vanilla extract
- Ground cinnamon (for garnish)
Cooking Instructions:
- Prepare the Pastry Dough: In a mixing bowl, combine the gluten-free flour, melted butter, sugar, and salt. Mix until the ingredients form a soft dough. If the dough is too crumbly, add a teaspoon of cold water at a time until it holds together. Once combined, wrap the dough in plastic wrap and refrigerate for at least 30 minutes.
- Preheat the Oven: Preheat your oven to 375°F (190°C). This will guarantee that your tarts bake evenly and develop a nice golden color.
- Roll Out the Dough: After chilling, remove the dough from the refrigerator and place it on a lightly floured surface. Roll it out to about 1/8 inch thick. Use a round cutter to cut out circles that are slightly larger than the diameter of your muffin tin cups.
- Shape the Pastry in the Tin: Grease a muffin tin with butter or cooking spray. Gently press each dough circle into the cups of the muffin tin, making sure to cover the bottom and sides evenly.
- Prepare the Custard Filling: In a saucepan over medium heat, combine the milk, heavy cream, and sugar. Stir until the sugar dissolves, then bring it to a gentle simmer. In a separate bowl, whisk together the egg yolks, cornstarch, and vanilla extract until smooth. Gradually add the hot milk mixture to the egg yolk mixture, whisking continuously to prevent curdling.
- Fill the Pastry Shells: Pour the custard filling into each pastry shell, filling them about 3/4 full. This allows room for the custard to puff up as it cooks.
- Bake the Tarts: Place the muffin tin in the preheated oven and bake for 20-25 minutes, or until the tops are set and slightly browned. Keep an eye on them to avoid overbaking.
- Cool and Serve: Once baked, remove the tarts from the oven and let them cool in the tin for about 10 minutes. Then, carefully transfer them to a wire rack to cool completely. Serve warm or at room temperature, sprinkling with ground cinnamon if desired.
Extra Tips:
For the best results, confirm that your ingredients are at room temperature before starting, as this will help create a smoother custard. If you want a more pronounced caramelization on top, you can use a kitchen torch to lightly char the custard before serving.
These tarts are best enjoyed fresh, but they can be stored in an airtight container in the refrigerator for up to two days. Reheat them in the oven for a few minutes before serving to restore their flaky texture.
Torta De Azeitão (Almond Cake)

Torta De Azeitão is a beloved Portuguese dessert that showcases the delightful flavors of almonds, honey, and lemon. This gluten-free cake is moist, aromatic, and has a lovely texture that melts in your mouth. Traditionally served in the region of Azeitão, this cake holds a special place in Portuguese cuisine, often enjoyed as a treat during family gatherings or festive occasions.
Making Torta De Azeitão at home isn’t only a rewarding experience but also a great way to introduce gluten-free delights to your table. By using almond flour instead of regular wheat flour, this recipe guarantees that everyone can enjoy this scrumptious dessert without worrying about gluten. With its sweet yet subtle flavors, this cake is sure to impress anyone who takes a bite.
Ingredients (Serves 4-6):
- 200g almond flour
- 150g granulated sugar
- 4 large eggs
- 50g unsalted butter, melted
- Zest of 1 lemon
- 2 tablespoons honey
- 1 teaspoon vanilla extract
- A pinch of salt
- Powdered sugar for dusting (optional)
Cooking Instructions:
- Preheat the Oven: Begin by preheating your oven to 180°C (350°F). This step is essential as it guarantees that the cake bakes evenly and rises properly.
- Prepare the Baking Pan: Grease a round cake pan (approximately 9 inches) with butter and line the bottom with parchment paper. This prevents the cake from sticking and makes it easier to remove after baking.
- Mix Dry Ingredients: In a mixing bowl, combine the almond flour, granulated sugar, and a pinch of salt. Whisk these ingredients together to guarantee they’re evenly distributed.
- Whisk Eggs: In a separate bowl, crack the eggs and whisk them until they’re frothy. This incorporates air into the eggs, giving the cake a light texture.
- Combine Wet Ingredients: Add the melted butter, lemon zest, honey, and vanilla extract to the whisked eggs. Mix well until all ingredients are fully combined.
- Combine Wet and Dry Mixtures: Gradually fold the wet mixture into the dry ingredients using a spatula. Be gentle to avoid deflating the mixture, guaranteeing a fluffy cake texture.
- Pour into Pan: Pour the batter into the prepared cake pan and spread it evenly. Tap the pan lightly on the counter to remove any air bubbles.
- Bake the Cake: Place the cake in the preheated oven and bake for approximately 25-30 minutes, or until the top is golden brown and a toothpick inserted into the center comes out clean.
- Cool and Serve: Once baked, remove the cake from the oven and let it cool in the pan for about 10 minutes. Then, carefully transfer it to a wire rack to cool completely. Before serving, dust with powdered sugar if desired.
Extra Tips:
When making Torta De Azeitão, confirm that all your ingredients are at room temperature for the best results. This helps the batter mix more easily and creates a smoother consistency.
Additionally, feel free to experiment with flavors by adding a splash of almond extract or incorporating a handful of chopped almonds into the batter for added texture and crunch.
Store any leftovers in an airtight container at room temperature for up to three days, but it’s sure to be gobbled up quickly!
Salame De Chocolate (Chocolate Salami)

Salame De Chocolate, or Chocolate Salami, is a beloved Portuguese dessert that brings a delightful twist to traditional chocolate treats. This no-bake dessert isn’t only gluten-free but also incredibly easy to prepare, making it a perfect choice for family gatherings or parties.
The combination of rich chocolate, crunchy nuts, and sweet biscuits creates a unique texture that will have everyone reaching for another slice. This indulgent treat resembles a salami log, hence its name, and is often rolled in powdered sugar or cocoa powder to enhance its visual appeal.
It can be sliced and served as a sweet snack or dessert, making it versatile for any occasion. Whether you’re a seasoned chef or a kitchen novice, this recipe will guide you through the simple steps to create a delicious Salame De Chocolate that will impress your guests.
Ingredients (Serves 4-6):
- 200g gluten-free digestive biscuits
- 100g unsweetened cocoa powder
- 150g granulated sugar
- 100g unsalted butter, softened
- 2 large eggs
- 100g chopped nuts (such as walnuts or almonds)
- 100g dark chocolate (optional, for extra richness)
- Powdered sugar or cocoa powder (for dusting)
Cooking Instructions:
- Prepare the Biscuit Base: Start by placing the gluten-free digestive biscuits in a zip-lock bag and crush them into small pieces using a rolling pin. This will create a crumbly texture for the base of your salami. Alternatively, you can pulse them in a food processor until coarsely ground.
- Melt the Chocolate: If you’re including dark chocolate, chop it into small pieces and melt it in a heatproof bowl set over a pot of simmering water (double boiler method) or in the microwave in short bursts. Stir until smooth and remove from heat once melted.
- Mix Wet Ingredients: In a large mixing bowl, combine the softened butter and granulated sugar. Using a hand mixer or whisk, beat until the mixture is creamy and well combined. Add the eggs one at a time, mixing thoroughly after each addition.
- Combine Ingredients: Incorporate the melted chocolate (if using) and cocoa powder into the butter-sugar mixture, stirring until fully combined. Then, add the crushed biscuits and chopped nuts, mixing until everything is evenly coated.
- Shape the Salami: Lay out a large piece of plastic wrap on a clean surface. Spoon the chocolate mixture onto the wrap and shape it into a log. Roll it tightly, twisting the ends of the wrap to secure it. Refrigerate the log for at least 4 hours, or until it’s firm enough to slice.
- Serve: Once chilled and firm, remove the chocolate salami from the fridge and unwrap it. Roll it in powdered sugar or cocoa powder to give it a nice finish. Slice into rounds and serve on a platter.
Extra Tips:
For added flavor, consider infusing the chocolate mixture with a splash of vanilla extract or a hint of orange zest.
If you desire a more textured salami, feel free to experiment with different types of nuts or even dried fruits. This dessert can be made a day in advance and stored in the refrigerator, making it a convenient option for entertaining.
Enjoy your Salame De Chocolate chilled for the best taste and texture!