

Scandinavian cuisine has always captured my heart with its rich flavors and cozy dishes. When I learned to make gluten-free versions of my favorites, I was over the moon. Picture enjoying classic Swedish meatballs or a slice of Norwegian almond cake, all without the gluten worry. These recipes are so scrumptious that no one will even notice they’re gluten-free. Ready to explore these tasty treasures?
Classic Swedish Meatballs With Lingonberry Sauce

Classic Swedish Meatballs are a beloved dish that brings the comforting flavors of Scandinavia right to your dinner table. These tender meatballs are traditionally made with a mixture of ground beef and pork, seasoned with warm spices, and served with a rich and creamy gravy.
When paired with sweet and tart lingonberry sauce, they create a delightful balance of flavors that will leave your taste buds dancing.
This gluten-free version guarantees that everyone can enjoy this classic dish without compromising on taste or texture. Using gluten-free breadcrumbs and a few simple swaps, you can recreate the authentic flavors of Swedish meatballs that your family and friends will love.
Serve them alongside creamy mashed potatoes or lingonberry jam for a truly authentic Swedish experience.
Ingredients (Serves 4-6):
- 1 pound ground beef
- 1 pound ground pork
- 1 cup gluten-free breadcrumbs
- 1/2 cup milk (or dairy-free milk)
- 1/2 cup finely chopped onion
- 2 cloves garlic, minced
- 1 large egg
- 1 teaspoon salt
- 1/2 teaspoon black pepper
- 1/2 teaspoon ground allspice
- 1/2 teaspoon ground nutmeg
- 1 tablespoon fresh parsley, chopped (optional)
- 3 tablespoons olive oil or butter (for frying)
- 2 cups beef broth
- 1 cup heavy cream (or coconut cream for a dairy-free option)
- 1 jar lingonberry sauce (for serving)
Cooking Instructions:
1. Prepare the Meatball Mixture: In a large mixing bowl, combine ground beef, ground pork, gluten-free breadcrumbs, milk, chopped onion, minced garlic, egg, salt, black pepper, allspice, nutmeg, and parsley.
Mix everything together gently until well combined. Be careful not to over-mix, as this can make the meatballs tough.
2. Shape the Meatballs: Using your hands, form the mixture into small meatballs, about 1-1.5 inches in diameter. Place them on a baking sheet lined with parchment paper.
This will make it easier to transfer them to the pan later.
3. Cook the Meatballs: Heat olive oil or butter in a large skillet over medium-high heat. Once hot, add the meatballs in batches, making sure not to overcrowd the pan.
Cook for about 5-7 minutes on each side, or until they’re browned and cooked through. Remove the meatballs from the skillet and set them aside on a plate.
4. Make the Gravy: In the same skillet, with the drippings from the meatballs, add beef broth and bring it to a simmer.
Whisk in the heavy cream and cook for a few minutes until the sauce thickens slightly. You can scrape up any browned bits from the bottom of the pan for added flavor.
5. Combine and Serve: Return the meatballs to the skillet and gently coat them in the gravy.
Let them simmer for a few minutes to absorb the flavors. Serve hot, with a generous spoonful of lingonberry sauce on the side.
Extra Tips:
To enhance the flavor of your Swedish meatballs, consider adding a splash of Worcestershire sauce to the meat mixture or the gravy for an extra depth of flavor.
If you prefer a lighter version, you can substitute half of the ground pork with ground turkey. Additionally, you can prepare the meatballs ahead of time and freeze them; just cook them directly from frozen, adding a few extra minutes to the cooking time.
Enjoy your meal with a side of gluten-free mashed potatoes or a fresh salad for a well-rounded dish!
Norwegian Almond Cake
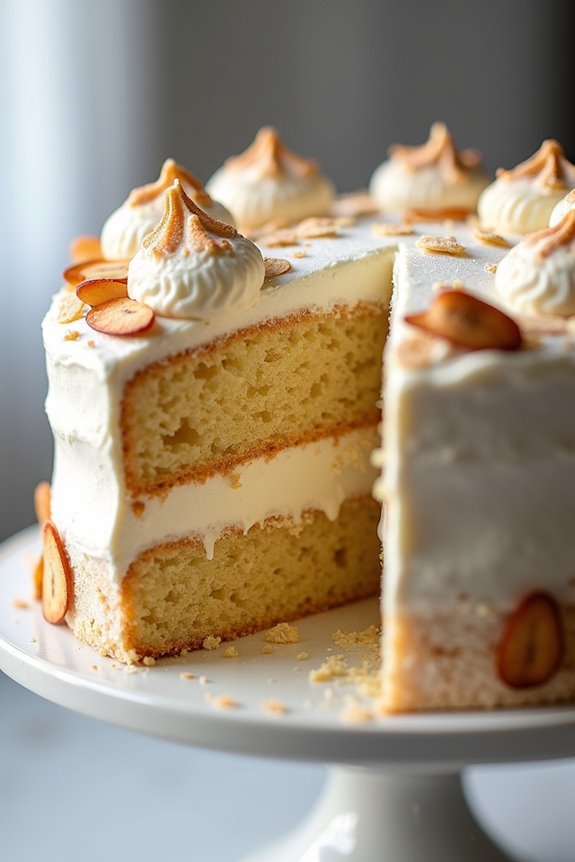
Norwegian Almond Cake, known as “Kvæfjordkake” or “Verdens Beste,” is a delightful dessert that perfectly embodies the Scandinavian spirit with its rich flavors and textures.
This gluten-free cake is made primarily from ground almonds, which give it a moist and tender crumb, while the meringue topping adds a light, airy texture that contrasts beautifully with the cake beneath. Traditionally served on special occasions, this cake is both visually stunning and delicious, making it a favorite among dessert lovers.
In addition to its amazing taste, Norwegian Almond Cake is also relatively simple to prepare. The combination of almond flour, sugar, and eggs creates a lovely base, and the whipped cream filling adds an indulgent finish.
This recipe is perfect for gatherings or family dinners, and it can easily be adapted to suit different tastes by adding fruits or flavored extracts. With a serving size of 4-6 people, this cake is an excellent choice for sharing with friends and family.
Ingredients:
- 2 cups almond flour
- 1 cup granulated sugar
- 4 large eggs, separated
- 1/2 teaspoon baking powder
- 1/4 teaspoon salt
- 1 teaspoon vanilla extract
- 1 cup heavy whipping cream
- 2 tablespoons powdered sugar
- 1/2 cup sliced almonds (for garnish)
Cooking Instructions:
- Preheat the oven: Begin by preheating your oven to 350°F (175°C). This will guarantee that your cake bakes evenly and achieves a nice golden color.
- Prepare the cake batter: In a large mixing bowl, combine the almond flour, granulated sugar, baking powder, and salt. Mix well to confirm the dry ingredients are evenly distributed.
- Whisk egg yolks: In a separate bowl, whisk together the egg yolks and vanilla extract until well combined. Gradually add the yolk mixture to the dry ingredients, mixing until a smooth batter forms.
- Beat egg whites: In another clean bowl, beat the egg whites with an electric mixer until stiff peaks form. This step is essential for achieving a light and airy cake.
- Fold in the egg whites: Gently fold the whipped egg whites into the almond batter in three additions. Be careful not to deflate the mixture; this will help maintain the cake’s light texture.
- Bake the cake: Pour the batter into a greased and lined 9-inch round cake pan. Smooth the top and bake in the preheated oven for 25-30 minutes, or until the cake is golden and a toothpick inserted into the center comes out clean.
- Cool the cake: Once baked, remove the cake from the oven and allow it to cool in the pan for about 10 minutes before transferring it to a wire rack to cool completely.
- Prepare the whipped cream: While the cake is cooling, whip the heavy cream and powdered sugar in a mixing bowl until soft peaks form. This will serve as the filling for the cake.
- Assemble the cake: Once the cake is completely cooled, slice it in half horizontally. Spread the whipped cream filling evenly over the bottom half and place the top half back on. Top with sliced almonds for decoration.
Extra Tips:
When preparing the Norwegian Almond Cake, make sure to use finely ground almond flour for the best texture. If you prefer a sweeter flavor, feel free to adjust the sugar to your taste.
Additionally, you can infuse the whipped cream with flavors such as almond extract or citrus zest for an extra layer of taste. For an even more festive presentation, consider garnishing with fresh berries or a dusting of powdered sugar before serving.
Enjoy this Scandinavian delight with a cup of coffee or tea for a truly delightful experience!
Danish Potato Salad
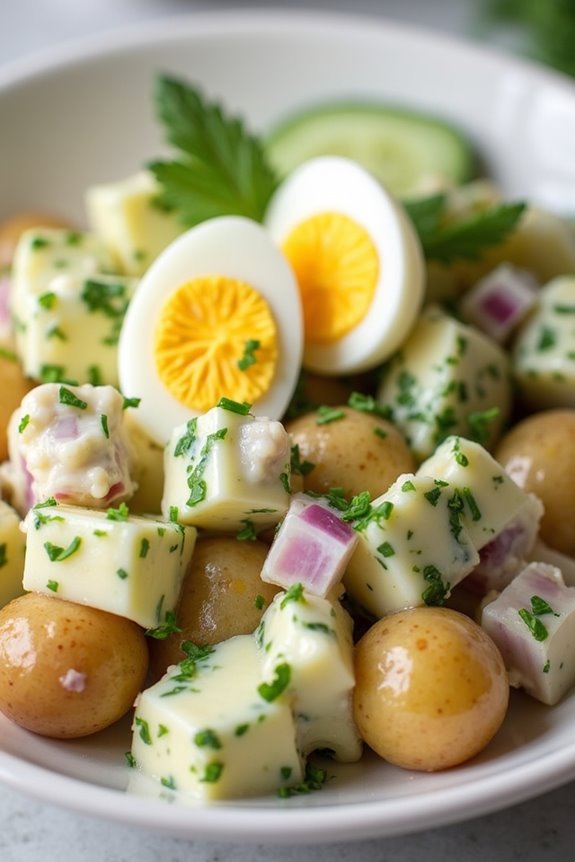
Danish Potato Salad, known as “Kartoffelsalat” in Denmark, is a delightful and creamy dish that showcases the simplicity and freshness of Scandinavian cuisine. This gluten-free salad is perfect for serving at summer barbecues, family gatherings, or as a side dish to accompany your favorite main courses. The combination of tender potatoes, crisp vegetables, and a rich dressing creates a satisfying dish that’s beloved across the region.
What makes this potato salad unique is the use of fresh herbs, tangy mustard, and a blend of creamy and vinegar-based dressings. The result is a salad that isn’t only delicious but also visually appealing, with bright colors and textures. Whether you’re a seasoned cook or a beginner, this recipe will guide you through creating a perfect Danish Potato Salad that everyone will enjoy.
Ingredients (Serves 4-6)
- 1 kg (2.2 lbs) small new potatoes
- 1/2 cup mayonnaise (gluten-free)
- 1/4 cup Greek yogurt (gluten-free)
- 2 tablespoons Dijon mustard
- 1 tablespoon apple cider vinegar
- 1 tablespoon fresh dill, chopped
- 1 tablespoon fresh chives, chopped
- 1/2 cup red onion, finely chopped
- 1 cup cucumber, diced
- Salt and pepper to taste
- Optional: hard-boiled eggs for garnish
Cooking Instructions
- Prepare the Potatoes: Start by washing the new potatoes thoroughly to remove any dirt. Place them in a large pot, cover with cold water, and add a pinch of salt. Bring the water to a boil over medium-high heat. Once boiling, reduce the heat to medium and let the potatoes cook until they’re tender, about 15-20 minutes. You can check for doneness by inserting a fork or knife into a potato; it should slide in easily.
- Cool the Potatoes: Once the potatoes are cooked, drain them in a colander and rinse with cold water to stop the cooking process. Allow them to cool for about 10-15 minutes until they’re cool enough to handle. If desired, you can peel the potatoes at this stage, but leaving the skin on adds texture and nutrients.
- Make the Dressing: In a mixing bowl, combine the mayonnaise, Greek yogurt, Dijon mustard, apple cider vinegar, chopped dill, and chives. Whisk together until the dressing is smooth and well blended. Taste and season with salt and pepper as needed.
- Combine Ingredients: Cut the cooled potatoes into bite-sized pieces and place them in a large mixing bowl. Add the finely chopped red onion and diced cucumber to the bowl. Pour the dressing over the potato mixture and gently toss everything together until the potatoes are evenly coated with the dressing.
- Chill and Serve: Cover the bowl with plastic wrap and place the salad in the refrigerator to chill for at least one hour. This allows the flavors to meld together. Before serving, give the salad a gentle stir, and if desired, garnish with sliced hard-boiled eggs for an extra touch.
Extra Tips
When making Danish Potato Salad, feel free to customize the ingredients based on your taste preferences. You can add other vegetables such as bell peppers or radishes for added crunch and color. For a bit of sweetness, consider adding some diced apples or pickles.
Additionally, letting the salad sit in the fridge longer will enhance the flavors even more, making it a great make-ahead option for gatherings. Enjoy your cooking adventure!
Finnish Salmon Soup
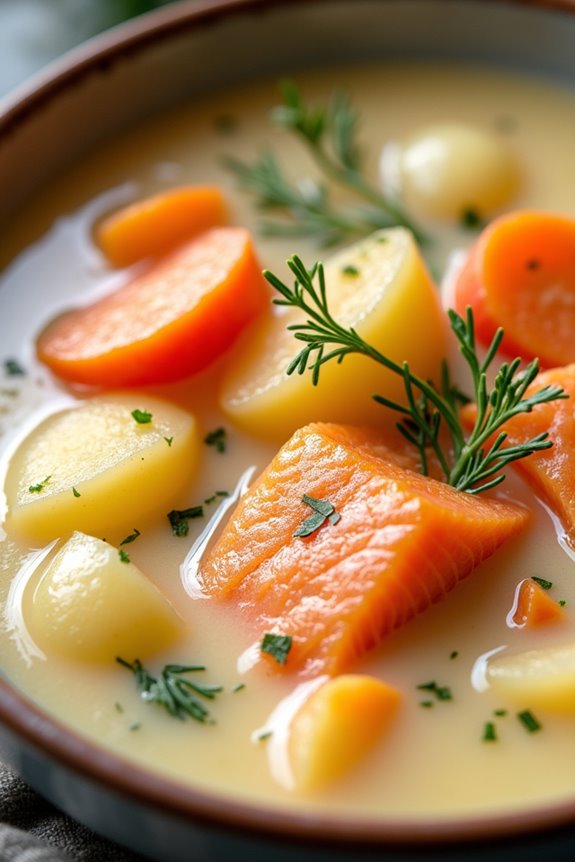
Finnish Salmon Soup, known as Lohikeitto, is a comforting and creamy dish that highlights the natural flavors of fresh salmon combined with a rich broth. This traditional Finnish recipe isn’t only gluten-free but also incredibly easy to prepare, making it a perfect choice for family dinners or gatherings.
The blend of vegetables, herbs, and salmon creates a delightful meal that warms the soul, especially during the colder months. This soup is known for its simplicity, yet it’s packed with flavor. The creamy base is typically made with heavy cream and butter, which adds a luxurious texture to the dish, while the fresh dill gives it a fragrant finish.
Serve it with a slice of gluten-free bread for a complete meal that everyone will enjoy.
Ingredients (Serves 4-6):
- 1 lb (450g) fresh salmon fillet, skin removed and cut into bite-sized pieces
- 4 cups (1 L) vegetable or fish broth
- 2 medium potatoes, peeled and diced
- 1 medium onion, finely chopped
- 2 carrots, sliced
- 1 cup (240ml) heavy cream
- 2 tablespoons butter
- 1 tablespoon fresh dill, chopped (or 1 teaspoon dried dill)
- Salt and pepper to taste
- Lemon wedges (for serving)
Cooking Instructions:
- Prepare the Vegetables: Start by peeling and dicing the potatoes and carrots. Finely chop the onion. This step guarantees that all vegetables are ready to go into the pot, allowing for a smooth cooking process.
- Sauté the Onion: In a large pot, melt the butter over medium heat. Add the chopped onion and sauté for about 3-4 minutes, or until the onion becomes translucent. This will enhance the flavor of the soup.
- Add the Broth and Vegetables: Pour in the vegetable or fish broth, followed by the diced potatoes and sliced carrots. Increase the heat to bring the mixture to a gentle boil. Once boiling, reduce the heat and let it simmer for about 10-15 minutes, or until the vegetables are tender.
- Add the Salmon: Gently stir in the salmon pieces into the pot. Cook for an additional 5-7 minutes, until the salmon is cooked through and flakes easily with a fork. Be careful not to overcook the salmon to keep it tender.
- Finish with Cream and Dill: Lower the heat and stir in the heavy cream and chopped dill. Allow the soup to warm through without boiling, and season with salt and pepper to taste. This step adds the creamy texture and aromatic flavor to your soup.
- Serve: Ladle the soup into bowls and serve hot, garnished with lemon wedges on the side. The lemon adds a rejuvenating zing that complements the richness of the soup.
Extra Tips:
For the best results, always use fresh, high-quality salmon for this dish. If you prefer a lighter version, you can substitute half of the heavy cream with milk.
Additionally, feel free to experiment with other herbs like thyme or parsley, depending on your taste preferences. For a bit of extra flavor, consider adding a splash of white wine to the broth before adding the vegetables.
Enjoy your Finnish Salmon Soup with a side of gluten-free bread to soak up the delicious broth!
Swedish Cardamom Buns
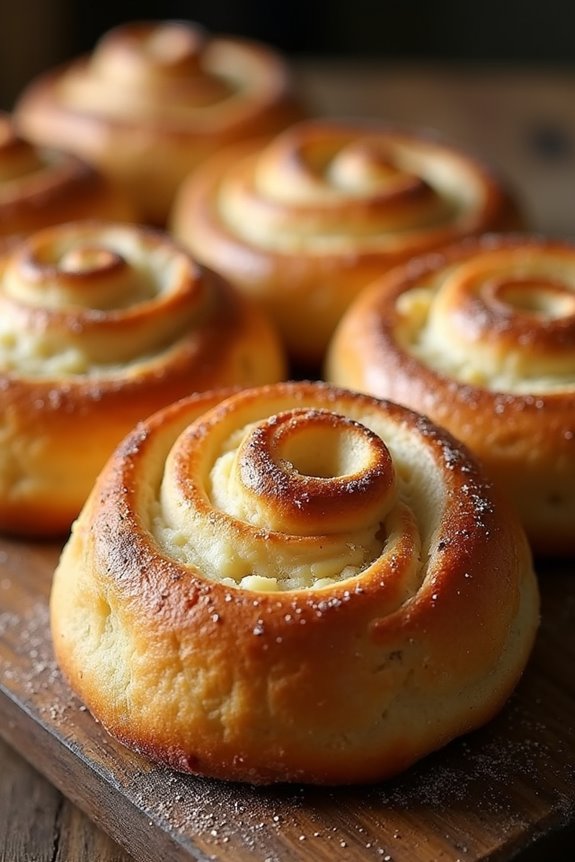
Swedish Cardamom Buns, or “Kardemummabullar,” are a delightful treat that brings the warm, comforting flavors of cardamom into a soft, sweet bread. Traditionally enjoyed with coffee or tea, these buns are perfect for a cozy afternoon enjoyed with friends or family. The aromatic spices and hint of sweetness make them irresistible, while the gluten-free adaptation guarantees that everyone can indulge in this Scandinavian classic.
Making Swedish Cardamom Buns involves a simple dough that’s flavored with cardamom and filled with a delicious butter and sugar mixture. This recipe is designed for serving 4-6 people, making it ideal for gatherings or a cozy family breakfast. With a few basic ingredients and some patience, you can create a batch of these delightful buns that will fill your home with warmth and the enticing scent of freshly baked bread.
Ingredients:
- 2 cups gluten-free all-purpose flour
- 1 cup almond flour
- 1/4 cup sugar
- 1/2 teaspoon salt
- 1 tablespoon ground cardamom
- 2 teaspoons instant yeast
- 1 cup warm milk (dairy or non-dairy)
- 1/4 cup melted butter (dairy or non-dairy)
- 1 large egg
- 1/4 cup sugar (for filling)
- 1/4 cup softened butter (for filling)
- 1 tablespoon ground cardamom (for filling)
- 1 egg (beaten, for egg wash)
- Coarse sugar (for sprinkling on top)
Cooking Instructions:
- Prepare the Dough: In a large mixing bowl, combine the gluten-free all-purpose flour, almond flour, sugar, salt, ground cardamom, and instant yeast. Mix well to assure even distribution of the dry ingredients.
- Add Wet Ingredients: In a separate bowl, whisk together the warm milk, melted butter, and egg. Slowly pour this mixture into the dry ingredients, mixing until a soft dough forms. If the dough is too sticky, you can add a little more flour, one tablespoon at a time.
- Knead the Dough: Transfer the dough onto a lightly floured surface and knead gently for about 5-7 minutes. This will help develop the structure of the dough. Form it into a ball and place it back into the mixing bowl.
- First Rise: Cover the bowl with a clean kitchen towel or plastic wrap and let the dough rise in a warm place for about 1 hour, or until it has doubled in size.
- Prepare the Filling: While the dough rises, mix together the softened butter, sugar, and ground cardamom in a small bowl until well combined. Set aside.
- Shape the Buns: After the dough has risen, punch it down gently to release any air bubbles. Roll the dough out onto a floured surface into a rectangle, about 1/4 inch thick. Spread the filling evenly over the surface of the dough.
- Cut and Roll: Starting from one long side, roll the dough tightly into a log. Cut the log into 12 equal pieces. You can cut them into smaller pieces for mini buns if desired.
- Second Rise: Place the cut buns on a baking sheet lined with parchment paper. Cover them again with a kitchen towel and let them rise for an additional 30 minutes.
- Preheat the Oven: While the buns are rising, preheat your oven to 375°F (190°C).
- Egg Wash and Bake: Brush the tops of the buns with the beaten egg and sprinkle coarse sugar on top. Bake in the preheated oven for 15-20 minutes, or until golden brown.
- Cool and Serve: Remove the buns from the oven and allow them to cool on a wire rack for a few minutes before serving. Enjoy them warm or at room temperature.
Extra Tips:
For the best flavor, use freshly ground cardamom if possible, as it has a more intense aroma than pre-ground. You can also experiment with adding a touch of vanilla extract to the filling for an additional layer of flavor.
If you prefer a more pronounced sweetness, feel free to adjust the sugar in the filling or the topping. These buns can be stored in an airtight container for a few days and also freeze well, making them a perfect make-ahead treat!
Icelandic Lamb Stew
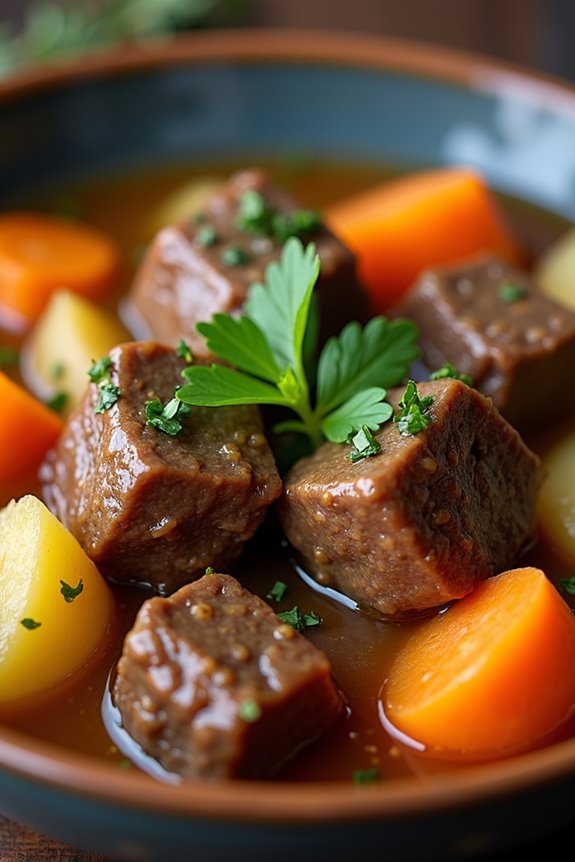
Icelandic Lamb Stew is a hearty and comforting dish that highlights the rich flavors of tender lamb, root vegetables, and aromatic herbs. This traditional recipe is perfect for warming up during the chilly months or when you crave a nourishing meal. The combination of fresh ingredients and slow-cooking techniques guarantees that the lamb becomes incredibly tender while infusing the entire stew with deep, savory flavors.
Making this stew is an enjoyable process, as it allows you to engage with the ingredients and create a wholesome dish that embodies the spirit of Icelandic cuisine. Served with a side of gluten-free bread or over a bed of creamy mashed potatoes, this stew becomes a satisfying meal that can be shared with family or friends. The best part is that it’s gluten-free, making it accessible to those with dietary restrictions while still providing a satisfying and flavorful experience.
Ingredients (Serves 4-6):
- 2 pounds lamb shoulder, cut into 1.5-inch cubes
- 2 tablespoons olive oil
- 1 large onion, chopped
- 3 cloves garlic, minced
- 4 medium carrots, chopped
- 3 medium potatoes, peeled and diced
- 2 cups rutabaga or swede, peeled and chopped
- 6 cups low-sodium chicken or vegetable broth
- 1 tablespoon tomato paste
- 1 tablespoon fresh thyme leaves (or 1 teaspoon dried thyme)
- 1 bay leaf
- Salt and pepper to taste
- Fresh parsley, chopped (for garnish)
Cooking Instructions:
- Prepare the Ingredients: Start by cutting the lamb shoulder into 1.5-inch cubes. Chop the onion, garlic, carrots, potatoes, and rutabaga. Having all ingredients prepped will streamline the cooking process.
- Brown the Lamb: In a large pot or Dutch oven, heat the olive oil over medium-high heat. Add the lamb cubes in batches, making sure not to overcrowd the pan. Brown the lamb on all sides for about 5-7 minutes. This step is vital as it adds depth and flavor to the stew.
- Sauté the Aromatics: Once the lamb is browned, remove it from the pot and set it aside. In the same pot, add the chopped onions and sauté for about 3-4 minutes until they become translucent. Add the minced garlic and sauté for an additional 1-2 minutes until fragrant.
- Add the Vegetables: Stir in the carrots, potatoes, and rutabaga. Cook for about 5 minutes, allowing the vegetables to slightly soften and absorb the flavors from the pot.
- Combine Ingredients: Return the browned lamb to the pot. Add the chicken or vegetable broth, tomato paste, thyme, bay leaf, and season with salt and pepper. Stir well to combine all ingredients.
- Simmer the Stew: Bring the mixture to a boil, then reduce the heat to low. Cover the pot and let the stew simmer for 1.5 to 2 hours, or until the lamb is tender and the flavors meld together. Stir occasionally and check the seasoning, adjusting salt and pepper as needed.
- Serve: Once the lamb is tender, remove the bay leaf. Ladle the stew into bowls and garnish with fresh parsley. Serve hot, ideally with gluten-free bread or mashed potatoes on the side.
Extra Tips:
For an even richer flavor, consider marinating the lamb in a mixture of olive oil, garlic, and herbs for a few hours or overnight before cooking.
Additionally, feel free to customize the vegetables based on what you have on hand or prefer, such as parsnips or turnips. If you like a thicker stew, you can mix 1 tablespoon of cornstarch with a bit of cold water and add it to the stew during the last 10 minutes of cooking, allowing it to thicken.
Enjoy your culinary journey with this Icelandic classic!
Norwegian Raspeballer (Potato Dumplings)
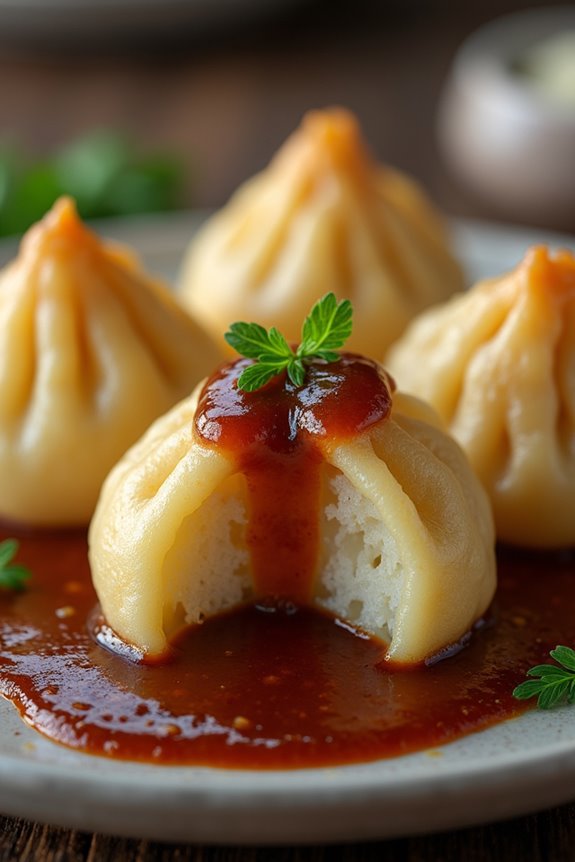
Norwegian Raspeballer, also known as potato dumplings, is a traditional dish that embodies the heart and soul of Scandinavian cuisine. These dumplings are typically made from a mixture of raw and cooked potatoes, resulting in a delightful texture that’s both dense and fluffy.
Often served with a savory meat sauce or alongside meats such as lamb or pork, Raspeballer can be a comforting addition to any meal, especially during the colder months. This gluten-free version guarantees that everyone can enjoy this classic dish without compromising on flavor or texture.
The preparation of Raspeballer is an art that combines simple ingredients and techniques passed down through generations. The key to achieving the perfect dumpling lies in the balance of the raw and cooked potatoes, as well as the proper handling of the dough.
With just a few ingredients and some patience, you can create these delicious dumplings that are sure to impress your family and friends.
Ingredients (Serves 4-6)
- 4 medium-sized potatoes (about 2 pounds)
- 1 cup gluten-free all-purpose flour
- 1 teaspoon salt
- 1/4 teaspoon ground nutmeg (optional)
- 1/2 cup cooked and finely chopped meat (optional, such as lamb or pork)
- Water for boiling
Cooking Instructions
- Prepare the Potatoes: Start by peeling the potatoes and cutting them into quarters. Boil them in a large pot of salted water until they’re fork-tender, about 15-20 minutes. Once cooked, drain the potatoes and let them cool slightly.
- Mash and Combine: Once the potatoes are cool enough to handle, mash them until smooth. In a large mixing bowl, combine the mashed potatoes with the gluten-free flour, salt, and nutmeg (if using). Mix until a soft dough forms, being careful not to overwork it.
- Shape the Dumplings: Divide the dough into equal portions, about the size of a golf ball. If using meat, flatten each portion of dough slightly, place a small amount of chopped meat in the center, and fold the dough around it to seal. Roll the dumplings gently between your hands to shape them into smooth balls.
- Boil the Dumplings: Bring a large pot of salted water to a gentle boil. Carefully drop the dumplings into the boiling water, making sure not to overcrowd the pot. Cook them for about 15-20 minutes, or until they float to the surface and are cooked through. Use a slotted spoon to remove them and set aside.
- Serve: Serve the Raspeballer warm, drizzled with a rich meat sauce or alongside your favorite meat dish. They pair wonderfully with gravy, sautéed vegetables, or even a fresh salad for a complete meal.
Extra Tips
When making Raspeballer, make certain that the potatoes are well-drained after boiling to avoid excess moisture in the dough, which can lead to gummy dumplings.
If the dough feels too sticky, you can add a little more gluten-free flour until it reaches the desired consistency. Additionally, for added flavor, consider incorporating herbs or spices into the dumpling mixture or experiment with different fillings.
Enjoy your cooking experience and the delicious results!
Danish Rye Bread
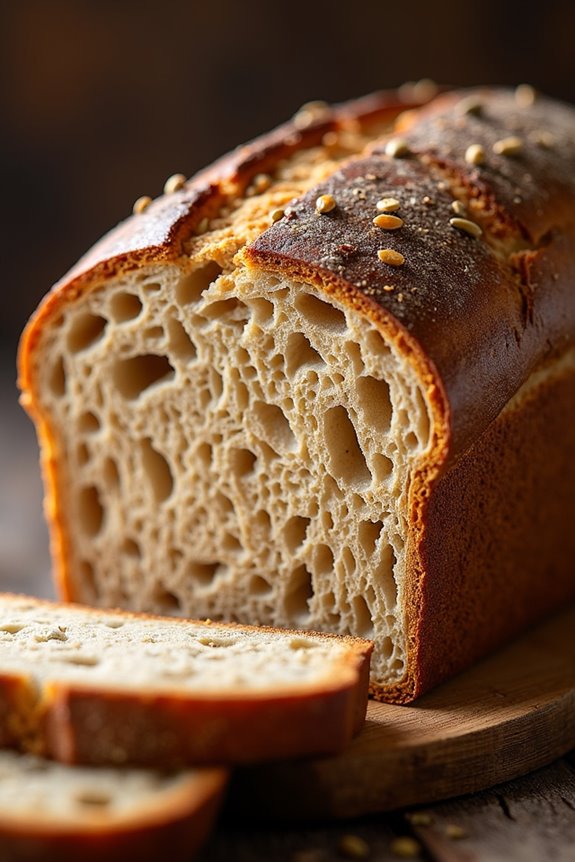
Danish Rye Bread, known as “rugbrød,” is a staple in Danish cuisine, celebrated for its dense texture and rich flavor. This hearty bread is naturally gluten-free and is often enjoyed with various toppings, from herring to cheese and vegetables. The use of dark rye flour gives it a distinct taste while also providing numerous health benefits, including high fiber content and essential nutrients.
Making Danish Rye Bread at home is a rewarding experience, allowing you to control the ingredients and tailor the flavors to your preference. It requires a bit of patience, as the dough needs time to rise, but the result is a deliciously moist bread that pairs beautifully with many dishes.
Let’s explore the ingredients and the step-by-step process of creating this traditional Scandinavian delight!
Ingredients (serving size: 4-6 people)
- 2 cups gluten-free rye flour
- 1 cup gluten-free all-purpose flour
- 1 cup warm water (about 110°F)
- 1/2 cup sourdough starter (gluten-free)
- 1/4 cup molasses
- 1 tablespoon salt
- 1 tablespoon caraway seeds (optional)
- 1/4 cup sunflower seeds (optional)
- 1/4 cup pumpkin seeds (optional)
- 1 tablespoon apple cider vinegar
- 1 teaspoon instant yeast
Cooking Instructions
- Prepare the Dough: In a large mixing bowl, combine the warm water, sourdough starter, and molasses. Stir until the mixture is well combined. Add the apple cider vinegar, salt, and instant yeast, mixing thoroughly.
- Incorporate the Flours: Gradually add the gluten-free rye flour and gluten-free all-purpose flour to the wet mixture. Stir with a wooden spoon or spatula until a thick, sticky dough forms. If using, fold in the caraway seeds, sunflower seeds, and pumpkin seeds.
- Knead the Dough: Turn the dough out onto a lightly floured surface and knead gently for about 5 minutes. Since gluten-free dough is different, focus on mixing it well rather than traditional kneading.
- First Rise: Place the dough in a lightly oiled bowl, cover it with a damp cloth or plastic wrap, and let it rise in a warm place for about 1-2 hours, or until it has doubled in size.
- Shape the Loaf: Once the dough has risen, punch it down gently to release any air bubbles. Shape the dough into a loaf and place it in a greased or lined loaf pan.
- Second Rise: Cover the loaf with a cloth and let it rise again in a warm area for about 30-45 minutes, or until it has puffed up.
- Preheat the Oven: While the dough is rising, preheat your oven to 375°F (190°C).
- Bake the Bread: Once the loaf has risen, place it in the preheated oven and bake for 35-40 minutes, or until the top is golden brown and the bread sounds hollow when tapped on the bottom.
- Cool and Serve: Remove the bread from the oven and let it cool in the pan for about 10 minutes before transferring it to a wire rack to cool completely. Slice and serve with your favorite toppings.
Extra Tips
When making Danish Rye Bread, it’s essential to allow ample time for the dough to rise, as this contributes to the bread’s flavor and texture.
If you don’t have a gluten-free sourdough starter, you can create one using gluten-free flour and water. Additionally, feel free to experiment with other seeds or herbs to customize the flavor of your rye bread.
Storing the bread in an airtight container will keep it fresh for several days, or you can freeze it for longer storage. Enjoy your homemade Danish Rye Bread with various toppings for a true Scandinavian experience!
Swedish Creamy Mushroom Sauce
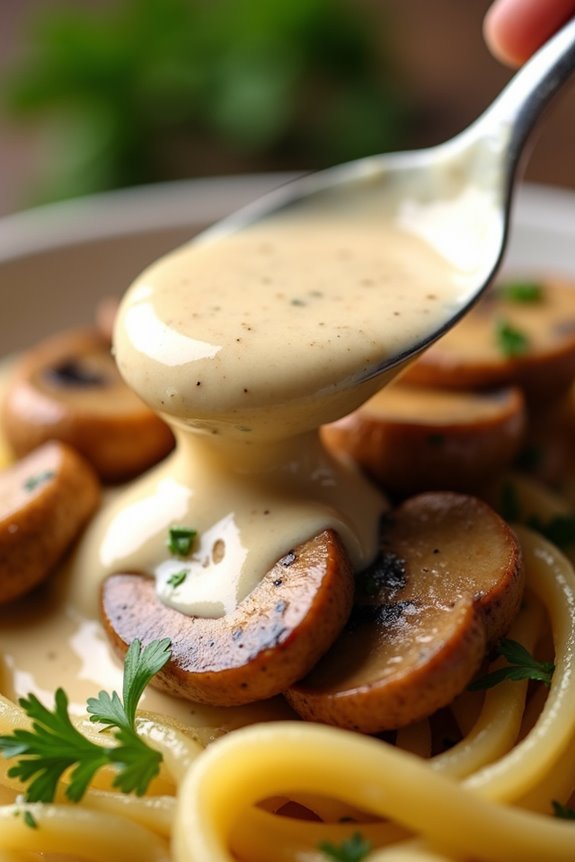
Swedish Creamy Mushroom Sauce is a delightful accompaniment that enhances a variety of dishes, from meatballs to pasta. This rich and velvety sauce is infused with the earthy flavors of mushrooms and a hint of tanginess from sour cream, making it a versatile addition to any meal.
It’s not only gluten-free but also packed with flavor, ensuring that everyone at the table can enjoy it. This recipe is perfect for a serving size of 4-6 people, making it ideal for family dinners or gatherings.
The combination of fresh ingredients and simple preparation allows home cooks to create a delicious sauce that will impress guests without spending hours in the kitchen. Whether you’re drizzling it over grilled chicken or tossing it with gluten-free pasta, Swedish Creamy Mushroom Sauce is sure to become a favorite in your culinary repertoire.
Ingredients:
- 1 pound fresh mushrooms (such as cremini or button), sliced
- 2 tablespoons olive oil
- 2 tablespoons butter
- 1 small onion, finely chopped
- 2 cloves garlic, minced
- 1 teaspoon dried thyme
- 1 cup vegetable or chicken broth (gluten-free)
- 1 cup heavy cream
- 1/2 cup sour cream
- Salt and pepper, to taste
- Fresh parsley, chopped (for garnish)
Instructions:
1. Sauté the Vegetables: In a large skillet, heat the olive oil and butter over medium heat. Once melted and hot, add the chopped onion and sauté for 3-4 minutes until softened and translucent.
Then, add the minced garlic and continue to cook for an additional minute, stirring frequently to prevent burning.
2. Cook the Mushrooms: Add the sliced mushrooms to the skillet. Stir frequently and cook for about 5-7 minutes, or until the mushrooms are browned and have released their moisture. This step is essential for enhancing the flavor of the mushrooms.
3. Season and Add Broth: Sprinkle the dried thyme over the mushroom mixture, followed by a generous pinch of salt and pepper. Pour in the vegetable or chicken broth, stirring to combine.
Bring the mixture to a simmer and allow it to cook for about 5 minutes, letting the flavors meld together.
4. Incorporate Cream: Lower the heat to medium-low and add the heavy cream to the skillet. Stir well to combine, and allow the sauce to simmer gently for another 3-4 minutes until it thickens slightly.
Be careful not to let it boil to prevent the cream from curdling.
5. Finish with Sour Cream: Remove the skillet from heat and stir in the sour cream until fully incorporated. Taste the sauce and adjust the seasoning with additional salt and pepper, if needed.
6. Serve: Transfer the creamy mushroom sauce to a serving bowl or drizzle it over your desired dish. Garnish with freshly chopped parsley for a pop of color and added flavor.
Extra Tips: When making Swedish Creamy Mushroom Sauce, feel free to experiment with different types of mushrooms for varied flavors and textures.
If you prefer a thicker sauce, let it simmer a bit longer or add a cornstarch slurry (1 tablespoon cornstarch mixed with 1 tablespoon water) to achieve your desired consistency. Additionally, this sauce can be made ahead of time and reheated gently on the stove before serving.
Finnish Blueberry Pie
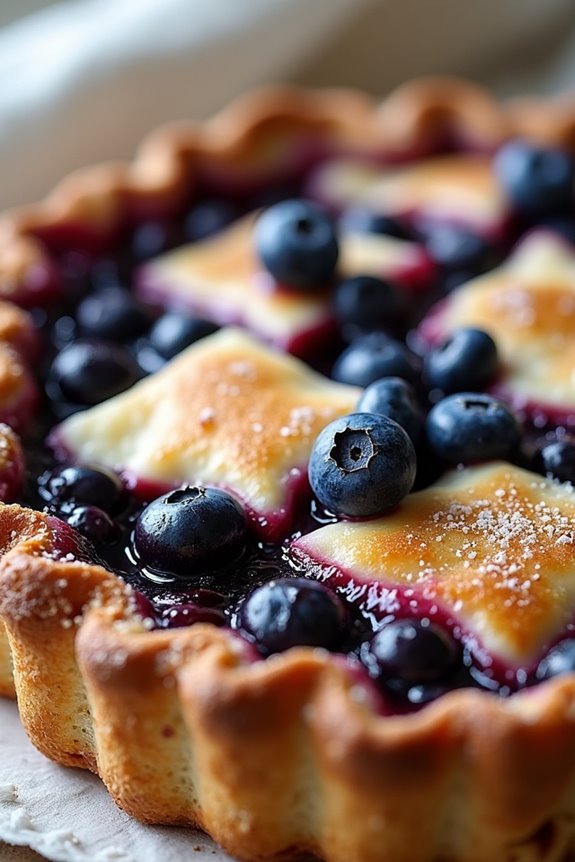
Finnish Blueberry Pie, known as “mustikkapiirakka,” is a delightful dessert that captures the essence of Scandinavian flavors. This pie isn’t only gluten-free but also bursting with the sweet and tangy goodness of fresh blueberries. The combination of a buttery and tender crust with the juicy filling creates a perfect balance that’s bound to impress your family and friends.
Served warm or cold, this pie makes for a fantastic treat any time of the year—especially during the summer months when blueberries are in season.
Making Finnish Blueberry Pie is a straightforward process that anyone can enjoy. The pie crust is made from gluten-free flour, guaranteeing that it can be enjoyed by those with gluten sensitivities. Once baked, it’s filled with a luscious blueberry mixture that melds beautifully with the crust.
This pie isn’t only easy to prepare but is also a fantastic way to showcase the natural sweetness of blueberries, making it a must-try recipe for anyone looking to indulge in a Scandinavian classic.
Ingredients (Serves 4-6):
- 1 ½ cups gluten-free all-purpose flour
- ½ cup unsalted butter, softened
- ¼ cup sugar
- 1 large egg
- 1 teaspoon vanilla extract
- ½ teaspoon salt
- 2 cups fresh blueberries
- ¼ cup sugar (for filling)
- 1 tablespoon cornstarch
- 1 tablespoon lemon juice
- 1 teaspoon cinnamon (optional)
Cooking Instructions:
- Prepare the Crust: In a mixing bowl, combine the gluten-free all-purpose flour, softened butter, ¼ cup sugar, egg, vanilla extract, and salt. Use a fork or your hands to mix until the dough comes together. It should be slightly sticky but manageable. If it’s too dry, add a teaspoon of cold water at a time until the desired consistency is reached.
- Chill the Dough: Form the dough into a ball, wrap it in plastic wrap, and refrigerate for at least 30 minutes. This step is essential for helping the dough firm up and makes it easier to roll out later.
- Preheat the Oven: While the dough is chilling, preheat your oven to 375°F (190°C). This guarantees that the oven is hot enough to create a nice golden crust when the pie is baked.
- Prepare the Filling: In a separate bowl, combine the fresh blueberries, ¼ cup sugar, cornstarch, lemon juice, and cinnamon (if using). Gently toss the blueberries to coat them in the sugar and cornstarch mixture, which will help create a thick and juicy filling.
- Roll Out the Dough: Once the dough has chilled, remove it from the refrigerator. On a lightly floured surface (using gluten-free flour), roll out the dough to fit a 9-inch pie dish. Transfer the rolled dough to the pie dish, pressing it gently into the bottom and sides.
- Add the Filling: Pour the blueberry mixture into the prepared crust, spreading it evenly. If desired, you can reserve a few blueberries to sprinkle on top for decoration.
- Bake the Pie: Place the pie in the preheated oven and bake for about 30-35 minutes, or until the crust is lightly golden and the filling is bubbling. Keep an eye on the pie to prevent over-browning.
- Cool and Serve: Once baked, remove the pie from the oven and allow it to cool for at least 15 minutes before slicing. This will help the filling set up a bit more.
Extra Tips: For an added touch, consider serving your Finnish Blueberry Pie with a scoop of vanilla ice cream or a dollop of whipped cream. If fresh blueberries aren’t available, frozen blueberries can be used as a substitute; just be sure to thaw and drain them before adding to the filling to avoid excess moisture.
Additionally, feel free to experiment with other berries or a mix of fruits for a unique twist on this classic dessert!