

As the sun graces the Nordic skies with its endless light, there’s a feeling of warmth that inspires a special kind of culinary magic. This season, let’s embrace the delightful simplicity and freshness of Scandinavian cuisine. From the zesty allure of grilled salmon to the sweet indulgence of berry pavlova, each dish is a celebration of summer’s bounty. Join me as we explore twelve vibrant recipes that bring the essence of this beautiful season to your table. Get ready to savor the flavors of a Scandinavian summer.
Grilled Salmon With Dill and Lemon
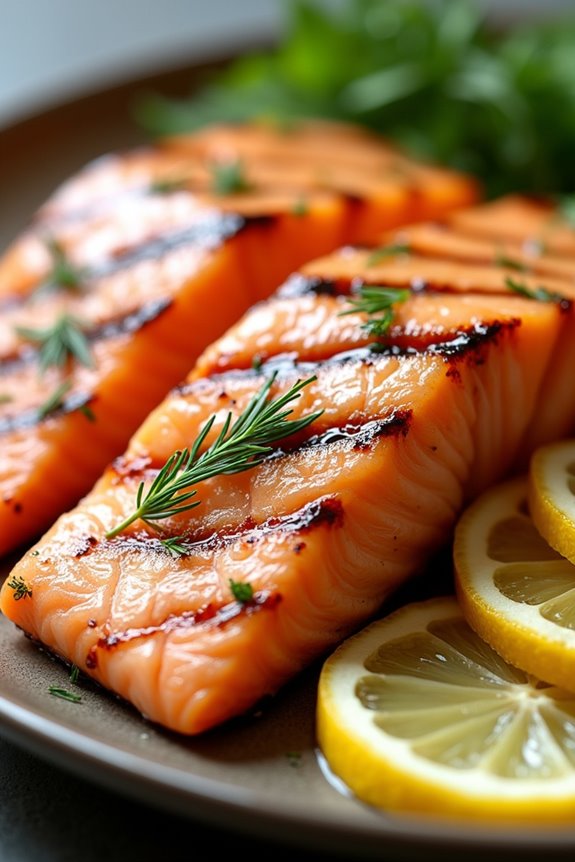
Grilled Salmon with Dill and Lemon is a quintessential Scandinavian dish that beautifully showcases the fresh flavors of the region. This dish isn’t only simple to prepare but also highlights the natural richness of salmon, complemented by the fragrant notes of dill and the bright acidity of lemon.
As summer approaches, this meal becomes a go-to for outdoor gatherings, allowing you to enjoy the warm weather while savoring a delicious and healthy dish. The combination of grilling and fresh herbs makes this salmon recipe a standout. The high heat of the grill caramelizes the fish, creating a slight char while keeping the interior moist and flaky.
Paired with a revitalizing salad or grilled vegetables, this dish can easily become the star of any summer meal. Whether you’re hosting a barbecue or simply enjoying a family dinner, Grilled Salmon with Dill and Lemon brings a taste of Scandinavian summers to your table.
Ingredients (Serves 4-6)
- 4-6 salmon fillets (6 ounces each)
- 1/4 cup fresh dill, chopped
- 2 tablespoons olive oil
- 2 lemons (one for juice, one sliced for grilling)
- Salt and pepper to taste
- 2 cloves garlic, minced
- Optional: lemon wedges for serving
Cooking Instructions
- Prepare the Marinade: In a small bowl, combine the chopped dill, olive oil, lemon juice, minced garlic, salt, and pepper. Mix well until all ingredients are incorporated. This marinade will infuse the salmon with flavor while also helping to keep it moist during grilling.
- Marinate the Salmon: Place the salmon fillets in a shallow dish or a zip-top bag. Pour the marinade over the salmon, ensuring each piece is well-coated. Cover the dish or seal the bag and let it marinate in the refrigerator for at least 30 minutes to one hour. This step allows the flavors to penetrate the fish, resulting in a more flavorful dish.
- Preheat the Grill: While the salmon is marinating, preheat your grill to medium-high heat (about 375-400°F). If using a charcoal grill, make sure the coals are hot and ashed over. A properly heated grill will give the salmon a nice sear.
- Prepare the Grill Surface: Before placing the salmon on the grill, lightly oil the grates with a paper towel dipped in vegetable oil to prevent sticking. This is essential for achieving beautiful grill marks and ensuring the fish cooks evenly.
- Grill the Salmon: Carefully place the marinated salmon fillets on the grill, skin-side down if applicable. Close the grill lid and cook for about 4-6 minutes, depending on the thickness of the fillets. After this time, use a spatula to gently check if the salmon is releasing from the grill. If it is, flip the fillets over and grill for an additional 3-5 minutes, or until the salmon flakes easily with a fork and is opaque throughout.
- Add Lemon Slices: During the last few minutes of grilling, place lemon slices directly on the grill next to the salmon. Grill them until they’ve nice grill marks and are warm, about 2-3 minutes. This will enhance the dish’s presentation and add an extra citrusy flavor.
- Serve: Once the salmon is cooked through, remove it from the grill and let it rest for a couple of minutes. Serve the grilled salmon with the grilled lemon slices and optional lemon wedges on the side for an extra burst of flavor.
Extra Tips
For the best flavor, choose high-quality, fresh salmon, preferably wild-caught if possible. Additionally, avoid overcooking the salmon to retain its moisture and tenderness; a meat thermometer can be helpful, aiming for an internal temperature of around 145°F.
If you have leftovers, grilled salmon can be delicious in salads or sandwiches the next day. Pair your grilled salmon with a revitalizing cucumber salad or roasted potatoes for a complete meal that captures the essence of Scandinavian summer dining.
Fresh Cucumber Salad With Sour Cream Dressing
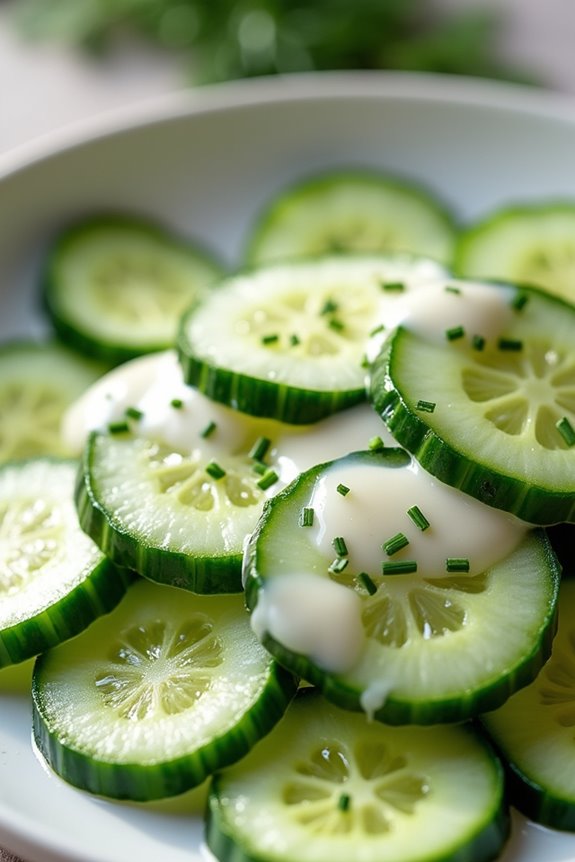
Fresh Cucumber Salad With Sour Cream Dressing is a light and invigorating dish that perfectly complements any summer meal. This Scandinavian classic showcases the crispness of cucumbers, balanced with a tangy and creamy dressing that elevates the dish. The ingredients are simple and wholesome, allowing the natural flavors to shine through. Ideal for barbecues, picnics, or as a side dish to grilled meats, this salad is a must-try during the warm months.
The combination of fresh herbs and the coolness of sour cream makes this salad not just delicious but also a delightful addition to your summer table. With just a few ingredients, you can create a dish that feels special yet is incredibly easy to prepare. Whether you’re entertaining guests or enjoying a quiet meal at home, this invigorating cucumber salad is sure to impress.
Ingredients (Serves 4-6)
- 4 medium cucumbers
- 1 cup sour cream
- 1 tablespoon fresh dill, chopped
- 1 tablespoon fresh chives, chopped
- 1 tablespoon apple cider vinegar
- 1 teaspoon sugar
- Salt and pepper to taste
Cooking Instructions
- Prepare the Cucumbers: Start by washing the cucumbers thoroughly under cool running water. Peel them if desired, but leaving the skin on adds color and crunch. Slice the cucumbers thinly, about 1/4 inch thick. You can use a knife or a mandoline slicer for even slices.
- Make the Dressing: In a medium bowl, combine the sour cream, chopped dill, chopped chives, apple cider vinegar, and sugar. Whisk the mixture until it’s smooth and creamy. This dressing will be the star of your salad, adding a rich tanginess to the fresh cucumbers.
- Combine Ingredients: In a large salad bowl, add the sliced cucumbers. Pour the sour cream dressing over the cucumbers, and gently toss until all the cucumber slices are well coated in the dressing.
- Season to Taste: Sprinkle salt and pepper over the salad according to your taste preferences. Be sure to mix the salad again gently to distribute the seasoning evenly.
- Chill and Serve: For best flavor, cover the salad and let it chill in the refrigerator for at least 30 minutes before serving. This allows the cucumbers to absorb the dressing and the flavors to meld together beautifully. Just before serving, give it a quick stir.
Extra Tips
For added flavor, consider including thinly sliced red onions or a sprinkle of crushed garlic in the salad. These ingredients can enhance the overall taste without overpowering the freshness of the cucumbers.
Additionally, if you prefer a lighter version, you can substitute Greek yogurt for sour cream. This swap keeps the creamy texture while adding a protein boost. Enjoy your Fresh Cucumber Salad With Sour Cream Dressing as a delightful side that will elevate any summer meal!
Nordic Shrimp Sandwiches

Nordic Shrimp Sandwiches, or “Räkmacka,” are a quintessential Scandinavian dish that celebrates the freshness of shrimp and the simplicity of good bread. These open-faced sandwiches aren’t only visually stunning but also incredibly flavorful, making them a perfect choice for summer gatherings or casual lunches.
The combination of fresh shrimp, creamy mayonnaise, and crisp vegetables atop a slice of robust rye or sourdough bread creates a delightful contrast of textures and tastes that embodies the essence of Nordic cuisine. In Scandinavian culture, food is often about celebrating the bounty of the sea and local ingredients, and these shrimp sandwiches do just that.
Typically garnished with dill, lemon, and perhaps a touch of caviar, they invite you to plunge into a taste of the Nordic summer, evoking memories of coastal picnics and sun-soaked days. Whether you’re enjoying them as a light meal or serving them at a gathering, Nordic Shrimp Sandwiches are sure to impress with their fresh ingredients and elegant presentation.
Ingredients (serves 4-6 people)
- 1 lb (450g) cooked shrimp, peeled and deveined
- 4-6 slices of rye or sourdough bread
- ½ cup mayonnaise
- 1 tablespoon Dijon mustard
- 1 tablespoon fresh lemon juice
- 2-3 tablespoons fresh dill, chopped
- 1 small red onion, thinly sliced
- 1-2 ripe tomatoes, sliced
- 1-2 hard-boiled eggs, sliced
- Lettuce leaves (e.g., butter lettuce or arugula)
- Lemon wedges for garnish
- Salt and pepper to taste
Cooking Instructions
- Prepare the Shrimp Mixture: In a large bowl, combine the cooked shrimp, mayonnaise, Dijon mustard, lemon juice, and chopped dill. Mix gently until the shrimp are well-coated with the dressing. Season with salt and pepper to taste. This mixture is the star component of your sandwich and should be flavorful and well-balanced.
- Toast the Bread: If desired, lightly toast the rye or sourdough bread slices to enhance their flavor and texture. Toasting adds a pleasant crunch that complements the creamy shrimp mixture. Let the bread cool slightly before assembling the sandwiches.
- Assemble the Sandwiches: Start by placing a lettuce leaf on each slice of bread. This will act as a barrier to keep the bread from becoming soggy from the shrimp mixture. Next, spoon a generous amount of the shrimp mixture onto each slice, spreading it evenly.
- Add Toppings: Layer the sliced tomatoes and red onions on top of the shrimp mixture. Then, place a few slices of hard-boiled egg on top of each sandwich for added richness and visual appeal. The combination of fresh veggies and eggs adds color and additional flavor.
- Garnish and Serve: Garnish each sandwich with a sprig of fresh dill and a lemon wedge on the side. Serve immediately to enjoy the freshness of the ingredients. You can also serve them chilled if you prefer, allowing the flavors to meld together.
Extra Tips
For an extra burst of flavor, consider adding capers or a sprinkle of smoked paprika to the shrimp mixture. If you want to make the sandwiches ahead of time, prepare the shrimp mixture and store it in the refrigerator, but wait to assemble the sandwiches until just before serving to guarantee the bread stays fresh and the toppings are crisp.
Enjoy your Nordic Shrimp Sandwiches with a chilled glass of white wine or a revitalizing summer beverage to complete the experience!
Potato and Chive Salad
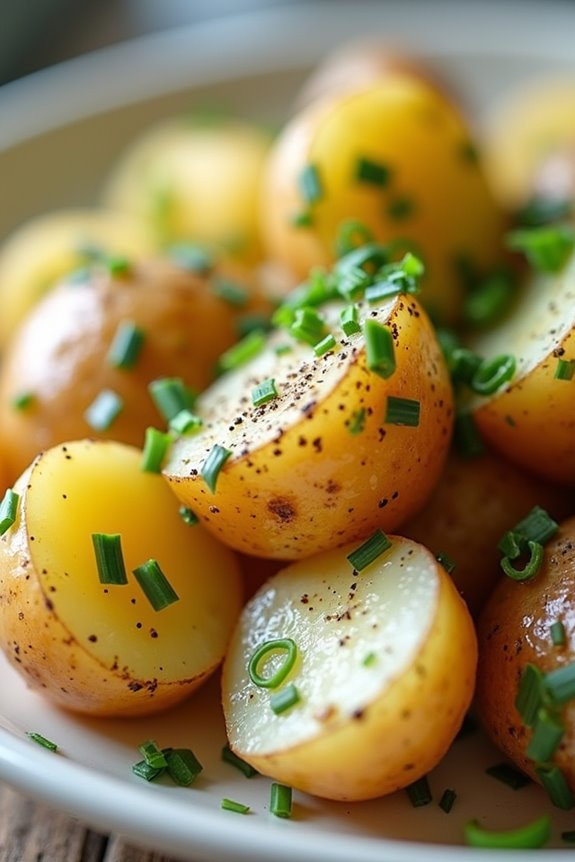
Potato and Chive Salad is a delightful Scandinavian dish that perfectly embodies the essence of summer with its fresh ingredients and vibrant flavors. This salad isn’t only revitalizing but also incredibly versatile, making it a fantastic side dish for barbecues, picnics, or light lunches. The combination of tender potatoes, aromatic chives, and a creamy dressing creates a harmonious balance that will please any palate.
This dish is easy to prepare and can be made in advance, allowing the flavors to meld together beautifully. The use of fresh chives adds a subtle onion flavor that complements the earthy taste of the potatoes. Whether served warm or chilled, Potato and Chive Salad is a simple yet satisfying addition to any summer meal.
Ingredients (Serves 4-6):
- 2 pounds of small waxy potatoes (such as new potatoes or Yukon Gold)
- 1 cup of sour cream
- 1/4 cup of mayonnaise
- 2 tablespoons of fresh lemon juice
- 1 tablespoon of Dijon mustard
- 1/2 teaspoon of salt
- 1/4 teaspoon of black pepper
- 1/2 cup of fresh chives, finely chopped
- 2 tablespoons of fresh dill, chopped (optional)
- 1/4 red onion, finely chopped (optional)
Cooking Instructions:
- Cook the Potatoes: Begin by washing the potatoes thoroughly to remove any dirt. Place them in a large pot and cover with cold water, adding a pinch of salt. Bring the water to a boil and then reduce to a simmer. Cook the potatoes for about 15-20 minutes or until they’re fork-tender but not mushy. Drain the potatoes and allow them to cool slightly.
- Prepare the Dressing: While the potatoes are cooling, prepare the dressing. In a mixing bowl, combine the sour cream, mayonnaise, lemon juice, Dijon mustard, salt, and black pepper. Whisk together until smooth and well blended. Taste and adjust seasoning as needed.
- Chop the Vegetables: Once the potatoes are cool enough to handle, cut them into bite-sized pieces. If you’re using red onion, finely chop it now. Add the chopped potatoes and red onion (if using) to a large mixing bowl.
- Add Herbs: Sprinkle the chopped chives and dill (if using) over the potatoes in the mixing bowl. These fresh herbs will enhance the flavor and add a burst of color to the salad.
- Combine Everything: Pour the dressing over the potato mixture and gently fold everything together using a spatula or wooden spoon. Be careful not to mash the potatoes; you want to keep them intact for texture.
- Chill and Serve: Once everything is combined, cover the salad with plastic wrap or transfer it to a serving dish. Refrigerate for at least 30 minutes to allow the flavors to meld together. Serve chilled or at room temperature.
Extra Tips:
For an added layer of flavor, consider roasting the potatoes instead of boiling them. Toss them in olive oil, salt, and pepper, and roast at 400°F (200°C) until golden brown and crispy. This will give the salad a wonderful depth and texture.
Additionally, feel free to customize the salad by adding other ingredients such as diced cucumbers or cherry tomatoes for extra revitalization. Enjoy your Potato and Chive Salad as a perfect complement to your summer meals!
Berry Pavlova With Whipped Cream
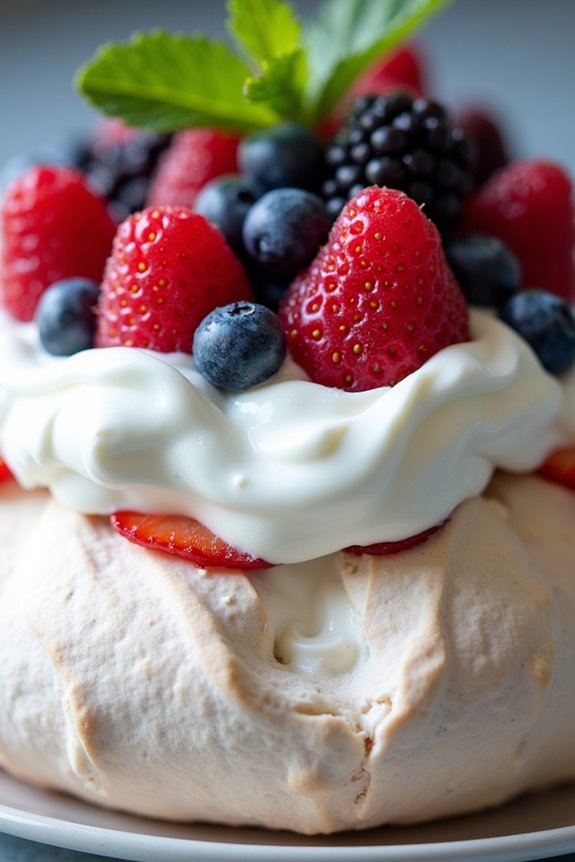
Pavlova is a classic dessert that originated in Australia and New Zealand but has become a favorite in many Scandinavian households, especially during the summer when fresh berries are abundantly available.
This delightful meringue-based dessert is crispy on the outside and soft on the inside, making it an ideal canvas for a luscious layer of whipped cream and a generous topping of seasonal berries. The combination of textures and flavors creates a light and invigorating treat that’s perfect for summer gatherings or special occasions.
Making a Berry Pavlova isn’t only satisfying but also surprisingly simple. With just a few key ingredients, you can create a stunning dessert that will impress your guests.
The key to a successful pavlova is in the meringue—be certain to whip the egg whites until they form stiff peaks and to bake it at a low temperature for a long time to achieve that perfect chewy interior. Once topped with whipped cream and fresh berries, this dessert is sure to be the star of any summer feast.
Ingredients (Serves 4-6):
- 4 large egg whites
- 1 cup granulated sugar
- 1 teaspoon white vinegar
- 1 teaspoon cornstarch
- 1 cup heavy whipping cream
- 2 tablespoons powdered sugar
- 1 teaspoon vanilla extract
- 2 cups mixed berries (such as strawberries, blueberries, and raspberries)
- Mint leaves for garnish (optional)
Cooking Instructions:
- Preheat the Oven: Begin by preheating your oven to 225°F (110°C). This low temperature is vital for drying out the meringue properly without browning it.
- Prepare the Baking Sheet: Line a baking sheet with parchment paper. You can draw a circle on the parchment to guide the shape of your pavlova; a diameter of about 8-10 inches is ideal.
- Whisk Egg Whites: In a clean, dry mixing bowl, add the egg whites. Using an electric mixer, beat the egg whites on medium speed until soft peaks form. This usually takes about 3-4 minutes.
- Add Sugar Gradually: Gradually add the granulated sugar, a tablespoon at a time, while continuing to beat the egg whites on high speed. Continue until the mixture is glossy and stiff peaks form. This should take another 4-5 minutes.
- Incorporate Vinegar and Cornstarch: Gently fold in the white vinegar and cornstarch using a spatula. These ingredients help create the marshmallow-like interior of the pavlova.
- Shape the Pavlova: Spoon the meringue mixture onto the prepared parchment paper, using the circle as a guide. Create a slight dip in the center to hold the whipped cream and berries later.
- Bake the Meringue: Place the baking sheet in the preheated oven and bake for about 1 hour and 15 minutes. The pavlova should be crisp on the outside and slightly soft inside. Turn off the oven and leave the pavlova inside to cool completely with the door ajar.
- Prepare Whipped Cream: In a large mixing bowl, combine the heavy whipping cream, powdered sugar, and vanilla extract. Using an electric mixer, whip the cream until soft peaks form.
- Assemble the Pavlova: Once the meringue has cooled completely, carefully transfer it to a serving platter. Spoon the whipped cream into the center of the pavlova, then top with your mixed berries.
- Garnish and Serve: Optionally, garnish with mint leaves for a fresh touch. Slice and serve immediately for the best texture.
Extra Tips: When making your Berry Pavlova, it’s essential to guarantee that your mixing bowl and utensils are completely clean and free of grease, as any fat can prevent the egg whites from whipping properly.
Additionally, you can prepare the meringue a day in advance and store it in an airtight container to keep it crisp. Feel free to experiment with different berry combinations, or even add a drizzle of berry coulis or chocolate sauce for an extra layer of flavor. Enjoy your delightful summer dessert!
Pickled Herring With Red Onions and Apples
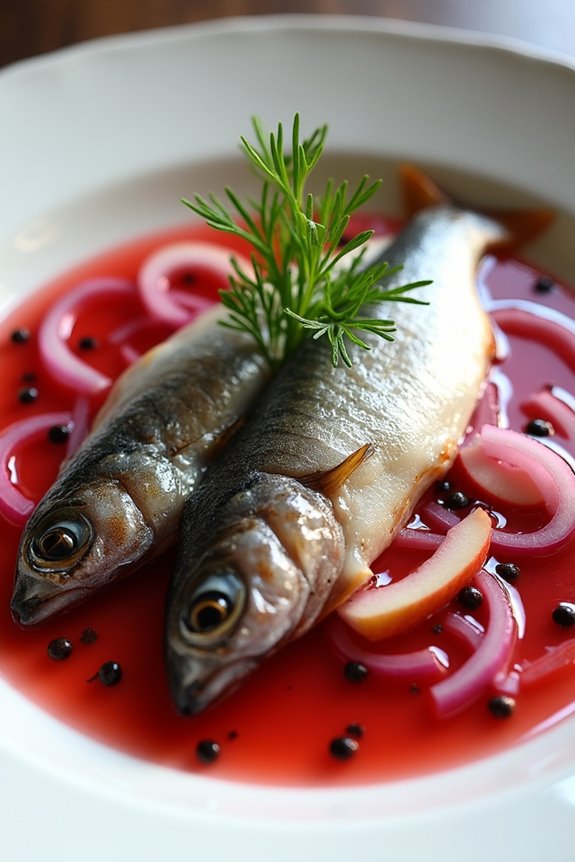
Pickled herring is a beloved dish in Scandinavian cuisine, often enjoyed during summer gatherings and festive occasions. The combination of the salty, tangy herring with the sweetness of apples and the bite of red onions creates a delightful balance of flavors.
This dish isn’t only easy to prepare but also makes for a stunning centerpiece on a buffet table. Serve it with crispbread or boiled potatoes for a traditional experience.
The process of pickling herring is relatively simple and can be done in advance, making it a perfect dish for entertaining. The marinated herring can be stored in the refrigerator for up to a week, allowing the flavors to meld beautifully. This recipe serves 4-6 people and is perfect for a summer gathering or a light lunch.
Ingredients:
- 400g pickled herring fillets
- 1 large red onion, thinly sliced
- 2 medium apples, cored and julienned (preferably a tart variety like Granny Smith)
- 1 cup apple cider vinegar
- 1 cup water
- 2 tablespoons sugar
- 1 teaspoon salt
- 1 teaspoon black peppercorns
- 2 bay leaves
- Fresh dill for garnish (optional)
Cooking Instructions:
- Prepare the Brine: In a medium saucepan, combine the apple cider vinegar, water, sugar, salt, black peppercorns, and bay leaves. Heat the mixture over medium heat, stirring until the sugar and salt are completely dissolved.
- Remove from heat and allow it to cool to room temperature.
- Slice the Vegetables: While the brine is cooling, thinly slice the red onion and julienne the apples. Confirm that the apples are cut into thin strips to blend well with the herring and absorb the flavors of the brine.
- Layer the Ingredients: In a glass or ceramic dish, layer the pickled herring fillets, sliced onions, and julienned apples. Make sure to distribute them evenly for balanced flavor in every bite.
- Add the Brine: Once the brine has cooled, pour it over the layered herring, onions, and apples. Confirm that all the ingredients are submerged in the brine. If necessary, you can place a small plate on top to keep everything submerged.
- Marinate: Cover the dish with plastic wrap or a lid and place it in the refrigerator. Allow the mixture to marinate for at least 24 hours, although 48 hours will yield even better flavor.
- Serve: Before serving, give the dish a gentle stir to redistribute the onions and apples. Garnish with fresh dill if desired. Serve chilled with crispbread or boiled potatoes.
Extra Tips:
For an additional flavor twist, consider adding a few cloves or a pinch of mustard seeds to the brine for an enhanced taste.
Also, feel free to experiment with different types of apples or add other vegetables such as carrots or cucumbers for added texture. Remember, the longer the herring marinates, the more flavorful it becomes, so plan ahead and enjoy this revitalizing dish at your summer gatherings!
Roasted Beetroot and Goat Cheese Salad
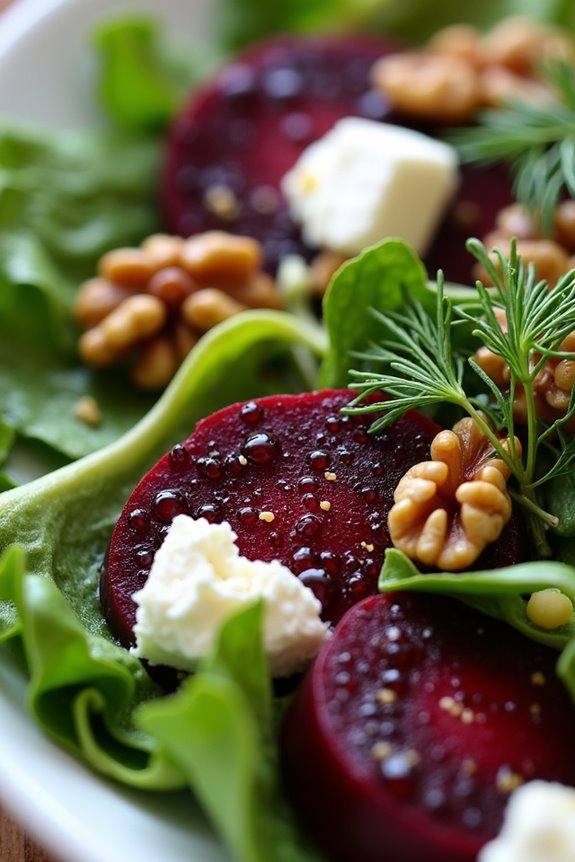
The Roasted Beetroot and Goat Cheese Salad is a delightful dish that captures the essence of Scandinavian summer dining. This vibrant salad combines the earthiness of roasted beets with the creamy tang of goat cheese, creating a perfect balance of flavors and textures.
With fresh greens and a simple vinaigrette, this salad not only looks stunning but also tastes invigorating, making it an ideal choice for summer picnics, barbecues, or as a light lunch.
Roasting the beets brings out their natural sweetness, which pairs beautifully with the tartness of the goat cheese. This dish can be easily customized to include other seasonal vegetables or nuts, making it versatile for various occasions.
Serve it as a side or make it the centerpiece of a light meal; either way, the Roasted Beetroot and Goat Cheese Salad is sure to impress.
Ingredients (Serves 4-6)
- 4 medium-sized beetroots
- 100g goat cheese, crumbled
- 150g mixed salad greens (such as arugula, spinach, or mixed baby greens)
- 1/4 cup walnuts, toasted and roughly chopped
- 3 tablespoons olive oil
- 1 tablespoon balsamic vinegar
- 1 teaspoon honey
- Salt and pepper, to taste
- Fresh herbs (such as dill or parsley) for garnish
Cooking Instructions
- Preheat the Oven: Begin by preheating your oven to 200°C (400°F). This will guarantee that the beetroots roast evenly and develop a lovely caramelized flavor.
- Prepare the Beetroots: Wash the beetroots thoroughly to remove any dirt. Trim the tops and roots, but leave the skin on. Wrap each beetroot individually in aluminum foil, creating a sealed packet. This will help lock in moisture during roasting.
- Roast the Beetroots: Place the wrapped beetroots on a baking sheet and roast in the preheated oven for about 45-60 minutes, or until they’re tender when pierced with a fork. The cooking time may vary depending on the size of the beets.
- Cool and Peel the Beetroots: Once roasted, remove the beetroots from the oven and let them cool for a few minutes. Carefully unwrap the foil and, using paper towels, rub off the skins. The skins should come off easily. Cut the beetroots into wedges or cubes.
- Prepare the Vinaigrette: In a small bowl, whisk together the olive oil, balsamic vinegar, honey, salt, and pepper. Adjust the seasoning to your taste. This vinaigrette will add a nice tangy flavor to the salad.
- Assemble the Salad: In a large bowl, combine the mixed salad greens, roasted beetroot pieces, and toasted walnuts. Drizzle the vinaigrette over the salad and toss gently to coat all the ingredients.
- Add Goat Cheese and Garnish: Finally, sprinkle the crumbled goat cheese over the top of the salad. Garnish with fresh herbs for an extra touch of flavor and presentation.
Extra Tips
For a more complex flavor profile, consider adding additional ingredients such as sliced apples or pears for a fruity sweetness, or even some avocado for creaminess.
If you prefer a nut-free version, you can omit the walnuts or replace them with seeds like pumpkin or sunflower seeds. Additionally, roasting the beetroots a day in advance can save time and enhance the flavors.
Enjoy this vibrant salad as a invigorating dish during warm summer days!
Chilled Cucumber and Yogurt Soup
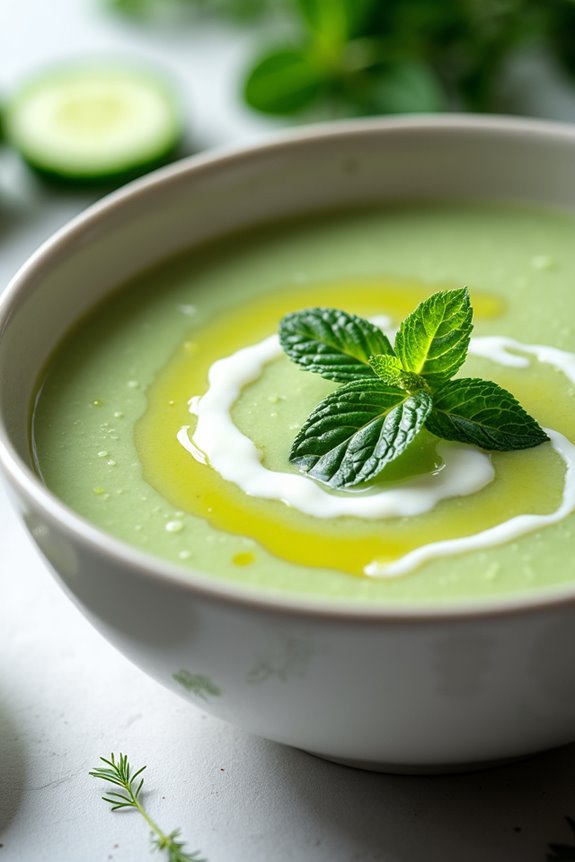
As the warm days of summer approach, nothing beats a rejuvenating and light dish that can be served cold. Chilled Cucumber and Yogurt Soup is a delightful Scandinavian recipe that captures the essence of summer with its vibrant flavors and soothing texture. This dish combines the crispness of cucumbers with the creaminess of yogurt, making it a perfect appetizer or a light meal on a hot day. Not only is it easy to prepare, but it also showcases the natural tastes of fresh ingredients, making it both healthy and satisfying.
This soup isn’t just delicious; it’s also incredibly versatile. You can adjust the seasonings and toppings to your liking, making it a great dish to adapt for different occasions. Serve it in individual bowls or as a communal dish, garnished with fresh herbs or croutons for added texture. Whether you’re hosting a summer gathering or simply enjoying a quiet lunch, this Chilled Cucumber and Yogurt Soup will certainly impress your guests and tantalize your taste buds.
Ingredients (Serves 4-6):
- 4 medium cucumbers, peeled and diced
- 2 cups plain Greek yogurt
- 1 cup vegetable or chicken broth
- 3 tablespoons fresh dill, chopped
- 2 tablespoons fresh lemon juice
- 1 garlic clove, minced
- Salt and pepper to taste
- Olive oil for drizzling (optional)
- Fresh dill or mint leaves for garnish
Cooking Instructions:
- Prepare the Cucumbers: Start by peeling the cucumbers and removing the seeds if they’re large. Dice them into small pieces to guarantee they blend smoothly later. This step is essential as it helps to reduce the water content and makes the soup less watery.
- Blend the Ingredients: In a blender or food processor, combine the diced cucumbers, Greek yogurt, vegetable or chicken broth, chopped dill, lemon juice, and minced garlic. Blend until the mixture is smooth and creamy. This is where you create the base of your soup, so make sure that everything is well incorporated.
- Season the Soup: Taste the blended mixture and season with salt and pepper according to your preference. Remember that the flavors will develop as the soup chills, so it’s important to balance the seasoning at this stage.
- Chill the Soup: Transfer the blended soup into a bowl or airtight container and refrigerate for at least 1-2 hours. Chilling the soup allows the flavors to meld together beautifully and enhances its rejuvenating qualities.
- Serve and Garnish: Once the soup has chilled, give it a good stir. Pour it into serving bowls and drizzle with olive oil if desired. Garnish with fresh dill or mint leaves for a pop of color and added flavor. This final touch elevates the presentation and makes it even more appealing.
Extra Tips: For a more robust flavor, let the soup chill overnight. This allows the ingredients to fully meld, creating a richer taste. Additionally, consider adding a splash of white wine vinegar for a tangy kick or incorporating other herbs like parsley or chives. If you prefer a thicker consistency, reduce the amount of broth or add more yogurt. Enjoy this vibrant dish as a light lunch, starter, or a rejuvenating accompaniment to grilled meats.
Open-Faced Smoked Mackerel Sandwiches
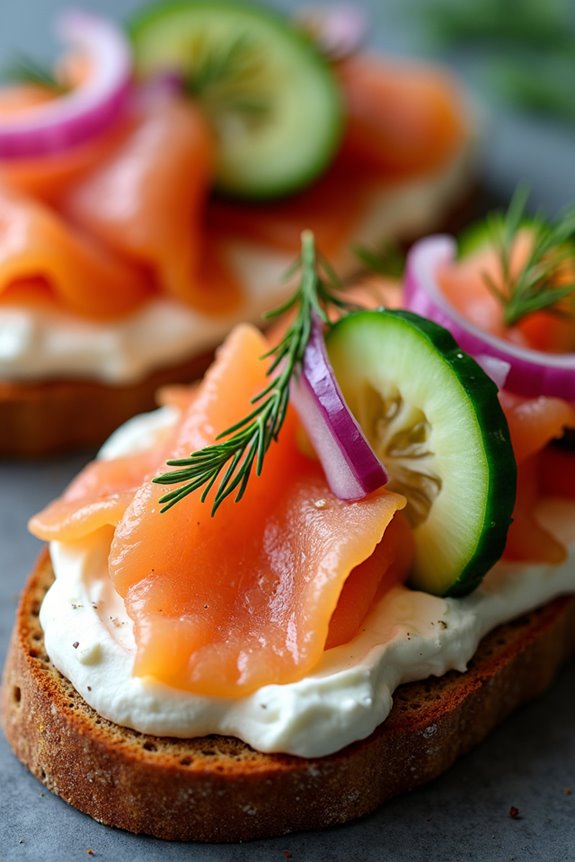
Open-faced smoked mackerel sandwiches are a delightful representation of Scandinavian cuisine, showcasing the region’s love for fresh and flavorful ingredients. This dish makes a perfect summer meal, ideal for lunch or a light dinner. The combination of creamy spreads, fresh vegetables, and the rich, smoky flavor of mackerel creates a rejuvenating yet hearty meal that can be enjoyed any time of the day.
These sandwiches are easy to prepare and can be customized with various toppings to suit your taste. The mackerel isn’t only delicious but also packed with nutrients, making this dish both a smart and satisfying choice. You can serve these open-faced sandwiches at a picnic, a summer gathering, or even as a part of a brunch spread.
Ingredients (Serves 4-6):
- 4-6 slices of dark rye bread
- 200g smoked mackerel fillets
- 150g cream cheese
- 1 tablespoon lemon juice
- 1 teaspoon Dijon mustard
- Fresh dill, for garnish
- 1 small red onion, thinly sliced
- 1 cucumber, thinly sliced
- 1 tomato, sliced
- Salt and pepper, to taste
Cooking Instructions:
- Prepare the Bread: Start by toasting the dark rye bread slices lightly until they’re golden brown. This step adds a nice crunch and enhances the flavor of the bread, providing a sturdy base for the toppings.
- Make the Cream Cheese Spread: In a mixing bowl, combine the cream cheese, lemon juice, and Dijon mustard. Mix until smooth and creamy. This spread will provide a tangy and rich base for the mackerel, balancing its smokiness.
- Assemble the Sandwiches: Take the toasted rye bread slices and spread a generous layer of the cream cheese mixture on each slice. This layer not only adds flavor but also acts as a barrier to keep the bread from getting soggy.
- Add the Smoked Mackerel: Flake the smoked mackerel fillets into bite-sized pieces and distribute them evenly over the cream cheese spread on each slice. The mackerel adds a smoky and savory element that’s essential to the dish.
- Top with Vegetables: Arrange the sliced red onion, cucumber, and tomato on top of the mackerel. These fresh vegetables add a crunchy texture and freshness that complement the rich flavors of the sandwich.
- Garnish and Season: Sprinkle fresh dill over the top of each sandwich and season with salt and pepper to taste. The dill not only enhances the flavor but also adds a beautiful pop of color.
- Serve: Arrange the open-faced sandwiches on a serving platter and enjoy them immediately, or refrigerate them for a short while if you prefer them chilled.
Extra Tips:
When preparing open-faced smoked mackerel sandwiches, feel free to experiment with different toppings, such as capers, avocados, or radishes for added flavor and texture. You can also use other types of bread, such as sourdough or whole grain, depending on your preference.
If you have leftovers, store the components separately to keep the bread from becoming soggy and enjoy them the next day for a quick and delicious meal.
Strawberry and Rhubarb Crumble
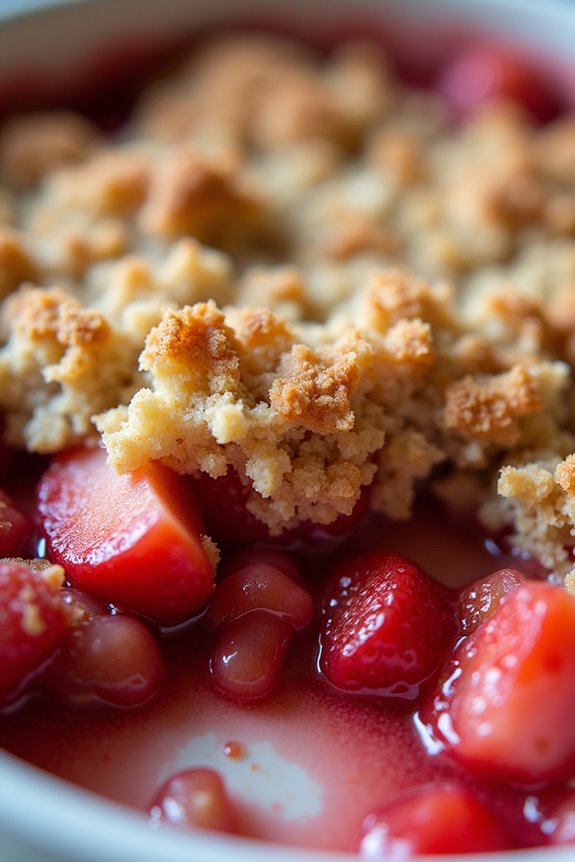
As the warm summer sun graces the Scandinavian landscape, the vibrant colors of ripe strawberries and tart rhubarb beckon home cooks to create delightful desserts that celebrate the season. The combination of sweet strawberries and tangy rhubarb is a classic pairing, and when baked together under a crispy, buttery crumble topping, they transform into a comforting dish that’s perfect for summer gatherings.
Whether served warm with a scoop of vanilla ice cream or chilled for a revitalizing treat, this Strawberry and Rhubarb Crumble is sure to impress your family and friends. This recipe isn’t only easy to prepare, but it also highlights the simplicity and freshness of seasonal ingredients, making it an ideal choice for potlucks, picnics, or family dinners.
The balance of flavors in the filling harmonizes beautifully with the crunchy topping, creating a satisfying dessert that captures the essence of Scandinavian summers. Gather your ingredients, and let’s plunge into making this delightful Strawberry and Rhubarb Crumble!
Ingredients (serving size: 4-6 people)
- 2 cups fresh strawberries, hulled and halved
- 2 cups rhubarb, chopped into 1-inch pieces
- 1 cup granulated sugar, divided
- 1 tablespoon lemon juice
- 1 teaspoon vanilla extract
- 1 cup all-purpose flour
- 1/2 cup rolled oats
- 1/2 cup brown sugar
- 1/2 teaspoon ground cinnamon
- 1/4 teaspoon salt
- 1/2 cup unsalted butter, melted
Cooking Instructions
- Preheat the Oven: Preheat your oven to 350°F (175°C). This guarantees that the crumble cooks evenly and becomes golden brown on top.
- Prepare the Filling: In a large mixing bowl, combine the halved strawberries and chopped rhubarb. Sprinkle 3/4 cup of granulated sugar, lemon juice, and vanilla extract over the fruit, and gently toss to coat. Allow the mixture to sit for about 10-15 minutes to let the juices release, which will help enhance the flavor.
- Make the Crumble Topping: In another bowl, mix together the flour, rolled oats, brown sugar, ground cinnamon, and salt. Pour in the melted butter and stir until the mixture resembles coarse crumbs. This will give your crumble a nice texture and a rich buttery flavor.
- Combine and Layer: Once the fruit mixture is ready, pour it into a greased 9×13 inch baking dish, spreading it out evenly. Then, sprinkle the crumble topping generously over the fruit layer, making sure it covers the filling completely.
- Bake: Place the baking dish in the preheated oven and bake for 35-40 minutes, or until the topping is golden brown and the filling is bubbling. Check the crumble at the 30-minute mark to confirm it doesn’t over-brown.
- Cool and Serve: Once baked, remove the dish from the oven and let it cool for about 10-15 minutes. Serve warm, ideally with a scoop of vanilla ice cream or a dollop of whipped cream for an added touch of indulgence.
Extra Tips
For an added dimension of flavor, consider incorporating chopped nuts into the crumble topping for a delightful crunch. You can also adjust the sugar level in the filling based on your sweetness preference, especially if your strawberries are particularly sweet or your rhubarb is very tart.
Additionally, this crumble can be made ahead of time and reheated, making it a convenient option for entertaining. Enjoy your Scandinavian Strawberry and Rhubarb Crumble!
Creamy Mushroom and Barley Risotto
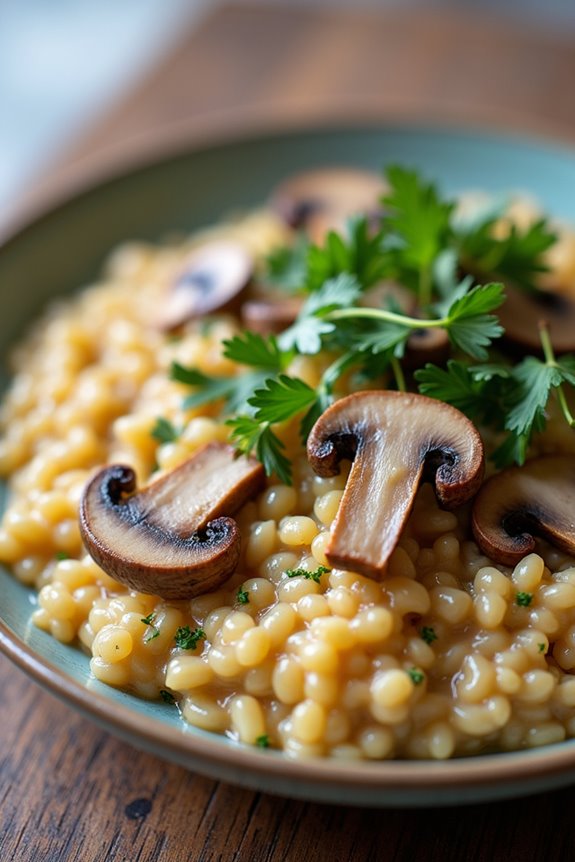
Experience the essence of Scandinavian cuisine with this delightful Creamy Mushroom and Barley Risotto. The combination of earthy mushrooms, nutty barley, and a touch of cream creates a comforting dish that’s perfect for summer gatherings or a cozy night in.
While traditional risotto is made with arborio rice, using barley adds a unique texture and richness that elevates this dish to new heights. This creamy risotto isn’t only satisfying but also packed with nutrients, making it a wholesome choice for any meal.
This recipe is simple to prepare yet delivers complex flavors that everyone will love. The slow cooking process allows the barley to absorb the flavors of the broth and the mushrooms, resulting in a creamy, hearty dish that’s sure to impress. Serve it as a main course or a side dish, and enjoy the taste of Scandinavia right in your own kitchen.
Ingredients (serving size of 4-6 people):
- 1 cup pearl barley
- 4 cups vegetable broth
- 1 tablespoon olive oil
- 1 medium onion, finely chopped
- 2 cloves garlic, minced
- 8 ounces mushrooms (such as cremini or shiitake), sliced
- 1 cup heavy cream
- ½ cup grated Parmesan cheese
- Salt and pepper, to taste
- Fresh parsley, chopped (for garnish)
Cooking Instructions:
- Prepare the Broth: In a medium saucepan, heat the vegetable broth over low heat. Keeping it warm throughout the cooking process will help the barley cook evenly and absorb the flavors better.
- Sauté Aromatics: In a large skillet, heat the olive oil over medium heat. Add the chopped onion and sauté for about 5 minutes, or until it’s translucent. Stir in the minced garlic and sauté for another minute, until fragrant.
- Cook the Mushrooms: Add the sliced mushrooms to the skillet and cook for about 5-7 minutes, stirring occasionally, until they release their moisture and start to brown. This step enhances the umami flavor of the mushrooms.
- Toast the Barley: Stir in the pearl barley and cook for 2-3 minutes, allowing it to toast slightly while mixing it with the mushroom mixture. This adds a nutty flavor to the dish.
- Add the Broth Gradually: Begin adding the warm vegetable broth to the skillet, one ladleful at a time. Stir frequently and allow each addition to be absorbed before adding the next. This process will take about 25-30 minutes until the barley is tender and creamy.
- Incorporate Cream and Cheese: Once the barley is cooked to your liking, reduce the heat to low and stir in the heavy cream and grated Parmesan cheese. Mix well until the cheese is melted and the risotto is creamy. Season with salt and pepper to taste.
- Garnish and Serve: Remove from heat and let it sit for a few minutes. Serve the risotto warm, garnished with freshly chopped parsley for an added touch of color and flavor.
Extra Tips: For an added depth of flavor, consider adding a splash of white wine to the skillet after sautéing the mushrooms and letting it reduce before adding the barley. You can also experiment with different types of mushrooms or add seasonal vegetables like asparagus or peas for a fresh, summery twist.
Wild Herb Frittata

The Wild Herb Frittata is a delightful dish that embodies the essence of Scandinavian summer cuisine. This recipe showcases the vibrant flavors of fresh herbs and eggs, making it a perfect choice for brunch or a light dinner. Utilizing seasonal ingredients, this frittata isn’t only easy to prepare but also a great way to embrace the bounty of fresh herbs found in Scandinavian gardens and meadows.
With its fluffy texture and aromatic taste, it’s sure to impress family and friends alike. To make this dish, you can use various wild herbs such as nettles, dandelion greens, wild garlic, or chives, depending on what you have available. The frittata is versatile and can be enjoyed warm or at room temperature, allowing it to be an ideal dish for gatherings or picnics.
Pair it with a fresh salad or crusty bread for a complete meal that captures the essence of summer in Scandinavia.
Ingredients (Serves 4-6):
- 8 large eggs
- 1 cup milk
- 1 cup mixed wild herbs (such as nettles, dandelion greens, wild garlic, and chives)
- 1 cup grated cheese (cheddar, goat cheese, or a mix)
- 1 medium onion, finely chopped
- 2 tablespoons olive oil or butter
- Salt and pepper, to taste
Cooking Instructions:
- Preheat the Oven: Begin by preheating your oven to 350°F (175°C). This guarantees that your frittata will cook evenly and develop a lovely golden top.
- Sauté the Onions: In a large oven-safe skillet, heat the olive oil or butter over medium heat. Add the finely chopped onion and sauté until it becomes soft and translucent, about 5-7 minutes. This step adds depth of flavor to the frittata.
- Prepare the Herb Mixture: While the onions are cooking, roughly chop your mixed wild herbs. Once the onions are ready, add the herbs to the skillet and sauté for an additional 2-3 minutes until they’re wilted and fragrant. Stir occasionally to promote even cooking.
- Whisk the Eggs and Milk: In a large bowl, whisk together the eggs and milk until well combined. Season with salt and pepper to taste. This mixture will form the base of your frittata.
- Combine Ingredients: Pour the egg mixture over the sautéed onions and herbs in the skillet. Gently stir to combine everything, making sure the herbs and onions are evenly distributed. Sprinkle the grated cheese on top.
- Cook on the Stovetop: Cook the frittata on the stovetop for about 5 minutes until the edges begin to set. This helps create a sturdy base before transferring it to the oven.
- Bake the Frittata: Carefully transfer the skillet to the preheated oven and bake for 15-20 minutes, or until the frittata is puffed up and a toothpick inserted in the center comes out clean. Keep an eye on it to prevent over-browning.
- Cool and Serve: Once cooked, remove the frittata from the oven and let it cool for a few minutes. Slice into wedges and serve warm or at room temperature.
Extra Tips:
For a more robust flavor, consider adding other seasonal vegetables like bell peppers or zucchini to the frittata. You can also experiment with different cheeses for varied taste profiles.
If you have leftover frittata, it keeps well in the refrigerator for a couple of days and can be easily reheated or enjoyed cold. For the freshest taste, try to use herbs that are locally sourced or freshly picked. This dish not only highlights the beauty of wild herbs but also promotes the idea of foraging and embracing the flavors of nature in your cooking.