

Potatoes aren’t just a side dish; they can be the shining star of your table. In Europe, these humble tubers take on exciting roles in various recipes. From the delicate French Pommes Dauphine to the bold Spanish Patatas Bravas, there’s so much to discover. Each dish has its own unique story and flavor. Ready to explore some hearty European potato recipes that might just change how you see this beloved ingredient?
Pommes Dauphine: French Potato Puffs

Pommes Dauphine are a delightful French treat that combines the smoothness of potato purée with the lightness of choux pastry. This elegant dish is often served as a side or an appetizer, showcasing the versatility of potatoes in French cuisine. The result is a crispy exterior that gives way to a soft and airy interior, making them an irresistible addition to any meal.
Preparing Pommes Dauphine might seem overwhelming, but once you get the hang of it, the process becomes quite enjoyable. The key to achieving the perfect puff lies in balancing the potato and choux pastry, guaranteeing they hold their shape while frying to a golden perfection. Whether it’s for a festive gathering or a cozy family dinner, these potato puffs are sure to impress.
Ingredients (Serves 4-6):
- 1 pound (450g) of potatoes (such as Yukon Gold or Russet)
- 1/2 cup (120ml) of water
- 1/4 cup (60g) of unsalted butter
- 1 teaspoon of salt
- 1 cup (125g) of all-purpose flour
- 3 large eggs
- 1/4 teaspoon of ground nutmeg (optional)
- Vegetable oil (for frying)
Cooking Instructions:
- Prepare the Potatoes: Begin by peeling the potatoes and cutting them into chunks. Place them in a pot of cold, salted water and bring to a boil. Cook until the potatoes are tender, about 15-20 minutes. Drain and let them steam for a few minutes to remove excess moisture, then mash until smooth.
- Make the Choux Pastry: In a saucepan, combine the water, butter, and salt. Bring the mixture to a boil over medium heat. Once boiling, remove from the heat and quickly add the flour, stirring vigorously with a wooden spoon until the dough pulls away from the sides of the pan and forms a ball.
- Incorporate Eggs: Allow the dough to cool for a few minutes, then add the mashed potatoes and mix until well combined. Beat in the eggs one at a time, guaranteeing each egg is fully incorporated before adding the next. The mixture should be smooth and glossy. If using, mix in the ground nutmeg for additional flavor.
- Heat the Oil: In a deep skillet or pot, heat about 2 inches of vegetable oil to 350°F (175°C). You can test the oil’s readiness by dropping a small amount of the batter into it; if it sizzles and rises to the surface, the oil is ready.
- Fry the Pommes Dauphine: Using a spoon or a piping bag, drop small balls of the batter into the hot oil, being careful not to overcrowd the pan. Fry until they’re golden brown and puffed, about 3-4 minutes. Use a slotted spoon to transfer them to a plate lined with paper towels to drain any excess oil.
- Serve: Serve the Pommes Dauphine warm, either on their own or with a dipping sauce of your choice.
Extra Tips:
For the best texture, guarantee that the mashed potatoes are completely smooth and free of lumps before mixing with the choux pastry. Additionally, maintain the oil temperature while frying to achieve even cooking.
If you prefer, you can add different herbs or spices to the batter for a unique flavor twist, or try serving them with aioli or garlic dip for an extra touch. Enjoy these delightful puffs fresh out of the fryer for the ultimate taste experience!
Spanish Tortilla: The Classic Potato Omelette

The Spanish Tortilla, also known as Tortilla Española, is a traditional Spanish dish that has become a beloved staple in many households around the world. This simple yet delicious dish features just a few key ingredients: potatoes, eggs, and onions, all expertly combined to create a fluffy, flavorful omelette. Perfect for any meal of the day, the Spanish Tortilla can be served warm or at room temperature, making it an ideal dish for gatherings, picnics, or a hearty breakfast.
Making a Spanish Tortilla isn’t only easy but also offers a great opportunity to experiment with flavors. While the classic version consists of potatoes and onions, you can customize this dish by adding herbs, spices, or even different vegetables to suit your taste. The beauty of the Spanish Tortilla lies in its versatility, and it’s sure to be a hit with family and friends alike.
Ingredients (Serves 4-6)
- 4 large potatoes
- 1 medium onion
- 6 large eggs
- Olive oil (about 1 cup for frying)
- Salt (to taste)
- Black pepper (to taste)
Cooking Instructions
- Prepare the Potatoes and Onions: Peel the potatoes and slice them into thin rounds, about 1/8 inch thick. You can also cut them into small cubes if you prefer. Slice the onion thinly. This step is vital as even slicing guarantees that the potatoes cook evenly.
- Fry the Potatoes and Onions: In a large skillet, heat about 1 cup of olive oil over medium heat. Once hot, add the sliced potatoes and onions. Sprinkle with a little salt. Fry them gently, stirring occasionally, until the potatoes are tender and slightly golden, about 15-20 minutes. Be careful not to brown them too much; they should be soft.
- Drain and Cool: Once the potatoes and onions are cooked, use a slotted spoon to transfer them to a colander to drain excess oil. Let them cool for a few minutes. This helps to avoid cooking the eggs prematurely when combined.
- Beat the Eggs: In a large bowl, crack the eggs and whisk them until well combined. Season with salt and black pepper. The whisking incorporates air, which will help make the tortilla fluffy.
- Combine Ingredients: Add the cooled potato and onion mixture to the bowl with the beaten eggs. Mix gently to combine, assuring that the potatoes and onions are evenly coated with the egg mixture.
- Cook the Tortilla: In a clean skillet (about 8-10 inches), add a little olive oil and heat it over medium heat. Once hot, pour the potato-egg mixture into the skillet, spreading it evenly. Cook for about 5-7 minutes, or until the bottom is set and lightly browned.
- Flip the Tortilla: To flip the tortilla, place a large plate over the skillet and invert the tortilla onto the plate. Slide the tortilla back into the skillet, uncooked side down. Cook for another 5-7 minutes until this side is set and golden.
- Serve: Once both sides are cooked, transfer the tortilla to a cutting board. Allow it to cool for a few minutes before slicing into wedges. Serve warm or at room temperature.
Extra Tips
When preparing your Spanish Tortilla, it’s important to keep an eye on the heat to avoid burning. If you’re new to flipping the tortilla, you might want to practice with a smaller batch until you feel confident.
Additionally, letting the tortilla rest for a few minutes after cooking allows the flavors to meld together beautifully. You can also experiment with different ingredients like bell peppers or chorizo for a twist on the classic recipe. Enjoy your Spanish Tortilla with a fresh salad or crusty bread for a complete meal!
Irish Colcannon: Creamy Mashed Potatoes With Greens
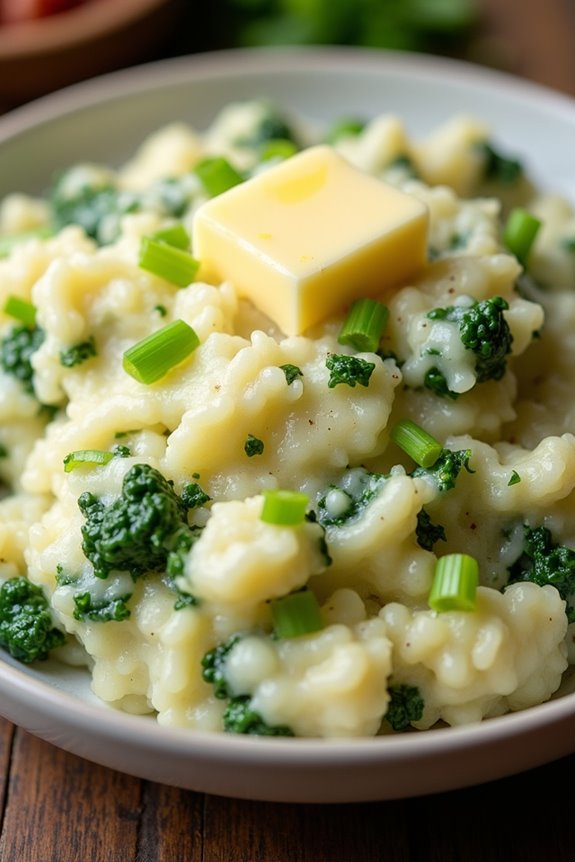
Irish Colcannon is a traditional dish that embodies the heart and soul of Irish cooking. This comforting recipe combines creamy mashed potatoes with the earthy flavors of cabbage or kale, creating a delightful side dish that pairs beautifully with meats or can stand alone as a vegetarian option.
Often enjoyed during the colder months, colcannon is a staple at Irish tables, especially around Halloween when it’s customary to hide charms in the dish for good fortune.
The beauty of colcannon lies in its simplicity and the ability to customize it according to personal tastes. While the classic version includes butter, milk, and greens, variations can include scallions, leeks, or even a touch of cream for added richness.
Serve it hot, topped with a pat of butter that melts into the creamy potatoes, and you’ll have a dish that’s certain to warm hearts and bellies alike.
Ingredients (Serves 4-6):
- 2 pounds of potatoes (Yukon Gold or Russet)
- 1 cup of chopped green cabbage or kale
- 1/2 cup of chopped scallions (green onions)
- 1/2 cup of milk (or cream for a richer texture)
- 4 tablespoons of unsalted butter
- Salt, to taste
- Pepper, to taste
Cooking Instructions:
1. Prepare the Potatoes: Start by peeling the potatoes and cutting them into equal-sized chunks. This guarantees even cooking. Place the potato chunks in a large pot and cover them with cold water. Add a pinch of salt to the water and bring it to a boil over medium-high heat.
Cooking the potatoes in cold water prevents them from becoming mushy on the outside while remaining raw on the inside.
2. Cook the Greens: While the potatoes are boiling, heat a large skillet over medium heat and add a tablespoon of butter. Once melted, add the chopped cabbage or kale and cook for about 5-7 minutes or until the greens are tender. Stir occasionally to prevent sticking.
The greens should be wilted but still vibrant in color.
3. Boil the Potatoes: Once the potatoes reach a boil, reduce the heat to medium and let them simmer for about 15-20 minutes, or until they’re fork-tender. You can test this by poking a potato piece with a fork; it should slide in easily.
4. Mash the Potatoes: Drain the cooked potatoes and return them to the pot. Allow them to steam for a couple of minutes to remove excess moisture. Then, with a potato masher or ricer, mash the potatoes until smooth.
Avoid over-mashing to prevent a gluey texture.
5. Combine Ingredients: Stir in the milk (or cream), remaining butter, and the sautéed greens. Add the chopped scallions and season generously with salt and pepper. Mix until everything is well incorporated and the potatoes are creamy and fluffy.
6. Serve: Transfer the colcannon to a serving bowl. Create a small well in the center and place a pat of butter on top. This will melt into the dish, adding extra richness. Serve hot alongside your favorite main dishes.
Extra Tips:
For a twist on traditional colcannon, consider adding cooked bacon or ham for a smoky flavor. You can also experiment with different types of greens, such as spinach or Swiss chard, to switch up the taste.
Make sure to taste and adjust the seasoning before serving, as the flavors of the dish can vary based on the type of potatoes and greens used. Ultimately, colcannon can be made ahead and reheated, making it a convenient option for meal prep or festive gatherings. Enjoy!
Rösti: Swiss Potato Hash Browns

Rösti, a beloved Swiss dish, is often enjoyed as a breakfast or side dish, showcasing the deliciousness of simple ingredients. This crispy potato hash brown is traditionally made with grated potatoes, which are pan-fried until golden brown and crispy on the outside while remaining tender on the inside.
Although it originated in the German-speaking part of Switzerland, Rösti has become popular across Europe and is now enjoyed in numerous variations, often incorporating additional ingredients like onions, cheese, or herbs for added flavor.
The beauty of Rösti lies in its versatility; you can serve it alongside eggs for breakfast, as a side dish with meats, or even topped with delicious accompaniments like smoked salmon or crème fraîche. The key to achieving the perfect Rösti is to choose the right potatoes (waxy potatoes work best), guarantee they’re thoroughly cooked, and to use a hot pan to achieve that coveted crispy texture.
Whether you’re preparing a comforting weekend brunch or a delightful dinner, Rösti is sure to impress your family and friends.
Ingredients (serving size: 4-6 people)
- 1 kg (2.2 lbs) waxy potatoes (such as Yukon Gold or Charlotte)
- 1 medium onion, finely chopped (optional)
- 3 tablespoons butter
- 3 tablespoons vegetable oil
- Salt, to taste
- Pepper, to taste
Cooking Instructions
- Prepare the Potatoes: Start by washing and peeling the potatoes. Place them in a pot of salted water, bring to a boil, and cook for about 10-15 minutes until they’re just tender but not fully cooked. Drain the potatoes and let them cool slightly. Once cool enough to handle, grate the potatoes using a box grater or a food processor.
- Sauté the Onions: If you’re using onions, heat 1 tablespoon of butter and 1 tablespoon of vegetable oil in a large non-stick skillet over medium heat. Add the finely chopped onion and sauté for about 3-4 minutes until they’re translucent and fragrant. Remove the onions from the skillet and set aside.
- Combine Ingredients: In a large mixing bowl, combine the grated potatoes with the sautéed onions (if using), and season with salt and pepper to taste. Mix well to guarantee that the potatoes are evenly seasoned.
- Cook the Rösti: In the same skillet, add the remaining butter and oil over medium-high heat. Once the oil is hot, add the potato mixture, pressing it down firmly with a spatula to form a compact cake. Cook for about 8-10 minutes until the bottom is golden brown and crispy.
- Flip the Rösti: To flip the Rösti, carefully slide it onto a large plate. Place the skillet upside down over the plate and flip it so the uncooked side is now facing down. Add a bit more butter and oil to the skillet if needed, then slide the Rösti back into the pan. Cook for another 8-10 minutes until the second side is golden brown and crispy.
- Serve: Once cooked through, transfer the Rösti to a serving platter. Cut it into wedges and serve hot. Enjoy it as is or topped with your favorite accompaniments.
Extra Tips
For an even crispier Rösti, try using a cast-iron skillet, which retains heat well and promotes even browning. Additionally, make sure not to overcrowd the pan if you’re cooking multiple batches; this can cause the Rösti to steam rather than crisp.
If you want to experiment, feel free to add grated cheese, herbs, or even cooked bacon to the potato mixture for extra flavor. And remember, the key to a perfect Rösti is patience; allow it to cook thoroughly without rushing the flipping process. Enjoy your delicious homemade Rösti!
Patatas Bravas: Crispy Potatoes With Spicy Sauce

Patatas Bravas is a beloved Spanish tapas dish that consists of crispy fried potatoes served with a zesty, spicy sauce. Originating from the streets of Spain, this dish has become a staple in Spanish cuisine, enjoyed in bars and restaurants across the country. The combination of crispy textures and bold flavors makes it an irresistible appetizer or side dish that pairs beautifully with a variety of main courses.
The key to achieving the perfect Patatas Bravas lies in selecting the right type of potatoes and guaranteeing they’re cooked to a golden crisp. The accompanying sauce typically features a blend of tomatoes, garlic, and spices, adding a delightful kick that elevates the dish.
Whether you’re hosting a tapas night or simply craving a comforting snack, Patatas Bravas is sure to impress your guests with its vibrant flavors and satisfying crunch.
Ingredients (serving size of 4-6 people):
- 1 kg (2.2 lbs) of waxy potatoes (such as Yukon Gold or Red Bliss)
- 2 tablespoons of olive oil
- Salt (to taste)
For the spicy sauce:
- 1 cup of canned diced tomatoes
- 2 cloves of garlic, minced
- 1 teaspoon of smoked paprika
- 1 teaspoon of cayenne pepper (adjust to taste)
- 1 tablespoon of red wine vinegar
- 1 tablespoon of olive oil
- Salt and black pepper (to taste)
Cooking Instructions:
- Prepare the Potatoes: Start by peeling the potatoes and cutting them into bite-sized cubes, roughly 2-3 cm in size. This guarantees that they cook evenly and become crispy on the outside while remaining fluffy on the inside.
- Boil the Potatoes: Place the cubed potatoes in a pot of salted water and bring it to a boil. Let them cook for about 5-7 minutes until they’re just tender but not falling apart. Drain the potatoes and let them cool for a few minutes. This step helps in achieving a crispier texture when they’re fried.
- Heat the Oil: In a large skillet or frying pan, heat 2 tablespoons of olive oil over medium-high heat. Ensure that the oil is hot enough before adding the potatoes, as this will help to create that desired crispy exterior.
- Fry the Potatoes: Carefully add the boiled potatoes to the hot oil in batches to avoid overcrowding the pan. Fry them for about 10-12 minutes, turning occasionally until they turn golden brown and crispy. Once done, remove them from the pan and place them on a paper towel-lined plate to drain any excess oil. Sprinkle with salt to taste.
- Make the Spicy Sauce: In a separate saucepan, heat 1 tablespoon of olive oil over medium heat. Add the minced garlic and sauté for about 1 minute until fragrant. Then, add the canned diced tomatoes, smoked paprika, cayenne pepper, red wine vinegar, and season with salt and black pepper. Let the sauce simmer for about 10 minutes, allowing the flavors to meld together.
- Serve: Once the sauce has thickened slightly, drizzle it generously over the crispy fried potatoes or serve it on the side for dipping. Garnish with fresh herbs or a sprinkle of extra paprika if desired.
Extra Tips: When preparing Patatas Bravas, feel free to adjust the spice level according to your preference by adding more or less cayenne pepper. For even more flavor, consider adding a splash of hot sauce to the spicy sauce or incorporating diced chorizo while sautéing the garlic.
Additionally, serving the dish immediately after frying will guarantee that the potatoes retain their crispiness. Enjoy your delicious homemade Patatas Bravas!
Gnocchi: Italian Potato Dumplings

Gnocchi, a beloved staple of Italian cuisine, are soft, pillowy dumplings made primarily from potatoes. These versatile dumplings can be served in a variety of sauces, from a simple brown butter and sage sauce to a rich marinara. Making gnocchi from scratch may seem intimidating at first, but with the right technique and a little bit of practice, you can create a delightful dish that will impress family and friends alike.
The key to perfect gnocchi lies in the type of potatoes used; starchy potatoes like Russet work best to guarantee a light and airy texture.
To begin your gnocchi journey, it’s essential to prepare the potatoes correctly. Baking the potatoes instead of boiling them helps to reduce moisture content, yielding a better dough consistency. Once the potatoes are cooled and mashed, they’re combined with flour and egg to form a dough that’s easily shaped into little dumplings.
Don’t forget to lightly flour your work surface and your hands to prevent sticking. Once cooked, these little bites of heaven can be tossed in your sauce of choice or simply drizzled with olive oil and garnished with herbs.
Ingredients (Serves 4-6):
- 2 pounds Russet potatoes
- 1 ½ cups all-purpose flour (plus more for dusting)
- 1 large egg
- 1 teaspoon salt
- A pinch of nutmeg (optional)
Cooking Instructions:
- Bake the Potatoes: Preheat your oven to 400°F (200°C). Wash the potatoes and prick them with a fork to allow steam to escape. Place them directly on the oven rack and bake for about 45-60 minutes, or until they’re tender and easily pierced with a fork. Allow the potatoes to cool slightly before handling.
- Prepare the Potato Mixture: Once the potatoes are cool enough to handle, peel them and pass them through a potato ricer or mash them until smooth in a mixing bowl. Make sure there are no lumps, as this will affect the texture of the gnocchi.
- Make the Dough: Add the flour, egg, salt, and nutmeg (if using) to the bowl with the mashed potatoes. Mix until the dough begins to come together. Avoid overworking the dough; it should be soft and slightly sticky.
- Shape the Gnocchi: Flour your work surface lightly and divide the dough into smaller portions. Roll each portion into a long rope, about ¾ inch in diameter. Cut the rope into 1-inch pieces. To shape the gnocchi, you can use a fork to create ridges, which help the sauce adhere better, or simply leave them as is.
- Cook the Gnocchi: Bring a large pot of salted water to a boil. Carefully drop the gnocchi into the boiling water in batches, being careful not to overcrowd the pot. Cook until they float to the surface, about 2-3 minutes. Once they float, allow them to cook for an additional minute before removing them with a slotted spoon.
- Serve: Toss the cooked gnocchi in your favorite sauce or with olive oil and herbs. Serve immediately and enjoy the delightful texture and flavor of homemade gnocchi.
Extra Tips:
When making gnocchi, it’s important to work quickly to prevent the dough from becoming too sticky. If you find that your dough is too wet, you can add a little more flour, but be cautious not to overdo it, as this can make the gnocchi dense.
Additionally, you can prepare the gnocchi in advance and freeze them; just make sure to spread them out on a baking sheet before freezing to prevent them from sticking together. When you’re ready to cook them, there’s no need to thaw; just drop them into boiling water straight from the freezer for a quick meal.
Enjoy your culinary adventure with this classic Italian dish!
Potato Gratin: French Creamy Layered Delight

Potato Gratin, also known as Gratin Dauphinois, is a classic French dish that showcases the humble potato in a luxurious and creamy form. This delightful side dish is made by layering thinly sliced potatoes with heavy cream, garlic, and cheese, creating a rich and comforting flavor that pairs beautifully with a variety of main courses.
The top layer is often sprinkled with cheese to achieve a golden, bubbly crust that’s irresistible. Perfect for family gatherings or special occasions, Potato Gratin isn’t only delicious but also visually appealing with its beautifully arranged layers. The creamy texture and the savory notes make it a beloved choice in French cuisine.
Whether served alongside roast meats or enjoyed as a vegetarian option, this dish is sure to impress your guests and become a staple in your cooking repertoire.
Ingredients (Serves 4-6):
- 2 pounds of Yukon Gold potatoes
- 2 cups of heavy cream
- 1 cup of grated Gruyère cheese
- 1 cup of grated Parmesan cheese
- 2 cloves of garlic, minced
- 1 teaspoon of salt
- 1/2 teaspoon of black pepper
- 1/4 teaspoon of nutmeg
- 2 tablespoons of unsalted butter (for greasing)
Cooking Instructions:
- Preheat the Oven: Preheat your oven to 375°F (190°C). This guarantees the gratin will cook evenly and develop a beautiful golden crust.
- Prepare the Baking Dish: Grease a 9×13 inch baking dish with butter. This prevents the gratin from sticking and adds extra flavor.
- Slice the Potatoes: Using a mandoline or a sharp knife, slice the potatoes into thin rounds (about 1/8 inch thick). This uniform thickness guarantees even cooking and a smooth texture.
- Mix the Cream and Seasoning: In a mixing bowl, combine the heavy cream, minced garlic, salt, black pepper, and nutmeg. Stir well to incorporate the flavors, which will infuse the potatoes as they bake.
- Layer the Potatoes: Arrange half of the potato slices in the bottom of the prepared baking dish, overlapping them slightly. Pour half of the cream mixture over the potatoes, making sure to cover them evenly.
- Add Cheese: Sprinkle half of the Gruyère and Parmesan cheese over the first layer. This will help create a creamy and cheesy layer that binds the potatoes together.
- Repeat Layers: Repeat the layering process with the remaining potato slices, cream mixture, and cheeses. Finish with a final layer of cheese on top for a beautifully browned crust.
- Bake the Gratin: Cover the baking dish with aluminum foil and bake in the preheated oven for about 45 minutes. Then, remove the foil and bake for an additional 15-20 minutes, or until the top is golden brown and the potatoes are tender.
- Rest and Serve: Allow the gratin to rest for about 10 minutes before serving. This helps the layers set and makes it easier to cut into portions.
Extra Tips:
To elevate the flavor of your Potato Gratin, consider adding fresh herbs like thyme or rosemary to the cream mixture. For a bit of crunch, you can also mix in some breadcrumbs with the cheese topping.
Make sure to choose waxy potatoes like Yukon Gold or red potatoes for the best texture, as they hold up well during baking. Additionally, for a richer taste, experiment with different cheeses such as Fontina or Cheddar, or even a sprinkle of truffle oil for an indulgent twist. Enjoy your cooking experience!
Kartoffelsalat: German Potato Salad
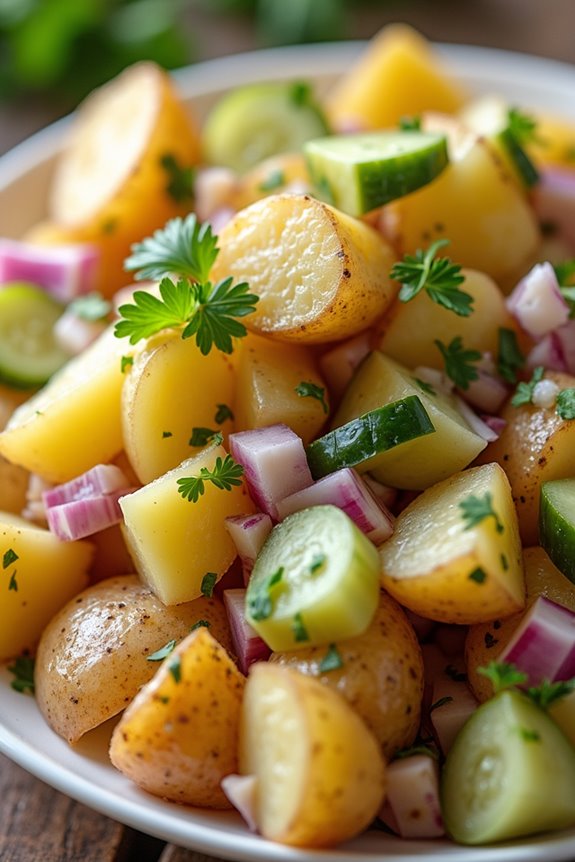
Kartoffelsalat, or German potato salad, is a beloved dish that varies regionally across Germany. Unlike the creamy potato salads often found in other countries, authentic German potato salad is typically made with a tangy dressing that features vinegar, mustard, and herbs, giving it a revitalizing flavor profile. This salad can be served warm or at room temperature, making it a versatile dish perfect for summer barbecues, picnics, or as a side dish for hearty meals.
The key to a great Kartoffelsalat lies in the quality of the potatoes and the balance of flavors in the dressing. Using waxy potatoes will yield a salad with a pleasing texture, as they hold their shape well while still being tender. This recipe is designed to serve 4-6 people, guaranteeing there’s enough to go around whether it’s for a family dinner or a gathering with friends.
Ingredients
- 1.5 pounds waxy potatoes (such as Yukon Gold or Red potatoes)
- 1 cup diced cucumbers (preferably pickled)
- 1/2 cup red onion, finely chopped
- 1/4 cup fresh parsley, chopped
- 1/4 cup vegetable broth
- 1/4 cup apple cider vinegar
- 2 tablespoons Dijon mustard
- 1 tablespoon sugar
- 1/4 cup vegetable oil
- Salt and pepper to taste
Cooking Instructions
- Prepare the Potatoes: Start by washing the potatoes thoroughly. Place them in a large pot and cover them with cold water. Add a pinch of salt to the water, then bring it to a boil over medium-high heat. Cook the potatoes until they’re fork-tender, about 15-20 minutes. Avoid overcooking, as you want them firm enough to hold their shape in the salad.
- Cool and Peel the Potatoes: Once cooked, drain the potatoes and let them cool slightly until they’re safe to handle. You can peel the skins if desired, but many people leave them on for added texture and flavor. Cut the potatoes into bite-sized pieces and transfer them to a large mixing bowl.
- Prepare the Dressing: In a separate bowl, whisk together the vegetable broth, apple cider vinegar, Dijon mustard, sugar, vegetable oil, and a pinch of salt and pepper. This dressing will bring a tangy and slightly sweet flavor to the salad. Adjust the seasoning according to your taste preferences.
- Combine Ingredients: Add the diced cucumbers, chopped red onion, and parsley to the bowl with the potatoes. Pour the dressing over the salad and gently toss everything together to guarantee the potatoes are evenly coated without breaking them apart.
- Let it Marinate: For the best flavor, let the Kartoffelsalat sit for at least 30 minutes before serving. This allows the potatoes to absorb the dressing and the flavors to meld together. If serving warm, you can enjoy it immediately, but it’s also delicious at room temperature.
Extra Tips
When making Kartoffelsalat, feel free to customize the ingredients to suit your taste. Some people like to add crispy bacon bits for a smoky flavor, while others might incorporate boiled eggs for added richness.
Additionally, using fresh herbs like dill or chives can elevate the dish even further. Remember to taste and adjust the seasoning as you go, as the balance of vinegar and oil is essential to achieving the perfect tangy flavor.
Enjoy your Kartoffelsalat as a delightful companion to grilled meats or as a satisfying standalone dish!
Baked Jacket Potatoes: A British Classic
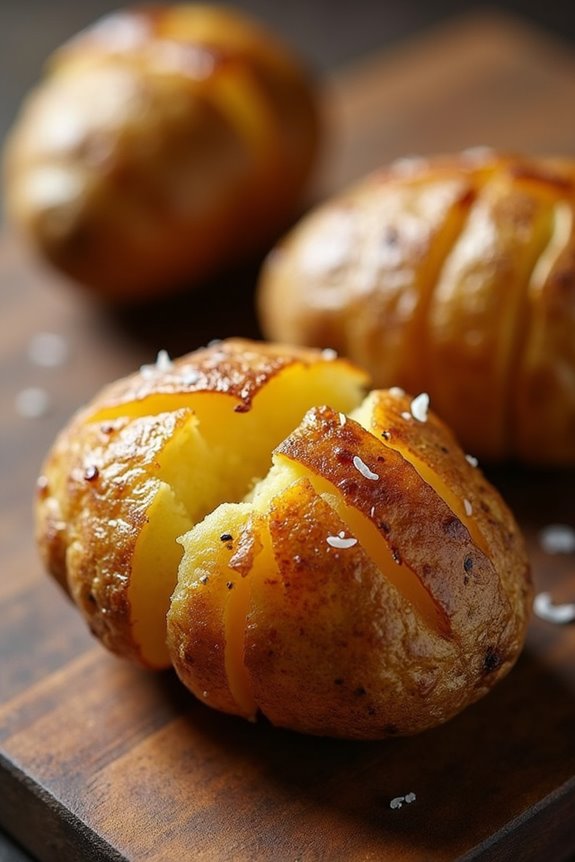
Baked jacket potatoes are a beloved staple of British cuisine, celebrated for their crispy skin and fluffy interior. This dish isn’t only simple to prepare, but it also offers a wonderful base for a variety of toppings, ranging from classic butter and cheese to more elaborate fillings like baked beans or chili con carne.
Perfect for a cozy family dinner or a casual gathering with friends, baked jacket potatoes are versatile and can be customized to suit any palate.
To make the perfect baked jacket potato, it’s crucial to choose the right type of potato. The best varieties for baking are the floury types, such as Russet or Maris Piper, which become light and fluffy when cooked.
The cooking process is straightforward, requiring just a bit of patience as the potatoes bake to golden perfection. With a few simple ingredients and some time in the oven, you can create a delicious dish that’s sure to please everyone at the table.
Ingredients (serving size: 4-6 people)
- 4-6 large floury potatoes (such as Russet or Maris Piper)
- Olive oil (for coating)
- Sea salt (for sprinkling)
Cooking Instructions
- Preheat the Oven: Begin by preheating your oven to 200°C (400°F). This guarantees that the potatoes will cook evenly and develop a crispy skin.
- Prepare the Potatoes: Wash the potatoes thoroughly under cold running water to remove any dirt. Pat them dry with a clean kitchen towel. Prick each potato several times with a fork; this allows steam to escape during cooking and prevents them from bursting in the oven.
- Coat with Oil and Salt: Rub the potatoes with a little olive oil to help crisp the skin. Then sprinkle sea salt generously over the surface of each potato, ensuring they’re well-seasoned.
- Bake the Potatoes: Place the prepared potatoes directly on the middle rack of the preheated oven. Bake for 45-60 minutes, depending on the size of the potatoes. You’ll know they’re done when the skin is crispy and a fork can easily pierce through to the fluffy interior.
- Check for Doneness: Around the 45-minute mark, check the potatoes by inserting a fork or skewer into the center. If it goes in easily, the potatoes are ready. If not, continue baking and check every 5-10 minutes until they reach the desired tenderness.
- Serve: Once the potatoes are baked, remove them from the oven and let them sit for a few minutes. Cut a cross on the top of each potato and gently squeeze the sides to fluff up the insides. Serve immediately with your choice of toppings.
Extra Tips
For the best results, select potatoes that are similar in size to guarantee they cook evenly. You can also experiment with various toppings, such as sour cream, chives, cheese, or bacon bits, to add flavor.
If you want to prepare ahead of time, you can bake the potatoes and keep them warm wrapped in foil until you’re ready to serve. Enjoy the simplicity and heartiness of baked jacket potatoes, and don’t hesitate to get creative with your favorite toppings!
Aloo Gobi: Indian-Spiced Potatoes and Cauliflower
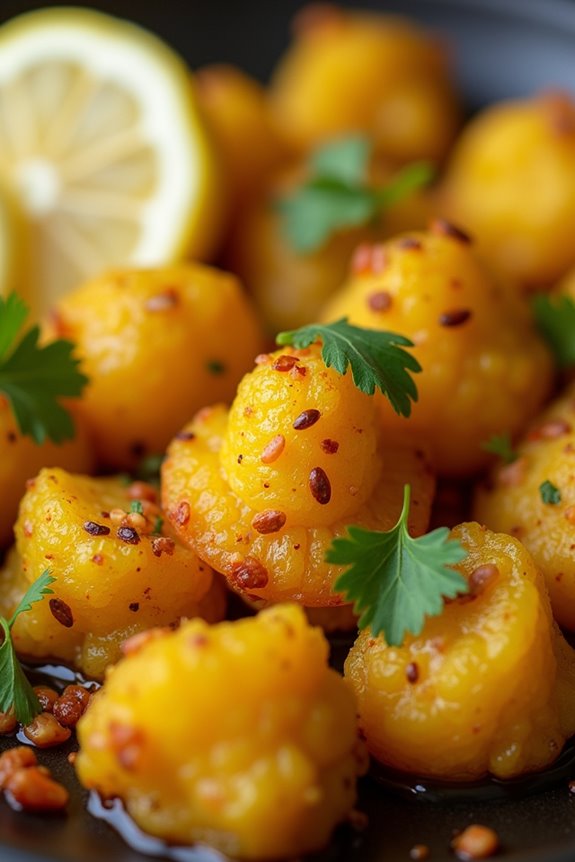
Aloo Gobi is a classic Indian dish that combines the earthy flavors of potatoes and the subtle sweetness of cauliflower, all brought together with a medley of spices. This vibrant dish not only pleases the palate but also boasts a beautiful golden hue, thanks to the turmeric. The combination of these two ingredients makes it a favorite among vegetarians and meat-lovers alike, as it can easily be served as a side or a main dish.
This recipe for Aloo Gobi is straightforward, making it an excellent choice for both novice and experienced cooks. The ingredients are simple and can often be found in your pantry, while the cooking process allows the spices to meld beautifully, creating a dish that’s aromatic and flavorful.
Whether served with rice, naan, or on its own, Aloo Gobi is sure to satisfy.
Ingredients (Serving Size: 4-6 people)
- 2 medium potatoes, peeled and diced
- 1 medium cauliflower, cut into florets
- 3 tablespoons vegetable oil
- 1 teaspoon cumin seeds
- 1 teaspoon mustard seeds
- 1 teaspoon turmeric powder
- 1 teaspoon coriander powder
- 1 teaspoon garam masala
- 1-2 green chilies, slit (optional)
- 1 medium onion, finely chopped
- 2 cloves garlic, minced
- 1-inch piece ginger, grated
- Salt, to taste
- Fresh cilantro, for garnish
- Lemon wedges, for serving
Cooking Instructions
- Prepare the Vegetables: Begin by preparing the potatoes and cauliflower. Peel and dice the potatoes into bite-sized pieces. Cut the cauliflower into florets. Rinse both under cold water to remove any dirt and set aside.
- Heat the Oil: In a large skillet or pan, heat the vegetable oil over medium heat. Allow the oil to warm up for a minute, which will help in releasing the flavors of the spices.
- Temper the Spices: Add the cumin seeds and mustard seeds to the hot oil. Sauté them for about 30 seconds until they begin to splutter. This step infuses the oil with their flavors.
- Sauté the Onions: Add the finely chopped onions to the skillet. Cook, stirring occasionally, until they turn golden brown, approximately 5-7 minutes. This caramelization adds depth to the dish.
- Add Garlic and Ginger: Stir in the minced garlic and grated ginger, cooking for an additional 1-2 minutes until fragrant. Be careful not to let them burn, as this can turn the dish bitter.
- Incorporate the Spices: Sprinkle in the turmeric powder, coriander powder, and garam masala. If using, add the slit green chilies now. Stir well to coat the onion mixture evenly with the spices and cook for about a minute for the spices to bloom.
- Combine Potatoes and Cauliflower: Add the diced potatoes and cauliflower florets to the pan. Stir to mix everything together, ensuring the vegetables are coated with the spiced onion mixture.
- Add Water and Simmer: Pour in about half a cup of water and season with salt to taste. Cover the skillet and reduce the heat to low. Let it simmer for about 20-25 minutes, stirring occasionally, until the vegetables are tender and cooked through.
- Final Touches: Once the potatoes and cauliflower are cooked, taste and adjust the seasoning if necessary. Remove from heat and garnish with fresh cilantro.
- Serve: Serve Aloo Gobi hot with lemon wedges on the side for an extra zing. It pairs perfectly with rice, naan, or even as a filling in wraps.
Extra Tips
When cooking Aloo Gobi, feel free to adjust the spice levels according to your preference. If you like it spicier, increase the number of green chilies or add a pinch of red chili powder.
Additionally, for a creamier texture, you can add a splash of coconut milk towards the end of cooking. To enhance the flavor even more, consider roasting the cauliflower florets before adding them to the dish; this will give them a lovely charred flavor that complements the spices beautifully.
Papas Arrugadas: Canarian Wrinkled Potatoes
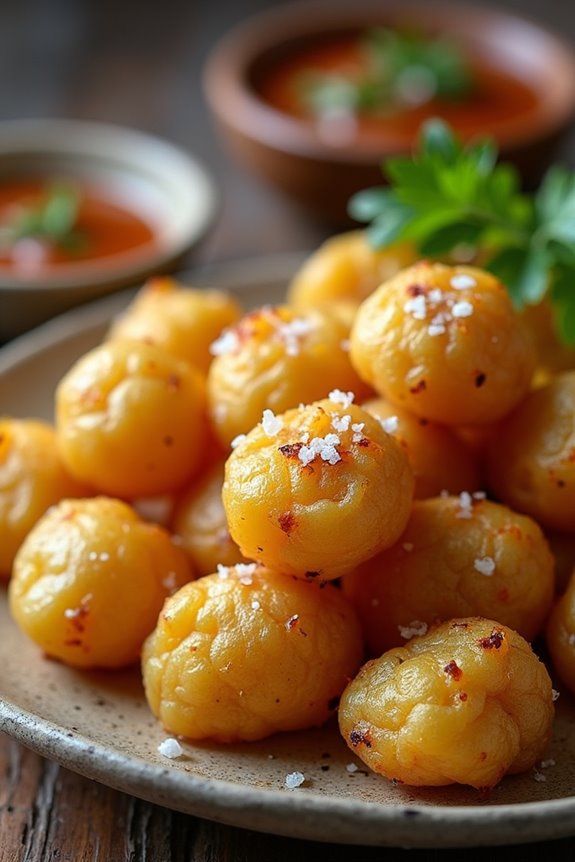
Papas Arrugadas, or Canarian wrinkled potatoes, are a traditional dish from the Canary Islands, known for their unique texture and flavor. These small, salt-crusted potatoes are typically served as a side dish and are often enjoyed with a spicy mojo sauce. The preparation of Papas Arrugadas is simple yet requires a few key techniques to achieve the perfect wrinkled appearance. They’re best enjoyed with the skin on, as the skin adds to the flavor and texture of the dish.
The beauty of Papas Arrugadas lies in their simplicity and the quality of ingredients. The potatoes are boiled in heavily salted water, which not only enhances their flavor but also creates a delightful crust as they cool down. This dish is a staple in Canarian cuisine and is a fantastic way to showcase the humble potato. Whether served as part of a larger meal or enjoyed on their own, Papas Arrugadas are sure to impress with their unique taste and presentation.
Ingredients (serving size of 4-6 people):
- 1 kg (2.2 lbs) small waxy potatoes (such as new potatoes or fingerling)
- 100 g (½ cup) sea salt
- Water (enough to cover the potatoes)
Cooking Instructions:
- Prepare the Potatoes: Begin by selecting small, waxy potatoes as they hold their shape better during cooking. Wash the potatoes thoroughly to remove any dirt, but don’t peel them, as the skins will add flavor and help create the wrinkled texture.
- Boil the Potatoes: In a large pot, add the washed potatoes and cover them with water. Add the sea salt to the pot. The amount of salt may seem excessive, but it’s essential for creating the signature taste and texture of the dish.
- Cook Until Tender: Bring the pot to a boil over high heat, then reduce to a simmer. Cook the potatoes for about 20-25 minutes or until they’re fork-tender. You can check for doneness by piercing one of the larger potatoes with a fork.
- Drain and Dry: Once the potatoes are cooked, drain the water from the pot. Return the potatoes to the pot and place it back on low heat. Allow the potatoes to steam for an additional 5-10 minutes, shaking the pot occasionally. This will help the remaining moisture evaporate and encourage the formation of the salt crust.
- Cool and Serve: After steaming, remove the pot from the heat and let the potatoes cool slightly. As they cool, the salt will adhere to the skin, creating the characteristic wrinkled appearance. Serve the Papas Arrugadas warm, accompanied by your choice of mojo sauce or simply with a drizzle of olive oil.
Extra Tips: To enhance the flavor of your Papas Arrugadas, consider using a mix of different types of potatoes for varied textures and tastes. Additionally, try experimenting with different types of sea salt for added depth of flavor. For a more authentic touch, serve the potatoes with a homemade mojo sauce, which can be made from garlic, herbs, and chili peppers blended with olive oil. Enjoy your Canarian culinary adventure!
Vareniki: Ukrainian Potato Dumplings
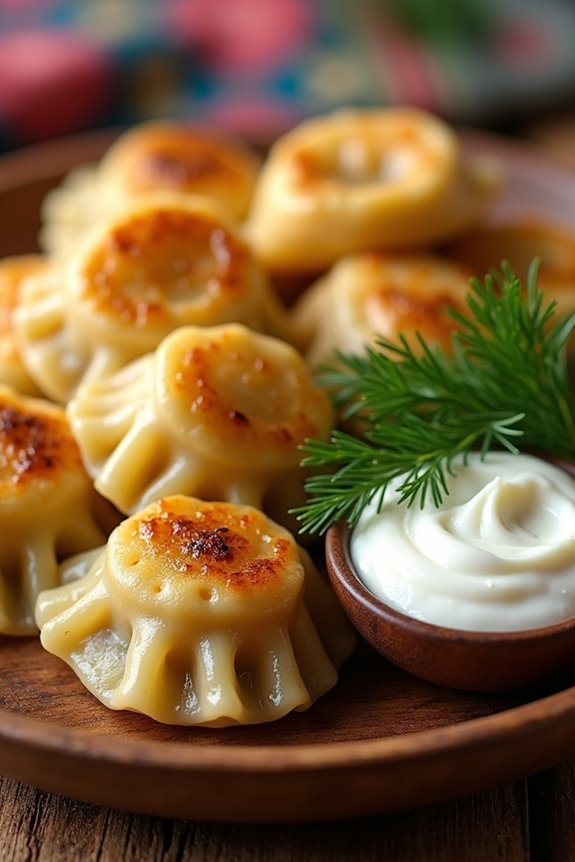
Vareniki are traditional Ukrainian dumplings that are often filled with a variety of ingredients, but one of the most popular fillings is mashed potatoes. These delightful dumplings are a staple in Ukrainian cuisine, cherished for their comforting texture and rich flavor. They can be served with a variety of toppings, including sour cream, caramelized onions, or fresh herbs, making them a versatile dish suitable for any occasion.
Making vareniki from scratch may seem intimidating at first, but with a little patience and practice, you’ll be able to create these delicious potato dumplings in no time. The dough is simple to prepare and can be filled with a creamy potato mixture, which can be seasoned to your liking. Gather your ingredients, roll up your sleeves, and get ready to enjoy a hearty meal that’s bound to please family and friends alike.
Ingredients (Serves 4-6)
- 2 cups all-purpose flour
- 1 large egg
- 1/2 cup water (more if needed)
- 1 teaspoon salt
- 4 medium potatoes, peeled and chopped
- 1/2 cup ricotta cheese (optional)
- 1/4 cup butter (for serving)
- Sour cream (for serving)
- Fresh dill or parsley (for garnish, optional)
Cooking Instructions
- Prepare the Dough: In a large mixing bowl, combine the flour and salt. Create a well in the center and add the egg. Gradually pour in the water while mixing with a fork or your hands until a dough starts to form. Knead the dough on a floured surface for about 5-7 minutes until it becomes smooth and elastic. Cover the dough with a clean kitchen towel or plastic wrap and let it rest for 30 minutes.
- Make the Filling: While the dough is resting, prepare the potato filling. Boil the chopped potatoes in salted water until tender, approximately 15-20 minutes. Drain the potatoes and mash them in a bowl. If using ricotta cheese, mix it in with the mashed potatoes. Season with salt and pepper to taste, and let the mixture cool slightly.
- Roll Out the Dough: After the resting period, divide the dough into two equal portions. On a floured surface, roll out one portion of the dough to about 1/8 inch thick. Keep the other portion covered to prevent it from drying out.
- Cut and Fill the Dumplings: Use a round cutter or glass (about 3 inches in diameter) to cut circles from the rolled dough. Place about a tablespoon of the potato filling in the center of each circle. Fold the dough over the filling to create a half-moon shape, pressing the edges firmly to seal. You can crimp the edges with a fork for a decorative touch.
- Cook the Vareniki: Bring a large pot of salted water to a boil. Carefully drop the filled vareniki into the boiling water, making sure not to overcrowd the pot. Cook for about 5-7 minutes or until they float to the surface. Use a slotted spoon to remove them and place them on a plate.
- Serve: In a skillet, melt the butter over medium heat. Add the cooked vareniki and sauté for a few minutes until they’re slightly golden. Serve warm with a dollop of sour cream and garnish with fresh dill or parsley if desired.
Extra Tips
When making vareniki, verify that the filling isn’t too wet, as this can make sealing the dumplings challenging. If you have leftover dough or filling, feel free to experiment with different fillings such as cheese, sauerkraut, or cherries for a sweet version.
You can also freeze uncooked vareniki; simply place them in a single layer on a baking sheet, freeze until solid, and then transfer them to a freezer bag. Cook them directly from frozen, adding a couple of extra minutes to the boiling time. Enjoy your homemade Ukrainian dumplings!
Poutine: Canadian Fries With Gravy and Cheese Curds

Poutine is a beloved Canadian dish that has gained international acclaim for its delicious combination of crispy French fries, rich gravy, and squeaky cheese curds. Originating from Quebec, this comfort food has become a staple in diners and fast-food establishments across Canada and beyond.
The beauty of poutine lies in its simplicity; however, it offers endless possibilities for customization and creativity, allowing you to experiment with various toppings and flavors.
To create the perfect poutine at home, you’ll want to focus on the quality of your ingredients, especially the fries and the gravy. The key to great poutine is to serve it hot, allowing the cheese curds to slightly melt and blend with the gravy, creating a delightful, gooey texture.
Whether you’re entertaining guests or simply indulging in a cozy night in, poutine is the ultimate dish to satisfy your cravings.
Ingredients (Serves 4-6):
- 4 large russet potatoes
- Vegetable oil (for frying)
- 2 cups cheese curds
- 2 cups beef or chicken gravy
- Salt (to taste)
- Pepper (to taste)
Cooking Instructions:
1. Prepare the Fries: Start by washing and peeling the russet potatoes. Cut them into thick French fry shapes, about 1/2 inch wide. Rinse the cut fries in cold water to remove excess starch and then pat them dry with a paper towel to guarantee they fry up crispy.
2. Heat the Oil: In a large, heavy-bottomed pot or deep fryer, pour enough vegetable oil to submerge the fries completely. Heat the oil to 350°F (175°C). You can use a cooking thermometer for accuracy, as the right temperature is essential for crispy fries.
3. Fry the Potatoes: Carefully add the dried potato strips to the hot oil in batches, making sure not to overcrowd the pot. Fry the potatoes for about 5-7 minutes or until they turn golden brown and crispy.
Once done, use a slotted spoon to remove the fries and place them on a paper towel-lined plate to drain excess oil. Season with salt while still hot.
4. Prepare the Gravy: In a saucepan, heat the beef or chicken gravy over medium heat until it’s hot and simmering. Stir occasionally to prevent sticking. If you prefer a homemade gravy, you can make it from scratch using meat drippings, flour, and broth.
5. Assemble the Poutine: On a large serving plate or platter, layer the hot fries generously. Sprinkle the cheese curds over the fries while they’re still hot, allowing the heat to slightly melt the curds.
Finally, pour the hot gravy over the fries and cheese curds, making sure every piece is well coated.
6. Serve Immediately: Poutine is best enjoyed fresh and hot. Serve right away with additional salt and pepper on the side if desired.
Extra Tips:
For an extra touch, consider adding toppings such as sautéed mushrooms, pulled pork, or crispy bacon to elevate your poutine experience.
If you’re looking for a healthier option, try baking the fries in the oven instead of frying, though the texture may differ. Remember to serve the poutine immediately for the best taste and presentation, as the cheese curds need the warmth from the fries and gravy to create that perfect melty goodness!
Causa Rellena: Peruvian Potato Salad With Fillings
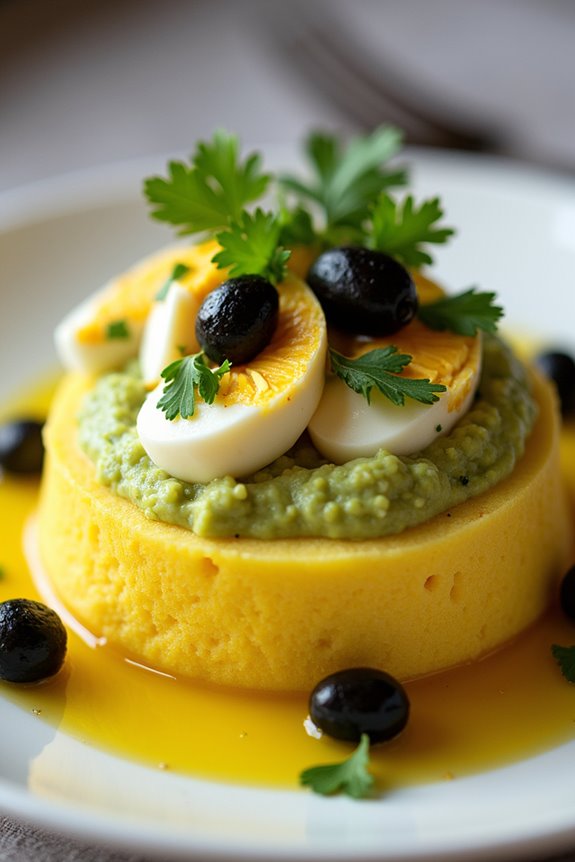
Causa Rellena is a delightful and colorful Peruvian dish that showcases the versatility of potatoes, a staple ingredient in European cuisine as well. This vibrant layered potato salad isn’t only visually appealing but also bursting with flavor. The base consists of mashed yellow potatoes seasoned with lime juice and aji amarillo (yellow chili pepper), which gives the dish its distinctive taste and bright yellow color.
Traditionally, Causa Rellena is served cold and layered with various fillings, making it an excellent choice for a revitalizing appetizer or light main course.
Preparing Causa Rellena is a fun and creative process. You can customize the fillings to suit your taste, whether you prefer chicken, tuna, or vegetables. In this recipe, we’ll use a delicious chicken filling mixed with avocado and mayonnaise, providing a creamy contrast to the tangy potato layer. This dish isn’t only a celebration of flavors but also a great way to impress your guests with a unique culinary experience.
Ingredients (Serves 4-6):
- 1.5 pounds yellow potatoes
- 2 tablespoons aji amarillo paste (or to taste)
- 3 tablespoons lime juice
- 1 teaspoon salt
- 1 cup cooked chicken, shredded
- 1 ripe avocado, mashed
- 1/4 cup mayonnaise
- 1/4 cup red onion, finely chopped
- 1/4 cup cilantro, chopped
- 1 hard-boiled egg, sliced (for garnish)
- Olive oil (for drizzling)
- Black olives (for garnish, optional)
Cooking Instructions:
- Prepare the Potatoes: Begin by boiling the yellow potatoes in salted water until they’re tender, about 20-25 minutes. Check for tenderness by inserting a fork; it should slide in easily. Once cooked, drain and let them cool slightly.
- Mash the Potatoes: Once the potatoes are cool enough to handle, peel them and place them in a large mixing bowl. Mash the potatoes until smooth and creamy, then add the aji amarillo paste, lime juice, and salt. Mix thoroughly until the ingredients are well combined and the potatoes have a vibrant yellow color.
- Prepare the Chicken Filling: In a separate bowl, combine the shredded chicken, mashed avocado, mayonnaise, red onion, and chopped cilantro. Mix well until all the ingredients are evenly coated and the filling is creamy.
- Layer the Causa: To assemble the dish, take a round or rectangular mold (or a serving dish) and add half of the mashed potato mixture to the bottom, pressing it down firmly to create an even layer. Next, spread the chicken filling evenly over the potato layer, making sure it reaches the edges.
- Top with Remaining Potatoes: Add the remaining mashed potato mixture on top of the chicken filling, pressing down gently to create a smooth surface. Cover the dish with plastic wrap and refrigerate for at least 30 minutes to an hour to allow the flavors to meld and the layers to set.
- Serve and Garnish: Once chilled, carefully unmold or slice the Causa Rellena if using a serving dish. Garnish with slices of hard-boiled eggs and drizzle with olive oil. You can also add black olives for an extra touch of flavor and decoration.
Extra Tips:
When making Causa Rellena, it’s crucial to choose the right type of potato. Yellow potatoes, such as Peruvian yellow potatoes or Yukon Gold, work best due to their creamy texture and buttery flavor.
Feel free to experiment with different fillings, such as tuna or vegetables, to create your perfect version of this dish. Additionally, prepare the Causa Rellena a few hours in advance or even the day before, as the flavors improve with time, making it an ideal dish for gatherings or meal prep.