

There’s something so heartwarming about the cozy vibe of British pubs, where traditional dishes feel like a warm hug. From the comforting layers of Shepherd’s Pie to the satisfying crunch of Fish and Chips, every recipe has its own unique charm. I still remember the comforting taste of Bangers and Mash from my first visit. If you’re eager to bring these classic British flavors into your kitchen, let’s explore some irresistible recipes together.
Traditional Shepherd’s Pie
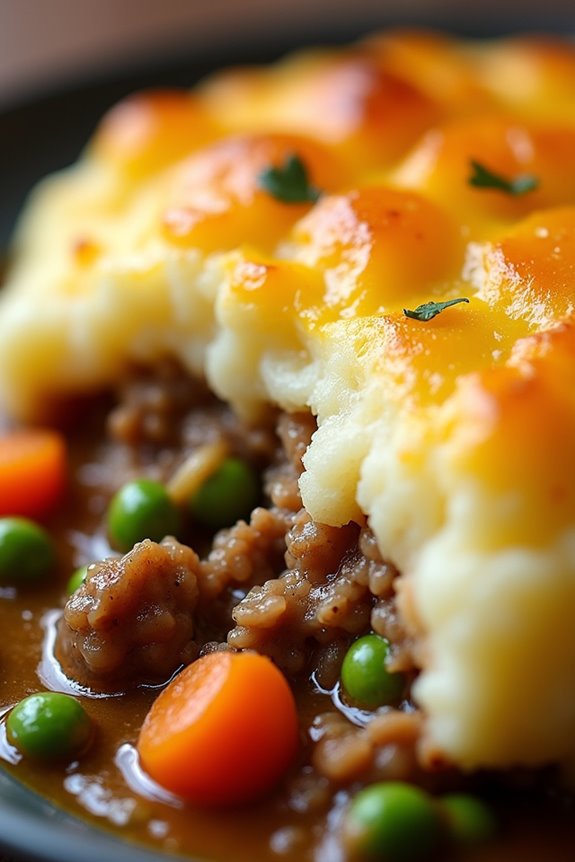
Shepherd’s Pie is a classic British dish that has warmed the hearts and stomachs of many for generations. This comforting casserole consists of a savory meat filling, typically made with lamb, and is topped with a creamy layer of mashed potatoes.
Originating from the British Isles, Shepherd’s Pie is a perfect representation of home-cooked meals, making it a staple in pubs across the country. Its hearty nature and flavorful ingredients combine to create a dish that isn’t only delicious but also satisfying, making it an ideal choice for family dinners or gatherings.
The beauty of Shepherd’s Pie lies in its versatility; while traditional recipes call for lamb, you can easily substitute it with beef for a Cottage Pie or incorporate your favorite vegetables for a vegetarian option.
The creamy mashed potato topping is essential, as it adds a rich texture and balances the savory filling below. Whether you’re preparing it for a weekend feast or a weeknight meal, Shepherd’s Pie is sure to impress and bring a taste of British comfort to your table.
Ingredients (Serves 4-6):
- 1 lb (450g) ground lamb (or beef for Cottage Pie)
- 1 medium onion, finely chopped
- 2 carrots, diced
- 2 cloves garlic, minced
- 1 cup (240ml) beef or lamb broth
- 1 tablespoon tomato paste
- 1 teaspoon Worcestershire sauce
- 1 teaspoon dried thyme
- 1 teaspoon dried rosemary
- Salt and pepper to taste
- 4 cups (about 900g) mashed potatoes (prepared with butter and milk)
- 1 cup (100g) frozen peas (optional)
- 1 tablespoon olive oil
Cooking Instructions:
1. Preheat the Oven: Begin by preheating your oven to 400°F (200°C). This guarantees that the Shepherd’s Pie will cook evenly and develop a lovely golden crust on top when baked.
2. Cook the Meat Filling: In a large skillet or frying pan, heat the olive oil over medium heat. Add the chopped onions and carrots, sautéing for about 5 minutes or until the vegetables are softened.
Then, add the minced garlic and cook for an additional minute until fragrant.
3. Brown the Meat: Increase the heat to medium-high and add the ground lamb (or beef) to the skillet. Cook, breaking it apart with a spatula, until browned all over—approximately 7-10 minutes.
Drain any excess fat if necessary.
4. Add Flavorings: Once the meat is browned, stir in the tomato paste, Worcestershire sauce, dried thyme, dried rosemary, salt, and pepper. Mix well to combine.
Pour in the broth and bring the mixture to a simmer. Allow it to cook for about 5-10 minutes until the sauce has thickened slightly.
5. Incorporate Peas: If using frozen peas, add them to the meat mixture and stir to combine. This adds a pop of color and sweetness to the filling.
6. Assemble the Pie: Transfer the meat filling into a baking dish, spreading it out evenly. Next, spoon the prepared mashed potatoes on top of the filling, spreading it smoothly to cover the meat entirely.
You can create a textured surface with a fork for extra crispiness.
7. Bake: Place the assembled Shepherd’s Pie in the preheated oven and bake for about 25-30 minutes, or until the top is golden brown and the filling is bubbling around the edges.
8. Serve: Once baked, remove the Shepherd’s Pie from the oven and let it rest for a few minutes before serving. This will help the filling set a bit and make it easier to serve.
Extra Tips:
When making Shepherd’s Pie, using leftovers can be a great time-saver; simply mix in some leftover roast lamb or beef with your vegetables and seasonings.
For creamier mashed potatoes, consider adding a little cream cheese or sour cream to the mix. If you like a bit of heat, a sprinkle of red pepper flakes in the filling can enhance the flavor.
Finally, to elevate the dish, try topping the mashed potatoes with grated cheese before baking for an extra cheesy crust!
Classic Fish and Chips
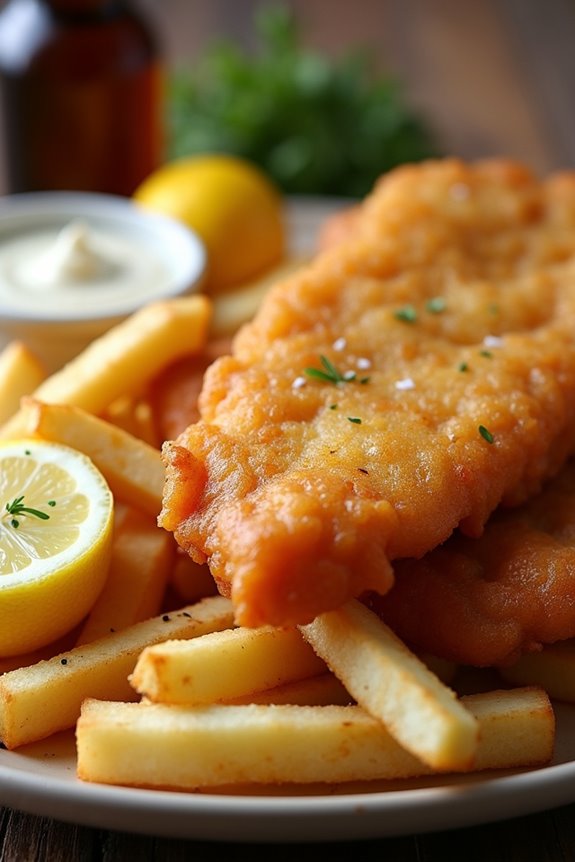
There’s nothing quite like the comforting and satisfying crunch of classic fish and chips. This dish, a staple of British cuisine, combines crispy battered fish with golden, fluffy chips, creating a perfect harmony of flavors and textures. Traditionally enjoyed with malt vinegar, tartar sauce, or a wedge of lemon, fish and chips is more than just a meal; it’s a culinary experience that transports you to the bustling streets of England.
To make the perfect fish and chips, the choice of fish is essential. The ideal fish for this recipe is white fish, such as cod or haddock, which has a mild flavor and flaky texture. The batter should be light and crispy, allowing the fish to shine. Paired with thick-cut chips, this dish is a favorite not only in pubs but also in homes across the UK. Whether you’re serving it on a Friday night or for a special occasion, this recipe will give you that authentic pub experience.
Ingredients (Serves 4-6):
- 4-6 pieces of white fish fillets (cod or haddock)
- 1 cup all-purpose flour (plus extra for dusting)
- 1 cup cold sparkling water
- 1 teaspoon baking powder
- Salt and pepper to taste
- 4-5 large russet potatoes (for chips)
- Oil for frying (vegetable or canola)
- Malt vinegar (for serving)
- Tartar sauce (for serving)
- Lemon wedges (for garnish)
Cooking Instructions:
- Prepare the Chips: Start by peeling the russet potatoes and cutting them into thick chips, about 1 cm in width. Rinse the cut potatoes in cold water to remove excess starch, then pat them dry with a clean kitchen towel. This helps achieve a crispier texture when frying.
- Par-Cook the Chips: In a large pot, heat oil to 160°C (320°F). Carefully add the chips in batches and cook for about 5-6 minutes, until they’re pale and soft but not browned. Remove them from the oil and drain on paper towels. This step is vital for guaranteeing that the chips are fluffy on the inside.
- Make the Batter: In a mixing bowl, combine 1 cup of flour, baking powder, and a pinch of salt and pepper. Gradually whisk in the cold sparkling water until you achieve a smooth, lump-free batter. The carbonation in the sparkling water will help create a light and airy texture in the batter.
- Heat the Oil for Frying Fish: In a deep fryer or a large heavy-bottomed pot, heat oil to 180°C (350°F). Use a thermometer to monitor the temperature, as the right heat is essential for frying.
- Coat the Fish: Lightly dust the fish fillets with flour to help the batter stick. Then, dip each fillet into the prepared batter, ensuring it’s fully coated.
- Fry the Fish: Carefully lower the battered fish into the hot oil, frying in batches to avoid overcrowding. Cook for 4-5 minutes, turning occasionally, until the batter is golden brown and the fish is cooked through. Remove the fish with a slotted spoon and drain on paper towels.
- Finish the Chips: Increase the oil temperature to 190°C (375°F). Fry the par-cooked chips again in batches for about 3-4 minutes, or until they’re golden brown and crispy. Drain on paper towels and sprinkle with salt.
- Serve: Plate the fish and chips together, garnishing with lemon wedges. Serve hot with malt vinegar and tartar sauce on the side for dipping.
Extra Tips:
For the best results, confirm that your oil is at the correct temperature before frying; this will help keep the batter light and crunchy. If you’re looking to add a twist, consider using beer instead of sparkling water for the batter, giving it a richer flavor.
Remember to keep the fried fish warm in a low oven while you finish frying the chips to confirm everything is served hot and fresh. Enjoy your homemade classic fish and chips!
Hearty Beef and Ale Pie

Hearty Beef and Ale Pie is a classic British dish, perfect for those chilly evenings when you crave something warm and comforting. This pie features tender chunks of beef slow-cooked in a rich, flavorful ale gravy, all encased in a flaky pastry. The combination of savory beef and aromatic herbs makes it a hearty meal that’s sure to satisfy.
Whether you’re hosting a dinner party or simply enjoying a cozy night in, this dish is a crowd-pleaser. Serve it with some creamy mashed potatoes or a side of seasonal vegetables for a complete meal that embodies the essence of British pub food.
Ingredients (Serves 4-6)
- 1 kg beef chuck, cut into 2.5 cm cubes
- 2 tablespoons olive oil
- 1 large onion, diced
- 2 carrots, diced
- 2 cloves garlic, minced
- 2 tablespoons plain flour
- 500 ml stout or dark ale
- 2 tablespoons Worcestershire sauce
- 1 teaspoon dried thyme
- 1 bay leaf
- Salt and pepper, to taste
- 500 g ready-made shortcrust pastry
- 1 egg, beaten (for egg wash)
Cooking Instructions
- Brown the Beef: In a large heavy-based pot, heat the olive oil over medium-high heat. Add the beef cubes in batches, ensuring not to overcrowd the pot. Brown the beef on all sides for about 5-7 minutes. This step enhances the flavor of the meat and provides a nice texture to the final dish.
- Sauté the Vegetables: Once the beef is browned, remove it from the pot and set aside. In the same pot, add the diced onion and carrots. Sauté them for about 5 minutes until they start to soften. Add the minced garlic and cook for an additional minute until fragrant.
- Thicken the Sauce: Sprinkle the plain flour over the sautéed vegetables and stir well to combine. Cook for 1-2 minutes to remove the raw flour taste. This will help thicken the gravy later.
- Add Liquid and Simmer: Gradually pour in the stout or dark ale, stirring continuously to avoid lumps. Return the browned beef to the pot along with the Worcestershire sauce, dried thyme, bay leaf, salt, and pepper. Bring to a boil, then reduce the heat to low and let the mixture simmer for about 1.5 to 2 hours, or until the beef is tender and the sauce has thickened.
- Prepare the Pastry: Preheat your oven to 200°C (400°F). Roll out the shortcrust pastry on a floured surface to fit your pie dish. Make sure it’s large enough to cover the top of the dish completely.
- Assemble the Pie: Once the beef filling has cooled slightly, pour it into the pie dish. Lay the rolled pastry over the filling, pressing the edges to seal. You can trim any excess pastry and use it to create decorative shapes on top.
- Egg Wash and Bake: Brush the top of the pastry with the beaten egg to give it a golden color when baked. Cut a few slits in the pastry to allow steam to escape. Place the pie in the preheated oven and bake for 25-30 minutes, or until the pastry is golden brown.
- Serve: Once baked, remove the pie from the oven and let it cool for a few minutes before serving. This allows the filling to settle and makes it easier to slice.
Extra Tips
When making Hearty Beef and Ale Pie, feel free to customize the filling by adding your favorite vegetables, such as mushrooms or peas, for added texture and flavor.
If you’re short on time, you can use store-bought pastry, but making your own can elevate the dish. For an extra touch, consider serving your pie with a side of homemade gravy or a splash of extra ale on the side. Enjoy your hearty meal!
Bangers and Mash
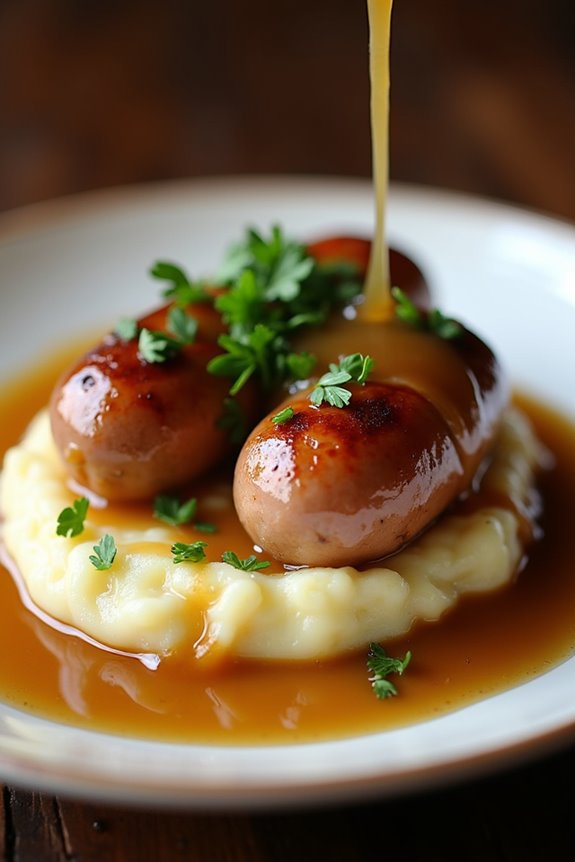
Bangers and Mash is a classic British dish that combines succulent sausages with creamy mashed potatoes, often served with a rich onion gravy. This comforting meal is a staple in pubs across the UK and is loved for its simplicity and hearty flavors.
The name “bangers” is said to have originated during World War I when sausages were known to burst or “bang” while cooking due to the high water content and lack of meat. This dish is perfect for family dinners or gatherings, as it’s both satisfying and easy to prepare.
While the dish highlights the humble sausage and mashed potatoes, the secret to elevating Bangers and Mash lies in the gravy. A well-made onion gravy can transform this dish into a gourmet experience, bringing depth and flavor that complements the sausages and mash beautifully.
Whether you choose pork, beef, or a vegetarian sausage, this dish is endlessly adaptable to suit your preferences.
Ingredients (Serves 4-6):
- 8 pork sausages (or your choice of sausage)
- 2 pounds (900g) potatoes, peeled and quartered
- 4 tablespoons butter
- 1/2 cup milk
- Salt and pepper, to taste
- 2 tablespoons vegetable oil
- 2 large onions, sliced
- 2 tablespoons all-purpose flour
- 2 cups beef or vegetable stock
- 1 tablespoon Worcestershire sauce
- Fresh parsley, chopped (for garnish)
Cooking Instructions:
- Prepare the Potatoes: Begin by placing the peeled and quartered potatoes in a large pot of salted water. Bring to a boil over high heat, then reduce to a simmer. Cook the potatoes for about 15-20 minutes or until they’re tender and easily pierced with a fork.
- Cook the Sausages: While the potatoes are cooking, heat the vegetable oil in a large skillet or frying pan over medium heat. Add the sausages and cook for 12-15 minutes, turning occasionally until they’re browned and cooked through. Once done, remove them from the pan and set aside.
- Make the Onion Gravy: In the same skillet, add the sliced onions and cook over medium heat for about 10 minutes, stirring frequently until they’re soft and caramelized. Sprinkle the flour over the onions and stir well to coat. Cook for an additional minute to remove the raw flour taste.
- Add Stock and Simmer: Gradually pour in the beef or vegetable stock while stirring constantly to avoid lumps. Add Worcestershire sauce and bring the mixture to a gentle simmer. Let it cook for about 5-10 minutes until the gravy thickens. Season with salt and pepper to taste.
- Mash the Potatoes: Once the potatoes are tender, drain them and return them to the pot. Add the butter and milk, then mash until smooth and creamy. Season with salt and pepper to taste.
- Serve: To serve, place a generous scoop of mashed potatoes on each plate, top with sausages, and ladle the onion gravy over the top. Garnish with freshly chopped parsley if desired.
Extra Tips:
For an extra layer of flavor, consider adding a splash of red wine to the onion gravy while it simmers.
If you prefer a vegetarian version, opt for plant-based sausages and vegetable stock. Additionally, you can enhance the mashed potatoes by mixing in roasted garlic or cream cheese for a richer texture.
Serve with a side of peas or green beans for a complete meal. Enjoy your homemade Bangers and Mash!
Sticky Toffee Pudding
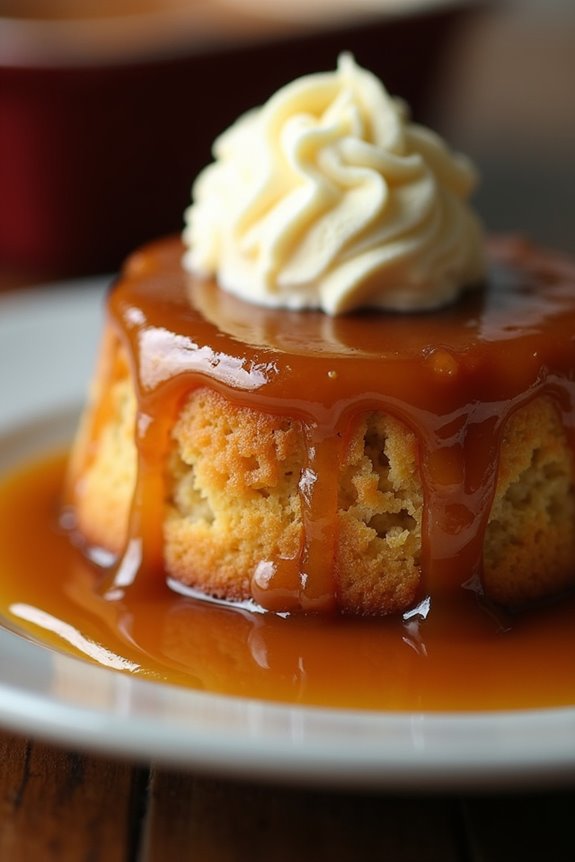
Sticky Toffee Pudding is a classic British dessert that boasts a rich, moist sponge cake drenched in a luscious toffee sauce. Originating from the Lake District, this indulgent treat has become a staple in pubs across the UK and is often served warm with a scoop of vanilla ice cream or a dollop of clotted cream.
The combination of the sticky toffee sauce and the soft sponge creates an unforgettable dessert experience that’s certain to impress guests at any gathering.
The beauty of Sticky Toffee Pudding lies in its simplicity, yet the depth of flavor is extraordinary. The sponge is typically made with finely chopped dates, which not only add sweetness but also moisture to the cake. The toffee sauce is a heavenly blend of butter, brown sugar, and cream, poured generously over the warm pudding.
Whether you’re looking to end a sumptuous meal on a high note or treat yourself to a comforting dessert, this Sticky Toffee Pudding recipe is the perfect choice.
Ingredients (Serves 4-6):
- 200g pitted dates, chopped
- 250ml boiling water
- 1 tsp baking soda
- 75g unsalted butter, softened
- 150g brown sugar
- 2 large eggs
- 1 tsp vanilla extract
- 175g self-raising flour
- Pinch of salt
For the Toffee Sauce:
- 150g brown sugar
- 100g unsalted butter
- 200ml double cream
- 1 tsp vanilla extract
Cooking Instructions:
1. Prepare the Dates: Start by placing the chopped dates in a bowl and pouring the boiling water over them. Add the baking soda and let this mixture sit for about 10-15 minutes. This will soften the dates and help to infuse the pudding with their natural sweetness.
2. Make the Cake Batter: In a large mixing bowl, cream together the softened butter and brown sugar until the mixture is light and fluffy. This will typically take about 2-3 minutes. Then, add the eggs one at a time, mixing well after each addition, followed by the vanilla extract.
3. Combine Wet and Dry Ingredients: Gradually fold in the self-raising flour and a pinch of salt into the butter-sugar mixture, alternating with the date mixture. Be careful not to overmix; just confirm everything is combined well.
4. Bake the Pudding: Preheat your oven to 180°C (350°F). Grease a baking dish or individual ramekins, then pour the batter into the prepared dish. Bake for approximately 25-30 minutes or until a skewer inserted into the center comes out clean.
Once done, allow the pudding to cool slightly in the dish.
5. Prepare the Toffee Sauce: In a saucepan over medium heat, combine the brown sugar, butter, and double cream. Stir continuously until the mixture comes to a gentle boil. Allow it to simmer for a couple of minutes until it thickens slightly, then remove it from the heat and stir in the vanilla extract.
6. Serve: Once the pudding has cooled for a few minutes, carefully invert it onto a serving plate. Drizzle a generous amount of the warm toffee sauce over the top, allowing it to soak into the sponge. Serve immediately with ice cream or clotted cream for a delightful finish.
Extra Tips:
For an added layer of flavor, consider soaking the dates overnight in a bit of dark rum or strong tea before using them in the recipe. This not only enhances the taste but also adds an extra level of moisture to the pudding.
Additionally, when making the toffee sauce, be sure to keep an eye on it to prevent burning; stirring continuously will help you achieve the perfect consistency. Enjoy your Sticky Toffee Pudding warm for the best experience!
Ploughman’s Lunch
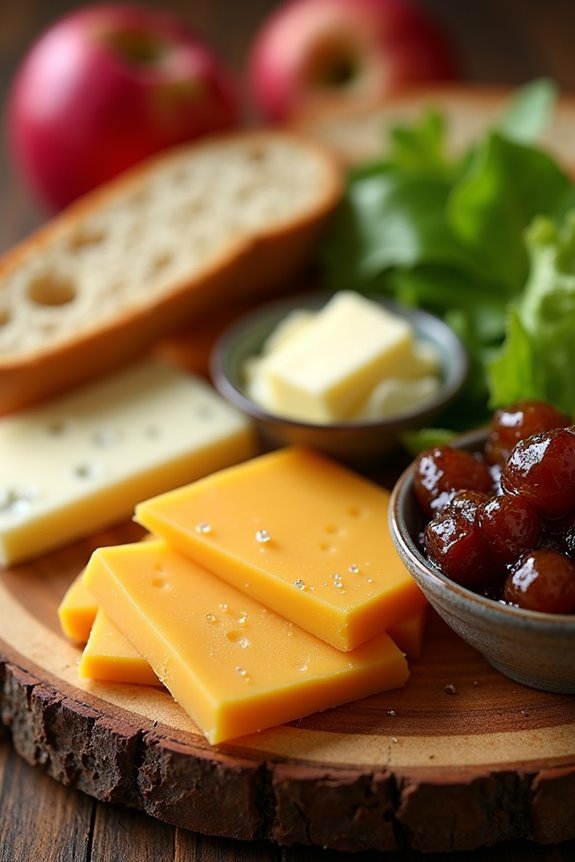
The Ploughman’s Lunch is a classic British dish that embodies the essence of traditional pub fare. Typically served cold, this meal is a delightful assortment of cheeses, bread, pickles, and other accompaniments. Its origins can be traced back to the rural communities of England, where laborers would enjoy a hearty meal during their breaks. This dish isn’t only filling but also provides a fantastic opportunity to showcase local produce and artisanal ingredients.
Creating a Ploughman’s Lunch is as much about presentation as it’s about flavor. A well-assembled platter can be a feast for the eyes, making it perfect for sharing with family and friends. The beauty of this dish is its versatility; you can mix and match various cheeses, breads, and condiments according to your preference or what you have on hand. Whether you’re preparing it for a casual gathering or a sophisticated picnic, a Ploughman’s Lunch is sure to impress.
Ingredients (serving size: 4-6 people)
- 200g cheddar cheese, sliced
- 200g Stilton cheese, crumbled
- 200g goat cheese, sliced
- 1 baguette or 400g of crusty bread, sliced
- 150g pickled onions
- 150g Branston pickle or any chutney of your choice
- 200g mixed salad leaves
- 2-3 apples, sliced
- 100g butter, softened
- Salt and pepper to taste
Cooking Instructions
- Prepare the Bread: Start by slicing the baguette or crusty bread into thick rounds. Arrange them neatly on a large serving platter. The bread serves as the base of the Ploughman’s Lunch, and its texture complements the cheeses beautifully.
- Select the Cheeses: Choose a variety of cheeses to include on the platter. For this recipe, slice the cheddar and goat cheese, and crumble the Stilton. Arrange these cheeses artfully on the platter, ensuring they’re spaced out for aesthetic appeal.
- Add the Pickles and Chutneys: Include bowls of pickled onions and Branston pickle or chutney alongside the cheeses and bread. These condiments provide a tangy contrast to the rich flavors of the cheeses and are essential components of the Ploughman’s Lunch.
- Prepare the Salad: Rinse the mixed salad leaves under cold water and dry them thoroughly. Place a handful of salad leaves on the platter, adding a fresh, crisp element to the dish.
- Slice the Apples: Core and slice the apples into wedges. Arrange these slices on the platter around the cheeses and bread. The apples not only add a rejuvenating crunch but also bring a touch of natural sweetness.
- Butter and Season: Provide a small dish of softened butter for spreading on the bread. Season the platter with salt and pepper to taste, ensuring that all components are well-balanced in flavor.
Extra Tips
When preparing a Ploughman’s Lunch, feel free to customize the ingredients based on what you enjoy or have available. Experiment with different types of cheeses, such as a creamy Brie or a sharp blue cheese, and add additional elements like cured meats or hard-boiled eggs for extra variety.
Presentation is key, so take your time to arrange the elements in an appealing way. Enjoy this delightful dish with a pint of ale for an authentic British experience!
Chicken Tikka Masala
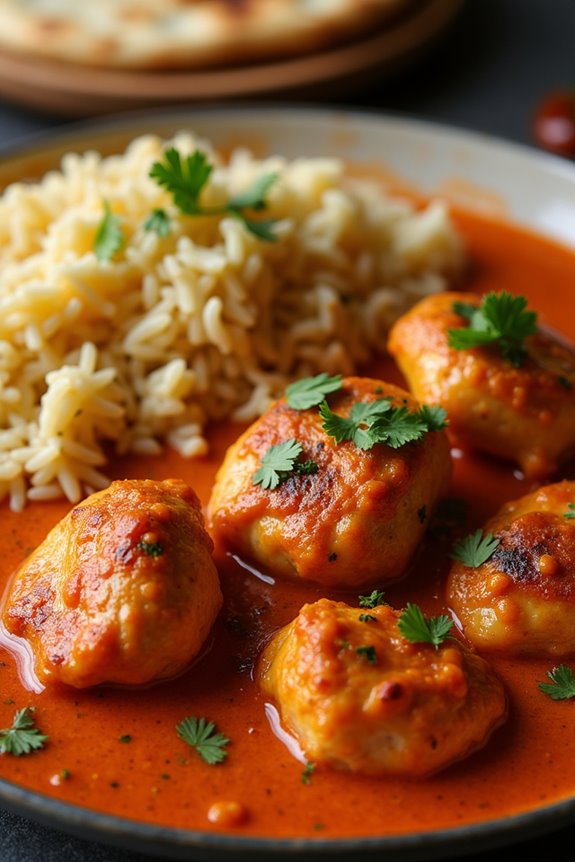
Chicken Tikka Masala is a beloved dish that seamlessly blends Indian and British culinary traditions. The dish features tender chunks of marinated chicken that are cooked to perfection and then simmered in a rich, creamy tomato-based sauce, infused with a medley of spices. Its origins are often debated, but what remains undisputed is its popularity, especially in British pubs where it has become a staple on the menu.
Paired with fluffy basmati rice or warm naan bread, Chicken Tikka Masala is an irresistible offering that promises to satisfy your cravings for both flavor and comfort.
To prepare Chicken Tikka Masala, you’ll first marinate the chicken to infuse it with spices and yogurt, creating a depth of flavor. After grilling or baking the chicken to achieve a smoky char, it’s combined with the aromatic sauce that features tomatoes, cream, and spices like garam masala and cumin. The result is a dish that’s both vibrant and hearty, perfect for sharing with family and friends.
Now, let’s get started on this delicious recipe that serves 4-6 people.
Ingredients
- 1.5 lbs (680g) boneless, skinless chicken thighs or breasts, cut into bite-sized pieces
- 1 cup plain yogurt
- 2 tablespoons lemon juice
- 2 teaspoons garam masala
- 1 teaspoon ground cumin
- 1 teaspoon ground coriander
- 1 teaspoon turmeric
- 1 teaspoon paprika
- Salt, to taste
- 2 tablespoons vegetable oil
- 1 medium onion, finely chopped
- 3 cloves garlic, minced
- 1-inch piece ginger, grated
- 1 can (14 oz) crushed tomatoes
- 1 cup heavy cream
- Fresh cilantro, chopped, for garnish
Cooking Instructions
- Marinate the Chicken: In a large bowl, combine the plain yogurt, lemon juice, garam masala, cumin, coriander, turmeric, paprika, and a pinch of salt. Add the chicken pieces to the marinade, ensuring they’re thoroughly coated. Cover the bowl and refrigerate for at least 1 hour, or ideally overnight, to allow the flavors to penetrate the chicken.
- Cook the Chicken: Preheat your grill or oven to high heat. If using a grill, thread the marinated chicken onto skewers. Grill the chicken for about 10-15 minutes, turning occasionally, until cooked through and slightly charred. If using an oven, place the chicken pieces on a baking sheet and bake for 15-20 minutes or until fully cooked. Set aside once done.
- Prepare the Sauce: In a large pan, heat the vegetable oil over medium heat. Add the finely chopped onion and sauté until it becomes golden brown, about 5-7 minutes. Stir in the minced garlic and grated ginger, and cook for an additional 1-2 minutes until fragrant.
- Add Tomatoes and Spices: Pour in the crushed tomatoes and add a pinch of salt, along with the remaining spices (garam masala, cumin, coriander, turmeric, and paprika). Stir well to combine and let simmer for about 10 minutes, allowing the flavors to meld.
- Incorporate Cream: Reduce the heat to low and slowly stir in the heavy cream, mixing until the sauce is creamy and well blended. Let it simmer for another 5 minutes, adjusting the seasoning as necessary.
- Combine Chicken and Sauce: Add the cooked chicken pieces to the sauce, stirring gently to coat them thoroughly. Allow the chicken to simmer in the sauce for about 5 minutes, ensuring it’s heated through.
- Serve: Garnish with freshly chopped cilantro and serve hot with basmati rice or naan bread.
Extra Tips
For an extra layer of flavor, consider adding a touch of smoked paprika to the marinade or sauce, which will enhance the smokiness of the dish.
Additionally, if you prefer a spicier version, feel free to incorporate chopped green chilies or a pinch of cayenne pepper into the sauce. Ultimately, using fresh ingredients, especially herbs and spices, will elevate the dish’s flavor profile considerably.
Enjoy your homemade Chicken Tikka Masala!
Welsh Rarebit

Welsh Rarebit, a classic British dish, is a delightful combination of rich cheese sauce poured over toasted bread. Originating from Wales, this dish is often served as a hearty snack or light meal. The unique blend of flavors comes from a mixture of cheese, spices, and sometimes a splash of beer or Worcestershire sauce, which elevates it beyond a simple cheese toast.
This comfort food is perfect for chilly evenings or casual gatherings with friends and family.
To prepare Welsh Rarebit, the essential factor is selecting the right cheese and ensuring it melts perfectly to create a luscious topping for your bread. Traditionally, a sharp Cheddar is recommended, but feel free to experiment with different types of cheese for varied flavors. Served hot and bubbly, it’s an irresistible treat that pairs well with a pint of your favorite ale or cider.
Ingredients (Serves 4-6):
- 4 slices of thick-cut bread (such as sourdough or white)
- 200g sharp Cheddar cheese, grated
- 50g cream cheese
- 2 tablespoons butter
- 1 tablespoon all-purpose flour
- 1 teaspoon mustard powder
- 1 teaspoon Worcestershire sauce
- 1/2 cup milk (or beer for an alternate flavor)
- Salt and black pepper to taste
- Optional: chopped chives or parsley for garnish
Cooking Instructions:
- Toast the Bread: Begin by toasting the slices of bread until they’re golden brown. This will provide a sturdy base for your Welsh Rarebit and prevent the bread from becoming soggy when the cheese sauce is poured on top. Set the toasted bread aside.
- Prepare the Cheese Sauce: In a medium saucepan, melt the butter over medium heat. Once melted, whisk in the flour to create a roux. Continue to cook for about 1 minute until it turns a light golden color. This step is important as it will thicken the cheese sauce.
- Add Liquid: Gradually whisk in the milk (or beer) to the roux, ensuring there are no lumps. Cook on medium heat until the mixture begins to thicken, stirring frequently. This should take about 3-5 minutes.
- Incorporate Cheeses and Flavorings: Once the sauce has thickened, reduce the heat to low and stir in the grated Cheddar and cream cheese until fully melted and combined. Add the mustard powder, Worcestershire sauce, and season with salt and black pepper to taste. Mix until smooth and creamy.
- Assemble the Dish: Preheat your grill (broiler) to high. Place the toasted bread on a baking sheet. Spoon the cheese sauce generously over each slice of toast, ensuring an even coating.
- Grill the Rarebit: Place the baking sheet under the hot grill for about 3-5 minutes, or until the cheese is bubbling and golden brown. Keep an eye on it to avoid burning.
- Serve: Remove from the grill, garnish with chopped chives or parsley if desired, and serve hot. Enjoy your Welsh Rarebit with a side salad or on its own!
Extra Tips:
When making Welsh Rarebit, feel free to customize the recipe by adding additional ingredients such as cooked bacon, tomato slices, or even sautéed mushrooms for extra flavor.
If you prefer a spicier kick, consider adding a dash of hot sauce or paprika to the cheese sauce. Always serve it immediately for the best texture and taste, and don’t hesitate to experiment with different cheeses to find your favorite combination!
Full English Breakfast
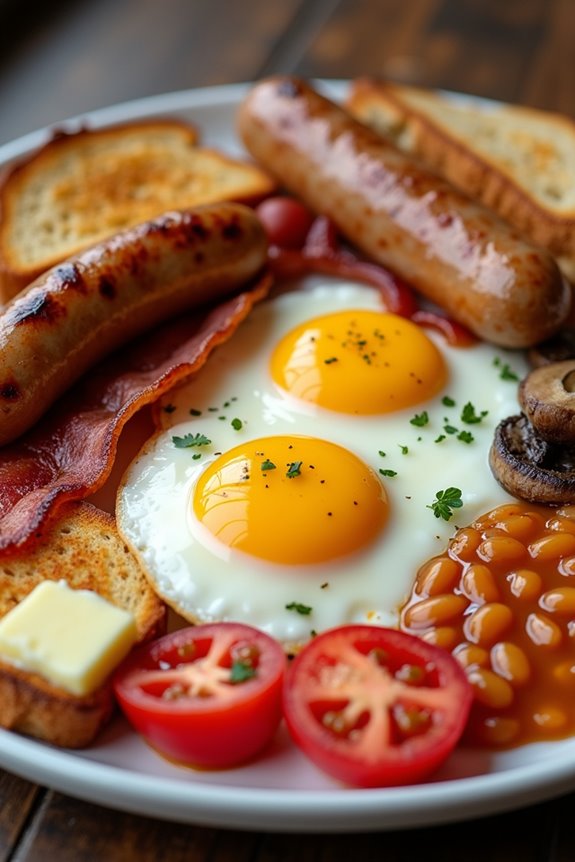
A Full English Breakfast is the quintessential way to kickstart your day in Britain, offering a hearty and satisfying meal that has become a beloved tradition. This breakfast plate typically includes an array of ingredients, providing a delightful combination of flavors and textures.
Whether you’re enjoying it as a leisurely weekend brunch or a weekday treat, this meal promises to fill you up and energize your morning.
The beauty of a Full English Breakfast lies in its versatility; you can customize it to suit your preferences. Classic components often include sausages, bacon, eggs, baked beans, tomatoes, mushrooms, and toast. Each ingredient plays a vital role in creating a well-rounded breakfast experience, and when cooked to perfection, they come together to create a dish that’s comforting and comforting.
Let’s explore the details of preparing this iconic meal that serves 4-6 people.
Ingredients:
- 8 sausages (pork or your choice)
- 8 slices of bacon
- 4 large eggs
- 1 can (400g) of baked beans
- 4 ripe tomatoes, halved
- 200g mushrooms, sliced
- 4 slices of thick bread (for toasting)
- Butter (for cooking and spreading)
- Salt and pepper (to taste)
- Optional: black pudding, hash browns, or any other favorite ingredients
Cooking Instructions:
1. Cook the Sausages and Bacon: In a large frying pan over medium heat, add the sausages. Cook them for about 10-12 minutes, turning occasionally until they’re golden brown and cooked through.
Once the sausages are nearly done, push them to one side of the pan and add the bacon slices. Cook the bacon until crispy, about 5-7 minutes, and then remove both the sausages and bacon from the pan, keeping them warm on a plate.
2. Prepare the Eggs: In the same pan, if necessary, add a little more butter and crack the eggs directly into the pan. Fry the eggs to your liking—sunny side up, over-easy, or scrambled. This should take about 3-5 minutes.
Season with salt and pepper. Once cooked, transfer the eggs to the plate with the sausage and bacon.
3. Cook the Tomatoes and Mushrooms: Next, add the halved tomatoes and sliced mushrooms to the pan. Cook until the tomatoes are softened and the mushrooms are golden, about 5-7 minutes.
You can season these with a pinch of salt and pepper if desired. Once done, add them to the plate.
4. Heat the Baked Beans: Pour the baked beans into a small saucepan and heat them over medium heat until warmed through, stirring occasionally. This should take about 5 minutes.
Once heated, serve the beans in a bowl on the side.
5. Toast the Bread: Finally, toast the bread slices in a toaster or on a separate pan with a little butter until golden brown. Serve these alongside the rest of the components for a complete meal.
Extra Tips:
When preparing a Full English Breakfast, timing is key to guarantee everything is served hot and fresh.
Consider starting with the sausages, as they take the longest to cook, while the eggs and toast can be prepared towards the end. You can also personalize your breakfast by adding additional items like hash browns or black pudding for an extra twist.
Enjoy the meal with a hot cup of tea or coffee for the ultimate British experience!
Scotch Eggs

Scotch Eggs are a delightful British pub classic that combines the comforting flavors of savory sausage meat with a perfectly boiled egg, all encased in a crispy breadcrumb coating.
Traditionally enjoyed as a snack or picnic food, these delicious morsels can be served hot or cold, making them versatile for any occasion. The rich combination of textures and flavors is sure to impress your friends and family, whether served as an appetizer or main dish.
In this recipe, you’ll learn how to create perfect Scotch Eggs that boast a golden, crispy exterior and a luscious, runny yolk inside, or a hard-boiled egg if you prefer. This dish isn’t only delicious but also a fun cooking project that’s great for gatherings. Gather your ingredients, roll up your sleeves, and let’s get started on this quintessential British treat!
Ingredients (serves 4-6 people):
- 6 large eggs
- 1 pound (450g) sausage meat (or sausage links with casings removed)
- 1 cup (100g) breadcrumbs
- 1/2 cup (60g) all-purpose flour
- 1 teaspoon dried thyme
- 1 teaspoon salt
- 1/2 teaspoon black pepper
- 1 teaspoon mustard (optional)
- Oil for frying (vegetable or sunflower oil)
Cooking Instructions:
1. Boil the Eggs: Place 6 large eggs in a saucepan and cover them with cold water. Bring the water to a boil, then reduce the heat and simmer the eggs for about 6-7 minutes for soft-boiled eggs (or 9-10 minutes for hard-boiled).
Once done, transfer the eggs to a bowl of ice water to stop the cooking process. Let them cool for a few minutes, then peel the eggs carefully.
2. Prepare the Sausage Mixture****: In a mixing bowl, combine the sausage meat with dried thyme, salt, pepper, and mustard (if using). Mix thoroughly until all ingredients are well incorporated.
3. Assemble the Scotch Eggs: Take a portion of the sausage mixture and flatten it in your hand. Place a peeled egg in the center and carefully wrap the sausage around the egg, ensuring it’s completely covered.
Repeat this process for all the eggs.
4. Coat the Eggs: Set up a breading station with three shallow dishes: one with flour, one with beaten eggs (whisk 2 eggs), and one with breadcrumbs. Roll each sausage-wrapped egg in flour, then dip it into the beaten eggs, and finally coat it in breadcrumbs.
Make sure each egg is evenly coated.
5. Fry the Scotch Eggs: In a deep pan or fryer, heat oil to 350°F (175°C). Carefully lower the coated eggs into the hot oil, a few at a time, and fry for about 5-6 minutes or until they’re golden brown and cooked through.
Use a slotted spoon to transfer them to a paper towel-lined plate to drain excess oil.
6. Serve: Allow the Scotch Eggs to cool slightly before slicing them in half to reveal the beautiful egg yolk inside. Serve them warm or at room temperature with your favorite dipping sauces, such as mustard or aioli.
Extra Tips:
For the best results, make sure to use fresh eggs, as they hold their shape better during cooking.
If you want to experiment with flavors, try adding herbs like parsley or spices like paprika to the sausage mixture. Additionally, you can bake the Scotch Eggs instead of frying for a healthier version—simply place them on a baking sheet and bake at 375°F (190°C) for 25-30 minutes, or until golden brown.
Enjoy your homemade Scotch Eggs as a delicious snack or part of a hearty meal!
Cornish Pasty

The Cornish pasty is a traditional British dish that hails from Cornwall. This hearty pastry is well-loved for its flaky crust and savory filling, making it a perfect meal for any time of day. Originally, miners would take these portable meals underground, as they were easy to eat with one hand and packed full of nutrition.
Today, the Cornish pasty is a symbol of Cornish pride and is enjoyed by many people across the UK and beyond.
Making a Cornish pasty at home is a rewarding endeavor. With a few simple ingredients, you can create a delightful dish that captures the essence of this classic pub favorite. The key to a great pasty lies in the balance of flavors and the perfect pastry, which should be both crisp and tender.
Gather your ingredients, roll up your sleeves, and let’s plunge into crafting these delicious hand-held pies.
Ingredients (Serves 4-6 people):
- 500g (4 cups) of all-purpose flour
- 250g (1 cup) of unsalted butter, chilled and cubed
- 6-7 tablespoons of cold water
- 300g (10.5 oz) of beef skirt or stewing steak, diced
- 200g (7 oz) of potatoes, peeled and diced
- 100g (3.5 oz) of swede (rutabaga), peeled and diced
- 1 small onion, finely chopped
- Salt and pepper, to taste
- 1 egg, beaten (for egg wash)
Cooking Instructions:
1. Make the Pastry: In a large mixing bowl, combine the flour and a pinch of salt. Add the chilled, cubed butter and rub it into the flour using your fingertips until the mixture resembles breadcrumbs.
Gradually add cold water, one tablespoon at a time, mixing until the dough comes together. Knead gently on a floured surface until smooth. Wrap in cling film and refrigerate for at least 30 minutes.
2. Prepare the Filling: In a bowl, mix together the diced beef, potatoes, swede, and chopped onion. Season generously with salt and pepper. This mix should be well combined to guarantee even flavor distribution throughout the pasties.
3. Roll Out the Pastry: Once chilled, take the pastry out of the refrigerator. Divide it into 4-6 equal pieces, depending on the desired size of your pasties.
On a lightly floured surface, roll each piece into a circle about 5mm thick (approximately ¼ inch). Aim for a diameter of around 20cm (8 inches).
4. Fill the Pasties: Place about a handful of the filling mixture onto one half of each pastry circle, leaving a border around the edge. Be careful not to overfill, as this can cause the pasties to burst while baking.
5. Seal the Pasties: Fold the pastry over the filling to create a semi-circle. Press the edges together firmly, then crimp them with your fingers or a fork to create a secure seal.
This not only secures the filling but also gives the pasty a traditional look.
6. Egg Wash and Bake: Preheat your oven to 200°C (400°F). Place the pasties on a baking tray lined with parchment paper. Brush the tops with the beaten egg for a golden finish.
Bake in the preheated oven for about 30-35 minutes, or until the pasties are golden brown and cooked through.
7. Cool and Serve: Once baked, remove the pasties from the oven and let them cool for a few minutes before serving. They can be enjoyed warm or at room temperature.
Extra Tips:
When preparing your Cornish pasties, feel free to experiment with different fillings, such as chicken or vegetables, to suit your taste.
Be sure to keep the pastry cold while you work with it, as this will help achieve a flakier texture. If you have leftover filling, consider using it in a savory pie or as a topping for baked potatoes.
Finally, the pasties can be frozen before baking, making them a great option for quick meals on busy days—just bake them straight from the freezer, adding a few extra minutes to the cooking time. Enjoy your homemade Cornish pasties!
Lancashire Hotpot
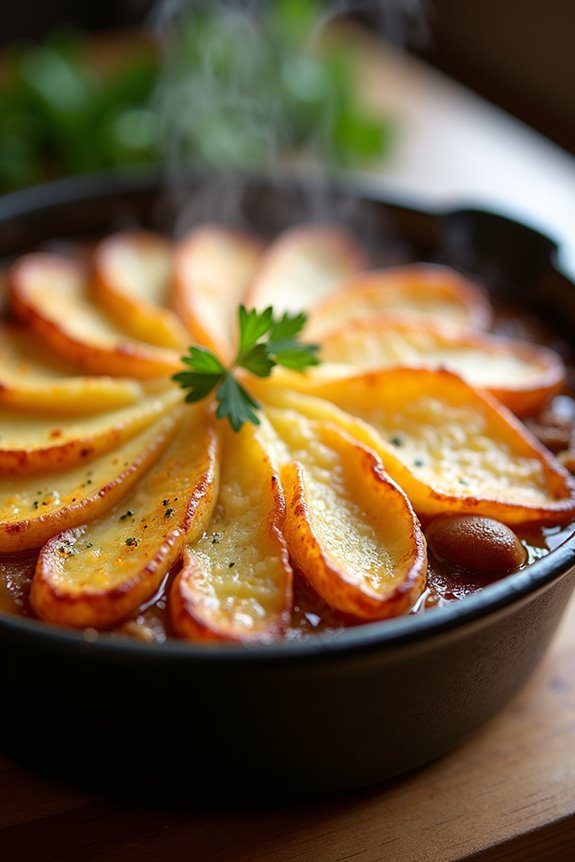
Lancashire Hotpot is a traditional British dish that hails from the heart of England, specifically the county of Lancashire. This comforting one-pot meal features tender lamb or beef, slow-cooked with root vegetables and topped with a golden layer of sliced potatoes. The slow cooking process allows the meat to become incredibly tender while infusing all the flavors of the ingredients. It’s a hearty dish perfect for chilly evenings or family gatherings, bringing warmth and a sense of home to any dining table.
The beauty of Lancashire Hotpot lies in its simplicity and adaptability. While the classic recipe calls for lamb, you can easily substitute it with beef or even make a vegetarian version by using mushrooms and hearty vegetables. The dish is typically served with pickled red cabbage or crusty bread, making it even more satisfying.
Whether you’re a seasoned cook or a novice in the kitchen, this recipe will guide you through crafting an authentic Lancashire Hotpot that’s sure to impress.
Ingredients (serving size: 4-6 people)
- 1.5 lbs (700g) lamb or beef, cut into chunks
- 2 tablespoons vegetable oil
- 2 onions, sliced
- 2 carrots, diced
- 2 celery stalks, diced
- 3 cloves garlic, minced
- 4 cups beef or lamb stock
- 2 tablespoons Worcestershire sauce
- 1 teaspoon dried thyme
- 1 bay leaf
- Salt and pepper, to taste
- 2-3 large potatoes, thinly sliced (about 1 lb/450g)
- Fresh parsley, for garnish (optional)
Cooking Instructions
- Preheat the Oven: Begin by preheating your oven to 325°F (160°C). A slow and steady cooking temperature is vital for guaranteeing the meat becomes tender and the flavors meld beautifully.
- Brown the Meat: Heat the vegetable oil in a large, heavy-based pot or Dutch oven over medium-high heat. Add the chunks of lamb or beef in batches, making sure not to overcrowd the pot. Brown the meat on all sides, which will enhance the flavor of the dish. Once browned, remove the meat and set it aside.
- Sauté the Vegetables: In the same pot, add the sliced onions, diced carrots, and diced celery. Sauté for about 5-7 minutes until the onions are translucent and the vegetables begin to soften. Add the minced garlic and cook for an additional minute until fragrant.
- Combine Ingredients: Return the browned meat to the pot, and pour in the beef or lamb stock. Stir in the Worcestershire sauce, dried thyme, bay leaf, and season with salt and pepper. Bring the mixture to a gentle boil.
- Layer the Potatoes: Once boiling, reduce the heat to a simmer. Layer the thinly sliced potatoes evenly over the top of the meat and vegetable mixture. Make sure that the potatoes overlap slightly to create an even coverage.
- Bake the Hotpot: Cover the pot with a tight-fitting lid or foil and transfer it to the preheated oven. Bake for about 1.5 to 2 hours, or until the meat is tender and the potatoes are cooked through. Remove the lid for the last 30 minutes of cooking to allow the potatoes to crisp up.
- Serve and Garnish: Once cooked, remove the hotpot from the oven and let it rest for a few minutes. Serve hot, garnished with fresh parsley if desired, alongside pickled red cabbage or crusty bread.
Extra Tips
For an even richer flavor, consider adding a splash of red wine to the pot alongside the stock. This will deepen the taste of the broth!
Additionally, if you prefer a thicker sauce, you can mix a tablespoon of cornstarch with cold water and stir it into the pot during the last 15 minutes of cooking.
Remember not to skip the browning step, as it adds a depth of flavor that’s essential to the dish. Enjoy your homemade Lancashire Hotpot!
Vegetable Curry
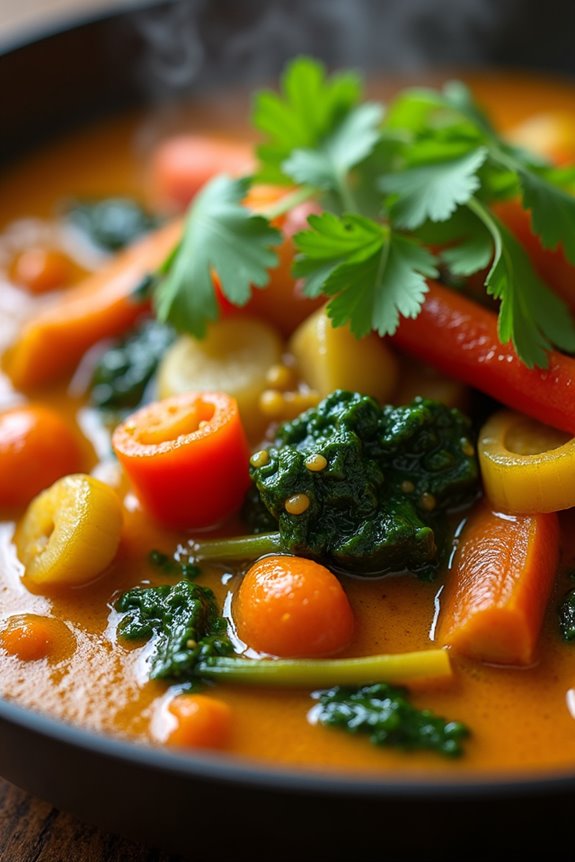
Vegetable curry is a delightful and aromatic dish that has become a staple in British pubs, combining a medley of seasonal vegetables with fragrant spices to create a hearty meal. This dish isn’t only comforting but also versatile, allowing you to use any vegetables you have on hand. The vibrant colors and rich flavors make it an appealing choice for both vegetarians and meat lovers alike.
Served with fluffy rice or warm naan, vegetable curry is perfect for sharing with family and friends.
Cooking a vegetable curry is straightforward and can be adapted to suit your taste preferences. Whether you prefer a mild flavor or a spicier kick, this recipe can easily be adjusted by varying the spices used. In addition, it’s a great way to sneak in some extra nutrition, making it a wonderful choice for a wholesome meal.
Let’s explore the ingredients and steps needed to create this delicious dish for 4-6 people.
Ingredients
- 2 tablespoons vegetable oil
- 1 large onion, chopped
- 3 cloves garlic, minced
- 1 tablespoon fresh ginger, grated
- 1 tablespoon curry powder
- 1 teaspoon ground cumin
- 1 teaspoon ground coriander
- 1 can (400g) coconut milk
- 1 cup vegetable broth
- 1 medium carrot, diced
- 1 bell pepper, chopped
- 1 medium zucchini, diced
- 1 cup green beans, trimmed and cut into pieces
- 1 cup spinach, chopped
- Salt and pepper to taste
- Fresh cilantro, chopped (for garnish)
- Cooked rice or naan (to serve)
Cooking Instructions
- Heat the Oil: In a large pot or Dutch oven, heat the vegetable oil over medium heat. Once hot, add the chopped onion and sauté for about 5 minutes, or until the onion becomes translucent and starts to soften. This will create a flavorful base for the curry.
- Add Aromatics: Stir in the minced garlic and grated ginger, and cook for an additional 1-2 minutes, or until fragrant. Be careful not to burn the garlic, as it can turn bitter.
- Incorporate Spices: Add the curry powder, ground cumin, and ground coriander to the pot. Stir well to combine and cook for another minute. This step will toast the spices, enhancing their flavors and creating a rich aroma.
- Mix in Liquids: Pour in the coconut milk and vegetable broth, stirring until well combined. Bring the mixture to a gentle simmer.
- Add Vegetables: Add the diced carrot, chopped bell pepper, zucchini, and green beans to the pot. Stir to combine and allow the vegetables to cook for about 10-15 minutes, or until they’re tender but still retain some crunch.
- Finish with Spinach: Once the vegetables are cooked, stir in the chopped spinach and let it wilt for a couple of minutes. Season the curry with salt and pepper to taste, adjusting the seasoning as needed.
- Serve: Remove the pot from heat and ladle the vegetable curry into bowls. Garnish with fresh cilantro and serve alongside cooked rice or warm naan for a complete meal.
Extra Tips
For an extra layer of flavor, consider adding a splash of lime juice just before serving, which can brighten the dish considerably.
You can also customize the vegetable selection based on what’s in season or what you have available in your kitchen. Adding proteins like chickpeas or tofu can enhance the dish further, making it even more filling.
Finally, if you enjoy a bit of heat, feel free to throw in some chopped chili peppers or a dash of chili powder during the spice stage.
Eton Mess

Eton Mess is a delightful British dessert that consists of a combination of crushed meringue, fresh strawberries, and whipped cream. Traditionally served at Eton College’s annual cricket game against Harrow School, this pudding is a celebration of the delightful summer flavors that evoke a sense of nostalgia.
The contrast of textures between the crunchy meringue, juicy strawberries, and creamy whipped cream creates a harmonious dessert that’s both indulgent and invigorating. This dessert isn’t only easy to prepare but also customizable, allowing you to incorporate other fruits or flavors if desired.
With its vibrant colors and rich taste, Eton Mess is perfect for summer gatherings, picnics, or as a sweet conclusion to any meal. Here’s how to whip up this classic British dessert for 4-6 people.
Ingredients
- 4 large egg whites
- 250g (about 2 cups) granulated sugar
- 300ml (about 1 ¼ cups) heavy cream
- 1 tsp vanilla extract
- 400g (about 14 oz) fresh strawberries, hulled and halved
- A handful of fresh mint leaves (optional, for garnish)
Cooking Instructions
1. Prepare the Meringue: Preheat your oven to 120°C (250°F). In a large, clean bowl, whisk the egg whites until soft peaks form. Gradually add the granulated sugar, one tablespoon at a time, while continuing to whisk until the mixture is glossy and stiff peaks form. This process can take around 5-10 minutes.
2. Bake the Meringue: Line a baking tray with parchment paper and spoon the meringue mixture onto the tray, creating small dollops or a rough circle. Bake in the preheated oven for about 1.5 hours, or until the meringues are crisp and can easily be lifted from the parchment.
Once baked, turn off the oven and leave the meringues inside to cool completely.
3. Whip the Cream: In a separate bowl, pour the heavy cream and add the vanilla extract. Using a hand mixer or whisk, beat the cream until soft peaks form. Be careful not to overwhip, as you want the cream to remain light and fluffy.
4. Prepare the Strawberries: In a bowl, combine the halved strawberries with a sprinkle of sugar to enhance their natural sweetness. Allow them to sit for about 10 minutes, which will help the juices to release and create a lovely syrup.
5. Assemble the Eton Mess: Once the meringues are cooled, break them into bite-sized pieces. In a large serving bowl or individual glasses, layer the broken meringue pieces, whipped cream, and strawberries. You can create multiple layers for a more visually appealing presentation.
6. Garnish and Serve: Finish the dessert with a few mint leaves on top for an extra touch of freshness. Serve immediately to enjoy the contrast of textures and flavors.
Extra Tips
For the best results, make sure your mixing bowls and equipment are completely clean and free from any grease, as this can affect the meringue’s ability to whip up properly.
You can also experiment with other fruits such as raspberries or blueberries for a different flavor profile. Additionally, if you’re serving Eton Mess at a gathering, prepare the meringues and whipped cream in advance, but assemble the dessert just before serving to maintain the crunchy texture of the meringue.
Enjoy your delightful creation!