

I’ve discovered that the Mediterranean diet is a wonderful blend of flavors and health benefits that keep me coming back for more. From a refreshing Greek salad to a cozy chickpea stew, these dishes are a breeze to prepare and satisfy my cravings week after week. If you’re looking to refresh your meal routine with some wholesome and delicious options, you won’t want to miss what’s coming next.
Greek Salad With Feta and Olives
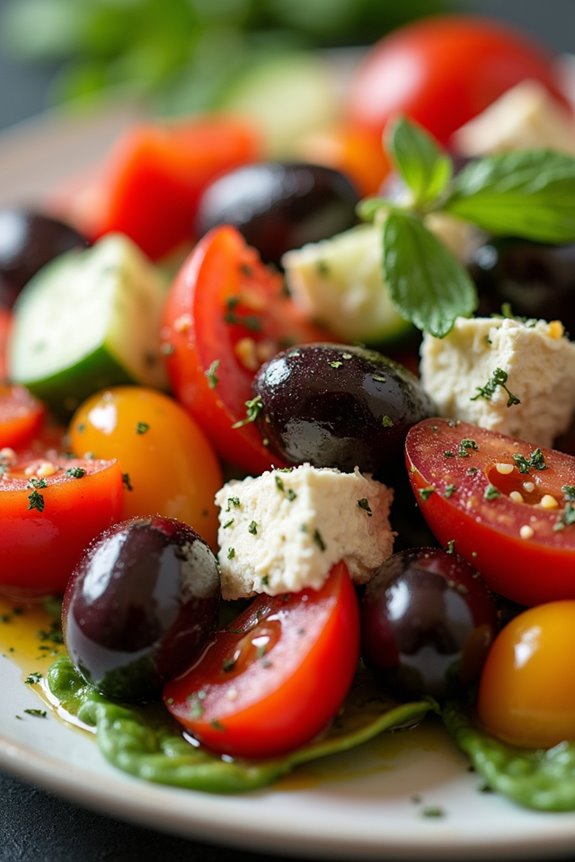
Greek Salad, known as Horiatiki in Greece, is a revitalizing and vibrant dish that perfectly embodies the flavors of the Mediterranean. This salad isn’t only easy to prepare but also packed with nutrients, making it an excellent choice for a light lunch or a side dish for dinner.
The combination of crisp vegetables, briny olives, and creamy feta cheese creates a delightful balance of textures and tastes that will transport you straight to the sun-kissed shores of Greece.
To make an authentic Greek Salad, you’ll want to use the freshest ingredients available. This means ripe tomatoes, crunchy cucumbers, sweet bell peppers, and high-quality feta cheese. The simplicity of the recipe allows the ingredients to shine, highlighting the natural flavors that define Mediterranean cuisine.
Serve this salad chilled, drizzled with olive oil and a sprinkle of oregano, for a dish that’s both satisfying and healthy.
Ingredients (Serves 4-6)
- 4 large ripe tomatoes, diced
- 1 large cucumber, peeled and sliced
- 1 bell pepper (red or green), diced
- 1 small red onion, thinly sliced
- 1 cup Kalamata olives, pitted
- 200g (7 oz) feta cheese, crumbled or in large chunks
- 1/4 cup extra-virgin olive oil
- 1 tablespoon red wine vinegar (optional)
- 1 teaspoon dried oregano
- Salt and pepper to taste
Cooking Instructions
- Prepare the Vegetables: Start by washing all the vegetables thoroughly. Dice the tomatoes into bite-sized pieces, peel and slice the cucumber, and chop the bell pepper. For the onion, slice it thinly to guarantee that it blends well with the other flavors. Place all the chopped vegetables into a large salad bowl.
- Add the Olives: Once the vegetables are ready, add the Kalamata olives to the bowl. These olives will add a rich, briny flavor that complements the freshness of the vegetables.
- Incorporate the Feta Cheese: Next, crumble or cut the feta cheese into large chunks and add it to the salad. The creamy texture of the feta provides a delightful contrast to the crunchy vegetables and the salty olives.
- Dress the Salad: In a small bowl, whisk together the extra-virgin olive oil, red wine vinegar (if using), dried oregano, salt, and pepper. Pour this dressing over the salad ingredients in the large bowl.
- Toss Gently: Using a large spoon or salad tongs, gently toss the salad to combine all the ingredients. Be careful not to break up the feta too much; you want to maintain some larger chunks for texture.
- Chill and Serve: Let the salad sit for about 10-15 minutes to allow the flavors to meld together. Serve chilled or at room temperature for the best taste.
Extra Tips
For the best results, use high-quality extra-virgin olive oil and authentic Greek feta cheese, as these ingredients greatly enhance the flavor of the salad.
Feel free to customize your Greek Salad by adding other ingredients like capers, artichokes, or even grilled chicken for added protein. This salad can also be made ahead of time; just wait to add the dressing until shortly before serving to keep the vegetables crisp.
Lemon Herb Grilled Chicken

Lemon Herb Grilled Chicken is a delightful Mediterranean dish that brings the vibrant flavors of the Mediterranean right to your grill. This recipe is perfect for summer gatherings or weeknight dinners, as it’s both quick to prepare and packed with fresh, zesty flavors. The combination of lemon juice, herbs, and garlic creates a marinade that tenderizes the chicken while infusing it with a revitalizing taste.
Pair it with a side of grilled vegetables or a light salad, and you have a complete meal that’s sure to impress. Grilling chicken not only adds a smoky flavor but also locks in the moisture, making each bite juicy and succulent. This Lemon Herb Grilled Chicken isn’t only easy to make but also healthy, allowing you to enjoy a delicious dish without the guilt.
Whether you’re a seasoned grill master or a beginner, this recipe will guide you through the process, guaranteeing that your chicken turns out perfectly every time.
Ingredients (Serving Size: 4-6 people)
- 4-6 boneless, skinless chicken breasts
- 1/4 cup olive oil
- 1/4 cup fresh lemon juice (about 2 lemons)
- 3 cloves garlic, minced
- 2 teaspoons dried oregano
- 1 teaspoon dried thyme
- 1 teaspoon salt
- 1/2 teaspoon black pepper
- 1 tablespoon fresh parsley, chopped (for garnish)
- Lemon wedges (for serving)
Cooking Instructions
- Prepare the Marinade: In a medium bowl, whisk together the olive oil, lemon juice, minced garlic, oregano, thyme, salt, and black pepper until well combined. This marinade won’t only flavor the chicken but also help to tenderize it.
- Marinate the Chicken: Place the chicken breasts in a large resealable plastic bag or a shallow dish. Pour the marinade over the chicken, making sure that each piece is well coated. Seal the bag or cover the dish with plastic wrap and refrigerate for at least 30 minutes, or up to 4 hours for a more intense flavor.
- Preheat the Grill: While the chicken is marinating, preheat your grill to medium-high heat. This step is vital for achieving those beautiful grill marks and making sure of even cooking.
- Grill the Chicken: Remove the chicken from the marinade, allowing any excess marinade to drip off. Place the chicken breasts on the hot grill. Cook for about 6-7 minutes on one side, then flip and grill for another 6-7 minutes on the other side, or until the internal temperature reaches 165°F (75°C).
- Rest the Chicken: Once cooked, remove the chicken from the grill and let it rest for about 5 minutes. This resting period allows the juices to redistribute within the meat, making it more tender and flavorful.
- Serve: Slice the chicken if desired, garnish with chopped parsley, and serve with lemon wedges on the side for an extra burst of citrus flavor.
Extra Tips
For the best results, make sure to marinate the chicken for at least 30 minutes, but if you have time, let it marinate longer to enhance the flavors further. You can also experiment with different herbs, such as basil or rosemary, to customize the taste to your liking.
Additionally, make certain your grill grates are clean and well-oiled before cooking to prevent sticking. Enjoy your Lemon Herb Grilled Chicken with your favorite sides for a complete Mediterranean experience!
Mediterranean Quinoa Bowl
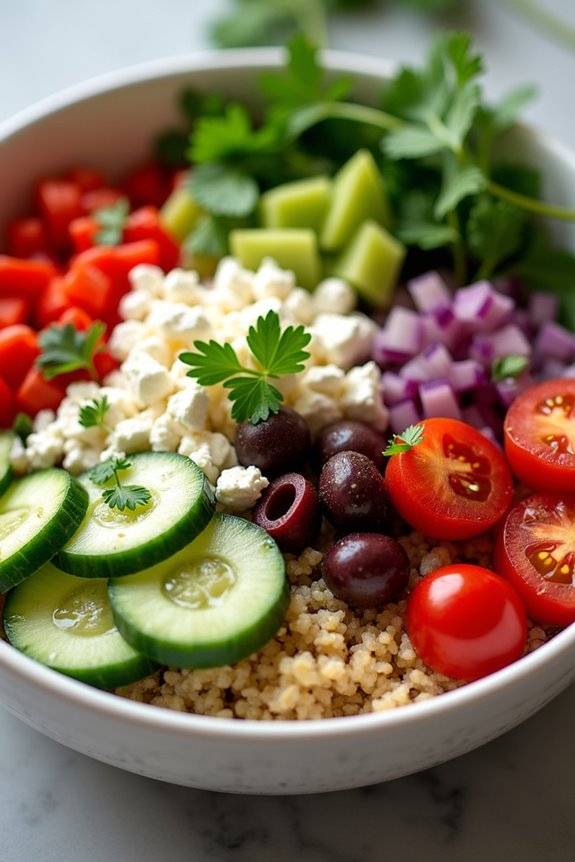
The Mediterranean Quinoa Bowl is a vibrant and nutrient-packed dish that combines the wholesome goodness of quinoa with colorful vegetables and zesty flavors. This meal is perfect for a quick lunch or a light dinner, offering a delightful balance of protein, fiber, and essential vitamins.
With Mediterranean influences, this bowl incorporates ingredients like cherry tomatoes, cucumbers, olives, and feta cheese, all drizzled with a rejuvenating lemon-olive oil dressing.
This recipe isn’t only easy to prepare but also versatile, allowing you to customize it with your favorite vegetables or proteins. Whether you’re a fan of chickpeas, grilled chicken, or simply looking to enjoy a vegetarian option, the Mediterranean Quinoa Bowl will satisfy your taste buds and nourish your body.
Serve it warm or chilled, and enjoy the vibrant flavors that the Mediterranean has to offer.
Ingredients (Serves 4-6)
- 1 cup quinoa
- 2 cups vegetable broth or water
- 1 cup cherry tomatoes, halved
- 1 cucumber, diced
- 1/2 cup red onion, finely chopped
- 1/2 cup Kalamata olives, pitted and sliced
- 1/2 cup feta cheese, crumbled
- 1 bell pepper, diced (any color)
- 1/4 cup fresh parsley, chopped
- 1/4 cup olive oil
- 2 tablespoons lemon juice
- Salt and pepper to taste
Cooking Instructions
- Rinse the Quinoa: Place the quinoa in a fine-mesh strainer and rinse it under cold water for about 1-2 minutes. This step is essential as it removes the saponins, a natural coating that can give quinoa a bitter taste.
- Cook the Quinoa: In a medium saucepan, bring the vegetable broth or water to a boil. Add the rinsed quinoa, reduce the heat to low, cover, and let it simmer for about 15 minutes, or until the quinoa is cooked and the liquid is absorbed. Once done, fluff the quinoa with a fork and set it aside to cool.
- Prepare the Vegetables: While the quinoa is cooking, chop the cherry tomatoes, cucumber, red onion, bell pepper, and parsley. Place all the chopped vegetables in a large mixing bowl, along with the sliced olives and crumbled feta cheese.
- Make the Dressing: In a small bowl, whisk together the olive oil, lemon juice, salt, and pepper until well combined. This dressing will add a bright flavor to the bowl.
- Combine Ingredients: Once the quinoa has cooled slightly, add it to the bowl with the chopped vegetables and feta. Pour the dressing over the top and gently toss everything together until well mixed. Adjust the seasoning as needed.
- Serve: The Mediterranean Quinoa Bowl can be served immediately or refrigerated for about 30 minutes to enhance the flavors. Serve it in individual bowls or on a large platter for sharing.
Extra Tips
When preparing the Mediterranean Quinoa Bowl, feel free to swap out or add ingredients based on your preferences or what you have on hand.
For an extra protein boost, consider adding grilled chicken, shrimp, or chickpeas. Additionally, you can customize the dressing by adding herbs like oregano or basil for more flavor.
This dish is also perfect for meal prep, as it keeps well in the refrigerator for a few days, making it an excellent option for quick, healthy meals throughout the week.
Roasted Vegetable Pita Wraps
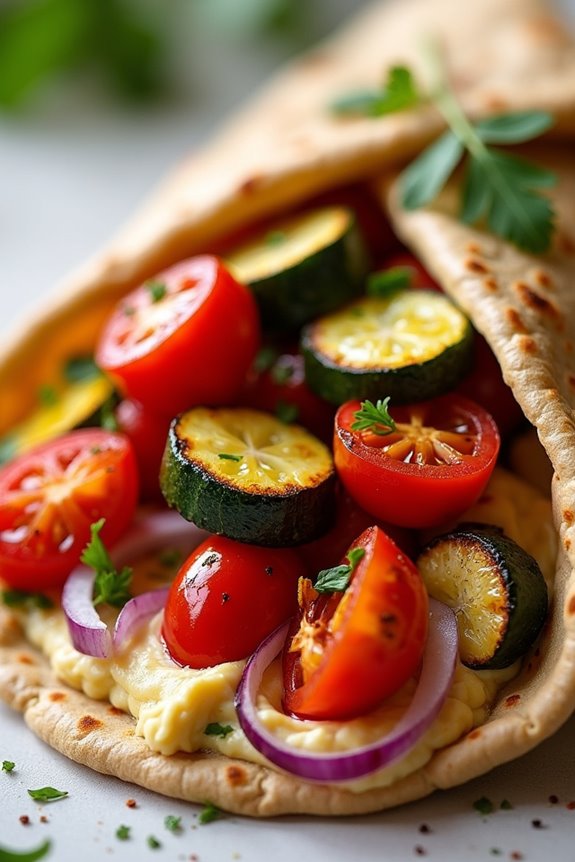
Roasted Vegetable Pita Wraps are a delightful and healthy choice for a meal that can be enjoyed by everyone, regardless of dietary preference. This Mediterranean-inspired dish isn’t only vibrant in color but also packed with nutrients and flavor. The combination of roasted seasonal vegetables, creamy hummus, and fresh herbs wrapped in warm pita bread creates a satisfying and wholesome meal perfect for lunch or dinner.
The beauty of Roasted Vegetable Pita Wraps lies in their versatility; you can easily customize the ingredients based on what you have on hand or your personal preferences. Whether you’re looking to impress guests at a gathering or simply want a quick and nutritious meal for your family, these wraps are sure to please. Served with a side of tzatziki or a light salad, they make for a complete and fulfilling Mediterranean feast.
Ingredients (Serves 4-6)
- 2 medium zucchini, sliced
- 1 red bell pepper, chopped
- 1 yellow bell pepper, chopped
- 1 red onion, cut into wedges
- 2 cups cherry tomatoes, halved
- 3 tablespoons olive oil
- 1 teaspoon dried oregano
- 1 teaspoon garlic powder
- Salt and pepper to taste
- 4-6 whole wheat pita breads
- 1 cup hummus
- Fresh parsley, chopped (for garnish)
Cooking Instructions
- Preheat the Oven: Start by preheating your oven to 425°F (220°C). A hot oven will help to roast the vegetables evenly and enhance their natural sweetness.
- Prepare the Vegetables: In a large mixing bowl, combine the sliced zucchini, chopped red and yellow bell peppers, and red onion wedges. Add the halved cherry tomatoes to the bowl as well.
- Season the Vegetables: Drizzle the olive oil over the vegetables. Sprinkle the dried oregano, garlic powder, salt, and pepper. Toss everything together until the vegetables are evenly coated with the oil and seasonings.
- Roast the Vegetables: Spread the seasoned vegetables in a single layer on a large baking sheet lined with parchment paper. Roast in the preheated oven for 25-30 minutes, stirring halfway through, until the veggies are tender and slightly caramelized.
- Warm the Pita Breads: While the vegetables are roasting, wrap the whole wheat pita breads in aluminum foil and place them in the oven for the last 5-10 minutes of the roasting time to warm them up.
- Assemble the Wraps: Once the vegetables are done, remove them from the oven and let them cool for a few minutes. Carefully unwrap the warm pita breads and spread a generous layer of hummus on each one.
- Fill the Pitas: Spoon the roasted vegetables into each pita, filling them generously.
- Garnish and Serve: Sprinkle fresh chopped parsley over the filled pitas for added flavor and color. Serve immediately while warm.
Extra Tips
To enhance the flavor of your Roasted Vegetable Pita Wraps, consider adding a squeeze of fresh lemon juice over the roasted vegetables before filling the pitas.
You can also experiment with different vegetables based on the season or your cravings—eggplant, carrots, or even sweet potatoes work wonderfully. For a bit of heat, add some sliced jalapeños or a drizzle of your favorite hot sauce.
Enjoy your wraps with a side of yogurt dip or a fresh salad for a complete meal!
Chickpea and Spinach Stew
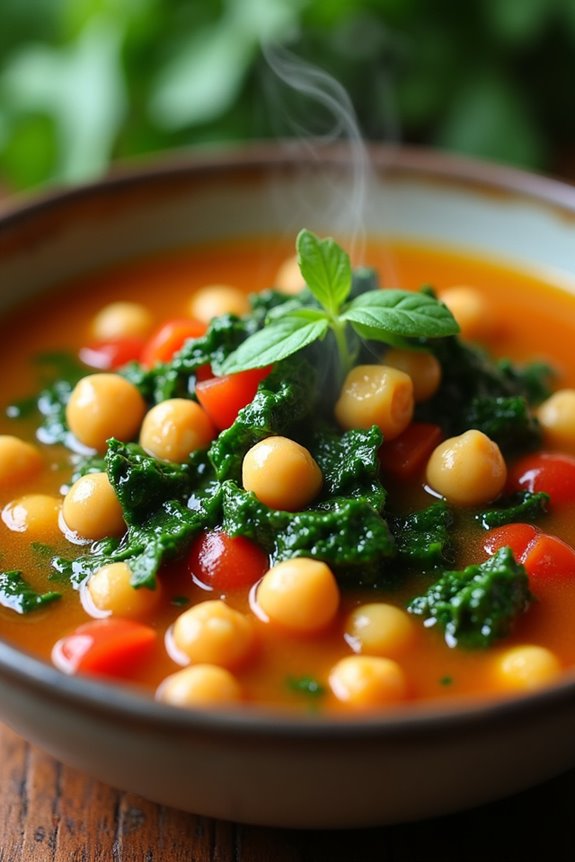
Chickpea and Spinach Stew is a delightful and nutritious dish that embodies the vibrant flavors of the Mediterranean. This hearty stew is packed with protein-rich chickpeas, fresh spinach, and a blend of aromatic spices, making it a perfect option for a wholesome weeknight dinner or a comforting meal on a chilly evening.
The combination of ingredients not only delivers a satisfying taste but also offers numerous health benefits, making it a favorite among both vegetarians and meat-lovers alike.
This stew is incredibly versatile and can be enjoyed on its own or served with crusty bread, rice, or couscous. Its rich flavors and colorful presentation make it an ideal dish for entertaining guests or for a family gathering. Plus, it’s easy to prepare, allowing you to enjoy a homemade meal in no time. Let’s get cooking!
Ingredients (Serves 4-6)
- 2 tablespoons olive oil
- 1 large onion, chopped
- 3 garlic cloves, minced
- 1 teaspoon ground cumin
- 1 teaspoon ground coriander
- 1/2 teaspoon smoked paprika
- 1 can (14 oz) diced tomatoes
- 1 can (15 oz) chickpeas, drained and rinsed
- 4 cups vegetable broth
- 5 cups fresh spinach, roughly chopped
- Salt and pepper to taste
- Fresh lemon juice (optional, for serving)
- Fresh parsley, chopped (for garnish)
Cooking Instructions
1. Sauté the Aromatics: In a large pot or Dutch oven, heat the olive oil over medium heat. Add the chopped onion and sauté for about 5-7 minutes, until the onion becomes translucent and soft.
Stir in the minced garlic and cook for an additional minute, allowing the garlic to become fragrant.
2. Add the Spices: Sprinkle in the ground cumin, ground coriander, and smoked paprika. Stir the mixture well to coat the onions and garlic evenly with the spices.
Cook for another 1-2 minutes, allowing the spices to bloom and release their flavors.
3. Incorporate the Tomatoes and Chickpeas: Pour in the diced tomatoes with their juices and the drained chickpeas.
Stir everything together, ensuring that the chickpeas are well distributed. This will add a rich texture and flavor to the stew.
4. Pour in the Broth: Add the vegetable broth to the pot, bringing the mixture to a gentle boil.
Once boiling, reduce the heat to low and let it simmer uncovered for about 15-20 minutes. This allows the flavors to meld together and the stew to thicken slightly.
5. Add the Spinach: Gently fold in the chopped spinach, stirring until it wilts down and is fully incorporated into the stew.
This should take about 2-3 minutes. Taste the stew and season with salt and pepper as needed.
6. Serve: Once the spinach is wilted and the stew is heated through, remove it from the heat.
Serve the Chickpea and Spinach Stew hot, with a squeeze of fresh lemon juice and a sprinkle of chopped parsley on top for an added burst of flavor.
Extra Tips
For added depth of flavor, consider letting the stew simmer for a longer period, allowing the ingredients to meld beautifully.
You can also customize this dish by adding other vegetables such as bell peppers or zucchini. If you prefer a spicier kick, toss in some red pepper flakes or a chopped chili pepper when sautéing the onions.
Leftovers can be stored in the refrigerator and make for a delicious lunch the next day!
Caprese Pasta Salad
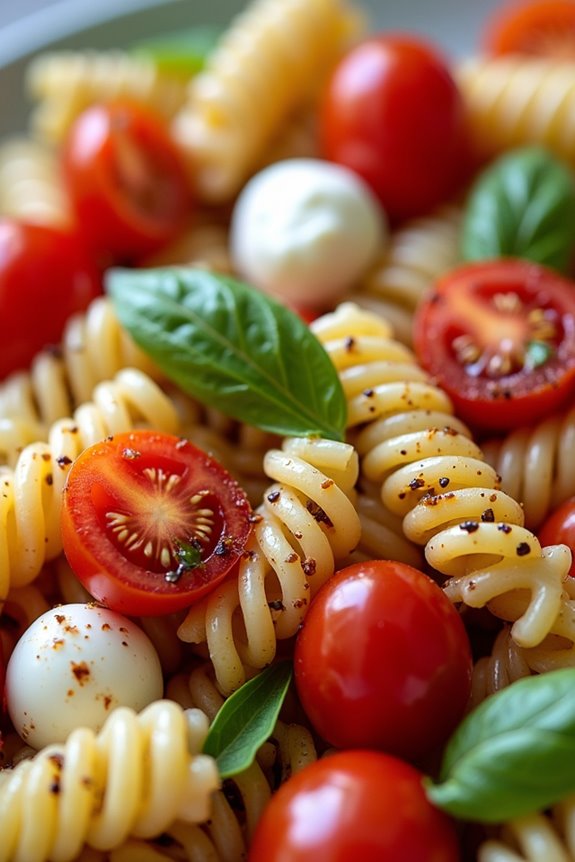
Caprese Pasta Salad is a delightful Mediterranean dish that combines the classic flavors of a traditional Caprese salad with the heartiness of pasta. This vibrant salad features ripe tomatoes, fresh mozzarella, fragrant basil, and a drizzle of balsamic glaze, all tossed together with al dente pasta. Perfect for warm-weather gatherings, picnics, or as a satisfying side dish, this salad showcases the fresh, simple ingredients that the Mediterranean diet is renowned for.
What makes Caprese Pasta Salad truly special is its versatility. You can enjoy it as a light main course or a side dish alongside grilled meats or seafood. The balance of flavors and textures—creamy mozzarella, juicy tomatoes, and aromatic basil—along with the satisfying bite of pasta, makes it a favorite among both kids and adults. With just a few minutes of preparation, you can whip up a delicious dish that will impress your family and friends.
Ingredients (Serves 4-6)
- 12 oz rotini or penne pasta
- 1 pint cherry tomatoes, halved
- 8 oz fresh mozzarella balls, halved
- 1 cup fresh basil leaves, torn
- 1/4 cup extra virgin olive oil
- 2 tbsp balsamic glaze
- Salt and pepper to taste
Cooking Instructions
- Cook the Pasta: Begin by boiling a large pot of salted water. Add the pasta and cook according to package instructions until al dente. Once cooked, drain the pasta and rinse it under cold water to stop the cooking process and cool it down. This prevents the pasta from becoming mushy in the salad.
- Prepare the Vegetables: While the pasta is cooking, wash and prepare the cherry tomatoes. Cut each tomato in half and set them aside. This step allows the tomatoes to release their juices and flavor the salad.
- Mix the Ingredients: In a large mixing bowl, combine the cooled pasta, halved cherry tomatoes, and mozzarella balls. Gently toss the ingredients together to guarantee they’re evenly distributed. This step is essential for making sure every bite is packed with flavor.
- Add the Basil and Dressing: Tear the fresh basil leaves and add them to the pasta mixture. Drizzle the extra virgin olive oil and balsamic glaze over the salad. Season with salt and pepper to taste. Toss everything together gently to coat the pasta and other ingredients in the dressing without breaking the mozzarella.
- Chill and Serve: For the best flavor, cover the salad and let it chill in the refrigerator for at least 30 minutes before serving. This allows the flavors to meld together. Serve cold or at room temperature, garnished with additional fresh basil if desired.
Extra Tips
For an added twist, consider incorporating other ingredients such as sliced olives, diced avocado, or grilled chicken for extra protein. You can also experiment with different types of pasta or cheeses, such as burrata or feta, to give your Caprese Pasta Salad a unique flair.
Shrimp Souvlaki With Tzatziki
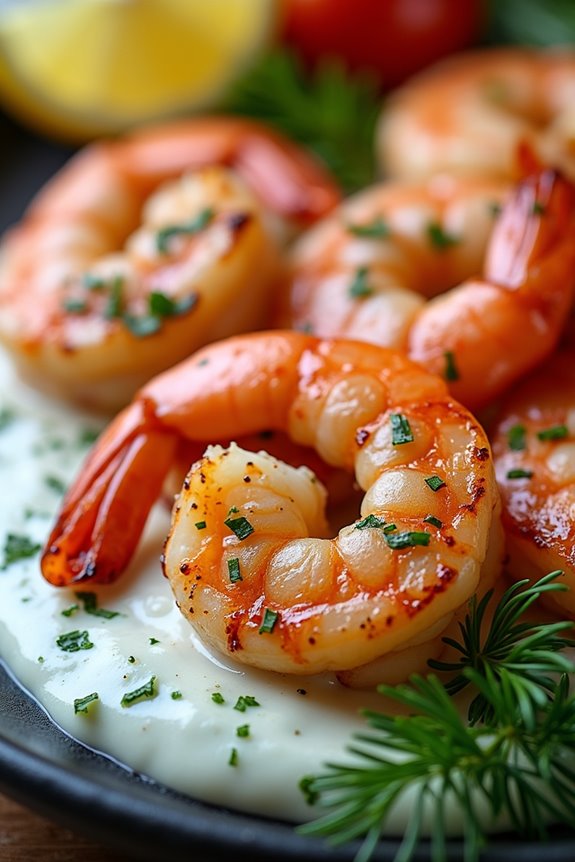
Shrimp Souvlaki with Tzatziki is a delightful Mediterranean dish that brings together the vibrant flavors of grilled shrimp marinated in a mix of aromatic spices, paired perfectly with a revitalizing yogurt-based sauce. This dish isn’t only healthy and light, but it also captures the essence of summer dining with its bright, zesty components.
Ideal for gatherings or a simple family dinner, it can be served on skewers or as a salad topping, making it versatile for any occasion.
This recipe features succulent shrimp that are marinated in olive oil, lemon juice, garlic, and herbs, then grilled to perfection. The accompanying tzatziki sauce, made with creamy Greek yogurt, cucumber, and dill, complements the shrimp with its cool, tangy flavor. Together, these elements create a harmonious balance that’s sure to impress your guests and satisfy your cravings for Mediterranean cuisine.
Ingredients (Serves 4-6)
- 1 pound large shrimp, peeled and deveined
- 1/4 cup olive oil
- 2 tablespoons lemon juice
- 3 cloves garlic, minced
- 1 teaspoon dried oregano
- 1 teaspoon salt
- 1/2 teaspoon black pepper
- 1/2 teaspoon paprika
- 1 cup Greek yogurt
- 1/2 cucumber, grated and drained
- 1 tablespoon fresh dill, chopped
- 1 tablespoon lemon juice (for tzatziki)
- Salt, to taste (for tzatziki)
- Fresh pita bread, for serving (optional)
Cooking Instructions
- Prepare the Shrimp Marinade: In a medium bowl, whisk together the olive oil, lemon juice, minced garlic, oregano, salt, black pepper, and paprika. Confirm that the mixture is well combined to evenly coat the shrimp.
- Marinate the Shrimp: Add the peeled and deveined shrimp to the marinade, tossing them gently to guarantee they’re well covered. Cover the bowl with plastic wrap and let the shrimp marinate in the refrigerator for at least 30 minutes, but no longer than 2 hours to prevent the shrimp from becoming too mushy.
- Make the Tzatziki Sauce: While the shrimp is marinating, prepare the tzatziki sauce. In a separate bowl, combine the Greek yogurt, grated cucumber, dill, lemon juice, and a pinch of salt. Mix well until all ingredients are fully incorporated. Adjust the salt to taste and set the tzatziki sauce aside in the refrigerator to chill.
- Preheat the Grill: Preheat your grill or grill pan to medium-high heat. If using wooden skewers, make sure to soak them in water for about 30 minutes beforehand to prevent burning.
- Skewer the Shrimp: Thread the marinated shrimp onto the skewers, leaving a little space between each shrimp for even cooking. If you prefer, you can also grill the shrimp directly without skewering them.
- Grill the Shrimp: Place the skewered shrimp on the preheated grill. Cook for about 2-3 minutes on each side or until the shrimp turn pink and opaque, indicating they’re fully cooked. Be careful not to overcook them, as shrimp can become tough.
- Serve: Once cooked, remove the shrimp from the grill and let them rest for a couple of minutes. Serve the shrimp souvlaki with the chilled tzatziki sauce and warm pita bread if desired.
Extra Tips
For added flavor, consider adding a splash of white wine to the shrimp marinade or incorporating other herbs like parsley or mint for a different twist.
Make sure to drain the grated cucumber well to avoid a watery tzatziki. If you don’t have a grill, a stovetop grill pan or broiler works well too.
Finally, feel free to customize the shrimp with additional vegetables on the skewers, such as bell peppers or cherry tomatoes, for a colorful presentation. Enjoy your Mediterranean feast!
Lentil and Feta Salad
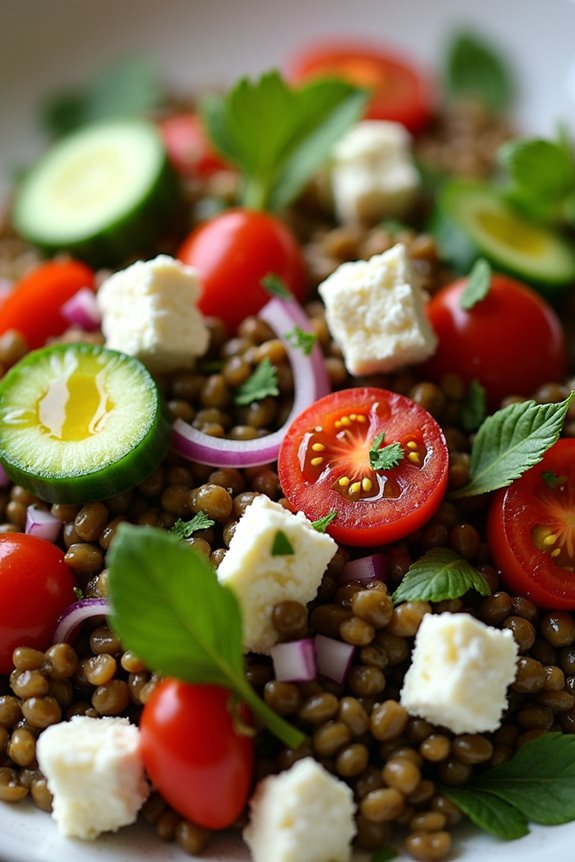
Lentil and Feta Salad is a rejuvenating and nutritious dish that beautifully combines the earthy flavors of lentils with the tangy creaminess of feta cheese. This salad isn’t only rich in protein and fiber but also packed with vitamins and minerals, making it a perfect addition to any meal.
It’s ideal as a light lunch, a side dish for dinner, or even a filling snack. The vibrant colors and textures of the vegetables make it visually appealing, ensuring it’s a hit among family and friends.
This Mediterranean-inspired salad is easy to prepare and can be customized to suit your taste. Whether you prefer it with extra herbs or a dash of lemon juice for added brightness, this dish can be adapted to be your own.
The combination of lentils, fresh vegetables, and feta creates a harmony of flavors that’s both satisfying and healthy. Serve it chilled or at room temperature for a delightful meal that’s sure to impress.
Ingredients (serving size: 4-6 people)
- 1 cup dried green or brown lentils
- 4 cups water
- 1 medium red onion, finely chopped
- 1 cucumber, diced
- 1 bell pepper (red or yellow), diced
- 1 cup cherry tomatoes, halved
- 1 cup feta cheese, crumbled
- 1/4 cup fresh parsley, chopped
- 1/4 cup olive oil
- 2 tablespoons red wine vinegar
- 1 teaspoon Dijon mustard
- Salt and pepper to taste
- Optional: 1 teaspoon dried oregano or fresh basil
Cooking Instructions
- Cook the Lentils: Rinse the lentils thoroughly under cold water. In a pot, combine the lentils and 4 cups of water. Bring to a boil, then reduce the heat and let it simmer uncovered for about 20-25 minutes, or until the lentils are tender but still hold their shape. Drain and allow to cool.
- Prepare the Vegetables: While the lentils are cooking, chop the red onion, cucumber, bell pepper, and cherry tomatoes into bite-sized pieces. Place them in a large mixing bowl.
- Make the Dressing: In a small bowl or jar, whisk together the olive oil, red wine vinegar, Dijon mustard, salt, pepper, and optional dried oregano or basil. Taste and adjust seasoning if necessary.
- Combine Ingredients: Once the lentils have cooled, add them to the bowl with the chopped vegetables. Crumble the feta cheese on top and pour the dressing over the mixture.
- Toss and Serve: Gently toss all the ingredients together until well combined. If desired, let the salad sit for about 15 minutes to allow the flavors to meld before serving.
Extra Tips
For an extra kick, consider adding chopped olives or sun-dried tomatoes to the salad. You can also substitute the feta with goat cheese for a different flavor profile.
This salad can be made ahead of time and stored in the refrigerator for up to two days, making it a convenient option for meal prep. Finally, feel free to experiment with the herbs and spices based on your preferences, as this salad is versatile and can accommodate various flavors.
Enjoy your healthy and delicious Lentil and Feta Salad!
Mediterranean Stuffed Peppers

Mediterranean Stuffed Peppers are a vibrant and flavorful dish that brings together the essence of Mediterranean cuisine. These bell peppers are filled with a savory mixture of rice, vegetables, and aromatic spices, making them a perfect option for a wholesome meal. They aren’t only visually appealing but also provide a balance of nutrients, making them a great choice for both vegetarians and meat lovers when you customize the filling as desired.
The beauty of this dish lies in its versatility. You can adapt the filling based on your preferences or dietary needs by adding ingredients like ground meat or different grains. Not only are stuffed peppers a great way to use up leftover ingredients, but they also make for an impressive presentation at dinner parties or family gatherings. Serve them with a side salad and some crusty bread for a complete Mediterranean experience.
Ingredients (Serves 4-6):
- 4-6 large bell peppers (any color)
- 1 cup cooked rice (white or brown)
- 1 can (15 oz) chickpeas, drained and rinsed
- 1 medium onion, diced
- 2 cloves garlic, minced
- 1 medium zucchini, diced
- 1 medium tomato, diced
- 1 teaspoon dried oregano
- 1 teaspoon ground cumin
- 1 teaspoon paprika
- Salt and pepper to taste
- 1/2 cup feta cheese, crumbled (optional)
- Olive oil for drizzling
- Fresh parsley for garnish (optional)
Cooking Instructions:
- Prepare the Peppers: Preheat your oven to 375°F (190°C). Cut the tops off the bell peppers and remove the seeds and membranes. Place the peppers upright in a baking dish and set aside.
- Cook the Filling: In a large skillet, heat a tablespoon of olive oil over medium heat. Add the diced onion and sauté until it becomes translucent, about 3-4 minutes. Stir in the minced garlic and cook for an additional 1-2 minutes until fragrant.
- Add Vegetables and Spices: Incorporate the diced zucchini and tomato into the skillet. Cook for approximately 5 minutes until the zucchini softens. Stir in the cooked rice, chickpeas, oregano, cumin, paprika, salt, and pepper. Mix well and cook for another 2-3 minutes to allow the flavors to meld.
- Fill the Peppers: Carefully spoon the filling mixture into each prepared bell pepper, packing it down gently. If using, sprinkle crumbled feta cheese on top of the filling.
- Bake: Drizzle a little olive oil over the stuffed peppers and cover the baking dish with aluminum foil. Bake in the preheated oven for 25-30 minutes. Remove the foil and bake for an additional 10-15 minutes, or until the peppers are tender and slightly charred.
- Serve: Remove the stuffed peppers from the oven and let them cool for a few minutes. Garnish with fresh parsley if desired and serve warm.
Extra Tips:
When preparing Mediterranean Stuffed Peppers, feel free to customize the filling to suit your taste. You can swap out the chickpeas for ground turkey or beef for added protein, or include other vegetables like spinach or carrots for more variety.
For added flavor, consider mixing in some olives or sun-dried tomatoes. Additionally, if you prefer a bit of a kick, add some crushed red pepper flakes to the filling mixture. Enjoy experimenting with different ingredients to make this dish uniquely yours!
Zaatar-Spiced Roasted Cauliflower
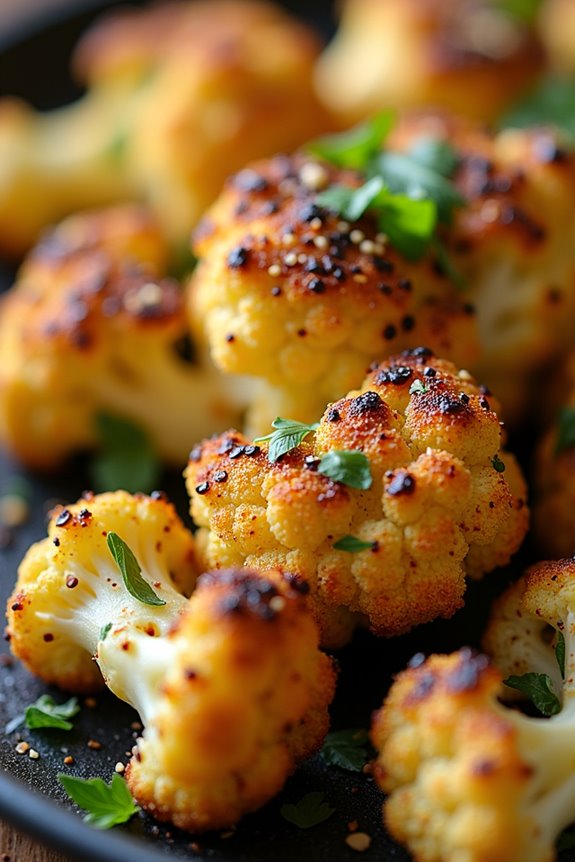
Zaatar-Spiced Roasted Cauliflower is a delicious and healthy dish that celebrates the vibrant flavors of the Mediterranean. This recipe features cauliflower, a versatile vegetable that takes on a wonderful texture when roasted. The zaatar spice blend, which includes thyme, sumac, and sesame seeds, infuses the cauliflower with a unique and aromatic taste, making it a perfect side dish or a light main course.
Roasting the cauliflower not only enhances its natural sweetness but also gives it a beautiful golden-brown color that’s visually appealing. This dish isn’t just a feast for the eyes; it’s also packed with nutrients and is suitable for various dietary preferences, including vegan and gluten-free. Serve it alongside your favorite grains or salads for a complete meal that’s sure to satisfy family and friends.
Ingredients (Serves 4-6):
- 1 large head of cauliflower, cut into florets
- 3 tablespoons olive oil
- 2 tablespoons zaatar spice blend
- 1 teaspoon garlic powder
- 1 teaspoon salt
- 1/2 teaspoon black pepper
- Fresh lemon juice (from 1 lemon)
- Fresh parsley, chopped (for garnish)
Cooking Instructions:
- Preheat the Oven: Begin by preheating your oven to 425°F (220°C). This high temperature is crucial for achieving that perfect roasted texture and caramelization on the cauliflower.
- Prepare the Cauliflower: While the oven is heating, take the large head of cauliflower and cut it into bite-sized florets. Make sure the pieces are roughly the same size to guarantee even cooking.
- Mix the Spices: In a large bowl, combine the olive oil, zaatar spice blend, garlic powder, salt, and black pepper. Stir the mixture until well combined, creating a flavorful marinade for the cauliflower.
- Coat the Cauliflower: Add the cauliflower florets to the bowl with the zaatar mixture. Toss the florets gently until they’re evenly coated with the spice blend. This step guarantees that each bite is packed with flavor.
- Roast the Cauliflower: Spread the coated cauliflower florets in a single layer on a baking sheet lined with parchment paper. Make sure there’s enough space between the florets to allow for proper roasting. Place the baking sheet in the preheated oven and roast for about 25-30 minutes, or until the cauliflower is golden brown and tender, tossing halfway through for even cooking.
- Finish and Serve: Once roasted, remove the cauliflower from the oven and squeeze fresh lemon juice over the top for a burst of acidity. Transfer the cauliflower to a serving platter and garnish with chopped fresh parsley before serving.
Extra Tips:
For an even more intense flavor, consider marinating the cauliflower in the zaatar mixture for about 30 minutes before roasting. This will allow the spices to penetrate the florets more deeply.
Additionally, experimenting with different vegetables in the same spice mix can lead to new and exciting variations of this dish. Don’t hesitate to add a sprinkle of feta cheese or pomegranate seeds on top before serving for an extra touch of Mediterranean flair!
Greek Yogurt Parfait With Honey and Nuts

Greek Yogurt Parfait with Honey and Nuts is a delightful and nutritious dish that embodies the essence of Mediterranean cuisine. This parfait is a perfect balance of creamy, tangy Greek yogurt layered with the sweetness of honey and the crunch of nuts. It’s not only a wholesome breakfast option but also makes for an elegant dessert or a rejuvenating snack. The beauty of this recipe lies in its simplicity, allowing the quality ingredients to shine through.
This recipe is versatile and can be easily customized to suit your taste preferences. You can mix in seasonal fruits, swap out the nuts for your favorites, or even add a sprinkle of cinnamon for an extra layer of flavor. This parfait is great for serving at brunch or even as a make-ahead option for a busy weekday morning. With its vibrant layers and delightful taste, it’s sure to please everyone at your table.
Ingredients (serves 4-6):
- 4 cups of Greek yogurt (plain or flavored)
- 1 cup of honey
- 1 cup of mixed nuts (such as almonds, walnuts, and pistachios), roughly chopped
- 2 cups of granola
- 2 cups of fresh seasonal fruits (such as berries, peaches, or bananas)
- A pinch of cinnamon (optional)
Instructions:
- Prepare Your Ingredients: Gather all of your ingredients and confirm that your nuts are chopped and fruits are washed and sliced as needed. This will make the assembly process much smoother.
- Layer the Yogurt: Start with a clear serving glass or bowl. Spoon about ½ cup of Greek yogurt into the bottom of the glass. Use a spatula to spread it evenly across the bottom.
- Add Honey: Drizzle about 2 tablespoons of honey over the layer of yogurt. This adds a sweet contrast to the tanginess of the yogurt.
- Incorporate Granola: Sprinkle a layer of granola (approximately ¼ cup) on top of the honey. This will add a satisfying crunch and texture to your parfait.
- Add Fruits: Next, add a layer of your chosen fresh seasonal fruits (about ½ cup). This not only adds flavor but also a splash of color to your parfait.
- Repeat the Layers: Repeat the layering process—yogurt, honey, granola, and fruits—until you reach the top of the glass. Aim for at least two to three layers for a visually appealing parfait.
- Finish with Nuts: Once you reach the top, finish with a final sprinkle of chopped nuts and an optional dusting of cinnamon for added flavor.
- Serve or Chill: You can serve the parfaits immediately or chill them in the refrigerator for about 30 minutes to let the flavors meld together.
Extra Tips:
For an even more indulgent parfait, consider adding a dollop of whipped cream on top before serving. You can also experiment with different types of yogurt, such as flavored varieties or even non-dairy options if desired.
If you’re preparing this ahead of time, keep the granola separate until just before serving to maintain its crunchiness. Enjoy your Greek Yogurt Parfait with Honey and Nuts as a deliciously healthy treat!
Spinach and Feta Stuffed Chicken Breasts
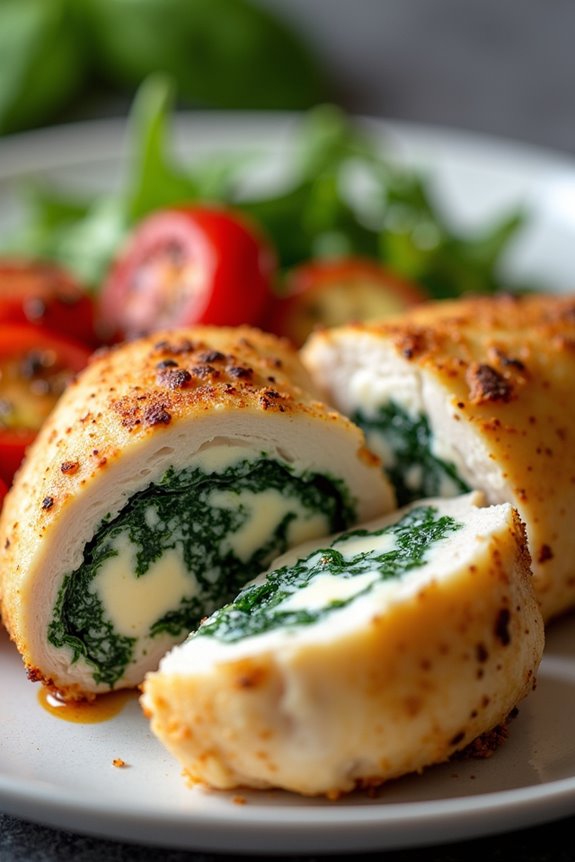
Spinach and Feta Stuffed Chicken Breasts is a delightful Mediterranean dish that combines the savory flavors of fresh spinach and creamy feta cheese, all wrapped in tender, juicy chicken breasts. This recipe isn’t only delicious but also healthy, making it a perfect option for a family dinner or a special occasion.
The combination of spinach and feta creates a rich, flavorful filling that pairs beautifully with the chicken, making each bite a satisfying experience.
Preparing Spinach and Feta Stuffed Chicken Breasts is fairly straightforward, and the result is an impressive meal that can be served with a variety of sides, such as roasted vegetables or a light salad. With a preparation time of about 20 minutes and a cooking time of around 30 minutes, you can have this mouthwatering dish on the table in less than an hour.
Let’s get started on creating this delicious Mediterranean classic!
Ingredients (Serves 4-6 people):
- 4-6 boneless, skinless chicken breasts
- 4 cups fresh spinach, chopped
- 1 cup feta cheese, crumbled
- 1 cup cream cheese, softened
- 2 cloves garlic, minced
- 1 tablespoon olive oil
- 1 teaspoon dried oregano
- 1 teaspoon salt
- ½ teaspoon black pepper
- ½ teaspoon red pepper flakes (optional)
- Toothpicks or kitchen twine for securing chicken
Cooking Instructions:
- Preheat the Oven: Begin by preheating your oven to 375°F (190°C). This guarantees that your chicken will cook evenly and properly when placed in the oven.
- Prepare the Filling: In a large skillet, heat the olive oil over medium heat. Add the minced garlic and sauté for about 1 minute until fragrant. Then, add the chopped spinach and cook until wilted, which should take about 3-4 minutes. Remove from heat and let cool slightly.
- Mix the Filling: In a mixing bowl, combine the cooked spinach and garlic mixture with the crumbled feta cheese, softened cream cheese, dried oregano, salt, black pepper, and red pepper flakes (if using). Mix well until all ingredients are thoroughly combined.
- Prepare the Chicken: Place the chicken breasts on a clean cutting board. Using a sharp knife, carefully slice a pocket into each chicken breast, being careful not to cut all the way through. This pocket will hold the spinach and feta filling.
- Stuff the Chicken: Generously spoon the spinach and feta mixture into each chicken breast pocket. Use toothpicks or kitchen twine to secure the openings, guaranteeing the filling stays inside during cooking.
- Bake the Chicken: Place the stuffed chicken breasts in a greased baking dish. Bake in the preheated oven for about 30-35 minutes, or until the chicken is cooked through and has reached an internal temperature of 165°F (74°C).
- Rest and Serve: Once cooked, remove the chicken from the oven and let it rest for 5 minutes before slicing. This allows the juices to redistribute, guaranteeing the chicken remains moist. Serve warm with your choice of sides.
Extra Tips:
When making Spinach and Feta Stuffed Chicken Breasts, feel free to experiment with the filling ingredients. You can add sun-dried tomatoes, olives, or different herbs for added flavor.
Additionally, if you want a crispy exterior, consider searing the stuffed chicken breasts in a hot skillet with a little olive oil for a few minutes on each side before baking. This will give the chicken a beautiful golden crust while keeping the filling tender and flavorful.
Enjoy your Mediterranean culinary adventure!
Grilled Eggplant and Zucchini Stacks
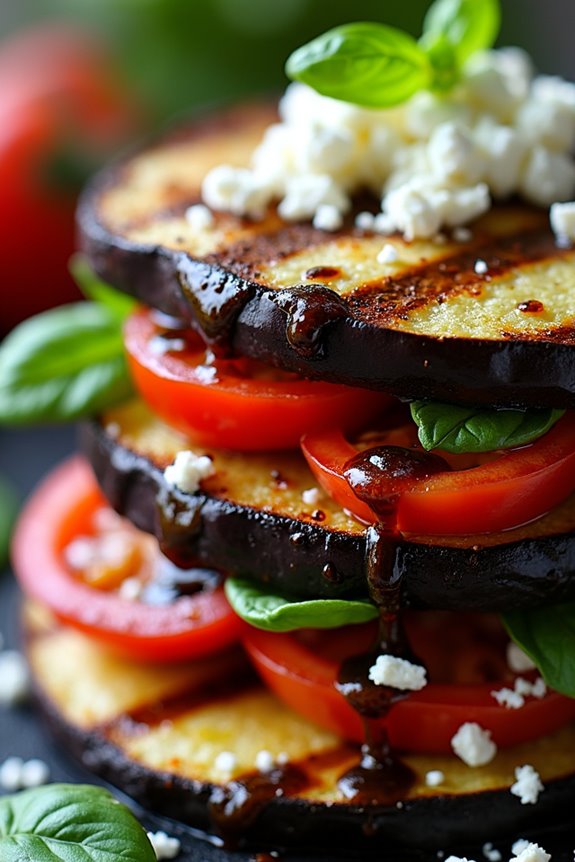
Grilled Eggplant and Zucchini Stacks are a delightful Mediterranean dish that brings together the rich flavors of grilled vegetables with a touch of freshness. This recipe is perfect for summer gatherings or weeknight dinners, showcasing the vibrant colors and textures of eggplant and zucchini. Layered with fresh herbs and a drizzle of balsamic reduction, these stacks aren’t only visually appealing but also packed with nutrients.
As you prepare this dish, the grilling process enhances the natural sweetness of the vegetables while imparting a smoky flavor. This recipe is versatile; you can add your favorite cheeses or herbs to customize it to your taste. Serve it as a main dish or a side, and enjoy the harmonious blend of Mediterranean flavors in every bite.
Ingredients (Serves 4-6)
- 2 medium eggplants, sliced into 1/4-inch rounds
- 2 medium zucchinis, sliced into 1/4-inch rounds
- 1 cup cherry tomatoes, halved
- 1/2 cup fresh basil leaves
- 1/4 cup extra virgin olive oil
- 1 teaspoon salt
- 1/2 teaspoon black pepper
- 1/4 cup balsamic vinegar
- 1/2 cup crumbled feta cheese (optional)
- 1 teaspoon dried oregano (optional)
Cooking Instructions
1. Prepare the Vegetables: Start by washing and slicing the eggplants and zucchinis into 1/4-inch thick rounds. This thickness guarantees they grill evenly and maintain their shape.
Season the slices with salt and let them sit for about 20 minutes to draw out moisture. This step will help reduce bitterness in the eggplants and enhance their flavor.
2. Preheat the Grill: While the vegetables are resting, preheat your grill to medium-high heat. This temperature is ideal for achieving those beautiful grill marks and guaranteeing that the vegetables cook through without becoming mushy.
3. Rinse and Dry: After 20 minutes, rinse the eggplant and zucchini slices under cold water to remove excess salt. Pat them dry with paper towels to make sure they grill well and don’t steam on the grill.
4. Coat with Olive Oil: In a large bowl, toss the eggplant and zucchini slices with olive oil, black pepper, and optional oregano. This step adds flavor and helps prevent sticking to the grill.
5. Grill the Vegetables: Place the eggplant and zucchini slices on the grill. Grill for about 4-5 minutes on each side, or until they’re tender and have nice grill marks. Keep an eye on them to avoid burning.
6. Prepare the Balsamic Reduction: While the vegetables are grilling, pour balsamic vinegar into a small saucepan and bring it to a simmer over medium heat.
Reduce the heat to low and let it simmer for about 10 minutes, or until it thickens slightly. This will create a sweet and tangy drizzle for the finished dish.
7. Assemble the Stacks: Once the vegetables are grilled, begin assembling the stacks. Start with a slice of eggplant, add a layer of zucchini, a few cherry tomato halves, and a sprinkle of fresh basil.
Repeat the layers until you reach the desired height, finishing with a layer of eggplant on top.
8. Garnish and Serve: Drizzle the balsamic reduction over the stacked vegetables and sprinkle with crumbled feta cheese if desired.
Serve warm or at room temperature for a delicious Mediterranean experience.
Extra Tips
When preparing Grilled Eggplant and Zucchini Stacks, feel free to experiment by adding other vegetables such as bell peppers or mushrooms for a different flavor profile.
Additionally, marinating the vegetables in olive oil, garlic, and herbs for a few hours before grilling will enhance their taste even more. For added protein, consider serving these stacks alongside grilled chicken or chickpeas. Enjoy your cooking adventure!
Olive Oil and Herb Flatbread
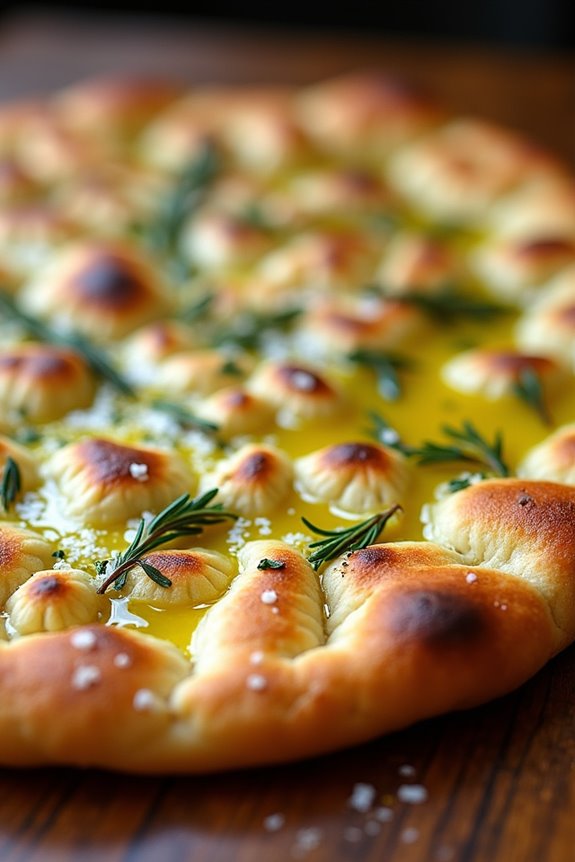
Olive Oil and Herb Flatbread is a delightful addition to any Mediterranean meal, providing a perfect base for dips, a side for soups, or simply enjoyed on its own. This flatbread is infused with aromatic herbs and a rich olive oil flavor, making it both fragrant and delicious. Its soft, chewy texture pairs beautifully with a variety of toppings, from fresh tomatoes and basil to creamy hummus, or it can be served alongside grilled meats for a complete feast.
Making Olive Oil and Herb Flatbread is a straightforward process that yields impressive results. The dough comes together quickly and can be flavored with your choice of herbs, whether you prefer the classic combination of rosemary and thyme, or a zesty mix of oregano and basil. Once baked, this flatbread can be enjoyed warm or at room temperature, making it ideal for gatherings or casual meals.
Ingredients (Serves 4-6):
- 2 cups all-purpose flour
- 1 teaspoon salt
- 1 teaspoon sugar
- 1 teaspoon active dry yeast
- ¾ cup warm water (about 110°F)
- 2 tablespoons olive oil (plus extra for brushing)
- 1 tablespoon fresh rosemary, chopped (or your choice of herbs)
- 1 tablespoon fresh thyme, chopped (or your choice of herbs)
- Sea salt for sprinkling
Cooking Instructions:
- Activate the Yeast: In a small bowl, combine the warm water and sugar, stirring to dissolve. Sprinkle the active dry yeast over the top and let it sit for about 5-10 minutes until it becomes frothy. This step guarantees that the yeast is alive and will help the dough rise.
- Mix the Dry Ingredients: In a large mixing bowl, combine the all-purpose flour and salt. Mix well to guarantee the salt is evenly distributed throughout the flour.
- Combine Ingredients: Once the yeast mixture is frothy, add it to the flour mixture along with the olive oil and chopped herbs. Use a wooden spoon or your hands to mix the ingredients until they form a rough dough.
- Knead the Dough: Transfer the dough onto a lightly floured surface and knead it for about 5-7 minutes, until it’s smooth and elastic. If the dough is too sticky, sprinkle a little more flour as needed.
- Let It Rise: Form the dough into a ball and place it in a lightly greased bowl, covering it with a clean kitchen towel or plastic wrap. Allow it to rise in a warm area for about 1 hour, or until it has doubled in size.
- Preheat the Oven: While the dough is rising, preheat your oven to 475°F (245°C). If you have a pizza stone, place it in the oven to heat up as well.
- Shape the Flatbread: Once the dough has risen, punch it down to release the air. Divide it into 2-3 equal portions, depending on how thick you want the flatbreads. Roll each portion into a circle or oval shape, about ¼-inch thick.
- Prepare for Baking: Place the shaped flatbreads on a baking sheet lined with parchment paper or onto the preheated pizza stone. Brush the tops with olive oil and sprinkle with sea salt.
- Bake: Bake the flatbreads in the preheated oven for about 10-12 minutes, or until they’re golden brown and puffed up. Rotate the baking sheet halfway through for even cooking.
- Cool and Serve: Remove the flatbreads from the oven and let them cool slightly before slicing. Serve warm or at room temperature with your favorite dips or as a side dish.
Extra Tips:
For a more flavorful flatbread, experiment with different herb combinations or add minced garlic to the dough. You can also top the flatbread with cheese or sliced olives before baking for added flavor.
If you want to make the flatbread ahead of time, you can prepare the dough and store it in the refrigerator for up to 24 hours before shaping and baking. Just be sure to bring it back to room temperature before rolling it out. Enjoy your homemade Olive Oil and Herb Flatbread!