

There’s something truly heartwarming about British desserts that always brings a smile to my face. From the cozy comfort of Sticky Toffee Pudding to the delightful freshness of Eton Mess, these sweet treats are all about creating memories. They’re perfect for bringing people together and adding a touch of sweetness to any gathering. If you’re aiming to impress at your next event, these classic recipes are worth considering. Let’s uncover what makes them so irresistible.
Sticky Toffee Pudding
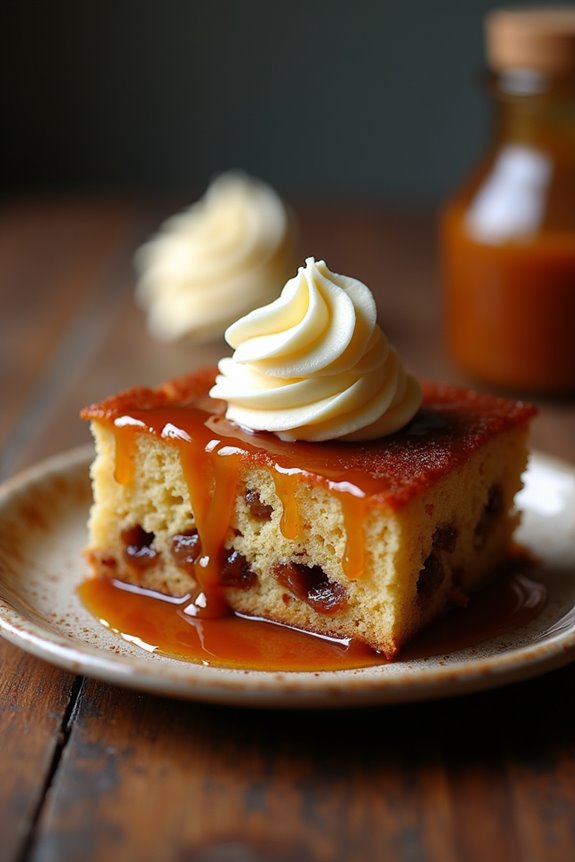
Sticky Toffee Pudding is a quintessential British dessert that has captured the hearts and taste buds of many. This moist sponge cake, made with finely chopped dates, is drenched in a rich toffee sauce and typically served warm with a scoop of vanilla ice cream or a dollop of clotted cream. Its origins can be traced back to the Lake District in England, where it was first introduced in the 20th century.
This indulgent treat is perfect for special occasions or as a comforting dessert after a hearty meal. The beauty of Sticky Toffee Pudding lies in its balance of flavors and textures. The sponge is soft and sticky, while the toffee sauce is sweet and buttery, creating a delightful contrast.
This dessert has become a staple in British pubs and restaurants, often leaving diners craving more. With this recipe, you can recreate this classic dish in your own kitchen, impressing family and friends with its delicious taste and warm, inviting aroma.
Ingredients (Serves 4-6):
- 200g (7 oz) pitted dates, chopped
- 250ml (1 cup) boiling water
- 1 teaspoon baking soda
- 75g (⅓ cup) unsalted butter, softened
- 150g (¾ cup) dark brown sugar
- 2 large eggs
- 1 teaspoon vanilla extract
- 175g (1 ¼ cups) all-purpose flour
- 1 teaspoon baking powder
- Pinch of salt
For the Toffee Sauce:
- 100g (½ cup) unsalted butter
- 150g (¾ cup) dark brown sugar
- 250ml (1 cup) heavy cream
- 1 teaspoon vanilla extract
Cooking Instructions:
1. Prepare the Dates: In a bowl, combine the chopped dates and boiling water. Stir in the baking soda and set aside to cool for about 10-15 minutes. This step helps soften the dates and infuse the water with their natural sweetness.
2. Make the Batter: In a large mixing bowl, cream together the softened butter and dark brown sugar until light and fluffy. This should take about 3-4 minutes. The air incorporated into the mixture will help the pudding rise.
3. Add Eggs and Vanilla: Beat in the eggs one at a time, followed by the vanilla extract, mixing well after each addition. This guarantees that the eggs are fully integrated into the batter.
4. Combine Dry Ingredients: In another bowl, whisk together the flour, baking powder, and salt. Gradually add this dry mixture to the butter and sugar mixture, stirring until just combined. Be careful not to overmix, as this can make the pudding dense.
5. Incorporate the Dates: Fold the cooled date mixture, including the water, into the batter. This will create a rich and sticky texture that characterizes Sticky Toffee Pudding.
6. Prepare the Baking Dish****: Preheat your oven to 180°C (350°F). Grease a baking dish or a set of individual ramekins with butter. Pour the batter into the prepared dish, smoothing the top with a spatula.
7. Bake: Bake in the preheated oven for about 30-35 minutes, or until a skewer inserted into the center comes out clean. The pudding should be firm to the touch yet springy.
8. Make the Toffee Sauce: While the pudding is baking, prepare the toffee sauce. In a saucepan over medium heat, combine the butter, dark brown sugar, and heavy cream. Stir continuously until the butter is melted and the sugar is dissolved, bringing the mixture to a gentle boil.
Allow it to simmer for 5-7 minutes until thickened slightly, then stir in the vanilla extract.
9. Serve: Once the pudding is baked, remove it from the oven and let it cool for a few minutes. Cut into squares or serve directly from the dish. Pour the warm toffee sauce over the pudding and serve immediately with ice cream or cream.
Extra Tips:
For the best results, allow the pudding to rest for a few minutes before slicing, as this will help it set and improve the texture. Additionally, if you want to prepare the dish ahead of time, you can store the baked pudding in the refrigerator and reheat it in the oven, covering it with foil to prevent it from drying out.
The toffee sauce can also be made in advance and stored in the refrigerator; simply warm it up before serving. Enjoy your homemade Sticky Toffee Pudding!
Eton Mess
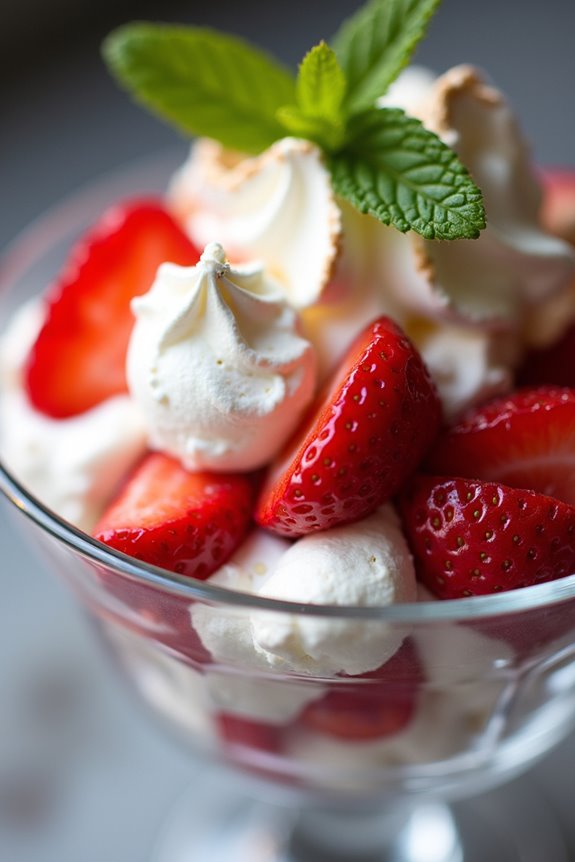
Eton Mess is a delightful British dessert that perfectly captures the essence of summer with its light, airy textures and vibrant flavors. Traditionally served at Eton College’s annual cricket match against Harrow School, this dessert combines crushed meringues, fresh strawberries, and whipped cream to create a colorful and indulgent treat.
It’s incredibly easy to prepare, making it an ideal choice for gatherings, picnics, or simply a sweet indulgence at home. This dessert not only pleases the palate but also offers an appealing presentation. The contrasting textures of crunchy meringue, creamy whipped cream, and juicy strawberries create a symphony of flavors that are sure to impress anyone who tries it.
Eton Mess is highly customizable too; feel free to experiment with different fruits or add a splash of berry sauce for an extra burst of flavor.
Ingredients (serving size: 4-6 people):
- 4 large egg whites
- 250g (about 2 cups) caster sugar
- 500ml (about 2 cups) heavy cream
- 1 tsp vanilla extract
- 400g (about 14 oz) fresh strawberries, hulled and halved
- A handful of fresh mint leaves (for garnish, optional)
Cooking Instructions:
- Preheat the Oven: Begin by preheating your oven to 120°C (250°F). This low temperature is essential for baking the meringues slowly and evenly, ensuring they dry out without browning.
- Make the Meringues: In a clean, dry mixing bowl, whisk the egg whites until soft peaks form. Gradually add the caster sugar, one tablespoon at a time, while continuing to whisk until the mixture becomes glossy and forms stiff peaks. This process should take about 10 minutes with an electric mixer.
- Shape the Meringues: Once the meringue is ready, spoon dollops onto a lined baking sheet or use a piping bag to create different shapes. Aim for a rustic look—there’s no need for perfection. Bake the meringues in the preheated oven for about 1.5 hours, then turn off the oven and let them cool completely inside. This will help them retain their crispness.
- Prepare the Whipped Cream: While the meringues cool, pour the heavy cream into a mixing bowl. Add the vanilla extract and whisk until soft peaks form. Be careful not to over-whip, as you want the cream to remain light and airy.
- Combine the Ingredients: In a large mixing bowl, gently break the cooled meringues into large pieces. Add the halved strawberries and whipped cream, then fold everything together gently. Make sure not to over-mix, as you want to maintain the lovely textures.
- Serve: Spoon the Eton Mess into individual serving bowls or glasses. Garnish with fresh mint leaves if desired, and serve immediately for the best texture.
Extra Tips:
For an added twist, consider incorporating other berries like raspberries or blueberries, or even a drizzle of chocolate sauce for a richer flavor.
If you prefer a less sweet dessert, reduce the amount of sugar in the meringue slightly. Always serve Eton Mess immediately after mixing to keep the meringue crunchy; if prepared in advance, store the components separately and combine just before serving for the best experience.
Enjoy your delightful Eton Mess!
Bread and Butter Pudding
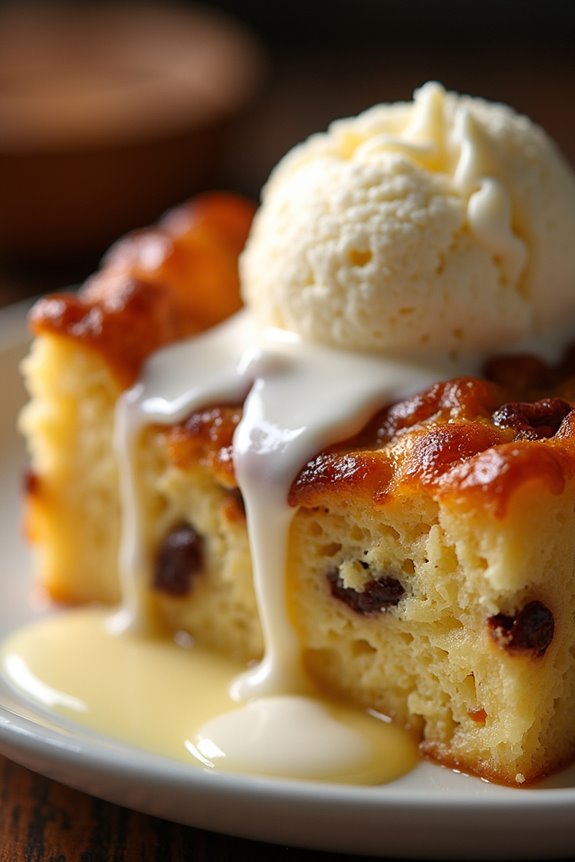
Bread and Butter Pudding is a classic British dessert that beautifully combines the simplicity of stale bread with the richness of custard. This delightful dish is often enjoyed during colder months, as it serves as a comforting reminder of home and family dinners.
The pudding is made by layering slices of buttered bread, typically enriched with ingredients like raisins or currants and a creamy custard mixture, before baking it to golden perfection. The result is a luscious, warm dessert that’s perfect for sharing with loved ones.
This indulgent treat isn’t only a delicious way to use up leftover bread, but it also allows for a variety of personal touches. You can experiment with different types of bread, such as brioche or croissants, and add flavorings like vanilla, nutmeg, or even a splash of whiskey or rum.
Whether served warm with a drizzle of cream or a scoop of ice cream, Bread and Butter Pudding is sure to impress and satisfy.
Ingredients (serves 4-6):
- 6 slices of stale bread (white or brioche)
- 75g unsalted butter, softened
- 100g raisins or currants
- 4 large eggs
- 500ml whole milk
- 150ml double cream
- 100g granulated sugar
- 1 teaspoon vanilla extract
- 1 teaspoon ground nutmeg (optional)
- Zest of 1 lemon (optional)
- A pinch of salt
Cooking Instructions:
- Preheat the Oven: Begin by preheating your oven to 180°C (350°F). This guarantees that your pudding will bake evenly and develop a nice golden crust.
- Prepare the Bread: Take the slices of stale bread and generously spread butter on one side of each slice. If using brioche or other rich bread, you can slice it thicker for a more indulgent pudding.
- Layer the Bread: Cut the buttered bread into triangles or rectangles and place half of the slices, buttered side up, in a greased baking dish. Sprinkle half of the raisins or currants over the bread layer.
- Add More Bread and Fruit: Layer the remaining bread slices on top of the first layer, again buttered side up. Scatter the rest of the raisins or currants over this second layer.
- Make the Custard Mixture: In a large mixing bowl, whisk together the eggs, sugar, milk, double cream, vanilla extract, ground nutmeg (if using), lemon zest (if using), and a pinch of salt. Confirm the mixture is well combined and the sugar has dissolved.
- Pour Custard Over Bread: Carefully pour the custard mixture over the layered bread in the baking dish, making sure to soak all the bread evenly. Allow it to sit for about 10-15 minutes to absorb the custard.
- Bake the Pudding: Place the baking dish in the preheated oven and bake for 30-40 minutes, or until the top is golden brown and the custard is set. You can insert a knife into the center; if it comes out clean, the pudding is ready.
- Serve: Once baked, remove the pudding from the oven and let it cool for a few minutes. Serve warm, optionally accompanied by cream, custard, or ice cream.
Extra Tips: To enhance the flavor of your Bread and Butter Pudding, consider using a mix of different breads for added texture and taste. You can also experiment with adding spices like cinnamon or cardamom to the custard for a unique twist.
If you have extra time, letting the pudding sit for a few hours or overnight in the fridge before baking allows the bread to soak up more of the custard, resulting in an even richer dessert. Enjoy your warm, comforting pudding!
Victoria Sponge Cake
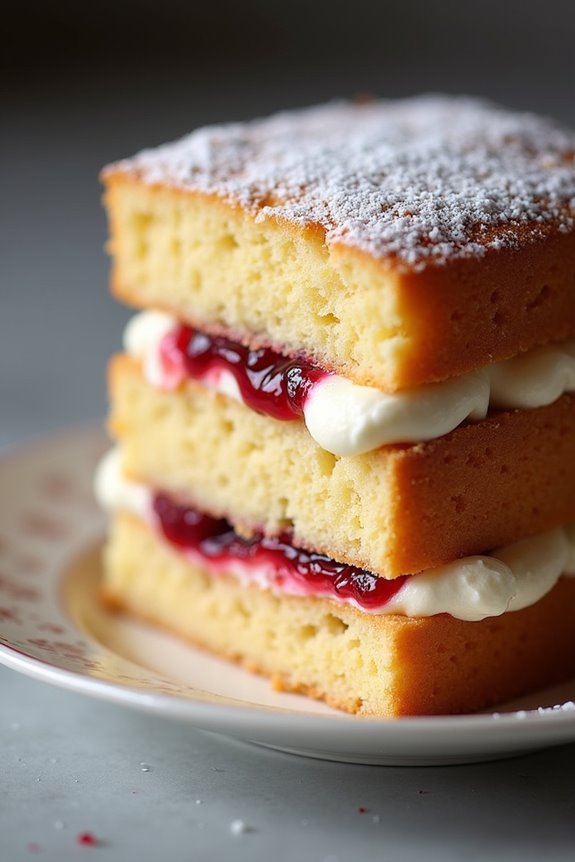
The Victoria Sponge Cake is a quintessential British dessert that has delighted palates for generations. Named after Queen Victoria, who was known to enjoy a slice with her afternoon tea, this cake is characterized by its light and airy texture, making it a perfect treat for any occasion.
The classic version comprises two layers of buttery sponge cake filled with a luscious jam and whipped cream or buttercream, making it not only visually appealing but also a delightful combination of flavors and textures.
Making a Victoria Sponge Cake from scratch is a rewarding experience that requires just a few basic ingredients and a bit of patience. This cake is perfect for birthdays, tea parties, or simply when you want to indulge in something sweet.
With a little bit of practice, you’ll be able to whip up a perfect sponge that’s sure to impress family and friends. So, let’s explore the recipe!
Ingredients (serving size: 4-6 people):
- 200g unsalted butter, softened
- 200g caster sugar
- 4 large eggs
- 200g self-raising flour
- 1 tsp baking powder
- 1 tsp vanilla extract
- A pinch of salt
- 100g strawberry or raspberry jam
- 100ml double cream, whipped
- Icing sugar, for dusting
Cooking Instructions:
- Preheat the Oven: Begin by preheating your oven to 180°C (350°F). This step is essential as it guarantees that your cake bakes evenly and rises properly. Prepare two 20cm (8-inch) round cake tins by greasing them with butter and lining the bottoms with parchment paper.
- Cream the Butter and Sugar: In a large mixing bowl, add the softened butter and caster sugar. Using an electric mixer or a wooden spoon, cream them together until the mixture is light and fluffy. This process incorporates air into the batter, which is vital for achieving a light texture in your sponge cake.
- Add the Eggs: Crack the eggs into a separate bowl and lightly whisk them. Gradually add the eggs to the creamed butter and sugar mixture, one at a time, mixing well after each addition to confirm everything is well combined. If the mixture starts to curdle, add a spoonful of flour to bring it back together.
- Incorporate Dry Ingredients: Sift the self-raising flour, baking powder, and salt into the bowl. Gently fold the dry ingredients into the wet mixture using a spatula or wooden spoon, being careful not to overmix. You want to maintain that airy texture, so mix until just combined. Finally, add the vanilla extract for flavor.
- Bake the Cake: Divide the batter evenly between the two prepared cake tins. Smooth the tops with a spatula to confirm even baking. Place the tins in the preheated oven and bake for 25-30 minutes, or until the cakes are golden brown and a skewer inserted into the center comes out clean.
- Cool the Cakes: Once baked, remove the cakes from the oven and allow them to cool in the tins for about 10 minutes. Then, carefully turn them out onto a wire rack to cool completely. Cooling is vital to prevent the cake from becoming soggy once the filling is added.
- Assemble the Cake: Once the cakes are completely cool, place one layer on a serving plate. Spread the jam evenly over the top of the first cake layer. Then, add the whipped double cream on top of the jam, spreading it out gently. Place the second cake layer on top and lightly press down.
- Finish and Serve: To finish, dust the top of the cake with icing sugar for a lovely presentation. Slice the cake into wedges and enjoy it with a cup of tea or coffee.
Extra Tips: When making a Victoria Sponge Cake, it’s important to use room temperature ingredients for better incorporation and an even texture. You can experiment with different types of jam, such as apricot or blackcurrant, for a twist on the classic flavor profile.
Additionally, to keep your cake moist, don’t overbake it; keep an eye on it towards the end of the baking time. Enjoy your baking!
Banoffee Pie
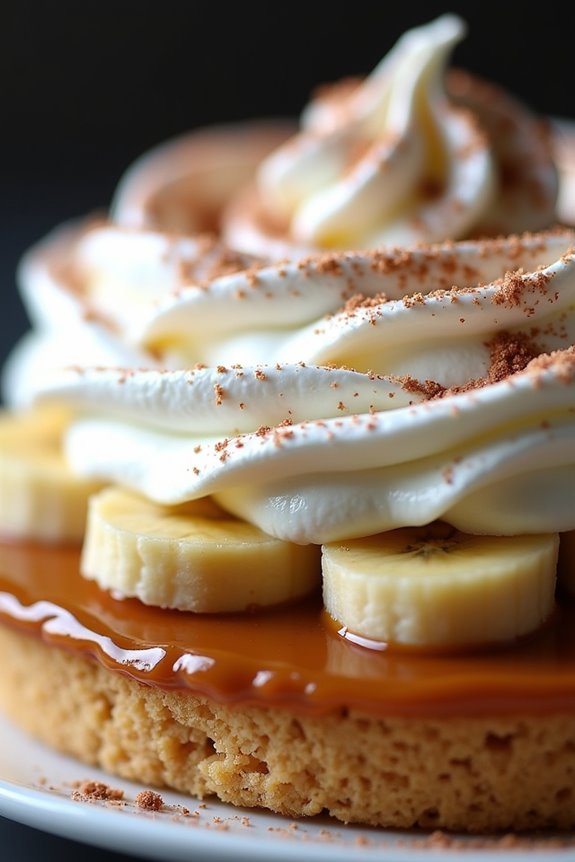
Banoffee Pie is a classic British dessert that beautifully marries the flavors of bananas, toffee, and whipped cream, all nestled in a buttery biscuit base. This indulgent treat isn’t only simple to prepare but also makes for an impressive centerpiece for any gathering. With its delightful layers and rich taste, Banoffee Pie is guaranteed to satisfy any sweet tooth and leave your guests clamoring for seconds.
The origins of Banoffee Pie can be traced back to the 1970s, and it has since become a staple in British dessert culture. The combination of fresh bananas, luscious toffee made from condensed milk, and a light, airy topping of whipped cream creates a delightful contrast of textures and flavors. Whether served at a family dinner, a birthday celebration, or just as a special treat, this pie is sure to impress.
Ingredients (Serves 4-6)
- 200g digestive biscuits
- 100g unsalted butter, melted
- 397g tin of sweetened condensed milk
- 2 large ripe bananas
- 300ml double cream
- 2 tablespoons icing sugar
- 1 teaspoon vanilla extract
- Grated chocolate or cocoa powder, for garnish (optional)
Cooking Instructions
- Prepare the Biscuit Base: Start by crushing the digestive biscuits into fine crumbs. You can do this by placing them in a plastic bag and using a rolling pin or by pulsing them in a food processor. Once crushed, combine the biscuit crumbs with the melted butter in a mixing bowl until the mixture resembles wet sand.
- Form the Base in a Tin: Press the biscuit mixture firmly into the bottom and slightly up the sides of a 9-inch tart or pie tin. Use the back of a spoon or your fingers to create an even layer. Place the tin in the fridge for about 30 minutes to set.
- Make the Toffee Filling: In a saucepan, simmer the sweetened condensed milk over low heat for approximately 30-40 minutes, stirring constantly. The goal is to turn the milk into a thick, golden toffee. Be vigilant, as it can burn easily. Once done, remove from heat and let it cool slightly before spreading it over the biscuit base.
- Layer the Bananas: Slice the ripe bananas and arrange them evenly over the toffee layer, ensuring they cover the entire surface for a balanced flavor in each bite.
- Whip the Cream: In a mixing bowl, combine the double cream, icing sugar, and vanilla extract. Whip the cream using an electric mixer until soft peaks form. Be careful not to overwhip, as it can turn grainy.
- Top the Pie: Gently spread or pipe the whipped cream over the banana layer, creating a fluffy topping. You can use a spatula or a piping bag for a decorative finish.
- Garnish and Chill: For an extra touch, sprinkle grated chocolate or cocoa powder on top of the whipped cream. Place the pie back in the fridge for at least 1 hour to allow all the flavors to meld together and for the pie to set properly.
Extra Tips
When making Banoffee Pie, it’s important to use ripe bananas for the best flavor and texture. If you’re short on time, you can use store-bought caramel sauce instead of making your own toffee, though nothing compares to the homemade version!
For added crunch, consider incorporating a layer of crushed nuts or a sprinkle of caramelized nuts on top before serving. Finally, this pie is best enjoyed fresh, so try to prepare it the same day you plan to serve it for peak taste and texture.
Trifle
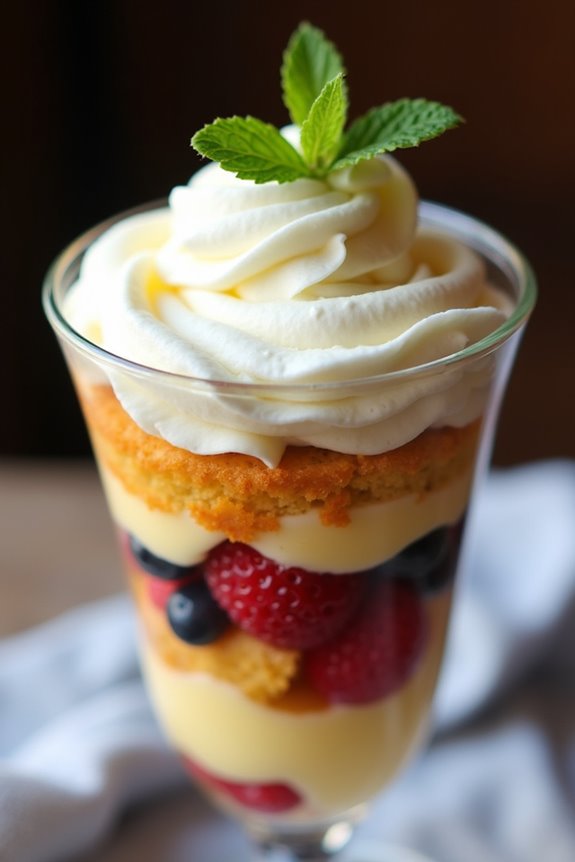
Trifle is a classic British dessert that layers a medley of flavors and textures, resulting in an indulgent treat that’s perfect for any occasion. Traditionally, it consists of sponge cake soaked in sherry or fruit juice, creamy custard, fresh fruit, and whipped cream, all beautifully arranged in a glass dish to showcase its colorful layers.
The beauty of trifle lies in its versatility; you can adapt it with different fruits, cakes, and flavorings to create your unique twist on this delightful dessert.
To prepare a trifle, you can use store-bought components for convenience or make everything from scratch for a more personal touch. Regardless of your approach, the key is to allow the flavors to meld together, ideally letting the trifle sit in the refrigerator for a few hours or overnight. This not only enhances the taste but also provides a stunning presentation when served.
Here’s how you can make a traditional trifle that will serve 4-6 people.
Ingredients
- 1 sponge cake (store-bought or homemade)
- 1 cup sherry or fruit juice (such as orange juice)
- 2 cups custard (homemade or store-bought)
- 1 cup mixed berries (strawberries, raspberries, blueberries)
- 1 cup whipped cream
- Fresh mint leaves (for garnish)
- Optional: chocolate shavings or nuts for decoration
Cooking Instructions
- Prepare the Sponge Cake: If you’re using a homemade sponge cake, bake it according to your recipe. Allow it to cool completely before slicing it into even layers. If using store-bought, simply slice it into layers.
- Soak the Cake: Take each layer of sponge cake and lightly soak it with sherry or fruit juice. This will add moisture and flavor to the cake. Lay the soaked sponge pieces at the bottom of your trifle dish or individual serving glasses.
- Add the Custard: Pour a layer of custard over the soaked sponge cake. Make sure to spread it evenly to cover the cake completely. This creamy layer adds richness and pairs perfectly with the texture of the sponge.
- Layer the Fruits: Add a layer of mixed berries on top of the custard. You can alternate between different types of berries for a vibrant look and variety in flavor. Make sure they’re evenly distributed across the custard.
- Repeat Layers: Repeat the process of layering. Add another layer of soaked sponge, followed by custard and then berries, until you reach the top of your dish. The final layer should be custard topped with berries.
- Top with Whipped Cream: Finish your trifle with a generous layer of whipped cream. You can either spread it smoothly or pipe it for a decorative touch.
- Garnish and Chill: Garnish the top with fresh mint leaves and optional chocolate shavings or nuts. Cover the trifle with plastic wrap and place it in the refrigerator to chill for at least 2 hours or overnight for the best flavor.
Extra Tips
When making trifle, feel free to get creative with the ingredients! You can substitute the sponge cake with ladyfingers or even a chocolate cake for a different flavor profile.
For a non-alcoholic version, simply skip the sherry and use fruit juice instead. Additionally, letting the trifle sit overnight allows the flavors to meld beautifully, resulting in a more cohesive dessert.
When serving, make sure to scoop down to the bottom to get all the lovely layers in each dish, guaranteeing everyone gets a taste of the delightful combination of cake, custard, fruit, and cream.
Spotted Dick
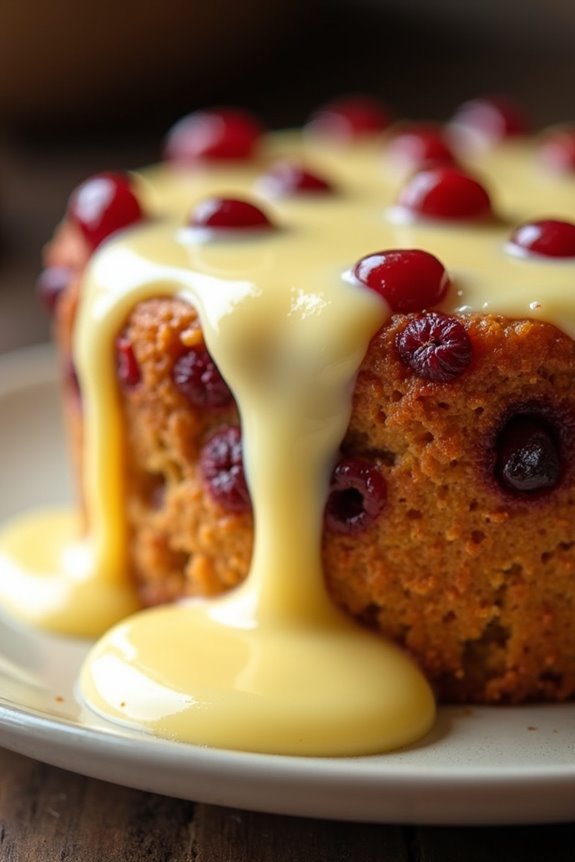
Spotted Dick is a classic British dessert that hails from the Victorian era, known for its rich flavor and delightful texture. The name may elicit a chuckle, but this steamed sponge pudding is a favorite for many, often served with lashings of custard. It gets its unique name from the spots of dried fruit, usually currants or raisins, dispersed throughout the cake-like pudding, creating a charming visual as well as a delicious flavor profile.
Traditionally steamed, Spotted Dick is a comforting dessert that evokes nostalgia and warmth. While it may require some patience for the steaming process, the end result is a moist, flavorful pudding that pairs beautifully with smooth, creamy custard. This delightful dish is perfect for family gatherings or as a special treat to enjoy on a chilly evening.
Ingredients (serving size: 4-6 people)
- 225g (8 oz) self-raising flour
- 115g (4 oz) shredded suet (or softened butter)
- 115g (4 oz) sugar
- 150g (5 oz) currants or raisins
- 1 tsp baking powder
- 1/2 tsp ground nutmeg
- 1/2 tsp ground cinnamon
- 1 large egg
- 300ml (10 fl oz) milk
- Zest of 1 lemon
- A pinch of salt
Cooking Instructions
- Prepare the Steaming Setup: Begin by preparing your steamer. You can use a large pot with a lid and a heatproof bowl or a pudding basin. Place a trivet or an upturned plate in the bottom of the pot to prevent the pudding from touching the bottom. Fill the pot with water until it reaches about halfway up the sides of the bowl or basin. Bring the water to a gentle simmer.
- Mix Dry Ingredients: In a large mixing bowl, sift together the self-raising flour, baking powder, ground nutmeg, ground cinnamon, and a pinch of salt. This step helps to aerate the flour and guarantees the pudding will rise beautifully during cooking.
- Combine Wet Ingredients: In another bowl, beat the egg and add the milk and lemon zest. Mix well until fully combined. If you’re using butter instead of suet, melt it gently before adding it to the wet mixture.
- Incorporate the Ingredients: Gradually add the wet mixture to the dry ingredients, stirring gently to combine. Be careful not to over-mix; you want the batter to be just combined. Fold in the shredded suet (or melted butter) and the currants or raisins, ensuring they’re evenly distributed throughout the batter.
- Pour and Cover: Once the batter is mixed, pour it into your prepared pudding basin or bowl. Cover the top with a piece of parchment paper and then a layer of aluminum foil, securing it tightly around the rim to prevent water from entering during steaming.
- Steam the Pudding: Carefully place the basin into the simmering water in your pot. Cover the pot with a lid and steam for about 1.5 to 2 hours. Check occasionally to ascertain there’s enough water in the pot, adding more boiling water if necessary.
- Check for Doneness: After the steaming time, remove the pudding from the pot and carefully lift off the foil and parchment paper. Insert a skewer into the center of the pudding; it should come out clean if it’s cooked through. If it’s not done, re-cover and steam for an additional 10-15 minutes.
- Serve: Let the pudding cool for a few minutes before turning it out onto a serving plate. Slice into wedges and serve warm with a generous pour of custard.
Extra Tips
For the best flavor and texture, use good-quality suet, or if you prefer a vegetarian option, opt for a high-fat butter. You can also experiment with different dried fruits or add a dash of vanilla extract to enhance the flavor.
Be sure to check the water level in your steamer throughout the cooking process to prevent it from running dry. Leftover pudding can be stored in the refrigerator and gently reheated for another indulgent dessert. Enjoy your Spotted Dick with a dollop of custard for a truly comforting experience!
Bakewell Tart
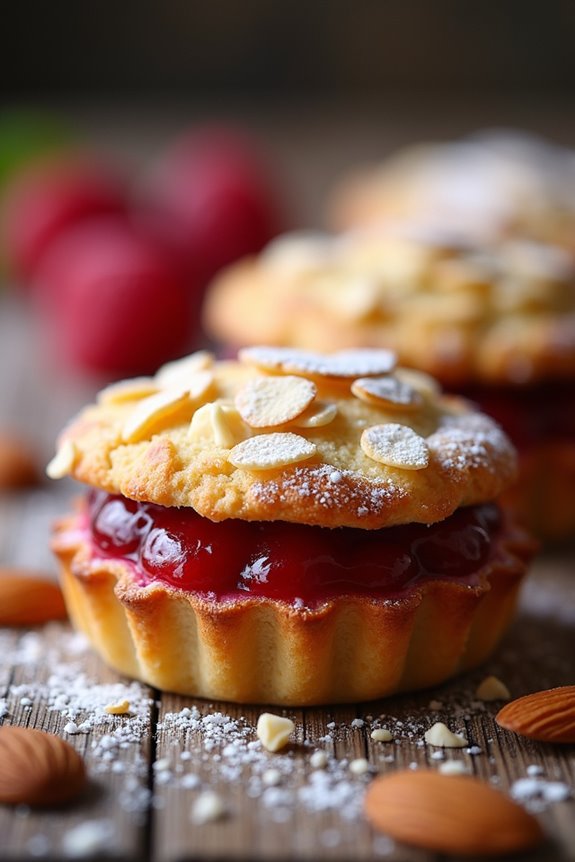
The Bakewell Tart is a quintessential British dessert that hails from the picturesque town of Bakewell in Derbyshire. With its buttery shortcrust pastry, luscious layers of jam, and a fragrant almond frangipane filling, this tart is truly a treat for the senses. Its delightful combination of textures and flavors makes it a perfect dessert for afternoon tea, special occasions, or simply to enjoy at home with family and friends.
Whether you prefer it served warm with a dollop of cream or cold with a cup of tea, Bakewell Tart never fails to impress. This traditional dessert is also versatile, allowing for variations such as the addition of fresh fruits or a drizzle of icing on top. The origins of the Bakewell Tart can be traced back to the 19th century, and it has since become a beloved staple in British baking.
By following this recipe, you’ll be able to create your own Bakewell Tart that captures the essence of this classic dish, making it a delightful addition to your dessert repertoire.
Ingredients (serving size: 4-6 people):
- 225g shortcrust pastry (homemade or store-bought)
- 150g raspberry or strawberry jam
- 125g unsalted butter, softened
- 125g caster sugar
- 2 large eggs
- 125g ground almonds
- 1 tsp almond extract
- 25g plain flour
- A handful of flaked almonds (for topping)
- Icing sugar (for dusting)
Cooking Instructions:
1. Prepare the Pastry Base:
Preheat your oven to 180°C (350°F). Roll out the shortcrust pastry on a lightly floured surface to fit a 23cm (9-inch) tart tin. Carefully line the tin with the pastry, making sure it reaches all the edges. Trim any excess pastry and prick the base with a fork to prevent it from puffing up during baking.
Place in the refrigerator for about 30 minutes to chill.
2. Blind Bake the Pastry:
Once chilled, cover the pastry with baking parchment and fill it with baking beans or rice to weigh it down. Bake in the preheated oven for 15 minutes, then remove the parchment and beans and bake for an additional 5-10 minutes until golden. Remove from the oven and allow to cool slightly.
3. Spread the Jam:
Once the pastry has cooled, spread an even layer of raspberry or strawberry jam over the base, making sure to cover it entirely.
4. Make the Frangipane Filling:
In a mixing bowl, cream together the softened butter and caster sugar until light and fluffy. Add the eggs one at a time, mixing well after each addition. Stir in the ground almonds, almond extract, and plain flour until fully combined and smooth.
5. Assemble the Tart:
Pour the frangipane mixture over the jam layer in the tart shell, smoothing it out with a spatula. Sprinkle flaked almonds evenly on top for extra texture and flavor.
6. Bake the Tart:
Place the assembled tart back in the oven and bake for 25-30 minutes, or until the frangipane is set and golden brown on top. A skewer inserted into the center should come out clean.
7. Cool and Serve:
Allow the Bakewell Tart to cool in the tin for about 10 minutes before transferring it to a wire rack to cool completely. Once cooled, dust with icing sugar before slicing and serving.
Extra Tips:
For an added touch of elegance, consider drizzling a simple icing made from icing sugar and water over the cooled tart or adding a few fresh raspberries on top before serving.
If you want to experiment with flavors, you can substitute almond extract with vanilla extract or add a hint of lemon zest to the frangipane for a revitalizing twist. Always verify your ingredients are at room temperature for the best mixing results, and enjoy this delightful dessert with a hot cup of tea!
Lemon Drizzle Cake
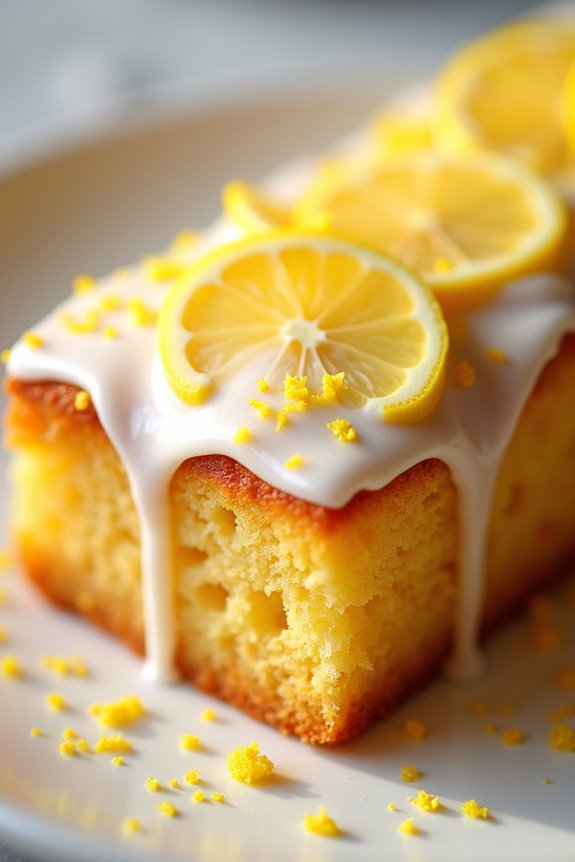
Lemon Drizzle Cake is a quintessential British dessert that stands out with its vibrant citrus flavor and moist texture. This delightful cake is perfect for any occasion, whether it’s a casual afternoon tea or a festive gathering. The bright lemony notes combined with a sweet, sticky glaze create a harmonious balance that will leave everyone reaching for seconds.
With its simple ingredients and straightforward method, this cake is both approachable for novice bakers and satisfying for seasoned chefs.
To achieve the perfect Lemon Drizzle Cake, it’s crucial to use fresh lemons for the best flavor. The zesty addition of lemon zest and juice not only elevates the cake’s taste but also infuses it with a rejuvenating aroma.
Once baked, the cake is drizzled with a tangy lemon syrup that seeps into the sponge, guaranteeing each bite is bursting with lemon goodness. Gather your ingredients and get ready to whip up this classic dessert that’s sure to impress!
Ingredients (serving size: 4-6 people)
- 225g (8oz) unsalted butter, softened
- 225g (8oz) caster sugar
- 4 large eggs
- 225g (8oz) self-raising flour
- Zest of 2 lemons
- Juice of 1 lemon
- 100g (3.5oz) icing sugar (for the drizzle)
- 2-3 tablespoons lemon juice (for the drizzle)
Cooking Instructions
- Preheat the Oven: Begin by preheating your oven to 180°C (350°F). This guarantees that your cake will bake evenly and rise beautifully.
- Prepare the Cake Tin: Grease a 2lb loaf tin with butter and line it with baking parchment. This will prevent the cake from sticking and make it easier to remove once baked.
- Cream Butter and Sugar: In a large mixing bowl, beat together the softened butter and caster sugar until the mixture is light and fluffy. This process incorporates air into the batter, which is essential for a light and airy cake.
- Add Eggs: Gradually add the eggs, one at a time, mixing well after each addition. If the mixture begins to curdle, you can add a tablespoon of flour to help stabilize it.
- Incorporate Dry Ingredients: Sift the self-raising flour into the mixture along with the lemon zest and juice. Gently fold the ingredients together using a spatula until just combined. Be careful not to overmix, as this can lead to a dense cake.
- Bake the Cake: Pour the batter into the prepared loaf tin and smooth the top with a spatula. Bake in the preheated oven for 45-50 minutes, or until a skewer inserted into the center comes out clean. Keep an eye on the cake towards the end of the baking time to prevent over-browning.
- Make the Drizzle Syrup: While the cake is baking, prepare the drizzle syrup by mixing the icing sugar with the lemon juice in a small bowl until smooth. Adjust the consistency by adding more lemon juice or icing sugar as needed.
- Cool and Drizzle: Once the cake is baked, remove it from the oven and allow it to cool in the tin for 10 minutes. Then, transfer it to a wire rack. While the cake is still warm, poke small holes in the top using a skewer and drizzle the syrup evenly over the surface. This allows the syrup to soak into the cake for added moisture and flavor.
- Serve: Allow the cake to cool completely before slicing. Enjoy your Lemon Drizzle Cake with a cup of tea or coffee!
Extra Tips
For an extra burst of flavor, consider adding poppy seeds to the batter or using lemon curd as a filling between layers if you choose to make a layered version.
Additionally, you can adjust the sweetness of the drizzle syrup by varying the amount of icing sugar to suit your taste. Storing the cake in an airtight container will help maintain its moisture, and it can be enjoyed for several days, making it a fantastic make-ahead dessert option!
Chocolate Fondant
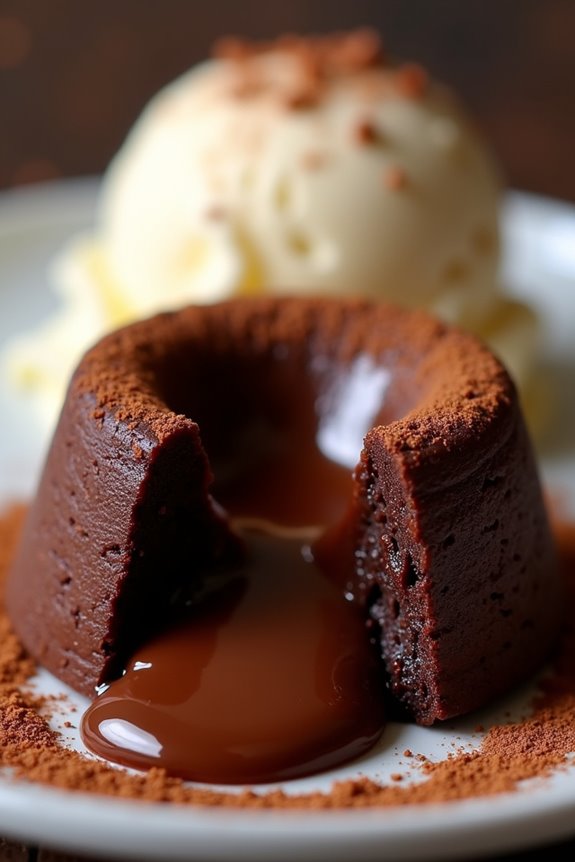
Chocolate Fondant is a decadent British dessert that boasts a rich, molten chocolate center concealed within a delicate outer shell. Often referred to as chocolate lava cake, this indulgent treat is perfect for special occasions or simply to satisfy a chocolate craving.
The beauty of chocolate fondant lies in its simplicity, requiring just a handful of ingredients and minimal preparation time, making it an accessible choice for both novice and experienced bakers alike.
To achieve the perfect balance of a crisp exterior and a gooey interior, it’s crucial to work with high-quality chocolate and guarantee precise baking times. The anticipation as you cut into the fondant and witness the chocolate ooze out is truly delightful. Serve it warm alongside a scoop of vanilla ice cream or a dollop of whipped cream for an exquisite dessert experience that will leave your guests raving.
Ingredients (Serves 4-6):
- 200g dark chocolate (70% cocoa)
- 100g unsalted butter
- 150g caster sugar
- 3 large eggs
- 3 large egg yolks
- 100g plain flour
- A pinch of salt
- Cocoa powder (for dusting)
Cooking Instructions:
- Prepare the ramekins: Preheat your oven to 200°C (180°C fan) and grease 4-6 ramekins with butter. Dust them with cocoa powder to prevent sticking. This step guarantees that your fondant will easily release from the ramekin once baked.
- Melt the chocolate and butter: In a heatproof bowl, combine the dark chocolate and unsalted butter. Place the bowl over a saucepan of simmering water (double boiler method) and stir until fully melted and smooth. Be careful not to let the bowl touch the water to avoid overheating the chocolate.
- Mix the eggs and sugar: In a separate large bowl, whisk together the caster sugar, whole eggs, and egg yolks until the mixture becomes pale and slightly frothy. This aerates the eggs and helps create a light texture in the fondant.
- Combine the mixtures: Gradually pour the melted chocolate and butter mixture into the egg mixture while continuously whisking. This ensures that the chocolate doesn’t cook the eggs. Mix until well blended.
- Add the flour and salt: Gently fold in the plain flour and a pinch of salt into the chocolate mixture using a spatula. Be careful not to overmix, as this could result in a denser fondant.
- Fill the ramekins: Divide the batter evenly among the prepared ramekins, filling them about three-quarters full. This allows space for the fondants to rise without overflowing during baking.
- Bake the fondants: Place the ramekins on a baking tray and bake in the preheated oven for 10-12 minutes. The edges should be firm, while the center remains soft and slightly wobbly. Keep a close eye on them to prevent overbaking.
- Serve: Once baked, remove the fondants from the oven and let them sit for 1 minute. Carefully run a knife around the edges of each ramekin, then invert them onto serving plates. Serve immediately while they’re still warm to enjoy that luscious molten center.
Extra Tips:
For the best results, make sure your ingredients are at room temperature before you begin, as this helps in achieving a smooth batter.
If you’re preparing the fondants ahead of time, you can refrigerate the filled ramekins for up to a day. Just add an extra minute or two to the baking time if baking straight from the fridge.
Experiment with different toppings or sauces, such as raspberry coulis or salted caramel, to elevate your dessert even further!