

When it comes to vegetarian cuisine, I love how plants can be elevated to pure luxury with vibrant flavors and stunning presentations. These 11 European recipes are all about turning vegetables into exquisite dishes, from creamy risottos to elegant tarts. Each one is a delightful exploration of seasonal ingredients that feels both indulgent and satisfying. Get ready to transform your vegetarian dining experience with these sumptuous meals. Let’s uncover the secrets of these lush recipes together!
Truffle Risotto With Wild Mushrooms
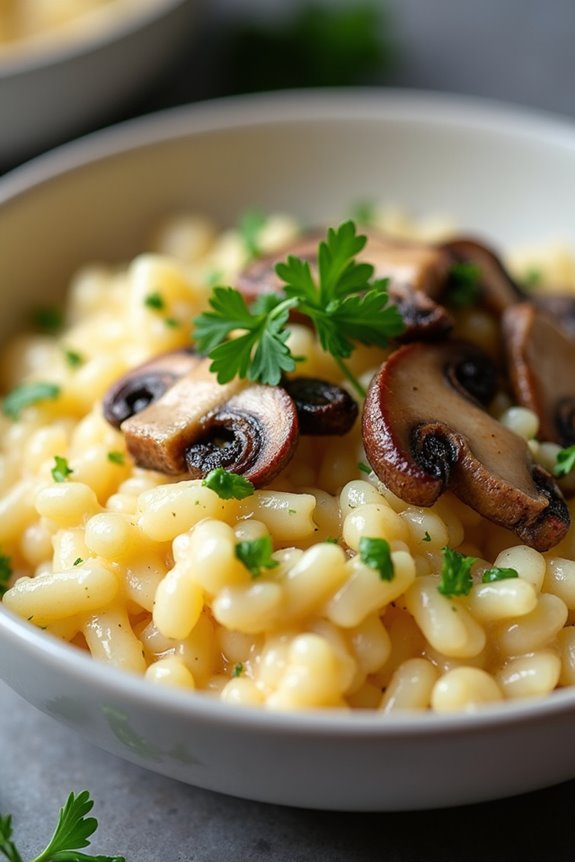
Truffle Risotto with Wild Mushrooms is a luxurious and flavorful vegetarian dish that elevates the classic Italian risotto to a whole new level. The combination of creamy Arborio rice, the earthy flavors of wild mushrooms, and the aromatic essence of truffles creates a dish that’s both comforting and sophisticated.
This recipe is perfect for a special occasion or a cozy dinner at home, and it’s sure to impress your guests with its rich flavors and creamy texture.
Making risotto may seem intimidating, but with a little patience and attention, you’ll find that it’s quite manageable. The key to a perfect risotto is to add the broth gradually, allowing the rice to absorb the liquid slowly, which results in a creamy consistency.
Pair this dish with a crisp salad or a glass of white wine for a complete meal that celebrates the wonderful flavors of vegetarian cooking.
Ingredients (Serves 4-6):
- 1 ½ cups Arborio rice
- 4 cups vegetable broth
- 1 cup dry white wine
- 2 tablespoons olive oil
- 1 small onion, finely chopped
- 2 cloves garlic, minced
- 8 ounces mixed wild mushrooms (such as shiitake, cremini, and oyster), cleaned and sliced
- ½ cup grated Parmesan cheese (or a vegan alternative)
- 2 tablespoons truffle oil
- Salt and pepper to taste
- Fresh parsley, chopped (for garnish)
Cooking Instructions:
1. Prepare the Broth: In a medium saucepan, heat the vegetable broth over low heat. It’s important to keep the broth warm while preparing the risotto, as adding cold broth will slow down the cooking process.
2. Sauté the Aromatics: In a large skillet or saucepan, heat the olive oil over medium heat. Add the chopped onion and sauté for about 5 minutes until it becomes translucent. Then, add the minced garlic and cook for an additional minute, stirring frequently to prevent burning.
3. Cook the Mushrooms: Add the sliced wild mushrooms to the skillet and sauté for about 5-7 minutes, or until they’re tender and slightly browned. Season with salt and pepper to taste.
Once cooked, remove half of the mushrooms from the skillet and set them aside for garnish.
4. Toast the Rice: Add the Arborio rice to the skillet with the remaining mushrooms and stir well to coat the rice with the oil and aromatics. Toast the Rice for about 2-3 minutes, stirring frequently until the grains are slightly translucent around the edges.
5. Deglaze with Wine: Pour in the dry white wine and stir continuously until the wine has mostly evaporated. This will add depth of flavor to the risotto.
6. Add the Broth Gradually: Begin adding the warm vegetable broth, one ladle at a time, to the rice. Stir frequently and wait until the broth is mostly absorbed before adding the next ladle. Continue this process for about 18-20 minutes, or until the rice is creamy and al dente.
7. Finish the Risotto: Once the rice is cooked, remove the skillet from heat. Stir in the grated Parmesan cheese and truffle oil, adjusting seasoning with salt and pepper as needed. The risotto should be creamy and slightly loose in texture.
8. Serve and Garnish: Spoon the risotto into bowls and top with the reserved sautéed mushrooms and a sprinkle of fresh parsley. Drizzle a little extra truffle oil if desired and serve immediately.
Extra Tips:
For an even more intense truffle flavor, consider using a combination of truffle oil and shaved fresh truffles if they’re available.
Additionally, feel free to experiment with different types of mushrooms for unique flavor profiles. Always serve risotto immediately after cooking, as it tends to thicken if left to sit.
If you need to hold it for a short while, stir in a little extra broth to maintain its creamy consistency before serving. Enjoy your culinary creation!
Ratatouille Tart With Goat Cheese

Ratatouille Tart with Goat Cheese is a delightful vegetarian dish that beautifully combines the fresh flavors of summer vegetables with the creamy tang of goat cheese. This dish isn’t only visually stunning but also packed with nutrients and is perfect for a light lunch or dinner. The crust is made from a buttery pastry that cradles a colorful mix of zucchini, eggplant, bell peppers, and tomatoes, all seasoned to perfection. The addition of goat cheese adds richness and a touch of sophistication, making this tart a wonderful centerpiece for any meal.
Preparing this Ratatouille Tart can be a fun culinary adventure, especially if you involve family or friends in the process. The vibrant colors of the vegetables will make the kitchen feel lively, and the aroma of the herbs will surely tempt everyone to the table. Whether served warm or at room temperature, this tart is versatile enough to be enjoyed any time of year. Let’s gather our ingredients and get cooking!
Ingredients (Serves 4-6):
- 1 pre-made tart crust (or homemade pastry crust)
- 1 medium zucchini, thinly sliced
- 1 medium eggplant, thinly sliced
- 1 bell pepper (red or yellow), thinly sliced
- 1 medium tomato, thinly sliced
- 4 ounces goat cheese, crumbled
- 2 tablespoons olive oil
- 1 teaspoon dried thyme
- 1 teaspoon dried basil
- Salt and pepper, to taste
- Fresh basil leaves, for garnish (optional)
Cooking Instructions:
- Preheat the Oven: Begin by preheating your oven to 375°F (190°C). This guarantees that the tart will bake evenly and achieve a nice golden crust by the time it’s finished cooking.
- Prepare the Tart Crust: If using a pre-made tart crust, follow the package instructions for blind baking. If making your own, roll out the pastry and fit it into a tart pan. Prick the bottom with a fork to prevent it from puffing up during baking. Bake for about 10 minutes until lightly golden, then remove from the oven and set aside.
- Prepare the Vegetables: In a large mixing bowl, combine the sliced zucchini, eggplant, bell pepper, and tomato. Drizzle with olive oil, then sprinkle the dried thyme, dried basil, salt, and pepper over the vegetables. Toss everything together until the veggies are well coated in the oil and seasonings.
- Assemble the Tart: Arrange the seasoned vegetables in a circular pattern over the partially baked tart crust, overlapping slightly for an attractive presentation. Crumble the goat cheese evenly on top of the vegetables to add flavor and creaminess.
- Bake the Tart: Place the assembled tart back into the preheated oven and bake for 35-40 minutes, or until the vegetables are tender and the goat cheese is slightly browned. Keep an eye on it in the last few minutes to confirm it doesn’t over-brown.
- Serve: Once baked, remove the tart from the oven and let it cool for a few minutes. Garnish with fresh basil leaves if desired, then slice and serve warm or at room temperature.
Extra Tips:
For added flavor, consider marinating the sliced vegetables in the olive oil and herbs for at least 30 minutes before assembling the tart. This will enhance their taste and provide a more robust flavor profile.
Additionally, feel free to experiment with other seasonal vegetables or cheese varieties to put your unique twist on this classic dish. Enjoy your cooking and the delightful flavors of Ratatouille Tart with Goat Cheese!
Stuffed Bell Peppers With Quinoa and Feta
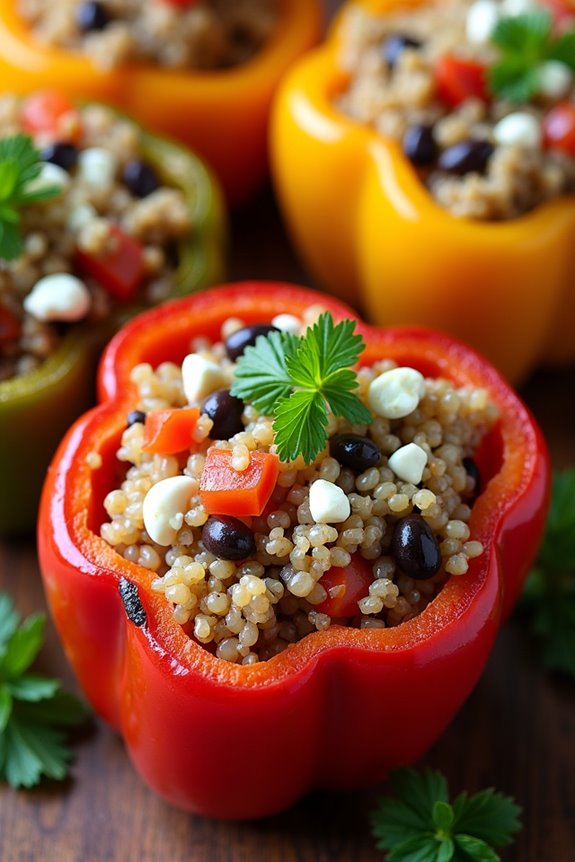
Stuffed bell peppers with quinoa and feta is a delightful, colorful dish that combines wholesome ingredients into a hearty meal. This recipe isn’t only visually appealing but also packed with nutrients, making it an excellent choice for vegetarians and anyone looking to incorporate more plant-based meals into their diet. The combination of quinoa, a complete protein, with the creamy tang of feta cheese creates a satisfying filling that pairs wonderfully with the sweetness of the roasted bell peppers.
This dish is versatile and can be customized with your favorite vegetables or spices. It’s perfect for a family dinner or meal prep, as you can easily adjust the quantities to suit your needs. With a cooking time of about 40 minutes, you can enjoy a delicious and nutritious meal without spending all day in the kitchen. Let’s plunge into the recipe!
Ingredients (serving size: 4-6 people)
- 4 large bell peppers (any color)
- 1 cup quinoa, rinsed
- 2 cups vegetable broth or water
- 1 cup diced tomatoes (canned or fresh)
- 1 medium onion, diced
- 2 cloves garlic, minced
- 1 teaspoon dried oregano
- 1 teaspoon cumin
- Salt and pepper to taste
- 1 cup crumbled feta cheese
- 1 cup cooked black beans (optional)
- Fresh parsley or basil for garnish
Cooking Instructions
- Preheat the Oven: Begin by preheating your oven to 375°F (190°C). This will guarantee that your stuffed peppers will cook evenly and thoroughly once they’re ready to be baked.
- Prepare the Quinoa: In a medium saucepan, combine the rinsed quinoa and vegetable broth (or water). Bring it to a boil over medium heat. Once boiling, reduce the heat to low, cover, and simmer for about 15 minutes or until the quinoa is fluffy and the liquid is absorbed. Remove from heat and let it sit, covered, for an additional 5 minutes.
- Sauté the Vegetables: While the quinoa is cooking, heat a tablespoon of olive oil in a large skillet over medium heat. Add the diced onion and sauté for about 5 minutes until translucent. Then add the minced garlic, diced tomatoes, oregano, cumin, salt, and pepper. Cook for an additional 2-3 minutes, stirring occasionally to combine the flavors.
- Combine Filling Ingredients: Add the cooked quinoa to the skillet with the sautéed vegetables. Stir in the crumbled feta cheese and black beans (if using). Mix everything together until well combined, then remove from heat.
- Prepare the Bell Peppers: While the filling is cooling slightly, slice the tops off the bell peppers and remove the seeds and membranes. Place the peppers upright in a baking dish.
- Stuff the Peppers: Spoon the quinoa and feta mixture into each bell pepper, packing it down gently to make sure they’re well filled. You can top each pepper with extra feta if desired.
- Bake the Peppers: Cover the baking dish with aluminum foil and bake in the preheated oven for 25 minutes. After 25 minutes, remove the foil and bake for an additional 10-15 minutes, or until the peppers are tender and slightly charred at the edges.
- Garnish and Serve: Once cooked, remove the stuffed peppers from the oven. Allow them to cool slightly before garnishing with fresh parsley or basil. Serve warm and enjoy your delicious stuffed bell peppers!
Extra Tips
When making stuffed bell peppers, feel free to experiment with different grains such as brown rice or farro instead of quinoa. You can also add in chopped spinach, corn, or any other vegetables you enjoy.
If you prefer a spicier kick, consider adding some chili flakes or diced jalapeños to the filling mixture. Leftover stuffed peppers can be stored in the refrigerator for up to four days and make for a great reheatable meal!
Creamy Spinach and Ricotta Cannelloni
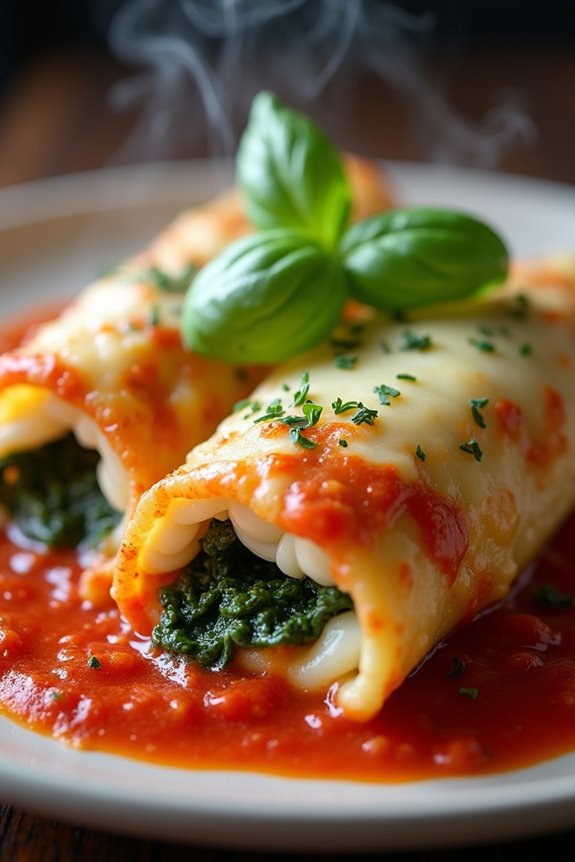
Creamy Spinach and Ricotta Cannelloni is a delightful vegetarian dish that combines the rich flavors of spinach and creamy ricotta cheese, all wrapped up in tender pasta tubes and baked to perfection. This dish isn’t only comforting but also a great way to incorporate more vegetables into your diet. Perfect for family dinners or gatherings, the cannelloni is both satisfying and visually appealing, making it a crowd-pleaser for vegetarians and meat-lovers alike.
The beauty of this recipe lies in its simplicity and the richness of its flavors. The creamy filling, made from fresh spinach and ricotta cheese, is seasoned to enhance its taste and then stuffed into cannelloni shells. Once baked with marinara sauce and a sprinkle of cheese, the result is a bubbling, golden dish that will surely impress your guests.
Let’s explore the ingredients and cooking instructions to create this delicious meal for 4-6 people.
Ingredients:
- 12-15 cannelloni tubes
- 2 cups fresh spinach, chopped
- 1 cup ricotta cheese
- 1 cup shredded mozzarella cheese, divided
- 1/2 cup grated Parmesan cheese
- 2 cloves garlic, minced
- 1 teaspoon olive oil
- 2 cups marinara sauce
- 1 teaspoon dried oregano
- Salt and pepper, to taste
- Fresh basil leaves for garnish (optional)
Cooking Instructions:
- Preheat the Oven: Begin by preheating your oven to 375°F (190°C). This will guarantee that the cannelloni is baked evenly and thoroughly.
- Prepare the Filling: In a medium skillet, heat the olive oil over medium heat. Add the minced garlic and sauté for about 1 minute, until fragrant. Then, add the chopped spinach and cook until it has wilted, about 3-4 minutes. Remove from heat and let it cool slightly before mixing in the ricotta cheese, half of the mozzarella cheese, grated Parmesan cheese, oregano, salt, and pepper. Stir until well combined.
- Stuff the Cannelloni: Using a small spoon or a piping bag, carefully fill each cannelloni tube with the spinach and ricotta mixture. Be generous, but make sure that the filling doesn’t overflow.
- Prepare the Baking Dish: Spread a thin layer (about 1 cup) of marinara sauce on the bottom of a baking dish. This will prevent the cannelloni from sticking and add flavor.
- Arrange the Cannelloni: Place the stuffed cannelloni side by side in the baking dish. Once all the tubes are arranged, pour the remaining marinara sauce over the top, ensuring all the pasta is covered. Sprinkle the remaining mozzarella cheese on top.
- Bake the Cannelloni: Cover the baking dish with aluminum foil and bake in the preheated oven for 25 minutes. After 25 minutes, remove the foil and bake for an additional 10-15 minutes, or until the cheese is melted and bubbly, and the cannelloni is heated through.
- Garnish and Serve: Once baked, remove the dish from the oven and let it cool for a few minutes. Garnish with fresh basil leaves if desired, and serve warm.
Extra Tips: To enhance the flavor of your cannelloni, consider adding a pinch of nutmeg to the ricotta filling for a subtle warmth. You can also add additional vegetables, such as sautéed mushrooms or zucchini, to the filling for extra texture and nutrition. If you prefer a spicier dish, sprinkle some red pepper flakes into the marinara sauce before pouring it over the cannelloni. Enjoy your homemade dish!
Beetroot Carpaccio With Walnuts and Blue Cheese

Beetroot Carpaccio is a vibrant and elegant dish that serves as a perfect starter or side for any meal. This vegetarian recipe showcases the earthy sweetness of thinly sliced beetroots, complemented by the rich, tangy flavors of blue cheese and the crunch of walnuts. The dish isn’t only visually stunning with its deep red hues but also packed with nutrients, making it a healthy choice for any occasion.
Creating Beetroot Carpaccio is a straightforward process that allows the natural flavors of the ingredients to shine. The beets are roasted to amplify their sweetness and then thinly sliced to create delicate layers. Topped with crumbled blue cheese, toasted walnuts, and a simple vinaigrette, this dish is a delightful combination of textures and tastes, ideal for impressing guests or enjoying a revitalizing meal at home.
Ingredients (Serves 4-6):
- 4 medium-sized beetroots
- 100g blue cheese, crumbled
- 75g walnuts, roughly chopped
- 2 tablespoons olive oil
- 1 tablespoon balsamic vinegar
- Salt and pepper, to taste
- Fresh arugula or mixed greens for garnish
- Optional: a sprinkle of fresh herbs (like thyme or parsley)
Cooking Instructions:
- Prepare the Beetroots: Preheat your oven to 200°C (390°F). Wash and trim the beetroots, removing any dirt. Wrap each beetroot individually in aluminum foil and place them on a baking sheet. Roast in the oven for about 45-60 minutes, or until a fork easily pierces through the beets. This method will enhance their sweetness and flavor.
- Cool and Peel: Once roasted, remove the beets from the oven and allow them to cool for about 10-15 minutes. When they’re cool enough to handle, peel the beets using your hands or a paper towel; the skins should come off easily.
- Slice the Beets: Using a sharp knife or mandoline, slice the beets as thinly as possible to create delicate carpaccio. Arrange the slices in a circular pattern on a large serving platter, slightly overlapping them to create a beautiful presentation.
- Prepare the Dressing: In a small bowl, whisk together the olive oil, balsamic vinegar, salt, and pepper until well combined. This simple dressing will enhance the flavors of the beets without overpowering them.
- Assemble the Dish: Drizzle the dressing evenly over the beet slices. Scatter the crumbled blue cheese and chopped walnuts over the top of the beetroot carpaccio, ensuring even distribution for flavor in every bite.
- Garnish and Serve: Finally, add a handful of fresh arugula or mixed greens on top for a pop of color and freshness. If desired, sprinkle some fresh herbs over the dish for added flavor. Serve immediately, allowing guests to enjoy the carpaccio while the ingredients are fresh.
Extra Tips:
For added depth of flavor, consider marinating the beet slices in the vinaigrette for about 30 minutes before serving. This will allow the beets to absorb the dressing more fully.
Additionally, you can experiment with different types of cheese or nuts, such as goat cheese or pecans, to customize the dish to your taste.
Finally, make sure your beetroots are uniformly sized for even cooking, and don’t hesitate to use pre-cooked beets for a quicker preparation.
Zucchini Noodles With Pesto and Cherry Tomatoes
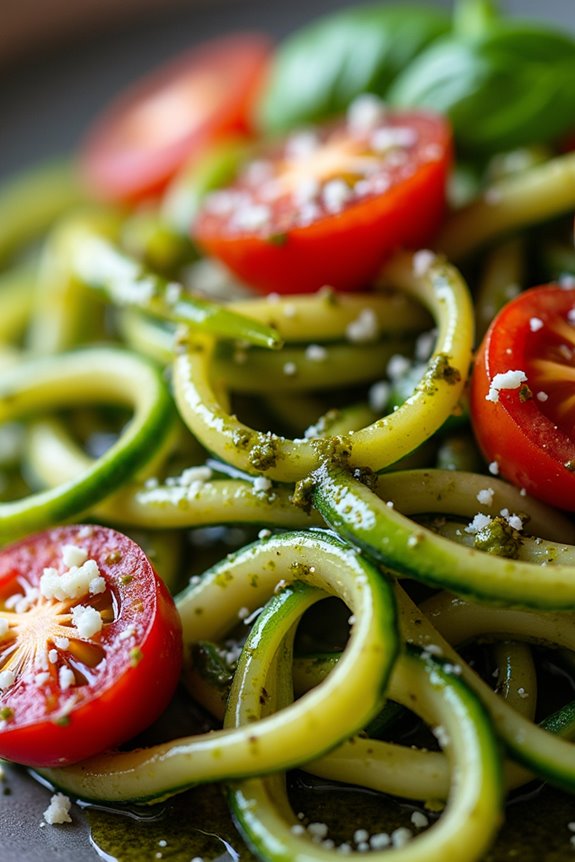
Zucchini Noodles with Pesto and Cherry Tomatoes is a vibrant and healthy dish that brings together the freshness of zucchini and the rich flavors of pesto. This dish isn’t only vegetarian but also gluten-free, making it an excellent alternative to traditional pasta.
The spiralized zucchini gives a delightful crunch while the cherry tomatoes add a burst of sweetness, perfectly complementing the aromatic basil pesto. It’s an ideal meal for a light lunch or dinner and can be prepared in under 30 minutes, making it a convenient choice for busy weeknights.
Creating this dish allows you to enjoy the benefits of fresh vegetables while indulging in the deliciousness of pesto. You can use store-bought pesto for convenience, or make your own for an extra touch of flavor. This recipe serves 4-6 people, making it perfect for a family gathering or a cozy dinner with friends.
The combination of textures and flavors in this dish is sure to impress even the most discerning palate.
Ingredients
- 4 medium zucchini
- 2 cups cherry tomatoes, halved
- 1 cup basil pesto (store-bought or homemade)
- 2 tablespoons olive oil
- Salt and pepper to taste
- Grated Parmesan cheese (optional, for serving)
- Fresh basil leaves (optional, for garnish)
Cooking Instructions
1. Prepare the Zucchini Noodles****: Begin by washing the zucchini thoroughly. Using a spiralizer or a julienne peeler, create zucchini noodles (zoodles) by spiraling the zucchinis into long strands. If you don’t have a spiralizer, you can use a regular vegetable peeler to create thin strips. Set the zoodles aside.
2. Sauté the Cherry Tomatoes: In a large skillet, heat the olive oil over medium heat. Once the oil is hot, add the halved cherry tomatoes to the skillet. Sauté the tomatoes for about 3-4 minutes, or until they start to soften and release their juices. This will enhance their sweetness and flavor, making them a perfect addition to the dish.
3. Combine Zoodles and Pesto: Add the prepared zucchini noodles to the skillet with the sautéed cherry tomatoes. Toss everything together gently, allowing the zucchini noodles to cook for about 2-3 minutes. The goal is to warm the zoodles without making them mushy.
Then, add the basil pesto and stir until the zoodles are evenly coated.
4. Season and Serve: Season the dish with salt and pepper to taste. Remove from heat and transfer the zoodles with pesto and cherry tomatoes to a serving bowl. If desired, sprinkle grated Parmesan cheese on top for added flavor and garnish with fresh basil leaves.
Extra Tips
For an added layer of flavor, consider roasting the cherry tomatoes in the oven instead of sautéing them. Simply toss them in olive oil, salt, and pepper, then roast at 400°F (200°C) for about 15-20 minutes until they’re caramelized.
This technique will intensify their sweetness and add a lovely depth to your dish. Additionally, feel free to customize your zoodles by incorporating other vegetables such as bell peppers or spinach for extra nutrition. Enjoy your delightful Zucchini Noodles with Pesto and Cherry Tomatoes!
Eggplant Parmesan With Fresh Basil
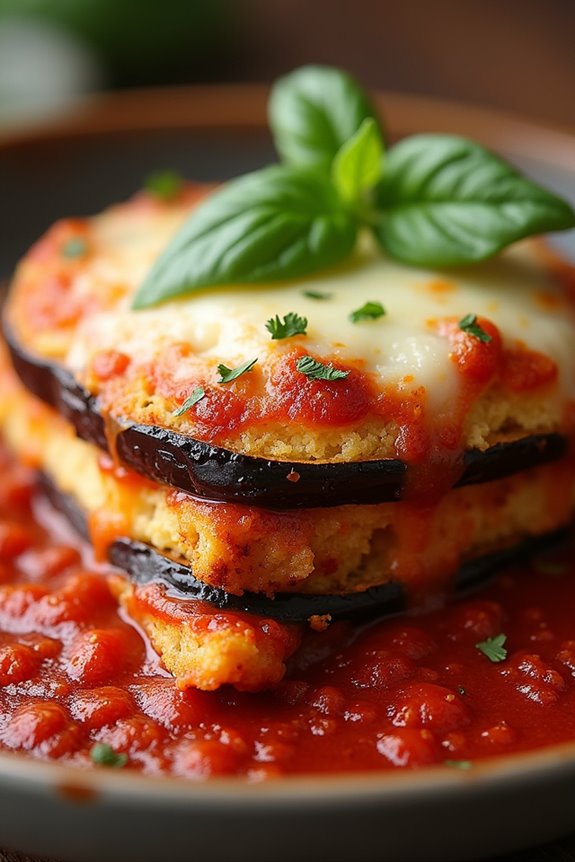
Eggplant Parmesan is a classic Italian dish that’s both hearty and satisfying, making it a favorite among vegetarians and meat-eaters alike. The combination of layers of crispy-breaded eggplant, savory marinara sauce, and melted cheese creates a delicious flavor profile that’s elevated by the addition of fresh basil.
This dish not only showcases the rich taste of eggplant but also provides a beautiful presentation, making it perfect for a family dinner or a gathering with friends.
Making Eggplant Parmesan is a labor of love, but the results are well worth the effort. This recipe focuses on achieving the perfect balance of textures and flavors. The eggplant is sliced, salted, and allowed to sweat to reduce bitterness, then coated and baked to create a crispy exterior.
Layered with a rich tomato sauce and gooey cheese, this dish is then baked until bubbling and golden. Serve it with a side salad or some crusty bread for a complete meal that everyone will enjoy.
Ingredients (serving size: 4-6 people):
- 2 medium eggplants, sliced into 1/4 inch rounds
- 1 teaspoon salt (for sweating the eggplant)
- 1 cup all-purpose flour
- 3 large eggs, beaten
- 2 cups breadcrumbs (preferably Italian seasoned)
- 2 cups marinara sauce
- 2 cups shredded mozzarella cheese
- 1 cup grated Parmesan cheese
- 1/2 cup fresh basil leaves, chopped
- 1 teaspoon black pepper
- 1 teaspoon garlic powder
- Olive oil (for drizzling)
Cooking Instructions:
1. Prepare the Eggplant: Begin by slicing the eggplants into 1/4 inch rounds. Place the slices in a colander and sprinkle with salt. Allow them to sit for about 30 minutes. This process draws out moisture and bitterness from the eggplant.
2. Rinse and Pat Dry: After 30 minutes, rinse the eggplant slices under cold water to remove excess salt. Pat them dry with paper towels to confirm they aren’t too wet when breading.
3. Set Up Breading Station****: Preheat your oven to 425°F (220°C). Set up a breading station with three shallow dishes: one for flour, one for the beaten eggs, and one for breadcrumbs mixed with black pepper and garlic powder.
4. Bread the Eggplant: Take each eggplant slice, dredge it in flour, dip it in the beaten eggs, and then coat it in breadcrumbs. Place the breaded slices on a baking sheet lined with parchment paper.
5. Bake the Eggplant: Drizzle olive oil over the breaded eggplant slices and bake in the preheated oven for about 25-30 minutes, flipping halfway through, until they’re golden brown and crispy.
6. Layer the Ingredients: In a large baking dish, spread a thin layer of marinara sauce on the bottom. Layer half of the baked eggplant slices, followed by half of the remaining marinara sauce, half of the mozzarella cheese, half of the Parmesan cheese, and half of the chopped basil.
Repeat the layering process with the remaining ingredients.
7. Bake the Dish: Cover the baking dish with aluminum foil and bake in the oven at 375°F (190°C) for 30 minutes. Remove the foil and bake for an additional 15-20 minutes, or until the cheese is bubbly and golden.
8. Garnish and Serve: Once baked, remove the Eggplant Parmesan from the oven and let it sit for about 10 minutes before slicing. Garnish with the remaining fresh basil before serving.
Extra Tips:
For an even richer flavor, consider using homemade marinara sauce or adding layers of sautéed vegetables like zucchini or spinach.
If you prefer a lighter version, you can grill the eggplant instead of baking it for a healthier alternative. Additionally, feel free to experiment with different cheeses such as ricotta or provolone for varied flavors. Enjoy your Eggplant Parmesan with a sprinkle of extra fresh basil for a bright finish!
Savory Mushroom and Gruyere Galette
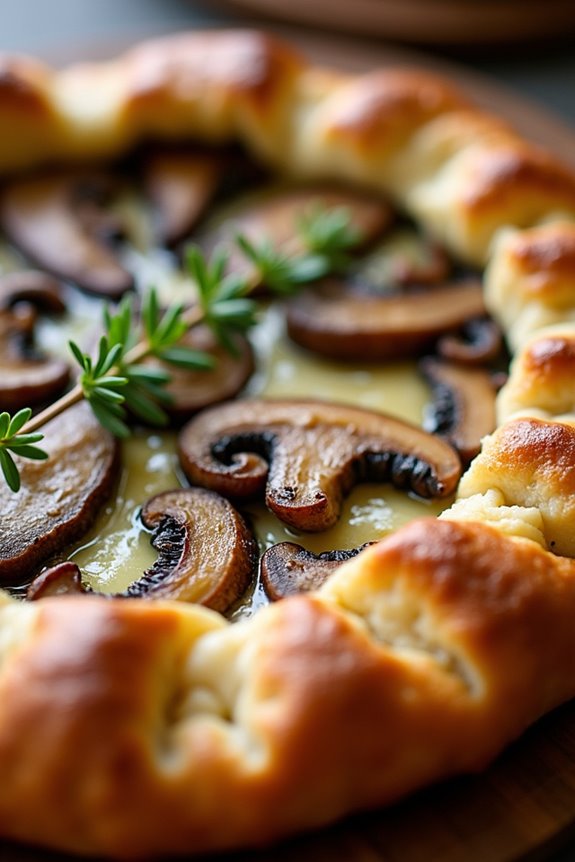
If you’re looking for a hearty, flavorful vegetarian dish that’s perfect for a cozy dinner or a delightful brunch, this Savory Mushroom and Gruyere Galette is an excellent choice.
This rustic tart combines the earthiness of mushrooms with the rich, nutty flavor of Gruyere cheese, all enveloped in a flaky, buttery crust. It’s easy to prepare and can be served warm or at room temperature, making it a versatile addition to any meal.
The beauty of a galette lies in its simplicity. You can use a variety of mushrooms depending on what you have on hand or what’s in season, and the Gruyere cheese provides a lovely melt that enhances the dish.
Pair it with a fresh salad for a complete meal, or serve it as an impressive appetizer at your next gathering. This recipe yields approximately 4-6 servings, making it perfect for sharing with family and friends.
Ingredients:
- 1 pre-made pie crust (store-bought or homemade)
- 2 tablespoons olive oil
- 1 medium onion, thinly sliced
- 2 cloves garlic, minced
- 16 ounces mixed mushrooms (such as cremini, shiitake, or button), sliced
- Salt and pepper, to taste
- 1 teaspoon fresh thyme leaves (or ½ teaspoon dried thyme)
- 1 cup Gruyere cheese, grated
- 1 egg, beaten (for egg wash)
- Fresh parsley, chopped (for garnish, optional)
Cooking Instructions:
1. Prepare the Filling: In a large skillet over medium heat, heat the olive oil. Add the sliced onion and cook for about 5 minutes, until softened. Add the minced garlic and cook for an additional minute until fragrant.
Stir in the sliced mushrooms, season with salt, pepper, and thyme. Cook until the mushrooms are tender and any moisture has evaporated, about 8-10 minutes. Remove from heat and let cool slightly.
2. Preheat the Oven: While the filling is cooling, preheat your oven to 400°F (200°C). Line a baking sheet with parchment paper to prevent sticking.
3. Roll Out the Crust: On a lightly floured surface, roll out the pie crust to a 12-inch circle, about 1/8 inch thick. Transfer the rolled crust onto the prepared baking sheet.
4. Assemble the Galette: Spread the cooled mushroom mixture evenly over the center of the crust, leaving about a 2-inch border around the edges. Sprinkle the grated Gruyere cheese on top of the mushroom mixture.
5. Fold the Edges: Carefully fold the edges of the crust over the filling, pleating it as necessary to create a rustic look. The center will remain exposed.
6. Brush with Egg Wash: Brush the exposed crust with the beaten egg to give it a golden color during baking.
7. Bake the Galette: Bake in the preheated oven for 30-35 minutes, or until the crust is golden brown and the cheese is bubbly.
8. Cool and Serve: Allow the galette to cool for 10 minutes before slicing. Garnish with chopped parsley if desired, and serve warm or at room temperature.
Extra Tips:
For added flavor, consider incorporating some sautéed spinach or kale into the filling.
You can also experiment with different types of cheese, such as fontina or feta, for a unique twist. To keep the crust extra flaky, chill the pie dough for at least 30 minutes before rolling it out. This will help achieve the perfect texture.
If you have leftovers, they can be stored in an airtight container in the refrigerator and reheated in the oven for best results. Enjoy your delicious Savory Mushroom and Gruyere Galette!
Butternut Squash Gnocchi With Sage Butter
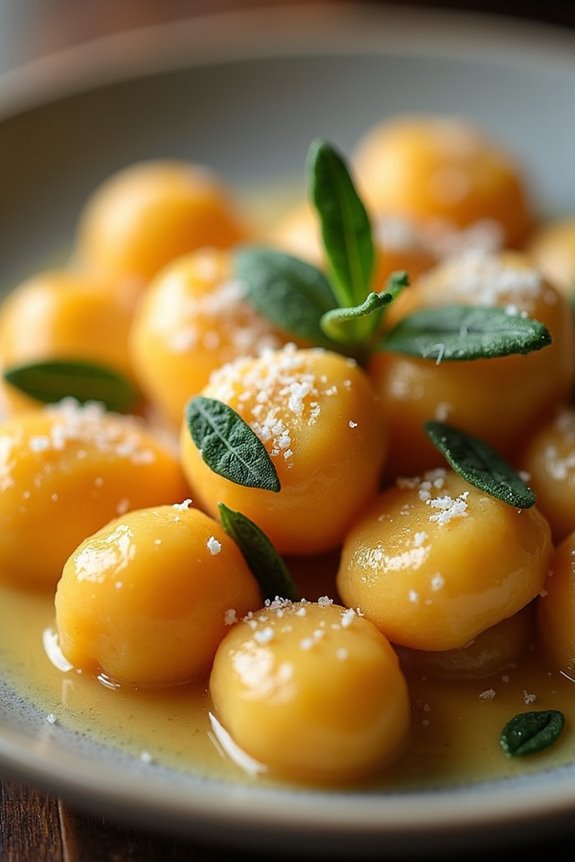
Butternut Squash Gnocchi with Sage Butter is a delightful dish that marries the sweetness of roasted butternut squash with the comforting texture of gnocchi. This vegetarian recipe isn’t only hearty but also packed with flavor, making it an excellent choice for a cozy dinner or a festive gathering.
The addition of sage butter adds an aromatic touch that enhances the natural sweetness of the squash and creates a rich, buttery sauce that clings perfectly to the gnocchi.
Making gnocchi from scratch may seem intimidating, but it’s easier than you think! With just a few simple ingredients, you can create pillowy bites of goodness that are far superior to store-bought versions.
This recipe is perfect for those looking to impress guests or simply enjoy a comforting meal at home. Let’s plunge into the ingredients and cooking instructions to bring this mouthwatering dish to your table.
Ingredients (Serves 4-6):
- 1 medium butternut squash (about 2 pounds)
- 2 cups all-purpose flour, plus more for dusting
- 1 large egg
- 1 teaspoon salt
- 1/2 teaspoon nutmeg
- 1/4 cup unsalted butter
- 10 fresh sage leaves
- Freshly grated Parmesan cheese (for serving, optional)
Cooking Instructions:
1. Prepare the Butternut Squash: Preheat your oven to 400°F (200°C). Cut the butternut squash in half, scoop out the seeds, and place the halves cut-side down on a baking sheet.
Roast the squash in the preheated oven for about 40-45 minutes, or until it’s tender and can be easily pierced with a fork. Once done, let it cool slightly, then scoop out the flesh and mash it in a bowl until smooth.
2. Make the Gnocchi Dough**: In a large mixing bowl, combine the mashed butternut squash, flour, egg, salt, and nutmeg. Mix until the ingredients are incorporated and a dough forms**.
Be careful not to overwork the dough; it should be soft and slightly sticky. If necessary, add a little more flour until you achieve the right consistency.
3. Shape the Gnocchi: Lightly flour a clean surface and divide the dough into four equal portions. Roll each portion into a long rope, about 1/2 inch thick.
Cut the rope into 1-inch pieces to form the gnocchi. To create the traditional gnocchi shape, you can gently press each piece with a fork or your thumb to create ridges.
4. Cook the Gnocchi: Bring a large pot of salted water to a boil. Add the gnocchi in batches, being careful not to overcrowd the pot.
When the gnocchi float to the surface, they’re done (about 2-3 minutes). Use a slotted spoon to transfer them to a plate and keep them warm.
5. Prepare the Sage Butter: In a large skillet, melt the butter over medium heat. Add the sage leaves and cook until the butter is golden brown and the sage is crisp, about 3-4 minutes.
Remove from heat.
6. Combine and Serve: Add the cooked gnocchi to the skillet with the sage butter, gently tossing to coat them evenly. Serve immediately, garnished with freshly grated Parmesan cheese if desired.
Extra Tips:
When making gnocchi, it’s important to use the right amount of flour to guarantee the dough isn’t too sticky. If you find that your dough is too wet, add a little more flour until it’s manageable.
Additionally, you can freeze uncooked gnocchi on a baking sheet and transfer them to a freezer bag once frozen for a quick meal option later. Just boil them straight from the freezer when you’re ready to enjoy them!
Rustic Vegetable Tart With Herb Crust
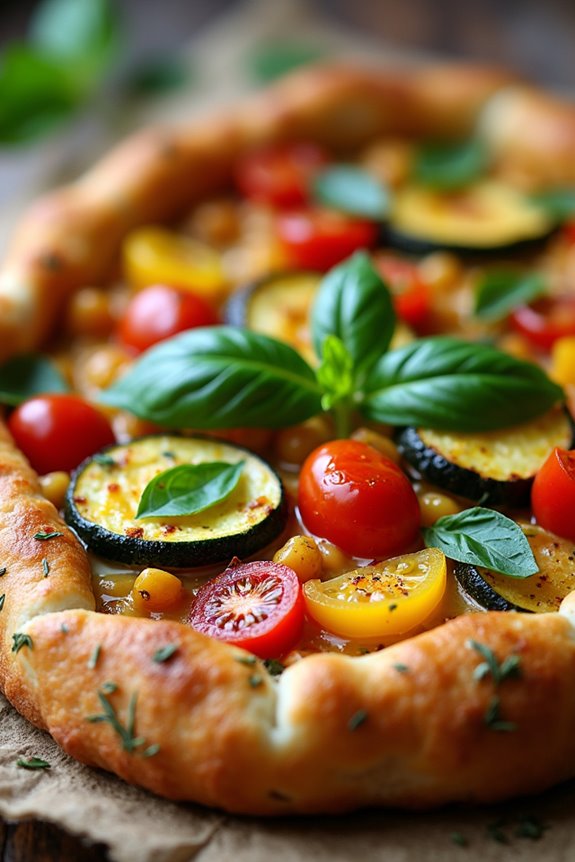
This Rustic Vegetable Tart with Herb Crust is a delightful vegetarian dish that embodies the essence of fresh, seasonal vegetables enveloped in a flaky, herb-infused crust. Perfect for a family gathering or a special occasion, this tart not only looks impressive but is also packed with flavors that will please both vegetarians and meat-lovers alike.
The combination of roasted vegetables, creamy cheese, and the aromatic herb crust creates a harmonious balance that will leave everyone wanting more. Making this tart is a wonderful way to explore the vibrant world of vegetables. You can use a variety of seasonal vegetables such as zucchini, bell peppers, and cherry tomatoes, guaranteeing that the tart isn’t only delicious but also colorful and nutritious.
This dish can be served warm or at room temperature, making it a versatile option for picnics, brunches, or light dinners.
Ingredients (Serves 4-6):
- 1 ½ cups all-purpose flour
- ½ cup cold unsalted butter, cubed
- 1 teaspoon dried thyme
- 1 teaspoon dried rosemary
- 1/2 teaspoon salt
- 4-5 tablespoons ice water
- 2 tablespoons olive oil
- 1 medium onion, sliced
- 1 zucchini, sliced
- 1 bell pepper, diced
- 1 cup cherry tomatoes, halved
- 1 cup ricotta cheese
- 1 cup grated Parmesan cheese
- Salt and pepper to taste
- Fresh basil leaves for garnish (optional)
Cooking Instructions:
1. Make the Herb Crust: In a mixing bowl, combine the all-purpose flour, dried thyme, dried rosemary, and salt. Add the cold cubed butter and use a pastry cutter or your fingers to mix until the mixture resembles coarse crumbs.
Gradually add ice water, one tablespoon at a time, mixing until the dough just comes together. Form the dough into a disk, wrap it in plastic wrap, and refrigerate for at least 30 minutes.
2. Prepare the Vegetables: While the dough is chilling, preheat your oven to 400°F (200°C). In a large skillet, heat the olive oil over medium heat. Add the sliced onion and sauté until soft and translucent, about 5 minutes.
Then, add the sliced zucchini and diced bell pepper; cook for an additional 5-7 minutes until the vegetables are tender. Finally, stir in the halved cherry tomatoes and season with salt and pepper. Remove from heat and let cool.
3. Roll Out the Dough: Once the dough has chilled, remove it from the refrigerator. On a lightly floured surface, roll out the dough into a large circle, about 1/4 inch thick.
Carefully transfer the rolled-out dough to a tart pan, pressing it into the edges. Trim any excess dough hanging over the sides.
4. Assemble the Tart: In a mixing bowl, combine the ricotta cheese and grated Parmesan cheese. Spread the cheese mixture evenly over the bottom of the tart crust.
Next, layer the sautéed vegetables over the cheese mixture, spreading them out evenly.
5. Bake the Tart: Place the tart in the preheated oven and bake for 30-35 minutes, or until the crust is golden brown and the cheese is bubbly.
If the crust edges brown too quickly, cover them with aluminum foil.
6. Cool and Serve: Once baked, remove the tart from the oven and let it cool for about 10 minutes. Garnish with fresh basil leaves if desired, slice, and serve warm or at room temperature.
Extra Tips: When making this Rustic Vegetable Tart, feel free to experiment with different vegetables according to what’s in season or what you have on hand.
You can also swap out the ricotta and Parmesan for other cheeses like goat cheese or feta for a different flavor profile. If you want a more golden crust, you can brush the edges of the tart with an egg wash before baking.
Remember to allow the tart to cool slightly before slicing to guarantee clean cuts. Enjoy your cooking!
Chocolate Hazelnut Torte With Raspberry Coulis

Indulge in the rich and decadent flavors of this Chocolate Hazelnut Torte, perfectly paired with a vibrant raspberry coulis. This delightful dessert is sure to impress your guests while being entirely vegetarian. The combination of chocolate and hazelnuts creates a luscious torte with a moist texture, and the tartness of the raspberry coulis provides a rejuvenating contrast that elevates the dish to new heights.
Whether for a special occasion or simply to satisfy your sweet tooth, this torte is a fantastic choice that will leave everyone wanting more.
Preparing this chocolate hazelnut torte isn’t only simple but also an enjoyable experience. With a few quality ingredients and a little patience, you can whip up this stunning dessert in no time. The torte can be made ahead of time, allowing the flavors to meld beautifully, making it perfect for entertaining.
Serve it with a drizzle of raspberry coulis and perhaps a dollop of whipped cream for an extra touch of elegance.
Ingredients (serving size: 4-6 people):
- 1 cup hazelnuts (toasted and chopped)
- 1 cup dark chocolate (chopped)
- 1/2 cup unsalted butter
- 3/4 cup granulated sugar
- 3 large eggs
- 1 teaspoon vanilla extract
- 1/2 cup all-purpose flour
- 1/4 teaspoon salt
For the raspberry coulis:
- 2 cups fresh raspberries
- 1/4 cup granulated sugar
- 1 tablespoon lemon juice
Cooking Instructions:
- Prepare the Hazelnuts: Preheat your oven to 350°F (175°C). Spread the hazelnuts on a baking sheet and toast them in the oven for about 10 minutes, or until they’re golden and fragrant. Allow them to cool, then chop roughly and set aside.
- Melt the Chocolate and Butter: In a heatproof bowl, combine the chopped dark chocolate and unsalted butter. Set the bowl over a pot of simmering water (double boiler method) and stir until both the chocolate and butter are completely melted and smooth. Remove from heat and let it cool slightly.
- Mix the Batter: In a large mixing bowl, whisk together the granulated sugar, eggs, and vanilla extract until well combined. Slowly add the melted chocolate mixture to the egg mixture, stirring continuously to combine.
- Incorporate Dry Ingredients: Gently fold in the all-purpose flour, salt, and chopped hazelnuts into the chocolate mixture, being careful not to overmix. The batter should be smooth and thick.
- Bake the Torte: Grease an 8-inch round cake pan and line the bottom with parchment paper. Pour the batter into the prepared pan and smooth the top. Bake in the preheated oven for 25-30 minutes, or until a toothpick inserted into the center comes out with a few moist crumbs. Allow the torte to cool in the pan for 10 minutes before transferring it to a wire rack to cool completely.
- Prepare the Raspberry Coulis: In a small saucepan over medium heat, combine the fresh raspberries, granulated sugar, and lemon juice. Cook, stirring gently, until the raspberries have broken down and the mixture is syrupy, about 5-7 minutes. Strain the mixture through a fine-mesh sieve to remove the seeds, and set aside to cool.
- Serve: Once the torte has cooled completely, slice it into wedges. Drizzle with the raspberry coulis just before serving, and add a dollop of whipped cream if desired.
Extra Tips:
For an elegant presentation, consider garnishing the torte with a few whole hazelnuts and fresh raspberries. You can also enhance the flavor of the torte by using high-quality dark chocolate with at least 70% cocoa content.
If you want to make the torte ahead of time, it can be stored in an airtight container at room temperature for up to 3 days or in the refrigerator for up to a week. The raspberry coulis can be made a day in advance and stored in the refrigerator, allowing the flavors to develop further.
Enjoy your delicious Chocolate Hazelnut Torte with Raspberry Coulis!