

When the craving for chocolate and cherries hits, German Black Forest cake is the ultimate indulgence that comes to mind. Its luscious layers, whipped cream, and tangy cherry filling create a delightful balance that’s simply irresistible. I’ve gathered 14 delicious recipes that put a fresh spin on this beloved dessert. From traditional cakes to creative interpretations, there’s a recipe here to spark your next baking project. Let’s explore these delectable creations together.
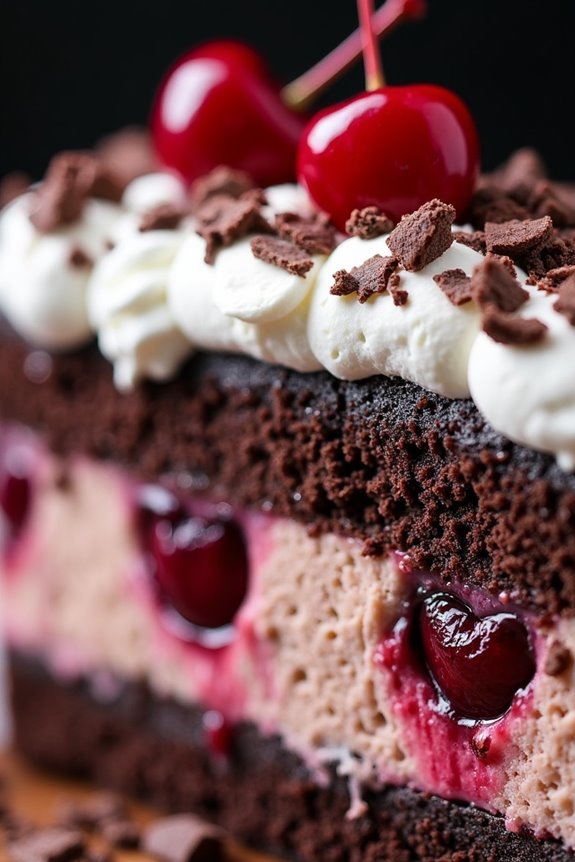
Classic German Black Forest Cake
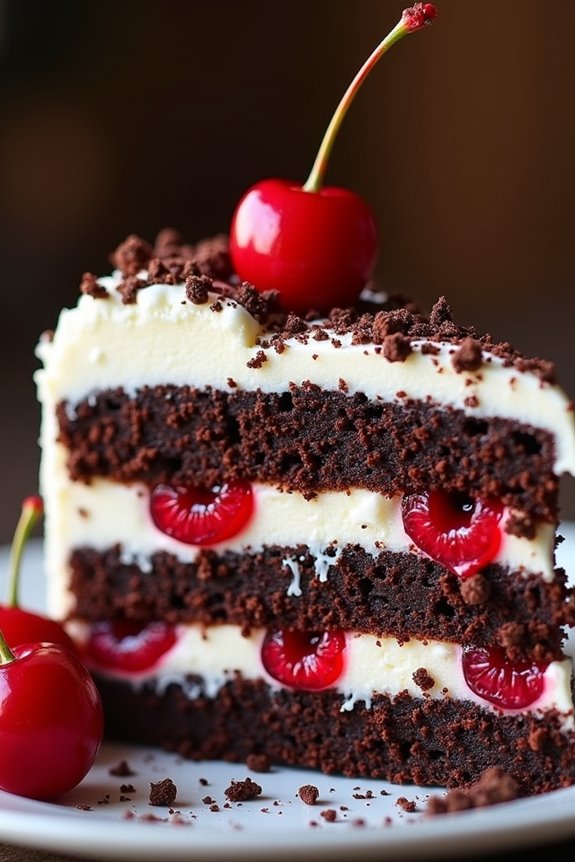
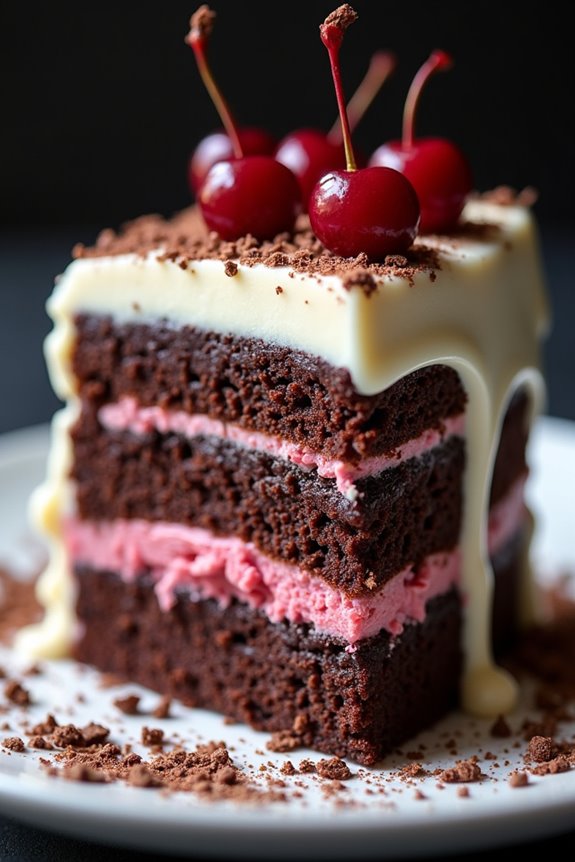
The Classic German Black Forest Cake, or Schwarzwälder Kirschtorte, is a delectable dessert that combines rich chocolate cake, luscious whipped cream, and tart cherries. Originating from the Black Forest region in Germany, this cake is renowned for its unique combination of flavors and textures.
The name “Black Forest” is derived from the region’s famous cherry brandy, known as Kirschwasser, which is often used in the cake to enhance its flavor. Whether it’s for a special occasion or a simple family gathering, this cake is sure to impress.
Making a Classic German Black Forest Cake requires careful attention to detail, but the end result is a breathtaking and delicious dessert that’s worth the effort. This recipe will guide you through each step to create a stunning cake that beautifully showcases layers of chocolate sponge, whipped cream, and cherries. With a serving size of 4-6 people, this cake is perfect for sharing with friends and family.
Ingredients
- 1 ½ cups all-purpose flour
- 1 cup granulated sugar
- ½ cup unsweetened cocoa powder
- 1 ½ teaspoons baking powder
- ½ teaspoon baking soda
- ¼ teaspoon salt
- 3 large eggs
- ½ cup vegetable oil
- 1 teaspoon vanilla extract
- 1 cup buttermilk
- 1 jar (24 oz) Morello cherries, drained and juice reserved
- 1 cup heavy whipping cream
- 2 tablespoons powdered sugar
- 2 tablespoons Kirsch (cherry brandy)
- Dark chocolate shavings (for garnish)
Cooking Instructions
- Prepare the Cake Batter: Preheat your oven to 350°F (180°C) and grease two 9-inch round cake pans. In a large mixing bowl, combine the flour, sugar, cocoa powder, baking powder, baking soda, and salt. Whisk together until well mixed.
- Mix Wet Ingredients: In a separate bowl, beat the eggs and then add the vegetable oil, vanilla extract, and buttermilk. Mix until combined.
- Combine Dry and Wet Mixtures: Gradually add the wet mixture to the dry ingredients, stirring until just combined. Be careful not to overmix.
- Bake the Cakes: Divide the batter evenly between the prepared cake pans. Bake in the preheated oven for about 25-30 minutes or until a toothpick inserted in the center comes out clean. Once baked, allow the cakes to cool in the pans for about 10 minutes before transferring them to a wire rack to cool completely.
- Prepare the Whipped Cream: In a medium bowl, whip the heavy cream with an electric mixer until soft peaks form. Gradually add the powdered sugar and continue to whip until stiff peaks form.
- Assemble the Cake: Once the cakes are completely cooled, slice each cake in half horizontally, creating four layers. Place one layer on a serving plate and drizzle with some reserved cherry juice and a tablespoon of Kirsch. Spread a layer of whipped cream on top and add a layer of cherries. Repeat this process for the next two layers.
- Top and Garnish: Place the final cake layer on top and cover the entire cake with the remaining whipped cream. Decorate with dark chocolate shavings and additional cherries if desired.
- Chill and Serve: Refrigerate the assembled cake for at least 2 hours before serving to let the flavors meld together. Slice and enjoy!
Extra Tips
When making the Classic German Black Forest Cake, it’s important to use high-quality ingredients for the best flavor. Opt for a good quality cocoa powder and fresh cherries if possible.
If you prefer a less sweet cake, reduce the amount of sugar in the whipped cream. Additionally, feel free to adjust the amount of Kirsch used to suit your taste; just remember that it adds a distinctive flavor characteristic of this classic dessert. Enjoy your baking!
Black Forest Cupcakes
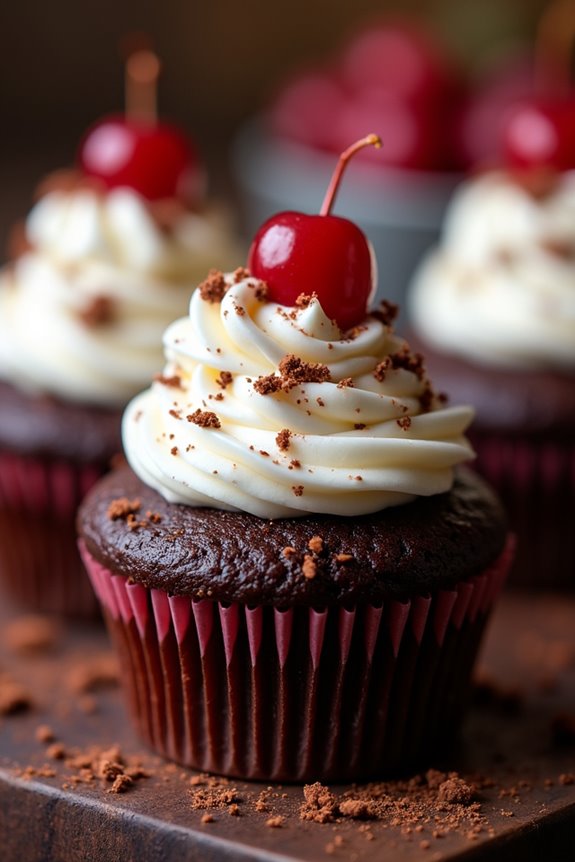
Black Forest Cupcakes are a delightful twist on the classic German Black Forest Cake, combining rich chocolate cake with the luscious flavors of cherries and whipped cream. These mini desserts capture the essence of the traditional cake while providing a convenient, portable treat. Perfect for any celebration or simply as a sweet indulgence, these cupcakes are sure to impress with their rich flavors and beautiful presentation.
The combination of moist chocolate cupcakes, a cherry filling, and whipped cream frosting makes these Black Forest Cupcakes a crowd-pleaser. They aren’t only easy to make but also allow for creativity in decoration, making them a fun baking project for both novice and experienced bakers. With just the right amount of sweetness and a hint of tartness from the cherries, these cupcakes are a delicious homage to the beloved Black Forest Cake.
Ingredients (Serves 4-6 people):
- 1 cup all-purpose flour
- 1 cup granulated sugar
- 1/3 cup unsweetened cocoa powder
- 1/2 teaspoon baking powder
- 1/2 teaspoon baking soda
- 1/4 teaspoon salt
- 1/2 cup buttermilk
- 1/4 cup vegetable oil
- 1 large egg
- 1 teaspoon vanilla extract
- 1/2 cup boiling water
- 1 cup cherry pie filling
- 1 cup heavy whipping cream
- 2 tablespoons powdered sugar
- Chocolate shavings (for garnish)
Cooking Instructions:
- Preheat the Oven: Begin by preheating your oven to 350°F (175°C). This guarantees that the cupcakes bake evenly and rise properly.
- Prepare the Cupcake Batter: In a large mixing bowl, combine the all-purpose flour, granulated sugar, unsweetened cocoa powder, baking powder, baking soda, and salt. Whisk these dry ingredients together until they’re evenly combined.
- Mix Wet Ingredients: In a separate bowl, whisk together the buttermilk, vegetable oil, egg, and vanilla extract. Gradually add this mixture to the dry ingredients, mixing until just combined. Finally, stir in the boiling water until the batter is smooth.
- Fill Cupcake Liners: Line a cupcake tin with paper liners and fill each liner about two-thirds full with the batter. This should yield around 12 cupcakes; make sure to evenly distribute the batter.
- Bake the Cupcakes: Place the cupcake tin in the preheated oven and bake for 18-20 minutes, or until a toothpick inserted into the center comes out clean. Once baked, remove from the oven and let them cool in the tin for about 5 minutes before transferring them to a wire rack to cool completely.
- Prepare the Whipped Cream: In a mixing bowl, beat the heavy whipping cream with an electric mixer on medium speed. Once it begins to thicken, add the powdered sugar and continue to beat until stiff peaks form.
- Assemble the Cupcakes: Once the cupcakes are completely cooled, use a small knife or a cupcake corer to remove a small portion from the center of each cupcake. Fill the cavity with cherry pie filling, then pipe or spread the whipped cream on top of each cupcake.
- Garnish and Serve: Finish by garnishing each cupcake with chocolate shavings for that signature Black Forest look. Serve immediately or refrigerate until ready to enjoy.
Extra Tips:
For an added depth of flavor, consider using dark chocolate cocoa powder in the cupcake batter. You can also enhance the cherry filling by adding a splash of Kirsch (cherry liqueur) for an adult version of these cupcakes.
If you’re making them ahead of time, store the cupcakes in an airtight container without the whipped cream topping, as it’s best to add the cream just before serving for maximum freshness. Enjoy your baking!
Vegan Black Forest Cake
The Vegan Black Forest Cake is a delightful twist on the classic German dessert, offering all the indulgent flavors without any animal products. This decadent cake features layers of rich chocolate sponge, a luscious cherry filling, and a creamy vegan whipped topping, making it perfect for birthdays, celebrations, or simply satisfying a sweet tooth. The combination of cherries and chocolate creates a harmonious balance that makes each bite a true delight.
To make this Vegan Black Forest Cake, you’ll want to choose high-quality ingredients to guarantee a rich flavor profile. The key to achieving a moist and tender cake lies in the use of plant-based milk, flaxseed meal for binding, and a vegan whipped cream that mimics the traditional dairy version. With a bit of preparation and love, you can create a stunning centerpiece that will impress both vegans and non-vegans alike.
Ingredients (serves 4-6 people):
- 1 ½ cups all-purpose flour
- 1 cup granulated sugar
- ½ cup unsweetened cocoa powder
- 1 tsp baking soda
- ½ tsp salt
- 1 cup almond milk (or any plant-based milk)
- 1/3 cup vegetable oil
- 1 tbsp apple cider vinegar
- 1 tsp vanilla extract
- 1 cup pitted cherries (frozen or fresh)
- 1 cup vegan whipped cream (store-bought or homemade)
- 2 tbsp powdered sugar (for sweetening the whipped cream)
- Dark chocolate shavings (for garnish)
Cooking Instructions:
1. Preheat the Oven: Begin by preheating your oven to 350°F (175°C). This step is essential as it guarantees that your cake bakes evenly and rises properly.
2. Prepare the Cake Batter: In a large mixing bowl, combine the all-purpose flour, granulated sugar, cocoa powder, baking soda, and salt. Whisk these dry ingredients together until they’re well mixed.
In a separate bowl, mix the almond milk, vegetable oil, apple cider vinegar, and vanilla extract. Pour the wet ingredients into the dry ingredients and stir until just combined; be careful not to over-mix, as this can lead to a dense cake.
3. Bake the Cake: Divide the batter evenly into two greased 8-inch round cake pans. Smooth the tops with a spatula and bake in the preheated oven for 25-30 minutes, or until a toothpick inserted in the center comes out clean.
Once done, remove the cakes from the oven and allow them to cool in the pans for 10 minutes before transferring them to a wire rack to cool completely.
4. Prepare the Cherry Filling: While the cakes are cooling, prepare the cherry filling. If using fresh cherries, pit and chop them. If using frozen cherries, let them thaw and drain excess liquid.
In a small saucepan, heat the cherries over medium heat until they’re warmed through and slightly softened. You may add a tablespoon of sugar if you prefer a sweeter filling. Set aside to cool.
5. Whip the Vegan Cream: In a mixing bowl, combine the vegan whipped cream with powdered sugar. Use a hand mixer or stand mixer to whip the cream until it reaches a fluffy consistency.
This will serve as the frosting and filling for your cake.
6. Assemble the Cake: Once the cakes are completely cool, place one layer on a serving plate. Spread a generous layer of the cherry filling on top, followed by a layer of the whipped cream.
Place the second cake layer on top and frost the entire cake with the remaining whipped cream. Garnish with dark chocolate shavings and additional cherries, if desired.
7. Chill and Serve: For the best flavor and texture, refrigerate the assembled cake for at least 1 hour before serving. This allows the flavors to meld beautifully. Slice and enjoy your Vegan Black Forest Cake!
Extra Tips: When making the Vegan Black Forest Cake, feel free to experiment with different types of plant-based milk or sweeteners to cater to your taste preferences.
For an extra touch, you can add a splash of cherry liqueur to the cherries for an adult version. Also, to make the cake even more decadent, consider adding layers of chocolate ganache or additional fruit between the layers. Enjoy your baking!
Gluten-Free Black Forest Cake
Indulging in a slice of German Black Forest Cake is a delightful experience, and with this gluten-free version, everyone can enjoy the rich flavors without worry. This cake combines moist chocolate sponge layers with luscious cherry filling and creamy whipped frosting, creating a perfect balance of sweetness and tartness.
Using gluten-free flour guarantees that this classic dessert can be appreciated by those with gluten sensitivities while maintaining the traditional essence of this beloved treat.
The key to a successful gluten-free Black Forest Cake lies in choosing the right flour blend and making certain that the cake remains moist and flavorful. The combination of cocoa powder and gluten-free flour brings depth to the chocolate flavor, while the cherries add a rejuvenating burst of juiciness.
Topped with a generous layer of whipped cream and chocolate shavings, this cake is sure to impress at any gathering or celebration.
Ingredients (Serves 4-6)
- 1 ½ cups gluten-free all-purpose flour
- 1 cup granulated sugar
- ½ cup unsweetened cocoa powder
- 1 teaspoon baking powder
- ½ teaspoon baking soda
- ½ teaspoon salt
- 3 large eggs
- ½ cup milk (dairy or non-dairy)
- ½ cup vegetable oil
- 1 teaspoon vanilla extract
- 1 cup cherries, pitted and chopped (fresh or canned)
- 1 cup heavy cream
- 2 tablespoons powdered sugar
- Chocolate shavings for garnish
Cooking Instructions
- Preheat the Oven: Begin by preheating your oven to 350°F (175°C). This guarantees that the cake bakes evenly and rises properly.
- Prepare the Cake Pans: Grease two 8-inch round cake pans with butter or non-stick spray, and line the bottoms with parchment paper. This step helps prevent the cake from sticking and makes it easier to remove once baked.
- Mix Dry Ingredients: In a large mixing bowl, whisk together the gluten-free flour, granulated sugar, cocoa powder, baking powder, baking soda, and salt. Mixing the dry ingredients together first guarantees that the leavening agents are evenly distributed throughout the flour.
- Combine Wet Ingredients: In a separate bowl, whisk together the eggs, milk, vegetable oil, and vanilla extract until well combined. This mixture adds moisture and flavor to the cake.
- Combine Wet and Dry Mixtures: Pour the wet mixture into the bowl of dry ingredients. Stir gently until the batter is just combined; be careful not to over-mix, as this can lead to a denser cake.
- Fold in Cherries: Gently fold in the chopped cherries into the batter. This adds a burst of flavor and moisture to the cake.
- Bake the Cake: Divide the batter evenly between the two prepared cake pans. Bake in the preheated oven for 25-30 minutes or until a toothpick inserted into the center comes out clean. Allow the cakes to cool in the pans for about 10 minutes before transferring them to a wire rack to cool completely.
- Make the Whipped Cream: While the cakes are cooling, beat the heavy cream and powdered sugar in a chilled mixing bowl until soft peaks form. This will be used to frost the cake and create a light, airy texture.
- Assemble the Cake: Once the cakes are completely cool, place one layer on a serving plate. Spread a layer of whipped cream on top, followed by a layer of chopped cherries. Place the second cake layer on top and repeat the process, covering the entire cake with the remaining whipped cream.
- Decorate: Garnish the top of the cake with chocolate shavings and any remaining cherries. This not only adds visual appeal but also enhances the dessert’s flavor.
Extra Tips
For an even richer flavor, consider adding a splash of cherry liqueur to the cherry filling or soaking the cake layers in cherry juice before assembling.
If you prefer a less sweet option, you can reduce the amount of sugar in the whipped cream. Additionally, feel free to experiment with different gluten-free flour blends to find the one that best suits your taste and texture preferences.
Enjoy your baking adventure and the delightful results of this Gluten-Free Black Forest Cake!
Mini Black Forest Tarts
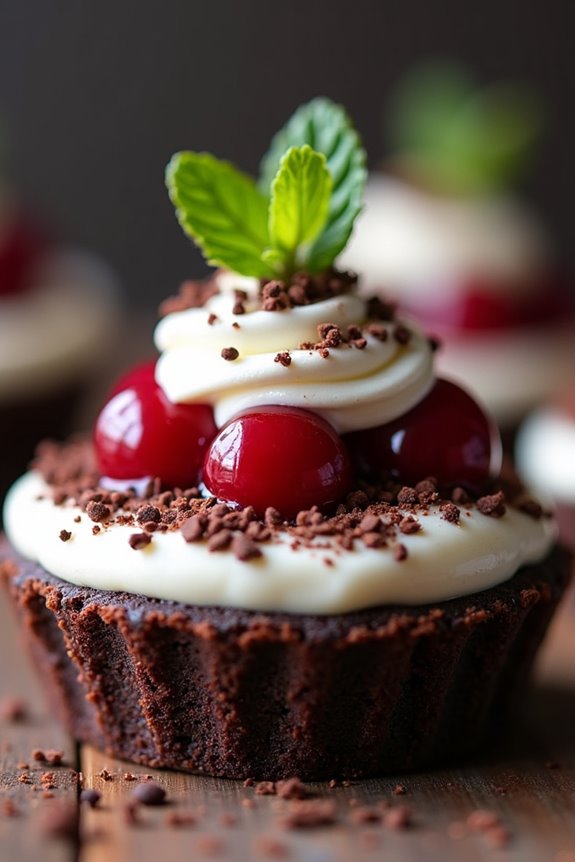
Mini Black Forest Tarts are a delightful twist on the classic German dessert, Black Forest Cake. These individual tarts feature a rich, chocolatey crust filled with luscious layers of whipped cream, cherries, and a hint of Kirsch (cherry schnapps). Perfect for any celebration or simply as a sweet treat after dinner, these tarts balance the flavors of chocolate and cherry beautifully, creating a delightful experience with each bite.
Making these tarts is a fun and rewarding process. The combination of a buttery tart shell, creamy filling, and the topping of fresh cherries is sure to impress your family and friends. They’re also a great option for portion control, allowing everyone to indulge in their own mini dessert without the guilt of overindulging. Let’s get started!
Ingredients (Serves 4-6)
- 1 ½ cups all-purpose flour
- ½ cup unsweetened cocoa powder
- ½ cup powdered sugar
- ½ cup unsalted butter, softened
- 1 large egg
- 1 cup heavy cream
- 2 tablespoons sugar
- 1 teaspoon vanilla extract
- 1 cup cherry pie filling (or fresh cherries)
- 2 tablespoons Kirsch (optional)
- Chocolate shavings (for garnish)
- Fresh mint leaves (for garnish, optional)
Cooking Instructions
- Prepare the Tart Shells: In a mixing bowl, combine the all-purpose flour, cocoa powder, and powdered sugar. Add the softened butter and mix until the mixture resembles coarse crumbs. Then, add the egg and mix until the dough comes together. If the dough is too crumbly, add a teaspoon of cold water until it forms a smooth ball.
- Chill the Dough: Wrap the tart dough in plastic wrap and refrigerate for at least 30 minutes. This helps to firm up the dough, making it easier to roll out and less likely to shrink during baking.
- Preheat the Oven: While the dough is chilling, preheat your oven to 350°F (175°C). This guarantees that your tarts will bake evenly and properly when they’re ready.
- Roll and Shape the Dough: After chilling, remove the dough from the refrigerator. On a floured surface, roll out the dough to about 1/8 inch thick. Cut out circles that are slightly larger than your tartlet pans and gently press them into the pans. Prick the bottoms with a fork to allow steam to escape while baking.
- Bake the Tart Shells: Bake the tart shells in the preheated oven for 10-12 minutes, or until they’re firm to the touch. Remove from the oven and allow them to cool in the pans for a few minutes before transferring them to a wire rack to cool completely.
- Prepare the Whipped Cream: In a chilled mixing bowl, pour the heavy cream, add the sugar and vanilla extract. Whip the cream until soft peaks form. Be careful not to overwhip, as you want a light and fluffy texture.
- Assemble the Tarts: Once the tart shells are completely cool, spoon in a layer of whipped cream, followed by a layer of cherry pie filling (or fresh cherries). If using Kirsch, drizzle a small amount over the cherries for added flavor.
- Garnish and Serve: Top the tarts with additional whipped cream and garnish with chocolate shavings and fresh mint leaves if desired. Serve immediately or refrigerate until ready to serve.
Extra Tips
When making Mini Black Forest Tarts, feel free to get creative with your toppings. You can use dark chocolate shavings for a rich flavor or opt for white chocolate for a beautiful contrast against the dark tart shell.
If you prefer, you can also add a layer of chocolate ganache before the whipped cream for an extra indulgent treat. Additionally, make sure to serve these tarts chilled for the best texture and flavor. Enjoy your baking adventure!
Black Forest Cheesecake
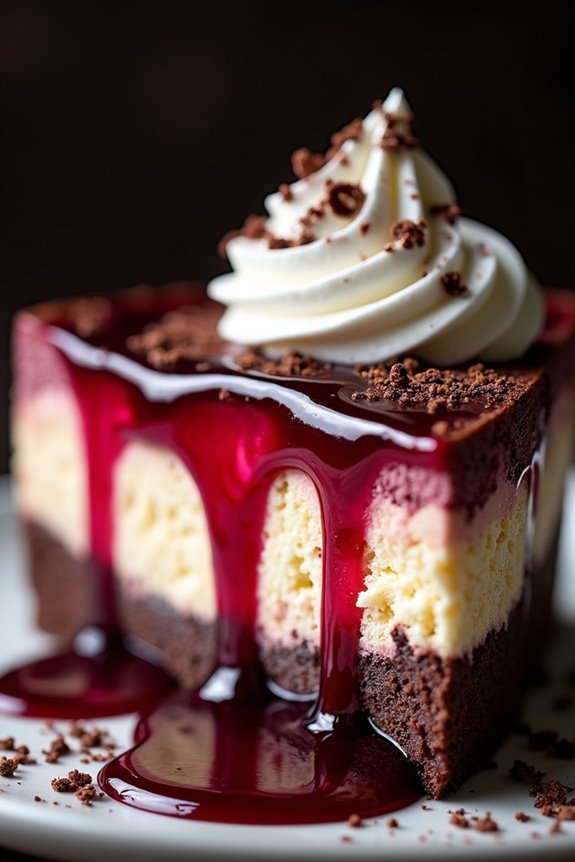
Black Forest Cheesecake is a delightful twist on the traditional German Black Forest Cake, combining the rich, creamy texture of cheesecake with the iconic flavors of chocolate, cherries, and whipped cream. This decadent dessert features a chocolate cookie crust, a luscious cheesecake filling, and is topped with a cherry compote and fluffy whipped cream. It’s perfect for special occasions or any time you want to impress family and friends with a show-stopping dessert.
Making this cheesecake may take some time and patience, but the result is well worth the effort. The layers of flavor and texture create a harmonious balance that will tantalize your taste buds. Whether you’re a seasoned baker or a novice in the kitchen, this recipe is accessible and bound to become a favorite in your dessert repertoire.
Ingredients (serving size: 4-6 people)
- 1 ½ cups chocolate cookie crumbs
- ½ cup unsalted butter, melted
- 16 oz cream cheese, softened
- ¾ cup granulated sugar
- 1 tsp vanilla extract
- 3 large eggs
- 1 cup sour cream
- ½ cup cocoa powder
- 1 cup cherry pie filling
- 1 cup heavy whipping cream
- 2 tbsp powdered sugar
- Chocolate shavings (for garnish)
Cooking Instructions
- Prepare the crust: Preheat your oven to 325°F (160°C). In a mixing bowl, combine the chocolate cookie crumbs and melted butter until the mixture resembles wet sand. Press this mixture firmly into the bottom of a 9-inch springform pan to create an even layer. Bake the crust for 10 minutes, then remove it from the oven and set aside to cool.
- Make the cheesecake filling: In a large mixing bowl, beat the softened cream cheese with an electric mixer until smooth and creamy. Gradually add the granulated sugar and vanilla extract, mixing until well combined. Add the eggs one at a time, mixing on low speed until just incorporated. Be careful not to overmix to maintain a smooth texture.
- Incorporate sour cream and cocoa powder: Add the sour cream and cocoa powder to the cream cheese mixture. Mix on low speed until everything is well blended and smooth. The mixture should be thick and creamy.
- Bake the cheesecake: Pour the cheesecake filling over the cooled crust in the springform pan. Smooth the top with a spatula. Bake in the preheated oven for 50-60 minutes, or until the center is set but still slightly jiggly. Turn off the oven and let the cheesecake cool in the oven with the door slightly ajar for about an hour. This helps prevent cracking.
- Chill the cheesecake: Once cooled, refrigerate the cheesecake for at least 4 hours, preferably overnight, to allow it to set properly.
- Prepare the topping: Before serving, whip the heavy cream with the powdered sugar until stiff peaks form. Spread or pipe the whipped cream over the top of the chilled cheesecake. Spoon the cherry pie filling evenly over the whipped cream.
- Garnish and serve: Finish off your Black Forest Cheesecake with chocolate shavings for a decorative touch. Slice and serve chilled.
Extra Tips
When making Black Forest Cheesecake, ascertain that all your ingredients are at room temperature to achieve a smooth consistency. You can also customize the cherry topping by using fresh cherries instead of pie filling for a more natural flavor.
Additionally, consider allowing the cheesecake to sit at room temperature for about 15-20 minutes before serving, as this enhances the flavor and makes it easier to slice. Enjoy your delicious creation!
Black Forest Trifle
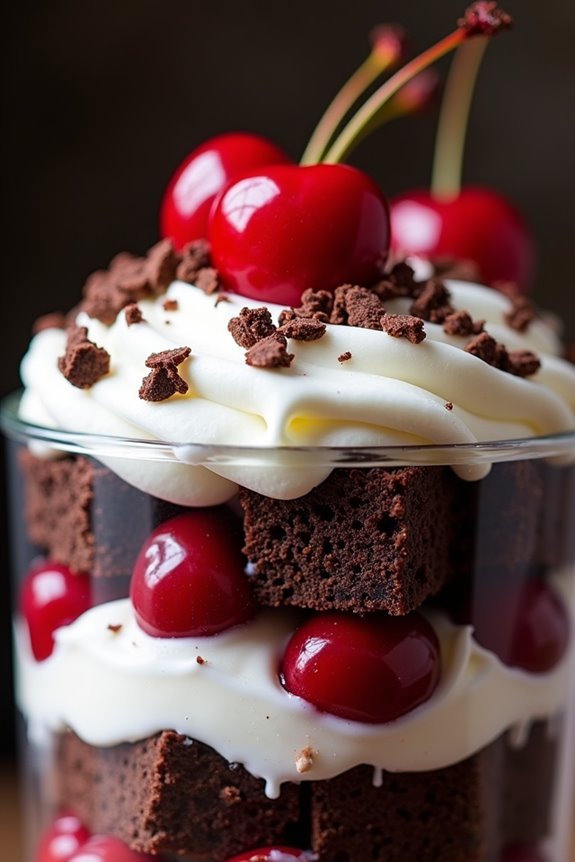
The Black Forest Trifle is a delightful dessert that brings together the rich flavors of chocolate, cherries, and whipped cream in a layered presentation. This enchanting dish is inspired by the traditional German Black Forest Cake but offers a modern twist that’s perfect for gatherings and family celebrations. With its combination of moist chocolate cake, tart cherries, and fluffy cream, the trifle is both visually stunning and utterly delicious.
Creating a Black Forest Trifle is an excellent way to showcase the classic flavors of the beloved cake in a more approachable format. This dessert isn’t only easy to assemble but also allows for variations, such as using different types of fruit or flavors to suit your preferences. Whether you’re hosting a dinner party or simply treating yourself to a sweet delight, this trifle will impress everyone at the table.
Ingredients (Serves 4-6)
- 1 chocolate cake (store-bought or homemade, about 8-inch round)
- 1 cup cherry pie filling (or fresh cherries)
- 2 cups heavy whipping cream
- 1/4 cup powdered sugar
- 1 teaspoon vanilla extract
- 1/2 cup dark chocolate shavings (for garnish)
- Fresh cherries (for garnish, optional)
Instructions
- Prepare the Chocolate Cake: If you’re making the chocolate cake from scratch, bake it according to your recipe or package instructions. Allow the cake to cool completely before cutting it into bite-sized cubes. If using store-bought cake, simply remove it from its packaging and cut it into cubes.
- Whip the Cream: In a large mixing bowl, pour in the heavy whipping cream. Add the powdered sugar and vanilla extract. Using a hand mixer or stand mixer, whip the cream on medium-high speed until soft peaks form. Be careful not to over-whip the cream, as it should remain fluffy and smooth.
- Layer the Trifle: In a large glass trifle bowl or individual serving glasses, start by adding a layer of chocolate cake cubes at the bottom. Follow this with a generous layer of cherry pie filling (or fresh cherries). Add a layer of whipped cream on top of the cherries, smoothing it out to create an even layer.
- Repeat the Layers: Continue the layering process by adding more chocolate cake cubes, followed by cherries, and then whipped cream. Repeat this until you reach the top of the bowl or glass, ensuring the last layer is whipped cream for a polished finish.
- Garnish and Chill: Once you have finished layering, sprinkle the top with dark chocolate shavings for an elegant touch. If desired, add a few fresh cherries on top for decoration. Cover the trifle with plastic wrap and refrigerate for at least 2 hours to allow the flavors to meld together.
Extra Tips
When preparing the Black Forest Trifle, you can customize it by adding a splash of cherry liqueur or almond extract to the cherries for an adult version. For a richer chocolate flavor, consider using chocolate ganache between the layers instead of whipped cream.
Additionally, if you’re short on time, pre-made chocolate cake and whipped cream can save you effort while still delivering a delightful dessert. Remember to serve the trifle chilled for the best taste and texture. Enjoy your delicious creation!
No-Bake Black Forest Cake
The No-Bake Black Forest Cake is a delightful twist on the classic German dessert that combines rich chocolate flavors with the tartness of cherries, all without the need for baking. This cake is perfect for those who want to enjoy a decadent treat without the hassle of turning on the oven.
The layers of chocolate cookies, whipped cream, and cherries come together to create a visually stunning and delicious dessert that will impress any guest. This recipe isn’t only easy to prepare but also allows you to customize the flavors to your liking. You can use fresh cherries, cherry pie filling, or even a cherry liqueur to enhance the taste.
The No-Bake Black Forest Cake is ideal for summer gatherings, birthdays, or any special occasion where you want a show-stopping dessert that can be made ahead of time and served chilled.
Ingredients (serving size: 4-6 people):
- 200g chocolate cookies (such as Oreo or Digestive biscuits)
- 100g unsalted butter, melted
- 500ml heavy whipping cream
- 3 tablespoons powdered sugar
- 1 teaspoon vanilla extract
- 400g canned or jarred cherries (pitted), drained and juice reserved
- 2 tablespoons cherry liqueur (optional)
- Chocolate shavings (for garnish)
- Additional cherries (for garnish)
Cooking Instructions:
- Prepare the Cookie Base: Start by crushing the chocolate cookies into fine crumbs. You can do this by placing them in a food processor or sealing them in a zip-top bag and crushing them with a rolling pin. Once you have fine crumbs, transfer them to a mixing bowl.
- Combine with Butter: Pour the melted butter into the bowl with the cookie crumbs. Mix well until the mixture resembles wet sand. This will be the base of your cake.
- Form the Cake Base: Line the bottom of a 9-inch springform pan with parchment paper. Pour the cookie crumb mixture into the pan and press it down firmly with your hands or the back of a spoon to create an even layer. Place the pan in the refrigerator to set while you prepare the filling.
- Make the Whipped Cream: In a large mixing bowl, combine the heavy whipping cream, powdered sugar, and vanilla extract. Using an electric mixer, whip the cream on medium-high speed until soft peaks form. Be careful not to overbeat, as you want a light and fluffy texture.
- Layer the Cake: Remove the cookie crust from the refrigerator. Spread a layer of whipped cream over the crust, followed by a layer of cherries. If using cherry liqueur, drizzle some over the cherries for added flavor. Repeat the layers (whipped cream and cherries) until you reach the top of the pan, finishing with a layer of whipped cream.
- Chill the Cake: Cover the cake with plastic wrap and refrigerate for at least 4 hours, or overnight if possible. This chilling time allows the flavors to meld and the cake to set properly.
- Serve: Once chilled, carefully remove the sides of the springform pan. Garnish the top with chocolate shavings and additional cherries before slicing and serving.
Extra Tips: When making the No-Bake Black Forest Cake, you can elevate the flavors by using high-quality chocolate cookies and fresh cherries when in season.
To save time, consider preparing the cake a day in advance, allowing it to chill overnight for better flavor integration. This cake can also be frozen for a longer shelf life; just make sure to wrap it well to prevent freezer burn.
Black Forest Pudding Parfaits
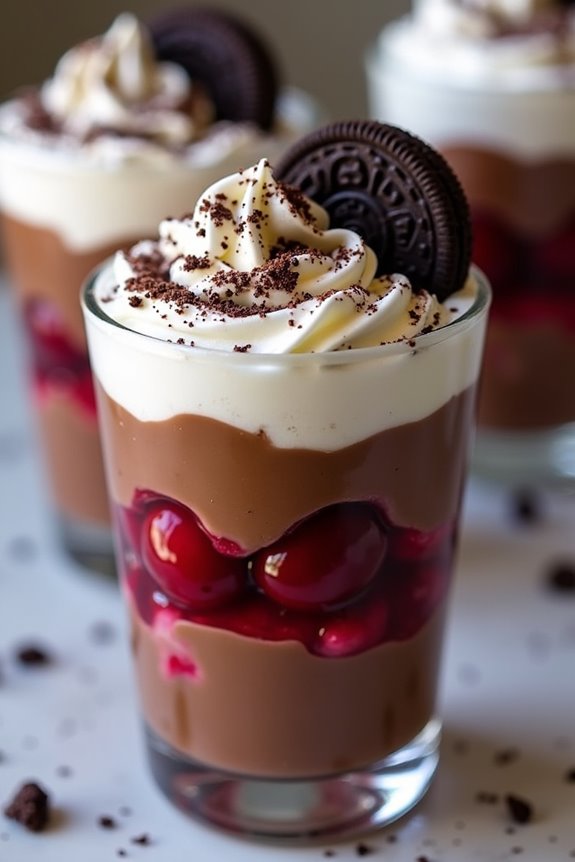
Black Forest Pudding Parfaits are a delicious twist on the classic German Black Forest Cake, bringing together the rich flavors of chocolate, cherries, and cream in a delightful layered dessert. This recipe is perfect for those who want to enjoy the essence of the traditional cake without the need for baking.
These indulgent parfaits aren’t only visually appealing but also incredibly simple to assemble, making them a fantastic choice for gatherings or a sweet treat at home.
In this recipe, you’ll create a luscious chocolate pudding, layer it with whipped cream and cherries, and serve it in elegant glass cups for a beautiful presentation. The combination of textures and flavors will surely impress your friends and family, offering them a taste of the iconic Black Forest in a new and fun way.
So, gather your ingredients and get ready to create these delicious Black Forest Pudding Parfaits!
Ingredients (Serves 4-6)
- 1 cup heavy cream
- 1/4 cup powdered sugar
- 1 teaspoon vanilla extract
- 2 cups chocolate pudding (store-bought or homemade)
- 1 cup cherry pie filling (or fresh cherries, pitted and sliced)
- 1/2 cup crushed chocolate cookies (such as Oreos or chocolate wafers)
- Chocolate shavings or cocoa powder for garnish (optional)
Cooking Instructions
1. Prepare the Whipped Cream: In a large mixing bowl, pour the heavy cream, powdered sugar, and vanilla extract. Using an electric mixer, whip the cream on medium speed until soft peaks form. This usually takes about 3-5 minutes.
Be careful not to overwhip, as you want a light and airy texture.
2. Assemble the Parfaits: Start with a clean glass or parfait cup. Add a layer of chocolate pudding to the bottom of each cup, filling it about one-third full. Smooth the top with a spoon for an even layer.
3. Add the Cherry Filling: Spoon a layer of cherry pie filling over the chocolate pudding in each cup. If using fresh cherries, distribute them evenly over the pudding layer. This adds a burst of flavor and beautiful color to your parfaits.
4. Layer the Whipped Cream: Follow the cherry layer with a generous dollop of the whipped cream. You can use a piping bag for a more decorative effect or simply spoon it on top.
Make sure to cover the cherries completely.
5. Repeat the Layers: Repeat the layering process with another layer of chocolate pudding, followed by cherries, and topped with whipped cream until the cups are filled, leaving a little space at the top for garnishing.
6. Garnish and Chill: For the final touch, sprinkle crushed chocolate cookies over the top layer of whipped cream. If desired, add chocolate shavings or a dusting of cocoa powder for extra flair.
Cover the parfaits with plastic wrap and refrigerate for at least 1 hour to allow the flavors to meld.
Extra Tips
To elevate your Black Forest Pudding Parfaits, consider adding a splash of cherry liqueur to the cherry filling for an adult version of the dessert.
If you’re short on time, pre-made chocolate pudding can save you effort, but for a richer taste, homemade pudding is worth the extra step.
Be sure to serve the parfaits chilled for the best flavor and texture, and feel free to customize the layers according to your preferences, such as incorporating raspberries or using different types of cookies for crunch!
Chocolate Cherry Layer Cake
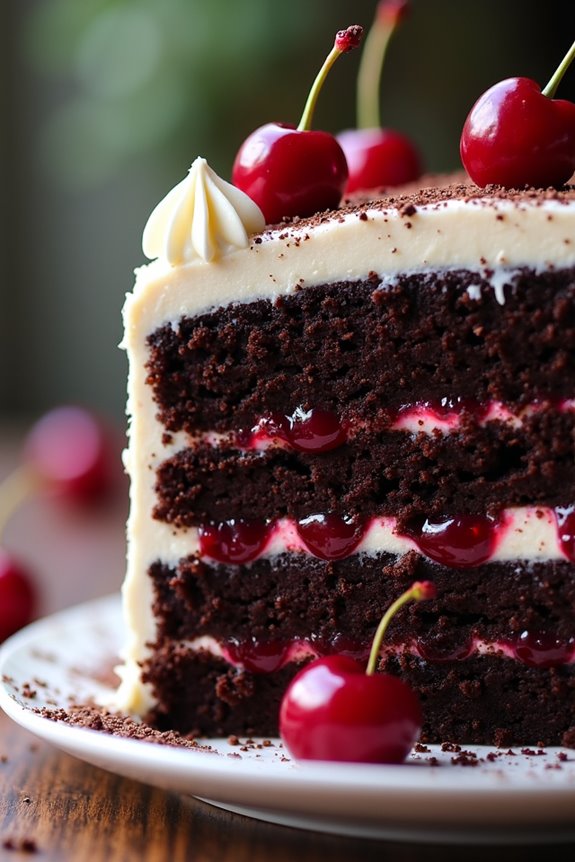
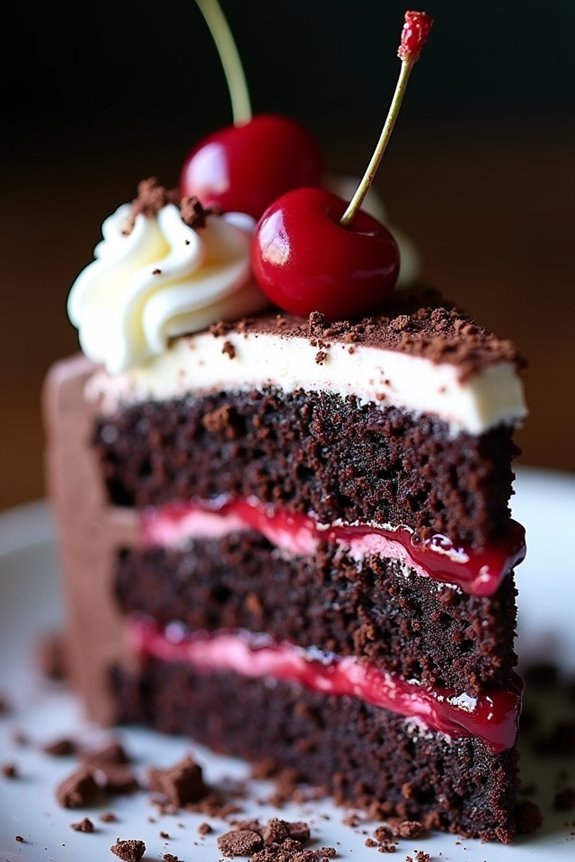
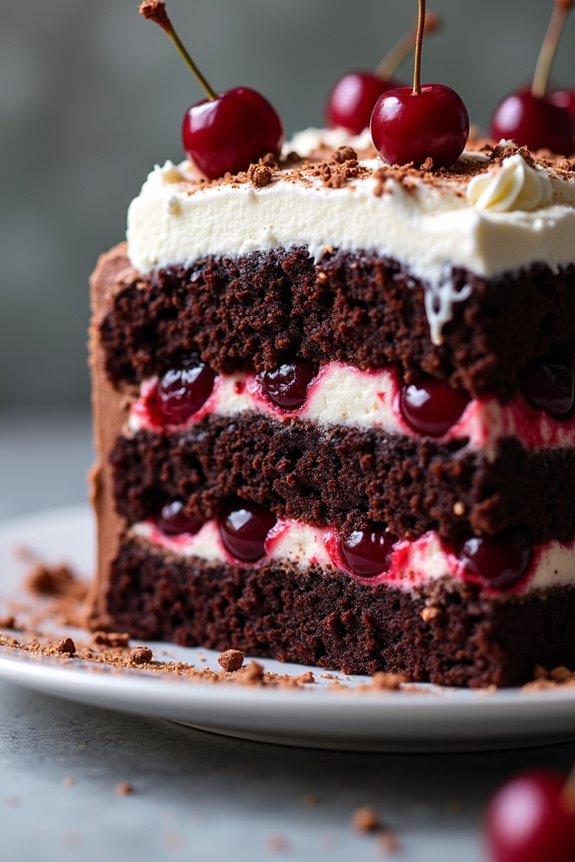
The Chocolate Cherry Layer Cake is a delightful twist on the classic German Black Forest Cake. This indulgent dessert features layers of rich chocolate cake, luscious cherry filling, and creamy whipped frosting. It’s perfect for special occasions, birthdays, or simply to satisfy your sweet tooth. The combination of intense chocolate and vibrant cherries creates a harmonious blend of flavors that will impress your guests and leave them wanting more.
In addition to its delicious taste, this cake has an elegant presentation with its dark chocolate layers contrasting beautifully with the bright red cherries. Making the cake from scratch allows you to control the quality of ingredients, guaranteeing a fresher and more flavorful dessert. Follow this recipe to create a show-stopping Chocolate Cherry Layer Cake that will be the centerpiece of your dessert table.
Ingredients (Serves 4-6)
- 1 ½ cups all-purpose flour
- 1 cup granulated sugar
- ½ cup unsweetened cocoa powder
- 1 teaspoon baking powder
- 1 teaspoon baking soda
- ½ teaspoon salt
- 1 cup buttermilk
- ½ cup vegetable oil
- 2 large eggs
- 2 teaspoons vanilla extract
- 1 cup boiling water
- 1 jar (12 oz) morello cherries, drained and juice reserved
- 1 cup heavy whipping cream
- 2 tablespoons powdered sugar
- Dark chocolate shavings (for garnish)
Cooking Instructions
- Preheat the Oven: Begin by preheating your oven to 350°F (175°C). This guarantees that the cake bakes evenly and rises properly.
- Prepare Cake Pans: Grease and flour two 9-inch round cake pans to prevent the cakes from sticking. Alternatively, you can line the bottoms with parchment paper.
- Combine Dry Ingredients: In a large mixing bowl, sift together the flour, granulated sugar, cocoa powder, baking powder, baking soda, and salt. Mix these dry ingredients until well combined.
- Mix Wet Ingredients: In another bowl, combine the buttermilk, vegetable oil, eggs, and vanilla extract. Whisk until smooth.
- Combine Mixtures: Pour the wet ingredients into the dry ingredients and mix until just combined. Gradually add in the boiling water, stirring until the batter is smooth and well blended.
- Bake the Cakes: Divide the batter equally between the prepared cake pans. Bake in the preheated oven for 30-35 minutes or until a toothpick inserted into the center comes out clean.
- Cool the Cakes: Once baked, remove the cakes from the oven and let them cool in the pans for about 10 minutes. Then, turn them out onto a wire rack to cool completely.
- Prepare Cherry Filling: While the cakes are cooling, prepare the cherry filling. In a small bowl, mix the drained cherries with a few tablespoons of the reserved cherry juice to create a syrup-like consistency.
- Whip the Cream: In a separate bowl, whip the heavy cream with powdered sugar until soft peaks form. This will be used for frosting the cake.
- Assemble the Cake: Once the cakes are completely cool, place one layer on a serving plate. Spread half of the whipped cream over the first layer, then top with half of the cherry filling. Place the second layer on top and repeat with the remaining whipped cream and cherries on top.
- Garnish: Finish by garnishing the top of the cake with dark chocolate shavings for an elegant touch.
Extra Tips
For the best results, verify all your ingredients are at room temperature before mixing. This helps create a smoother batter and promotes even baking. If you prefer a richer cherry flavor, consider adding a splash of cherry liqueur to the cherry filling.
Additionally, you can make the cake layers in advance and store them in the refrigerator, allowing the flavors to meld beautifully overnight. Enjoy your Chocolate Cherry Layer Cake with a dollop of extra whipped cream on the side for added indulgence!
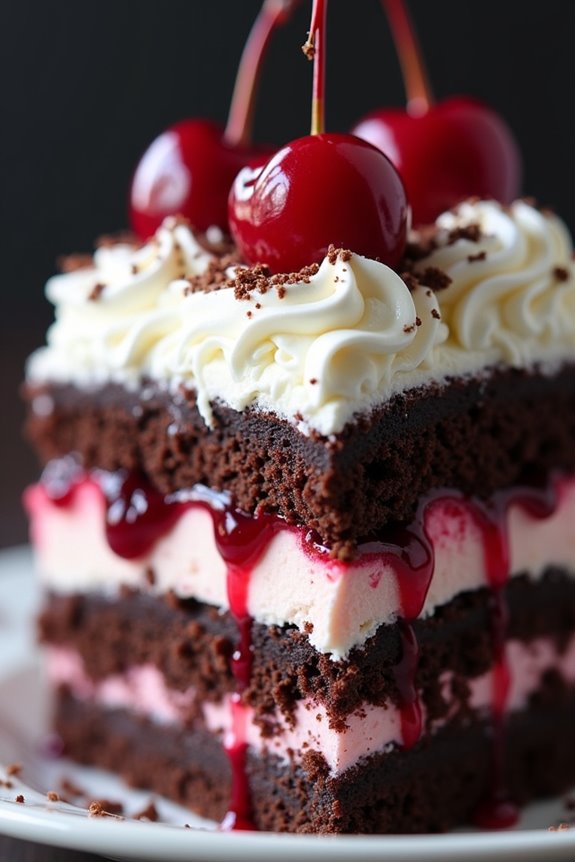
Black Forest Ice Cream Cake
Black Forest Ice Cream Cake is a delightful fusion of two beloved desserts: the classic German Black Forest cake and a rejuvenating ice cream cake. This indulgent dessert features layers of rich chocolate cake, creamy ice cream, and luscious cherries, all topped with whipped cream and chocolate shavings. Perfect for any celebration or a hot summer day, this cake not only looks impressive but also offers a deliciously satisfying taste that’s sure to please your guests.
To make this cake, you have the option of using store-bought chocolate cake or baking your own. Using high-quality ingredients, especially the chocolate and cherries, will elevate the flavors and create a more luxurious dessert. The combination of textures from the cake, ice cream, and whipped cream adds an exciting element, making every bite a delightful experience. With this recipe, you’ll be able to create a stunning Black Forest Ice Cream Cake that’s easy to prepare and serves 4-6 people.
Ingredients:
- 1 store-bought chocolate cake (8-inch round)
- 2 cups chocolate ice cream (softened)
- 1 cup cherry pie filling (with whole cherries)
- 1 cup heavy whipping cream
- 2 tablespoons powdered sugar
- 1 teaspoon vanilla extract
- Chocolate shavings (for garnish)
- Fresh cherries (for garnish)
Instructions:
- Prepare the Chocolate Cake: If you’re using a store-bought chocolate cake, slice it horizontally into two even layers. If you’re baking your own cake, allow it to cool completely before slicing. This step is essential as it helps to guarantee that the layers hold together well when assembled.
- Layer the Ice Cream: Take the first layer of chocolate cake and place it on a serving plate or a cake board. Spread a generous layer of softened chocolate ice cream over the top of the cake, making sure to reach the edges. This layer should be about 1 inch thick for a nice balance of flavors.
- Add the Cherry Filling: Spoon half of the cherry pie filling over the chocolate ice cream layer, spreading it gently but evenly. This will add a sweet and tart flavor that complements the chocolate perfectly.
- Assemble the Second Layer: Place the second layer of chocolate cake on top of the cherry filling, pressing down lightly to secure it in place. This layer will help to create a stable base for the rest of the dessert.
- Top with Ice Cream: Repeat the process by spreading another layer of softened chocolate ice cream over the second layer of cake. Make sure it’s even and reaches the edges, just like the first layer.
- Final Cherry Layer: Add the remaining cherry pie filling on top of the second layer of ice cream, spreading it evenly. This will create a beautiful visual and delicious contrast to the chocolate and ice cream.
- Whip the Cream: In a mixing bowl, whip the heavy cream, powdered sugar, and vanilla extract together until soft peaks form. This whipped cream will be used to frost the top and sides of the cake, creating a light and fluffy finish.
- Frost the Cake: Carefully spread the whipped cream over the top and sides of the assembled cake, smoothing it out as you go. You can use a spatula or the back of a spoon to achieve a nice finish.
- Garnish and Serve: Finish off the cake by garnishing it with chocolate shavings and fresh cherries on top. For a more dramatic presentation, you can also sprinkle some shavings around the base of the cake.
- Freeze and Slice: Place the assembled cake in the freezer for at least 2 hours to allow the ice cream to firm up. When ready to serve, slice the cake with a sharp knife, dipping it in warm water between cuts for cleaner slices.
Extra Tips: To make your Black Forest Ice Cream Cake even more special, consider adding a layer of whipped cream between the cake and ice cream layers for added creaminess. You can also drizzle some chocolate syrup over the top or between layers for an extra indulgent touch.
If you prefer a boozy flavor, a splash of Kirsch (cherry schnapps) can be brushed onto the cake layers before assembling for that authentic Black Forest taste. Remember to keep the cake stored in the freezer until just before serving to maintain its shape and texture. Enjoy your delicious creation!
Black Forest Brownies
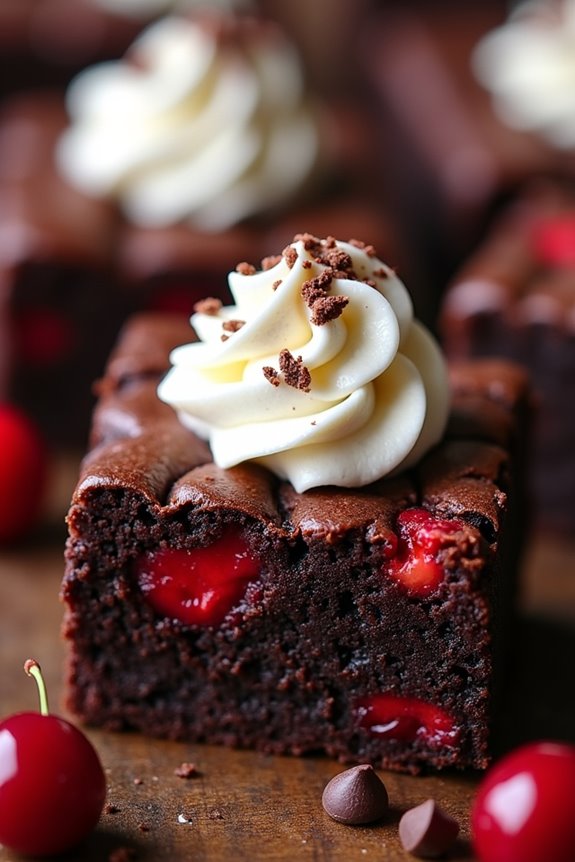
Indulge in the rich, decadent flavors of Black Forest Brownies, a delightful twist on the classic German Black Forest Cake. Combining the deep chocolatey goodness of brownies with the sweet tartness of cherries, these dessert bars are sure to impress at any gathering or simply satisfy your sweet tooth.
Topped with luscious whipped cream and a sprinkle of chocolate shavings, they present a beautiful and delicious way to enjoy the traditional Black Forest flavors in a more convenient format.
These brownies aren’t only easy to make, but they also offer a unique presentation that makes them perfect for parties or family gatherings. The recipe yields 4-6 servings, guaranteeing that everyone gets a taste of this delightful treat.
With a few simple ingredients and a bit of time, you can create a stunning dessert that captures the essence of the beloved Black Forest cake while maintaining the fudgy texture of brownies.
Ingredients:
- 1 cup unsweetened cocoa powder
- 1 cup all-purpose flour
- 1/2 teaspoon baking powder
- 1/4 teaspoon salt
- 1 cup unsalted butter, melted
- 2 cups granulated sugar
- 4 large eggs
- 1 teaspoon vanilla extract
- 1 cup dark chocolate chips
- 1 cup pitted cherries (fresh or jarred)
- Whipped cream for serving
- Chocolate shavings for garnish
Cooking Instructions:
- Preheat the Oven: Begin by preheating your oven to 350°F (175°C). This guarantees that your brownies will bake evenly and achieve the perfect fudgy texture.
- Prepare the Baking Dish: Grease a 9×13 inch baking dish or line it with parchment paper. This will prevent the brownies from sticking and make it easier to lift them out once they’re baked.
- Mix Dry Ingredients: In a medium bowl, whisk together the cocoa powder, flour, baking powder, and salt. This step is crucial to guarantee that the dry ingredients are well combined and evenly distributed throughout the brownie batter.
- Combine Wet Ingredients: In a large bowl, mix the melted butter and granulated sugar until smooth. Add the eggs one at a time, mixing well after each addition. Then stir in the vanilla extract. This creates a rich and creamy base for your brownies.
- Incorporate Dry Ingredients: Gradually add the dry ingredient mixture to the wet ingredients, stirring until just combined. Be careful not to overmix, as this can lead to tougher brownies.
- Add Chocolate Chips and Cherries: Fold in the dark chocolate chips and pitted cherries into the batter. The cherries will add a lovely tartness that balances the sweetness of the brownies.
- Pour and Spread: Pour the brownie batter into the prepared baking dish and spread it evenly with a spatula. This guarantees that your brownies will bake evenly and have a consistent texture.
- Bake: Place the baking dish in the preheated oven and bake for 25-30 minutes, or until a toothpick inserted into the center comes out with a few moist crumbs. Keep an eye on them to avoid overbaking.
- Cool and Serve: Once baked, remove the brownies from the oven and allow them to cool in the pan for about 10 minutes. Then, lift them out using the parchment paper (if used) and let them cool completely on a wire rack before cutting into squares.
- Garnish and Enjoy: Serve the Black Forest Brownies topped with a dollop of whipped cream and a sprinkle of chocolate shavings for an elegant finish. Enjoy your delicious creation!
Extra Tips:
For an enhanced cherry flavor, consider using cherry liqueur in the brownie batter or drizzle it on top before serving.
If you can’t find fresh cherries, jarred or frozen cherries work perfectly too; just be sure to drain any excess liquid.
To elevate the visual appeal, you can also add a cherry on top of each brownie when serving. Enjoy experimenting with variations, such as adding nuts or using different types of chocolate.
White Chocolate Black Forest Cake
Indulge in a delightful twist on the classic Black Forest Cake with this White Chocolate Black Forest Cake recipe. This dessert is a perfect combination of rich chocolate, sweet white chocolate, and the tartness of cherries, making it a showstopper for any occasion.
The luscious layers of moist chocolate cake are complemented by creamy white chocolate ganache and a hint of cherry flavor, creating a harmonious blend that will satisfy any sweet tooth.
This cake isn’t only visually stunning but also surprisingly easy to make. With a few simple ingredients and steps, you can impress your family and friends with a dessert that looks like it came straight from a professional bakery.
Whether it’s for a birthday, an anniversary, or just a weekend treat, this White Chocolate Black Forest Cake is sure to be a hit.
Ingredients (Serves 4-6)
- 1 ½ cups all-purpose flour
- 1 cup granulated sugar
- 1/3 cup unsweetened cocoa powder
- 1 tsp baking powder
- ½ tsp baking soda
- ½ tsp salt
- 1/2 cup unsalted butter, softened
- 2 large eggs
- 1 tsp vanilla extract
- 1 cup buttermilk
- 1 cup cherry filling (canned or homemade)
- 6 oz white chocolate, chopped
- 1 cup heavy cream
- 2 tbsp powdered sugar
- Fresh cherries for decoration
- Chocolate shavings for decoration
Cooking Instructions
1. Preheat the Oven: Preheat your oven to 350°F (175°C). This guarantees that your cake bakes evenly and rises properly.
2. Prepare Cake Pans: Grease and flour two 8-inch round cake pans. This prevents the cake from sticking and allows for easy removal once baked.
3. Combine Dry Ingredients: In a large mixing bowl, sift together the flour, granulated sugar, cocoa powder, baking powder, baking soda, and salt. Mixing the dry ingredients first helps to evenly distribute the leavening agents for a consistent rise.
4. Mix Wet Ingredients: In a separate bowl, cream the softened butter until light and fluffy. Add the eggs one at a time, mixing well after each addition, followed by the vanilla extract.
Then gradually mix in the buttermilk until smooth.
5. Combine Wet and Dry Ingredients: Pour the wet mixture into the bowl with the dry ingredients. Mix gently until just combined; be careful not to overmix, as this can result in a dense cake.
6. Bake the Cake: Divide the batter evenly between the prepared cake pans. Bake in the preheated oven for 25-30 minutes or until a toothpick inserted in the center comes out clean.
Let the cakes cool in the pans for 10 minutes before transferring them to a wire rack to cool completely.
7. Prepare White Chocolate Ganache: In a small saucepan over low heat, melt the chopped white chocolate. In a separate bowl, whip the heavy cream with powdered sugar until soft peaks form.
Gently fold the melted chocolate into the whipped cream until fully combined.
8. Assemble the Cake: Once the cakes are completely cooled, place one layer on a serving plate. Spread a layer of cherry filling over the top, followed by half of the white chocolate ganache.
Place the second layer on top and repeat the process with the remaining cherry filling and ganache.
9. Decorate: Top the cake with fresh cherries and chocolate shavings for an elegant finish. This adds a beautiful touch that enhances the presentation of your cake.
10. Serve: Slice the cake and Serve immediately, or refrigerate for an hour to help set the ganache before serving.
Extra Tips
For an even more decadent flavor, you can soak the chocolate cake layers with a little cherry juice or liqueur before adding the cherry filling. This adds moisture and enhances the cherry flavor.
Additionally, if you prefer a stronger white chocolate taste, consider increasing the amount of white chocolate in the ganache.
Be sure to store any leftovers in an airtight container in the refrigerator, and enjoy within a few days for the best taste and texture.
Black Forest Cake Pops
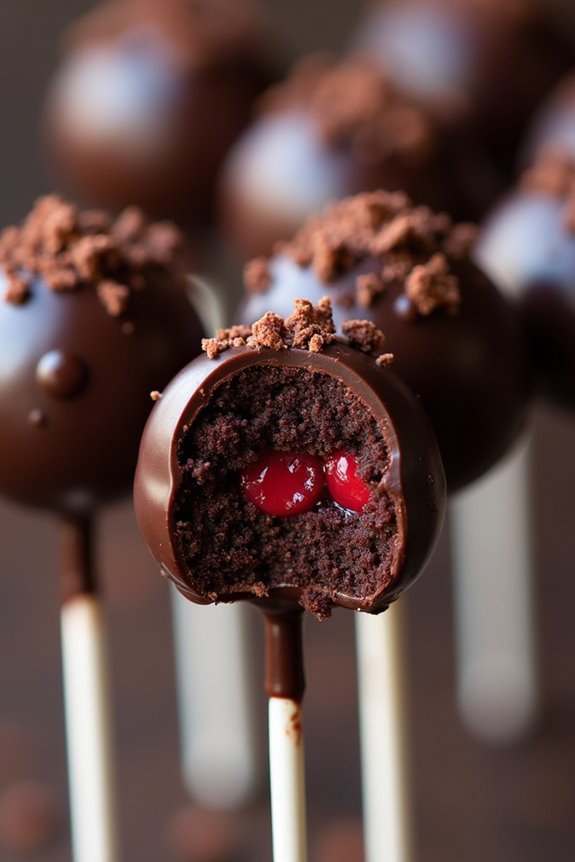
Black Forest Cake Pops are a delightful twist on the classic German dessert, combining the rich flavors of chocolate cake, tart cherries, and creamy whipped frosting into bite-sized treats. These cake pops aren’t only visually appealing but are also incredibly fun to make, making them a perfect addition to any celebration or gathering.
With their sweet and slightly tangy flavor profile, they bring a taste of the Black Forest right to your home in a format that’s easy to enjoy.
To make Black Forest Cake Pops, you’ll start with a moist chocolate cake, crumble it, and mix it with cherry filling and frosting to create a rich cake dough. This mixture is then shaped into small balls, chilled, and dipped in chocolate coating. Once decorated, these cake pops are sure to be a hit with guests of all ages.
Let’s explore the ingredients and cooking instructions to get started!
Ingredients (Serves 4-6 people):
- 1 cup chocolate cake crumbs (prepared from a baked chocolate cake)
- 1/2 cup cherry pie filling
- 1/4 cup whipped cream frosting
- 1 cup semi-sweet chocolate chips (for coating)
- 1 tablespoon vegetable oil (for thinning chocolate)
- 1/4 cup grated chocolate or chocolate shavings (for decoration)
- 6-8 lollipop sticks
Cooking Instructions:
- Prepare the Chocolate Cake: If you don’t have pre-made chocolate cake crumbs, bake a chocolate cake according to your favorite recipe or box instructions. Allow it to cool completely, then crumble it into fine crumbs in a large mixing bowl.
- Mix the Cake Pop Dough: To the chocolate cake crumbs, add the cherry pie filling and whipped cream frosting. Mix well using your hands or a spatula until the mixture is combined and holds together. It should be moist but not too sticky.
- Shape the Cake Balls: Using your hands, take a small amount of the cake mixture (about 1 tablespoon) and roll it into a ball. Place the shaped balls onto a baking sheet lined with parchment paper. Repeat this process until all the mixture is shaped into balls.
- Chill the Cake Pops: Place the baking sheet with the cake balls in the refrigerator for about 30 minutes. This helps the cake pops firm up, making them easier to dip later.
- Melt the Chocolate Coating: In a microwave-safe bowl, combine the chocolate chips and vegetable oil. Microwave in 30-second intervals, stirring in between, until the chocolate is smooth and melted.
- Dip the Cake Pops: Remove the chilled cake balls from the refrigerator. Dip the end of each lollipop stick into the melted chocolate, then insert it into the center of a cake ball. This helps to hold the stick in place. Once all sticks are inserted, dip each cake ball into the melted chocolate, ensuring it’s fully coated.
- Decorate the Cake Pops: After dipping, immediately sprinkle grated chocolate or chocolate shavings over the wet chocolate coating. Place the decorated cake pops upright in a block of styrofoam or a cake pop stand to allow the coating to set.
- Chill Again: Once all cake pops are decorated, place them back into the refrigerator for another 15-20 minutes to let the chocolate coating harden completely.
Extra Tips:
When making Black Forest Cake Pops, feel free to experiment with the flavor of the cake or filling used. If you prefer, you can use a chocolate ganache or a different type of frosting to customize the taste.
Additionally, consider adding a splash of cherry liqueur to the cake mixture for an adult twist. Finally, for a festive touch, you can use colored candy melts for coating or get creative with various toppings, such as crushed nuts or sprinkles, to make your cake pops stand out.
Enjoy your baking adventure!