

When I think of British cuisine, I picture cozy gatherings and elegant feasts. Dishes like Beef Wellington and Sticky Toffee Pudding have a charming way of warming the soul. Even Meghan might be tempted to recreate these palace favorites at home. Curious about how these royal delights can elevate your next meal? Let’s explore the culinary treasures that await.
Beef Wellington

Beef Wellington is a classic British dish that impresses with its elegant presentation and rich flavors. Traditionally served during special occasions and festive gatherings, this dish features a tender beef fillet coated with a savory mushroom duxelles and wrapped in flaky puff pastry. The combination of textures and tastes creates a delightful experience that’s certain to impress your guests.
With a little patience and attention to detail, you can master this iconic recipe and bring a taste of British culinary tradition to your table. This dish not only showcases the quality of the ingredients but also the skill of the chef. Using a high-quality cut of beef, such as beef tenderloin, guarantees that the final result is tender and juicy.
The mushroom duxelles adds depth of flavor, while the golden-brown pastry crust provides a beautiful contrast. Perfect for a dinner party or a festive holiday meal, Beef Wellington is a celebration of flavors wrapped in one stunning package.
Ingredients (Serves 4-6)
- 2 lb beef tenderloin, trimmed
- 1 lb mushrooms, finely chopped
- 2 tablespoons olive oil
- 2 tablespoons Dijon mustard
- 8 slices prosciutto
- 1 sheet of puff pastry (thawed if frozen)
- 1 egg, beaten (for egg wash)
- Salt and pepper to taste
- Fresh thyme leaves (optional, for garnish)
Cooking Instructions
- Prepare the Beef: Start by seasoning the beef tenderloin generously with salt and pepper. In a large skillet, heat the olive oil over high heat until it’s shimmering. Sear the beef on all sides for about 2-3 minutes per side, or until browned. Remove it from the heat and brush with Dijon mustard while it cools. Set aside.
- Make the Mushroom Duxelles: In the same skillet, add the finely chopped mushrooms and cook over medium heat. Stir frequently until all moisture has evaporated and the mixture is dry, about 10-15 minutes. Season with salt, pepper, and fresh thyme leaves if desired. Allow it to cool.
- Assemble the Wellington: On a clean surface, lay out the prosciutto slices slightly overlapping. Spread the cooled mushroom duxelles evenly over the prosciutto. Place the beef on top and carefully roll the prosciutto around the beef, making sure it’s tightly wrapped. Use plastic wrap to help shape it into a log and refrigerate for at least 30 minutes.
- Wrap in Puff Pastry: Preheat your oven to 400°F (200°C). Roll out the puff pastry on a floured surface into a rectangle large enough to envelop the beef. Unwrap the beef from the plastic wrap and place it in the center of the pastry. Fold the pastry over the beef, trimming any excess, and seal the edges with a fork. Brush the top with the beaten egg for a golden finish.
- Bake the Wellington: Place the wrapped Wellington seam-side down on a baking sheet lined with parchment paper. Cut a few slits in the pastry to allow steam to escape. Bake in the preheated oven for 25-30 minutes, or until the pastry is golden brown and crispy. Use a meat thermometer to check that the internal temperature of the beef reaches 125°F (52°C) for medium-rare.
- Rest and Serve: Once baked, remove the Beef Wellington from the oven and let it rest for 10-15 minutes before slicing. This resting period allows the juices to redistribute, guaranteeing a moist and flavorful dish. Slice into thick pieces and serve with your favorite sides.
Extra Tips
For an even more flavorful Beef Wellington, consider adding a layer of pâté (such as foie gras or chicken liver pâté) over the mushroom duxelles before rolling up the beef. Additionally, make sure the pastry is kept cold until it’s time to bake, as this will help achieve a flakier crust.
Finally, serve with a rich red wine sauce or gravy to elevate the dish even further.
Shepherd’s Pie

Shepherd’s Pie is a classic British comfort dish that combines a savory filling of minced lamb with vegetables, all topped with a creamy layer of mashed potatoes. Traditionally, this dish was made by shepherds using leftover meat, making it a frugal yet hearty meal that has stood the test of time. The flavors meld beautifully, and it’s perfect for warming up on a chilly evening.
The recipe is simple, and the result is a satisfying and delicious pie that can easily feed a family or a small gathering. The beauty of Shepherd’s Pie lies in its versatility. While the traditional recipe calls for lamb, you can easily substitute it with beef if you prefer. The key is to use fresh, high-quality ingredients to augment the flavor of the dish.
Serve it with a side of green peas or a fresh salad for a complete meal that will leave everyone asking for seconds.
Ingredients (Serves 4-6):
- 1 lb (450g) minced lamb (or beef)
- 1 medium onion, finely chopped
- 2 carrots, diced
- 2 cloves garlic, minced
- 1 cup frozen peas
- 1 tbsp tomato paste
- 1 tsp Worcestershire sauce
- 1 cup beef or vegetable stock
- 2 tbsp olive oil
- Salt and pepper, to taste
- 2 lbs (900g) potatoes, peeled and chopped
- 4 tbsp butter
- 1/2 cup milk
- 1 cup shredded cheddar cheese (optional)
Cooking Instructions:
- Preheat the Oven: Preheat your oven to 400°F (200°C). This guarantees that the Shepherd’s Pie will cook evenly and develop a beautiful golden crust on top.
- Cook the Potatoes: Place the chopped potatoes in a large pot of salted water. Bring to a boil and cook for about 15-20 minutes, or until the potatoes are tender. Drain the potatoes and return them to the pot.
- Mash the Potatoes: Add the butter and milk to the drained potatoes. Mash them until smooth and creamy. Season with salt and pepper to taste. Set aside while you prepare the filling.
- Prepare the Filling: In a large skillet, heat olive oil over medium heat. Add the chopped onion and diced carrots, cooking until they start to soften, about 5 minutes. Add the minced garlic and cook for another minute until fragrant.
- Cook the Meat: Increase the heat and add the minced lamb (or beef) to the skillet. Cook until browned, breaking it up with a spoon as it cooks. Drain any excess fat if necessary.
- Add Flavorings: Stir in the tomato paste, Worcestershire sauce, and beef or vegetable stock. Bring to a simmer and let it cook for about 10 minutes, allowing the flavors to meld. Add the frozen peas and season with salt and pepper.
- Assemble the Pie: In a baking dish, spread the meat and vegetable mixture evenly on the bottom. Top with the creamy mashed potatoes, spreading them out with a spatula. If desired, sprinkle shredded cheddar cheese on top for an extra layer of flavor.
- Bake: Place the assembled Shepherd’s Pie in the preheated oven and bake for about 25-30 minutes, or until the top is golden and the filling is bubbling around the edges.
- Serve: Allow the Shepherd’s Pie to cool for a few minutes before serving. This dish is best enjoyed hot and can be accompanied by a side of green peas or a fresh salad.
Extra Tips:
For a deeper flavor, consider adding herbs such as thyme or rosemary to the meat filling. You can also experiment with different vegetables, like corn or bell peppers, to suit your taste.
If you have leftovers, Shepherd’s Pie reheats beautifully in the oven or microwave, making it a perfect dish for meal prep. Enjoy your hearty and delicious Shepherd’s Pie!
Sticky Toffee Pudding
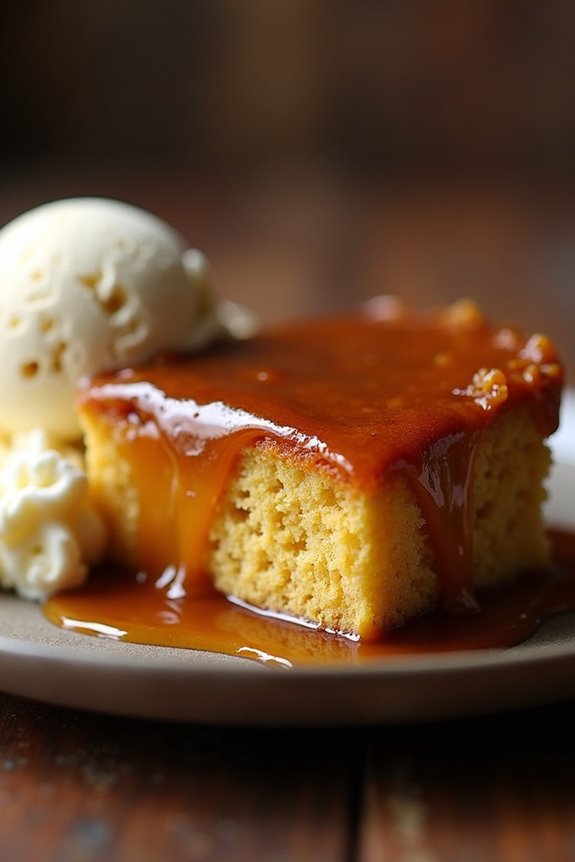
Sticky Toffee Pudding is a quintessential British dessert that has won over hearts and taste buds alike. This indulgent treat features a moist sponge cake made with finely chopped dates, drenched in a luscious toffee sauce. Traditionally served warm with a generous helping of vanilla ice cream or thick custard, this pudding is the perfect way to conclude any meal. Its rich flavors and comforting texture make it a favorite in British households, especially during the colder months.
The origins of Sticky Toffee Pudding are somewhat debated, but it’s widely believed to have been popularized in the Lake District. Over the years, variations have emerged, but the core recipe remains beloved for its simplicity and the delightful combination of sweet and savory elements. Whether it’s a family gathering or a special occasion, Sticky Toffee Pudding is certain to impress and satisfy the sweet tooth of anyone who tries it.
Ingredients (Serves 4-6)
- 200g pitted dates, chopped
- 300ml boiling water
- 1 tsp baking soda
- 75g unsalted butter, softened
- 150g brown sugar
- 2 large eggs
- 175g all-purpose flour
- 1 tsp vanilla extract
- 1 tsp baking powder
- Pinch of salt
Toffee Sauce Ingredients
- 100g unsalted butter
- 200g brown sugar
- 250ml heavy cream
- 1 tsp vanilla extract
Cooking Instructions
- Preheat the Oven: Begin by preheating your oven to 180°C (350°F). Grease a baking dish or a pudding basin with butter to guarantee that the pudding comes out easily after baking.
- Prepare the Dates: In a bowl, combine the chopped dates with boiling water and baking soda. Allow this mixture to sit for about 15 minutes. The hot water will soften the dates, making them easier to blend into the pudding batter.
- Make the Batter: In a large mixing bowl, cream together the softened butter and brown sugar until light and fluffy. This will incorporate air into the mixture, giving your pudding a nice texture.
- Add Eggs and Flavorings: Beat in the eggs one at a time, ensuring each is fully incorporated before adding the next. Stir in the vanilla extract to add depth of flavor.
- Combine Dry Ingredients: In a separate bowl, whisk together the flour, baking powder, and salt. Gradually fold the dry ingredients into the wet mixture, being careful not to overmix.
- Incorporate the Dates: Once the date mixture has cooled slightly, add it to the batter and stir until just combined. The mixture will be thick and sticky.
- Bake the Pudding: Pour the batter into the prepared baking dish and smooth the top. Bake in the preheated oven for 30-35 minutes, or until a skewer inserted into the center comes out clean.
- Prepare the Toffee Sauce: While the pudding is baking, make the toffee sauce. In a saucepan over medium heat, melt the butter and brown sugar together, stirring until combined. Gradually whisk in the heavy cream and vanilla extract, allowing it to simmer for 5 minutes until slightly thickened.
- Serve: Once the pudding is done, let it cool for a few minutes, then invert it onto a serving plate. Poke holes in the top of the pudding with a skewer and pour over half of the warm toffee sauce, allowing it to soak in. Serve warm with the remaining sauce on the side and a scoop of vanilla ice cream or custard.
Extra Tips
To enhance the flavor of your Sticky Toffee Pudding, consider adding a pinch of ground ginger or nutmeg to the batter for a subtle warmth.
Make sure to serve the pudding warm for the best experience, as this allows the toffee sauce to soak in beautifully. If you’re preparing it ahead of time, you can reheat the pudding in the oven or microwave just before serving.
Enjoy the delightful combination of textures and flavors that this classic British dessert offers!
Fish and Chips

Fish and chips is a classic British dish that has delighted taste buds for generations. Originating in the United Kingdom, this hearty meal features crispy battered fish paired with thick-cut fries, often served with a side of tartar sauce and a sprinkle of malt vinegar. The combination of flaky fish and crunchy chips creates a satisfying texture that’s both comforting and delicious.
While it may seem simple, perfecting the batter and achieving the ideal fry can elevate this dish to new heights.
To make an authentic fish and chips meal, it’s important to choose the right type of fish. Traditionally, cod or haddock are used due to their mild flavor and flaky texture. The batter should be light and crisp, allowing the natural flavors of the fish to shine through. Served hot and fresh, fish and chips are often enjoyed in a newspaper cone, evoking a sense of nostalgia for seaside towns in the UK.
Let’s explore this delightful recipe that serves 4-6 people.
Ingredients
- 4-6 pieces of cod or haddock fillets (about 150-200g each)
- 1 cup all-purpose flour (plus extra for dusting)
- 1 tsp baking powder
- 1 cup cold sparkling water
- Salt and pepper to taste
- 4 large russet potatoes
- Oil for frying (vegetable or sunflower oil)
- Tartar sauce (for serving)
- Malt vinegar (for drizzling)
Cooking Instructions
- Prepare the Potatoes: Start by peeling the russet potatoes and cutting them into thick chips, about 1-inch wide. Rinse the chips under cold water to remove excess starch, then pat them dry with a clean kitchen towel. This step helps to achieve a crispier texture when frying.
- Par-Cook the Chips: In a large pot, heat oil to 160°C (320°F). Carefully add the chips in batches, cooking them for about 5-7 minutes until they’re tender but not browned. Remove the chips using a slotted spoon and set them aside on paper towels to drain excess oil. This initial cooking process will guarantee the chips are soft inside.
- Prepare the Batter: In a mixing bowl, combine 1 cup of flour, baking powder, salt, and pepper. Gradually whisk in the cold sparkling water until you achieve a smooth batter with no lumps. The carbonation in the sparkling water will help create a light and crispy texture when fried.
- Heat the Oil for Frying Fish: In a deep frying pan or pot, heat the oil to 180°C (356°F). It’s vital to monitor the temperature with a thermometer, as too hot oil can burn the batter while too cool will result in greasy fish.
- Coat the Fish: Lightly dust each fillet of fish with flour, shaking off any excess. This helps the batter adhere better. Dip each fillet into the prepared batter, ensuring it’s completely coated.
- Fry the Fish: Carefully lower the battered fish into the hot oil, frying in batches to avoid overcrowding. Cook for about 4-6 minutes, turning occasionally until the batter is golden brown and the fish is cooked through. Remove the fish using a slotted spoon and place it on paper towels to drain.
- Fry the Chips: Increase the oil temperature to 190°C (375°F) and return the par-cooked chips to the hot oil in batches. Fry them for an additional 3-5 minutes until they’re golden and crispy. Drain on paper towels and season with salt.
- Serve: Plate the fish and chips together, with a side of tartar sauce and a drizzle of malt vinegar for added flavor. Enjoy your homemade fish and chips while they’re hot!
Extra Tips
For the best results, verify that all your ingredients, especially the sparkling water and oil, are very cold. This helps in achieving that perfect crispy texture.
You can also experiment with different types of fish or seasonings in the batter for a unique twist. Additionally, if you’re looking to make the dish healthier, consider baking the chips instead of frying them, though the traditional method will give you the authentic taste and texture.
Enjoy your delicious fish and chips!
Bangers and Mash

Bangers and Mash is a classic British comfort food that consists of sausages (the ‘bangers’) served alongside creamy mashed potatoes (the ‘mash’). This dish is traditionally served with onion gravy, making it a hearty and satisfying meal that has been beloved by families for generations.
The combination of savory sausages and fluffy mashed potatoes, all drenched in rich gravy, creates a delightful symphony of flavors and textures that’s sure to warm hearts and homes.
This dish isn’t only delicious but also incredibly versatile. You can customize the recipe by using different types of sausages, such as pork, beef, chicken, or even vegetarian options. The mashed potatoes can also be elevated by adding ingredients like garlic, cheddar cheese, or herbs to suit your taste preferences.
Whether enjoyed as a casual weeknight dinner or a special occasion feast, Bangers and Mash is a meal that brings people together.
Ingredients (serving size: 4-6 people):
- 6-8 sausages (pork, beef, or your preference)
- 2 lbs potatoes, peeled and chopped
- 1 cup milk
- 4 tablespoons butter
- Salt and pepper, to taste
- 1 large onion, thinly sliced
- 2 tablespoons all-purpose flour
- 2 cups beef or chicken stock
- 1 tablespoon Worcestershire sauce
- Fresh parsley, chopped (for garnish)
Cooking Instructions:
- Prepare the Potatoes: Start by peeling and chopping the potatoes into even-sized chunks. Place them in a large pot, cover with cold water, and add a generous pinch of salt. Bring the water to a boil over high heat, then reduce to a simmer. Cook the potatoes for about 15-20 minutes or until they’re fork-tender.
- Cook the Sausages: While the potatoes are cooking, heat a large skillet over medium heat. Add the sausages and cook them for about 10-15 minutes, turning occasionally, until they’re browned and cooked through. Remove the sausages from the skillet and set them aside, keeping them warm.
- Make the Onion Gravy: In the same skillet, add the sliced onions and cook them over medium heat until they’re soft and caramelized, about 8-10 minutes. Stir in the flour and cook for another minute to create a roux. Gradually whisk in the stock and Worcestershire sauce, ensuring there are no lumps. Bring the mixture to a simmer and cook until it thickens, about 5 minutes. Season with salt and pepper to taste.
- Mash the Potatoes: Once the potatoes are cooked, drain them and return them to the pot. Add the butter and milk, then mash until smooth and creamy. Season with salt and pepper to taste.
- Serve: To serve, place a generous scoop of mashed potatoes on each plate, top with the sausages, and drizzle the onion gravy over the top. Garnish with chopped parsley for added flavor and color.
Extra Tips: For an extra layer of flavor, try adding a splash of milk and a dollop of cream to your mashed potatoes for a richer texture. Additionally, feel free to experiment with different types of sausages to find your favorite combination.
If you prefer a thicker gravy, simply let it simmer longer until it reaches your desired consistency. Enjoy your Bangers and Mash with a side of peas or a simple green salad for a complete meal!
Cornish Pasty

The Cornish Pasty is a traditional British dish that hails from Cornwall, a picturesque region in the southwest of England. This hearty pastry has roots dating back to the 13th century and was originally designed as a convenient meal for tin miners. The pasty is filled with a delicious mixture of meat and vegetables, wrapped in a robust pastry crust, making it both portable and filling.
Today, it’s celebrated not just as a local delicacy, but also as a staple in British cuisine, enjoyed by people of all ages.
Making a Cornish Pasty at home is a rewarding experience that allows you to enjoy this classic dish fresh out of the oven. The key to a perfect pasty lies in the flaky pastry and the balance of flavors within the filling. The combination of beef, potatoes, onions, and turnips creates a savory filling that’s encapsulated in a golden, crisp crust.
Whether you’re enjoying it as a meal or a snack, a homemade Cornish Pasty is sure to delight your taste buds.
Ingredients (Serves 4-6):
- 500g (1 lb) beef skirt or chuck steak, diced
- 250g (9 oz) potatoes, peeled and diced
- 150g (5 oz) swede (or rutabaga), peeled and diced
- 150g (5 oz) onion, finely chopped
- 1 tsp salt
- 1/2 tsp black pepper
- 1 tsp dried thyme (optional)
- 1 tbsp Worcestershire sauce (optional)
- 500g (1 lb) all-purpose flour
- 250g (9 oz) unsalted butter, chilled and cubed
- 1/2 tsp salt (for the pastry)
- 150ml (5 fl oz) cold water
- 1 egg, beaten (for glazing)
Cooking Instructions:
- Prepare the Pastry: In a large mixing bowl, combine the flour and salt for the pastry. Add the cubed butter and rub it into the flour using your fingertips until the mixture resembles fine breadcrumbs. Gradually add the cold water, mixing until the dough comes together. Wrap the dough in cling film and refrigerate for at least 30 minutes.
- Make the Filling: In a separate bowl, combine the diced beef, potatoes, swede, and onion. Season the mixture with salt, pepper, and thyme, making certain everything is well mixed. If you’re using Worcestershire sauce, stir it in for added flavor.
- Roll Out the Pastry: Once the pastry has chilled, preheat the oven to 200°C (400°F). On a floured surface, roll out the pastry to about 3mm (1/8 inch) thick. Use a round cutter or a plate to cut out circles of pastry, approximately 20cm (8 inches) in diameter.
- Fill the Pastry: Place a generous spoonful of the filling mixture onto one half of each pastry circle, leaving a border around the edge. Brush the edge with beaten egg to help seal the pasty. Fold the pastry over to enclose the filling and crimp the edges tightly to secure.
- Bake the Pasties: Place the pasties on a baking tray lined with parchment paper. Brush the tops with the remaining beaten egg to give them a beautiful golden finish. Bake in the preheated oven for 30-40 minutes or until the pastry is golden brown and crisp.
- Serve: Once baked, remove the pasties from the oven and allow them to cool slightly. They can be enjoyed warm or at room temperature, making them perfect for picnics or packed lunches.
Extra Tips:
When making Cornish Pasties, feel free to customize the filling according to your taste. You can substitute the beef with chicken, turkey, or even a vegetarian mix of vegetables.
Additionally, make certain that the filling isn’t too wet, as this can lead to soggy pastry. If you prefer a more robust flavor, consider adding fresh herbs or spices to the filling. Finally, remember to let the pasties cool slightly after baking, as the filling can be very hot. Enjoy your homemade Cornish Pasties!
Toad in the Hole

Toad in the Hole is a classic British dish that brings together the comforting flavors of sausages and Yorkshire pudding in a single, hearty meal. Originating in the 18th century, it’s believed to have been created as a way to stretch the meat further by baking it in a thick batter. The dish is traditionally served with onion gravy and vegetables, making it a perfect choice for a family dinner or a cozy gathering with friends.
The dish’s name is said to evoke imagery of a toad peeking out of its burrow, with the sausages resembling the toad and the Yorkshire pudding batter mimicking the earth. The combination of crispy edges and soft, fluffy interior creates a delightful texture that complements the savory sausages perfectly. Whether you’re a seasoned cook or trying it for the first time, Toad in the Hole is bound to impress with its rustic charm and satisfying flavors.
Ingredients (Serves 4-6):
- 6-8 pork sausages
- 1 cup all-purpose flour
- 1 cup milk
- 3 large eggs
- 1 teaspoon salt
- 1 teaspoon mustard powder (optional)
- 4 tablespoons vegetable oil or dripping
- Freshly ground black pepper (to taste)
Cooking Instructions:
- Preheat the Oven: Begin by preheating your oven to 220°C (425°F). A hot oven is crucial for achieving a crispy Yorkshire pudding batter.
- Prepare the Sausages: In a large ovenproof dish or roasting pan, add the oil or dripping and place it in the oven to heat up. Meanwhile, take the sausages and arrange them in the dish. Once the oil is hot and shimmering, carefully add the sausages to the dish and cook for about 15 minutes until they’re browned on the outside.
- Make the Batter: While the sausages are cooking, prepare the Yorkshire pudding batter. In a mixing bowl, combine the flour, salt, and mustard powder (if using). In a separate bowl, whisk together the eggs and milk. Gradually pour the egg mixture into the flour mixture, whisking until smooth and lump-free. Allow the batter to rest for at least 10 minutes.
- Combine and Bake: After the sausages have browned, carefully remove the dish from the oven. Pour the rested batter over the sausages, making sure they’re evenly covered. Return the dish to the oven immediately and bake for 25-30 minutes, or until the batter has risen and turned golden brown.
- Serve: Once cooked, remove the Toad in the Hole from the oven. Allow it to cool for a few minutes before slicing into portions. Serve hot with onion gravy and your choice of vegetables for a complete meal.
Extra Tips:
For an added depth of flavor, consider adding herbs like thyme or rosemary to the batter or the sausages before cooking. You can also experiment with different types of sausages, such as Cumberland or spicy sausages, to elevate the dish.
Confirm that all your ingredients are at room temperature before mixing to help the batter rise better. Finally, serving the dish immediately after baking will guarantee the Yorkshire pudding remains light and fluffy, rather than deflating. Enjoy your Toad in the Hole!
Eton Mess

Eton Mess is a quintessentially British dessert that combines the delightful textures and flavors of crushed meringue, whipped cream, and fresh strawberries. Traditionally served at Eton College during the annual cricket match against Harrow School, this dessert is as charming as it’s delicious.
With its vibrant colors and contrasting textures, Eton Mess isn’t just a treat for the palate but also a feast for the eyes, making it a popular choice for summer gatherings and special occasions.
The beauty of Eton Mess lies in its simplicity; it’s an easy dessert to whip up with minimal fuss. The ingredients come together in a symphony of sweetness and creaminess, with the meringue providing a satisfying crunch that pairs beautifully with the luscious cream and juicy strawberries.
Whether you’re hosting a garden party or simply indulging in a sweet craving, Eton Mess is sure to impress.
Ingredients (serving size: 4-6 people)
- 4 large meringue nests or 200g store-bought meringue
- 600ml heavy whipping cream
- 300g fresh strawberries, hulled and halved
- 2 tablespoons granulated sugar (adjust to taste)
- 1 teaspoon vanilla extract
- Fresh mint leaves for garnish (optional)
Cooking Instructions
1. Prepare the Strawberries: In a mixing bowl, combine the hulled and halved strawberries with 1 tablespoon of granulated sugar. Gently toss to coat the strawberries and set aside for about 15-20 minutes. This will help release their natural juices and enhance their sweetness.
2. Whip the Cream: In a large mixing bowl, pour in the heavy whipping cream. Using an electric mixer or a whisk, beat the cream until it forms soft peaks. This means that when you lift the whisk, the cream should hold its shape but still have a slight wobble.
Add in the remaining tablespoon of sugar and the vanilla extract, then continue to whip until just combined.
3. Crumble the Meringue: Take the meringue nests and break them into bite-sized pieces. You can do this by hand or using a rolling pin to crush them in a plastic bag, depending on your preference for texture. The crushed meringue should have both small bits and larger chunks for a delightful mix.
4. Combine Ingredients: In a large bowl, gently fold the whipped cream into the strawberries, making sure to keep the mixture light and airy.
Then, add the crumbled meringue to the bowl and fold everything together until just combined. Be careful not to over-mix; you want to create a marbled effect rather than a uniform mixture.
5. Serve: Spoon the Eton Mess into individual serving dishes or a large serving bowl. You can top it with a few extra strawberry halves and a sprig of fresh mint for garnish.
Serve immediately for the best texture, as the meringue will soften over time.
Extra Tips
When making Eton Mess, it’s best to prepare the strawberries and whip the cream right before serving to maintain the freshness and texture of the dessert.
If you prefer a twist, feel free to incorporate other fruits such as raspberries or blueberries. For an added depth of flavor, consider drizzling a bit of fruit coulis or a splash of liqueur over the top.
Enjoy your delightful Eton Mess, and don’t be afraid to get creative with the toppings!
Full English Breakfast

A Full English Breakfast is a quintessential British meal that perfectly embodies the heartiness and comfort of traditional British cuisine. It typically consists of a variety of ingredients that come together to create a deliciously satisfying start to the day. From crispy bacon to golden sausages, baked beans, and perfectly poached or fried eggs, each component plays a significant role in this beloved dish.
Often served alongside grilled tomatoes, mushrooms, and toast, this breakfast is both filling and flavorful, making it a popular choice not only in the UK but among breakfast lovers around the globe.
Preparing a Full English Breakfast can be a delightful experience, allowing you to enjoy the rich flavors of each ingredient while mastering the art of timing. The key to a successful Full English is to cook each component to perfection while ensuring that everything is served hot.
Whether you’re treating yourself or cooking for a group, this classic breakfast is sure to impress and satisfy any appetite, making it a perfect dish for weekends or special occasions.
Ingredients (Serves 4-6)
- 8 slices of back bacon
- 4 sausages
- 4 eggs
- 1 can of baked beans
- 4 large tomatoes, halved
- 250g mushrooms, sliced
- 4 slices of black pudding (optional)
- 4 slices of bread (for toasting)
- Salt and pepper to taste
- Olive oil or butter (for frying)
Cooking Instructions
- Prepare the Ingredients: Start by gathering all your ingredients. Slice the tomatoes in half, clean and slice the mushrooms, and set aside the baked beans. If you’re using black pudding, slice it into rounds as well. This preparation will help streamline the cooking process.
- Cook the Bacon and Sausages: Heat a large frying pan over medium heat and add a splash of olive oil or a knob of butter. Once hot, add the sausages and cook them for about 10-12 minutes, turning occasionally until they’re browned and cooked through. After about 5 minutes, add the bacon to the pan and cook alongside the sausages until crispy and golden.
- Fry the Eggs: In a separate non-stick pan, add a little oil or butter over medium heat. Crack the eggs into the pan and cook them to your liking – sunny-side up, scrambled, or fried. Season with a pinch of salt and pepper. For a classic touch, you can also poach the eggs if you prefer.
- Cook the Tomatoes and Mushrooms: Once the bacon and sausages are nearly done, add the halved tomatoes and sliced mushrooms to the same pan. Cook them for about 4-5 minutes until the mushrooms are tender and tomatoes are slightly caramelized.
- Heat the Baked Beans: In a small saucepan, gently heat the baked beans over low heat until warmed through. Stir occasionally to prevent sticking.
- Toast the Bread: While everything is cooking, toast the bread slices in a toaster or on a grill until golden brown. This will serve as a lovely accompaniment to your Full English Breakfast.
- Assemble and Serve: Once everything is cooked, it’s time to plate up. Arrange the bacon, sausages, eggs, mushrooms, tomatoes, and black pudding (if using) on warm plates and serve with a side of baked beans and toast. Enjoy your hearty Full English Breakfast!
Extra Tips
Timing is essential when making a Full English Breakfast, as you want everything to be served hot and fresh. Consider starting with the sausages and bacon, as they take the longest to cook.
You can keep the cooked items warm in a low oven (around 80°C or 175°F) while you finish the other components. Additionally, feel free to customize your Full English by adding or omitting ingredients based on personal preference, such as including hash browns or avocado for a modern twist!
Ploughman’s Lunch
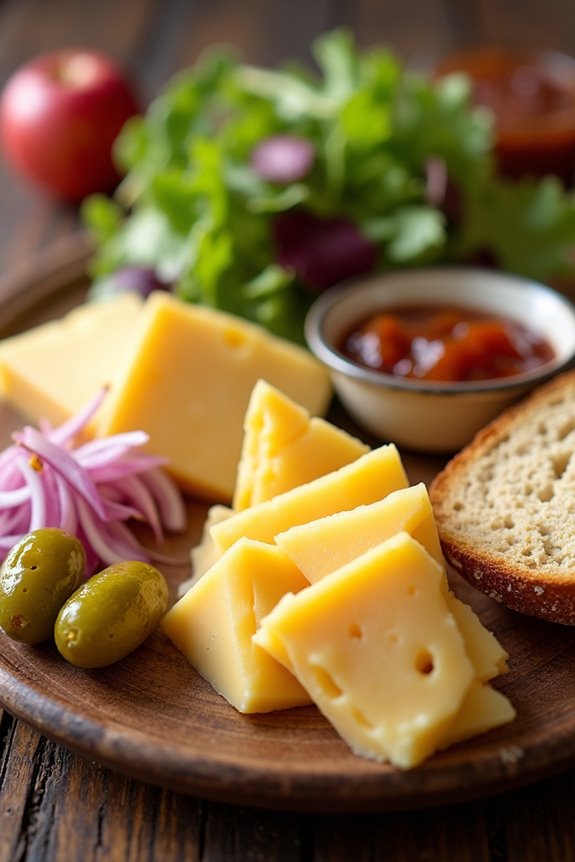
The Ploughman’s Lunch is a quintessential British dish that harks back to the pastoral traditions of England. Traditionally enjoyed by farmworkers, this hearty meal is perfect for a leisurely lunch, featuring a delightful combination of cheese, bread, and pickles. The beauty of a Ploughman’s Lunch lies in its simplicity and the variety of flavors and textures that can be brought together on one plate.
It isn’t just food; it’s an experience that celebrates the local produce and artisanal craftsmanship of British cheeses and breads. Preparing a Ploughman’s Lunch is less about cooking and more about assembling quality ingredients that complement each other. This dish typically includes a selection of cheeses, fresh bread, butter, and accompaniments such as pickles and salad.
It’s highly customizable, allowing you to choose your favorite cheeses or add seasonal vegetables. Whether you’re enjoying it as a picnic in the park or a casual meal at home, the Ploughman’s Lunch is both satisfying and delicious.
Ingredients (serves 4-6 people):
- 300g of mature Cheddar cheese
- 200g of Stilton cheese
- 250g of crusty bread (such as a baguette or sourdough)
- 100g of butter (room temperature for spreading)
- 4-6 pickled gherkins
- 4-6 pickled onions
- 2 apples (sliced)
- A handful of mixed salad leaves
- 4 tablespoons of Branston pickle or your favorite chutney
- Salt and pepper (to taste)
Cooking Instructions:
- Prepare the Cheese: Start by slicing the mature Cheddar and Stilton cheese into wedges or cubes. This makes it easy for guests to pick and enjoy. Arrange the cheese attractively on a serving platter, allowing the distinct colors and textures to shine.
- Slice the Bread: Cut the crusty bread into thick slices, or serve it whole for guests to tear off pieces. If you prefer, you can lightly toast the bread for added crunch. Arrange the bread on a separate plate or board.
- Arrange Pickles and Fruit: On the same platter as the cheese, place the pickled gherkins and pickled onions. Their tangy flavor complements the richness of the cheese. Add sliced apples to introduce a fresh, sweet element that balances the savory components.
- Add Salad Leaves: Rinse and dry the mixed salad leaves. These can be placed alongside the cheeses and pickles, providing a vibrant color and a revitalizing crunch.
- Include Condiments: Serve Branston pickle or your chosen chutney in a small bowl on the side. This allows guests to add a sweet and tangy element to their bites.
- Final Touches: Don’t forget to place the butter on the table, along with salt and pepper for seasoning. Guests can spread butter on their bread as desired, enhancing the overall flavor of the Ploughman’s Lunch.
Extra Tips:
When assembling your Ploughman’s Lunch, consider using locally sourced artisanal cheeses and bread to elevate the dish’s authenticity. Feel free to experiment with different types of cheese, such as goat cheese or farmhouse cheese, and add seasonal fruits like pears or berries for variety.
Victoria Sponge Cake
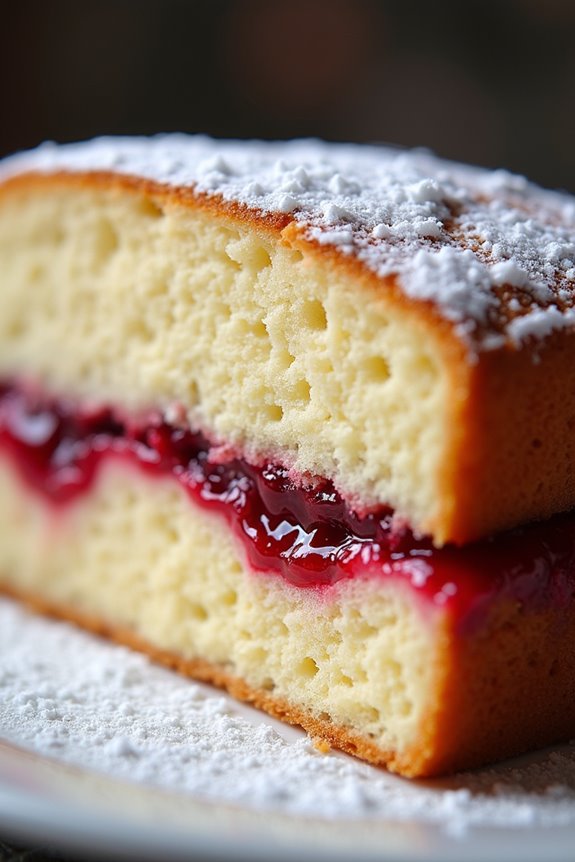
The Victoria Sponge Cake is a classic British dessert that owes its name to Queen Victoria, who was known to enjoy a slice of this delicious cake with her afternoon tea. This delightful sponge cake features a light and airy texture, made with simple ingredients such as butter, sugar, eggs, and flour.
The traditional recipe consists of two layers of sponge cake sandwiched together with a generous spread of jam and a light dusting of powdered sugar on top, making it a quintessential treat for any gathering or celebration.
Making a Victoria Sponge Cake isn’t only enjoyable but also a fantastic way to impress your friends and family. With a preparation time of just about 20 minutes and a baking time of around 25 minutes, this lovely cake can be whipped up in no time. It serves 4-6 people, making it perfect for a cozy afternoon tea or a special occasion.
Ingredients
- 200g unsalted butter, softened
- 200g granulated sugar
- 4 large eggs
- 200g self-raising flour
- 1 tsp baking powder
- 2 tbsp milk
- 100g raspberry or strawberry jam
- Icing sugar, for dusting
Instructions
- Preheat the Oven: Start by preheating your oven to 180°C (350°F). This guarantees that the cake bakes evenly and rises properly once you place it in the oven.
- Prepare the Cake Pans: Grease two 20cm (8-inch) round cake pans with butter or line them with parchment paper. This prevents the cake from sticking to the pans, making it easier to remove them once baked.
- Cream the Butter and Sugar: In a large mixing bowl, combine the softened butter and granulated sugar. Using an electric mixer, beat them together until the mixture is light and fluffy, which usually takes about 3-5 minutes. This step incorporates air into the mixture, contributing to the cake’s light texture.
- Add the Eggs: Crack the eggs into the bowl one at a time, mixing well after each addition. This helps to guarantee that the eggs are fully incorporated into the batter.
- Combine Dry Ingredients: In a separate bowl, sift together the self-raising flour and baking powder. This helps to aerate the flour and remove any lumps, resulting in a smoother batter.
- Mix Dry and Wet Ingredients: Gradually add the flour mixture to the butter and egg mixture, alternating with the milk. Start and end with the flour mixture, gently folding it in until just combined. Be careful not to overmix, as this can lead to a dense cake.
- Divide and Bake: Evenly divide the batter between the prepared cake pans. Use a spatula to smooth the tops. Bake in the preheated oven for 25-30 minutes, or until the cakes are golden brown and a skewer inserted into the center comes out clean.
- Cool the Cakes: Once baked, remove the cakes from the oven and let them cool in the pans for about 10 minutes. Then, carefully transfer them to a wire rack to cool completely.
- Assemble the Cake: Once the cakes are completely cooled, place one layer on a serving plate. Spread the jam evenly over the top of the first layer, then place the second layer on top.
- Final Touches: Dust the top of the cake with icing sugar for a lovely finish. Optionally, you can add fresh berries or whipped cream for an extra treat.
Extra Tips
For an extra touch of flavor, consider adding a splash of vanilla extract or a hint of lemon zest to the batter. Make sure all your ingredients are at room temperature for better mixing.
When spreading the jam, be generous but guarantee it doesn’t overflow the sides. Store any leftover cake in an airtight container at room temperature, and it will stay fresh for a few days. Enjoy your delightful Victoria Sponge Cake with a cup of tea!
Sunday Roast
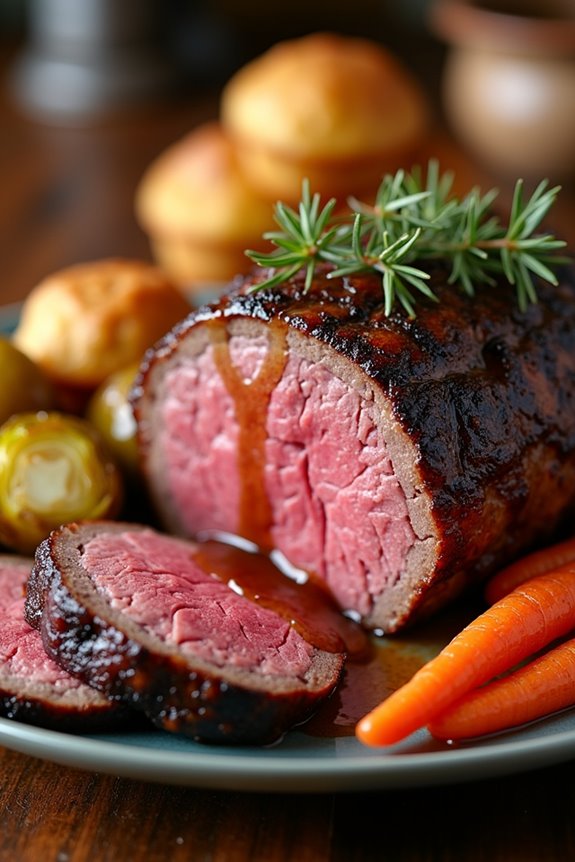
A Sunday Roast is a cherished British tradition, known for bringing families together around the dinner table. This hearty meal typically features a succulent joint of meat, accompanied by an array of delicious sides such as roasted vegetables, Yorkshire puddings, and rich gravy. The joy of preparing a Sunday Roast lies not only in the flavors but also in the experience of sharing this meal with loved ones, making it a perfect centerpiece for any family gathering.
The beauty of the Sunday Roast is its versatility; you can choose from various meats including beef, chicken, lamb, or pork, each providing a unique taste and texture. The key to a successful Sunday Roast is guaranteeing that the meat is cooked to perfection, with the right balance of seasoning and accompanied by perfectly roasted accompaniments. This recipe will guide you through the essential steps to create a classic Sunday Roast that will impress your family and friends.
Ingredients (Serves 4-6)
- 1.5 kg (3.3 lbs) beef joint (e.g., rib roast or sirloin)
- 2 tablespoons olive oil
- Salt and freshly ground black pepper, to taste
- 4 large potatoes, peeled and quartered
- 2 large carrots, peeled and chopped
- 1 large onion, quartered
- 250 g (8.8 oz) Brussels sprouts, trimmed
- 4 large eggs
- 200 g (7 oz) plain flour
- 200 ml (6.8 fl oz) milk
- 1-2 teaspoons mustard (optional)
- 500 ml (17 fl oz) beef stock
- 2 tablespoons Worcestershire sauce
- Fresh herbs (such as thyme or rosemary) for garnish
Cooking Instructions
- Prepare the Meat: Preheat your oven to 220°C (428°F). Take the beef joint out of the fridge and let it sit at room temperature for about 30 minutes. This helps to guarantee even cooking. Rub the meat all over with olive oil, and season generously with salt and black pepper.
- Roast the Beef: Place the beef joint in a roasting tray and insert it into the preheated oven. Roast for 20 minutes at high heat to develop a nice crust, then reduce the oven temperature to 180°C (356°F). Roast for an additional 1 hour for medium-rare, or longer if you prefer it well done. Use a meat thermometer to check the internal temperature (about 60°C/140°F for medium-rare).
- Prepare the Vegetables: While the beef is roasting, prepare your vegetables. In a separate large pot, boil salted water and add the quartered potatoes. Boil for about 10 minutes until slightly softened, then drain and shake them in the pot to fluff up the edges. This will create a crispy texture when roasted.
- Roast the Potatoes and Carrots: Add the potatoes and chopped carrots to the roasting tray around the beef during the last 40 minutes of cooking. Drizzle them with olive oil and season with salt and pepper. Toss the vegetables occasionally to guarantee they roast evenly.
- Make the Yorkshire Puddings: While the roast and vegetables are cooking, prepare the Yorkshire pudding batter. In a bowl, whisk together the eggs, flour, milk, and mustard (if using) until smooth. Let the batter rest. When there are about 20 minutes left on the beef, place a muffin tin in the oven to heat up. Once hot, add a small amount of oil to each muffin cup and pour in the batter. Bake for about 20 minutes until puffed and golden brown.
- Cook the Brussels Sprouts: In the last 10 minutes of roasting, add the Brussels sprouts to the tray with the other vegetables. They’ll cook quickly and will be tender and vibrant.
- Rest the Meat: Once the beef is cooked to your liking, remove it from the oven and let it rest for at least 15 minutes. This allows the juices to redistribute, guaranteeing a tender and juicy result.
- Make the Gravy: While the meat is resting, strain the juices from the roasting tray into a saucepan. Add the beef stock and Worcestershire sauce, and bring to a simmer. Whisk continuously until the gravy thickens to your desired consistency.
- Serve: Slice the beef joint and serve it alongside the roasted potatoes, carrots, Brussels sprouts, and Yorkshire puddings. Drizzle with the gravy, and garnish with fresh herbs for a delightful finish.
Extra Tips
For the best results, guarantee all ingredients are at room temperature before cooking, which helps in achieving even cooking. If you have leftovers, the Sunday Roast is perfect for sandwiches or stews the next day.
Don’t hesitate to experiment with different vegetables, like parsnips or sweet potatoes, to add variety to your roast. Finally, always let your meat rest after cooking to maintain its juices and tenderness. Enjoy your Sunday Roast tradition!