

There’s something truly magical about the warm aromas that fill a kitchen when baking with cinnamon. These 15 rustic European recipes transform simple ingredients into comforting delights. Each recipe, from the soft Cinnamon Swirl Bread to the flaky Spiced Apple Strudel, brings a touch of nostalgia and artistry. If you’re curious about how these treats can elevate your baking game and create a cozy atmosphere, you’ll want to keep exploring.
Cinnamon Swirl Bread
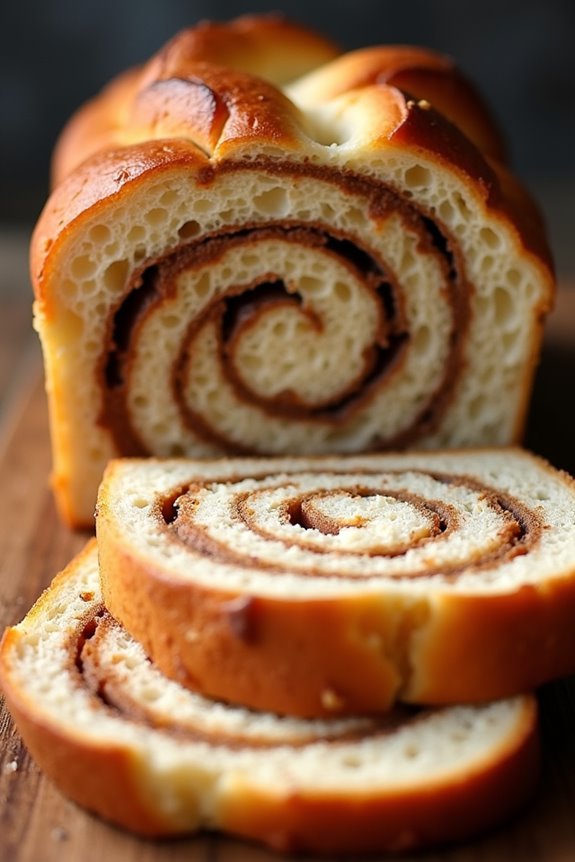
Cinnamon Swirl Bread is a delightful treat that combines the warmth of freshly baked bread with the comforting aroma of cinnamon and sugar. This rustic European recipe is perfect for breakfast, brunch, or as a sweet snack any time of the day.
With its soft texture and sweet, swirled filling, this bread is sure to become a family favorite. Whether enjoyed plain or toasted with a pat of butter, each slice offers a little taste of home.
Making Cinnamon Swirl Bread requires some time and patience, but the end result is well worth the effort. The dough rises to create a fluffy base, while the cinnamon filling adds a delightful sweetness. This recipe serves 4-6 people, making it perfect for sharing with loved ones.
Gather your ingredients and let’s get started on this mouthwatering baking adventure!
Ingredients:
- 4 cups all-purpose flour
- 1 packet (2 ¼ tsp) active dry yeast
- 1 cup warm milk (110°F/43°C)
- ¼ cup granulated sugar
- ¼ cup unsalted butter, melted
- 2 large eggs
- 1 tsp salt
- 1 tbsp ground cinnamon
- ½ cup brown sugar
- ½ cup chopped walnuts or pecans (optional)
Instructions:
1. Prepare the Dough: In a large mixing bowl, combine warm milk, sugar, and yeast. Let it sit for about 5-10 minutes until it becomes frothy. This indicates that the yeast is active.
Next, add the melted butter, eggs, and salt to the mixture and stir until combined.
2. Incorporate the Flour: Gradually add the flour to the wet ingredients, mixing until a dough forms. You may need to add more flour if the dough is too sticky.
Once combined, knead the dough on a floured surface for about 8-10 minutes until it becomes smooth and elastic.
3. First Rise: Place the kneaded dough in a greased bowl, cover it with a clean cloth, and let it rise in a warm place for about 1-1.5 hours or until it has doubled in size.
4. Make the Cinnamon Filling: While the dough is rising, mix the brown sugar, ground cinnamon, and chopped nuts (if using) in a bowl. This will be the filling for your bread.
5. Shape the Bread: Once the dough has risen, punch it down and turn it out onto a floured surface. Roll it into a rectangle about 12×18 inches.
Spread the cinnamon filling evenly over the dough, leaving a small border around the edges.
6. Roll and Shape: Starting from one of the long edges, carefully roll the dough into a tight log. Pinch the seams to seal the roll, then tuck the ends underneath.
7. Second Rise: Place the rolled dough in a greased loaf pan. Cover it with a cloth and let it rise again for about 30-45 minutes until it puffs up.
8. Bake the Bread: Preheat your oven to 350°F (175°C). Bake the Bread for 30-35 minutes, or until it’s golden brown and sounds hollow when tapped on the bottom.
9. Cool and Serve: Once baked, remove the bread from the oven and let it cool in the pan for about 10 minutes.
Then, transfer it to a wire rack to cool completely before slicing.
Extra Tips:
For the best results, make sure your yeast is fresh and active before starting. You can also experiment with different spices in the filling or add raisins for extra sweetness.
To keep the bread fresh, store it in an airtight container at room temperature for up to three days, or freeze it for longer storage. Enjoy your warm Cinnamon Swirl Bread with a drizzle of icing or a sprinkle of powdered sugar for an extra touch!
Spiced Apple Strudel
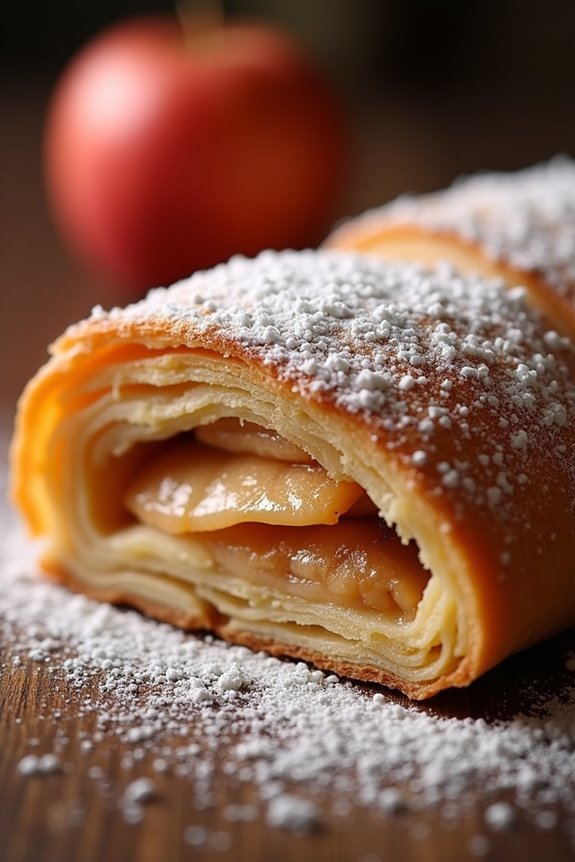
Spiced Apple Strudel is a delightful dessert that embodies the essence of rustic European baking. Its flaky, golden-brown pastry envelops a warm and aromatic filling of spiced apples, creating a perfect balance of textures and flavors. This dish isn’t only a treat for the taste buds but also a feast for the eyes, making it a splendid addition to any gathering or family meal.
The strudel’s origins trace back to Austria, where it has been a beloved staple for centuries, showcasing the rich culinary traditions of the region.
Making Spiced Apple Strudel at home may seem challenging, but with a bit of patience and the right ingredients, anyone can craft this exquisite pastry. The key lies in the dough, which should be stretched thin enough to allow for the filling to shine through. The filling itself is a harmonious mix of tart apples, sugar, cinnamon, and a hint of lemon juice, accentuating the natural sweetness of the fruit.
Serve this strudel warm, dusted with powdered sugar, and perhaps accompanied by a scoop of vanilla ice cream or a dollop of whipped cream for an extra indulgent treat.
Ingredients (Serves 4-6):
- 6 medium-sized apples (preferably Granny Smith or Honeycrisp)
- 1 tablespoon lemon juice
- 1/2 cup granulated sugar
- 1 teaspoon ground cinnamon
- 1/4 teaspoon ground nutmeg
- 1/4 cup raisins (optional)
- 1/4 cup chopped walnuts or pecans (optional)
- 1 package (1 lb) phyllo dough
- 1/2 cup unsalted butter, melted
- 1/4 cup breadcrumbs
- Powdered sugar for dusting
Cooking Instructions:
- Prepare the Filling: Begin by preheating your oven to 375°F (190°C). Peel, core, and slice the apples into thin wedges. In a large mixing bowl, combine the sliced apples with lemon juice, granulated sugar, ground cinnamon, ground nutmeg, raisins, and nuts (if using). Toss the mixture well to guarantee the apples are evenly coated with the spices and sugar. Set the filling aside to allow the flavors to meld.
- Prepare the Phyllo Dough: Lay out a clean kitchen towel on your work surface and place a sheet of phyllo dough on top. Brush it lightly with melted butter, then layer another sheet on top, repeating until you have about 6-8 sheets stacked together. This will create a sturdy base for your strudel.
- Add the Breadcrumbs: Sprinkle the breadcrumbs evenly over the layered phyllo dough. The breadcrumbs will help absorb excess moisture from the apples, keeping the pastry crisp.
- Add the Apple Filling: Spoon the prepared apple filling along one edge of the phyllo dough, leaving about an inch of space at the sides. Carefully fold the sides of the dough over the filling to secure it, then gently roll the strudel away from you, tucking in the sides as you go to create a neat log shape.
- Bake the Strudel: Transfer the rolled strudel to a baking sheet lined with parchment paper. Brush the top with more melted butter for a golden finish. Bake in the preheated oven for 30-35 minutes or until the pastry is golden brown and crispy.
- Cool and Serve: Once baked, remove the strudel from the oven and let it cool for about 10 minutes. Dust the top with powdered sugar before slicing and serving warm.
Extra Tips:
For the best results, confirm your phyllo dough is well-thawed and handled with care, as it can dry out quickly. If you’re working in a warm environment, cover the sheets you’re not currently using with a damp cloth to keep them moist.
Feel free to experiment with different spices or add-ins, such as a splash of vanilla extract or a sprinkle of lemon zest, to customize the flavor to your liking. Enjoy your homemade Spiced Apple Strudel with a scoop of vanilla ice cream or a dollop of fresh whipped cream for an extra touch of indulgence!
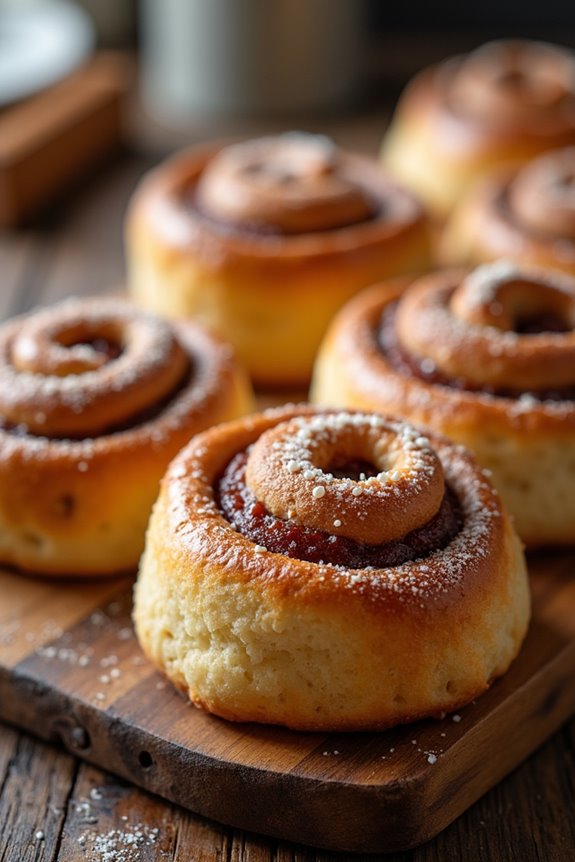
Danish Cinnamon Rolls
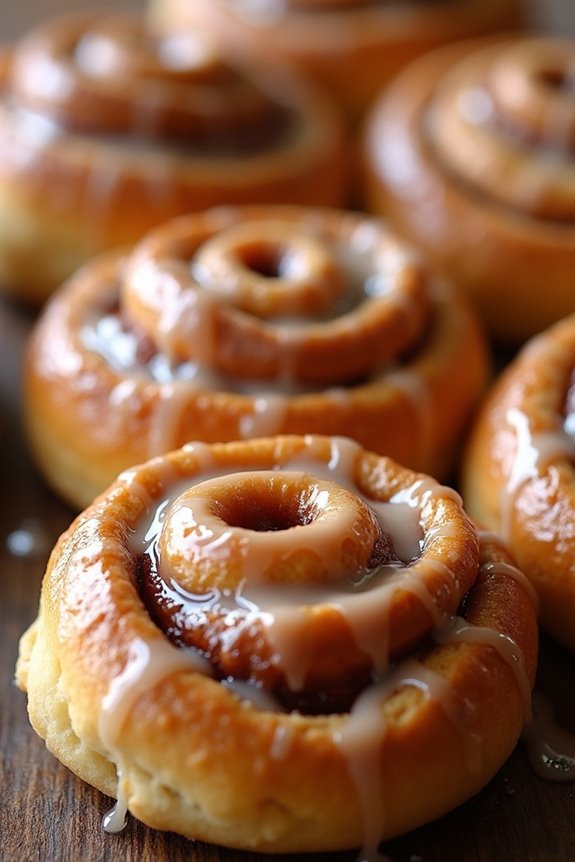
Danish Cinnamon Rolls, known for their soft, flaky texture and rich, sweet filling, are a delightful treat that can brighten any morning. Originating from Denmark, these rolls are a popular pastry enjoyed across Europe and beyond. The secret to their luxurious texture lies in the laminated dough, which incorporates layers of butter to create that signature flakiness. When baked, the rolls puff up beautifully and are often finished with a glaze that adds a touch of sweetness, making them irresistible.
Making Danish Cinnamon Rolls may seem intimidating, but with a little patience and practice, you can master this delicious recipe. The process involves preparing a yeast dough, allowing it to rise, and then rolling it out with a cinnamon-sugar filling. After shaping the rolls, they’re baked until golden brown and topped with a sweet icing. This recipe yields enough rolls to serve 4-6 people, perfect for sharing with family or friends at breakfast or brunch.
Ingredients (Serves 4-6):
- 4 cups all-purpose flour
- 1/4 cup granulated sugar
- 1 packet (2 1/4 tsp) active dry yeast
- 1 cup whole milk, warmed
- 1/2 cup unsalted butter, softened
- 1/2 tsp salt
- 2 large eggs
- 1 cup brown sugar, packed
- 2 tablespoons ground cinnamon
- 1/2 cup raisins or chopped nuts (optional)
- 1 cup powdered sugar
- 2 tablespoons milk (for icing)
- 1 teaspoon vanilla extract
Instructions:
- Prepare the Dough: In a large mixing bowl, combine the warmed milk, yeast, and granulated sugar. Allow it to sit for about 5-10 minutes until it becomes frothy. Then, add the softened butter, salt, and eggs, mixing well to combine. Gradually add the flour, one cup at a time, until a soft dough forms.
- Knead the Dough: Transfer the dough to a floured surface and knead for about 8-10 minutes until it becomes smooth and elastic. Form the dough into a ball, place it in a greased bowl, and cover it with a kitchen towel. Let it rise in a warm place for about 1 hour, or until it has doubled in size.
- Make the Cinnamon Filling: While the dough is rising, mix together the brown sugar, ground cinnamon, and optional raisins or nuts in a small bowl. Set this mixture aside for later use.
- Roll Out the Dough: Once the dough has risen, punch it down and transfer it onto a floured surface. Roll it out into a rectangle, approximately 16×24 inches in size.
- Add the Filling: Spread the cinnamon filling evenly over the rolled-out dough, leaving a small border around the edges. Starting from one long side, tightly roll the dough into a log.
- Cut the Rolls: Slice the rolled dough into 12 equal pieces. Place the rolls in a greased baking dish, making sure they’re spaced slightly apart to allow for expansion.
- Second Rise: Cover the baking dish with a towel and let the rolls rise for another 30-45 minutes, until they’ve puffed up.
- Bake the Rolls: Preheat your oven to 375°F (190°C). Bake the rolls for 20-25 minutes, or until they’re golden brown and cooked through.
- Prepare the Icing: While the rolls are baking, whisk together the powdered sugar, milk, and vanilla extract in a small bowl until smooth.
- Glaze the Rolls: Once the cinnamon rolls are baked, remove them from the oven and let them cool slightly. Drizzle the icing over the warm rolls before serving.
Extra Tips:
To achieve the best flavor and texture, use high-quality butter for the dough and filling. It’s also helpful to confirm that your milk is warm but not hot when activating the yeast; this will help the dough rise effectively.
For added flavor, you can experiment with different fillings, such as cream cheese or fruit preserves. Finally, these rolls can be made ahead of time; simply prepare the dough, shape the rolls, and refrigerate them overnight before baking. Enjoy your homemade Danish Cinnamon Rolls!
Cinnamon Raisin Bagels
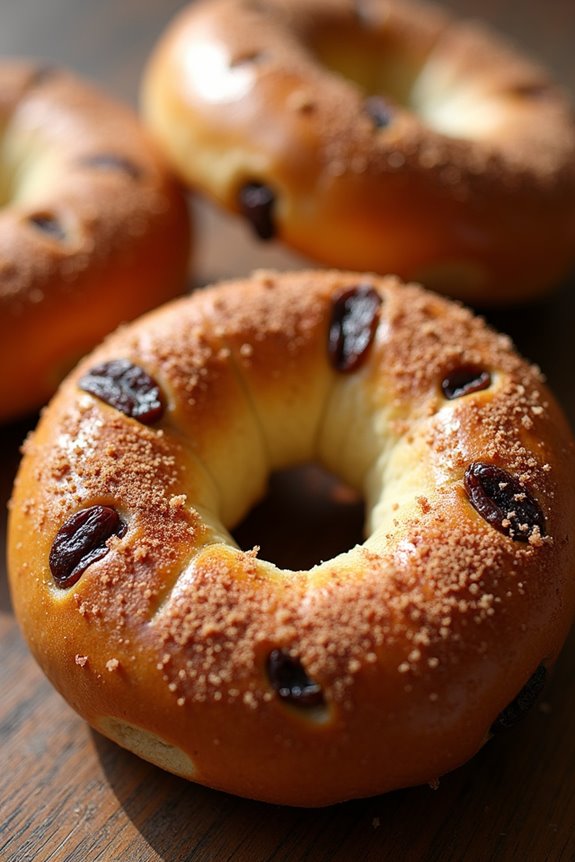
Cinnamon Raisin Bagels are a delightful twist on the classic bagel, combining the warm flavors of cinnamon with sweet, plump raisins. These bagels are perfect for breakfast or a snack, offering a satisfying chew and a hint of sweetness that pairs wonderfully with cream cheese or butter.
Making bagels at home may seem intimidating, but with a little patience and the right technique, you can create these delicious gems that will impress family and friends alike.
The process of making Cinnamon Raisin Bagels involves mixing together a simple dough, allowing it to rise, shaping the bagels, and then boiling and baking them to achieve that iconic chewy texture. While the recipe may take some time, the end result is well worth the effort. Your homemade bagels will be fresh, warm, and bursting with flavor, making them a perfect addition to any meal or occasion.
Ingredients (Serves 4-6)
- 4 cups all-purpose flour
- 2 teaspoons active dry yeast
- 1 ½ cups warm water (about 110°F)
- 2 tablespoons brown sugar
- 1 teaspoon salt
- 1 tablespoon ground cinnamon
- 1 cup raisins
- 1 tablespoon honey (for boiling)
- Extra flour for dusting
Instructions
- Activate the Yeast: In a small bowl, combine the warm water, brown sugar, and active dry yeast. Stir gently and let it sit for about 5-10 minutes until the mixture becomes frothy. This indicates that the yeast is active and ready to use.
- Make the Dough: In a large mixing bowl, combine the flour, salt, and ground cinnamon. Once the yeast mixture is frothy, pour it into the bowl with the dry ingredients. Mix everything together until a sticky dough forms.
- Knead the Dough: Turn the dough out onto a floured surface and knead it for about 8-10 minutes until it becomes smooth and elastic. If the dough is too sticky, sprinkle a little extra flour as needed while kneading. When finished, incorporate the raisins into the dough by flattening it slightly and folding the raisins in until evenly distributed.
- First Rise: Place the kneaded dough into a lightly greased bowl, cover it with a damp cloth, and let it rise in a warm place for about 1-2 hours, or until it doubles in size.
- Shape the Bagels: Once the dough has risen, punch it down to release any air bubbles. Divide the dough into 8 equal pieces. Roll each piece into a ball, then use your thumb to poke a hole in the center, gently stretching the dough to form a bagel shape.
- Boil the Bagels: In a large pot, bring water to a boil and add the honey. Carefully drop in a few bagels at a time, boiling them for about 1-2 minutes on each side. This step is essential for achieving the chewy texture. Remove the bagels and place them on a baking sheet lined with parchment paper.
- Bake the Bagels: Preheat your oven to 425°F (220°C). Bake the boiled bagels in the preheated oven for 20-25 minutes or until they’re golden brown. Let them cool slightly on a wire rack before serving.
- Serve and Enjoy: Once cooled, enjoy your Cinnamon Raisin Bagels with cream cheese, butter, or your favorite spread.
Extra Tips
To enhance the flavor of your Cinnamon Raisin Bagels, consider adding a touch of vanilla extract to the dough or sprinkle some cinnamon sugar on top before baking for added sweetness.
Additionally, make sure that your water is at the right temperature when activating the yeast; too hot can kill the yeast, while too cold may not activate it properly.
For a fun twist, feel free to experiment with different dried fruits or nuts mixed into the dough. Enjoy the process of creating these delicious bagels, and don’t hesitate to share them with friends and family!
German Apple Cake
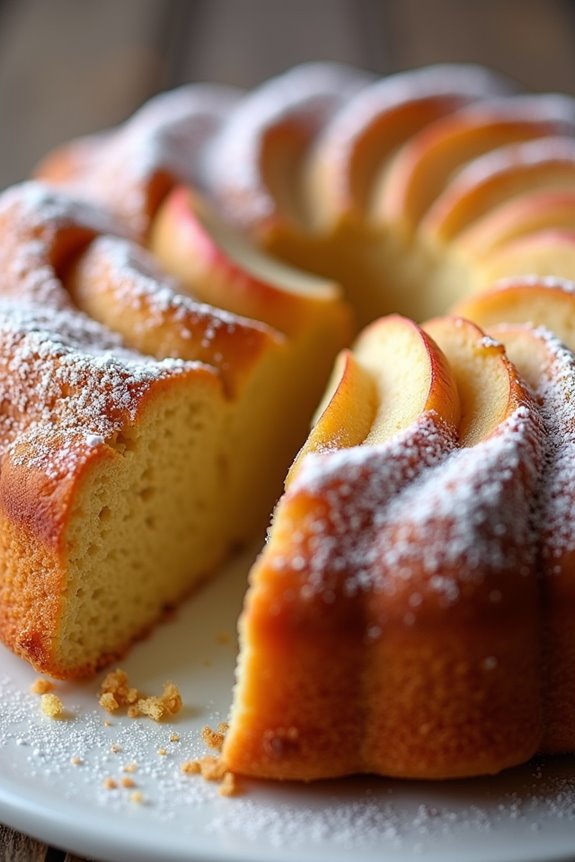
German Apple Cake, or “Apfelkuchen,” is a delightful dessert that embodies the charm of rustic European baking. This cake is well-loved for its moist texture and the warm, comforting flavors of cinnamon and fresh apples. Ideal for gatherings or a cozy family dinner, the cake is often enjoyed with a dusting of powdered sugar or a dollop of whipped cream.
It’s a perfect way to celebrate the bounty of autumn, especially when fresh apples are in season. The beauty of this German classic lies in its simplicity and the ease of preparation. Made with a buttery cake base, fresh apples, and a hint of spices, this recipe will impress your guests and satisfy your sweet tooth.
Whether served as a dessert after a hearty meal or accompanied by coffee in the afternoon, German Apple Cake is sure to become a cherished favorite.
Ingredients (Serves 4-6):
- 2 large apples, peeled, cored, and sliced thinly
- 1 cup granulated sugar
- 1/2 cup unsalted butter, softened
- 2 large eggs
- 1 teaspoon vanilla extract
- 1 cup all-purpose flour
- 1 teaspoon baking powder
- 1 teaspoon ground cinnamon
- 1/4 teaspoon salt
- Powdered sugar, for dusting (optional)
Cooking Instructions:
- Preheat the Oven: Begin by preheating your oven to 350°F (175°C). This guarantees that the cake bakes evenly and achieves a nice golden color.
- Prepare the Baking Dish: Grease and flour a 9-inch round cake pan. This step is essential to prevent the cake from sticking to the pan after baking.
- Cream Butter and Sugar: In a large mixing bowl, cream together the softened butter and granulated sugar using an electric mixer on medium speed until the mixture is light and fluffy. This process introduces air into the batter, which helps to create a light texture.
- Add Eggs and Vanilla: Add the eggs one at a time, mixing well after each addition. Then stir in the vanilla extract. This step adds moisture and flavor to the cake batter.
- Combine Dry Ingredients: In a separate bowl, whisk together the flour, baking powder, cinnamon, and salt. This guarantees that the leavening agent is evenly distributed throughout the flour.
- Mix Dry Ingredients into Wet: Gradually add the dry mixture to the wet ingredients, mixing until just combined. Be careful not to over-mix, as this can lead to a dense cake.
- Fold in Apples: Gently fold the sliced apples into the batter, ensuring they’re evenly distributed. The apples will add moisture and flavor to the cake.
- Transfer to the Baking Dish: Pour the batter into the prepared cake pan, spreading it evenly. This guarantees that the cake bakes uniformly.
- Bake the Cake: Place the cake in the preheated oven and bake for 40-45 minutes, or until a toothpick inserted into the center comes out clean. Keep an eye on it during the last few minutes of baking to avoid over-browning.
- Cool and Serve: Once baked, remove the cake from the oven and let it cool in the pan for about 10 minutes before transferring it to a wire rack to cool completely. Dust with powdered sugar before serving, if desired.
Extra Tips:
To enhance the flavor of your German Apple Cake, consider adding a handful of chopped nuts, such as walnuts or pecans, to the batter for an added crunch.
You can also experiment with different apple varieties; Granny Smith apples work well for a tart flavor, while Honeycrisp adds sweetness. Serve warm with vanilla ice cream or a drizzle of caramel sauce for an extra special treat!
Cinnamon-Sugar Knots
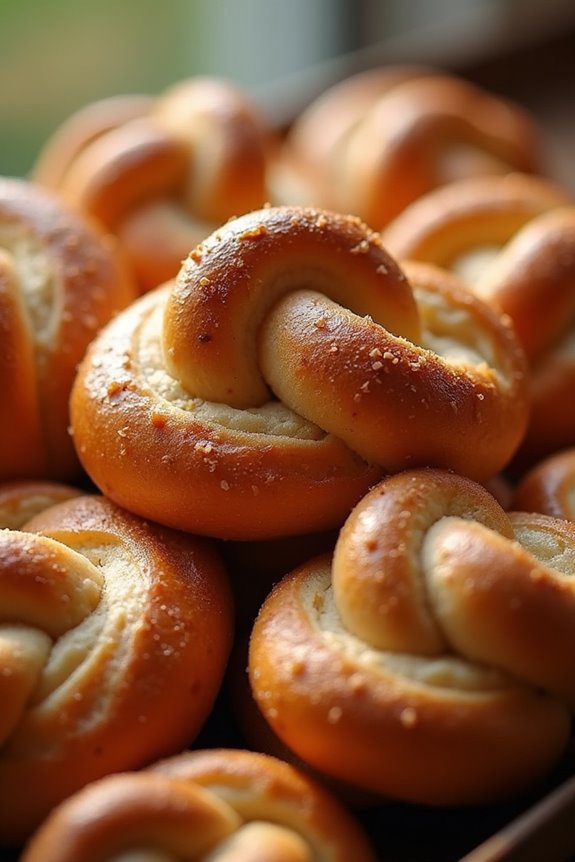
Cinnamon-Sugar Knots are a delightful treat that embodies the rustic charm of European baking. These soft, doughy knots are infused with the warm flavors of cinnamon and sugar, making them a perfect addition to any breakfast table or afternoon tea. The combination of buttery dough and sweet cinnamon filling creates a comforting experience that will transport you to a quaint European bakery with every bite.
Whether enjoyed fresh out of the oven or slightly warmed the next day, these knots are sure to please.
Creating Cinnamon-Sugar Knots is a rewarding process that brings together simple ingredients to create a wonderful treat. The dough is easy to work with and can be made ahead of time. Once you shape the knots and coat them in cinnamon-sugar, the aroma wafting through your kitchen will be irresistible.
These knots aren’t only delicious but also a fun activity to make with family or friends, turning a simple recipe into a cherished memory.
Ingredients (serving size: 4-6 people):
- 2 cups all-purpose flour
- 1/4 cup granulated sugar
- 1 teaspoon instant yeast
- 1/2 teaspoon salt
- 1/2 cup warm milk (110°F or 43°C)
- 1/4 cup unsalted butter, melted
- 1 large egg
- 1 tablespoon ground cinnamon
- 1/4 cup brown sugar
- Additional melted butter for brushing
Cooking Instructions:
- Prepare the Dough: In a large mixing bowl, combine 2 cups of all-purpose flour, 1/4 cup granulated sugar, 1 teaspoon instant yeast, and 1/2 teaspoon salt. Mix the dry ingredients until well combined. In a separate bowl, whisk together 1/2 cup warm milk, 1/4 cup melted butter, and 1 large egg. Gradually add the wet mixture to the dry ingredients, stirring until a soft dough forms.
- Knead the Dough: Transfer the dough onto a lightly floured surface. Knead the dough for about 5-7 minutes until it becomes smooth and elastic. If the dough is too sticky, add a little extra flour as needed. Once kneaded, shape the dough into a ball and place it in a greased bowl, covering it with a damp cloth. Allow it to rise in a warm place for about 1 hour, or until it has doubled in size.
- Prepare the Cinnamon-Sugar Filling: In a small bowl, mix together 1 tablespoon ground cinnamon and 1/4 cup brown sugar. Set this mixture aside for later use.
- Shape the Knots: After the dough has risen, punch it down to release the air. On a floured surface, roll the dough into a rectangle about 1/4 inch thick. Brush the surface with additional melted butter. Evenly sprinkle the cinnamon-sugar mixture over the dough. Cut the rectangle into long strips about 1 inch wide. Take each strip and tie it into a knot, tucking the ends underneath.
- Second Rise: Place the knots on a baking sheet lined with parchment paper. Cover them with a cloth and let them rise for another 30 minutes. While they rise, preheat your oven to 350°F (175°C).
- Bake the Knots: Once the knots have risen, bake them in the preheated oven for 15-20 minutes or until they’re golden brown. Remove them from the oven and let them cool slightly before serving.
- Serve: Enjoy the Cinnamon-Sugar Knots warm, perhaps with a cup of coffee or tea. They can also be stored in an airtight container for a couple of days.
Extra Tips:
To elevate your Cinnamon-Sugar Knots even further, consider adding a glaze made from powdered sugar and milk on top once they’ve cooled. This simple icing can add a sweet finish that complements the cinnamon flavor beautifully.
If you prefer a more decadent treat, you can also add chopped nuts or raisins to the filling for added texture and flavor. Enjoy experimenting with different variations to make this classic recipe your own!
Traditional Czech Trdelník
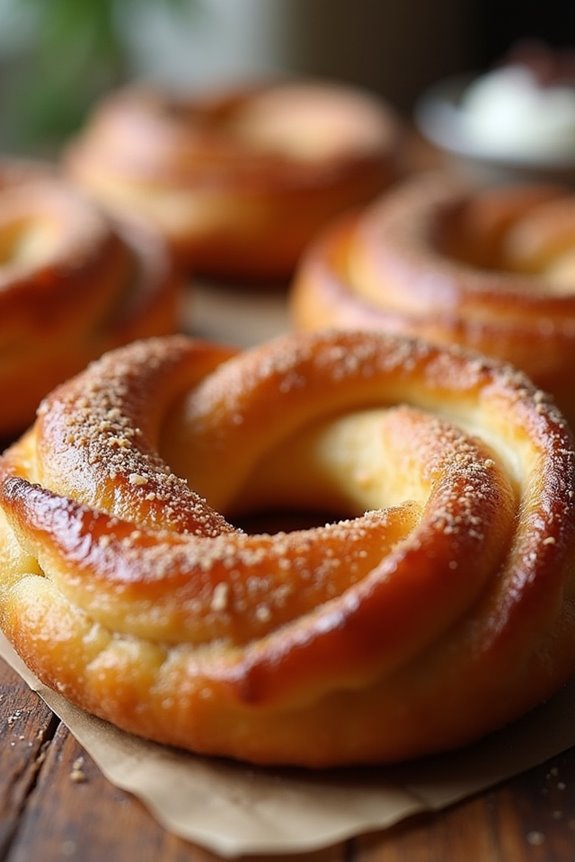
Trdelník, often referred to as chimney cake, is a delightful pastry that originates from the Czech Republic and has captured the hearts and taste buds of many around the world. This sweet treat is traditionally cooked over an open flame, giving it a unique texture and flavor that’s hard to resist. The dough is rolled around a wooden stick, baked to perfection, and then generously coated in sugar and cinnamon, making it an irresistible dessert or snack.
While Trdelník can be found in many street markets, making it at home allows you to customize the flavors and fillings. You can enjoy it plain or fill it with whipped cream, ice cream, or even Nutella for a more decadent experience. This recipe will guide you through the process of creating your own traditional Czech Trdelník, perfect for a serving size of 4-6 people.
Ingredients:
- 500g all-purpose flour
- 200ml milk
- 100g granulated sugar (plus extra for coating)
- 75g unsalted butter (melted)
- 2 large eggs
- 10g active dry yeast
- 1 teaspoon vanilla extract
- 1 teaspoon salt
- 1 teaspoon ground cinnamon
- 1 tablespoon vegetable oil (for greasing the stick)
- Optional toppings: whipped cream, ice cream, Nutella, or fruit
Cooking Instructions:
- Activate the Yeast: In a small bowl, combine the warm milk (about 110°F/43°C) with the active dry yeast and a tablespoon of sugar. Let it sit for about 5-10 minutes until it becomes frothy. This process activates the yeast and guarantees your dough will rise properly.
- Prepare the Dough: In a large mixing bowl, combine the flour, melted butter, eggs, vanilla extract, and salt. Once the yeast mixture is ready, add it to the bowl. Mix the ingredients together until a shaggy dough forms.
- Knead the Dough: Transfer the dough onto a lightly floured surface and knead it for about 10 minutes until it’s smooth and elastic. If the dough sticks to your hands, sprinkle a little more flour as needed.
- First Rise: Form the kneaded dough into a ball and place it in a greased bowl, covering it with a clean kitchen towel. Allow it to rise in a warm place for about 1-2 hours, or until it has doubled in size.
- Shape the Trdelník: Once the dough has risen, punch it down to release the air. Divide the dough into equal pieces (around 6-8) and roll each piece into a long rope. Wrap each rope around a greased wooden stick, leaving some space between the coils.
- Coat with Sugar: In a shallow plate, mix together the granulated sugar and cinnamon. Roll the wrapped dough sticks in this mixture, making sure they’re well coated.
- Bake the Trdelník: If you have access to a grill or open flame, roast the sticks over the heat, turning them frequently for about 10-15 minutes until they’re golden brown and cooked through. Alternatively, you can bake them in a preheated oven at 375°F (190°C) for about 15-20 minutes or until golden brown.
- Serve and Enjoy: Remove the Trdelník from the sticks while they’re still warm and let them cool slightly. You can fill them with your choice of whipped cream, ice cream, or spread, then serve immediately.
Extra Tips:
When making Trdelník, verify that your dough has risen sufficiently for the best texture. If you want to experiment with flavors, consider adding grated lemon or orange zest to the dough for a citrus twist.
Additionally, for a more traditional experience, try serving the Trdelník with a sprinkle of finely chopped nuts or a drizzle of chocolate. Finally, if you don’t have wooden sticks, you can also use metal skewers to create the signature shape.
Swedish Cinnamon Buns
Swedish Cinnamon Buns, or “Kanelbullar,” are a beloved treat in Sweden and a staple in many Scandinavian bakeries. These soft, sweet buns are infused with a delightful cinnamon filling and topped with pearl sugar, making them the perfect accompaniment to coffee or tea. The enchanting aroma of freshly baked cinnamon buns wafting through your kitchen is simply irresistible, and they’re sure to bring a smile to anyone who enjoys them.
Making these buns at home is a rewarding experience that invites a touch of Scandinavian tradition into your kitchen. With their fluffy texture and the warm, spicy notes of cinnamon, these buns aren’t only delicious but also a wonderful way to gather friends and family. Whether enjoyed at breakfast, as an afternoon snack, or as a dessert, Swedish Cinnamon Buns are a delightful treat that everyone will love.
Ingredients (Serving Size: 4-6 People)
- 4 cups all-purpose flour
- 1/2 cup granulated sugar
- 1 packet (2 1/4 tsp) active dry yeast
- 1/2 tsp salt
- 1 cup whole milk
- 1/4 cup unsalted butter (melted)
- 1 large egg
- 1 tbsp ground cinnamon
- 1/4 cup brown sugar (packed)
- 1/4 cup unsalted butter (softened)
- Pearl sugar for topping (optional)
Cooking Instructions
- Prepare the dough: In a large mixing bowl, combine the flour, sugar, yeast, and salt. In a small saucepan, heat the milk until it’s warm but not boiling. Add the melted butter and whisk in the egg. Pour the warm milk mixture into the dry ingredients and mix until a dough forms.
- Knead the dough: Transfer the dough onto a floured surface and knead for about 5-7 minutes until the dough is smooth and elastic. You can add more flour if the dough is too sticky.
- First rise: Place the kneaded dough into a greased bowl, cover it with a clean cloth, and let it rise in a warm place for about 1 hour, or until it has doubled in size.
- Prepare the filling: While the dough is rising, mix together the softened butter, brown sugar, and ground cinnamon in a small bowl until well combined.
- Roll out the dough: Once the dough has risen, punch it down to release the air. On a floured surface, roll the dough out into a large rectangle, approximately 1/4 inch thick.
- Spread the filling: Evenly spread the cinnamon filling mixture over the rolled-out dough, ensuring to cover the entire surface.
- Shape the buns: Starting from one long edge, roll the dough tightly into a log. Slice the log into 12 equal pieces.
- Second rise: Place the sliced buns on a baking sheet lined with parchment paper, leaving space between each one. Cover with a cloth and let them rise for another 30 minutes.
- Preheat the oven: While the buns are rising, preheat your oven to 375°F (190°C).
- Bake the buns: Once the buns have risen, sprinkle pearl sugar on top if desired. Bake in the preheated oven for 15-20 minutes, or until golden brown.
- Cool and serve: Remove the buns from the oven and let them cool on a wire rack for a few minutes before serving. Enjoy warm!
Extra Tips
For the best results, make sure your milk is warm but not hot, as overheating can kill the yeast. If you’re short on time, you can let the dough rise in a slightly warmed oven (turned off) to speed up the process.
Additionally, feel free to experiment with the filling by adding nuts or raisins for an extra touch. These buns are best enjoyed fresh but can be stored in an airtight container for a couple of days or frozen for longer storage.
Polish Babka With Cinnamon
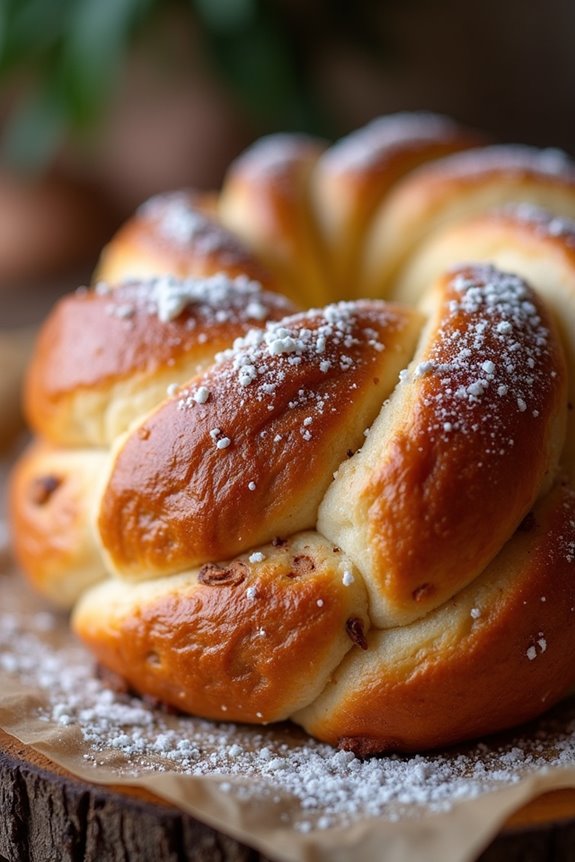
Polish Babka is a delightful and sweet yeast bread that has become a beloved staple in many households throughout Poland and beyond. This rich bread is often associated with festive occasions and family gatherings, showcasing a beautifully braided or twisted appearance that’s both visually striking and deliciously comforting. The addition of cinnamon creates a warm, aromatic flavor that perfectly complements the soft, fluffy texture of the babka, making it a treat that’s hard to resist.
Baking Polish Babka with Cinnamon is a rewarding experience that fills your home with delightful scents and provides a wonderful treat for friends and family. Whether served for breakfast, dessert, or a special occasion, this recipe is sure to impress. The process may take some time due to the rising of the dough, but the end result is well worth the wait. So, roll up your sleeves and get ready to create a lovely loaf of Polish Babka that’s perfect for sharing.
Ingredients (Serves 4-6):
- 4 cups all-purpose flour
- 1 packet (2 1/4 teaspoons) active dry yeast
- 1/2 cup granulated sugar
- 1 teaspoon salt
- 1 teaspoon ground cinnamon
- 1/2 cup milk, warmed
- 1/2 cup unsalted butter, melted
- 3 large eggs
- 1 teaspoon vanilla extract
- 1/2 cup brown sugar
- 1 tablespoon ground cinnamon (for filling)
- Powdered sugar (for dusting, optional)
Cooking Instructions:
- Prepare the Dough: In a large mixing bowl, combine the flour, sugar, salt, and ground cinnamon. In a small bowl, dissolve the yeast in the warmed milk and let it sit for about 5-10 minutes until it becomes frothy. Once ready, add the melted butter, eggs, and vanilla extract to the yeast mixture, then pour it into the dry ingredients. Mix together until a dough forms.
- Knead the Dough: Transfer the dough to a floured surface and knead it for about 8-10 minutes until it becomes smooth and elastic. If the dough is too sticky, sprinkle a little more flour as needed. Form the dough into a ball and place it in a lightly greased bowl, covering it with a clean kitchen towel.
- First Rise: Allow the dough to rise in a warm place for about 1-2 hours, or until it has doubled in size. This step is essential for developing the dough’s texture and flavor.
- Prepare the Filling: While the dough is rising, mix together the brown sugar and ground cinnamon in a small bowl. This mixture will be used as the filling for the babka.
- Shape the Babka: Once the dough has risen, punch it down to release the air. Roll the dough out on a lightly floured surface into a rectangle about 1/4 inch thick. Evenly spread the brown sugar and cinnamon filling over the dough, leaving a small border around the edges.
- Roll and Twist: Starting from one of the long edges, carefully roll the dough tightly into a log. Once rolled, pinch the edges to seal. Cut the log in half lengthwise to expose the filling, then twist the two halves together, creating a braid-like shape.
- Second Rise: Place the twisted dough into a greased loaf pan. Cover it with a towel and let it rise again for about 30-45 minutes, or until it has puffed up again.
- Bake: Preheat your oven to 350°F (175°C). Once the dough has risen, bake it in the preheated oven for 30-35 minutes or until the top is golden brown and a toothpick inserted into the center comes out clean.
- Cool and Serve: Remove the babka from the oven and allow it to cool in the pan for about 10 minutes before transferring it to a wire rack to cool completely. If desired, dust the top with powdered sugar before serving.
Extra Tips: When making Polish Babka with Cinnamon, make sure that your ingredients are at room temperature for better incorporation and rising. If you have time, let the dough rise slowly in the refrigerator overnight for a more developed flavor. You can also experiment with different fillings, such as nuts or chocolate, to customize your babka. Enjoy your baking, and don’t hesitate to share this delightful treat with family and friends!
Hungarian Chimney Cake
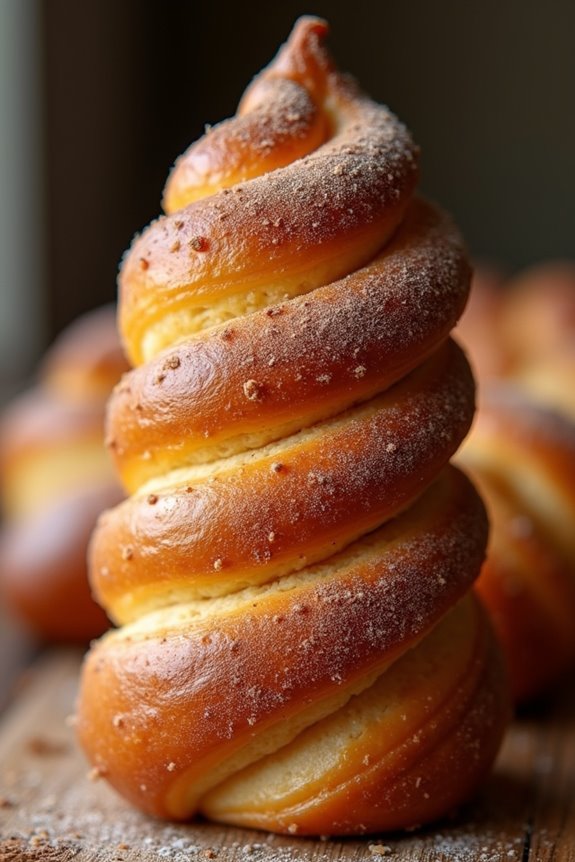
Hungarian Chimney Cake, known as “Kürtőskalács,” is a delightful sweet pastry that originated in Hungary but has become popular throughout Central and Eastern Europe. This traditional treat is characterized by its unique cylindrical shape and a crispy, caramelized outer layer.
It’s often enjoyed at fairs and festivals, where the enticing aroma of baking dough fills the air, and the sight of the spinning cakes over an open flame is a feast for the eyes. The dough is rolled around a wooden cylinder and baked to perfection, creating a deliciously chewy texture that’s both satisfying and indulgent.
The outer layer is typically coated in a mixture of sugar and cinnamon, giving it a sweet and aromatic flavor that complements the soft, fluffy interior. You can also experiment with various toppings, such as nuts or cocoa powder, to add your personal touch.
Whether enjoyed warm or at room temperature, Hungarian Chimney Cake is a delightful treat that can be served as a dessert or a snack, making it a versatile addition to any gathering.
Ingredients (Serves 4-6):
- 4 cups all-purpose flour
- 1 cup milk, warmed
- 1/2 cup granulated sugar
- 1/4 cup unsalted butter, melted
- 1 packet (2 1/4 teaspoons) active dry yeast
- 1 large egg
- 1 teaspoon vanilla extract
- 1 teaspoon salt
- 1/2 cup granulated sugar (for coating)
- 2 teaspoons ground cinnamon (for coating)
- Additional melted butter (for brushing)
- Optional: finely chopped nuts or cocoa powder (for coating)
Instructions:
1. Prepare the Dough: In a small bowl, combine the warmed milk and the active dry yeast. Let it sit for about 5-10 minutes until it becomes frothy.
In a large mixing bowl, whisk together the flour, sugar, and salt. Make a well in the center and add the yeast mixture, melted butter, egg, and vanilla extract. Mix until a dough begins to form.
2. Knead the Dough: Transfer the dough onto a lightly floured surface and knead for about 8-10 minutes until it becomes smooth and elastic. If the dough is too sticky, sprinkle in a little more flour as needed.
Once kneaded, place the dough in a lightly greased bowl, cover it with a damp cloth, and let it rise in a warm place for about 1 hour or until it has doubled in size.
3. Shape the Cakes: After the dough has risen, punch it down to release the air. Divide the dough into 4 equal pieces.
Roll each piece into a long strip, about 1 inch in diameter. Grease the wooden cylinder or rolling pin you’ll use, and wrap the dough strips around it, overlapping slightly, to form a spiral shape.
4. Coat the Dough: In a shallow dish, combine the sugar and cinnamon for the coating. Brush the wrapped dough generously with melted butter, then roll it in the sugar-cinnamon mixture to coat evenly.
5. Bake the Cakes: Preheat your oven to 375°F (190°C). Place the prepared chimney cakes on a baking sheet lined with parchment paper.
Bake for about 20-25 minutes, rotating them halfway through to guarantee even baking, until they’re golden brown and crispy on the outside.
6. Serve and Enjoy: Once baked, remove the chimney cakes from the oven and let them cool slightly.
You can brush them with more melted butter and roll them in additional sugar or nuts if desired. Serve warm and enjoy the deliciousness!
Extra Tips:
When making Hungarian Chimney Cake, patience is key, especially during the dough rising process. Confirm your yeast is fresh for the best results, and try adding a touch of cardamom or nutmeg to the sugar coating for a unique flavor twist.
If you want to achieve a more authentic experience, consider grilling the cakes over an open flame instead of baking them in the oven. This can give them a delightful smoky flavor and a perfectly crispy exterior. Enjoy experimenting with different toppings and fillings to customize your chimney cake!
Cinnamon and Honey Poppy Seed Cake

Cinnamon and Honey Poppy Seed Cake is a delightful treat that perfectly combines the nutty flavor of poppy seeds with the warmth of cinnamon and the sweetness of honey. This rustic cake is inspired by traditional European baking techniques, bringing an old-world charm to your kitchen.
Whether enjoyed as a dessert after dinner or a sweet addition to a cozy afternoon tea, this cake is sure to impress with its unique flavor profile and moist texture.
Baking this cake isn’t only simple but also a rewarding experience. The aromatic spices and the natural sweetness from honey create a harmonious balance that will leave your taste buds dancing.
With just a few basic ingredients, you can create a beautiful centerpiece for any gathering, making it a perfect choice for family celebrations or friendly get-togethers.
Ingredients (serves 4-6):
- 1 cup all-purpose flour
- 1/2 cup poppy seeds
- 1 teaspoon baking powder
- 1/2 teaspoon baking soda
- 1/2 teaspoon salt
- 1 teaspoon ground cinnamon
- 1/2 cup unsalted butter, softened
- 1/2 cup honey
- 2 large eggs
- 1/2 cup milk
- 1 teaspoon vanilla extract
Cooking Instructions:
- Preheat the Oven: Begin by preheating your oven to 350°F (175°C). Preheating is crucial to guarantee that the cake bakes evenly, resulting in a light and fluffy texture.
- Prepare the Baking Pan: Grease a 9-inch round cake pan with butter or line it with parchment paper. This step prevents the cake from sticking to the pan, making it easier to remove once baked.
- Mix Dry Ingredients: In a medium bowl, whisk together the flour, poppy seeds, baking powder, baking soda, salt, and ground cinnamon. Mixing these dry ingredients together guarantees that the leavening agents are evenly distributed throughout the cake batter.
- Cream Butter and Honey: In a large mixing bowl, use an electric mixer to cream the softened butter and honey together until the mixture is light and fluffy. This process incorporates air into the batter, contributing to the cake’s rise and texture.
- Add Eggs and Milk: Beat in the eggs one at a time, guaranteeing each egg is fully incorporated before adding the next. Then, mix in the milk and vanilla extract until smooth. This step adds moisture and flavor to the batter.
- Combine Wet and Dry Ingredients: Gradually add the dry ingredient mixture to the wet ingredients, mixing gently until just combined. Be careful not to overmix, as this can lead to a dense cake.
- Pour into Pan: Pour the batter into the prepared cake pan, smoothing the top with a spatula for an even surface. This guarantees that the cake rises evenly during baking.
- Bake the Cake: Place the cake in the preheated oven and bake for 30-35 minutes, or until a toothpick inserted into the center comes out clean. Keep an eye on the cake towards the end of the baking time to avoid overbaking.
- Cool and Serve: Once baked, remove the cake from the oven and let it cool in the pan for about 10 minutes. Then, transfer it to a wire rack to cool completely. Serve plain or drizzle with additional honey for an extra touch of sweetness.
Extra Tips:
For an added depth of flavor, consider toasting the poppy seeds lightly in a dry pan before adding them to the batter. This enhances their nutty taste and aroma.
Additionally, feel free to experiment by adding grated lemon or orange zest for a rejuvenating citrus note, or mixing in a handful of chopped nuts for extra texture.
This cake can also be stored in an airtight container at room temperature for up to three days, making it a perfect make-ahead option for your gatherings.
Finnish Pulla Bread
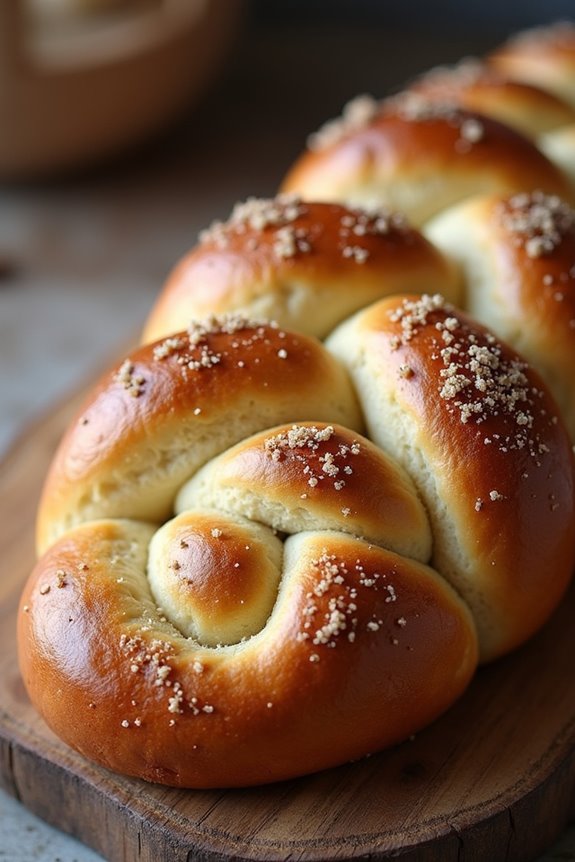
Finnish Pulla Bread is a delightful sweet bread that’s often enjoyed as a snack or with coffee in Finland. This braided bread is enriched with cardamom, which gives it a distinctive flavor profile that’s both aromatic and comforting. The texture is soft and fluffy, making it an ideal treat for gatherings or simply to savor on a quiet afternoon.
Traditionally, Pulla is enjoyed fresh, but it can also be toasted or served with butter, allowing you to enjoy its versatility.
Making Pulla Bread at home might seem intimidating, but the process is quite straightforward. The dough requires basic ingredients, and the comforting aroma of cardamom will fill your kitchen as it rises. Once baked, you can serve it warm or at room temperature, and it pairs wonderfully with coffee or tea. This recipe yields enough bread for 4-6 people, making it perfect for sharing with friends or family.
Ingredients:
- 4 cups all-purpose flour
- 1 cup milk
- 1/2 cup sugar
- 1/2 cup unsalted butter, softened
- 2 large eggs
- 1 packet (2 1/4 teaspoons) active dry yeast
- 1 teaspoon ground cardamom
- 1/2 teaspoon salt
- 1 egg (for egg wash)
- Pearl sugar (for topping, optional)
Cooking Instructions:
- Prepare the Yeast Mixture: In a small bowl, heat the milk until it’s warm but not hot (about 110°F). Sprinkle the yeast over the warm milk and let it sit for about 5-10 minutes, until it becomes frothy. This step activates the yeast, making sure your bread will rise properly.
- Mix Dry Ingredients: In a large mixing bowl, combine 3 cups of flour, sugar, ground cardamom, and salt. Whisk these ingredients together until they’re well blended. The cardamom is key to the bread’s unique flavor, so make sure to incorporate it thoroughly.
- Combine Wet Ingredients: In a separate bowl, beat the eggs and then add them to the yeast mixture along with the softened butter. Stir to combine, making certain the butter melts into the mixture.
- Form the Dough: Pour the wet mixture into the dry ingredients and stir until a shaggy dough forms. Gradually add the remaining cup of flour, mixing until the dough is cohesive and slightly sticky.
- Knead the Dough: Transfer the dough to a floured surface and knead for about 8-10 minutes until smooth and elastic. If the dough is too sticky, add a little more flour as needed.
- First Rise: Place the kneaded dough in a lightly greased bowl, cover it with a clean kitchen towel, and let it rise in a warm place for about 1-2 hours, or until it has doubled in size.
- Shape the Bread: Once the dough has risen, punch it down to release the air. Divide it into three equal pieces. Roll each piece into a long rope (about 12-14 inches) and braid them together to form a loaf. Pinch the ends to secure the braid.
- Second Rise: Transfer the braided loaf to a baking sheet lined with parchment paper. Cover it with a kitchen towel and let it rise for another 30-45 minutes until it puffs up again.
- Preheat the Oven: While the dough is rising, preheat your oven to 375°F (190°C).
- Egg Wash and Bake: Beat the additional egg and brush it over the loaf for a shiny finish. If desired, sprinkle pearl sugar on top. Bake for 25-30 minutes, or until the bread is golden brown and sounds hollow when tapped on the bottom.
- Cool and Serve: Remove the bread from the oven and let it cool on a wire rack. Slice and serve warm or at room temperature.
Extra Tips:
When making Finnish Pulla Bread, feel free to experiment with the flavors by adding raisins or almonds to the dough. For an even richer taste, you can substitute some of the butter with cream.
If you find your dough is too sticky, don’t hesitate to add a bit more flour during kneading, but be careful not to overdo it, as this could make the bread denser.
Finally, make sure your kitchen is warm while the dough rises; if it’s too cold, the yeast may not activate properly, affecting the bread’s texture. Enjoy your baking!
Spanish Churros With Cinnamon
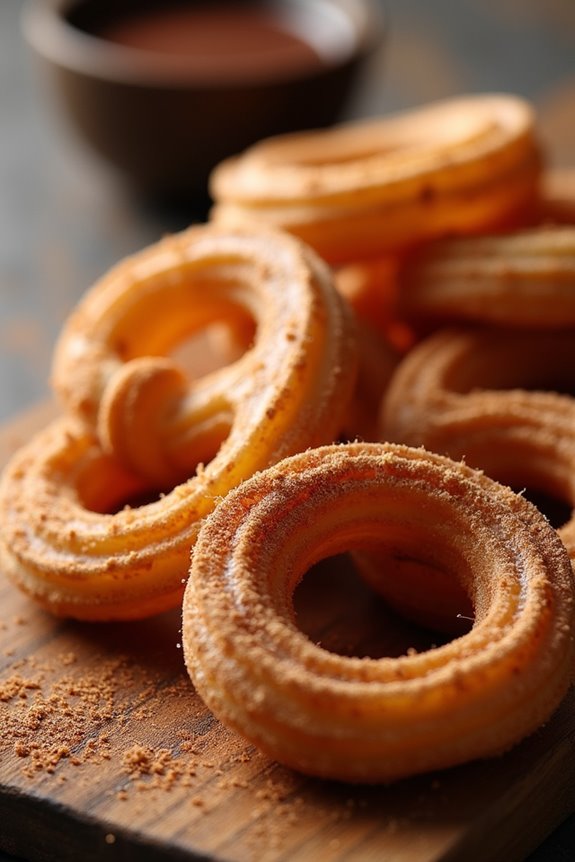
Churros are a beloved Spanish treat that combines a crispy exterior with a soft, fluffy interior, making them perfect for dipping in rich chocolate sauce or enjoying as is. Traditionally enjoyed for breakfast or as a snack, these delightful pastries are often dusted with sugar and cinnamon, adding an irresistible sweetness that complements their texture.
Making churros at home can be a fun and rewarding experience, allowing you to enjoy this classic dessert anytime you desire.
The process of making churros begins with a simple dough made from flour, water, sugar, and a touch of salt. This dough is then piped into hot oil, where it puffs up and becomes golden brown. Once cooked, the churros are rolled in a mixture of cinnamon and sugar, creating a deliciously aromatic coating.
Whether you’re serving them at a family gathering or indulging in a late-night snack, Spanish churros with cinnamon are sure to impress.
Ingredients (Serves 4-6)
- 1 cup water
- 2 tablespoons granulated sugar
- 1/2 teaspoon salt
- 1 cup all-purpose flour
- 2 tablespoons vegetable oil (plus extra for frying)
- 1 teaspoon vanilla extract
- 1/2 teaspoon ground cinnamon
- 1/4 cup granulated sugar (for coating)
- Chocolate sauce (for dipping, optional)
Cooking Instructions
- Prepare the Churro Dough: In a medium saucepan, combine 1 cup of water, 2 tablespoons of granulated sugar, and 1/2 teaspoon of salt. Bring this mixture to a gentle boil over medium heat. Once boiling, remove the saucepan from the heat and stir in 1 cup of all-purpose flour, mixing until a smooth dough forms. This will create the base for your churros.
- Add Flavor and Consistency: After the dough has formed, add 2 tablespoons of vegetable oil and 1 teaspoon of vanilla extract. Mix well until the oil is fully incorporated, and the dough is smooth and slightly glossy. Allow the dough to cool for a few minutes, making it easier to handle.
- Heat the Oil: In a deep skillet or saucepan, heat about 2 inches of vegetable oil over medium-high heat until it reaches 350°F (175°C). You can test if the oil is ready by dropping a small piece of dough into it; if it sizzles and rises to the surface, the oil is hot enough for frying.
- Pipe the Churros: Transfer the churro dough into a piping bag fitted with a large star tip. Carefully pipe strips of dough (about 4-6 inches long) directly into the hot oil, cutting them with kitchen scissors. Fry the churros in batches, ensuring not to overcrowd the pan, for about 2-4 minutes on each side, or until they’re golden brown and crispy.
- Drain and Coat: Once cooked, use a slotted spoon to remove the churros from the oil and place them on a plate lined with paper towels to drain excess oil. In a shallow dish, mix together 1/4 cup of granulated sugar and 1/2 teaspoon of ground cinnamon. Roll the warm churros in this mixture until they’re fully coated.
- Serve: Serve the churros warm with chocolate sauce for dipping if desired. Enjoy your homemade Spanish churros with cinnamon fresh and hot!
Extra Tips
For the best results, make sure the oil is at the correct temperature before adding the churros, as this will help achieve that perfect crispy texture.
If you don’t have a piping bag, a ziplock bag with the corner snipped off will work just as well. Additionally, you can experiment with the cinnamon-sugar coating by adding a pinch of nutmeg or using flavored sugars for a unique twist.
Enjoy your churros fresh, as they’re best consumed shortly after frying!
Italian Cinnamon Biscotti
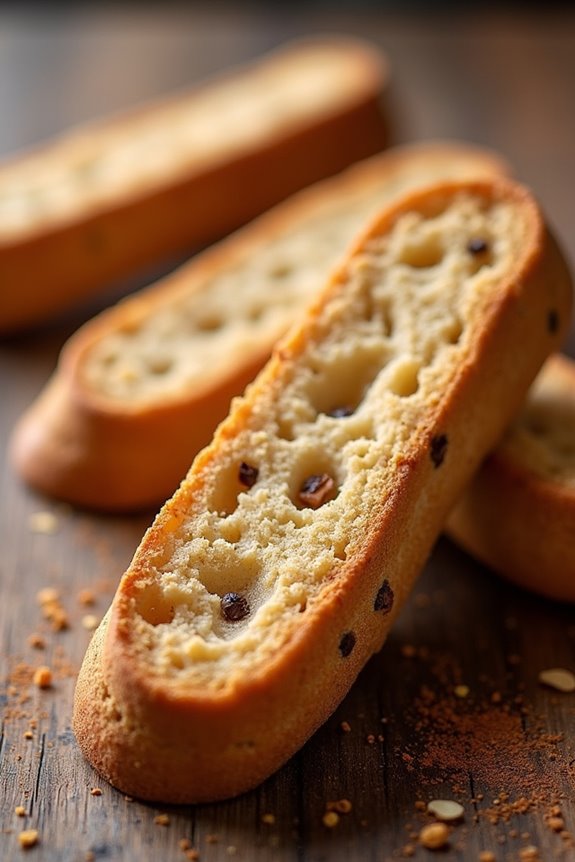
Italian Cinnamon Biscotti are a delightful treat that perfectly embodies the rustic charm of European baking. These twice-baked cookies are crunchy and flavorful, making them an excellent accompaniment to coffee or tea. The addition of cinnamon not only gives them a warm, spicy flavor but also fills your kitchen with an inviting aroma as they bake.
Perfect for sharing with family and friends, these biscotti are a reflection of the simple yet satisfying nature of Italian desserts. Biscotti, meaning “twice-baked” in Italian, are traditionally served alongside a hot beverage, allowing you to dip them and enjoy their unique texture. This recipe yields about 4-6 servings, making it ideal for gatherings or as a sweet snack to have on hand.
So, preheat your oven and get ready to experience the joy of making these delicious Italian Cinnamon Biscotti!
Ingredients
- 1 cup all-purpose flour
- 1 cup almond flour
- 1 teaspoon baking powder
- 1 teaspoon ground cinnamon
- 1/2 teaspoon salt
- 3/4 cup granulated sugar
- 2 large eggs
- 1 teaspoon vanilla extract
- 1/2 cup chopped almonds (or walnuts)
Cooking Instructions
- Preheat the Oven: Begin by preheating your oven to 350°F (175°C). This guarantees that the biscotti will bake evenly and reach the perfect level of crispiness.
- Mix Dry Ingredients: In a medium bowl, whisk together the all-purpose flour, almond flour, baking powder, ground cinnamon, and salt. This step is essential as it evenly distributes the leavening agent and spices throughout the flour mixture.
- Combine Wet Ingredients: In a separate large bowl, beat together the granulated sugar and eggs until the mixture is light and fluffy. Add the vanilla extract and mix until well combined. This mixture will provide the sweetness and flavor needed for the biscotti.
- Combine Wet and Dry Mixtures: Gradually add the dry ingredient mixture to the wet ingredients, stirring until just combined. Be careful not to overmix, as this can make the biscotti tough.
- Incorporate Nuts: Gently fold in the chopped almonds (or walnuts) into the dough. These nuts add a delightful crunch and flavor to your biscotti, making each bite satisfying.
- Shape the Dough: Lightly flour your hands and divide the dough into two equal portions. Shape each portion into a log about 12 inches long and 2 inches wide. Place the logs on a parchment-lined baking sheet, ensuring they’re spaced apart.
- First Bake: Bake the logs in the preheated oven for 25-30 minutes, or until they’re lightly golden and firm to the touch. This first baking step creates the initial structure of the biscotti.
- Cool and Slice: Remove the logs from the oven and let them cool on the baking sheet for about 10 minutes. Once cooled, use a serrated knife to slice the logs diagonally into 1/2-inch thick pieces.
- Second Bake: Arrange the sliced biscotti back on the baking sheet, cut side up. Bake them again for an additional 10-15 minutes, until they’re golden brown and crisp. This second baking is what gives biscotti their signature crunch.
- Cool Completely: Allow the biscotti to cool on a wire rack before serving. They’ll continue to harden as they cool, making them the perfect texture for dipping.
Extra Tips
When making Italian Cinnamon Biscotti, feel free to experiment with different nuts or even add dried fruits like cranberries or apricots for a unique twist.
Additionally, storing biscotti in an airtight container will keep them fresh for up to two weeks, making them a great make-ahead treat. If you prefer softer biscotti, reduce the second baking time slightly, and enjoy them fresh out of the oven. Happy baking!
French Pain Aux Raisins
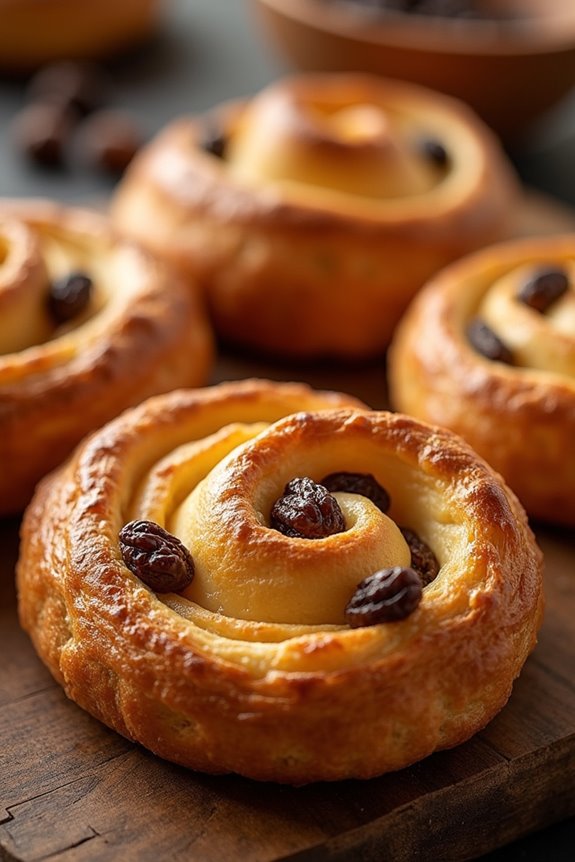
French Pain Aux Raisins, also known as “Raisin Bread,” is a delightful pastry that hails from the rustic bakeries of France. This treat is characterized by a buttery, flaky dough that’s generously filled with plump raisins and a creamy custard-like filling. Ideal for breakfast or an afternoon snack, Pain Aux Raisins is a perfect way to indulge in the art of European baking, bringing a touch of French café culture into your home.
Making Pain Aux Raisins requires a little patience and attention to detail, but the end result is a mouthwatering pastry that will impress family and friends alike. The key to achieving that signature flaky texture lies in the lamination process of the dough, where layers of butter are folded into the pastry. As the bread bakes, the butter creates steam, leading to that coveted airy structure.
So, roll up your sleeves and get ready to bring a taste of France to your kitchen!
Ingredients (Serves 4-6):
- 500g all-purpose flour
- 10g salt
- 50g sugar
- 10g instant yeast
- 250ml milk, lukewarm
- 200g unsalted butter, softened (for the dough)
- 100g unsalted butter, chilled (for lamination)
- 200g raisins
- 100ml heavy cream
- 2 large eggs
- 1 teaspoon vanilla extract
- 1 egg, beaten (for egg wash)
Cooking Instructions:
- Prepare the Dough: In a large mixing bowl, combine the flour, salt, sugar, and instant yeast. Make a well in the center, then pour in the lukewarm milk. Mix until a shaggy dough forms. Add 200g of softened butter and knead until the dough is smooth and elastic, about 10 minutes. Cover with a damp cloth and let it rise in a warm place until doubled in size, approximately 1-1.5 hours.
- Prepare the Laminated Butter: While the dough is rising, take 100g of chilled butter and place it between two sheets of parchment paper. Using a rolling pin, pound the butter into a rectangle about 1 cm thick. Refrigerate the butter slab while the dough rises.
- Laminate the Dough: Once the dough has risen, punch it down and roll it out into a rectangle on a floured surface. Place the chilled butter slab in the center of the dough. Fold the dough over the butter, encasing it completely. Roll it out again into a larger rectangle and then perform a series of folds: fold the dough into thirds like a letter, then roll it out again. Repeat this process 2-3 times, chilling the dough for 15 minutes between folds to keep the butter firm.
- Prepare the Filling: In a small saucepan, heat the heavy cream until warm. In a bowl, whisk together the eggs and vanilla extract, then pour in the warm cream while whisking continuously. This will create a custard-like filling. Soak the raisins in warm water for 10 minutes, then drain and set aside.
- Assemble the Pastries: Roll out the laminated dough into a rectangle approximately 1 cm thick. Spread the custard filling evenly over the dough, leaving a small border around the edges. Sprinkle the soaked raisins evenly over the filling. Starting from one long side, roll the dough tightly into a log. Cut the log into 6 equal pieces and place them cut-side up on a baking sheet lined with parchment paper.
- Final Rise and Bake: Cover the pastries with a clean kitchen towel and let them rise for another 30-45 minutes until puffed. Preheat the oven to 180°C (350°F). Brush the tops of the pastries with beaten egg for a golden finish. Bake in the preheated oven for 20-25 minutes or until golden brown.
- Cool and Serve: Once baked, remove the pastries from the oven and let them cool on a wire rack. Serve warm or at room temperature, and enjoy your homemade French Pain Aux Raisins!
Extra Tips:
For an added twist, consider infusing your custard filling with citrus zest or a splash of rum, which pairs beautifully with the raisins.
Additionally, make sure to keep your butter cold during the lamination process to achieve that perfect flaky texture. If you face any difficulties with the dough, don’t hesitate to let it rest a bit longer; it can make a world of difference. Enjoy the process and the delightful aroma that will fill your kitchen!