

When I think of European lunches, I envision sunny terraces and the soothing aroma of homemade dishes. Each recipe has its own story, from Italy’s colorful Caprese salad to Spain’s refreshing gazpacho. These meals are not just about satisfying hunger; they bring a sense of wanderlust. It’s like a little escape to charming bistros and lively markets. Let’s explore these delightful recipes that promise to make your midday meals feel like a mini-vacation.
Italian Caprese Salad With Pesto

The Italian Caprese Salad with Pesto is a classic dish that beautifully highlights the flavors of fresh ingredients. Originating from the island of Capri, this salad combines ripe tomatoes, creamy mozzarella, and fragrant basil, all drizzled with a vibrant pesto sauce.
It’s not only a feast for the eyes but also a revitalizing and satisfying meal perfect for a light lunch or as an appetizer for a dinner party.
This dish is simple yet elegant, making it an ideal choice for those warm summer days when you want something light and flavorful. The combination of the creamy mozzarella and the juicy tomatoes creates a delightful contrast, while the homemade pesto adds a burst of flavor that ties everything together.
Whether you’re hosting a gathering or enjoying a quiet meal at home, this Italian Caprese Salad with Pesto is sure to impress.
Ingredients (serving size: 4-6 people)
- 4 ripe tomatoes (preferably heirloom or beefsteak)
- 12 oz fresh mozzarella cheese (preferably buffalo mozzarella)
- 1 cup fresh basil leaves
- 1/2 cup pine nuts
- 1/2 cup grated Parmesan cheese
- 2 garlic cloves, minced
- 1/2 cup extra-virgin olive oil
- Salt and pepper to taste
- Balsamic glaze (optional, for drizzling)
Cooking Instructions
- Prepare the Pesto: Start by making the pesto. In a food processor, combine the fresh basil leaves, pine nuts, grated Parmesan cheese, and minced garlic. Pulse these ingredients until they’re finely chopped and mixed together.
- Add Oil: With the food processor running, slowly drizzle in the extra-virgin olive oil. Continue processing until the pesto reaches a smooth consistency. If it’s too thick, you can add a little more olive oil. Season with salt and pepper to taste, then set aside.
- Slice the Tomatoes and Mozzarella: Wash the tomatoes thoroughly. Slice them into thick rounds, about 1/4 inch thick. Do the same with the fresh mozzarella, ensuring the slices are of similar thickness to the tomatoes for an even presentation.
- Assemble the Salad: On a large serving platter, alternate layers of sliced tomatoes and mozzarella. For each layer, place a slice of tomato followed by a slice of mozzarella, repeating until all slices are used.
- Drizzle with Pesto: Generously drizzle the prepared pesto over the arranged salad. Make sure to cover all the layers to guarantee that every bite is infused with flavor.
- Garnish and Serve: If desired, drizzle some balsamic glaze over the top for added flavor and visual appeal. Season with a little salt and pepper to taste before serving.
Extra Tips
When making your Italian Caprese Salad with Pesto, use the freshest ingredients you can find, as quality plays a significant role in the flavor of the dish.
For an even more vibrant pesto, consider toasting the pine nuts lightly before adding them to the mixture; this will enhance their nutty flavor.
Additionally, feel free to experiment with the proportions of basil and garlic in the pesto to suit your taste preferences. Enjoy your salad immediately after assembling for the best texture and taste!
Spanish Gazpacho
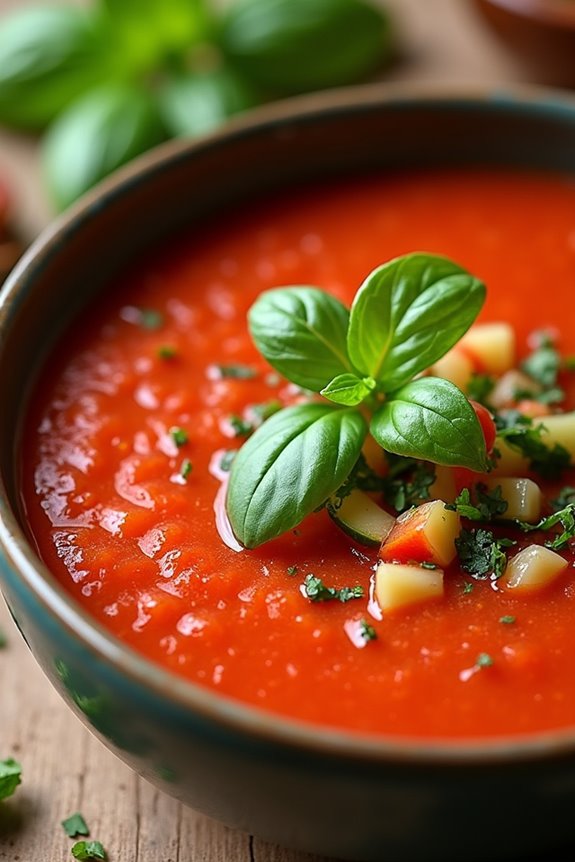
Spanish Gazpacho is a revitalizing cold soup that hails from the southern region of Andalusia. Perfect for hot summer days, this dish combines ripe tomatoes, fresh vegetables, and a hint of garlic to create a vibrant, flavorful experience. Traditionally served as an appetizer or as a light meal, gazpacho isn’t only delicious but also packed with nutrients, making it a healthy option for lunch.
Making gazpacho at home is simple and allows for customization based on your personal taste. The key to a great gazpacho lies in using the freshest ingredients available, particularly ripe tomatoes, which provide the base for the soup. This dish can be prepared ahead of time, allowing the flavors to meld together beautifully. Serve it chilled, garnished with diced vegetables or croutons for added texture.
Ingredients (serving size: 4-6 people):
- 6 ripe tomatoes, chopped
- 1 cucumber, peeled and chopped
- 1 red bell pepper, chopped
- 1 green bell pepper, chopped
- 1 small red onion, chopped
- 2 cloves garlic, minced
- 3 cups tomato juice
- 1/4 cup extra virgin olive oil
- 2 tablespoons red wine vinegar
- Salt and pepper to taste
- Fresh basil or parsley for garnish (optional)
Cooking Instructions:
- Prepare the Vegetables: Begin by washing and chopping the tomatoes, cucumber, bell peppers, and onion into small pieces. This will help them blend more easily and guarantee that they release their flavors into the soup.
- Blend the Ingredients: In a blender or food processor, combine the chopped tomatoes, cucumber, red bell pepper, green bell pepper, red onion, and garlic. Blend until smooth, adjusting the consistency to your liking; some prefer a chunkier gazpacho, while others enjoy it silky smooth.
- Add Liquids and Seasoning: Pour the blended mixture into a large bowl. Stir in the tomato juice, olive oil, and red wine vinegar. Season with salt and pepper to taste. Make sure to mix everything thoroughly to combine all the flavors.
- Chill the Gazpacho: Cover the bowl with plastic wrap or a lid and refrigerate the gazpacho for at least 2 hours, or ideally overnight. Chilling allows the flavors to develop and intensify, resulting in a more delicious final dish.
- Serve the Gazpacho: Once chilled, give the gazpacho a good stir before serving. Ladle it into bowls and garnish with fresh basil or parsley if desired. You can also add diced vegetables or croutons on top for an added crunch.
Extra Tips: To elevate your Spanish Gazpacho, consider adding a splash of hot sauce for a spicy kick or a few drops of lemon juice for brightness. You can also experiment with different herbs, such as cilantro or mint, to personalize the flavor profile.
Additionally, serving the gazpacho with a side of crusty bread will make for a more filling meal, perfect for a leisurely lunch.
French Quiche Lorraine

French Quiche Lorraine is a classic savory tart that hails from the Lorraine region of France. This dish features a deliciously flaky pastry crust filled with a rich custard made from eggs, cream, and cheese, complemented by crispy bacon or lardons. Quiche Lorraine is perfect for lunch, brunch, or even as a light dinner option, making it a versatile dish that can be served warm or at room temperature. Its delightful combination of flavors and textures will undoubtedly impress your family and friends.
The beauty of Quiche Lorraine lies in its adaptability. While the traditional recipe calls for bacon, you can easily modify it by adding vegetables, herbs, or different types of cheese to suit your taste preferences. This dish not only showcases the French culinary tradition but also provides an opportunity for creativity in the kitchen.
Whether you’re hosting a gathering or simply enjoying a quiet meal at home, Quiche Lorraine is a comforting and elegant choice that never disappoints.
Ingredients (Serves 4-6):
- 1 pre-made pie crust (9-inch)
- 6 slices of bacon, chopped
- 1 cup heavy cream
- 3 large eggs
- 1 cup shredded Gruyère cheese
- 1/2 cup milk
- 1/4 teaspoon salt
- 1/4 teaspoon black pepper
- 1/4 teaspoon nutmeg (optional)
- Fresh parsley for garnish (optional)
Cooking Instructions:
- Preheat the Oven: Begin by preheating your oven to 375°F (190°C). This will guarantee that your quiche cooks evenly and achieves a perfect golden brown color on the crust.
- Cook the Bacon: In a skillet over medium heat, cook the chopped bacon until it’s crispy, about 6-8 minutes. Use a slotted spoon to transfer the cooked bacon to a paper towel-lined plate to drain excess grease. This step adds fantastic flavor to the quiche.
- Prepare the Custard Mixture: In a mixing bowl, whisk together the heavy cream, eggs, milk, salt, pepper, and nutmeg (if using) until fully combined. This creamy custard will be the base of your quiche, providing a rich texture.
- Assemble the Quiche: Place the pre-made pie crust in a 9-inch pie dish. Sprinkle the cooked bacon evenly over the bottom of the crust, followed by the shredded Gruyère cheese. Pour the custard mixture over the cheese and bacon, guaranteeing it fills the crust evenly.
- Bake the Quiche: Place the quiche in the preheated oven and bake for 30-35 minutes, or until the custard is set and the top is lightly browned. You can check for doneness by inserting a knife into the center; it should come out clean.
- Cool and Serve: Once baked, remove the quiche from the oven and allow it to cool for about 10 minutes before slicing. This helps the custard set further and makes it easier to serve. Garnish with fresh parsley if desired.
Extra Tips:
For a perfectly flaky crust, make sure your pie crust is chilled before baking. You can also blind bake the crust for 10 minutes before adding the filling to prevent it from becoming soggy. If you want to add some vegetables, sautéed onions or spinach work wonderfully in Quiche Lorraine.
Finally, feel free to experiment with different cheeses like cheddar or feta for a unique twist on this classic recipe!
Greek Spinach and Feta Pie

Greek Spinach and Feta Pie, also known as Spanakopita, is a classic dish that beautifully combines the flavors of fresh spinach, creamy feta cheese, and flaky phyllo pastry. This savory pie isn’t only a staple in Greek cuisine but also a beloved comfort food in many Mediterranean households.
The crispy layers of phyllo contrast wonderfully with the soft, flavorful filling, making it a delightful option for lunch, appetizers, or even a light dinner.
Making your own Spanakopita may seem intimidating at first, but with a little practice, you’ll find that it’s a rewarding experience. The key to achieving that perfect flaky texture lies in how you handle the phyllo dough and the timing of your baking.
This dish is versatile; you can serve it hot or at room temperature, making it ideal for gatherings or meal prep for the week ahead.
Ingredients (Serves 4-6)
- 1 package (16 oz) phyllo dough, thawed
- 1 lb fresh spinach, washed and chopped
- 1 cup feta cheese, crumbled
- 1 cup ricotta cheese
- 1 medium onion, finely chopped
- 2 cloves garlic, minced
- 2 large eggs
- 1/4 cup fresh dill, chopped (or 1 tablespoon dried dill)
- 1/4 cup olive oil
- Salt and pepper, to taste
Cooking Instructions
1. Preheat the Oven: Begin by preheating your oven to 375°F (190°C). This guarantees that the pie will bake evenly and achieve a golden, crispy top.
2. Prepare the Filling: In a large skillet over medium heat, add a tablespoon of olive oil and sauté the chopped onion until it becomes translucent, about 5 minutes.
Add the minced garlic and chopped spinach, cooking until the spinach wilts and any excess moisture evaporates, around 3-4 minutes. Remove from heat and let it cool slightly.
3. Combine the Filling Ingredients: In a large bowl, mix the wilted spinach mixture with the crumbled feta, ricotta cheese, eggs, dill, and season with salt and pepper.
Stir until well combined, making sure that the cheeses are evenly distributed throughout the spinach.
4. Prepare the Phyllo Dough: Unroll the phyllo dough and cover it with a damp cloth to prevent it from drying out.
Take a large baking dish and brush the bottom with olive oil. Layer 6-8 sheets of phyllo dough in the dish, brushing each sheet with olive oil before adding the next.
5. Add the Filling: Once the base is ready, spread the spinach and cheese filling evenly over the phyllo layers.
6. Top with Phyllo Dough: Layer more phyllo sheets on top of the filling, repeating the brushing with olive oil for each layer.
Aim for about 6-8 layers on top, making sure that the filling is fully covered.
7. Cut and Bake: Use a sharp knife to cut the pie into squares or diamond shapes before baking.
This will make it easier to serve later. Place the pie in the preheated oven and bake for 30-40 minutes, or until the top is golden brown and crispy.
8. Cool and Serve: Once baked, remove the pie from the oven and let it cool for about 10 minutes before serving.
This will allow the filling to set a little, making it easier to cut and serve.
Extra Tips
To enhance the flavor of your Greek Spinach and Feta Pie, consider adding other herbs such as parsley or nutmeg to the filling mix.
If you want a richer flavor, you can use a combination of different cheeses, including a bit of shredded mozzarella or a sprinkle of Parmesan.
When handling phyllo dough, keep the unused sheets covered with a damp cloth to maintain moisture and prevent tearing.
Finally, for a delicious golden sheen, brush the top of the pie with an egg wash before baking. Enjoy your homemade Spanakopita!
German Bratwurst With Sauerkraut

German Bratwurst with Sauerkraut is a classic dish that embodies the heartiness of German cuisine. The bratwurst, a flavorful sausage, is typically made from pork, beef, or veal and is seasoned with a blend of spices that bring out its rich meaty flavor. When served with sauerkraut, a tangy fermented cabbage dish, it creates a perfect balance of savory and sour that’s both comforting and satisfying.
This dish isn’t only a staple at German beer gardens but also makes for an excellent lunch option that can be easily prepared at home.
Cooking German Bratwurst with Sauerkraut is straightforward and requires only a few ingredients. The dish can be made in one pan, making cleanup a breeze. The key to achieving a delicious bratwurst is to guarantee that they’re browned nicely and cooked through while allowing the sauerkraut to infuse its flavor into the dish.
This recipe serves 4-6 people, making it ideal for family gatherings or a cozy lunch with friends.
Ingredients
- 6 German bratwurst sausages
- 1 medium onion, thinly sliced
- 2 cloves garlic, minced
- 2 cups sauerkraut, drained
- 1 cup apple cider or beer
- 2 tablespoons olive oil
- 1 teaspoon caraway seeds (optional)
- Salt and pepper to taste
- Fresh parsley, chopped (for garnish)
Cooking Instructions
- Heat the Oil: In a large skillet, heat the olive oil over medium heat. This will create a non-stick surface and allow the bratwurst to brown nicely.
- Brown the Bratwurst: Add the bratwurst sausages to the skillet. Cook them for about 5-7 minutes, turning occasionally, until they’re browned on all sides. This step adds flavor and texture to the sausages.
- Add Onions and Garlic: Once the bratwurst is browned, add the sliced onions and minced garlic to the skillet. Sauté for about 3-4 minutes until the onions become translucent and fragrant.
- Incorporate Sauerkraut and Liquid: Stir in the drained sauerkraut and pour the apple cider or beer over the mixture. Add the caraway seeds if using. This will help to steam the sausages and infuse the sauerkraut with flavor.
- Simmer: Reduce the heat to low, cover the skillet with a lid, and let it simmer for about 15-20 minutes. This allows the flavors to meld together, and the bratwurst will cook through completely.
- Season and Serve: After simmering, taste the mixture and add salt and pepper as needed. Remove the skillet from heat, garnish with fresh parsley, and serve hot with your favorite side dishes, such as boiled potatoes or crusty bread.
Extra Tips
For an added depth of flavor, consider using a mix of different sausages or adding a splash of mustard to the sauerkraut while it cooks.
If you prefer a spicier kick, you can try adding some red pepper flakes. Leftover bratwurst and sauerkraut can be stored in the fridge and reheated for a quick lunch or dinner option. Enjoy this hearty dish with a revitalizing German beer for an authentic experience!
Hungarian Goulash
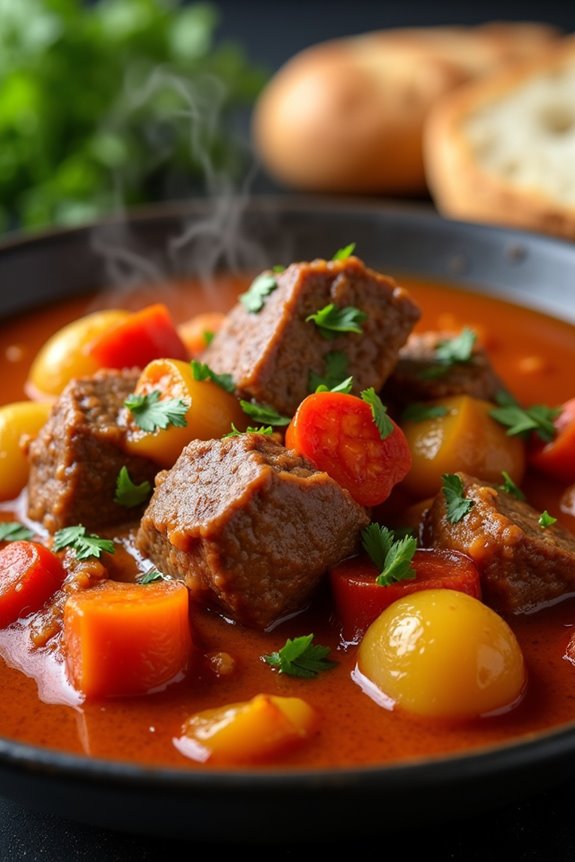
Hungarian Goulash is a beloved traditional dish that showcases the rich flavors and warming spices of Hungary. This hearty stew, typically made with beef, is infused with paprika, onions, and a medley of vegetables, creating a comforting meal that’s perfect for any occasion.
The dish has historical roots, being a staple among shepherds who’d cook it slowly over an open flame, allowing the flavors to meld beautifully. Today, goulash is enjoyed not only in Hungary but around the world, each region adding its unique twist to the recipe.
Cooking Hungarian Goulash isn’t just about following a recipe; it’s about embracing the spirit of Hungarian cuisine. The key to a great goulash lies in the quality of the ingredients, particularly the paprika, which lends its distinct flavor and color to the dish.
Whether served over egg noodles, with crusty bread, or enjoyed on its own, this goulash is sure to warm your heart and satisfy your hunger.
Ingredients (serving size: 4-6 people):
- 2 lbs beef chuck, cut into 1-inch cubes
- 2 tablespoons vegetable oil
- 2 large onions, finely chopped
- 4 cloves garlic, minced
- 3 tablespoons sweet Hungarian paprika
- 1 teaspoon caraway seeds
- 1 bell pepper, chopped (red or green)
- 4 medium potatoes, peeled and diced
- 4 carrots, sliced
- 4 cups beef broth
- 1 can (14.5 oz) diced tomatoes, drained
- Salt and pepper to taste
- Fresh parsley, chopped (for garnish)
Cooking Instructions:
- Brown the Meat: In a large Dutch oven or heavy pot, heat the vegetable oil over medium-high heat. Add the beef cubes in batches to avoid overcrowding. Sear the meat until browned on all sides, about 5-7 minutes per batch. Remove the browned meat and set aside.
- Sauté Onions and Garlic: In the same pot, add the chopped onions and sauté until they’re soft and translucent, about 5 minutes. Stir in the minced garlic and cook for an additional minute until fragrant.
- Add Spices: Lower the heat to medium and add the sweet Hungarian paprika and caraway seeds to the onions. Stir well to coat the onions in the spices, cooking for about 1-2 minutes to release the flavors.
- Combine Ingredients: Return the browned beef to the pot. Add the chopped bell pepper, diced potatoes, sliced carrots, diced tomatoes, and beef broth. Stir everything together until well combined.
- Simmer the Stew: Bring the mixture to a gentle boil, then reduce the heat to low. Cover the pot and let the goulash simmer for about 1.5 to 2 hours, stirring occasionally. This slow cooking allows the flavors to meld and the beef to become tender.
- Season to Taste: Once the beef is tender, taste the goulash and adjust the seasoning with salt and pepper as needed. If the stew is too thick, you can add a bit more beef broth or water to reach your desired consistency.
- Serve: Ladle the goulash into bowls and garnish with freshly chopped parsley. Serve hot, ideally with crusty bread or over egg noodles to soak up the delicious sauce.
Extra Tips: When cooking Hungarian Goulash, using quality paprika is essential, as it defines the dish’s flavor. For an extra depth of taste, consider adding a splash of red wine during the simmering process.
You can also customize the vegetables by adding other favorites like parsnips or celery. If you have leftovers, goulash tastes even better the next day, as the flavors continue to develop. Store it in an airtight container in the fridge for up to three days or freeze for longer storage.
Portuguese Bacalhau À Brás
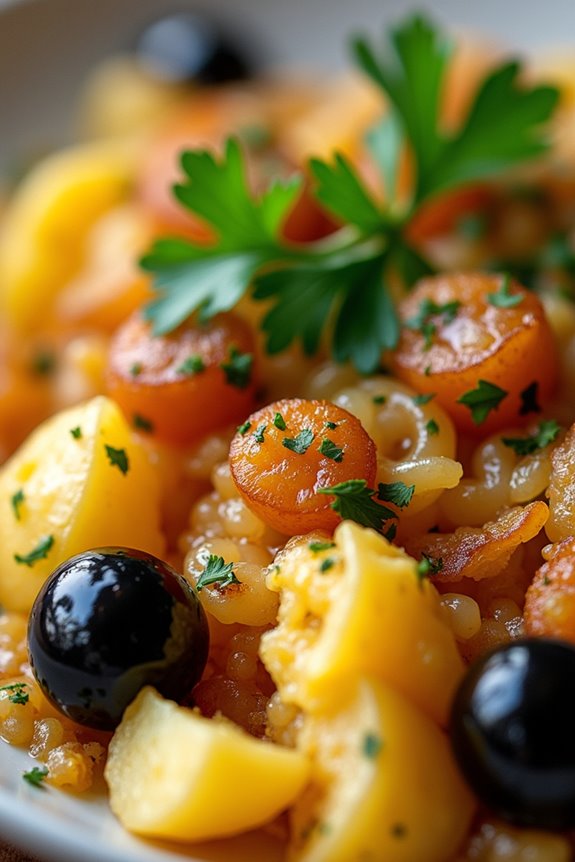
Bacalhau À Brás is a traditional Portuguese dish that celebrates the flavors of codfish, a staple in Portuguese cuisine. This dish combines shredded salted cod with finely chopped onions, crispy potatoes, and scrambled eggs, creating a hearty and satisfying meal. Often garnished with black olives and fresh parsley, Bacalhau À Brás isn’t only a feast for the stomach but also for the eyes, making it a perfect choice for lunch or dinner.
The roots of Bacalhau À Brás can be traced back to Lisbon, where it’s cherished for its comforting flavors and ease of preparation. Whether you’re familiar with Portuguese cooking or trying it for the first time, this dish is sure to impress with its blend of textures and rich taste. Serve it with a simple side salad or crusty bread for a complete meal that embodies the soul of Portuguese culinary traditions.
Ingredients (serves 4-6 people):
- 500g salted cod (bacalhau)
- 4 medium potatoes
- 1 large onion
- 4 large eggs
- 3 tablespoons olive oil
- 1 cup black olives (pitted)
- Fresh parsley (chopped, for garnish)
- Salt and pepper (to taste)
Cooking Instructions:
- Prepare the Cod: Begin by soaking the salted cod in cold water for 24 to 48 hours, changing the water several times to remove excess salt. After soaking, drain and rinse the cod, then boil it in a pot of water for about 10-15 minutes until cooked. Once cooked, remove the cod, let it cool slightly, and then shred it into small pieces, removing any skin and bones.
- Fry the Potatoes: While the cod is cooking, peel and cut the potatoes into thin matchsticks or use a mandoline for quicker preparation. Heat the olive oil in a large frying pan over medium heat. Fry the potatoes in batches until they’re golden and crispy, about 5-7 minutes per batch. Once done, remove the potatoes and place them on paper towels to drain excess oil.
- Sauté the Onion: In the same pan with a little remaining oil, add the chopped onion and sauté over medium heat until soft and translucent, about 5 minutes. Be careful not to brown the onions; they should be tender and aromatic.
- Combine Ingredients: Add the shredded cod to the sautéed onions and mix well. Then gently fold in the fried potatoes, incorporating them into the cod and onion mixture. Season with salt and pepper, taking care to taste as the cod may already be salty.
- Add Eggs: In a bowl, whisk the eggs until well combined. Pour the eggs over the cod mixture in the pan, stirring gently to coat all the ingredients. Cook for 3-4 minutes until the eggs are just set, making certain they remain soft and creamy. Remove from heat.
- Serve and Garnish: Transfer the Bacalhau À Brás to a serving dish. Garnish with black olives and a generous sprinkle of chopped parsley. Serve immediately while hot.
Extra Tips:
For an added depth of flavor, consider incorporating some sautéed garlic along with the onions or adding a dash of paprika to the mixture.
When frying the potatoes, be certain the oil is hot enough to achieve a crispy texture without becoming greasy. This dish is versatile, so feel free to adjust the seasoning and garnishes to suit your taste.
Leftovers can be stored in the refrigerator and enjoyed the next day, making it a convenient option for meal prep!
Swedish Meatballs With Lingonberry Sauce
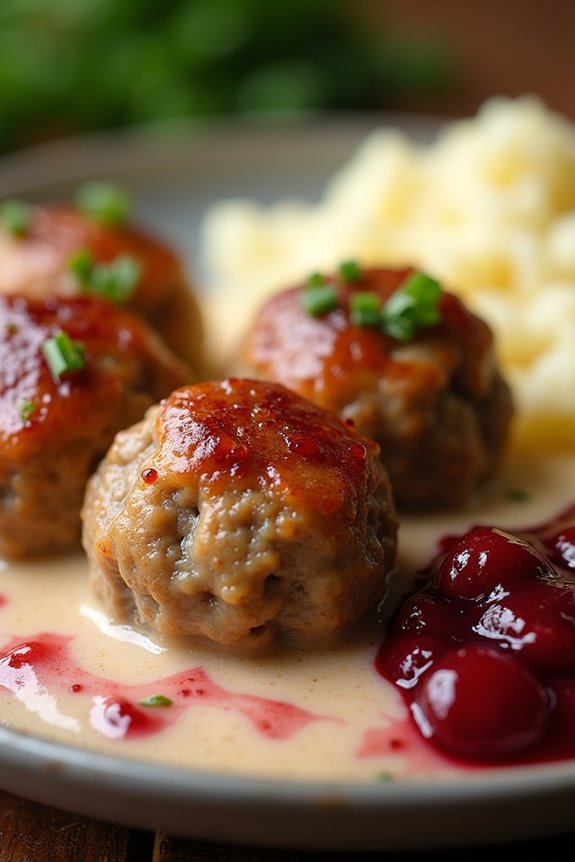
Swedish meatballs are a beloved classic, cherished for their deliciously tender texture and rich, savory flavor. Traditionally served with a creamy gravy and often accompanied by lingonberry sauce, this dish is a true representation of Swedish comfort food. The meatballs are usually made from a mix of ground beef and pork, seasoned with spices like allspice and nutmeg, and bound together with breadcrumbs and eggs. The tangy sweetness of the lingonberry sauce perfectly complements the savory meatballs, making each bite a delightful experience.
Cooking Swedish meatballs at home is easier than you might think, and the result is a dish that will impress family and friends alike. This recipe serves 4-6 people, making it ideal for a family lunch or a cozy dinner gathering. Prepare to savor the flavors of Sweden as you create this hearty, satisfying meal that will warm your heart and fill your belly.
Ingredients:
- 1 lb ground beef
- 1 lb ground pork
- 1 cup breadcrumbs
- 1/2 cup milk
- 1/4 cup finely chopped onion
- 1 egg
- 1 tsp salt
- 1/2 tsp black pepper
- 1/2 tsp ground allspice
- 1/2 tsp ground nutmeg
- 3 tbsp butter
- 3 tbsp all-purpose flour
- 2 cups beef broth
- 1 cup heavy cream
- Lingonberry sauce (for serving)
Cooking Instructions:
- Prepare the Meatball Mixture: In a large bowl, combine the ground beef, ground pork, breadcrumbs, milk, chopped onion, egg, salt, black pepper, allspice, and nutmeg. Mix gently with your hands or a spoon until all ingredients are well incorporated. Be careful not to overmix, as this can lead to tough meatballs.
- Shape the Meatballs: Using your hands, shape the mixture into small meatballs, about 1 inch in diameter. Place the formed meatballs on a baking sheet or plate. This step can be done ahead of time, allowing the meatballs to rest in the fridge for up to an hour, which helps them hold their shape while cooking.
- Cook the Meatballs: In a large skillet, melt 2 tablespoons of butter over medium heat. Once melted, add the meatballs in batches, making sure not to overcrowd the pan. Cook the meatballs for about 5-7 minutes, turning occasionally until they’re browned on all sides and cooked through. Remove the cooked meatballs from the skillet and set aside on a plate.
- Make the Sauce: In the same skillet, add 1 tablespoon of butter and melt over medium heat. Whisk in the flour and cook for about 1-2 minutes until lightly browned. Slowly pour in the beef broth while whisking continuously to avoid lumps. Bring the mixture to a simmer and let it thicken for about 3-4 minutes.
- Finish the Sauce: Once the sauce has thickened, reduce the heat to low and stir in the heavy cream. Return the meatballs to the skillet, coating them in the creamy sauce. Allow them to simmer in the sauce for an additional 5 minutes, ensuring they’re heated through.
- Serve: Serve the Swedish meatballs warm, drizzled with the creamy sauce, and accompanied by a generous spoonful of lingonberry sauce on the side. This dish is often enjoyed with mashed potatoes or lingonberry jam for a traditional touch.
Extra Tips:
When making Swedish meatballs, feel free to experiment with the seasoning to suit your personal taste. You can add fresh herbs like parsley or dill for added flavor.
If you prefer a lighter alternative, substitute the heavy cream with half-and-half or a non-dairy cream. For a truly Swedish experience, serve the meatballs with boiled potatoes, pickled cucumbers, or a crisp salad.
Don’t forget to have extra lingonberry sauce on hand, as it adds a deliciously tart contrast to the rich meatballs!
Belgian Waffles With Fresh Fruit

Belgian waffles are a delightful breakfast or brunch option, renowned for their light, fluffy texture and deep pockets that perfectly cradle toppings. Originating from Belgium, these waffles are thicker than traditional ones, making them ideal for holding a variety of delicious toppings, from whipped cream to fresh fruit. When paired with a medley of seasonal fruits, they create a vibrant and satisfying dish that isn’t only visually appealing but also healthy.
Making Belgian waffles is straightforward and can be easily adapted to suit different tastes. Whether you prefer sweet toppings like maple syrup or savory options, these waffles serve as a versatile base. This recipe yields about 4-6 servings, making it perfect for a family gathering or brunch with friends. Let’s explore the ingredients and cooking instructions to create these delectable Belgian waffles with fresh fruit.
Ingredients (Serves 4-6)
- 2 cups all-purpose flour
- 2 tablespoons sugar
- 1 tablespoon baking powder
- 1/2 teaspoon salt
- 2 large eggs
- 1 3/4 cups milk
- 1/2 cup vegetable oil or melted butter
- 1 teaspoon vanilla extract
- Fresh fruit (strawberries, blueberries, bananas, etc.)
- Whipped cream (optional)
- Maple syrup (optional)
Cooking Instructions
- Preheat the Waffle Iron: Start by preheating your Belgian waffle iron according to the manufacturer’s instructions. This step is essential for achieving a crispy exterior and fluffy interior.
- Mix Dry Ingredients: In a large mixing bowl, combine the all-purpose flour, sugar, baking powder, and salt. Whisk these dry ingredients together until they’re well mixed, ensuring that the baking powder and salt are evenly distributed throughout the flour.
- Prepare Wet Ingredients: In another bowl, crack the eggs and beat them lightly. Then add the milk, vegetable oil (or melted butter), and vanilla extract into the eggs. Mix these wet ingredients thoroughly until well combined.
- Combine Wet and Dry Ingredients: Pour the wet ingredients into the bowl with the dry ingredients. Gently fold the mixture together with a spatula or wooden spoon until just combined. Be careful not to overmix; it’s okay if there are a few lumps in the batter.
- Cook the Waffles: Lightly grease the preheated waffle iron with cooking spray or a small amount of oil. Pour an appropriate amount of batter (usually about 1 cup, but refer to your waffle iron’s guidelines) onto the center of the waffle iron. Close the lid and cook until the waffles are golden brown and crisp. This usually takes about 5-7 minutes, but check your waffle iron for specific cooking times.
- Serve with Fresh Fruit: Once cooked, carefully remove the waffles and place them on a plate. Top each waffle with a generous amount of fresh fruit. You can also add whipped cream and a drizzle of maple syrup if desired.
Extra Tips
For the best results, let your batter rest for about 5-10 minutes before cooking the waffles. This resting period allows the gluten to relax, resulting in a lighter texture.
Additionally, you can customize your Belgian waffles by adding chocolate chips, nuts, or spices like cinnamon to the batter for extra flavor. When serving, consider mixing different types of fresh fruit for a colorful presentation, and feel free to adjust the toppings according to the season or personal preferences.
Enjoy your delicious Belgian waffles with fresh fruit!
Czech Svíčková
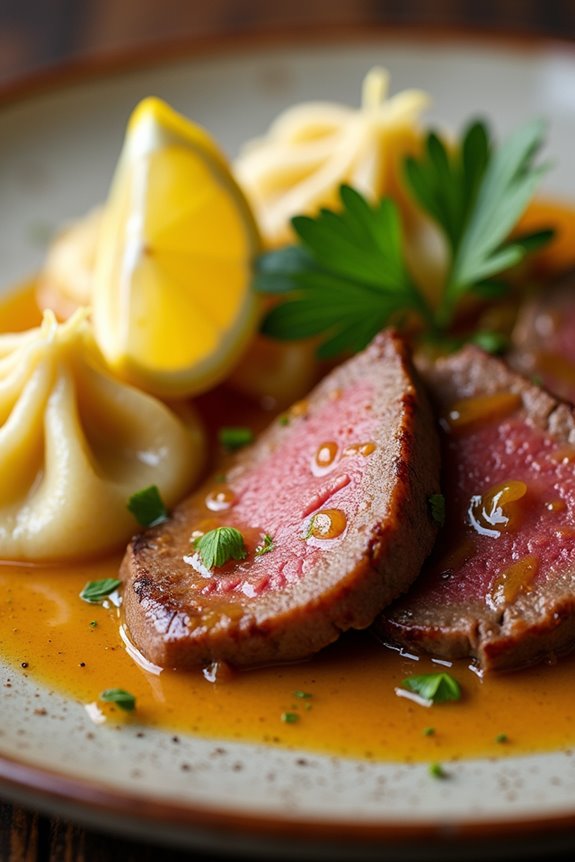
Czech Svíčková is a traditional dish that showcases the rich culinary heritage of the Czech Republic. This hearty meal consists of marinated beef served with a creamy vegetable sauce, typically accompanied by Czech-style dumplings and a squeeze of lemon. The dish is renowned for its unique combination of flavors, where the sweetness of the vegetables melds beautifully with the savory taste of the beef, creating a comforting and satisfying lunch option.
Svíčková is often prepared for special occasions and family gatherings, making it a beloved staple in Czech cuisine. The preparation of Svíčková requires a bit of time and patience, but the results are well worth the effort. The beef is typically marinated overnight, allowing the flavors to deepen, while the sauce is made from a blend of root vegetables, cream, and herbs. This dish not only feeds the body but also nourishes the soul, making it a perfect choice for a cozy lunch with family or friends.
Ingredients (Serves 4-6):
- 2 pounds of beef (such as sirloin or rump roast)
- 1 large onion, diced
- 2 carrots, peeled and chopped
- 1 parsnip, peeled and chopped
- 1 small celery root, peeled and chopped
- 4 cloves of garlic, minced
- 1 tablespoon of tomato paste
- 1 teaspoon of dried thyme
- 1 teaspoon of whole peppercorns
- 5-6 allspice berries
- 3 bay leaves
- 1 cup of beef broth
- 1 cup of heavy cream
- 2 tablespoons of white vinegar
- 2 tablespoons of vegetable oil
- Salt and pepper to taste
- Lemon wedges and fresh parsley for garnish
- Czech-style dumplings (for serving)
Cooking Instructions:
- Marinate the Beef: In a large bowl, combine the beef with vinegar, salt, pepper, thyme, and the whole peppercorns. Cover and refrigerate overnight to allow the meat to absorb the flavors.
- Sear the Beef: Heat vegetable oil in a large pot over medium-high heat. Remove the marinated beef from the refrigerator and pat it dry with paper towels. Sear the beef on all sides until browned, about 5-7 minutes. Remove the beef from the pot and set aside.
- Sauté the Vegetables: In the same pot, add the diced onion, carrots, parsnip, celery root, and garlic. Sauté the vegetables for about 10 minutes until they’re softened and slightly caramelized.
- Add Tomato Paste and Spices: Stir in the tomato paste and cook for an additional 2 minutes. Add the bay leaves, allspice berries, and beef broth to the pot. Return the beef to the pot, making certain it’s submerged in the liquid.
- Simmer the Dish: Bring the mixture to a gentle boil, then reduce the heat to low. Cover the pot and let it simmer for 1.5 to 2 hours, or until the beef is tender and easily shreds with a fork.
- Blend the Sauce: Once the beef is cooked, remove it from the pot and set it aside to rest. Discard the bay leaves and allspice berries. Using an immersion blender, blend the vegetable mixture until smooth and creamy. Stir in the heavy cream and adjust seasoning with salt and pepper, if needed.
- Serve: Slice the beef against the grain and serve it on a plate with the creamy sauce poured over the top. Accompany with Czech-style dumplings and garnish with lemon wedges and fresh parsley.
Extra Tips:
When making Svíčková, it’s crucial to allow the beef to marinate for at least 12 hours to achieve the best flavor. Additionally, you can enhance the sauce’s richness by adding a bit of butter just before serving.
For a unique twist, consider adding a splash of white wine to the sauce while cooking to deepen the flavor profile. Finally, make sure that you serve the dish hot, as the flavors are at their peak, and remember to enjoy it with a side of traditional Czech dumplings for a complete experience!
British Ploughman’s Lunch

The British Ploughman’s Lunch is a quintessential meal that hails from the rural traditions of England. Traditionally enjoyed by farmworkers during their midday break, this hearty lunch consists of a selection of cold, simple, and wholesome ingredients. It isn’t only satisfying but also allows for a variety of flavors and textures, making it a delightful option for leisurely lunches or picnics.
The beauty of a Ploughman’s Lunch lies in its flexibility; you can mix and match ingredients based on personal preference or seasonal availability. Typically, this lunch features a combination of artisanal cheeses, crusty bread, pickles, and fresh vegetables. It can also be accompanied by meats or preserved items like chutney, making it a versatile choice for various palates.
Whether you’re enjoying it at home or on a sunny afternoon outdoors, the Ploughman’s Lunch is an ideal way to savor the tastes of British cuisine.
Ingredients (Serves 4-6):
- 400g of mature cheddar cheese, sliced
- 200g of Stilton cheese, crumbled
- 1 loaf of crusty baguette or sourdough bread, sliced
- 100g of butter
- 200g of pickled onions or gherkins
- 2 medium-sized tomatoes, sliced
- 1 cucumber, sliced
- 100g of mixed salad greens
- 4 hard-boiled eggs, halved
- 200g of apple slices
- 100g of chutney (like Branston or apple chutney)
Cooking Instructions:
- Prepare the Cheese: Begin by slicing the mature cheddar cheese and crumbling the Stilton cheese. Arrange both cheeses on a large serving platter or wooden board. This presentation adds a rustic charm that’s characteristic of a Ploughman’s Lunch.
- Slice the Bread: Take your loaf of crusty bread and slice it into thick pieces. You can warm the bread slightly in the oven if you prefer it toasted, but it’s traditionally served fresh. Place the sliced bread adjacent to the cheese on the serving platter.
- Arrange the Vegetables: Wash and slice the tomatoes and cucumber. You can also prepare the mixed salad greens by rinsing them thoroughly. Arrange these fresh vegetables around the cheese and bread to create a colorful display.
- Add the Eggs: Hard-boil the eggs by placing them in a pot of boiling water for about 10-12 minutes, then cool them in ice water. Once cooled, peel and slice them in half. Place the egg halves on the platter alongside the other ingredients.
- Include the Pickles and Chutney: Add the pickled onions or gherkins to the platter for a tangy crunch. You can also serve the chutney in a small dish on the side, allowing guests to help themselves as they build their plates.
- Finish with Apple Slices: Ultimately, slice the apples into wedges and add them to the platter for an invigorating sweet contrast to the savory elements.
- Serve: Once everything is arranged, serve the Ploughman’s Lunch with plenty of napkins and perhaps a selection of beverages like ale or cider for a true British experience.
Extra Tips:
When preparing your Ploughman’s Lunch, consider using a variety of cheeses to enhance the flavor profile. Adding a tangy cheese such as goat cheese or a sharp blue cheese can provide a delightful contrast to the richer cheeses.
Additionally, feel free to incorporate seasonal fruits or vegetables to keep things fresh and exciting. Don’t forget to serve your lunch with a selection of different breads or crackers to cater to various tastes. Finally, let your guests assemble their plates; this interactive element makes the dining experience even more enjoyable!
Irish Colcannon
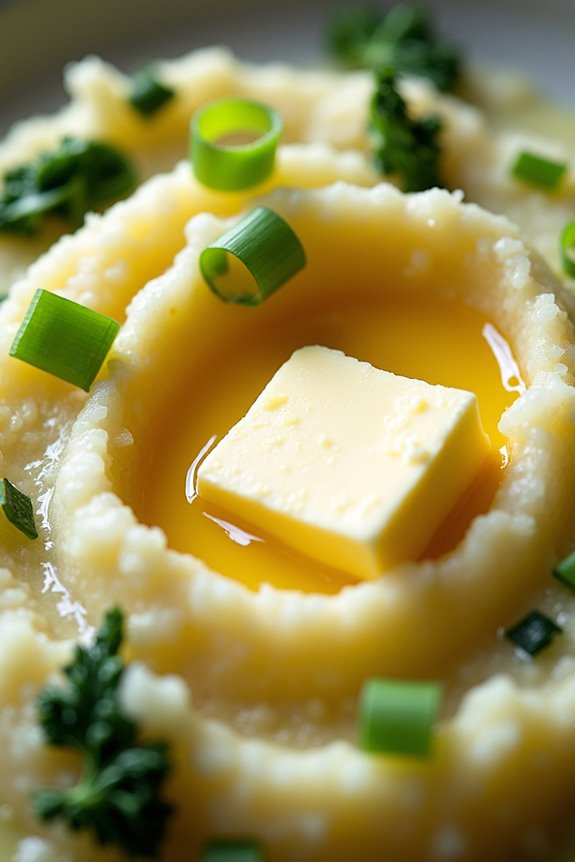
Irish Colcannon is a traditional dish that embodies the spirit of Irish comfort food. This hearty mash combines creamy potatoes with vibrant greens, typically kale or cabbage, and is often enriched with butter and milk. Colcannon has been enjoyed in Ireland for centuries, originally served during the harvest season and associated with the festival of Samhain.
It’s a dish that not only warms the heart but also showcases the simplicity and beauty of Irish ingredients. Making Colcannon isn’t only about following a recipe; it’s an experience steeped in culture and history. The dish is versatile, allowing cooks to adapt the ingredients based on what’s seasonally available.
Serve it as a main dish or as a side, and you’ll surely bring a taste of Ireland to your table. Whether you’re celebrating St. Patrick’s Day or just looking to enjoy a comforting meal, Colcannon is sure to satisfy.
Ingredients (Serves 4-6)
- 2 pounds of potatoes (Yukon Gold or Russet)
- 1 cup of chopped kale or cabbage
- 1/2 cup of milk
- 1/4 cup of unsalted butter
- 1/4 cup of chopped green onions (scallions)
- Salt, to taste
- Pepper, to taste
Cooking Instructions
- Prepare the Potatoes: Begin by peeling the potatoes and cutting them into evenly sized chunks. This helps them cook evenly. Place the potatoes in a large pot and cover them with cold water. Add a pinch of salt and bring to a boil over medium-high heat.
- Cook the Potatoes: Once the water is boiling, reduce the heat to medium and let the potatoes simmer for about 15-20 minutes, or until they’re fork-tender. You can test their doneness by poking them with a fork; they should easily break apart.
- Prepare the Greens: While the potatoes are cooking, wash and chop the kale or cabbage into small pieces. In a separate pot, bring a small amount of water to a boil and add the greens. Blanch for about 3-5 minutes until tender, then drain and set aside. This step helps soften the greens and enhances their flavor.
- Mash the Potatoes: Once the potatoes are cooked, drain them and return them to the pot. Add the butter and milk, then mash the potatoes until smooth and creamy. You can use a potato masher or a ricer for a finer texture.
- Combine Ingredients: Stir in the prepared greens and chopped green onions into the mashed potatoes. Mix until everything is well combined. Season with salt and pepper to taste, adjusting according to your preference.
- Serve: Transfer the Colcannon to a serving dish. For a traditional touch, create a small well in the center and add a pat of butter that will melt into the warm mash. Serve immediately and enjoy!
Extra Tips
When making Colcannon, feel free to experiment with the greens used; some people like to incorporate spinach or even leeks for added flavor. For a richer taste, consider using cream instead of milk.
Additionally, Colcannon can be a great way to use up leftover mashed potatoes; simply add the greens and green onions to your pre-made mash for a quick meal. Enjoy this comforting dish with a side of sausages or roasted meats for a complete Irish experience!