

As winter embraces us, there’s nothing quite like the heartwarming allure of Scandinavian comfort food to bring a sense of coziness. Each dish, from creamy mushroom soup to Swedish meatballs with lingonberry sauce, is like a warm hug on a chilly day. These recipes are perfect for nourishing both body and soul while sparking sweet memories of family gatherings. Let’s explore these 15 ultimate recipes that will surely enhance your winter meals.
Creamy Mushroom Soup
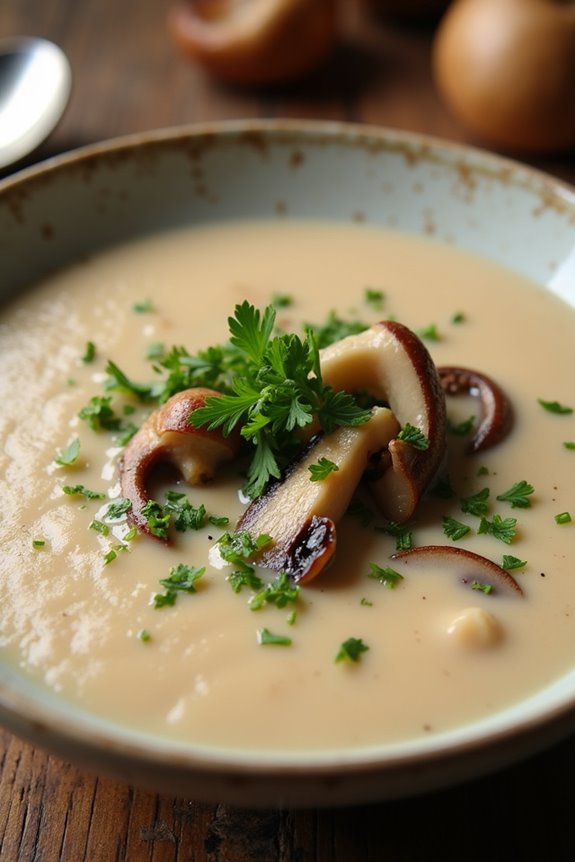
Scandinavian comfort food often revolves around hearty dishes that are both nourishing and satisfying. One such dish is the Creamy Mushroom Soup, a warm and inviting recipe that showcases the rich flavors of mushrooms paired with a velvety cream base. This soup is perfect for chilly evenings or gatherings with friends and family. It embodies the essence of Scandinavian cooking, where simple ingredients come together to create something truly delightful.
Mushrooms are the star of this dish, providing an earthy depth that complements the creaminess of the soup. The use of fresh herbs, garlic, and a splash of white wine adds layers of flavor that elevate this comforting bowl. Serve it with rustic bread or crisp crackers for a complete meal that will warm both the heart and the soul.
Ingredients (Serves 4-6)
- 500g mixed mushrooms (such as cremini, shiitake, and button mushrooms), chopped
- 1 medium onion, diced
- 3 cloves garlic, minced
- 4 cups vegetable broth
- 1 cup heavy cream
- 1/2 cup white wine (optional)
- 2 tablespoons olive oil
- 2 tablespoons unsalted butter
- 1 teaspoon dried thyme
- Salt and pepper, to taste
- Fresh parsley, chopped (for garnish)
Cooking Instructions
- Sauté the Aromatics: In a large pot, heat the olive oil and butter over medium heat. Once melted, add the diced onion and sauté until translucent, about 5 minutes. Then, add the minced garlic and cook for an additional minute until fragrant. This step builds a flavorful base for the soup.
- Cook the Mushrooms: Add the chopped mushrooms to the pot. Sauté them for about 7-10 minutes until they’re browned and have released their moisture. Stir occasionally to guarantee even cooking. The browning of the mushrooms adds depth to the soup’s flavor.
- Deglaze with Wine: If using, pour in the white wine and allow it to simmer for about 2-3 minutes, scraping any browned bits from the bottom of the pot. This step enhances the flavor profile and adds a touch of acidity that balances the creaminess.
- Add Broth and Seasonings: Pour in the vegetable broth and add the dried thyme. Bring the mixture to a boil, then reduce the heat to low and let it simmer for 15 minutes. This allows the flavors to meld together beautifully.
- Blend the Soup: After simmering, use an immersion blender to puree the soup until smooth. If you don’t have an immersion blender, carefully transfer the soup to a regular blender in batches. Pureeing the soup creates a creamy texture that’s comforting and rich.
- Stir in the Cream: Return the blended soup to the pot (if using a regular blender) and stir in the heavy cream. Heat the soup over low heat for an additional 5 minutes, but don’t let it boil. This step enriches the soup and gives it that creamy consistency.
- Season and Serve: Taste the soup and season with salt and pepper as needed. Serve hot, garnished with chopped fresh parsley for a touch of color and freshness.
Extra Tips
For an even richer flavor, consider using a combination of fresh and dried mushrooms. Dried porcini or shiitake mushrooms can be rehydrated and added to the soup for an umami boost.
Additionally, feel free to experiment with different herbs, such as rosemary or dill, to customize the flavor to your liking. If you prefer a thicker soup, you can add a tablespoon of cornstarch mixed with a little cold water during the cooking process.
Enjoy your Creamy Mushroom Soup with a side of crusty bread for a truly cozy meal!
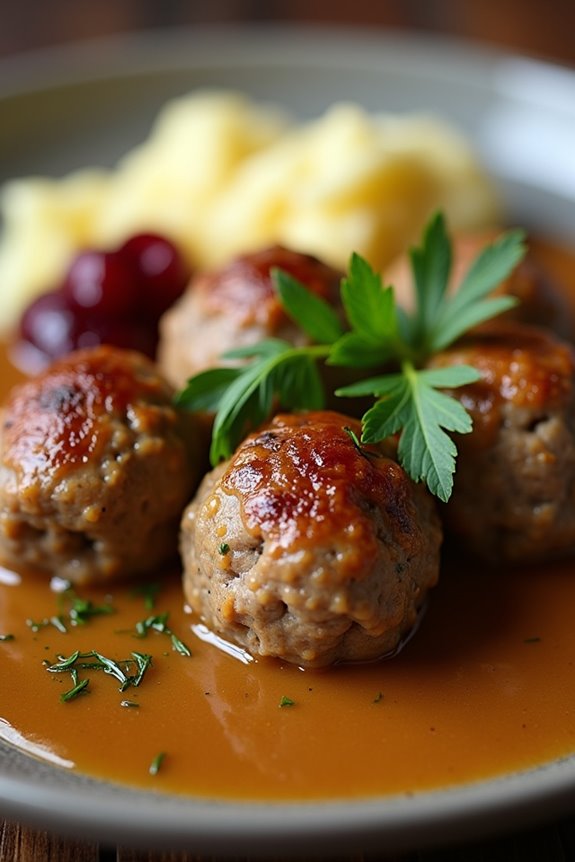
Swedish Meatballs With Lingonberry Sauce
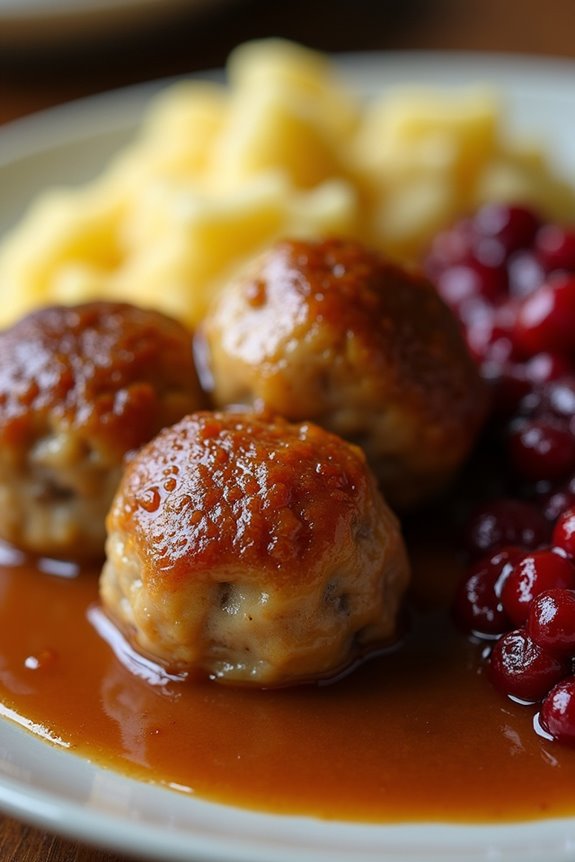
Swedish meatballs, or “Köttbullar,” are a traditional dish that has become beloved around the world for their comfort and flavor. These tender, flavorful meatballs are typically made from a mixture of ground beef and pork, seasoned with classic spices, and served with a rich, creamy gravy. The addition of lingonberry sauce adds a sweet and tart contrast that enhances the overall experience of this iconic dish.
Perfect for family dinners or gatherings, Swedish meatballs are sure to impress anyone who takes a bite. Making Swedish meatballs at home may seem intimidating, but with a few simple steps, you can recreate this classic comfort food right in your own kitchen.
Paired with creamy mashed potatoes or buttered egg noodles, and a side of lingonberry sauce, this dish isn’t only filling but also deliciously satisfying. Let’s explore the ingredients and cooking instructions to bring this delightful recipe to life!
Ingredients (serves 4-6)
- 1 pound ground beef
- 1 pound ground pork
- 1/2 cup breadcrumbs
- 1/4 cup milk
- 1 small onion, finely chopped
- 1/4 cup fresh parsley, chopped
- 1 egg
- 1 teaspoon salt
- 1/2 teaspoon black pepper
- 1/2 teaspoon ground allspice
- 1/2 teaspoon ground nutmeg
- 3 tablespoons butter (for frying)
- 2 tablespoons flour
- 2 cups beef broth
- 1 cup heavy cream
- Lingonberry sauce (for serving)
Cooking Instructions
1. Prepare the Meatball Mixture**: In a large mixing bowl, combine the ground beef and ground pork. Add the breadcrumbs, milk, finely chopped onion**, parsley, egg, salt, black pepper, allspice, and nutmeg.
Mix everything together until well combined, but be careful not to overmix, as this can make the meatballs tough.
2. Form the Meatballs: With clean hands, take small portions of the meat mixture and roll them into balls about 1 inch in diameter. Place the formed meatballs onto a baking sheet or plate.
This should yield around 24-30 meatballs, depending on the size.
3. Cook the Meatballs: In a large skillet, melt the butter over medium heat. Once the butter is hot, add the meatballs in batches, being careful not to overcrowd the pan.
Cook the meatballs for about 5-7 minutes, turning occasionally until they’re browned on all sides and cooked through. Remove the meatballs from the skillet and set aside.
4. Make the Gravy: In the same skillet, add the flour to the remaining butter and drippings. Whisk it together over medium heat for about 1-2 minutes to create a roux.
Gradually pour in the beef broth while whisking continuously to avoid lumps. Bring the mixture to a simmer, allowing it to thicken.
5. Add Cream and Combine: Once the gravy has thickened, stir in the heavy cream and return the cooked meatballs to the skillet.
Simmer for an additional 5 minutes to allow the flavors to meld and the meatballs to heat through. Taste and adjust seasoning if necessary.
6. Serve: Serve the Swedish meatballs warm, drizzled with the creamy gravy and accompanied by lingonberry sauce on the side.
This dish is best enjoyed with mashed potatoes or buttered noodles.
Extra Tips
To enhance the flavor of your Swedish meatballs, consider adding a splash of Worcestershire sauce to the meat mixture or incorporating finely grated garlic for an extra kick.
If you prefer a lighter version, you can substitute half of the heavy cream with low-fat milk or sour cream. When serving, make sure to have extra lingonberry sauce on hand, as it perfectly balances the richness of the meatballs and gravy.
Enjoy your culinary journey through Scandinavian comfort food!
Finnish Salmon Soup
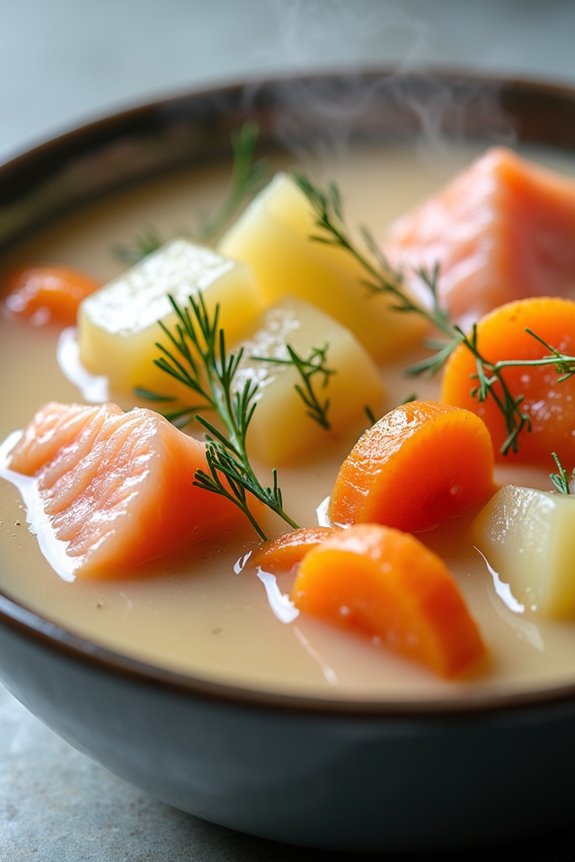
Finnish Salmon Soup, or “lohikeitto,” is a comforting and hearty dish that perfectly encapsulates the essence of Scandinavian cuisine. This creamy soup isn’t only packed with flavors but is also a celebration of fresh ingredients, primarily featuring salmon, potatoes, and dill. The combination of tender fish and the creamy broth makes it a favorite among families, especially during cold weather or festive gatherings.
This dish is incredibly versatile and can be enjoyed as a main course or a starter. The preparation is straightforward, making it perfect for both novice cooks and seasoned chefs. The vibrant colors and comforting flavors reflect the beauty of Finnish culture, and once you try it, you’ll see why it has become a cherished staple in many households.
Ingredients (Serves 4-6)
- 500g fresh salmon fillet, skin removed and cut into bite-sized pieces
- 4 medium-sized potatoes, peeled and diced
- 1 large onion, finely chopped
- 3 carrots, sliced
- 4 cups fish or vegetable broth
- 1 cup heavy cream
- 2 tablespoons fresh dill, chopped (or 1 tablespoon dried dill)
- Salt and pepper to taste
- 2 tablespoons butter
- 1 lemon, cut into wedges (for serving)
- Optional: 1/2 cup frozen peas for added color
Cooking Instructions
- Prepare the Vegetables: Start by peeling and dicing the potatoes, and slicing the carrots. Finely chop the onion. This prep work will guarantee that your vegetables cook evenly and make the soup flavorful.
- Sauté the Onion: In a large pot, melt the butter over medium heat. Add the chopped onion and sauté for about 5-7 minutes until it becomes translucent and fragrant. This step builds a solid flavor base for your soup.
- Cook the Vegetables: Add the diced potatoes and sliced carrots to the pot, stirring for a couple of minutes. Then, pour in the fish or vegetable broth and bring it to a boil. Reduce the heat and let it simmer for about 15-20 minutes, or until the potatoes are tender.
- Add the Salmon: Once the potatoes are cooked, gently stir in the salmon pieces. Continue to simmer for an additional 5-7 minutes until the salmon is cooked through and flakes easily. Be careful not to overcook the salmon to maintain its delicate texture.
- Incorporate Cream and Dill: Stir in the heavy cream and chopped dill, seasoning with salt and pepper to taste. Allow the soup to warm through for another 2-3 minutes. This final addition makes the soup rich and creamy while enhancing the flavors with the herb.
- Serve: Ladle the soup into bowls and serve hot, garnished with additional dill if desired. Serve with lemon wedges on the side for a zesty kick.
Extra Tips
For an added depth of flavor, consider simmering the broth with a bay leaf or a few peppercorns while cooking the vegetables, then removing them before adding the salmon.
If you prefer a lighter version, you can substitute half-and-half for the heavy cream. Additionally, feel free to customize the soup by adding other vegetables like leeks or celery for a different twist.
Enjoy your Finnish Salmon Soup with a slice of crusty bread to soak up the delicious broth!
Danish Pork Roast With Crackling

Danish Pork Roast with Crackling, or “Flæskesteg,” is a beloved traditional dish that embodies the essence of Scandinavian comfort food. This succulent roast is characterized by a juicy piece of pork with perfectly crispy crackling skin, bringing an irresistible crunch to every bite.
Often served during festive occasions or family gatherings, it pairs beautifully with sides like red cabbage, roasted potatoes, and a rich gravy. This dish isn’t only a feast for the eyes but also for the palate, showcasing the simplicity and heartiness of Danish cuisine.
Preparing a Danish Pork Roast may seem intimidating, but with the right approach, you can create a show-stopping centerpiece for your table. The key to achieving that sought-after crackling is all in the preparation and cooking method. By scoring the skin, seasoning it generously, and cooking it at the right temperature, you’ll guarantee that your roast is tender, flavorful, and has that magnificent crispy exterior that everyone loves.
The following recipe serves 4-6 people and will guide you through each step of the cooking process.
Ingredients:
- 2 to 2.5 kg (4.4 to 5.5 lbs) pork loin roast with skin
- 2 tablespoons coarse sea salt
- 1 tablespoon black pepper
- 1 tablespoon dried thyme
- 4 cloves garlic, minced
- 1 onion, quartered
- 1 cup vegetable or chicken broth
- Fresh herbs (e.g., rosemary or thyme) for garnish (optional)
Cooking Instructions:
- Prepare the Pork: Start by placing the pork roast skin-side up on a clean cutting board. Using a sharp knife, score the skin in a crosshatch pattern, making sure not to cut into the meat. This allows the fat to render and the skin to crisp up beautifully. Make the cuts about 1 inch apart.
- Season the Meat: In a small bowl, mix the coarse sea salt, black pepper, dried thyme, and minced garlic. Rub this seasoning mix thoroughly into the scored skin and the meat of the roast. Confirm that the seasoning is evenly distributed for best flavor.
- Preheat the Oven: Preheat your oven to 220°C (428°F). A high initial temperature is essential for achieving crisp crackling on the skin.
- Roast the Pork: Place the seasoned pork roast in a roasting pan, skin-side up, and surround it with the quartered onion. Pour the vegetable or chicken broth into the pan, which will help to keep the meat moist during cooking. Roast in the preheated oven for 30 minutes.
- Lower the Temperature: After 30 minutes, reduce the oven temperature to 180°C (356°F) and continue roasting for an additional 1.5 to 2 hours, or until the internal temperature of the meat reaches 70°C (160°F). Baste the pork occasionally with the pan juices to enhance flavor and moisture.
- Check the Crackling: If the crackling isn’t yet crispy, you can increase the oven temperature back to 220°C (428°F) for the final 10-15 minutes of cooking. Keep a close eye on it to prevent burning.
- Rest the Meat: Once cooked, remove the pork roast from the oven and cover it loosely with aluminum foil. Let it rest for at least 15-20 minutes before carving. This resting period allows the juices to redistribute throughout the meat, guaranteeing a juicy roast.
- Serve: After resting, carve the pork into slices, serve with your choice of sides, and garnish with fresh herbs if desired. Enjoy your delightful Danish Pork Roast with Crackling!
Extra Tips: For the best results, confirm that the skin of the pork is dry before scoring and seasoning. You can pat it down with paper towels to remove excess moisture.
Additionally, using a meat thermometer will help you accurately gauge the doneness of the roast without risking overcooking. Finally, save the leftover crackling for a tasty snack or crumble it over dishes like salads or potatoes for added texture and flavor!
Norwegian Fish Stew
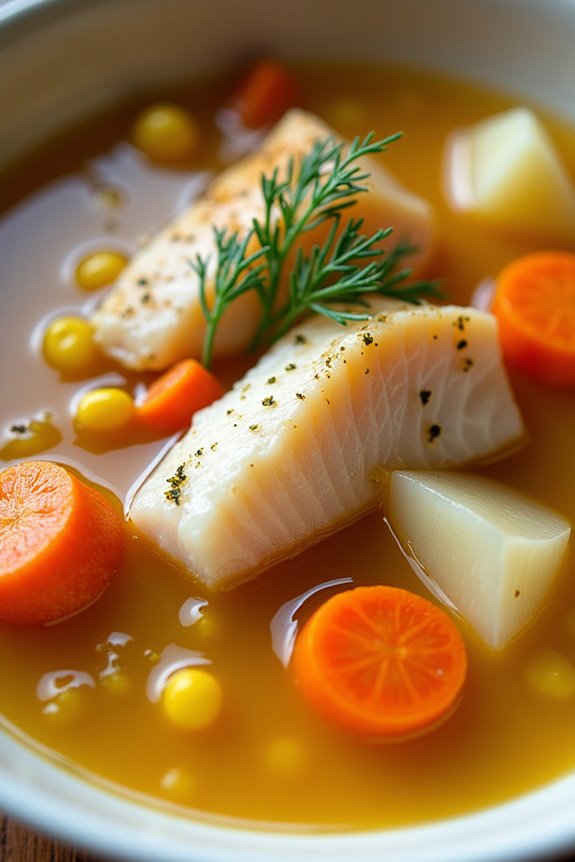
Norwegian Fish Stew, or “Fiskesuppe,” is a traditional dish that perfectly embodies the essence of Scandinavian comfort food. This hearty stew is packed with fresh fish, aromatic vegetables, and a rich, creamy broth that warms the soul.
It’s a dish that brings families together around the dinner table, showcasing the abundance of the sea and the simplicity of Nordic cuisine. With its delicate flavors and nourishing ingredients, this stew isn’t only delicious but also a healthy option for any meal.
Preparing Norwegian Fish Stew is a delightful experience that combines the freshest ingredients with straightforward cooking techniques. The stew is typically made with a variety of fish, such as cod or salmon, and is enhanced by the natural sweetness of root vegetables like carrots and potatoes.
The use of dill and a splash of cream elevates the dish, making it a comforting meal that’s perfect for chilly evenings. Gather your loved ones and enjoy this warm, flavorful stew that encapsulates the heart of Norwegian culinary tradition.
Ingredients (serving size: 4-6 people)
- 1 lb (450g) white fish fillets (cod, haddock, or similar)
- 1 lb (450g) salmon fillets
- 4 cups fish stock or vegetable broth
- 1 cup heavy cream
- 2 tablespoons butter
- 1 medium onion, diced
- 2 cloves garlic, minced
- 2 medium carrots, sliced
- 2 medium potatoes, diced
- 1 cup leeks, sliced (white part only)
- 1 cup corn kernels (fresh or frozen)
- 1 tablespoon fresh dill, chopped (or 1 teaspoon dried dill)
- Salt and pepper to taste
- Lemon wedges for serving
Cooking Instructions
- Prepare the Fish: Begin by rinsing the fish fillets under cold water and patting them dry with a paper towel. Cut the white fish into bite-sized pieces and the salmon into cubes. Set aside.
- Sauté the Vegetables: In a large pot or Dutch oven, melt the butter over medium heat. Add the diced onion and cook until it becomes translucent, about 3-4 minutes. Stir in the minced garlic and cook for an additional minute until fragrant.
- Add Root Vegetables: Add the sliced carrots, diced potatoes, and leeks to the pot. Sauté the vegetables for about 5-7 minutes, stirring occasionally, until they begin to soften.
- Pour in the Broth: Carefully add the fish stock or vegetable broth to the pot, making certain that all the vegetables are submerged. Bring the mixture to a simmer and let it cook for about 10 minutes until the vegetables are tender.
- Incorporate the Fish and Cream: Gently add the pieces of white fish and salmon to the pot, followed by the corn kernels. Pour in the heavy cream and stir to combine. Allow the stew to simmer for an additional 5-7 minutes, or until the fish is cooked through and flakes easily.
- Season and Serve: Stir in the chopped dill and season the stew with salt and pepper to taste. Remove the pot from the heat and let it sit for a couple of minutes. Serve the Norwegian Fish Stew hot, garnished with lemon wedges on the side.
Extra Tips
When making Norwegian Fish Stew, feel free to customize the recipe by including your favorite types of fish or even shellfish like shrimp or mussels.
For a lighter version, you can substitute half of the heavy cream with low-fat milk or even use a non-dairy alternative. To enhance the flavors, consider adding a splash of white wine to the broth or a pinch of smoked paprika for a subtle smokiness.
Always taste and adjust the seasoning before serving to ascertain the stew is perfectly balanced. Enjoy this comforting dish with crusty bread for a complete meal!
Potato Lefse

Potato Lefse is a traditional Norwegian flatbread made primarily from potatoes, flour, butter, and cream. It’s a beloved dish often enjoyed with a spread of butter and sugar or served alongside savory dishes. The origins of Lefse can be traced back to the 19th century, where it became a staple in Norwegian households, not only due to its delicious taste but also because it was an effective way to use up leftover potatoes.
The texture is soft and pliable, making it perfect for wrapping around fillings or simply being enjoyed on its own. Making Potato Lefse is a delightful cooking experience that connects you to Scandinavian culture. The process requires some care and attention, especially when it comes to rolling out the dough to achieve the perfect thinness.
With a few simple ingredients and some patience, you can create a wonderful, comforting dish that will surely warm your heart and home. Whether you’re celebrating a holiday or just looking for a delicious comfort food recipe, Potato Lefse is a fantastic addition to any meal.
Ingredients (Serves 4-6):
- 2 cups mashed potatoes (about 2 large potatoes)
- 1/4 cup unsalted butter, melted
- 1/4 cup heavy cream
- 1 cup all-purpose flour, plus more for rolling
- 1/2 teaspoon salt
- 1 tablespoon sugar (optional, for a sweeter version)
Cooking Instructions:
- Prepare the Potatoes: Peel and chop the potatoes into even-sized pieces, then boil them in salted water until they’re tender, about 15-20 minutes. Drain and mash them until smooth. Allow the mashed potatoes to cool completely.
- Mix the Ingredients: In a large mixing bowl, combine the cooled mashed potatoes, melted butter, heavy cream, salt, and sugar (if using). Mix well until all ingredients are fully incorporated.
- Add the Flour: Gradually add the flour to the potato mixture, stirring until a soft dough forms. Be careful not to overwork the dough; it should be slightly sticky but manageable. If it’s too sticky, you can add a little more flour.
- Divide the Dough: Divide the dough into 8-10 equal portions, rolling each portion into a ball. Cover the balls with a clean kitchen towel to prevent them from drying out.
- Roll Out the Lefse: On a lightly floured surface, take one dough ball and flatten it slightly with your hands. Using a rolling pin, roll out the dough into a thin circle, about 1/8 inch thick. Use flour as needed to prevent sticking.
- Cook the Lefse: Preheat a griddle or a large skillet over medium heat. Place the rolled-out Lefse onto the hot griddle and cook for about 1-2 minutes on each side, or until light golden brown spots appear. Adjust the heat as necessary to prevent burning.
- Cool and Serve: Once cooked, transfer the Lefse to a wire rack to cool. Repeat with the remaining dough balls. Serve warm or at room temperature with butter and sugar, or alongside savory dishes.
Extra Tips:
When making Potato Lefse, it’s essential to guarantee your mashed potatoes are free of lumps for a smooth dough. For the best texture, use starchy potatoes like Russets.
Additionally, if you have a Lefse grill or a special Lefse turning stick, they can make the process easier and more authentic. Store any leftover Lefse in an airtight container in the refrigerator, and they can be easily reheated on a skillet or griddle. Enjoy experimenting with different toppings and fillings to find your personal favorite!
Spiced Apple Cake
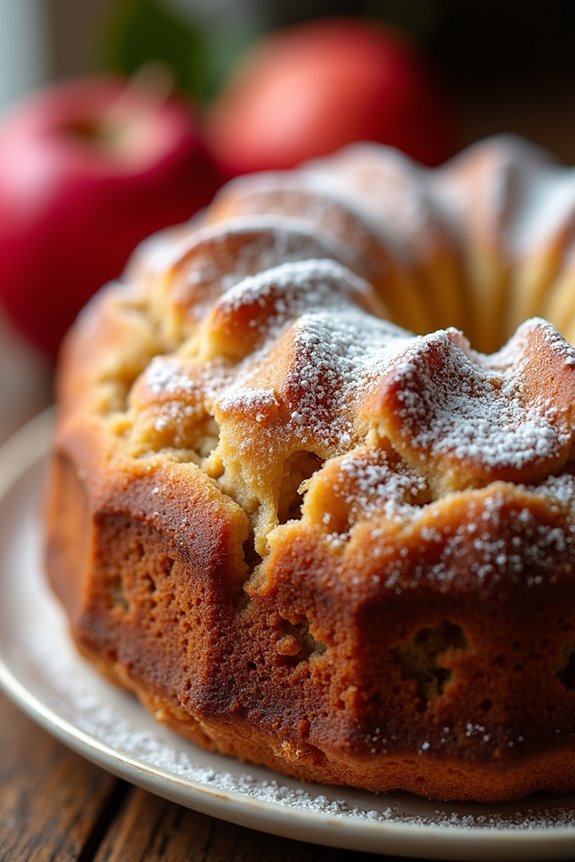
Scandinavian comfort food is known for its warmth and heartiness, with flavors that evoke memories of cozy gatherings and seasonal celebrations. One such dish that embodies these qualities is the Spiced Apple Cake. This delightful cake is a perfect balance of sweetness and spice, featuring tender chunks of apple that infuse the cake with moisture and flavor.
Whether enjoyed with a cup of coffee or served as a dessert during a family meal, this cake is sure to become a cherished recipe in your collection.
The beauty of this Spiced Apple Cake lies in its simplicity. With a few basic ingredients and straightforward preparation, you can create a delicious dessert that highlights the natural flavors of apples and spices.
Ideal for fall gatherings or any time you crave a taste of Scandinavian comfort, this cake isn’t only easy to make but also a delightful treat that’s sure to impress your guests.
Ingredients (Serves 4-6)
- 2 cups all-purpose flour
- 1 teaspoon baking powder
- 1 teaspoon baking soda
- 1 teaspoon ground cinnamon
- 1/2 teaspoon ground nutmeg
- 1/4 teaspoon ground allspice
- 1/2 teaspoon salt
- 1/2 cup unsalted butter, softened
- 1 cup granulated sugar
- 2 large eggs
- 1 teaspoon vanilla extract
- 1/2 cup buttermilk
- 3 cups peeled and chopped apples (such as Granny Smith or Honeycrisp)
- 1/2 cup chopped walnuts or pecans (optional)
- Powdered sugar for dusting (optional)
Cooking Instructions
- Preheat the Oven: Begin by preheating your oven to 350°F (175°C). This guarantees that your cake will bake evenly and rise properly when it’s placed in the oven.
- Prepare the Baking Pan: Grease a 9-inch round cake pan with butter or cooking spray, and lightly dust it with flour. This will prevent the cake from sticking to the pan, making it easier to release once baked.
- Mix Dry Ingredients: In a medium bowl, whisk together the flour, baking powder, baking soda, ground cinnamon, ground nutmeg, ground allspice, and salt. This step is essential as it guarantees that the leavening agents and spices are evenly distributed throughout the flour.
- Cream Butter and Sugar: In a large mixing bowl, use an electric mixer to cream together the softened butter and granulated sugar until the mixture is light and fluffy. This process incorporates air into the batter, which helps create a tender cake.
- Add Eggs and Vanilla: Beat in the eggs, one at a time, followed by the vanilla extract. Make sure to mix until fully combined. This step adds richness to the cake and enhances its flavor profile.
- Incorporate Dry Ingredients and Buttermilk: Gradually add the dry ingredients to the butter mixture, alternating with the buttermilk. Start and end with the dry ingredients, mixing just until incorporated. This method helps maintain the cake’s light texture.
- Fold in Apples and Nuts: Gently fold in the chopped apples and nuts (if using) using a spatula. Be careful not to overmix, as this can lead to a denser cake. The apples should be evenly distributed throughout the batter.
- Bake the Cake: Pour the batter into the prepared cake pan and smooth the top with a spatula. Bake in the preheated oven for 40-45 minutes, or until a toothpick inserted into the center comes out clean. Keep an eye on the cake to confirm it doesn’t overbake.
- Cool and Serve: Once baked, remove the cake from the oven and allow it to cool in the pan for about 10 minutes. Then, carefully transfer it to a wire rack to cool completely. Dust with powdered sugar before serving, if desired.
Extra Tips
To enhance the flavor of your Spiced Apple Cake, consider using a mix of different apples for a more complex taste.
Adding a sprinkle of cinnamon sugar on top before baking can also create a delightful crust. If you want to make the cake in advance, it stores well in an airtight container at room temperature for a couple of days or can be frozen for up to three months—just remember to thaw it overnight in the fridge before serving.
Enjoy your warm, comforting slice of Scandinavian delight!
Köttbullar (Swedish Meatballs)
Köttbullar, or Swedish meatballs, are a beloved staple of Scandinavian comfort food that have gained popularity worldwide. These tender and flavorful meatballs are traditionally served with a creamy gravy and lingonberry sauce, often accompanied by mashed potatoes or boiled potatoes. The combination of spices, along with the rich and savory sauce, makes Köttbullar a warm and inviting dish that can be enjoyed any time of the year, whether it be a cozy family dinner or a festive gathering.
Making Köttbullar from scratch is simpler than one might think, requiring just a few key ingredients and some love. The secret to the perfect meatball lies in the blend of meats and the addition of breadcrumbs soaked in milk, which keeps the meatballs moist and tender. Once cooked, these meatballs are typically served with a delicious brown gravy that brings everything together, making it a hearty meal that’s sure to satisfy.
Ingredients (Serves 4-6 people):
- 1 pound ground beef
- 1 pound ground pork
- 1 cup breadcrumbs
- 1/2 cup milk
- 1/2 onion, finely chopped
- 1 clove garlic, minced
- 1/4 cup fresh parsley, chopped
- 1 egg
- 1 teaspoon salt
- 1/2 teaspoon black pepper
- 1/2 teaspoon ground allspice
- 1/2 teaspoon ground nutmeg
- 3 tablespoons butter (for frying)
Cooking Instructions:
1. Prepare the Breadcrumb Mixture:
In a small bowl, combine the breadcrumbs and milk. Let the mixture sit for about 10 minutes until the breadcrumbs absorb the milk and soften. This will help keep the meatballs moist.
2. Sauté the Onion and Garlic:
In a skillet over medium heat, melt 1 tablespoon of butter. Add the chopped onion and minced garlic, sautéing until the onion is translucent and fragrant, about 3-4 minutes. Remove from heat and let it cool slightly.
3. Mix the Meatball Ingredients:
In a large mixing bowl, combine the ground beef, ground pork, softened breadcrumb mixture, sautéed onion and garlic, chopped parsley, egg, salt, pepper, allspice, and nutmeg. Using your hands or a spoon, mix until just combined, being careful not to overwork the mixture.
4. Form the Meatballs:
With your hands, shape the mixture into small meatballs, about 1 inch in diameter. Place the formed meatballs on a baking sheet lined with parchment paper.
5. Cook the Meatballs:
In a large skillet, heat the remaining butter over medium heat. Once hot, add the meatballs in batches, ensuring they don’t overcrowd the pan. Cook until browned on all sides and cooked through, about 8-10 minutes. Remove from the skillet and set aside.
6. Make the Gravy:
In the same skillet, add a tablespoon of flour to the remaining drippings and stir to create a roux. Gradually add in 2 cups of beef broth, whisking continuously until the gravy thickens. Season with salt and pepper to taste.
7. Serve:
Return the meatballs to the skillet with the gravy, coating them well. Serve hot with mashed potatoes, lingonberry sauce, and a sprinkle of fresh parsley for garnish.
Extra Tips:
For an authentic flavor, consider adding a dash of soy sauce or Worcestershire sauce to the meat mixture before forming the meatballs. This enhances the umami taste and adds depth to the dish.
Additionally, if you prefer a lighter option, you can substitute half of the ground pork with ground turkey or chicken. Always taste the mixture before cooking to adjust the seasoning to your liking, ensuring that every bite of your Köttbullar is bursting with flavor!
Glögg (Mulled Wine)

Glögg is a beloved Scandinavian winter drink that warms both the body and soul. Traditionally enjoyed during the festive season, this spiced mulled wine is infused with aromatic flavors that evoke the spirit of cozy gatherings and holiday cheer. The delightful combination of red wine, spices, and sweeteners creates a soothing beverage perfect for chilly nights or holiday celebrations.
Making Glögg is a simple yet rewarding process that allows for personal customization. You can adjust the sweetness, spice levels, and even add different fruits or nuts to enhance the flavor profile. Whether you’re sipping it by the fireplace or sharing it with friends, Glögg is sure to bring warmth to your winter festivities.
Ingredients (Serves 4-6 people):
- 1 bottle (750 ml) of dry red wine
- 1 cup of water
- 1/2 cup of sugar (can adjust to taste)
- 2 cinnamon sticks
- 5-6 whole cloves
- 3-4 cardamom pods, slightly crushed
- 1 orange, zested and juiced
- 1/4 cup of raisins
- 1/4 cup of blanched almonds, slivered
- Optional: a splash of brandy or vodka for extra warmth
Cooking Instructions:
- Combine the Base Ingredients: In a large pot, pour in the entire bottle of dry red wine along with 1 cup of water. This will form the base of your Glögg and help to dilute the wine slightly, making it smoother.
- Add the Sugar and Spices: Stir in the 1/2 cup of sugar until fully dissolved. Then, add the cinnamon sticks, whole cloves, and crushed cardamom pods. These spices will infuse the wine with their fragrant flavors as it heats.
- Incorporate the Orange: Add the zest and juice of the orange to the pot. This will add a fresh citrus note to the Glögg, balancing the spices and sweetness.
- Simmer the Mixture: Heat the pot over medium-low heat, allowing it to simmer gently. Don’t let it boil, as boiling can evaporate the alcohol and alter the flavors. Let it simmer for about 20-30 minutes, stirring occasionally to mix the ingredients.
- Add the Dried Fruits and Nuts: After simmering, stir in the raisins and slivered almonds. These will soak up the flavors and add texture to your Glögg. Let it simmer for an additional 10 minutes.
- Strain and Serve: Once the Glögg has reached your desired flavor, remove the pot from heat. Use a fine mesh strainer to strain out the spices and solids before serving. Pour the warm Glögg into heatproof mugs or glasses.
- Garnish and Enjoy: Optionally, you can garnish each serving with a slice of orange or a cinnamon stick. Serve warm and enjoy the cozy, fragrant experience of homemade Glögg.
Extra Tips:
For an extra layer of flavor, consider infusing your Glögg with additional spices or even a touch of vanilla extract. You can also experiment with different types of wine, such as a fruity Merlot or a spiced Zinfandel, to tailor the drink to your preferences.
If you have leftovers, Glögg can be stored in the refrigerator and gently reheated, though the flavors improve after a day of resting. Enjoy this delightful winter warmer with friends and family!
Rømmegrøt (Sour Cream Porridge)

Rømmegrøt is a traditional Norwegian dish that embodies the essence of Scandinavian comfort food. This creamy porridge is made primarily from sour cream, flour, and milk, resulting in a rich and velvety texture that offers a delightful warmth, especially during cold weather.
Often served with a sprinkle of cinnamon and sugar, Rømmegrøt is a cherished dish that has a nostalgic place in many Norwegian hearts, often enjoyed during festive occasions and family gatherings.
The beauty of Rømmegrøt lies in its simplicity, yet it captivates with its luxurious flavor and mouthfeel. As you prepare this dish, you’ll find that the combination of tangy sour cream and sweet toppings creates a unique balance that’s both satisfying and comforting. Perfect for breakfast or as a dessert, Rømmegrøt is an excellent way to experience the warmth and hospitality of Scandinavian cuisine.
Ingredients (serving size: 4-6 people)
- 2 cups sour cream
- 1 cup all-purpose flour
- 4 cups whole milk
- 1/2 teaspoon salt
- 1/4 cup sugar (for serving)
- 1 teaspoon ground cinnamon (for serving)
- Butter (for serving)
Cooking Instructions
- Prepare the Base: In a large mixing bowl, combine the sour cream and flour. Stir them together until you form a smooth paste. This mixture will serve as the base for your porridge, giving it that classic creamy texture.
- Heat the Mixture: In a heavy-bottomed saucepan, heat the milk over medium heat. Once the milk is warm, gradually whisk in the sour cream and flour mixture. Make sure to stir continuously to prevent lumps from forming. This step is vital for achieving a smooth porridge.
- Cook the Porridge: Continue to cook the mixture over medium heat, stirring constantly, until it thickens. This should take about 10 to 15 minutes. You know it’s ready when the porridge has a velvety consistency and can coat the back of a spoon.
- Season the Porridge: Once thickened, add the salt and stir well. Let the porridge simmer for an additional 2-3 minutes to enhance the flavor. Confirm that you maintain a gentle simmer and avoid boiling, as this could affect the texture.
- Serve the Rømmegrøt: Remove the saucepan from heat and ladle the Rømmegrøt into serving bowls. Top each serving with a pat of butter, a sprinkle of sugar, and a dash of cinnamon for added flavor.
- Enjoy: Serve the porridge warm and encourage your guests to mix in the toppings to their taste, creating a delightful combination of flavors in each bite.
Extra Tips
When preparing Rømmegrøt, it’s important to use high-quality sour cream for the best flavor. If you prefer a lighter version, you can substitute part of the whole milk with low-fat milk, but keep in mind that it may slightly alter the creaminess.
Additionally, let the porridge rest for a few minutes off the heat before serving; this allows the flavors to meld beautifully. Finally, don’t hesitate to experiment with toppings—some people enjoy adding berries or nuts for an extra twist!
Cardamom Buns

Cardamom buns, or “kardemummabullar,” are a beloved Scandinavian treat that combines the warmth of freshly baked bread with the aromatic spice of cardamom.
These soft, sweet buns are perfect for a cozy afternoon snack, paired with a cup of coffee or tea. The unique flavor of cardamom elevates the simple dough, creating a delightful experience that transports you to the heart of Scandinavia with every bite.
Making cardamom buns is a rewarding process that fills your kitchen with an inviting aroma. The dough is enriched with butter, milk, and sugar, making it tender and fluffy.
Once rolled out and made into spirals, they’re baked to golden perfection, resulting in a treat that’s both comforting and indulgent. Whether you’re enjoying them on a leisurely weekend morning or sharing them with friends, these buns are sure to become a favorite in your home.
Ingredients (Serves 4-6):
- 500g all-purpose flour
- 75g granulated sugar
- 10g ground cardamom
- 10g salt
- 25g active dry yeast
- 250ml whole milk, warmed
- 100g unsalted butter, melted
- 1 large egg
- 50g unsalted butter, softened (for filling)
- 100g brown sugar (for filling)
- 1 tablespoon ground cinnamon (for filling)
- 1 egg (for egg wash)
- Pearl sugar (for topping, optional)
Cooking Instructions:
1. Prepare the Dough: In a large mixing bowl, combine the warm milk and active dry yeast. Let it sit for about 5-10 minutes until frothy. Then, add the melted butter, sugar, ground cardamom, and salt. Mix well. Gradually add the flour to the mixture, stirring until a dough begins to form.
2. Knead the Dough: Transfer the dough to a floured surface and knead for about 10 minutes until it’s smooth and elastic. If the dough is sticky, add a little more flour as needed.
Once kneaded, place the dough in a lightly greased bowl, cover it with a damp cloth, and let it rise in a warm area for about 1-1.5 hours or until it doubles in size.
3. Prepare the Filling: In a small bowl, combine the softened butter, brown sugar, and ground cinnamon. Mix until well combined and set aside.
4. Roll Out the Dough: Once the dough has risen, punch it down to release the air. Turn it out onto a floured surface and roll it into a rectangle, about 1 cm thick. Spread the cinnamon filling evenly over the surface of the dough.
5. Shape the Buns: Starting from one long edge, roll the dough tightly into a log. Slice the log into 12 equal pieces. You can twist each piece or simply place them in a baking dish for a more traditional shape.
6. Second Rise: Place the buns onto a lined baking tray, leaving space between them to allow for rising. Cover them with a cloth and let them rise for an additional 30-45 minutes until puffy.
7. Preheat the Oven: While the buns are rising, preheat your oven to 200°C (400°F).
8. Egg Wash and Bake: Beat the remaining egg and brush it over the tops of the buns. If desired, sprinkle pearl sugar on top for added texture and sweetness.
Bake in the preheated oven for 15-20 minutes or until they’re golden brown.
9. Cool and Serve: Once baked, remove the buns from the oven and let them cool on a wire rack. Enjoy them warm or at room temperature.
Extra Tips:
When making cardamom buns, be sure to use freshly ground cardamom for the best flavor.
If you want to experiment, consider adding a touch of orange or lemon zest to the filling for a citrus twist. These buns can also be frozen after baking; just reheat them in the oven to enjoy them fresh later.
Rødkål (Braised Red Cabbage)
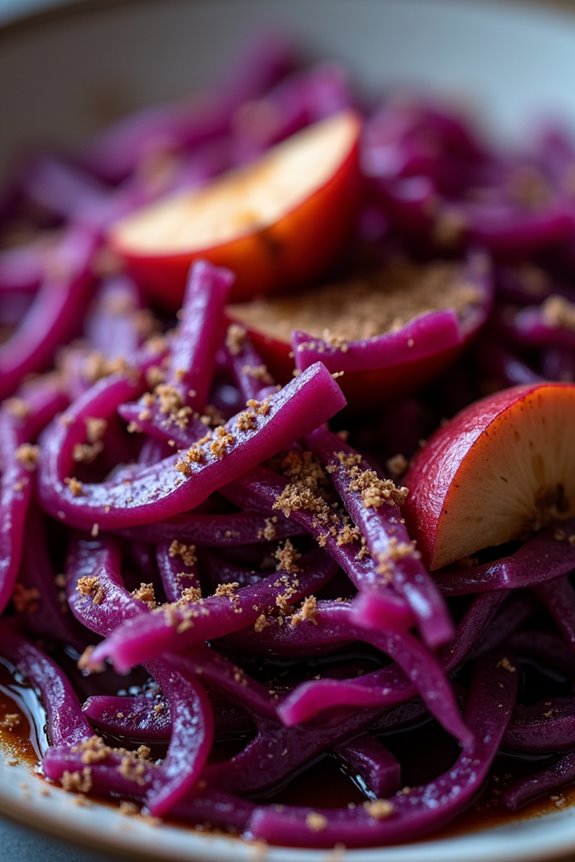
Rødkål, or braised red cabbage, is a classic side dish often found in Scandinavian cuisine, particularly enjoyed during the holiday season. This vibrant dish pairs beautifully with roasted meats, providing a sweet and tangy contrast that enhances the overall dining experience. The rich purple color of the cabbage not only adds visual appeal but also brings with it a wealth of nutrients, making it a delicious and healthful addition to any meal.
The slow cooking process allows the flavors to meld beautifully, creating a comforting dish that embodies the essence of Scandinavian comfort food.
To prepare Rødkål, you’ll need a few simple ingredients that come together to create a dish that’s both hearty and satisfying. The key to achieving the perfect balance of sweetness and acidity lies in the careful combination of apples, vinegar, and spices. This dish isn’t only easy to prepare but also benefits from a bit of time on the stove, allowing the ingredients to become tender and well-integrated.
Whether served at a festive gathering or a cozy family dinner, Rødkål is sure to be a hit on your table.
Ingredients (Serves 4-6):
- 1 medium head of red cabbage, finely shredded
- 2 tablespoons butter
- 1 large onion, thinly sliced
- 1 apple, peeled, cored, and sliced
- 1 cup apple cider vinegar
- 1/2 cup brown sugar
- 1 teaspoon ground cinnamon
- 1/2 teaspoon ground cloves
- Salt and pepper to taste
- 1/4 cup water
Cooking Instructions:
- Prepare the Ingredients: Begin by finely shredding the red cabbage and slicing the onion and apple. This will guarantee even cooking and proper texture in the final dish. Having all your ingredients ready before you start cooking will make the process smoother.
- Sauté the Onion: In a large, heavy-bottomed pot, melt the butter over medium heat. Add the sliced onion and sauté for about 5 minutes, or until the onion becomes soft and translucent. This step helps to develop the flavor base for the dish.
- Add the Cabbage and Apple: Once the onions are ready, add the shredded red cabbage and sliced apple to the pot. Stir well to combine with the onions. Cook for about 5 minutes, allowing the cabbage to wilt slightly. This will help to release the juices and flavors of the cabbage.
- Incorporate the Remaining Ingredients: Pour in the apple cider vinegar and sprinkle in the brown sugar, ground cinnamon, ground cloves, and a pinch of salt and pepper. Stir everything together until the cabbage is evenly coated with the vinegar and spices.
- Cook the Cabbage: Add the water to the pot, bring the mixture to a gentle simmer, then reduce the heat to low. Cover the pot and let it cook for 45 minutes to 1 hour, stirring occasionally. This slow cooking process allows the flavors to meld and the cabbage to become tender.
- Adjust Seasoning: After the cooking time is up, taste the Rødkål and adjust the seasoning with additional salt, pepper, or sugar if needed. The dish should have a nice balance of sweet and tangy flavors.
- Serve: Once cooked, remove the pot from heat and let it sit for a few minutes before serving. Rødkål can be enjoyed warm or at room temperature, making it a versatile side dish for any meal.
Extra Tips:
For added depth of flavor, consider incorporating a splash of red wine or adding a handful of raisins during the cooking process.
If you have leftover Rødkål, it keeps well in the refrigerator for a few days and often tastes even better the next day as the flavors continue to develop. Reheat gently on the stove or in the microwave before serving. This dish can also be frozen for longer storage, making it a convenient option for meal prep.
Baked Cod With Mustard Crust

Baked Cod With Mustard Crust is a delightful Scandinavian dish that combines the mild, flaky texture of cod with a zesty mustard topping, creating a perfect balance of flavors. This recipe isn’t only easy to prepare but also brings a touch of elegance to your dining table, making it an ideal choice for both weeknight dinners and special occasions.
The mustard crust adds a unique twist that elevates the fish, while the baking process guarantees that the cod remains tender and juicy. This dish is often accompanied by traditional Scandinavian sides such as boiled potatoes or a fresh salad, allowing the flavors of the cod to shine through.
Whether you’re familiar with Scandinavian cuisine or trying it for the first time, this Baked Cod With Mustard Crust is sure to impress your family and friends. With its simple preparation and bold flavors, it’s a must-try recipe for any seafood lover.
Ingredients (Servings: 4-6)
- 4 to 6 cod fillets (approximately 1.5 to 2 pounds)
- 3 tablespoons Dijon mustard
- 1 tablespoon whole grain mustard
- 1 tablespoon honey
- 1 tablespoon olive oil
- 1 cup breadcrumbs (preferably panko for extra crunch)
- 2 tablespoons fresh dill, chopped (or 1 tablespoon dried dill)
- Salt and pepper to taste
- Lemon wedges for serving (optional)
Cooking Instructions
- Preheat the Oven: Begin by preheating your oven to 400°F (200°C). This guarantees that the fish cooks evenly and the crust becomes golden and crispy.
- Prepare the Cod: Rinse the cod fillets under cold water and pat them dry with paper towels. Place them in a baking dish lined with parchment paper or lightly greased. Season the fillets with salt and pepper to taste.
- Make the Mustard Mixture: In a small bowl, combine the Dijon mustard, whole grain mustard, honey, and olive oil. Stir the mixture well until it’s smooth and fully incorporated. This mixture will serve as the flavorful base for the crust.
- Apply the Mustard Mixture: Spoon the mustard mixture evenly over the top of each cod fillet, spreading it to cover the fish completely. This will create a flavorful barrier that keeps the fish moist during baking.
- Prepare the Crust: In another bowl, combine the breadcrumbs and fresh dill. Mix well to guarantee the dill is evenly distributed throughout the breadcrumbs. Then, generously sprinkle this breadcrumb mixture over the mustard-coated cod, pressing lightly to ensure it adheres.
- Bake the Cod: Place the baking dish in the preheated oven and bake for about 15-20 minutes, or until the cod is cooked through and flakes easily with a fork. The crust should be golden brown and crispy.
- Serve: Once baked, remove the cod from the oven and let it sit for a minute. Serve the Baked Cod With Mustard Crust hot, with lemon wedges on the side for an added burst of flavor.
Extra Tips
When preparing the Baked Cod With Mustard Crust, consider using fresh herbs for enhanced flavor; if dill isn’t your favorite, parsley or chives can be great alternatives.
Make sure not to overbake the cod, as it can become dry; check for doneness around the 15-minute mark. Pairing this dish with a light salad or steamed vegetables can create a balanced meal.
Additionally, feel free to experiment with different types of mustards to find the combination that suits your taste best!
Swedish Potato Casserole

Swedish Potato Casserole, known as “Jansson’s Temptation,” is a traditional dish that has been a staple in Swedish homes for generations. This creamy, comforting casserole combines layers of thinly sliced potatoes, onions, and anchovies, all baked to perfection in a rich, savory cream sauce. It’s often served during festive occasions, particularly around Christmas, but its hearty nature makes it a wonderful option for any family dinner or gathering.
The beauty of this dish lies in its simplicity and the way it highlights the natural flavors of the ingredients. The anchovies add a unique umami depth to the casserole, while the potatoes provide a satisfying base. When baked, the top layer becomes golden and crispy, contrasting beautifully with the tender, creamy layers beneath. Whether you’re a fan of Scandinavian cuisine or just looking to try something new, this Swedish Potato Casserole is certain to delight your taste buds.
Ingredients (Serves 4-6):
- 2 pounds of potatoes (Yukon Gold or Russet), peeled and thinly sliced
- 1 large onion, thinly sliced
- 1 can (2 oz) of anchovy fillets, drained and chopped
- 2 cups heavy cream
- 1 cup milk
- 4 tablespoons butter, melted
- 1 teaspoon salt
- 1/2 teaspoon black pepper
- 1 teaspoon ground nutmeg
- 1/2 cup breadcrumbs (for topping)
Cooking Instructions:
- Preheat the Oven: Begin by preheating your oven to 375°F (190°C). This guarantees that your casserole will cook evenly and allows for that perfect golden crust on top.
- Prepare the Baking Dish: Grease a large baking dish (around 9×13 inches) with butter or cooking spray to prevent sticking. This step is vital to confirm that after baking, your casserole comes out intact and easy to serve.
- Layer the Ingredients: Start by layering half of the sliced potatoes evenly across the bottom of the baking dish. Then, sprinkle half of the sliced onions and half of the chopped anchovies over the potatoes. Repeat this layering process with the remaining potatoes, onions, and anchovies.
- Mix the Cream Sauce: In a separate bowl, whisk together the heavy cream, milk, melted butter, salt, pepper, and nutmeg until well combined. This mixture will create a rich and creamy sauce that binds all the layers together.
- Pour the Cream Mixture: Carefully pour the cream mixture over the layered potatoes, making sure to cover the top evenly. This will help keep the potatoes moist and flavorful while baking.
- Add Breadcrumbs: Finally, sprinkle the breadcrumbs over the top of the casserole. This will create a crispy topping when baked, adding texture to the creamy dish.
- Bake: Cover the baking dish with aluminum foil and bake in the preheated oven for 45 minutes. After 45 minutes, remove the foil and bake for an additional 20-30 minutes, or until the top is golden brown and the potatoes are tender when pierced with a fork.
- Cool and Serve: Once done, remove the casserole from the oven and allow it to cool for about 10 minutes before serving. This resting time helps the casserole set, making it easier to cut into portions.
Extra Tips:
For a richer flavor, consider adding grated cheese, such as Gruyère or Parmesan, to the cream mixture before pouring it over the potatoes. Additionally, you can adjust the amount of anchovies based on your personal preference; less will give a milder flavor, while more will enhance the umami notes notably.
If you want to make this dish ahead of time, you can assemble it a day in advance and store it in the refrigerator until you’re ready to bake. Just add a few extra minutes to the baking time if baking straight from the fridge. Enjoy your Swedish Potato Casserole!
Norwegian Brown Cheese Tart

Norwegian Brown Cheese Tart, known as “Brunost Tart,” is a delightful and unique dessert that showcases the rich, caramel-like flavor of traditional Norwegian brown cheese, or brunost. This creamy cheese, made from goat’s milk or a blend of cow’s and goat’s milk, adds a sweet and savory touch to the tart, making it a beloved comfort food for many.
Perfect for gatherings or as a special treat, this tart combines a buttery crust with a luscious filling, creating a balance of flavors that will definitely satisfy your sweet tooth.
This recipe will guide you through the process of creating a Norwegian Brown Cheese Tart that serves 4-6 people. With a few simple ingredients and straightforward steps, you’ll be able to bring a taste of Norway into your kitchen. Whether enjoyed as a dessert or a sweet snack with coffee, this tart is a must-try for anyone looking to explore Scandinavian cuisine.
Ingredients:
- 1 ½ cups all-purpose flour
- ½ cup unsalted butter, softened
- ¼ cup granulated sugar
- 1 large egg
- 1 teaspoon vanilla extract
- ½ teaspoon salt
- 1 cup brown cheese (brunost), grated
- 1 cup heavy cream
- 2 tablespoons brown sugar
- 2 large eggs
- 1 teaspoon ground cinnamon
Cooking Instructions:
1. Make the Crust: In a mixing bowl, combine the all-purpose flour, softened butter, granulated sugar, egg, vanilla extract, and salt. Mix until the ingredients are well incorporated and form a dough. If the dough is too sticky, you can add a bit more flour.
Once combined, flatten the dough into a disk, wrap it in plastic wrap, and refrigerate for at least 30 minutes to firm up.
2. Preheat the Oven: While the dough is chilling, preheat your oven to 350°F (175°C). This will guarantee that the crust bakes evenly and becomes golden brown.
3. Roll Out the Dough: After the dough has chilled, lightly flour a clean surface and roll out the dough into a circle about ¼ inch thick. Carefully transfer the rolled-out dough to a tart pan, pressing it into the bottom and sides. Trim any excess dough from the edges.
4. Prepare the Filling: In a medium saucepan over low heat, combine the grated brown cheese and heavy cream. Stir until the cheese is melted and the mixture is smooth. Remove from heat and let it cool slightly.
5. Combine Ingredients: In a separate mixing bowl, whisk together the brown sugar, eggs, and ground cinnamon until fully combined. Slowly add the melted cheese mixture to the egg mixture, whisking constantly to prevent the eggs from cooking.
Make sure the mixture is smooth and well blended.
6. Fill the Tart Shell: Pour the cheese filling into the prepared crust, smoothing out the top with a spatula.
7. Bake the Tart: Place the tart in the preheated oven and bake for about 30-35 minutes, or until the filling is set and slightly puffed. The edges may start to turn golden brown, which is a good sign that it’s ready.
8. Cool and Serve: Once baked, remove the tart from the oven and allow it to cool for at least 15 minutes before slicing. The tart can be enjoyed warm or at room temperature, and can be served plain or with a dollop of whipped cream.
Extra Tips:
When making the Norwegian Brown Cheese Tart, consider using a high-quality brunost for the best flavor. Feel free to experiment with different types of brown cheese, as some have a stronger caramel flavor than others.
Additionally, for an extra touch, you can sprinkle some chopped nuts or chocolate shavings on top of the tart before serving. This not only enhances the presentation but adds an extra layer of flavor and texture.