

As I explore the world of Portuguese cuisine, I’m captivated by the sun-kissed flavors that dance on my palate. Each dish, from succulent grilled sardines to creamy pastéis de nata, tells a story of summer. It evokes memories of warm evenings by the sea. Join me on a culinary journey where every recipe shines with freshness and tradition. Experience a taste of Portugal, no matter the season.
Grilled Sardines With Lemon and Herbs

Grilled Sardines with Lemon and Herbs is a quintessential Portuguese dish that embodies the vibrant flavors of the Mediterranean. These small, oily fish aren’t only delicious but also packed with omega-3 fatty acids, making them a healthy choice for a summer meal. Grilling sardines enhances their naturally rich flavor, while the addition of fresh herbs and zesty lemon elevates the dish to new heights.
Perfect for outdoor gatherings, this recipe captures the essence of summer in Portugal and is sure to impress your family and friends.
Sardines are best enjoyed fresh, and during the summer months, they’re abundant and at their peak. This recipe allows you to experience the full flavor of the fish, complemented by the brightness of citrus and the aromatic qualities of herbs. Serve your grilled sardines with crusty bread, a side salad, or grilled vegetables for a complete meal that celebrates the warmth and joy of summertime dining.
Ingredients (Serves 4-6):
- 12 fresh sardines, cleaned and scaled
- 4 tablespoons olive oil
- 2 lemons (1 for juice, 1 for wedges)
- 4 cloves garlic, minced
- 1/4 cup fresh parsley, chopped
- 2 tablespoons fresh oregano, chopped
- Salt and pepper, to taste
Cooking Instructions:
- Prepare the Sardines: Rinse the sardines under cold water and pat them dry with paper towels. Make certain they’re cleaned and scaled. This step is vital as it helps remove any residual slime and prepares the fish for seasoning.
- Marinate the Fish: In a large bowl, combine the olive oil, juice of one lemon, minced garlic, chopped parsley, and oregano. Season with salt and pepper. Add the sardines to the marinade, making sure they’re well-coated. Let them marinate for at least 30 minutes at room temperature to absorb the flavors.
- Preheat the Grill: While the sardines are marinating, preheat your grill to medium-high heat. This guarantees that the sardines will cook evenly and develop those lovely grill marks.
- Grill the Sardines: Carefully place the marinated sardines directly on the grill. Grill for about 3-4 minutes on each side, or until the skin is crispy and the fish is cooked through. Be gentle when flipping the sardines to avoid breaking them apart.
- Serve: Once cooked, remove the sardines from the grill and transfer them to a serving platter. Garnish with lemon wedges and additional fresh herbs if desired. Serve immediately while they’re hot and sizzling.
Extra Tips:
When grilling sardines, it’s important to keep an eye on them as they cook quickly. If you prefer, you can use a fish basket or grill mat to make flipping easier and to prevent the fish from sticking to the grill.
Additionally, serving the sardines with a drizzle of extra virgin olive oil and a sprinkle of sea salt right before serving can enhance the flavor even more. Enjoy your grilled sardines with a glass of chilled white wine for the ultimate summer experience!
Piri-Piri Chicken Skewers

Piri-Piri Chicken Skewers are a delightful and spicy dish that hails from the Portuguese cuisine, celebrated for its bold flavors and vibrant colors. This dish features succulent chicken marinated in a spicy piri-piri sauce, which adds a zesty kick to the tender meat.
Perfect for summer barbecues or family gatherings, these skewers aren’t only easy to prepare, but they also make for a fun and interactive meal that everyone can enjoy.
To achieve the best flavor, it’s important to marinate the chicken for at least a few hours, allowing the spices to penetrate the meat deeply. The result is juicy, flavorful chicken that pairs wonderfully with a fresh salad or grilled vegetables.
These skewers can be cooked on the grill or in the oven, making them versatile for any cooking situation. Enjoy the taste of Portugal with these delicious Piri-Piri Chicken Skewers!
Ingredients (Serves 4-6):
- 1.5 lbs (700g) boneless, skinless chicken thighs
- 1/4 cup olive oil
- 1/4 cup white wine vinegar
- 2 tablespoons piri-piri sauce
- 4 cloves garlic, minced
- 1 teaspoon smoked paprika
- 1 teaspoon salt
- 1/2 teaspoon black pepper
- 1 teaspoon dried oregano
- 1 teaspoon lemon juice
- Wooden or metal skewers (if using wooden, soak in water for 30 minutes)
Cooking Instructions:
- Prepare the Marinade: In a large bowl, combine the olive oil, white wine vinegar, piri-piri sauce, minced garlic, smoked paprika, salt, black pepper, dried oregano, and lemon juice. Whisk together until well blended. This marinade will infuse the chicken with flavor and moisture.
- Marinate the Chicken: Cut the chicken thighs into bite-sized pieces and add them to the marinade. Toss the chicken pieces in the marinade until they’re evenly coated. Cover the bowl with plastic wrap and refrigerate for at least 2 hours, or preferably overnight. This marinating process deepens the flavor.
- Preheat the Grill or Oven: If using a grill, preheat it to medium-high heat. If using an oven, preheat to 400°F (200°C). If using skewers, ascertain they’re prepared (soaked if wooden) and ready for use.
- Skewer the Chicken: Once marinated, thread the chicken pieces onto the skewers, leaving a small space between each piece to guarantee even cooking. This also allows the heat to circulate around the chicken, promoting better browning.
- Cook the Skewers: If grilling, place the skewers on the grill and cook for about 10-12 minutes, turning occasionally, until the chicken is cooked through and has nice grill marks. If baking, place the skewers on a baking sheet lined with parchment paper and bake for 15-20 minutes, turning halfway through.
- Serve and Enjoy: Once cooked, remove the skewers from the grill or oven and let them rest for a few minutes. Serve hot with your favorite dipping sauce or alongside a fresh salad.
Extra Tips:
For a perfect Piri-Piri Chicken Skewers experience, feel free to customize the level of spice by adjusting the amount of piri-piri sauce used in the marinade.
You can also add bell peppers, onions, or cherry tomatoes to the skewers for added flavor and color. If you have leftovers, the chicken can be stored in an airtight container in the refrigerator for up to three days and reheated as desired.
Enjoy your culinary journey to Portugal!
Caldo Verde (Green Soup)
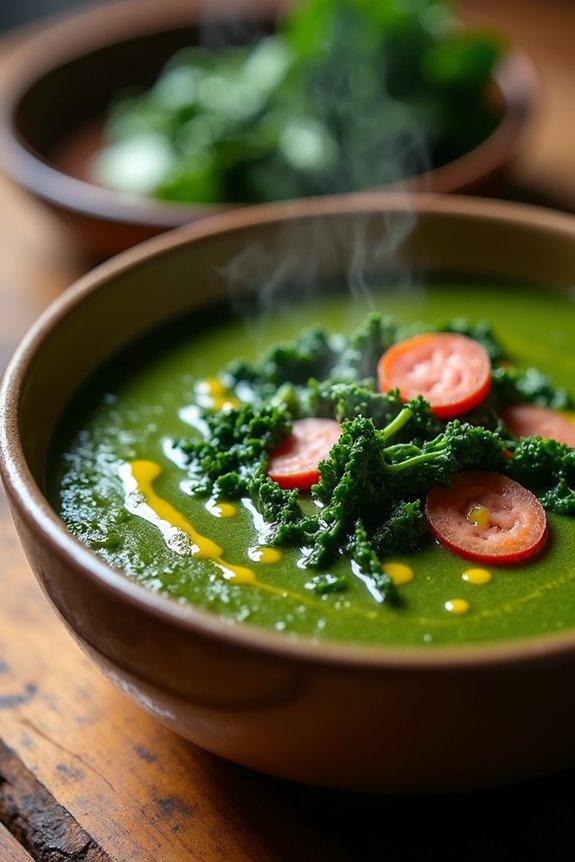
Caldo Verde, a traditional Portuguese soup, is a comforting dish that’s perfect for summer evenings. Its name translates to “green soup,” which comes from its vibrant color primarily derived from the key ingredient, kale. This hearty and nutritious soup is enjoyed as a staple in Portuguese cuisine, often served during festivals and family gatherings.
The simplicity of the ingredients allows the flavors to shine through, making it a delightful choice for both casual dinners and special occasions. The beauty of Caldo Verde lies in its ease of preparation. With a few fresh ingredients and minimal cooking time, you can create a soul-warming bowl of soup that isn’t only delicious but also packed with nutrients.
Traditionally, it’s served with slices of chouriço (smoked sausage) and a drizzle of olive oil, enhancing its flavors and providing a delightful contrast to the creamy texture of the soup. This recipe will guide you through making a perfect Caldo Verde that serves 4-6 people.
Ingredients
- 1 large onion, chopped
- 2 cloves garlic, minced
- 4 medium potatoes, peeled and diced
- 6 cups vegetable or chicken broth
- 1 pound kale, stems removed and leaves chopped
- 4 tablespoons olive oil
- Salt and pepper to taste
- 1 chouriço sausage, sliced (optional)
- Fresh bread for serving (optional)
Cooking Instructions
- Sauté the Aromatics: In a large pot, heat 2 tablespoons of olive oil over medium heat. Add the chopped onion and minced garlic, cooking until the onion is translucent and fragrant, about 5 minutes. This step builds the flavor base for your soup.
- Cook the Potatoes: Add the diced potatoes to the pot, stirring to combine with the onions and garlic. Pour in the broth and bring the mixture to a boil. Reduce the heat, cover, and simmer for approximately 15-20 minutes, or until the potatoes are tender. This allows the potatoes to absorb the flavors of the aromatics and broth.
- Blend the Soup: Once the potatoes are cooked, use an immersion blender to purée the soup until smooth. If you don’t have an immersion blender, you can carefully transfer the soup to a regular blender in batches. Blending the soup creates the creamy texture characteristic of Caldo Verde.
- Add the Kale: Return the blended soup to the stove and stir in the chopped kale. Simmer for an additional 5-10 minutes, or until the kale is tender but still vibrant green. This step guarantees that the kale retains its nutrients and flavor while becoming perfectly cooked.
- Season and Serve: Drizzle the remaining 2 tablespoons of olive oil into the soup, and season with salt and pepper to taste. If using, add the sliced chouriço sausage at this stage to warm it through. Ladle the soup into bowls and serve hot, optionally with fresh bread on the side.
Extra Tips
For an added depth of flavor, consider incorporating a pinch of red pepper flakes during the sautéing process to give the soup a subtle kick. Additionally, if you prefer a richer taste, you can replace some of the vegetable broth with a splash of white wine.
Always taste your soup before serving and adjust the seasoning as necessary, as the saltiness can vary between different brands of broth. Enjoy your Caldo Verde with a drizzle of high-quality olive oil for an authentic Portuguese experience!
Portuguese Tomato and Cucumber Salad
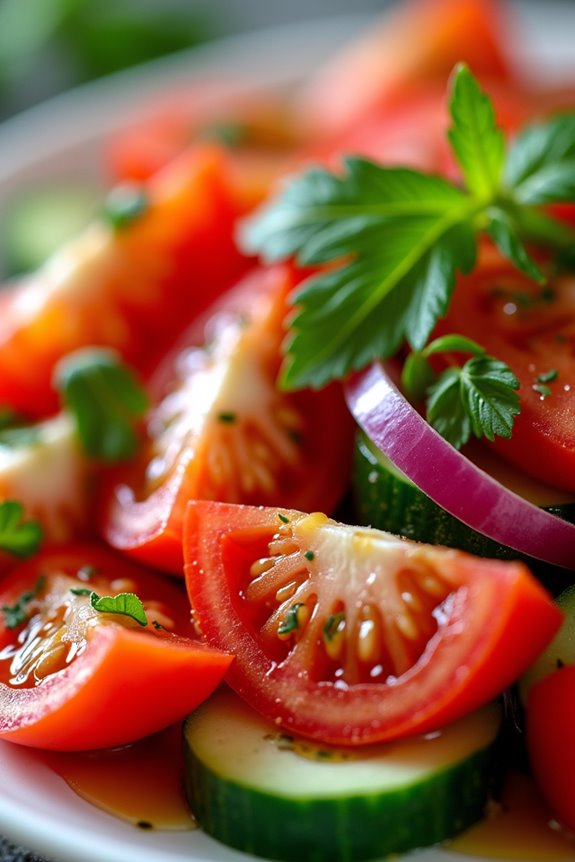
Portuguese Tomato and Cucumber Salad is a revitalizing dish that beautifully showcases the vibrant flavors of summer. This simple yet delicious salad is a staple in Portuguese cuisine, often enjoyed as a light appetizer or a side dish during family gatherings and barbecues. The combination of ripe tomatoes with crisp cucumbers, drizzled with olive oil and vinegar, creates a delightful medley that isn’t only pleasing to the palate but also visually appealing.
This salad is incredibly easy to prepare and can be made in under 15 minutes, making it a perfect option for those hot summer days when you want to keep the kitchen cool. By using fresh, high-quality ingredients, you’ll guarantee that every bite bursts with flavor. Serve it alongside grilled meats or seafood for a complete meal or enjoy it on its own for a light and healthy lunch.
Ingredients (serving size: 4-6 people)
- 4 medium-sized ripe tomatoes
- 1 large cucumber
- 1 small red onion
- 1/4 cup extra virgin olive oil
- 2 tablespoons red wine vinegar
- Salt (to taste)
- Black pepper (to taste)
- Fresh parsley or basil (for garnish)
Cooking Instructions
- Prepare the Vegetables: Start by washing the tomatoes and cucumber thoroughly. Cut the tomatoes into wedges, removing the core if desired, and slice the cucumber into thin rounds or half-moons, depending on your preference. For added flavor, you can peel the cucumber if you prefer a milder taste.
- Slice the Onion: Peel the red onion and slice it thinly. If the taste of raw onion is too strong for your liking, you can soak the slices in cold water for about 10 minutes to mellow the flavor before adding it to the salad.
- Combine Ingredients: In a large salad bowl, combine the tomato wedges, cucumber slices, and sliced red onion. Gently toss the ingredients together to mix them evenly without crushing the tomatoes.
- Prepare the Dressing: In a small bowl, whisk together the extra virgin olive oil, red wine vinegar, salt, and black pepper. Adjust the seasoning according to your taste. The dressing should complement the fresh vegetables without overpowering their natural flavors.
- Dress the Salad: Pour the dressing over the salad mixture and toss gently to coat all the vegetables. Be careful not to break up the tomatoes too much while mixing.
- Garnish and Serve: Finally, chop the fresh parsley or basil and sprinkle it over the top of the salad for a burst of color and flavor. Serve the salad immediately, or let it chill in the refrigerator for a few minutes to allow the flavors to meld.
Extra Tips
For the best results, use the freshest and ripest tomatoes available, as they’ll greatly enhance the taste of the salad. If you want to add a bit more texture, consider including some feta cheese or olives.
You can also experiment with different vinegars, such as balsamic or apple cider, to give the dressing a unique twist. This salad is best enjoyed fresh, but it can be stored in the refrigerator for a day if necessary; just be aware that the vegetables may release some water over time.
Bifana (Pork Sandwich)

Bifana is a beloved Portuguese street food that features marinated pork served in a crispy bread roll. This dish is famous for its savory and spicy flavor, making it a favorite among locals and tourists alike. The pork is typically seasoned with garlic, paprika, and white wine, resulting in a juicy and tender filling that pairs perfectly with the crusty bread.
Often enjoyed as a quick lunch or a late-night snack, Bifanas are both satisfying and easy to prepare at home.
To make the perfect Bifana, you’ll want to start by marinating the pork to enhance its flavor. The marination process allows the spices and seasonings to penetrate the meat, making it incredibly flavorful. Once marinated, the pork is cooked until golden brown and served hot in fresh rolls, often topped with a drizzle of the remaining marinade or a spicy sauce for an extra kick. Enjoy this delicious Portuguese delicacy at a summer barbecue or casual family gathering!
Ingredients (Serves 4-6 people):
- 1.5 pounds pork loin, thinly sliced
- 4 cloves garlic, minced
- 1 teaspoon paprika (preferably smoked)
- ½ teaspoon black pepper
- 1 teaspoon salt
- ½ cup white wine
- 2 tablespoons olive oil
- 6 crusty bread rolls (Portuguese rolls or similar)
- Optional: hot sauce or mustard for serving
Cooking Instructions:
- Prepare the Marinade: In a mixing bowl, combine minced garlic, paprika, black pepper, salt, white wine, and olive oil. Whisk together until well combined. This marinade will infuse the pork with rich flavors.
- Marinate the Pork: Add the thinly sliced pork loin to the marinade, ensuring each piece is well coated. Cover the bowl with plastic wrap and refrigerate for at least 1 hour, or overnight for more intense flavor.
- Cook the Pork: Heat a large skillet over medium-high heat. Once hot, add the marinated pork slices in a single layer. Cook for about 4-5 minutes on each side until the pork is browned and cooked through. Avoid overcrowding the pan; you may need to cook the pork in batches.
- Assemble the Sandwiches: Slice the crusty bread rolls in half and lightly toast them on a grill or in the oven. Place a generous portion of the cooked pork inside each roll. If desired, drizzle some of the leftover marinade over the pork or add hot sauce for extra heat.
- Serve: Serve the Bifanas warm with your favorite side dishes such as potato chips, salad, or pickles. Enjoy them with friends and family for a delightful Portuguese experience.
Extra Tips: When making Bifanas, feel free to adjust the spiciness to your taste by adding more or less paprika or using a spicier hot sauce. For a traditional touch, consider serving the sandwiches with a side of fried potatoes or a rejuvenating salad.
Always allow the pork to marinate for as long as possible to enhance the flavor, and don’t hesitate to experiment with different types of bread for a unique twist!
Shrimp and Chorizo Rice
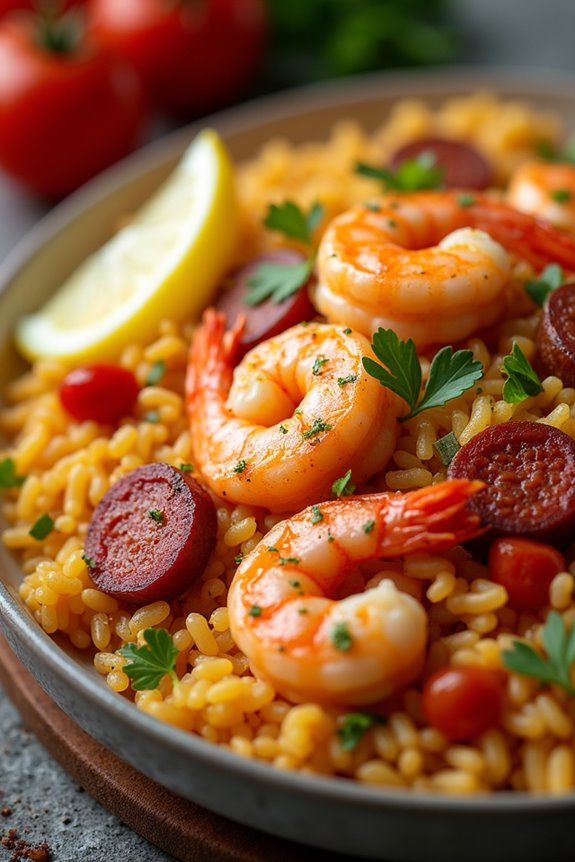
Shrimp and Chorizo Rice is a vibrant and flavorful dish that encapsulates the essence of Portuguese cuisine. The combination of succulent shrimp and spicy chorizo creates a delightful harmony of flavors that’s both satisfying and exciting. This dish isn’t only perfect for summer gatherings but also brings a taste of the coast to your dining table.
Whether it’s a family meal or a casual get-together with friends, Shrimp and Chorizo Rice is bound to impress. The preparation of this dish is relatively straightforward and can be accomplished in about 30 minutes. The key to achieving the best flavor lies in the quality of the ingredients, particularly the chorizo and shrimp.
Pair it with a crisp green salad or a glass of chilled white wine for a complete meal that celebrates the sunny, vibrant flavors of Portugal.
Ingredients (Serves 4-6)
- 1 lb (450g) large shrimp, peeled and deveined
- 8 oz (225g) chorizo sausage, sliced
- 2 cups long-grain rice
- 4 cups chicken or seafood broth
- 1 medium onion, finely chopped
- 2 cloves garlic, minced
- 1 bell pepper, diced (red or green)
- 1 can (14 oz) diced tomatoes, drained
- 1 teaspoon smoked paprika
- 1/2 teaspoon cayenne pepper (optional, for extra heat)
- 2 tablespoons olive oil
- Salt and pepper to taste
- Fresh parsley, chopped (for garnish)
- Lemon wedges (for serving)
Cooking Instructions
- Prepare Ingredients: Start by prepping all your ingredients. Peel and devein the shrimp, slice the chorizo, chop the onion, garlic, and bell pepper, and drain the diced tomatoes. Having everything ready will make the cooking process smoother.
- Cook Chorizo: In a large skillet or paella pan, heat the olive oil over medium heat. Add the sliced chorizo and sauté for about 5 minutes until it becomes crispy and releases its oils. This step infuses the oil with the rich flavors of the chorizo.
- Sauté Vegetables: Add the chopped onion, garlic, and bell pepper to the skillet with the chorizo. Cook for another 3-4 minutes until the vegetables are softened and the onion becomes translucent.
- Add Rice and Spices: Stir in the rice, smoked paprika, and cayenne pepper (if using). Mix well to guarantee the rice is coated with the flavorful oils and spices. Cook for about 2 minutes to toast the rice slightly.
- Incorporate Broth and Tomatoes: Pour in the chicken or seafood broth and add the drained diced tomatoes. Stir everything together and bring the mixture to a gentle boil. Season with salt and pepper to taste.
- Simmer the Rice: Reduce the heat to low, cover the skillet, and let the rice simmer for about 15-20 minutes, or until the rice is cooked through and has absorbed most of the liquid. Avoid lifting the lid too often, as this will release steam and affect cooking.
- Add Shrimp: Once the rice is nearly done, nestle the shrimp into the rice and cover again. Cook for an additional 5 minutes or until the shrimp are pink and cooked through.
- Serve: Once everything is cooked, fluff the rice with a fork and garnish with freshly chopped parsley. Serve hot with lemon wedges on the side for a zesty finish.
Extra Tips
When making Shrimp and Chorizo Rice, feel free to customize the dish to your taste by adding other ingredients such as peas, corn, or even a splash of white wine for acidity.
If you prefer a slightly smokier flavor, consider using smoked shrimp instead of regular shrimp. Additionally, be mindful of the cooking time for the shrimp, as they can become tough if overcooked.
If you can, let the dish sit for a few minutes before serving; this allows the flavors to meld together beautifully. Enjoy your culinary journey through Portugal!
Roasted Red Pepper and Feta Dip
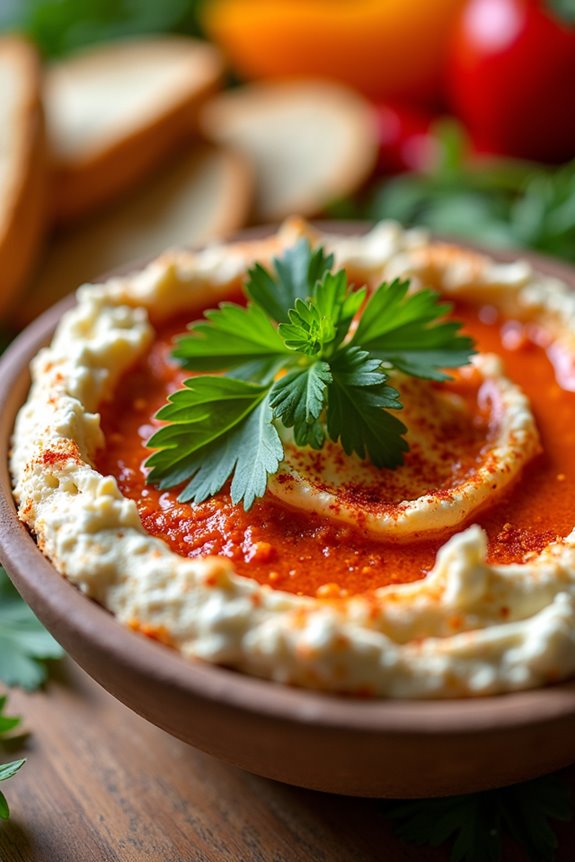
This vibrant Roasted Red Pepper and Feta Dip is a delightful addition to any summer gathering, capturing the essence of Portuguese flavors in a creamy, savory spread. The combination of smoky roasted red peppers and tangy feta cheese creates a rich and flavorful dip that pairs perfectly with crusty bread, fresh vegetables, or crispy pita chips.
It’s a simple yet impressive dish that can be prepared in advance, allowing you to enjoy your time with guests without the stress of last-minute cooking.
Preparing this dip is as straightforward as it’s delicious. The key to achieving that perfect balance of flavors lies in roasting the red peppers until they’re tender and slightly charred. This process enhances the natural sweetness of the peppers and adds depth to the dip.
Once blended with feta, garlic, and a splash of lemon juice, this dip transforms into a creamy concoction that will have everyone coming back for more. Serve it chilled or at room temperature for the best experience.
Ingredients (serves 4-6 people):
- 2 large red bell peppers
- 1 cup crumbled feta cheese
- 2 cloves garlic, minced
- 3 tablespoons olive oil
- 1 tablespoon fresh lemon juice
- 1 teaspoon smoked paprika
- Salt and pepper to taste
- Fresh parsley for garnish (optional)
Cooking Instructions:
1. Roast the Red Peppers: Preheat your oven to 450°F (230°C). Place the whole red bell peppers on a baking sheet and roast them in the oven for about 25-30 minutes, turning occasionally, until the skins are blistered and charred. This will enhance the smoky flavor of the peppers.
2. Cool and Peel: Once roasted, remove the peppers from the oven and place them in a bowl, covering it with plastic wrap or a kitchen towel. Let them steam for about 10-15 minutes. This will make the skins easier to peel off.
After steaming, peel off the charred skins, remove the stems and seeds, and roughly chop the peppers.
3. Blend the Ingredients: In a food processor, combine the roasted red peppers, crumbled feta cheese, minced garlic, olive oil, lemon juice, smoked paprika, salt, and pepper. Pulse the mixture until smooth and creamy. Taste and adjust the seasoning if needed.
4. Chill and Serve: Transfer the dip to a serving bowl and refrigerate for at least 30 minutes to allow the flavors to meld together. Before serving, give it a good stir and garnish with fresh parsley, if desired.
5. Enjoy: Serve the Roasted Red Pepper and Feta Dip with your choice of crusty bread, pita chips, or fresh vegetables for dipping.
Extra Tips:
For an added layer of flavor, consider incorporating a few red pepper flakes for a touch of heat or drizzle some balsamic reduction on top before serving.
If you want a creamier texture, you can blend in a few tablespoons of Greek yogurt or cream cheese. This dip can also be made a day in advance, making it a perfect option for parties or picnics. Just be sure to keep it covered in the refrigerator until ready to serve!
Bacalhau À Brás (Codfish Dish)
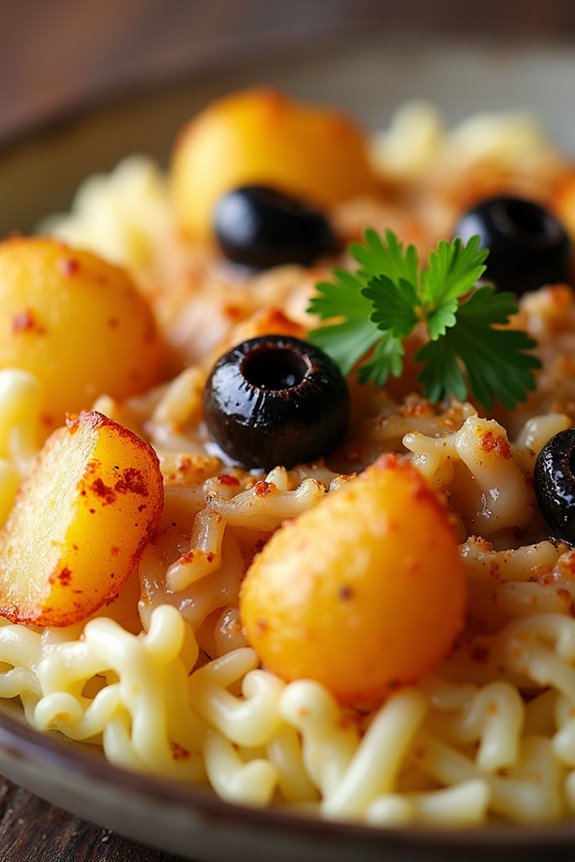
Bacalhau À Brás is a quintessential Portuguese dish that showcases the country’s love for codfish, known as bacalhau. This dish combines the flavors of shredded cod with finely chopped onions, crispy potatoes, and eggs to create a creamy and savory experience that’s both comforting and delicious.
Originating from Lisbon, Bacalhau À Brás is often served as a meal on its own and is a popular choice during festive occasions or family gatherings.
The beauty of Bacalhau À Brás lies in its simplicity and the quality of its ingredients. The dish is traditionally made with salt cod that has been soaked to remove excess saltiness, making it tender and flavorful.
The addition of olives and fresh parsley gives the dish a burst of color and a hint of brininess, while the eggs create a rich, creamy texture that binds everything together. Whether you’re a seasoned cook or a novice in the kitchen, this recipe is sure to impress your family and friends.
Ingredients (Serves 4-6)
- 400g salt cod (bacalhau), soaked and shredded
- 4 medium potatoes, peeled and cut into matchsticks (or use frozen French fries)
- 1 large onion, finely chopped
- 4 large eggs
- 2 tablespoons olive oil
- 1 cup black olives, pitted and sliced
- Fresh parsley, chopped (for garnish)
- Salt and pepper, to taste
Cooking Instructions
1. Prepare the Codfish: Begin by soaking the salt cod in water for 24 to 48 hours, changing the water several times. Once desalinated, drain the cod and shred it into bite-sized pieces. This step is essential to guarantee the cod is tender and not overly salty.
2. Fry the Potatoes: Heat a generous amount of olive oil in a large frying pan over medium heat. Add the matchstick potatoes and fry them until golden brown and crispy. If using frozen French fries, cook them according to package instructions until they’re crispy.
Once done, remove from the pan and place them on a paper towel to absorb excess oil.
3. Sauté the Onions: In the same frying pan, add a little more olive oil if needed and sauté the chopped onions over medium heat until they become soft and translucent. This will take about 5-7 minutes.
Stir occasionally to prevent browning.
4. Combine Ingredients: Add the shredded cod to the pan with the sautéed onions and mix well. Cook for about 5 minutes, allowing the cod to absorb the flavors of the onions.
Season with salt and pepper to taste, being careful with the salt since the cod may still retain some saltiness.
5. Add the Eggs: In a separate bowl, beat the eggs lightly. Pour the beaten eggs over the cod and onion mixture in the pan.
Gently stir to combine, allowing the eggs to cook and coat the cod mixture evenly. Cook until the eggs are just set, about 2-3 minutes.
6. Finish with Potatoes and Olives: Once the eggs are cooked, gently fold in the crispy potatoes and sliced black olives.
Mix carefully to combine without breaking the potatoes. Cook for an additional minute to heat everything through.
7. Serve: Transfer the Bacalhau À Brás to a serving dish. Garnish with freshly chopped parsley and Serve immediately, accompanied by additional olives if desired.
Extra Tips
When preparing Bacalhau À Brás, it’s important to guarantee that the cod is properly desalted, as this will greatly affect the overall flavor of the dish.
Additionally, for a bit of a twist, you can add a pinch of paprika or a sprinkle of lemon juice to brighten the flavors. If you prefer a creamier texture, consider adding a splash of cream or milk to the eggs before cooking.
Finally, don’t hesitate to customize the dish by incorporating other ingredients like bell peppers or peas for added color and nutrition.
Arroz De Marisco (Seafood Rice)
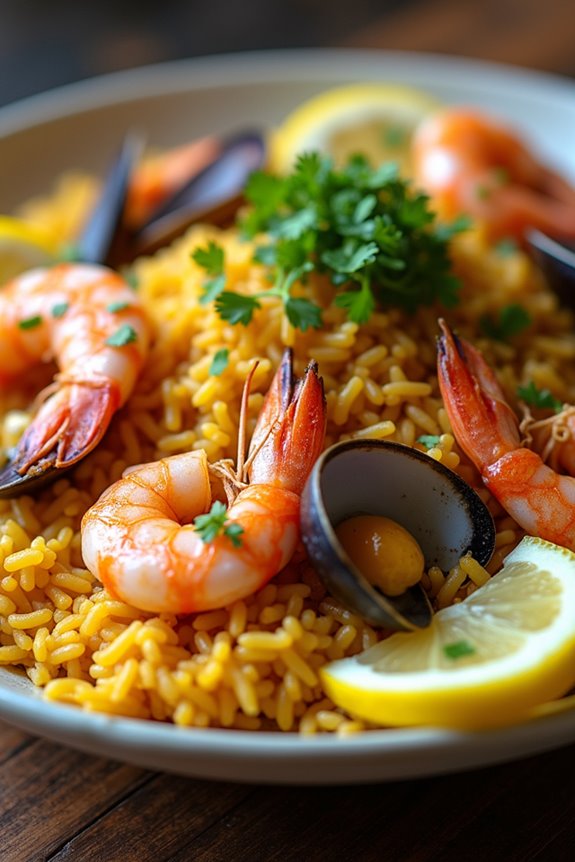
Arroz de Marisco is a beloved Portuguese dish that showcases the bounty of the sea, combining rice with a variety of fresh seafood. This dish isn’t just a meal; it’s an experience, often enjoyed during summer gatherings and family celebrations.
The harmonious blend of succulent shrimp, tender clams, and rich, flavorful broth creates a comforting and satisfying dish that transports you straight to the coastal shores of Portugal with every bite.
Cooking Arroz de Marisco is a delightful process that allows you to immerse yourself in the vibrant flavors and aromas of Portuguese cuisine. The key to a perfect seafood rice lies in the quality of the seafood and the broth you use.
Feel free to mix and match your favorite seafood, as this dish is incredibly versatile. Whether you’re cooking for a small family or a gathering of friends, this recipe serves 4-6 people and is sure to impress.
Ingredients:
- 2 cups of Arborio rice
- 1 lb shrimp, peeled and deveined
- 1 lb clams, scrubbed and rinsed
- 1 lb mussels, scrubbed and rinsed
- 4 cups fish or seafood stock
- 1 medium onion, finely chopped
- 4 cloves garlic, minced
- 1 bell pepper, diced
- 2 medium tomatoes, chopped
- 1 cup white wine
- 1/4 cup olive oil
- 1 teaspoon paprika
- 1 teaspoon saffron threads (optional)
- Salt and pepper, to taste
- Fresh parsley, chopped (for garnish)
- Lemon wedges (for serving)
Cooking Instructions:
1. Prepare the Broth: In a large pot, heat the seafood stock over low heat. If you’re using saffron, add it to the stock now to allow the flavors to infuse. Keep the broth warm but not boiling as you prepare the other ingredients.
2. Sauté the Aromatics: In a large skillet or paella pan, heat the olive oil over medium heat. Add the chopped onion and bell pepper, sautéing until they’re soft and translucent, about 5-7 minutes.
Then add the minced garlic and cook for an additional minute until fragrant.
3. Add Tomatoes and Spices: Stir in the chopped tomatoes, paprika, salt, and pepper. Cook for about 3-4 minutes until the tomatoes start breaking down and releasing their juices.
4. Toast the Rice: Add the Arborio rice to the skillet, stirring well to coat the rice with the mixture. Toast the rice for about 2-3 minutes until it starts to look slightly translucent.
5. Deglaze with Wine: Pour in the white wine and let it simmer for about 2 minutes, stirring occasionally until the wine is mostly absorbed by the rice.
6. Add the Broth: Gradually add the warm seafood stock to the skillet. Bring to a gentle simmer and reduce the heat to low. Stir occasionally, allowing the rice to absorb the liquid, about 15-20 minutes.
7. Incorporate the Seafood: When the rice is almost cooked, gently fold in the shrimp, clams, and mussels. Cover the skillet and cook for an additional 5-7 minutes or until the seafood is cooked through and the clams and mussels have opened.
8. Final Touches: Once the seafood is cooked, remove the skillet from the heat. Let it sit for a few minutes before fluffing the rice gently with a fork. Adjust seasoning with salt and pepper as needed.
9. Serve: Garnish with freshly chopped parsley and lemon wedges. Serve hot, allowing your guests to squeeze fresh lemon juice over their servings.
Extra Tips:
When preparing Arroz de Marisco, freshness is key, so try to source the freshest seafood available. Additionally, feel free to customize the seafood to your liking; squid, octopus, or different types of fish can enhance the dish further.
If you prefer a spicier kick, consider adding a pinch of red pepper flakes. Finally, allowing the dish to rest for a few minutes before serving helps the flavors meld beautifully, making every bite a taste of summer.
Pastéis De Nata (Custard Tarts)

Pastéis De Nata, or Portuguese custard tarts, are a beloved dessert that originated in Lisbon, Portugal. These delicious pastries are characterized by their flaky crust and creamy custard filling, often lightly caramelized on top for an irresistible finish.
They’re perfect for sharing with friends and family or enjoying with a cup of coffee. Making them at home can be a rewarding experience, allowing you to savor the delightful flavors of Portugal right in your kitchen.
The key to mastering Pastéis De Nata lies in the balance of the buttery pastry and the silky custard. While the ingredients may seem simple, the technique is essential for achieving the perfect texture and taste. This recipe serves 4-6 people, making it a delightful treat for a small gathering or a special occasion.
With a little patience and practice, you can create these iconic tarts that will impress anyone who takes a bite.
Ingredients
- 1 package (17.3 oz) of frozen puff pastry, thawed
- 1 cup of whole milk
- 1 cup of heavy cream
- 2/3 cup of granulated sugar
- 1/4 cup of all-purpose flour
- 4 large egg yolks
- 1 teaspoon of vanilla extract
- Zest of 1 lemon
- Ground cinnamon (for sprinkling)
- Powdered sugar (for dusting)
Cooking Instructions
1. Prepare the Pastry: Preheat your oven to 475°F (245°C). Roll out the thawed puff pastry on a lightly floured surface until it’s about 1/8 inch thick. Cut circles about 4 inches in diameter to line the muffin tin.
Gently press the pastry circles into the greased muffin tin cups, making sure they’re well-fitted to hold the custard filling.
2. Make the Custard: In a saucepan, combine the milk, cream, and sugar. Heat over medium heat, stirring until the sugar dissolves and the mixture is hot but not boiling.
In a separate bowl, whisk together the flour, egg yolks, vanilla extract, and lemon zest until smooth.
3. Combine the Mixtures: Slowly pour the hot milk mixture into the egg mixture, whisking continuously to prevent the eggs from scrambling.
Once combined, return the mixture to the saucepan and cook over medium-low heat, stirring constantly until it thickens, about 5-7 minutes. Remove from heat and let it cool slightly.
4. Fill the Pastry Cups: Carefully pour the custard filling into each pastry-lined muffin cup, filling them about 3/4 full. This allows room for the custard to puff up during baking.
5. Bake the Tarts: Place the muffin tin in the preheated oven and bake for 15-20 minutes, or until the custard is set and the tops are golden brown with some caramelization.
Keep an eye on them to make sure they don’t burn.
6. Cool and Serve: Once baked, remove the tarts from the oven and let them cool in the muffin tin for a few minutes before transferring them to a wire rack to cool completely.
Serve warm or at room temperature, dusted with powdered sugar and a sprinkle of ground cinnamon.
Extra Tips
For the best results, make sure to use high-quality butter in the puff pastry, as this will contribute to the flaky texture.
Additionally, allowing the custard filling to cool slightly before pouring it into the pastry will help prevent any sogginess. If you prefer a more pronounced caramelization on top, you can use a kitchen torch to lightly char the surface after baking.
Enjoy your homemade Pastéis De Nata fresh, as they’re best served the same day!
Watermelon and Feta Salad
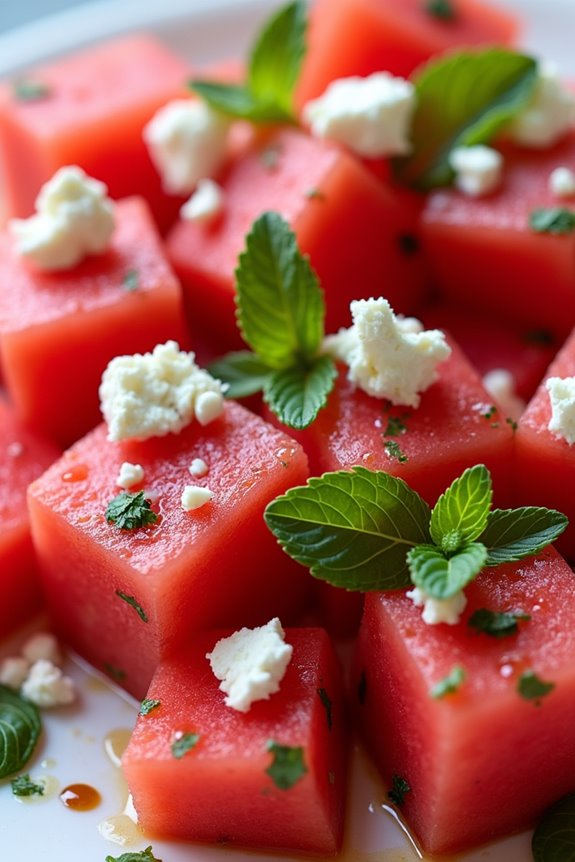
Watermelon and Feta Salad is a rejuvenating dish that embodies the vibrant flavors of summer, making it a perfect addition to any Portuguese meal. This salad combines the sweetness of ripe watermelon with the salty tang of feta cheese, creating a delightful contrast that’s both satisfying and invigorating.
It’s not only easy to prepare but also requires minimal cooking, making it an ideal choice for hot summer days when you want something light and nutritious. This salad is also versatile and can be served as a side dish at barbecues, picnics, or family gatherings.
The bright colors and fresh ingredients bring a burst of flavor and a touch of elegance to your table. Whether enjoyed on its own or paired with grilled meats, Watermelon and Feta Salad is sure to impress your guests and keep you cool during the warm summer months.
Ingredients (Servings: 4-6)
- 4 cups of cubed watermelon
- 1 cup of crumbled feta cheese
- 1/4 cup of fresh mint leaves, chopped
- 1/4 cup of extra virgin olive oil
- 2 tablespoons of balsamic vinegar
- Salt and pepper to taste
- Optional: 1/4 red onion, thinly sliced
Cooking Instructions
- Prepare the Watermelon: Start by selecting a ripe watermelon. Cut the watermelon in half and scoop out the flesh using a melon baller or knife, then chop it into bite-sized cubes. Place the cubed watermelon in a large mixing bowl.
- Add Feta Cheese: Crumble the feta cheese over the watermelon cubes. Make sure to distribute it evenly so that each bite will have a mix of flavors.
- Incorporate Mint: Chop the fresh mint leaves and sprinkle them over the watermelon and feta mixture. The mint adds a rejuvenating aroma and taste that complements the sweetness of the watermelon.
- Make the Dressing: In a small bowl, whisk together the extra virgin olive oil and balsamic vinegar. This dressing will enhance the salad’s flavors while tying all the ingredients together.
- Combine Ingredients: Drizzle the dressing over the watermelon, feta, and mint mixture. Gently toss everything together using a spatula or salad tongs to make sure that the dressing coats all the ingredients without breaking the watermelon or feta.
- Season and Serve: Taste the salad and add salt and pepper as needed. If you’re using red onion, add the thinly sliced pieces for an extra layer of flavor. Serve immediately or chill in the refrigerator for about 30 minutes before serving to let the flavors meld.
Extra Tips
For an added crunch, consider incorporating some toasted nuts such as almonds or pistachios. You can also experiment with different herbs like basil or arugula for a unique twist.
If you like a touch of sweetness, a drizzle of honey can enhance the flavors even further. This salad is best served fresh, but you can prepare the components in advance and assemble them just before serving to maintain freshness. Enjoy the colorful and delicious flavors of this Portuguese summer delight!
Sangria With Fresh Fruits

Sangria is a delightful and invigorating beverage, perfect for warm summer days and gatherings with friends and family. Originating from Spain, this fruity wine punch has found a beloved place in Portuguese cuisine as well. The beauty of sangria lies in its versatility; you can customize it with various fruits, wines, and even spirits to match your personal taste.
This particular recipe features a combination of fresh seasonal fruits, creating a vibrant and colorful drink that will quench your thirst and elevate your summer celebrations. Making sangria isn’t only easy but also fun, as you can involve your family or friends in the process. The key to a great sangria is to let the ingredients mingle for a while, allowing the flavors to blend beautifully.
Serve it over ice for an invigorating treat, and watch as your guests enjoy this classic summer drink. Here’s how to prepare a delicious Sangria with Fresh Fruits, perfect for serving 4-6 people.
Ingredients:
- 1 bottle of red wine (750ml)
- 1/4 cup brandy
- 1/4 cup orange liqueur (like Triple Sec or Cointreau)
- 1/4 cup sugar (adjust to taste)
- 1 orange, sliced
- 1 lemon, sliced
- 1 lime, sliced
- 1 apple, cored and diced
- 1 cup strawberries, hulled and halved
- 2 cups soda water or lemon-lime soda
- Ice cubes
- Fresh mint leaves for garnish (optional)
Instructions:
- Prepare the Fruits: Start by washing all the fruits thoroughly. Slice the orange, lemon, and lime into rounds. Core and dice the apple, and hull and halve the strawberries. The variety of fresh fruits not only adds flavor but also makes the sangria visually appealing.
- Mix the Base: In a large pitcher, combine the red wine, brandy, orange liqueur, and sugar. Stir well until the sugar is dissolved. This mixture forms the base of your sangria and the sweetness can be adjusted according to your preferences.
- Add the Fruits: Carefully add the sliced orange, lemon, lime, diced apple, and halved strawberries to the pitcher. Stir gently to mix the fruits with the liquid. Allowing the fruits to sit in the mixture enhances the flavor infusion.
- Chill the Sangria: Cover the pitcher with plastic wrap or a lid, and place it in the refrigerator for at least 2 hours (or up to 24 hours) to let the flavors meld together. The longer it sits, the more flavorful it will become.
- Serve: When you’re ready to serve, add ice cubes to glasses and pour the chilled sangria over the ice. Top each glass with a splash of soda water or lemon-lime soda for an invigorating fizz. Garnish with fresh mint leaves if desired.
Extra Tips: To make your sangria even more exciting, feel free to mix and match fruits based on what’s in season or what you have on hand. Consider adding peaches, pineapples, or even berries for a twist.
Additionally, if you prefer a less sweet version, reduce the amount of sugar or use unsweetened soda. Sangria can also be made with white wine or rosé for a lighter variation, making it adaptable for any preference!