

Slow mornings have a charm all their own, especially when they start with the wholesome flavors of European breakfasts.
From buttery French croissants to the hearty English full breakfast, each dish brings a comforting touch to the table.
These recipes captivate not just with their taste but with the cozy warmth they add to my mornings.
Curious about how these delightful dishes can change up your breakfast routine?
Let’s explore their delicious details together.
French Croissants With Almond Cream

French croissants are a classic pastry that are beloved for their flaky, buttery texture and delicate flavor. When paired with a rich almond cream filling, they become an indulgent treat perfect for breakfast or brunch.
These croissants are a true labor of love, showcasing the art of French pastry-making. The almond cream, or frangipane, adds a delightful nutty sweetness that complements the buttery layers of the croissant beautifully.
Making homemade croissants may seem overwhelming, but with a little patience and practice, anyone can master this delicious recipe. The process involves creating a yeast dough, incorporating layers of butter, and allowing it to rise and rest at key intervals.
Once baked, the croissants are golden and flaky, creating a satisfying crunch with every bite. Filled with almond cream, they take on an extra dimension of flavor that’s sure to impress your family and friends.
Ingredients (Serves 4-6):
- 500g all-purpose flour
- 10g salt
- 50g granulated sugar
- 10g instant yeast
- 300ml whole milk, lukewarm
- 250g unsalted butter, cold and cubed
- 100g almond flour
- 100g powdered sugar
- 1 large egg
- 1 tsp vanilla extract
- 2 tbsp all-purpose flour (for almond cream)
- 1 egg wash (1 egg mixed with 1 tbsp water)
Cooking Instructions:
- Prepare the Dough: In a large mixing bowl, combine the all-purpose flour, salt, granulated sugar, and instant yeast. Make a well in the center and pour in the lukewarm milk. Mix until a shaggy dough forms, then knead for about 5-7 minutes until smooth. Shape the dough into a ball, cover it with plastic wrap, and let it rest in a warm place for about 1 hour, or until doubled in size.
- Make the Butter Block: While the dough is rising, prepare the butter block. Place the cold cubed butter between two sheets of parchment paper and use a rolling pin to pound it into a flat rectangle about 1/2 inch thick. Chill it in the refrigerator to keep it firm.
- Incorporate the Butter: Once the dough has risen, roll it out on a floured surface into a large rectangle. Place the chilled butter block in the center and fold the dough over to encase the butter completely. Roll it out again into a larger rectangle, then fold it into thirds (like a letter). This is your first “turn.” Wrap it in plastic wrap and refrigerate for 30 minutes.
- Repeat Turns: Remove the dough from the fridge and roll it out again into a rectangle. Fold it into thirds for the second turn. Repeat this process one more time for a total of three turns, allowing the dough to chill for 30 minutes between each turn.
- Prepare the Almond Cream: In a mixing bowl, combine the almond flour, powdered sugar, 1 egg, vanilla extract, and 2 tablespoons of all-purpose flour. Mix until smooth and well combined. Set aside.
- Shape the Croissants: Roll out the dough into a large rectangle, about 1/4 inch thick. Cut the dough into triangles (approximately 5 inches wide and 12 inches long). Place a small spoonful of almond cream at the base of each triangle, then roll the dough tightly from the base to the tip to form the croissant shape. Place each croissant on a lined baking sheet.
- Proof the Croissants: Cover the croissants loosely with a clean kitchen towel and let them rise in a warm place for about 1 hour, or until they’ve puffed up and doubled in size.
- Preheat the Oven: Preheat your oven to 400°F (200°C). Brush the tops of the croissants with the egg wash for a golden finish.
- Bake: Bake the croissants for 15-20 minutes until they’re golden brown and crisp. Remove from the oven and let them cool on a wire rack before serving.
Extra Tips:
When making croissants, it’s essential to keep your ingredients cold to achieve that perfect flaky texture. If the butter starts to melt while you’re rolling, pop it back in the fridge for a few minutes.
Additionally, be patient during the proofing stage; the dough needs time to rise properly for the best flavor and texture. Finally, these croissants can be made ahead of time and frozen before baking—just bake them directly from the freezer, adding a few extra minutes to the baking time for a fresh treat any day.
Enjoy your delicious homemade French croissants with almond cream!
Spanish Tortilla Española

Spanish Tortilla Española, commonly referred to simply as “tortilla,” is a traditional Spanish dish that consists primarily of eggs, potatoes, and onions. It’s a staple in Spanish cuisine, often served as a tapas dish or enjoyed at any time of the day. Renowned for its simplicity, the tortilla is a delightful combination of tender potatoes and onions enveloped in a fluffy egg mixture, creating a hearty and satisfying meal.
Whether you’re enjoying it at breakfast, lunch, or dinner, this dish is both versatile and flavorful.
Making a perfect Spanish Tortilla Española requires attention to detail, especially in the cooking of the potatoes and onions. The key to a great tortilla lies in using the right amount of heat and allowing enough time for the potatoes to soften without browning too much.
This dish not only brings a taste of Spain to your kitchen but also provides an opportunity to impress your family and friends with a classic recipe that showcases the beauty of simple ingredients coming together in harmony.
Ingredients (serving size: 4-6 people):
- 6 large eggs
- 4 medium potatoes (Yukon Gold or similar)
- 1 medium onion (optional)
- 1 cup olive oil (for frying)
- Salt (to taste)
- Pepper (to taste)
Cooking Instructions:
- Prepare the ingredients: Start by peeling the potatoes and slicing them thinly, about 1/8 inch thick. If you’re using onions, slice them thinly as well. This will allow them to cook evenly and blend beautifully into the tortilla.
- Fry the potatoes and onions: In a large frying pan, heat the olive oil over medium heat. Once hot, add the sliced potatoes and onions (if using) to the pan. Cook gently, stirring occasionally, for about 15-20 minutes, or until the potatoes are tender but not browned. You want them to become soft and almost creamy in texture.
- Drain the potato mixture: Once the potatoes and onions are cooked, use a slotted spoon to transfer them to a colander, allowing excess oil to drain off. Let them cool for a few minutes, then season with salt and pepper.
- Beat the eggs: In a large mixing bowl, crack the eggs and whisk them until well combined. Season with a pinch of salt. Then, gently fold the cooled potato and onion mixture into the eggs, ensuring everything is well-coated.
- Cook the tortilla: In the same frying pan, remove any excess oil, leaving just enough to coat the bottom. Heat the pan over medium-low heat. Pour the egg and potato mixture back into the pan, spreading it evenly. Cook for about 5-7 minutes, or until the bottom is set and lightly golden.
- Flip the tortilla: To flip the tortilla, place a large plate over the pan and carefully invert the tortilla onto the plate. Slide it back into the pan, uncooked side down. Cook for another 5-7 minutes until the second side is set and golden.
- Serve: Once cooked, slide the tortilla onto a serving platter. Let it cool slightly before slicing it into wedges. It can be served warm, at room temperature, or even chilled.
Extra Tips:
For an even more flavorful tortilla, consider adding herbs such as fresh parsley or chives to the egg mixture, or experiment with different fillings like bell peppers or spinach.
Remember to keep the heat low to prevent the eggs from cooking too quickly, which can lead to a rubbery texture. Additionally, if you prefer a creamy center, you can slightly undercook the tortilla and let it rest off the heat for a few minutes before serving.
Enjoy your Spanish Tortilla Española with a side of crusty bread or a fresh green salad for a complete meal.
English Full Breakfast

The English Full Breakfast, often referred to simply as a “Full English,” is a hearty meal that’s a staple in British cuisine. Typically enjoyed in the morning, this dish is known for its variety of ingredients that come together to create a filling and satisfying start to the day. A classic Full English includes fried eggs, bacon, sausages, baked beans, grilled tomatoes, and black pudding, often served alongside toast or fried bread. Each component adds its own unique flavor and texture, making this breakfast not only filling but also delightful to the taste buds.
Preparation of the English Full Breakfast requires timing and organization to guarantee everything is cooked perfectly. While it may seem intimidating due to the number of components, with a little practice, you can master this breakfast feast. Gather your ingredients, heat your pans, and get ready to enjoy a traditional meal that embodies the essence of English breakfast culture.
Ingredients (Serves 4-6)
- 8 large eggs
- 8 slices of back bacon
- 4 breakfast sausages
- 1 can of baked beans (approximately 400g)
- 4 large tomatoes, halved
- 4 black pudding slices (optional)
- 4 slices of bread (for toasting or frying)
- Salt and pepper to taste
- Butter or oil for frying
Cooking Instructions
- Prepare the Ingredients: Begin by gathering all your ingredients and preparing them for cooking. Halve the tomatoes, slice the bread, and cut the black pudding (if using) into rounds. This will streamline your cooking process and guarantee everything is ready when you need it.
- Cook the Bacon: In a large frying pan, add the back bacon over medium heat. Cook for about 5-6 minutes on each side until crispy and golden. Once cooked, remove the bacon from the pan and set aside, leaving the fat behind to cook the other ingredients.
- Fry the Sausages: In the same pan, add the breakfast sausages. Cook them for about 10-12 minutes, turning occasionally until browned and cooked through. Once done, remove them from the pan and place alongside the bacon.
- Cook the Eggs: Crack the eggs into the pan, frying them sunny-side up or to your desired doneness. Cook for about 3-4 minutes, seasoning with salt and pepper. Once ready, carefully lift the eggs out and place them on a warm plate.
- Prepare the Tomatoes and Black Pudding: In the remaining fat, place the halved tomatoes cut-side down. Cook for about 3-4 minutes until they’re softened and slightly charred. If using black pudding, add the slices to the pan and cook for 2-3 minutes on each side until crispy.
- Heat the Baked Beans: While the other components are cooking, heat the baked beans in a small saucepan over low heat until warmed through, about 5 minutes. Stir occasionally to prevent sticking.
- Toast or Fry the Bread: Finally, toast the bread in a toaster or fry the slices in the pan with a little butter or oil until golden brown and crispy.
- Assemble the Breakfast: On each plate, serve a portion of bacon, sausages, eggs, baked beans, grilled tomatoes, and black pudding (if using). Add a slice of toast on the side for a complete meal.
Extra Tips
For an even more delicious Full English Breakfast, consider using high-quality ingredients, especially for the sausages and bacon. You can also customize the dish by adding other favorites like mushrooms or hash browns.
Timing is key, so start with the ingredients that take longer to cook, and keep everything warm in the oven while you finish the rest. Enjoy your breakfast with a steaming cup of tea or coffee for the true English experience!
Italian Frittata

The Italian frittata is a classic dish that showcases the beauty of simplicity and fresh ingredients. This versatile egg-based dish isn’t only a staple in Italian cuisine but also a fantastic way to start your day. Packed with vegetables, cheese, and sometimes meats, the frittata can be served warm or at room temperature, making it perfect for breakfast, brunch, or even a light lunch.
Its adaptability allows you to use whatever ingredients you have on hand, making it a go-to recipe for home cooks looking to whip up something delicious.
To make a perfect Italian frittata, the technique is just as important as the ingredients. The eggs are gently beaten and cooked slowly, allowing them to set evenly without becoming rubbery. The addition of sautéed vegetables and cheese enhances the flavor profile, creating a rich and satisfying dish.
Whether you prefer a classic combination of spinach and cheese or want to experiment with sun-dried tomatoes and herbs, this frittata will surely impress your family and friends.
Ingredients (Serves 4-6):
- 8 large eggs
- 1 cup milk
- 1 cup diced vegetables (such as bell peppers, onions, and zucchini)
- 1 cup fresh spinach, chopped
- 1 cup shredded cheese (such as mozzarella or cheddar)
- 1/2 cup cooked meat (such as bacon, sausage, or ham) – optional
- 2 tablespoons olive oil
- Salt and pepper to taste
- Fresh herbs (such as parsley or basil) for garnish – optional
Cooking Instructions:
1. Preheat the Oven: Begin by preheating your oven to 350°F (175°C). This guarantees that the frittata will cook evenly and set properly once you transfer the pan to the oven.
2. Sauté the Vegetables: In a large, oven-safe skillet, heat the olive oil over medium heat. Add the diced vegetables and sauté them until they’re soft and slightly caramelized, about 5-7 minutes. If you’re using meat, add it at this stage to heat through.
Stir in the chopped spinach and cook until wilted.
3. Whisk the Eggs and Milk: In a bowl, whisk together the eggs and milk until fully combined. Season with salt and pepper to taste. This mixture is the base of your frittata and will provide a light, fluffy texture.
4. Combine Ingredients: Pour the egg mixture over the sautéed vegetables and meat in the skillet. Gently stir to evenly distribute the ingredients. Sprinkle the shredded cheese on top of the mixture.
5. Cook on the Stove: Allow the frittata to cook on the stovetop for about 5 minutes. This step helps to set the bottom of the frittata before transferring it to the oven.
6. Bake in the Oven: Carefully transfer the skillet to the preheated oven. Bake for 15-20 minutes, or until the frittata is puffed up and the center is set. You can check for doneness by inserting a knife in the center; it should come out clean.
7. Cool and Serve: Once done, remove the frittata from the oven and let it cool for a few minutes. Slice into wedges and garnish with fresh herbs if desired. Serve warm or at room temperature.
Extra Tips:
For a more flavorful frittata, consider adding a sprinkle of grated Parmesan or a dash of your favorite seasoning blend to the egg mixture before pouring it into the skillet.
If you want to enhance the presentation, reserve a few vegetable pieces to place on top before baking. Additionally, frittatas can be made ahead of time and stored in the refrigerator for a quick breakfast option throughout the week. Just reheat individual slices in the microwave for a quick meal.
German Bircher Müesli
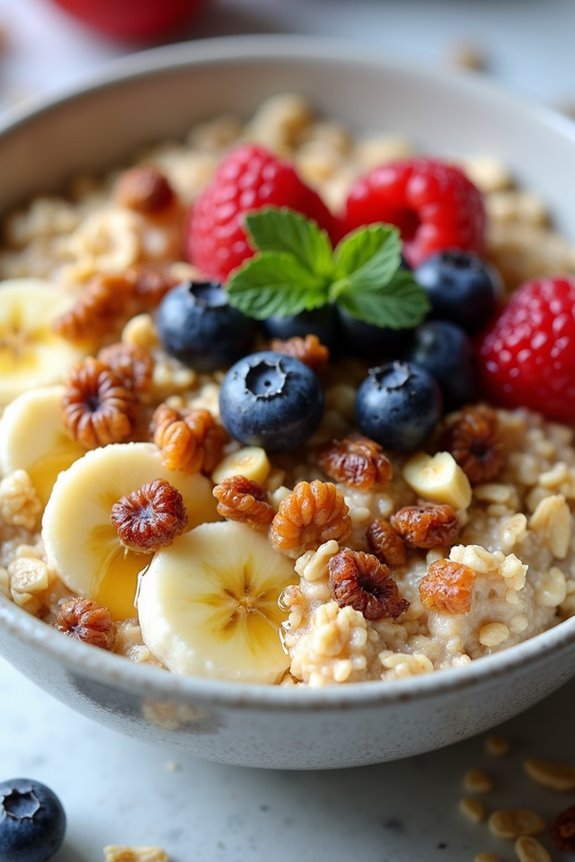
German Bircher Müesli is a delightful and nutritious breakfast option that has its roots in Switzerland, attributed to Dr. Maximilian Bircher-Brenner in the early 20th century. This dish is a fantastic way to start your day, combining oats, fresh fruits, nuts, and yogurt to create a wholesome meal that’s both filling and invigorating.
Traditionally, it’s served chilled, making it a popular choice for warm mornings or as a light breakfast option anytime.
The beauty of Bircher Müesli lies in its versatility. You can customize it with your favorite fruits, nuts, or even seeds to suit your taste preferences. The oats are soaked overnight, allowing them to absorb the yogurt and juice, resulting in a creamy texture that’s both satisfying and healthy. This recipe serves 4-6 people, making it an excellent choice for family breakfasts or brunch gatherings.
Ingredients:
- 2 cups rolled oats
- 2 cups yogurt (Greek or regular)
- 1 cup milk (dairy or non-dairy)
- 2 apples, grated (preferably tart varieties like Granny Smith)
- 1 banana, sliced
- 1/2 cup raisins or sultanas
- 1/2 cup nuts (almonds, walnuts, or hazelnuts), roughly chopped
- 1 tablespoon honey or maple syrup (optional, to taste)
- Juice of 1 lemon
- Fresh berries for garnish (optional)
Cooking Instructions:
- Prepare the Oats: In a large mixing bowl, combine the rolled oats, yogurt, and milk. Stir well to confirm that the oats are fully coated. Cover the bowl with plastic wrap or a lid and refrigerate overnight, allowing the oats to soak and soften.
- Grate the Apples: The next morning, remove the soaked oats from the refrigerator. Grate the apples directly into the bowl, including the skins for added fiber and nutrients. This will give the Müesli a fresh and fruity flavor.
- Add the Remaining Ingredients: Incorporate the sliced banana, raisins, chopped nuts, honey or maple syrup (if using), and lemon juice into the mixture. Stir everything together gently, confirming that all ingredients are evenly distributed.
- Adjust the Consistency: If you find the mixture too thick, you can add a little more milk to reach your desired consistency. Taste the Müesli and adjust the sweetness with more honey or syrup if necessary.
- Serve: Spoon the German Bircher Müesli into individual bowls or a large serving dish. Top with fresh berries for an added burst of flavor and color. You can also sprinkle additional nuts or seeds on top for extra crunch.
Extra Tips:
For the best results, prepare your Bircher Müesli the night before to allow the flavors to meld and the oats to soften properly.
Feel free to experiment with various fruits, such as pears, mangoes, or seasonal berries, to keep the dish exciting and vibrant. If you prefer a dairy-free version, simply use plant-based yogurt and non-dairy milk.
Additionally, for a touch of spice, consider adding a sprinkle of cinnamon or nutmeg to the mixture before serving!
Swedish Oat Porridge

Swedish Oat Porridge, known as “Havregrynsgröt,” is a warm, comforting breakfast that has been a staple in Swedish households for generations. This creamy and hearty porridge is made from rolled oats and is often enjoyed with various toppings, making it a versatile dish to start your day. Its simplicity and nutritious ingredients make it not only a delicious option but also a healthy one that can keep you satisfied until lunchtime.
Cooking Swedish Oat Porridge is straightforward, and with just a few ingredients, you can whip up a delightful breakfast in no time. The porridge can be customized to your liking with toppings such as fresh fruits, nuts, honey, or even a sprinkle of cinnamon. This recipe serves 4-6 people and is perfect for family gatherings or meal prepping for the week ahead.
Ingredients (Serves 4-6):
- 2 cups rolled oats
- 4 cups water or milk (or a combination of both)
- 1/4 teaspoon salt
- 1 tablespoon sugar (optional)
- Toppings: fresh berries, sliced bananas, nuts, honey, cinnamon, or yogurt (as desired)
Cooking Instructions:
- Combine Ingredients: In a large saucepan, combine the rolled oats, water or milk, and salt. If you prefer a sweeter porridge, add the sugar at this stage. Stir gently to mix the ingredients together.
- Bring to a Boil: Place the saucepan over medium-high heat and bring the mixture to a gentle boil. Keep an eye on it to prevent it from overflowing.
- Simmer the Porridge: Once it reaches a boil, reduce the heat to low. Allow the porridge to simmer for about 5-10 minutes, stirring occasionally to prevent sticking. The longer you cook it, the creamier it will become.
- Check Consistency: After the cooking time, check the consistency of the porridge. If you prefer a thinner porridge, you can add a little more water or milk. Stir well to combine.
- Serve Immediately: Remove the saucepan from the heat and serve the porridge hot in individual bowls. Add your favorite toppings such as fresh berries, sliced bananas, nuts, honey, or a sprinkle of cinnamon to enhance the flavor.
Extra Tips:
For added flavor and nutrition, consider soaking the oats overnight in milk or water. This not only reduces cooking time but also enhances the digestibility of the oats.
Additionally, experimenting with different types of milk (like almond or oat milk) can give the porridge a unique twist. Don’t hesitate to try various toppings to keep things exciting; seasonal fruits, nut butters, or even a dollop of yogurt can elevate your breakfast experience!
Greek Yogurt With Honey and Nuts
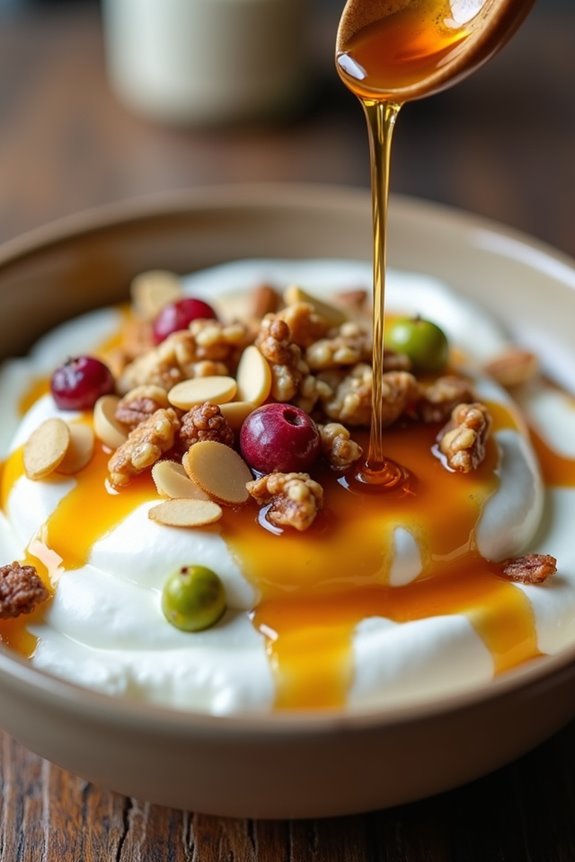
Greek yogurt with honey and nuts is a delightful and nutritious breakfast that reflects the rich culinary traditions of Greece. This dish combines the creamy texture of Greek yogurt with the sweetness of honey and the crunch of various nuts, creating a perfect balance of flavors and textures. It not only serves as a fulfilling breakfast but can also be enjoyed as a snack or a light dessert. Packed with protein and healthy fats, this dish is excellent for starting your day on a wholesome note.
Preparing Greek yogurt with honey and nuts is incredibly easy and requires minimal cooking, making it a perfect choice for busy mornings. You can customize the nuts to your liking or add fresh fruits for an extra burst of flavor. This recipe serves 4-6 people, making it perfect for a family breakfast or a brunch gathering with friends.
Ingredients (Serves 4-6):
- 4 cups of Greek yogurt
- 1 cup of mixed nuts (such as walnuts, almonds, and pistachios), roughly chopped
- 1/2 cup of honey
- 1 teaspoon of vanilla extract (optional)
- Fresh fruits (such as berries or sliced bananas) for garnish (optional)
Cooking Instructions:
- Prepare the Yogurt Base: In a large mixing bowl, spoon in the Greek yogurt. If you prefer a sweeter flavor, you can mix in the vanilla extract at this stage. Stir gently to combine, ensuring a smooth texture without over-mixing.
- Divide the Yogurt: Using a ladle or spoon, portion the yogurt into individual serving bowls. Aim for an even distribution so each serving has a generous amount of yogurt.
- Add Honey: Drizzle a tablespoon of honey over each bowl of yogurt. You can adjust the amount of honey depending on your desired sweetness; feel free to add more or less according to personal preference.
- Top with Nuts: Sprinkle a handful of the mixed chopped nuts over each bowl of yogurt and honey. This adds a delightful crunch and nutritious boost to each serving.
- Garnish with Fruits (Optional): If using fresh fruits, add a few pieces on top of the nut and honey mixture. Berries or banana slices work particularly well, giving a fresh contrast to the creamy yogurt.
- Serve Immediately: Enjoy the Greek yogurt with honey and nuts right away while the ingredients are fresh. This dish is best served immediately for the best texture and flavor.
Extra Tips:
For added depth of flavor, consider toasting the nuts lightly in a skillet over low heat before chopping them. This enhances their nuttiness and adds a warm aroma to the dish.
Additionally, experiment with different honeys, such as wildflower or orange blossom, to discover which varieties pair best with your yogurt. This dish can be prepared in advance and stored in the refrigerator, but for the best experience, it’s recommended to add the nuts and honey just before serving to maintain their crunchiness.
Danish Kanelsnegle (Cinnamon Rolls)

Danish Kanelsnegle, or cinnamon rolls, are a beloved breakfast treat originating from Denmark, known for their rich flavor and soft, gooey texture. These delightful pastries are perfect for a leisurely weekend brunch or a special occasion, where the sweet aroma of cinnamon fills the kitchen and draws everyone in.
The dough is light and fluffy, while the filling is a luscious blend of butter, sugar, and cinnamon, making each bite a heavenly experience.
Making Danish Kanelsnegle at home may seem intimidating, but with a bit of patience and love, you can create these mouthwatering pastries that will impress family and friends alike. The process involves preparing a yeast-based dough, allowing it to rise, rolling it out with the cinnamon filling, and then slicing it into spirals before baking. The result is a warm, comforting treat that pairs perfectly with a cup of coffee or tea.
Ingredients (Serves 4-6 people):
- 4 cups all-purpose flour
- 1/3 cup granulated sugar
- 1 packet (2 1/4 tsp) active dry yeast
- 1 cup milk, warmed
- 1/2 cup unsalted butter, melted
- 2 large eggs
- 1/2 teaspoon salt
- 1 cup brown sugar, packed
- 2 tablespoons ground cinnamon
- 1/2 cup unsalted butter, softened (for filling)
- 1 egg (for egg wash)
Cooking Instructions:
- Prepare the Dough: In a large mixing bowl, combine the warm milk and active dry yeast. Allow it to sit for about 5-10 minutes until it becomes frothy. Then, add the melted butter, sugar, eggs, and salt. Gradually mix in the flour, one cup at a time, until a soft dough forms.
- Knead the Dough: Transfer the dough to a floured surface and knead it for about 5-7 minutes until it becomes smooth and elastic. You can also use a stand mixer with a dough hook attachment for this step. Once kneaded, place the dough in a greased bowl, cover it with a clean cloth, and let it rise in a warm place for about 1 hour or until doubled in size.
- Make the Filling: In a small bowl, combine the brown sugar and ground cinnamon. Set aside. In another bowl, confirm that the softened butter is spreadable and ready to be used for the filling.
- Roll Out the Dough: After the dough has risen, punch it down to release the air. On a floured surface, roll the dough into a rectangle about 1/4 inch thick. Spread the softened butter evenly over the dough, followed by the cinnamon-sugar mixture.
- Form the Rolls: Starting from one long side of the rectangle, carefully roll the dough into a tight log. Pinch the seam to seal it. Using a sharp knife or a bench scraper, slice the log into 12 equal pieces.
- Arrange and Rise Again: Place the sliced rolls in a greased baking dish, leaving space between each roll for expansion. Cover the dish with a cloth and let the rolls rise again for about 30-40 minutes until they puff up.
- Preheat and Bake: Preheat your oven to 375°F (190°C). Brush the tops of the rolls with a beaten egg for a golden finish. Bake the rolls for 20-25 minutes, or until they’re golden brown and cooked through.
- Cool and Serve: Once baked, remove the rolls from the oven and allow them to cool slightly before serving. You can drizzle a simple icing made from powdered sugar and milk over the top for extra sweetness, if desired.
Extra Tips:
When making Danish Kanelsnegle, confirm that your yeast is active by testing it in warm milk before adding it to the dough.
Additionally, for added flavor, consider incorporating chopped nuts or raisins into the filling. Letting the dough rise in a warm environment is essential for achieving the perfect texture, so avoid cold drafts.
Finally, these cinnamon rolls can be prepared the night before; simply cover the unbaked rolls and refrigerate them overnight, allowing them to rise in the morning before baking. Enjoy your delicious homemade Danish Kanelsnegle!
Portuguese Pastéis De Nata

Pastéis de Nata, also known as Portuguese custard tarts, are a beloved delicacy originating from Portugal. These delightful pastries feature a flaky crust filled with a rich, creamy custard that’s often topped with a sprinkle of cinnamon or powdered sugar.
Renowned for their crispy exterior and smooth, sweet interior, pastéis de nata have gained popularity worldwide, making them a must-try for any breakfast or dessert lover. The combination of textures and flavors in each bite is simply irresistible, and they’re perfect for sharing with friends and family or savoring on your own.
Creating these pastries at home may seem challenging, but with the right ingredients and a step-by-step approach, you can attain that authentic taste. Traditionally enjoyed in the morning with coffee or as an afternoon treat, pastéis de nata are best served warm, allowing the custard to shine.
Follow this recipe to bring a touch of Portugal to your breakfast table.
Ingredients (serving size: 4-6 people):
- 1 package of puff pastry (about 17 oz)
- 1 cup heavy cream
- 1 cup whole milk
- 3/4 cup granulated sugar
- 1/4 cup cornstarch
- 6 large egg yolks
- 1 tablespoon vanilla extract
- Zest of 1 lemon
- Ground cinnamon (for dusting)
Instructions:
- Prepare the Puff Pastry: Preheat your oven to 450°F (230°C). Roll out the puff pastry on a lightly floured surface to about 1/8 inch thick. Cut circles that are slightly larger than your muffin tin cups (about 4 inches in diameter) and gently press them into the greased muffin tin. Confirm the pastry rises slightly above the edges.
- Make the Custard Mixture: In a medium saucepan, combine the heavy cream, whole milk, and granulated sugar. Stir over medium heat until the sugar dissolves. In a separate bowl, whisk together the cornstarch and egg yolks until smooth. Slowly add the warm milk mixture to the egg mixture, whisking continuously to prevent curdling.
- Cook the Custard: Pour the combined mixture back into the saucepan and place it over medium heat. Cook while stirring constantly until it thickens, about 5-7 minutes. Once thickened, remove from heat and stir in the vanilla extract and lemon zest.
- Fill the Pastry Shells: Carefully pour the custard into each pastry shell, filling them about three-quarters full. This will allow room for the custard to puff up while baking.
- Bake the Tarts: Place the muffin tin in the preheated oven and bake for about 15-20 minutes or until the pastry is golden brown and the custard has developed a few dark spots. Keep an eye on them to avoid burning.
- Cool and Serve: Once baked, remove the tarts from the oven and allow them to cool for a few minutes in the tin. Carefully remove them and place them on a wire rack. Serve warm, dusted with ground cinnamon if desired.
Extra Tips: To achieve the best results with your pastéis de nata, confirm your oven is properly preheated, as high heat is essential for creating that desired crispy pastry.
Additionally, using high-quality ingredients, especially fresh eggs and cream, will greatly enhance the flavor of your custard. Don’t be discouraged if your first batch doesn’t turn out perfect; pastry can take practice, but the delicious results are well worth the effort!
Irish Soda Bread
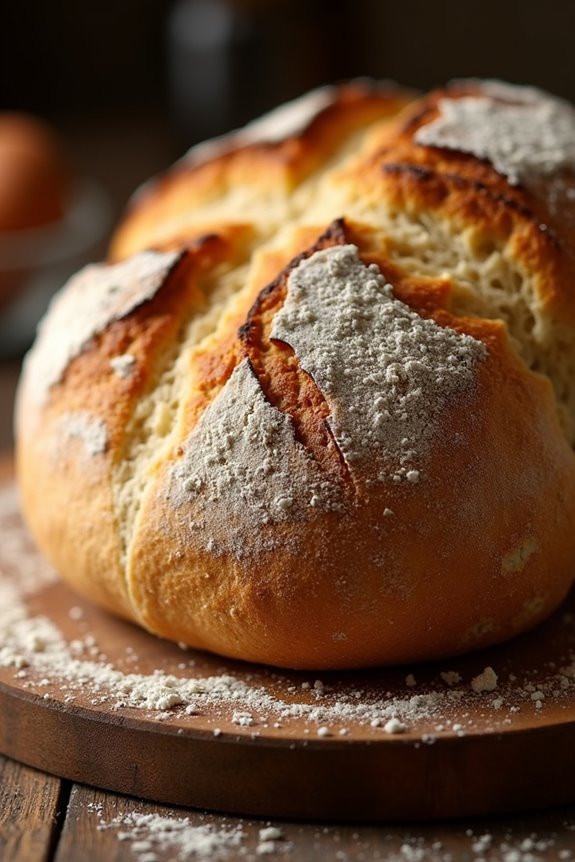
Irish Soda Bread is a traditional Irish quick bread that has become a beloved staple in homes around the world. This hearty bread is unique due to its use of baking soda as a leavening agent instead of yeast, allowing it to rise quickly without the need for long fermentation times. Its simple ingredients and rustic flavor make it the perfect accompaniment to any breakfast, whether served with butter and jam or alongside a hearty stew.
The history of Irish Soda Bread dates back to the 19th century when baking soda was introduced to Ireland. This versatile bread is often made with whole wheat flour, which adds a nutty flavor and a dense texture. Today, variations of this classic recipe can include ingredients like raisins, caraway seeds, or buttermilk to enhance its flavor. Regardless of the variation, making Irish Soda Bread is simple and rewarding, allowing you to enjoy a slice of Irish heritage with every bite.
Ingredients (Serves 4-6)
- 4 cups all-purpose flour
- 1 teaspoon baking soda
- 1 teaspoon salt
- 1 ¾ cups buttermilk (or milk mixed with 1 tablespoon vinegar)
Cooking Instructions
- Preheat the Oven: Begin by preheating your oven to 425°F (220°C). A hot oven is essential for achieving a good rise in your soda bread.
- Mix Dry Ingredients: In a large mixing bowl, combine the all-purpose flour, baking soda, and salt. Use a whisk or fork to mix the dry ingredients thoroughly, ensuring that the baking soda is evenly distributed throughout the flour.
- Add Wet Ingredients: Create a well in the center of the dry mixture and pour in the buttermilk. If you’re using a milk and vinegar mixture, allow it to sit for a few minutes until it curdles before adding it to the flour mixture.
- Combine Ingredients: Using your hands or a wooden spoon, gently mix the wet and dry ingredients together. Avoid overmixing; it’s important to just combine them until you form a soft dough. If the dough is too sticky, add a little more flour.
- Shape the Dough: Transfer the dough onto a lightly floured surface. Gently knead the dough for about 1 minute, just until it holds together. Shape it into a round loaf approximately 1.5 inches thick.
- Cut the Cross: Place the shaped dough onto a baking sheet lined with parchment paper. Use a sharp knife to score a deep cross (about 1/2 inch deep) on the surface of the dough. This helps the bread to cook evenly and creates a beautiful crust.
- Bake the Bread: Place the baking sheet in the preheated oven and bake for 30-35 minutes or until the bread is golden brown and sounds hollow when tapped on the bottom.
- Cool and Serve: Once done, remove the bread from the oven and let it cool on a wire rack for at least 10 minutes before slicing. Serve warm or at room temperature with butter, jam, or your favorite spreads.
Extra Tips
For an added layer of flavor, consider incorporating ingredients like raisins or caraway seeds into the dough before baking. Additionally, using a mix of whole wheat and all-purpose flour can enhance the texture and nutritional value of your soda bread.
If you don’t have buttermilk on hand, a simple substitute can be made by adding a tablespoon of vinegar or lemon juice to regular milk and letting it sit for a few minutes. Enjoy your homemade Irish Soda Bread fresh out of the oven for the best taste!
Hungarian Lángos

Hungarian Lángos is a beloved street food that has become a staple at fairs and festivals across Hungary. This deep-fried flatbread is typically topped with sour cream and grated cheese, but it can also be enjoyed with a variety of toppings, making it a versatile dish for breakfast or a snack. With its crispy exterior and soft, chewy interior, Lángos is sure to delight anyone who tries it.
Making Lángos at home is easier than you might think, and the end result is a delicious treat that’s perfect for sharing with family and friends. While traditional recipes often use simple ingredients, the magic of Lángos lies in the way these components come together to create a flavor-packed dish. Follow this recipe, and you’ll be on your way to enjoying a taste of Hungary right in your own kitchen.
Ingredients (Serves 4-6)
- 2 cups all-purpose flour
- 1 cup warm water
- 1 tablespoon active dry yeast
- 1 teaspoon sugar
- 1 teaspoon salt
- 1 medium potato, peeled and boiled
- Oil for frying
- Sour cream (for topping)
- Grated cheese (for topping)
- Optional: minced garlic, herbs, or toppings of your choice
Cooking Instructions
- Prepare the yeast mixture: In a small bowl, combine the warm water, sugar, and active dry yeast. Stir gently, then let it sit for about 5-10 minutes until it becomes frothy. This step activates the yeast, which is vital for the dough to rise.
- Make the dough: In a large mixing bowl, combine the flour and salt. Once the yeast mixture is frothy, add it to the flour along with the mashed boiled potato. Mix the ingredients until they form a sticky dough. The potato adds a unique flavor and texture to the Lángos.
- Knead the dough: Transfer the dough onto a floured surface and knead it for about 5-7 minutes, or until it becomes smooth and elastic. If the dough is too sticky, sprinkle a little more flour as needed. Kneading helps develop the gluten, which gives the Lángos its chewy texture.
- Let the dough rise: Place the dough in a lightly oiled bowl, cover it with a clean kitchen towel, and let it rise in a warm place for about 1 hour, or until it has doubled in size. This fermentation process is essential for flavor development.
- Shape the Lángos: Once the dough has risen, punch it down to release any air bubbles. Divide the dough into equal portions (about 4-6), and shape each portion into a disc about 1/2 inch thick. You can make them larger or smaller to your preference.
- Fry the Lángos: In a deep skillet or fryer, heat oil to 350°F (175°C). Carefully add the shaped dough discs to the hot oil, frying them for about 2-3 minutes on each side or until they’re golden brown and crispy. Make sure not to overcrowd the pan; fry in batches if necessary.
- Drain and serve: Once cooked, remove the Lángos from the oil and place them on a paper towel-lined plate to drain any excess oil. Serve hot, topped with sour cream, grated cheese, and any additional toppings you desire.
Extra Tips
For an extra flavorful twist, mix minced garlic into the sour cream for a delicious garlic sauce, or sprinkle fresh herbs like chives or parsley on top before serving.
You can also experiment with different toppings, such as sautéed mushrooms, ham, or even sweet toppings like jam or Nutella for a dessert version of Lángos. Enjoy this delightful dish fresh for the best taste, and don’t hesitate to get creative with your toppings!
Belgian Liège Waffles

Belgian Liège waffles are a delectable treat that combines a crispy exterior with a soft, chewy interior, thanks to the unique use of pearl sugar that caramelizes beautifully when cooked. Originating from the city of Liège in Belgium, these waffles are a popular street food and breakfast item across Europe.
They’re often enjoyed plain or topped with a variety of accompaniments such as whipped cream, fresh fruit, or chocolate sauce, making them a versatile and indulgent option for any meal of the day.
Making these waffles at home is easier than it might seem, and the results are truly worth the effort. With a few simple ingredients and a bit of patience while waiting for the dough to rise, you can create authentic Liège waffles that will impress your family and friends.
The key to achieving that signature flavor and texture lies in using high-quality ingredients, particularly the pearl sugar, which can typically be found at specialty grocery stores or online.
Ingredients (Serves 4-6):
- 2 cups all-purpose flour
- 1 cup milk, warmed
- 1/2 cup unsalted butter, softened
- 1/4 cup granulated sugar
- 1/4 teaspoon salt
- 2 teaspoons instant yeast
- 2 large eggs
- 1 teaspoon vanilla extract
- 1 cup pearl sugar
Cooking Instructions:
- Activate the Yeast: In a small bowl, combine the warm milk and instant yeast. Let it sit for about 5-10 minutes until it becomes frothy. This step guarantees that the yeast is active and ready to help the dough rise.
- Mix Wet Ingredients: In a large mixing bowl, whisk together the softened butter, granulated sugar, salt, eggs, and vanilla extract until well combined. Once the yeast mixture is ready, add it to the bowl and mix until smooth.
- Combine Dry Ingredients: Gradually add the flour to the wet mixture, stirring until a sticky dough forms. Be careful not to overmix; you want to maintain the dough’s airy texture.
- Knead the Dough: On a lightly floured surface, knead the dough gently for about 5 minutes until it becomes smooth and elastic. If the dough is too sticky, sprinkle a little more flour as needed.
- First Rise: Place the dough in a lightly greased bowl, cover it with a clean kitchen towel, and let it rise in a warm place for about 1 hour or until it has doubled in size.
- Incorporate Pearl Sugar: Once the dough has risen, gently punch it down to release the air. Fold in the pearl sugar until evenly distributed throughout the dough.
- Preheat the Waffle Iron: Preheat your Belgian waffle iron according to the manufacturer’s instructions. It’s important to make sure it’s hot enough to give your waffles that perfect golden-brown finish.
- Cook the Waffles: Scoop a portion of the dough (about 1/2 cup) into the preheated waffle iron, close the lid, and cook for approximately 3-5 minutes or until the waffles are golden brown and crispy on the outside. Repeat with the remaining dough.
- Serve: Once cooked, remove the waffles from the iron and serve immediately with your choice of toppings, such as fresh fruit, whipped cream, or chocolate sauce.
Extra Tips:
For the best flavor and texture, use high-quality butter and pearl sugar. If you can’t find pearl sugar, you can substitute with crushed sugar cubes, but the texture may differ slightly.
Allow the dough to rise in a warm area to guarantee proper fermentation, which contributes to the waffles’ flavor. Additionally, serving the waffles immediately after cooking is essential, as they’re best enjoyed fresh and warm.
If you have leftovers, you can store them in an airtight container and reheat them in a toaster for a quick treat!
Finnish Rye Bread With Smoked Salmon

Finnish Rye Bread, known as “Ruisleipa,” is a staple in Finnish cuisine, celebrated for its dense and hearty texture. This traditional bread is typically made with whole grain rye flour, which gives it a distinct, earthy flavor and a slightly sour taste due to the fermentation process.
When paired with smoked salmon, this dish transforms into an elegant breakfast option that encapsulates the essence of Scandinavian flavors. The combination not only offers a delicious taste but also provides a nutritious start to your day.
To prepare Finnish Rye Bread with Smoked Salmon, you can either make the rye bread from scratch or purchase it from a local bakery. The bread acts as the perfect base for the rich, smoky flavor of the salmon. Add cream cheese, fresh dill, and a squeeze of lemon to elevate the dish further.
This simple yet sophisticated breakfast can serve 4-6 people, making it an excellent choice for a brunch gathering or a cozy family breakfast.
Ingredients (Serves 4-6):
- 4-6 slices of Finnish rye bread
- 200g smoked salmon
- 200g cream cheese
- Fresh dill, for garnish
- 1 lemon, cut into wedges
- Optional: Capers, for garnish
Cooking Instructions:
- Prepare the Rye Bread: If you’re using store-bought Finnish rye bread, simply slice it into 1-inch thick pieces. If you prefer to make it from scratch, follow a traditional recipe to create the bread, allowing it to cool completely before slicing. The bread should be robust enough to hold the toppings without becoming soggy.
- Spread Cream Cheese: Take each slice of rye bread and generously spread cream cheese on top. This layer not only adds creaminess but also helps to balance the flavors of the smoked salmon. Use a spatula or the back of a spoon for an even spread.
- Layer with Smoked Salmon: Arrange slices of smoked salmon on top of the cream cheese. Depending on your preference, you can either lay the salmon flat or create a slight overlap for a more visually appealing presentation. The smoky flavor will complement the cream cheese beautifully.
- Garnish with Fresh Dill: Sprinkle fresh dill over the smoked salmon. This herb adds freshness and a hint of peppery flavor, enhancing the overall taste of the dish. You can either chop the dill finely or use whole sprigs for decoration.
- Serve with Lemon Wedges: Place the rye bread slices on a serving platter and add lemon wedges on the side. A squeeze of fresh lemon juice right before eating will brighten the flavors and add a zesty touch that pairs perfectly with the richness of the salmon.
- Optional Capers: If desired, scatter a few capers over the top for an extra burst of flavor. Capers add a salty, briny element that complements the dish wonderfully.
Extra Tips: When preparing Finnish Rye Bread with Smoked Salmon, freshness is key. Always use high-quality smoked salmon and make certain the cream cheese is at room temperature for easy spreading.
For a more substantial meal, consider adding slices of avocado or cucumber between the cream cheese and smoked salmon. Additionally, feel free to experiment with other garnishes such as red onion slices or microgreens for added flavor and presentation.
Croatian Fritule (Mini Doughnuts)

Croatian Fritule are delightful mini doughnuts that are popular throughout Croatia, especially during festive seasons and family gatherings. These sweet treats are made from a simple batter that combines flour, eggs, sugar, and a hint of citrus flavor, often enhanced with a splash of rum or brandy.
They’re fluffy on the inside and slightly crispy on the outside, making them the perfect indulgence for breakfast or dessert. Dust them with powdered sugar before serving for an extra touch of sweetness.
Making Fritule is a straightforward process, and they come together quickly, making them a great option for both casual mornings and special occasions. While they can be enjoyed warm straight from the fryer, they also taste wonderful at room temperature. Accompanied by a cup of coffee or tea, these mini doughnuts are sure to please everyone at the breakfast table.
Ingredients (Serves 4-6):
- 2 cups all-purpose flour
- 1/2 cup granulated sugar
- 1 tablespoon baking powder
- 1/4 teaspoon salt
- 2 large eggs
- 1/2 cup milk
- 1/2 teaspoon vanilla extract
- Zest of 1 lemon or orange
- 2 tablespoons rum or brandy (optional)
- Oil for frying
- Powdered sugar for dusting
Cooking Instructions:
1. Prepare the Batter: In a large mixing bowl, combine the flour, sugar, baking powder, and salt. Mix well to confirm that the dry ingredients are evenly distributed.
In a separate bowl, whisk together the eggs, milk, vanilla extract, citrus zest, and rum or brandy if using. Gradually add the wet mixture to the dry ingredients, stirring until just combined. The batter should be thick but smooth.
2. Heat the Oil: In a deep frying pan or pot, pour enough oil to submerge the fritule (about 2-3 inches deep) and heat it over medium heat. To check if the oil is ready, drop a small spoonful of batter into the oil; if it sizzles and rises to the surface, the oil is hot enough.
3. Fry the Fritule: Using a small ice cream scoop or two spoons, carefully drop spoonfuls of batter into the hot oil, making sure not to overcrowd the pan. Fry the Fritule in batches, cooking for about 2-3 minutes on each side or until they turn a golden-brown color.
4. Drain and Dust: Once cooked, use a slotted spoon to remove the fritule from the oil and transfer them to a plate lined with paper towels to absorb excess oil. While they’re still warm, dust them generously with powdered sugar.
5. Serve: Fritule are best served warm. Arrange them on a platter and enjoy them with a cup of coffee or tea. They can also be stored in an airtight container for a few days, although they’re most delicious fresh.
Extra Tips:
When making Croatian Fritule, feel free to customize the flavor by incorporating chopped dried fruits, nuts, or chocolate chips into the batter.
For an added twist, you can experiment with different citrus zests or even a hint of cinnamon for extra warmth. Remember to monitor the oil temperature closely while frying; if the oil is too hot, the fritule may burn on the outside while remaining raw on the inside. Enjoy experimenting with this traditional recipe!